6 Tips for Learning a Reverb Plug-in
Learning a reverb plug-in may seem daunting—but it doesn’t have to be! Learn ways to take the skills you already have to help you master reverb plug-ins in no time.
No one would fault you for thinking reverb plug-ins are tough to learn: they have idiosyncratic controls that are often different between manufacturers. Some are convolution-based reverbs, requiring impulse responses to simulate a real or sampled space. Others, like the


Exponential Audio
If a reverb is a recreation of an old hardware unit, it can bring its own set of quirky controls. Conversely, a reverb might be trying to do something new altogether, and wind up boasting parameters with inscrutable names like “shimmer” or “warp.”
So what can we do? Whatever can we do?
Friends, mixers, country-people—fear not! You can learn a reverb quickly, with judicious practice. Follow these tips, and you’ll be on your way.
1. Start with a reference session
Don’t just jump into a mix—that might be a surefire way to a mudville. Instead, devote some time to the new verb. Get yourself a cup of coffee and block out an hour of your schedule.
More important than the beverage, use a reference session—a project you know well, one comprised of instruments recorded in the real world.
A familiar session, used for these purposes, can be invaluable when learning a new plug-in. You already know what the session is capable of, so you have a concrete basis on which to test your verbs.
I use a mix from a band I worked with many years ago. The drums, bass, vocals, and guitars were recorded impeccably, and the genre is a sort of malleable rock—the song has heavy sections, spacey sections, loud sections, quiet sections. I can take it to the psychedelic or the metallic with ease. Find something like this for yourself.
2. Take one instrument and run it through some presets
Presets are not crutches if used well. But in the right hands, they can be valuable teaching tools, helping you learn the plug-in and the operating philosophy of the plug-in developer. In the case of reverb, you’ll get an idea of how a developer defines a plate, a hall, a room, a chamber, etc. Remember, the person programming the plug-in has ears too—they have a sound that they like, and part of learning the software is identifying their specific sound.
So scroll through some presets and just listen for a while. Note down what you hear. Start with overheads, for instance. Choose the halls from, say,


Exponential Audio
Here’s an overhead track from my reference session, completely dry:
And here it is with a Neutral Hall.
I notice a chunky sound in the low mids with a distinct pop of sound just after the transient hit. I found the same sort of frequency emphasis on the Recital Hall as well.
Now let’s move on to the Small Perc Plate.
I notice the same clarity of tone, a similar feeling in the low mids when the kick hits, though it’s not as present when you hear the snare. I move onto the Small Vintage Plate, and even though it’s darker and narrower, that pristine decay is still present to my ears.
All of this tells me something, so I note it down for later as I scroll through a group of halls, plates, rooms, and the like.
Pro Tip: When you engage in this exercise, the descriptors you use should be personal to you. The word could be “smooth.” It could be “sizzling.” It could be “a uniform pronouncement at 1 kHz.” Just make the associations for yourself.
3. Examine the early reflections and the tails separately
Settle on one preset now—ultimately, it might not matter which in the long run—and start looking at the early reflections and the tails independently. Verbs often have controls that affect either the early reflections or the tail, leaving the other alone entirely. These two different sections, considered together, give you the depth of field.
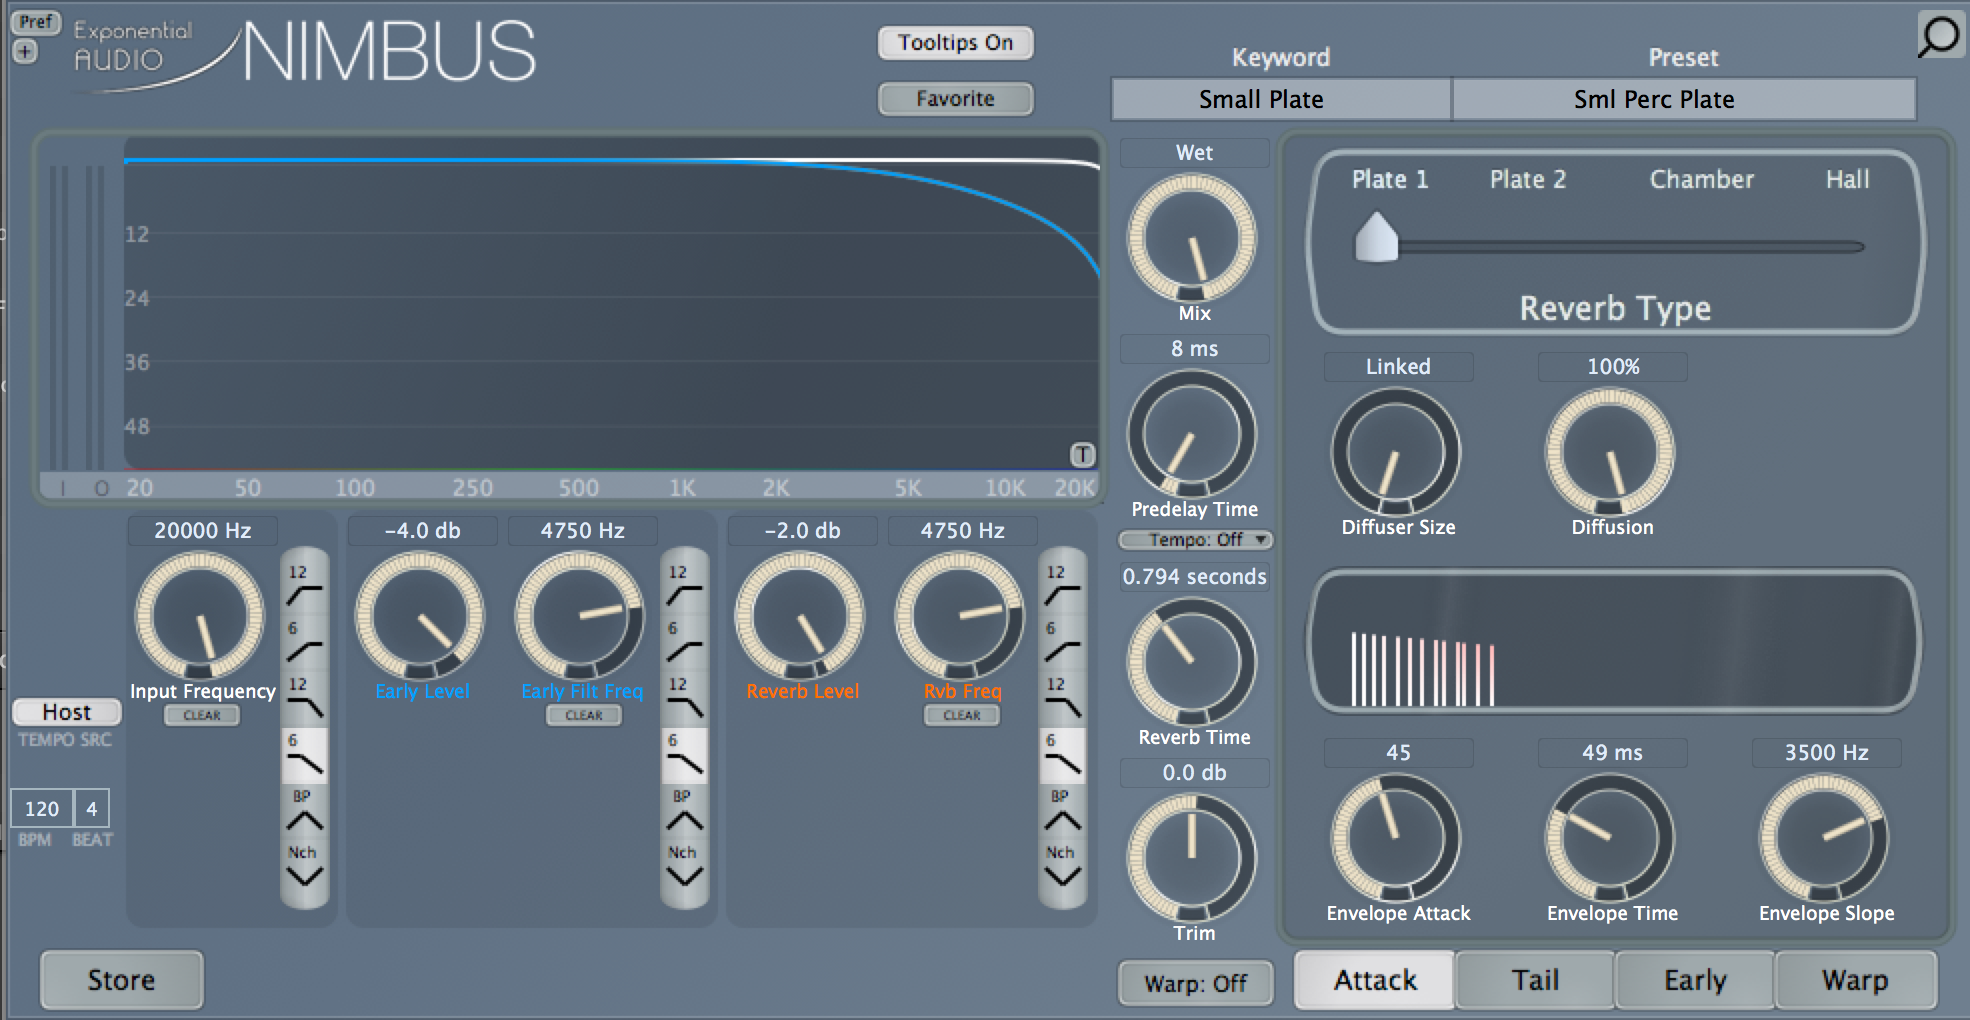
Say I have overheads going through NIMBUS. I’m working with the Perc Plate, shown below.

Perc Plate
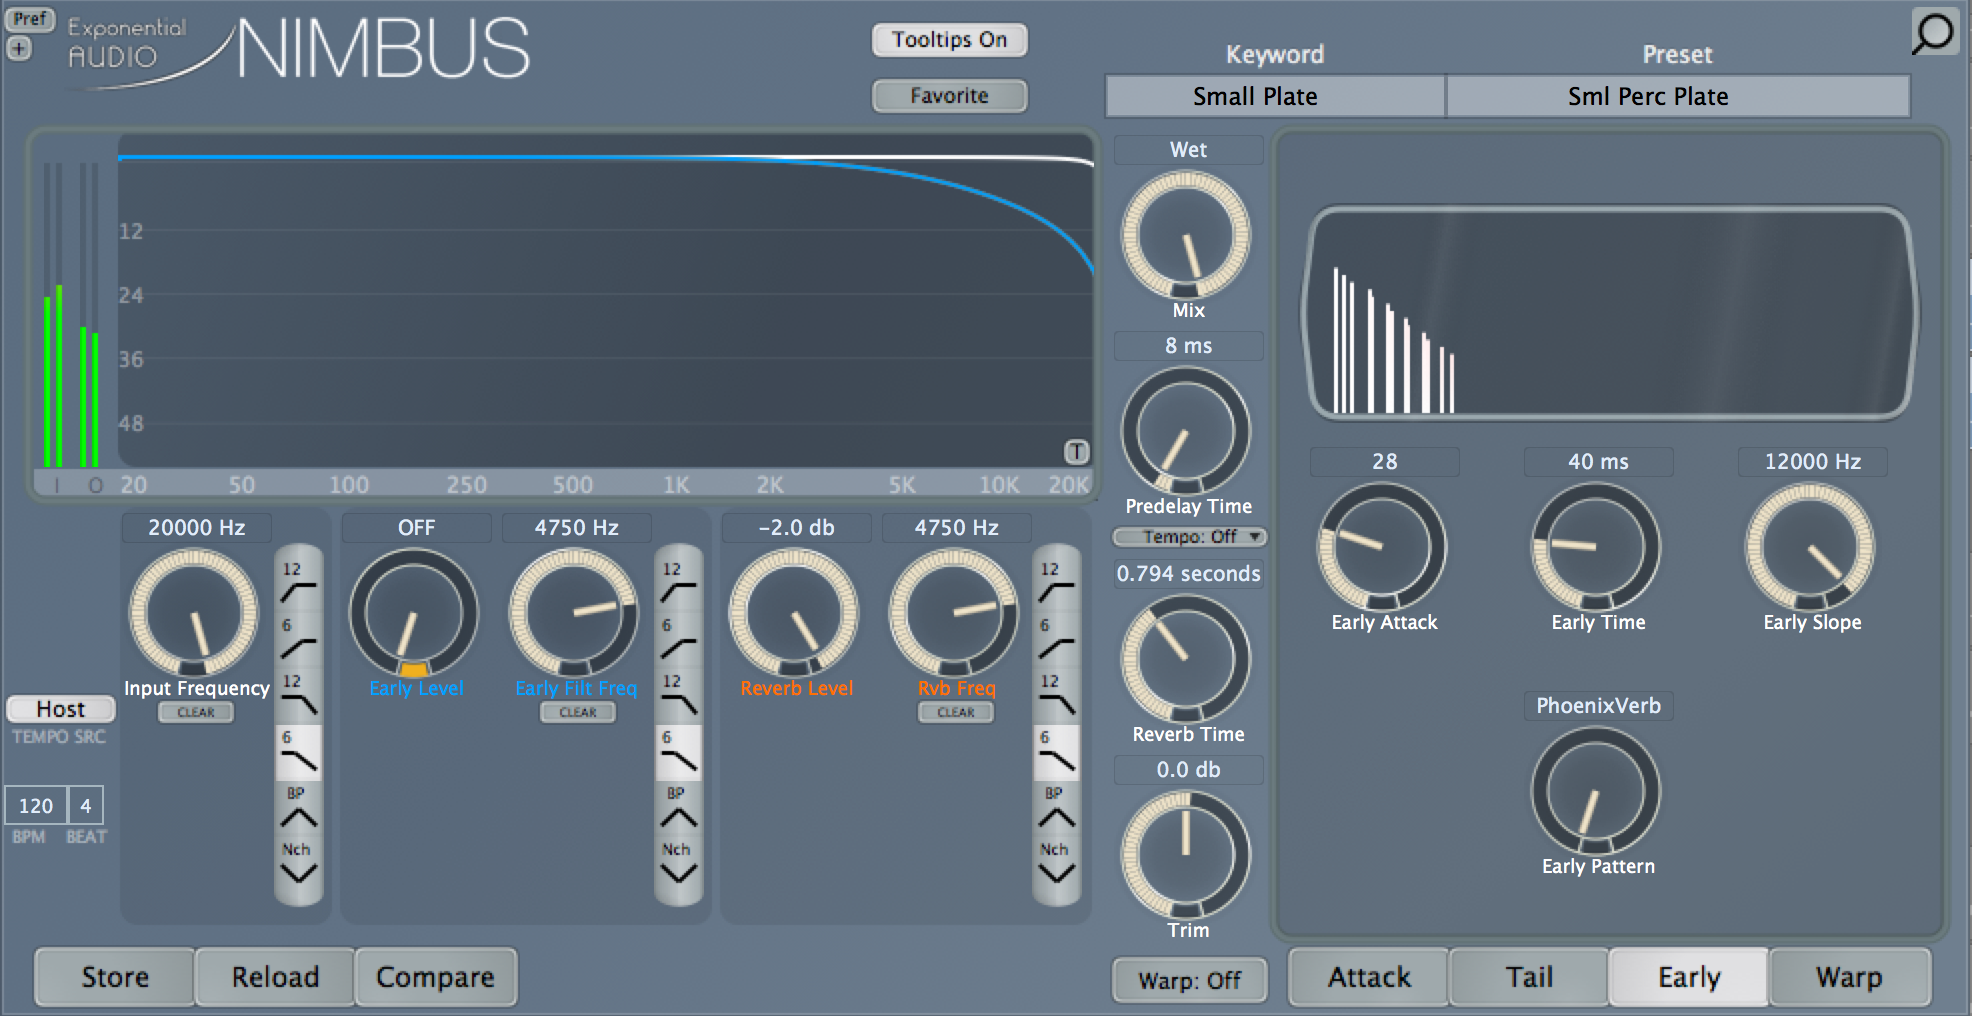
First I turn down the Reverb Level and turn up the Early Level, and shift tabs to the Early section.

Early Plate
Now, I go through the knobs and note how each one changes the early reflections. I won’t tell you what these knobs do (for more on that, check out this article) because depending on the manufacturer, the early section’s controls will change.
Develop your own understanding of these controls through analysis. I find writing down my reactions in a text document really helps me remember them. I may never open that document again, but somehow the info tends to stick.
Repeat the process with the tail section, turning the early reflections down, and the tails up. In NIMBUS, you’ll note controls such as Reverb Size or Dampening. Playing with Reverb Size, I note not only how the length of the tail changes, but also the changes in its timbre—the verb isn’t just longer or shorter, but feels as though it’s happening within entirely different spaces,
Looking at Dampening, I notice more cymbals in the tails, which makes sense, as it’s essentially a low-pass filter. Playing with the Damping Factor knob alongside Dampening, I can hear that filter induce different resonances. I make a note to remember my findings for later.

Tails Plate
Finally, balance the relative levels of the early reflections, late tails, and dry input signal in a few different ways. Note how these balances affect the depth of the overall sound.
4. Move onto global parameters
Once you understand your plug-in’s relationship between early and late sections, have a look at the global parameters. In something like NIMBUS, global parameters include input filtering, pre-delay, reverb time, reverb width, and many of the controls in the Attack page. I’m calling these “global parameters” because they affect both the Early and Tail sections together.

Global parameters
For instance, the Reverb Type will have a noticeable effect on both the early and late stages of the verb. The diffuser size and diffusion parameters will also change the sound of both stages.
Once you’ve developed an idea of the relationships between the early and tail sections, you have the building blocks in place to really understand, with your ears, how the global controls affect everything you’re hearing.
5. Play around with the weird and esoteric parameters
All verbs have their own eccentricities. NIMBUS, for instance, has an extensive Warp section that allows you to compress, distort, and manipulate the bit-depth of the reverb.
Run through these parameters as you did with the global controls, now that you have learned the building blocks. However, I believe it’s important to save this section for last: you want to drill the essentials before you move onto the rule-breaking stuff; there’s no point in learning how to mangle a sound if you don’t know how that sound works in the first place.

Warp!
6. Move onto the other tracks in the reference section
Repeat steps 2 through 5 with each instrument in your reference track. While I created a fully mixed loop out of a synthesizer in this article, you can create a relatively mixed track with reverb alone using all the parameters at your disposal. No, it won’t be ready for commercial release, but you’ll learn how to use one plug-in to vastly shape the sound of a whole tune.
Each instrument brings, by design, it’s own frequency makeup—guitars will sound different from drums; that’s just the nature of the beast. Each instrument will broaden your understanding of the plug-in through its responses to various combinations of frequencies. The same holds true for transient response: a drum is quite different from a slowly played guitar part, so a verb’s reaction will also differ.
By the end of this test session, you should have all the necessary info to judge how the reverb should operate in your workflow—and to judge how to use it quickly in your own work.
Conclusion
The big takeaway here is to move through a reverb in a certain order and to take notes along the way. This will force you to learn pieces of the plug-in piecemeal and to practice using them—as you might practice your right and left-hand technique differently while playing guitar.
A final word: I find I use the plug-ins I’ve reviewed in print far more than the plug-ins I haven’t. That’s because I’ve analyzed them in the way described above. Set aside an hour to learn a plug-in like this, and you’ll learn it in depth. It won’t be another unused module hanging around your growing folder of plug-ins. You’ll use it all the time because you’ll know how it works.


