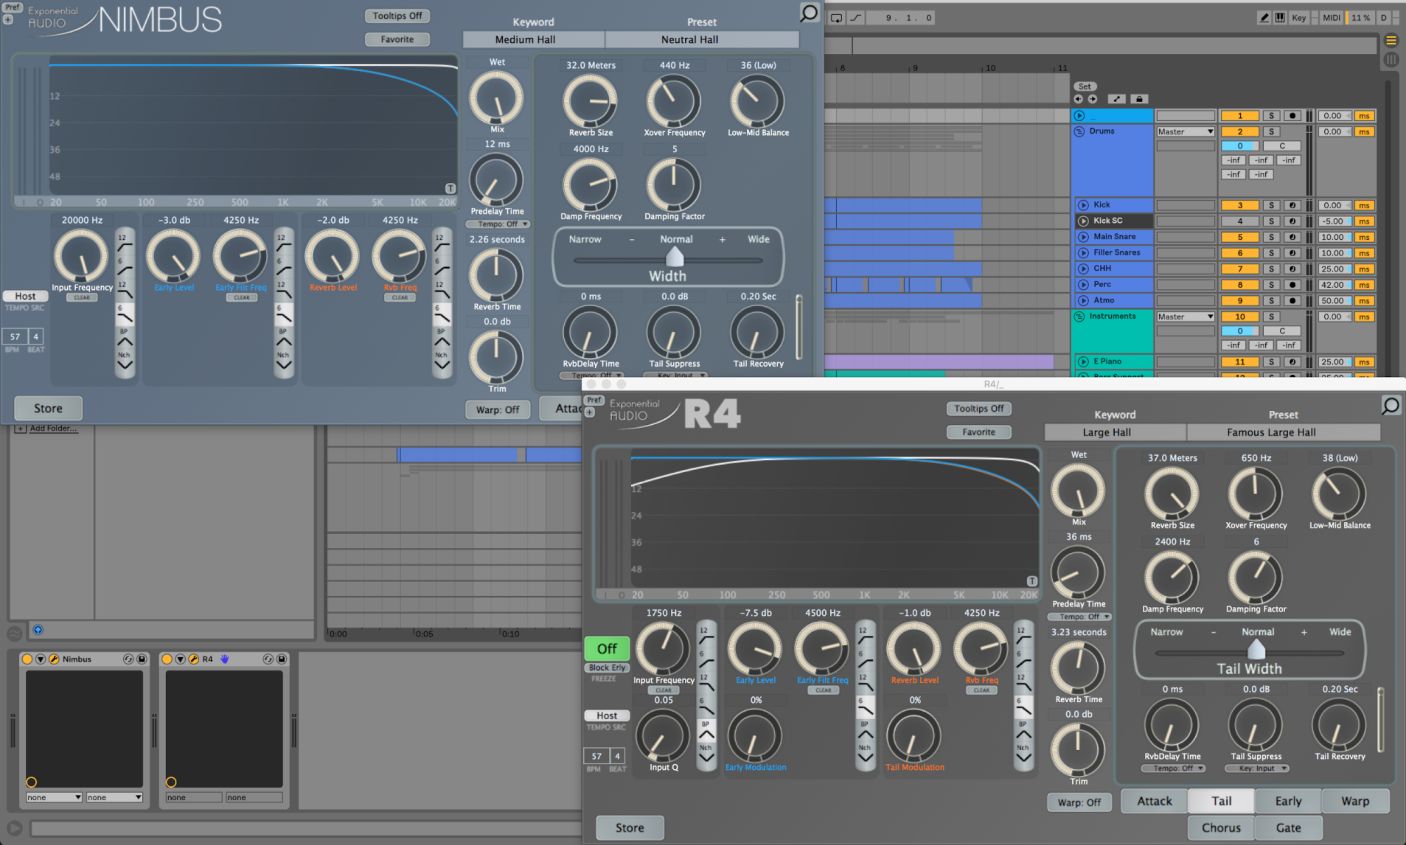
Learning Exponential Audio Plug-ins for Music Production through Presets
Exponential Audio offers powerful algorithmic reverbs for music production. In this article, we’ll cover parameters and great presets to help you get started with Nimbus and R4.
Exponential Audio offers several reverb plug-ins that make a great addition to any music producer’s toolkit. These plug-ins offer lush-sounding reverbs and interesting sound design capabilities, able to add plenty of character to a track. Also, as these plug-ins use algorithmic reverb, they can compete with the realism of a convolution reverb without requiring as much CPU.
Being quite sophisticated in design, these plug-ins may seem a little intimidating at first glance. However, Exponential Audio has included a ton of presets with each of their reverb plug-ins. This makes them as user-friendly to those who haven’t used the plug-ins before as they are to experienced users.
In this article, we’ll look at the potential of Exponential Audio plug-ins using presets. First, we’ll do an in-depth run-down of


Exponential Audio


Relay
Given that NIMBUS and R4 each have thousands of presets, we obviously won’t be going through all of them. However, we’ll touch on some of our favorites for spaces of all shapes, sizes, and sounds.
Using Exponential Audio presets in general
Exponential Audio wants to make sure you find the exact reverb sound that you’re looking for, so they’ve made the preset selection process easy to navigate.
We can narrow down our options using the Keyword menu. By selecting a general category like “Large," “Driven," “Vintage," or “Effect” (to name a few), the available presets in the Preset menu will change. This is a great way to speed up the selection process.
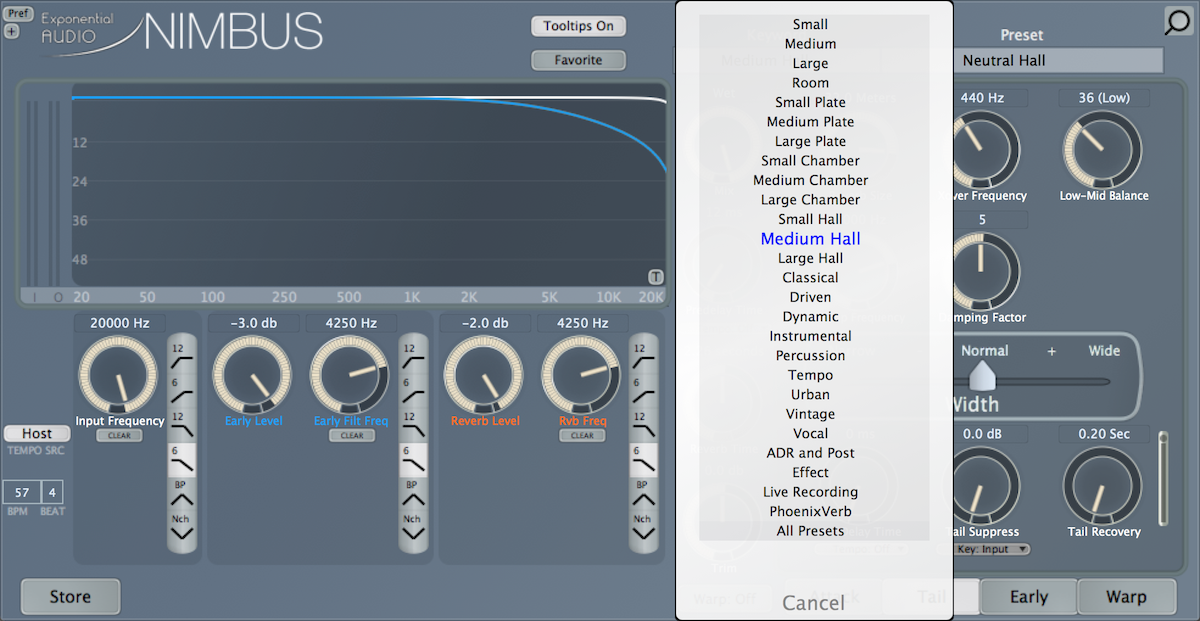
Nimbus keyword menu
Within the Preset menu, we have a TON of options to choose from. Every preset has a base setting, with many also having several variations. Variants like “Drk” and “Lite” will generally cause different amounts of high-frequency filtering to the reverb’s early reflections, variants like “Bnd” and “Nch” will respectively apply band or notch filters to the early and late reflections, and variants like “Narr” and “Wide” will automatically adjust the reverb’s stereo width.
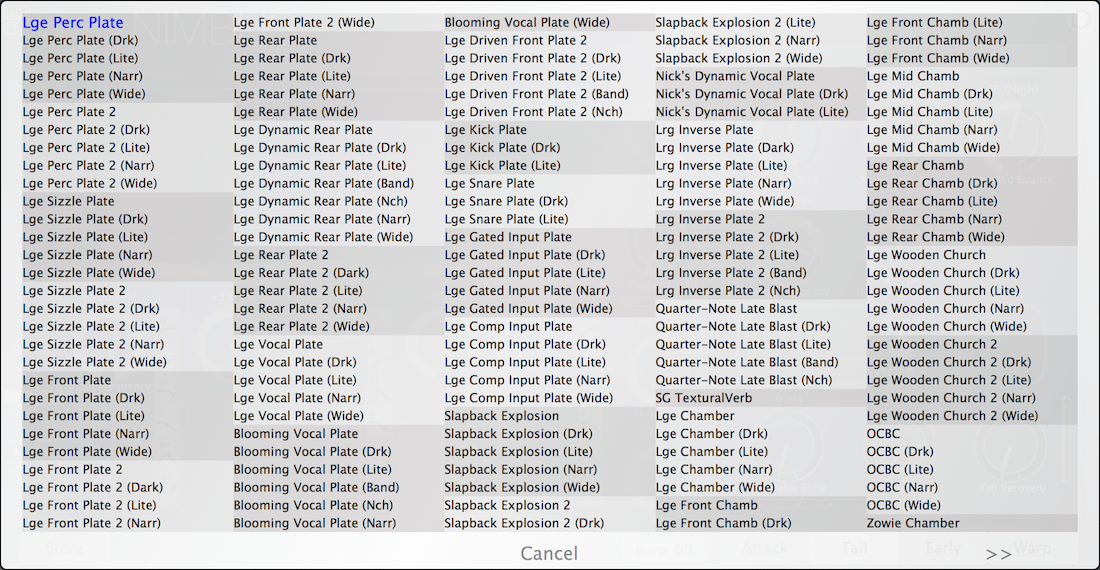
Page 1 of Nimbus presets under the “Large” keyword
Keep in mind that all of these parameters can be manually adjusted after selecting a preset so that the reverb sound fits your needs.
In the following sections, we’ll be trying out several presets from


Exponential Audio


R4 by Exponential Audio
For the sake of clarity, we’ll be using return channels when adding reverb to the elements in this track.
Using Exponential Audio plug-ins on drums
With the drums in this track, the snare is the most logical candidate to receive some reverb, as reverb on the snare is a common technique. Personally, I like adding reverb to every other snare in order to introduce some variation. For the following examples, we’ll just be adding reverb to all of the snare hits.
A short room reverb can add a lot of character to a snare sound. In the following example, I’ve added this small room sound using the “Tight Snare” preset in


Exponential Audio

Nimbus "Tight Snare"
Here’s another room reverb on the snare, this time using


R4 by Exponential Audio

R4 “Drum Room”
Next, let’s test out a larger-sounding reverb on the snare. Generally, in a relatively dry track like this, a longer reverb tail sounds a bit out of place. The fact that this track is pretty dry should, however, allow you to hear the reverb sound a bit more easily.
In the following example, I’ve used the “Lge Chamber (Drk)” preset in NIMBUS. This naturally has a longer decay time, as well as a dark character that I prefer for large rooms like this. The higher pre-delay value also helps to create the feeling of a large space.

Nimbus “Lge Chamber (Drk)”
Lastly, let’s try something weird for the snare reverb. Exponential Audio plug-ins have a multitude of effected-sounding reverb presets that can make our snare more interesting.
In the following example, I’ve used the “Appalachian Trail” preset under the “Effect” keyword in R4. This preset makes use of a high pre-delay to essentially act as a short delay, with the filtering creating an interesting resonant character.
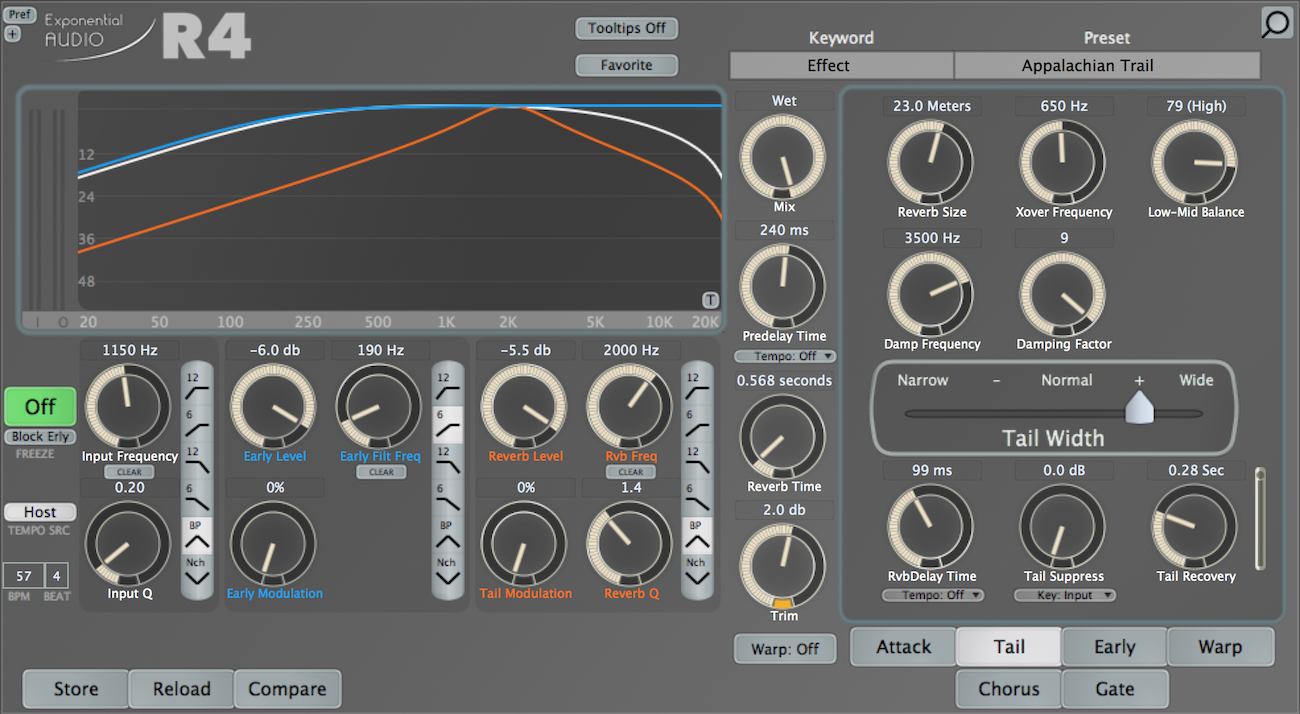
R4 “Appalachian Trail”
Using Exponential Audio plug-ins on synths
There are a few instruments in our little track that could use some reverb. Let’s start with the chopped, vamping synth that plays from the beginning.
In the following example, I’ve processed the synth with the “Live Room” preset under the “Instrumental” keyword in


Exponential Audio
I like how this preset augments the low-mids of our synth.
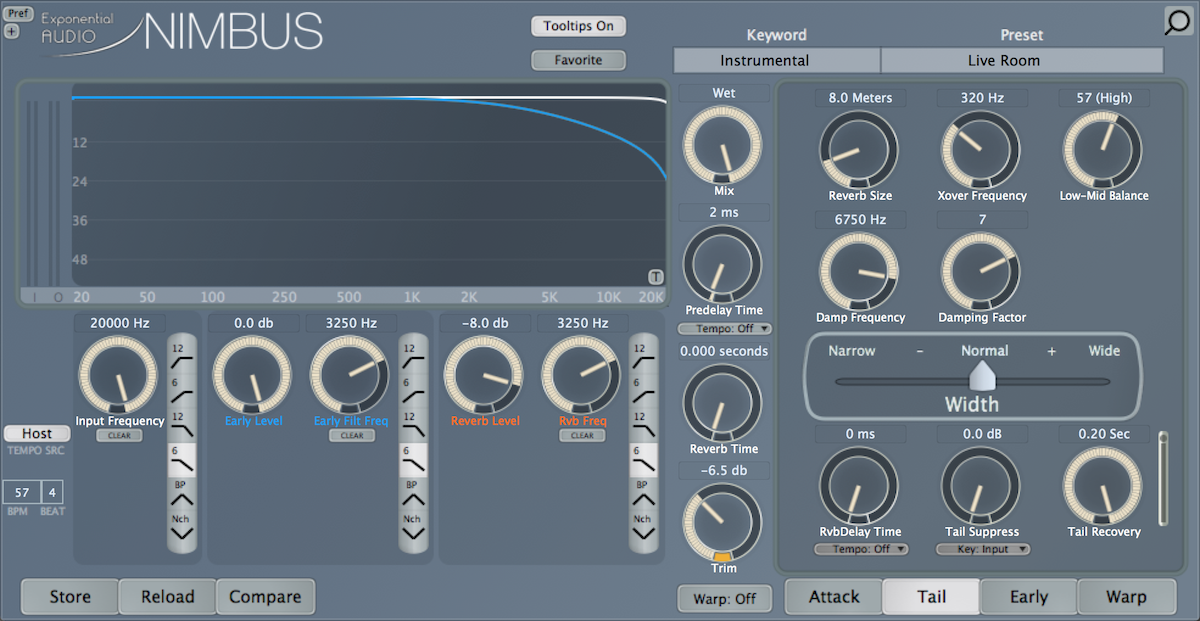
Nimbus “Live Room”
Now that we’ve used a super short reverb sound, let’s try out a larger room for the synth. In the following example, I’ve processed our synth with the “Complex Large Hall (Wide)” preset in


R4 by Exponential Audio
I’ve lowered the reverb decay time to about two seconds so that the reverb tail is timed to the largest gap between notes in the synth performance.

R4 “Complex Large Hall (Wide)”
Like we did with the snare, let’s find a sound-design oriented preset to affect the synth. In the following example, I’ve elected to use the “Talio Double Rhythm” preset in NIMBUS’ “Effect” category. Similarly to our previous effected reverb, this preset creates an interesting delay effect, this time with different filtering.
I’ve also adjusted the pre-delay time to a 32nd note triplet so it aligns more nicely with our drum groove.
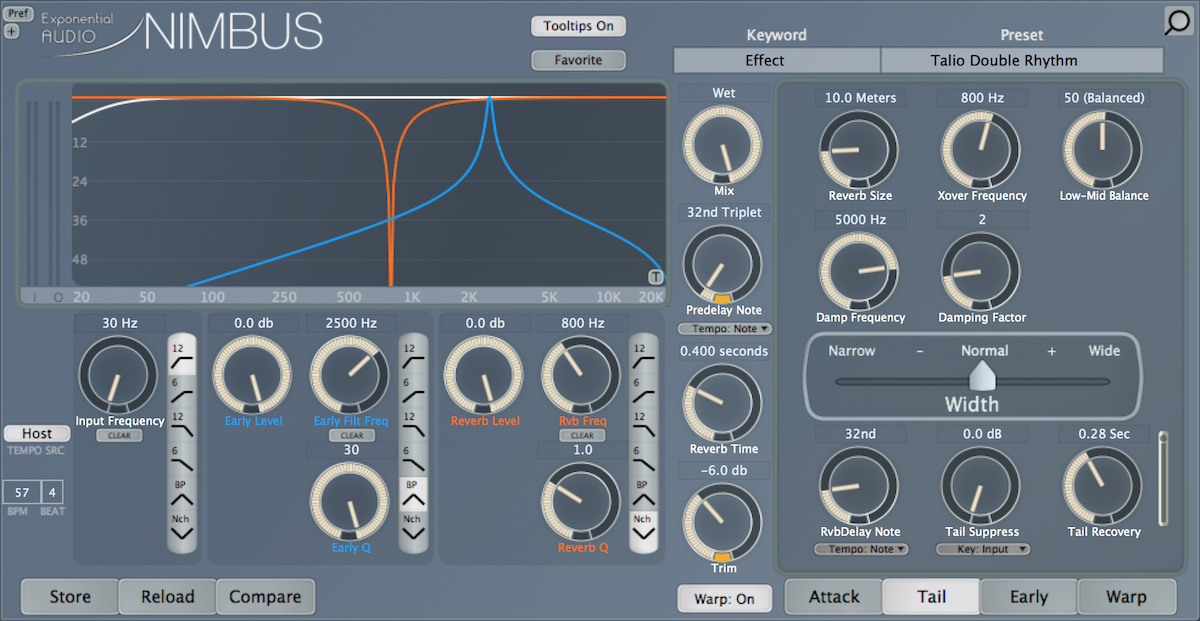
Nimbus “Talio Double Rhythm”
Using Exponential Audio plug-ins on keys
Next, let’s try applying some reverb presets to the electric piano that enters in the second half of our track.
Because the electric piano is a classic-sounding instrument, my first instinct was to search R4’s “Vintage” keyword for a preset. I settled on “A Furry Tale," which adds both a slight hiss and a reverb sound that warbles in pitch. Both of these effects sound characteristically vintage, which sounds great on an electric piano.
I also filtered some low frequencies out of the input signal (the electric piano) before it hits the reverb. This helps to reinforce the “vintage” sound that we’re going for here.

R4 “A Furry Tale”
The distorted electric piano is also a classic sound, so I went to


Exponential Audio

Nimbus “Sml Squashed Chamber (Drk)"
Since the chords in the electric piano part sustain, using a delay-based effected reverb preset (like we’ve used in previous examples) won’t be as effective. Therefore, I’ve gone with the “Dark Swirling Liquid” preset under


R4 by Exponential Audio

R4 “Dark Swirling Liquid”
Using Exponential Audio plug-ins on bass
While it’s not recommended to apply reverb to low-frequency sounds, our bass is a key element in the track and could sound interesting with a short or sound-design-esque reverb sound.
We’ll start with a short room for the bass to give it more presence in the sides of the stereo field. I chose to use the “In the Nursery” preset from NIMBUS “Small” keyword. With a short decay time and pre-delay, this preset helps the bass command a bit more space in the mix. I also filtered some low frequencies out of the input signal to avoid creating muddy reverb signal, which would cause plenty of issues for low-end clarity in the mix.
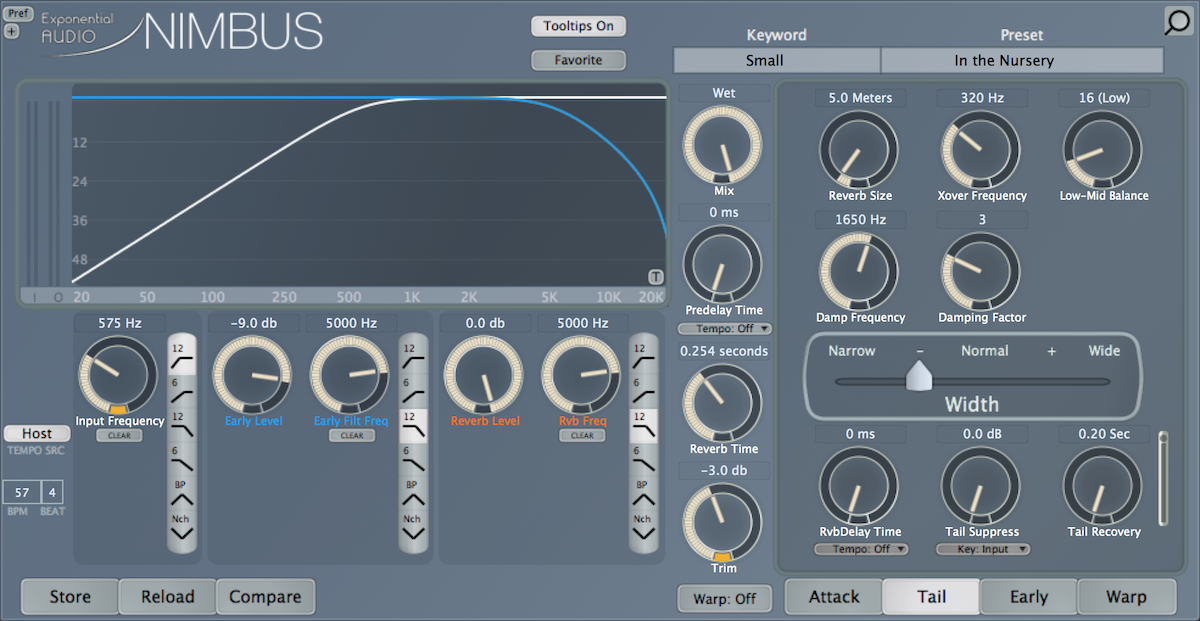
Nimbus “In the Nursery”
While this is an unconventional approach to processing a bass sound, we can go even further! To add even more character, I sent our bass to


R4 by Exponential Audio
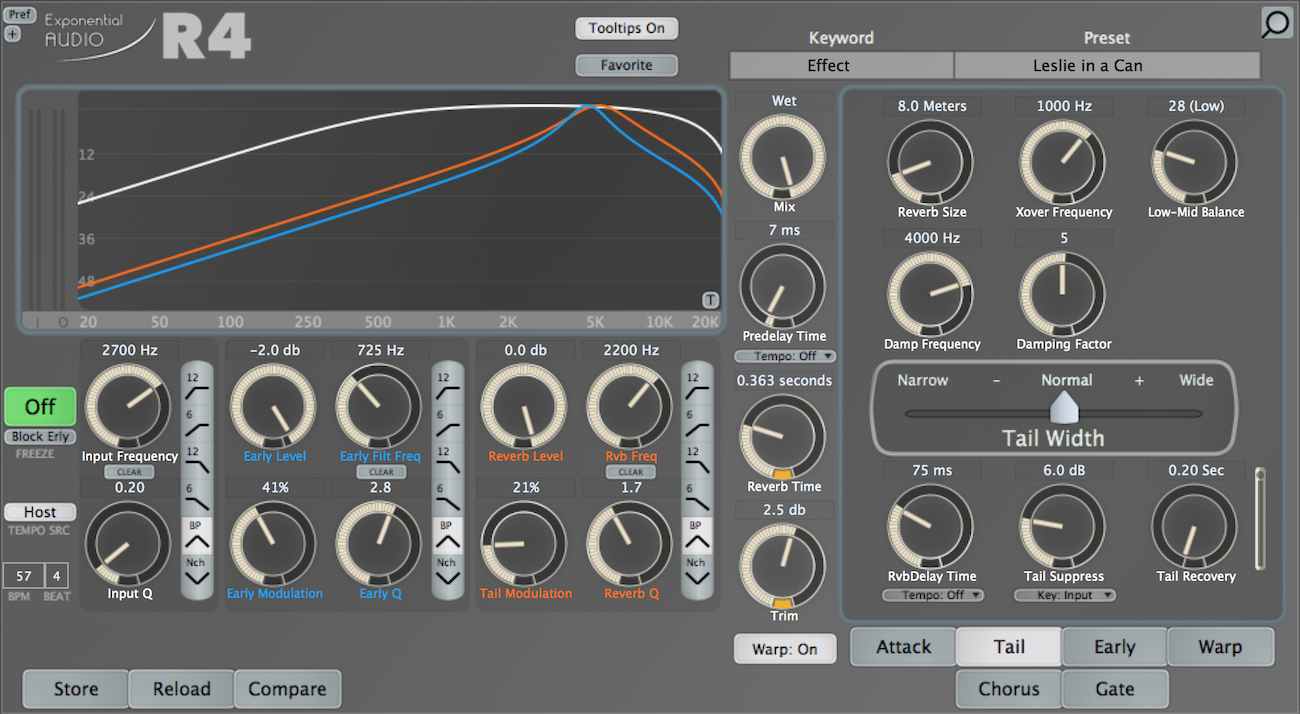
R4 “Leslie in a Can”
Using Exponential Audio plug-ins on vocals
Last but not least, let’s bring the vocals back to process with some reverb. The vocals already sound pretty robotic (courtesy of hard compression, tuning, and the Harmony module in


Nectar 3 Plus
Like we did with the bass, we can use a small room reverb to cause the vocals to take more space in the stereo field.


Exponential Audio


R4 by Exponential Audio

Nimbus “Airy Vocal Room”
For a more affected reverb sound, I chose to use the “Alternative Facts” preset under R4’s “Effect” keyword. This preset sounds a bit similar to the previous example, but uses a tempo-synced pre-delay time and more resonant filters. This has the effect of a delay while also creating an interesting timbre that pushes the vocals further into the “sound design” realm.
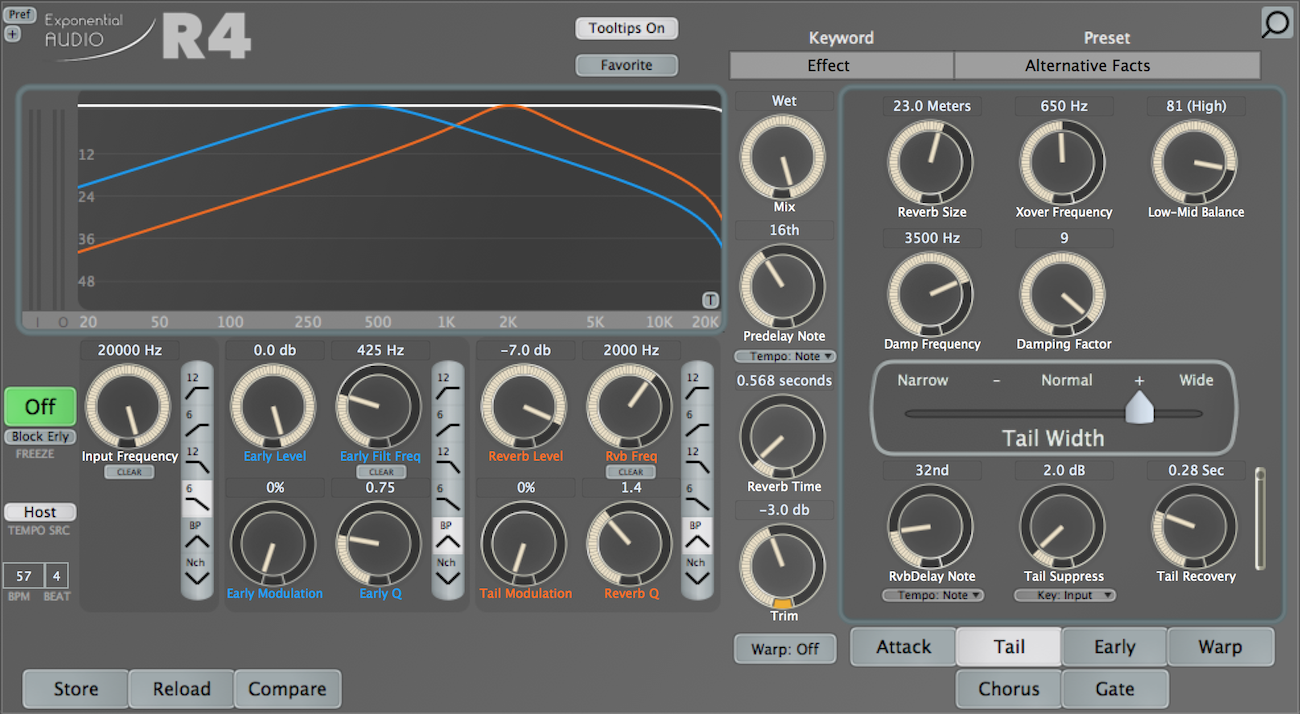
R4 “Alternative Facts”
Conclusion
As you can see, both


Exponential Audio


R4 by Exponential Audio

