5 Essential Tips for Mixing Reverb
Reverb is a helpful tool, but can potentially cause mix issues. In this article, we’ll discuss how to eliminate these problems and get the most out of reverb.
Reverb can be tricky to deal with in a mix. The space that it adds can be very helpful, but sloppy reverb sounds can often become smeared over the mix, reducing clarity. Achieving the proper balance when mixing reverb will give a sense of space without becoming distracting in the mix.
In this article, we’ll cover some methods for mixing reverb. We’ll discuss EQing, ducking, timing, and retriggering reverb.
1. Don't let other elements compete with reverb
The sense of space reverb can provide to mix elements provide character and make the track sound “larger than life.” However, dry signals should never have to compete with the reverb signal for frequencies. Reverb should just be treated as another element in the mix, one that needs to fit in the track’s sonic landscape.
Naturally, reverb should sit behind focal elements and not be distracting for the listener. Therefore, we need to process the reverb signal in a way that makes room for everything else.
Because we want the dry signal to cut through the mix, it’s generally good practice to use return/auxiliary channels to add reverb. The reverb plug-in on the return channel is set to 100% wet, allowing us to completely separate dry and wet signals. We’ll be doing this in all of the examples today.
2. EQing before and after reverb is applied
One of the main reasons to use return channels for reverb is the ability to EQ the reverb signal separately from the dry signal. This can be done before the reverb plug-in (EQing the input signal) or after the reverb plug-in (EQing the reverb output).
EQing before the reverb plug-in will affect how the reverb unit reacts. Reverb algorithms will react differently with different input signals. If there are frequencies that we want to attenuate (or even completely cut), doing so before the reverb plug-in can result in a smoother sound.
It’s certainly an option to EQ after the reverb plug-in, which can be helpful to tame unwanted resonances. But for the reason mentioned above, EQing before the reverb is recommended. Some reverb plug-ins will even contain an onboard input EQ to do this.
The Abbey Road Studios reverb trick
The “EQ before the reverb” method is a common one, attributed to mixing work done at the legendary Abbey Road Studios since the 1960s. In this method, we apply both a high-pass filter and a low-pass filter to cut low and high frequencies out of the input signal.
As you could expect, this is to create space for other elements in the mix. Low reverb signal, for instance, has the potential to create a lot of mud. Low-end clarity is incredibly important in mixing, especially in bass-heavy genres like electronic music. Festivals and clubs have powerful subwoofers, so any low mud will be obvious.
The low-end should be clean and reserved for elements like the bass and kick drum. Low-end reverb, even from other elements, can prevent the bass and kick from being clear.
For examples today, we’ll be using this beat:
In the following example, I send this low pluck sound to a reverb without any low cutting applied to the input signal. Listen for how the reverb clutters low and low-mid frequencies:
Filter out problematic low frequencies
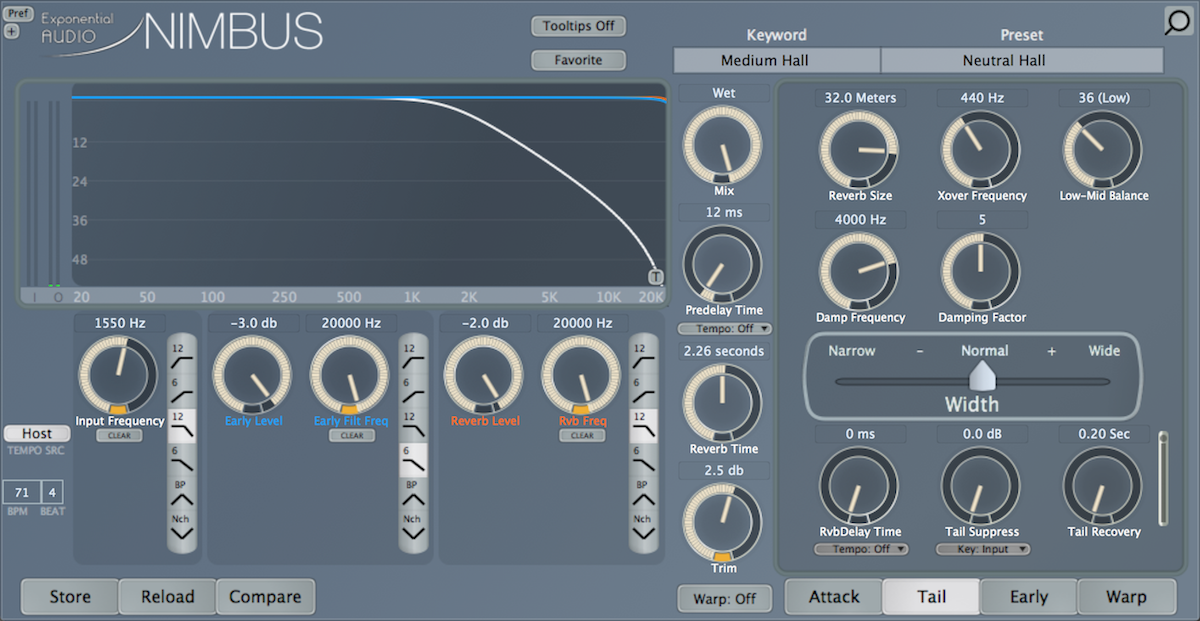
If we filter out some low frequencies from the input signal, the low and low-mid frequencies in other elements will have a much easier time coming through in the mix. iZotope's


Exponential Audio

EQing low input signal before reverb
The lowest reverb frequencies in any sound can compete for the low-mid “weight” of that dry sound. Therefore, filtering some lower frequencies out of the reverb signal can help to reserve the weight for the dry signal.
Use a low-pass filter to eliminate high frequencies
The Abbey Road reverb trick also makes use of a low-pass filter to eliminate some high frequencies. For starters, high reverb frequencies die out fastest in the physical world. Most (if not all) reverb plug-ins take this into account using algorithms that control the decay time of certain frequencies. Filtering some high frequencies out of a reverb signal can help to create a more natural-sounding reverb.
Along this line of thinking, high frequencies are responsible for making a signal sound present and close to the listener. High frequencies would die down at a distance, so the presence of high frequencies brings a sound closer to the listener. We want to keep these high frequencies in dry signals, as those are meant to sound close and intimate. If the reverb signal has too much high-frequency content, it can prevent dry signals from having the presence that they need.
In the following example, I send the low pluck sound to a reverb without any high cutting applied to the input signal. Listen for how the pluck has trouble standing out in the bright wash of the reverb:
If we filter out some high frequencies, the dry pluck sounds much more present. We’re able to preserve the airiness of reverb without crowding other important elements.

High frequency input signal EQ'd
In addition to the Abbey Roads reverb trick, we can perform some selective attenuation at certain frequencies to help certain elements stand out in the mix. A snare drum, for example, usually has a dominant fundamental frequency around 200 Hz. Because this is the key frequency for the snare, having space here will allow the snare to cut through the mix more easily. Therefore, with the snare’s fundamental frequency in mind, we can subtly attenuate this frequency in the reverb signal to make room for the snare.
3. Reverb ducking to provide more clarity
Reverb can get in the way of dry sounds, creating a smear over the mix that reduces overall clarity. Depending on the scenario, there are a few ways that we can perform some ducking to the reverb to minimize this smearing.
Ducking reverb with sidechain compression
The first option is sidechain compression. This is helpful as it will tie the reverb ducking to the shape of another sound. A common technique is to perform sidechain compression to the reverb using the original dry sound as the input. This will cause the reverb signal to duck when the dry signal plays, and swell up when the dry signal doesn’t.
We’re not really listening to the reverb signal while a song plays, as we can only really hear the reverb in the spaces in between notes. This technique gives us the benefits of reverb without causing it to clash with the dry signal.
In the following example, I perform some sidechain compression to the pluck reverb using the pluck itself as the sidechain input. Listen to how the reverb moves out of the way when the dry signal plays:
This type of sidechain compression happens after the reverb plug-in. However, with transient melodic instruments (like plucks, guitar, etc.), sidechain compression can also occur before the reverb plug-in.
Use sidechain compression to remove atonal transients
Transient information is often atonal, consisting of frequencies unrelated to the note played. As a result, leaving these transients in can cause a noisy reverb. If the reverb were to simply react to the tonal aspects of the instrument, it would sound smoother and less distracting.
To solve this issue, we can sidechain the input signal on every note played. This can be done with a ghost trigger, a short click or blast of white noise that simply engages the compressor. This will carve the transient out of the dry signal before it hits the reverb plug-in, causing the reverb to react exclusively to the tonal part of the instrument.
Lastly, we can sidechain the reverb signal with main drum elements, notably the kick (and sometimes snare). This will allow the punchy drums to cut through the mix a bit better. I’ve increased the low pluck reverb volume to demonstrate.
This method can be taken to the extreme with a high ratio and long release time, creating a pumping effect that can be interesting in certain tracks.
All of the above approaches can also be done with volume/gain automation or cropping the reverb signal as an audio clip. Both of these approaches are more tedious than sidechain compression, but can be more surgical and allow more control.
With volume automation, or by bouncing the reverb out to an audio clip and cropping it, we can cleanly cut the reverb out when dry sounds play.
4. Tempo-sync your reverb for better blending
We can blend the reverb into the mix by giving it a rhythmic correlation to the track itself. Most producers set their reverb times arbitrarily, but we can perform fine-tuning to tighten things up.
Reverb has two main time-based parameters: pre-delay and decay time. Pre-delay determines the time delay before the first early reflections occur. Decay time determines how long the reverb tail lasts. We can set these parameters to correspond with beat values at the track’s tempo.
In the following examples, I’ve set the reverb once with arbitrary time parameters, once with tempo-synced parameters. In the second example, rather than a random pre-delay time, the predelay lasts exactly one 1/64th note (52 ms at my tempo of 71 bpm). Instead of a “long” reverb, the decay time lasts exactly one half note (1.69 sec at my tempo). You can use a note length calculator like this to find the exact durations for beat values at a certain tempo in milliseconds.
Listen how the tempo-synched reverb lines up with the rhythm in the track. This makes the reverb less distracting and blends it into the mix better.
5. Reverb bypass automation for added clarity
Long, large-sounding reverb spaces have a tendency to reduce clarity in a mix. With busy melodic or harmonic elements, this is especially an issue. As many different notes are played, the reverb signals of each note build on each other. This mess of notes can distract from the dry sound, making it less clear in the mix.
There’s an interesting trick that we can use to solve this problem. Bypassing a reverb plug-in will stop reverb signal and turning it back on will allow it to react to the next note or chord.
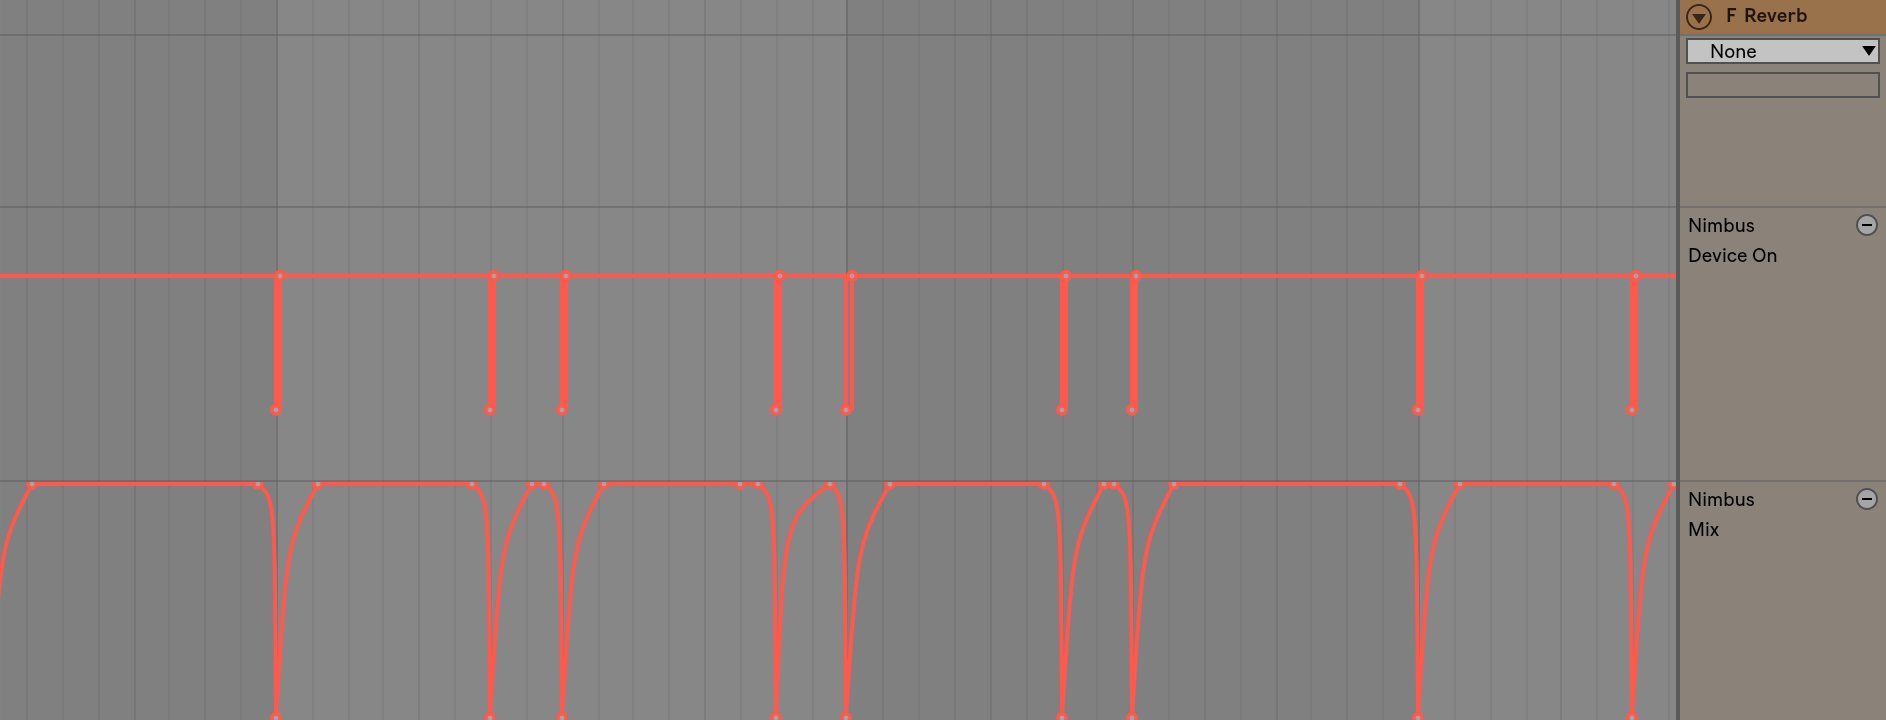
Using this logic, we can create plug-in bypass automation to retrigger the reverb signal for each note or chord. This will cause reverb signal to only be related to notes played.
In the following example, I send the pumping pad to a long reverb. Using some bypass automation, I force the reverb to retrigger at each chord. This can create a slight click, so I also automate the reverb plug-in’s dry / wet parameter to eliminate the click.

Reverb bypass and dry-wet automation
Keep in mind that this is not how reverb reacts in real life. All notes would be able to ring out in a large space, rather than being cut like the example above.
This method works well in electronic contexts where this organic reverb sound isn’t necessary. If you want a natural-sounding long reverb, you’re better off using one of the EQing, Ducking, or Timing methods above.
Conclusion
Properly handling reverb can drastically improve a mix. Dry sounds can come through without competing with reverb signals, giving them the presence and clarity that they should have.
By avoiding problems with masking, reverb can actually perform the role that it’s meant to perform. We can add subtle, immersive ambience while maintaining the integrity of the rest of the mix.


