13 Tips for Mixing and Producing EDM
EDM veteran Andrew Eisele shares his top tips for how to produce EDM; including common EDM production techniques, how to mix EDM with plug-ins, and some ways to improve your production workflow.
For the past 40 years EDM has hit the airwaves, with subgenres like house, techno, and dance-pop making crowds go wild. So what are the tried and true tricks of how to produce and mix professional EDM for yourself?
We sat down with Andrew Eisele, who brings over twenty years of experience to the table. A former teacher at Full Sail, Andrew not only worked with premier acts in the house, techno, and Miami bass scenes—people like DJ Magic Mike and Lady Miss Kier (of Deee-Lite“Groove is in the Heart” fame)—he also expanded into the live circuit. Now, he co-owns and runs The Brown Note here in Brooklyn, a club regularly featuring prominent acts such as Truth, Claude Young, Paul Johnson, Youngsta, and more.
This puts Andrew in an interesting position, as he boasts mixing, producing, teaching, live-sound, and sound-installation bona fides. He was gracious enough to sit down and walk me through his process, and you are about to be the beneficiary of this conversation. Whether you’re a producer or a mixer, you’re sure to get something out of the following interview.
I’ve been producing across several EDM genres for over 15 years as well, and I'll be demonstrating some of Andrew’s top thdown below. We’ll also explore some common EDM production techniques and how to achieve them using plug-ins. Let’s dive in!
This article references a previous version of Neutron. Learn about 

Neutron 5
1. Define your low end
Let’s start with the bass. Andrew said this: “With all dance music—it doesn’t matter which genre—you always have to pick where the low end is coming from. Because low-end frequencies are so big, and they take up so much room, you can’t have things fighting for it. Straight off the bat (and I know a lot of producers do this), it’s common to cut everything from 120 Hz on down except for your kick drum and your bass.”
To achieve this in your mix, use a plug-in like


Neutron
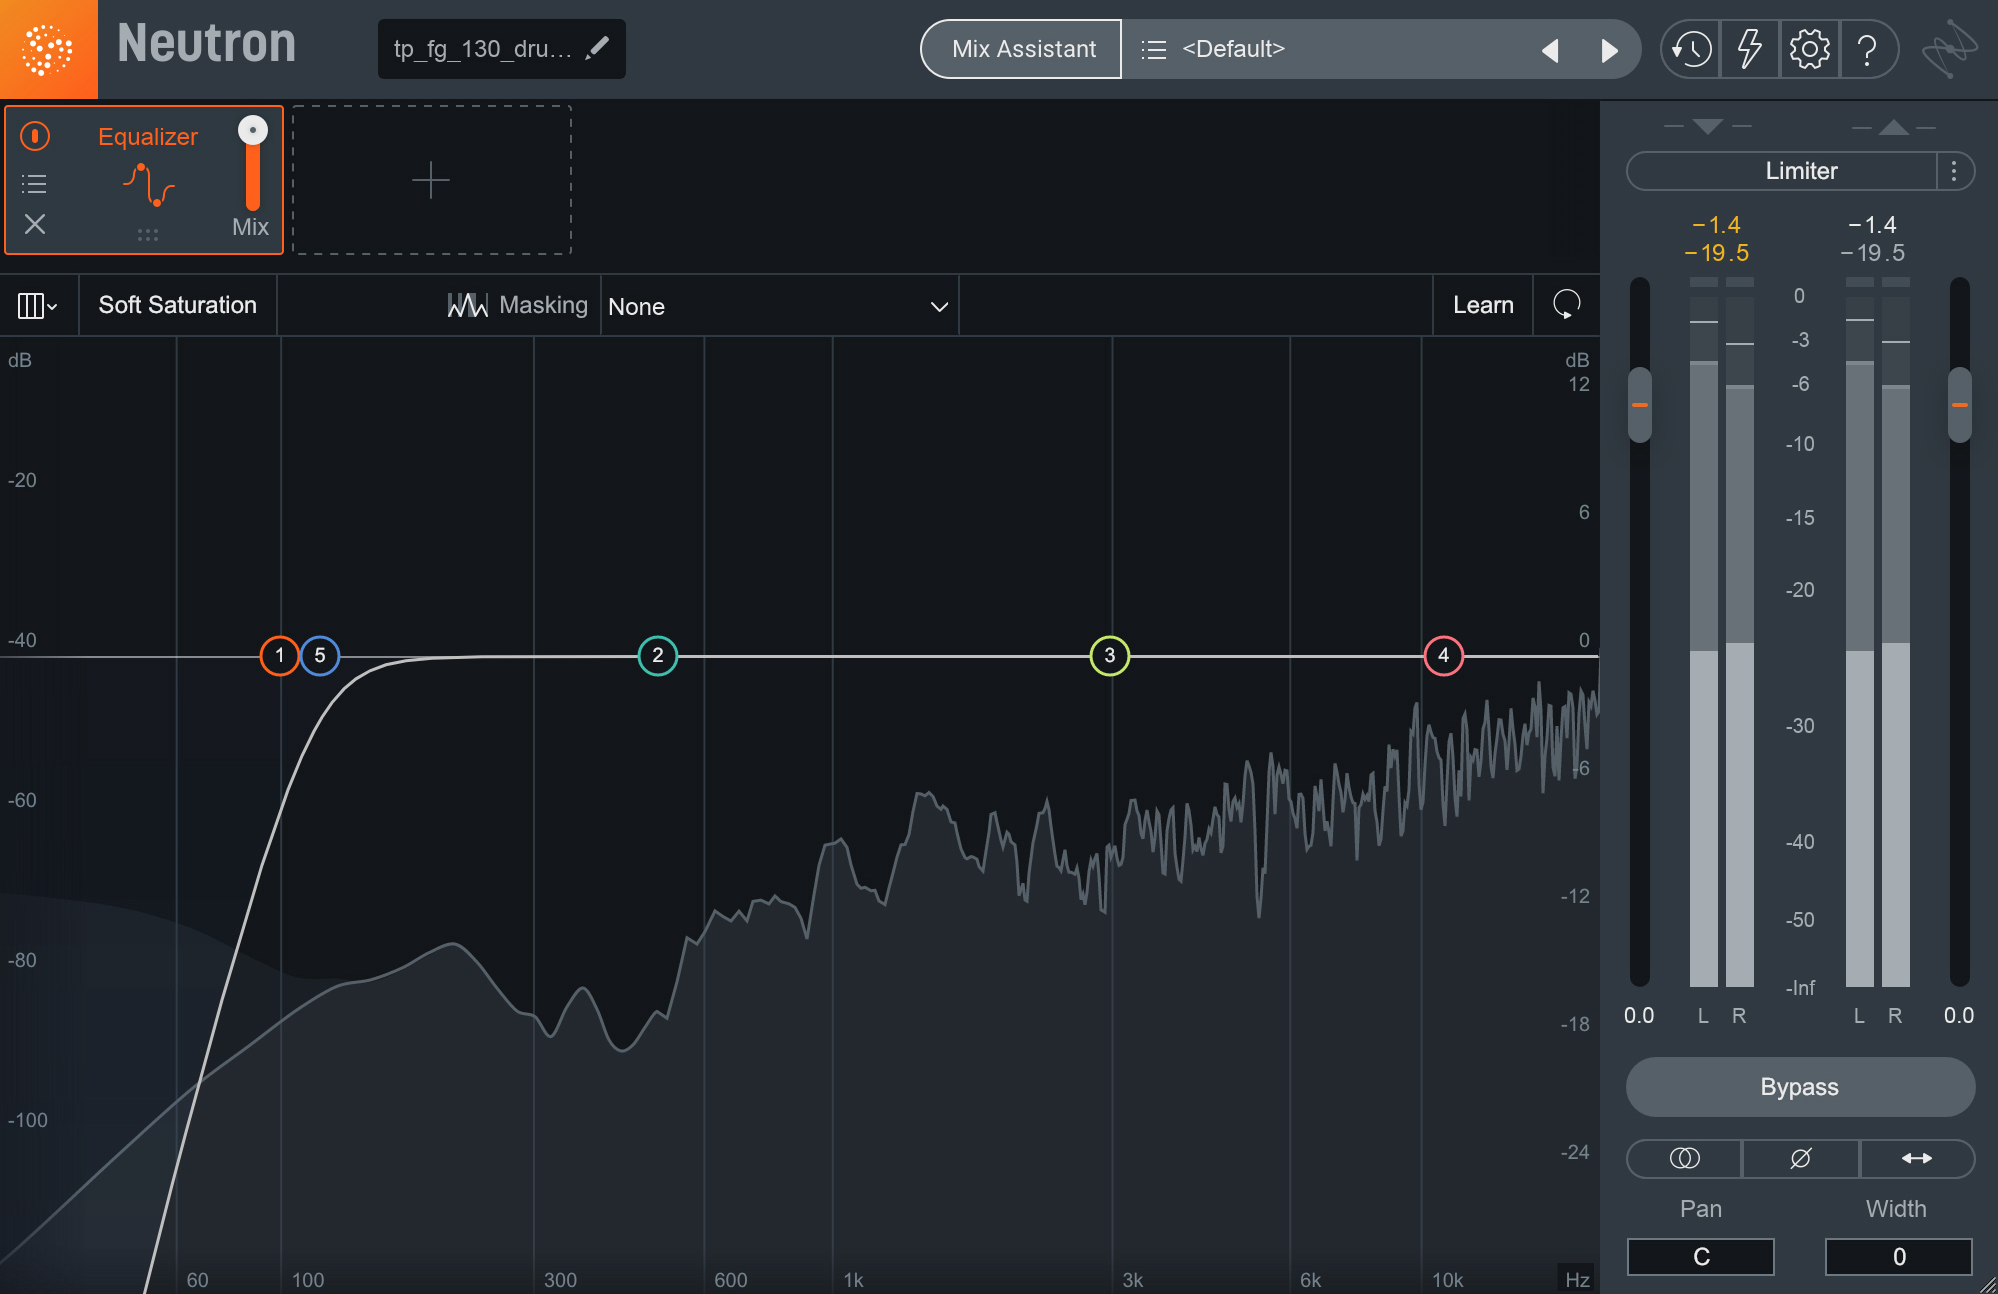
Use a high pass filter to cut frequencies below 120 Hz.
Be careful not to trust your ears, though, when deciding which instruments to cut from. For example: you may listen to a hi-hat loop and think there are no low frequencies present, but if you run it through an EQ analyzer, you’ll see there are actually some lower frequencies—albeit very low in volume. The problem is, when you stack every instrument that has some low frequencies on top of each other in your mix, it muddies things up and takes away from the clarity you could have in your low end.
Want to try these production tips out for yourself?
Get access to all of the plug-ins used in this article with a free trial of a


iZotope Music Production Suite Pro: Monthly
2. Split your bass
“One trick that everyone should know,” Andrew said, “is the use of a sine wave as your bass. It’s almost like you have two basslines, and 90% of the time they’re both going to be playing the same notes at the same time. But in terms of mixing, you have your top-bass, which is your high-end energy and your distorted bass sounds. But you’re cutting that off at around 90 Hz or 100 Hz. Then, you use a true sine wave to play that lower octave. That’s where your bass comes from, because it’s clean and pure in tone...and that’s what you want in your lower register.”
As Andrew said, If you want your bass to really pack a punch in those subs, the best trick in the book is to split your bassline in two: your “sub-bass” and your “top-bass.”
In the top-bass, you’ll keep your higher and more distorted bass sounds, but you’ll want to cut everything from about 50-90 Hz all the way down. Then, for the sub-bass (everything from 20 Hz up to where you made the cut in your top-bass), you’ll want to use only a pure sine wave.
I’m already hearing groans of “but..but...won’t that totally kill the vibe of that bass patch I’ve been tweaking for hours?!” The truth is, it’s much easier for a subwoofer to play a sine wave than it is for it to produce a signal with a ton of data. So, if you leave the sub frequency ranges up to a pure sine wave, you’ll get the cleanest, tightest sub possible. Then, those higher bass frequencies can get filled by your top-bass, where you can give it however much grit and grime you want.
Here’s an audio example of a bassline before and after I split it (headphones or mixing monitors recommended):
Hear the difference? Because we’re letting the sine wave handle the bulk of the work in the sub-bass region, it still keeps the overall tonal quality of the original bass while adding quite a bit more clarity and body to the bass section as a whole.
To achieve this particular split, I simply added a sine wave instrument, and had it play the same exact bassline as my original bass. Then, I added a high pass filter in Neutron’s EQ to my top-bass, rolling off everything below 90 Hz with a slope of 24 dB. Check it out below:

Neutron EQ high pass filter on top bass
3. Cut your kicks for clicks
Obviously, Andrew said, you should “tune your kick drum to the key that the song is in, so that it follows the bassline. That way, there’s no clash.” This is especially useful on songs with “extensive, long bass notes.”
But then he offered this production tip that had never occurred to me, even though I routinely sample kick drums.
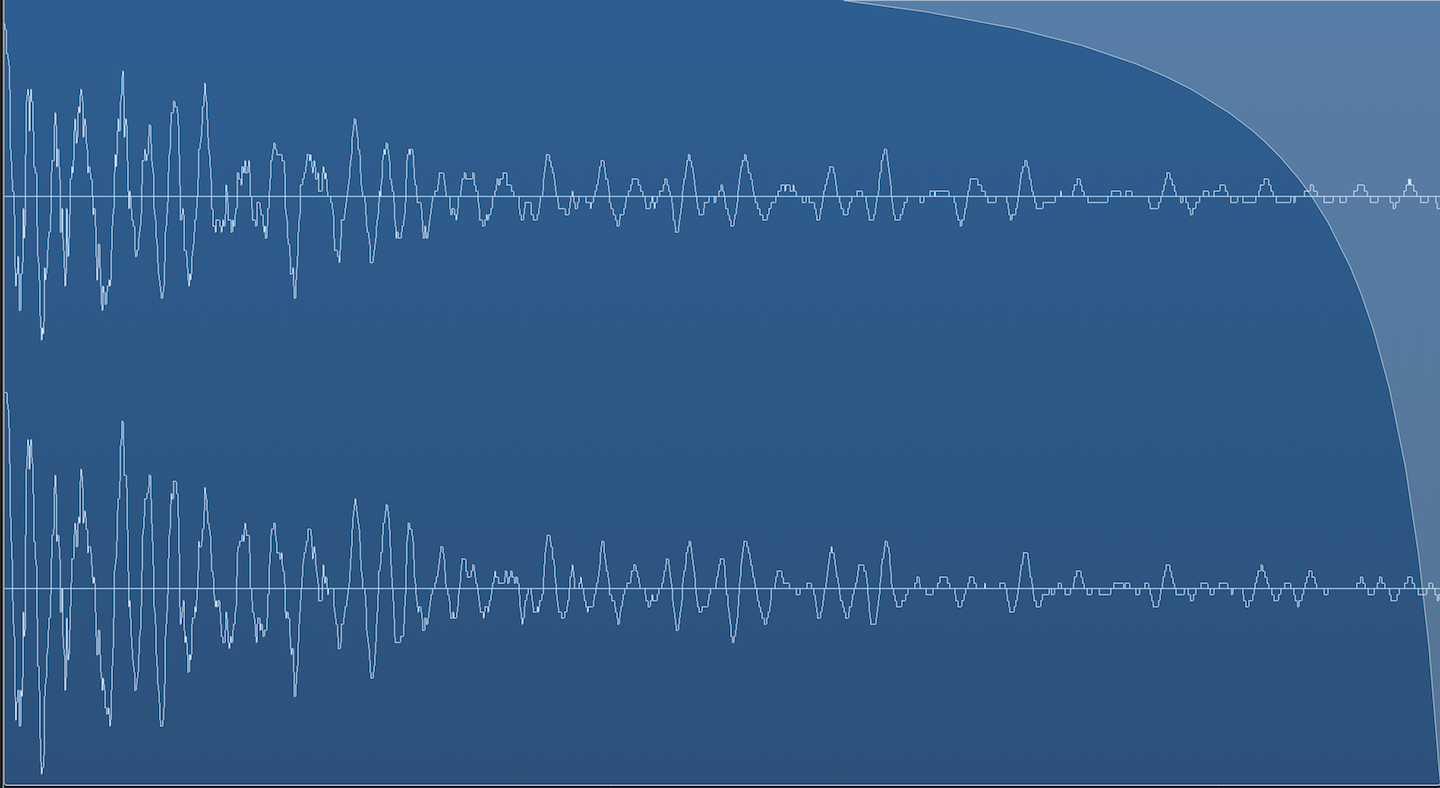
“One thing you might want to consider,” he said, “especially if you’re going after a strong attack and you’re using samples, is to cut [the waveform] at the highest peak, as opposed to the zero-crossing line.”
Here he’s talking about the act of cutting your samples during the pre-production process. Instead of starting the sample at the beginning of the kick—where the waveform starts to build from nothing—Andrew advises you look for the highest peak and chop the kick there. That way, “it adds this click. And if you want to make something highly percussive, that’s a good way of doing it.”
Kick Sample Cut at Peak of Waveform
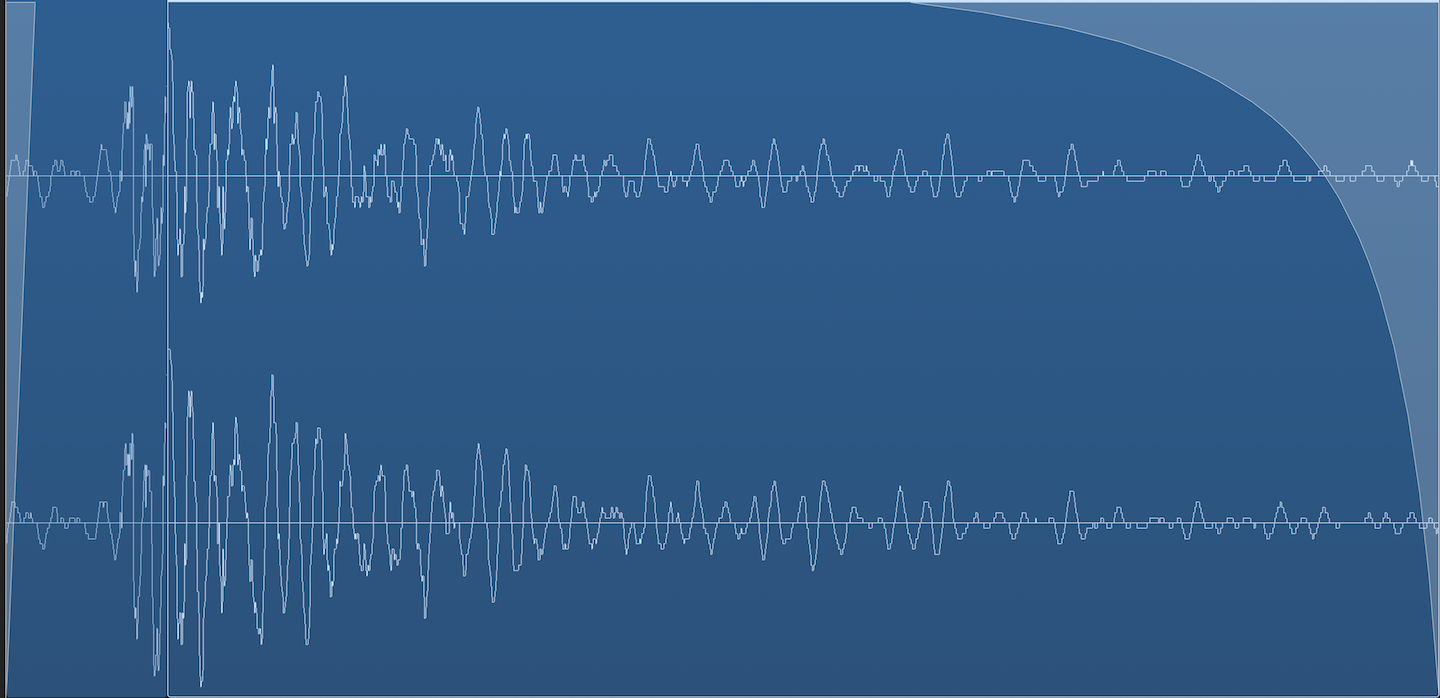
Resulting Kick Drum Sample
4. Carve space for your kick and bass
It doesn’t matter what genre of EDM you’re working with, there’s always going to be a war between the kick and the bass. Since they occupy many of the same frequencies, it’s a good practice to carve out space for each of them, so they don’t butt heads too much.
Here’s how Andrew said you should go about doing so in electronic music. “Your kick drum is somewhere in the pocket of where that sine bass is, so either you use an EQ, or you can use a sidechain compressor.”
Sure, you could always do the tried and true method of using sidechain compression to get that classic pumping sound common in genres like French House and Future Bass. This technique involves using a compressor to limit the volume of the bass whenever the kick hits. It’s highly effective, but can sometimes leave your low end sounding unnatural if you don’t have the right attack and release times set on your compressor.
My favorite method for carving out space for your kick and bass is to use the Masking Meter in Neutron. When you have an instance of Neutron on both your kick and bass tracks, you can use the inter-plugin communication built into Neutron to identify which frequencies are being masked by another track and make adjustments to the EQ of each.
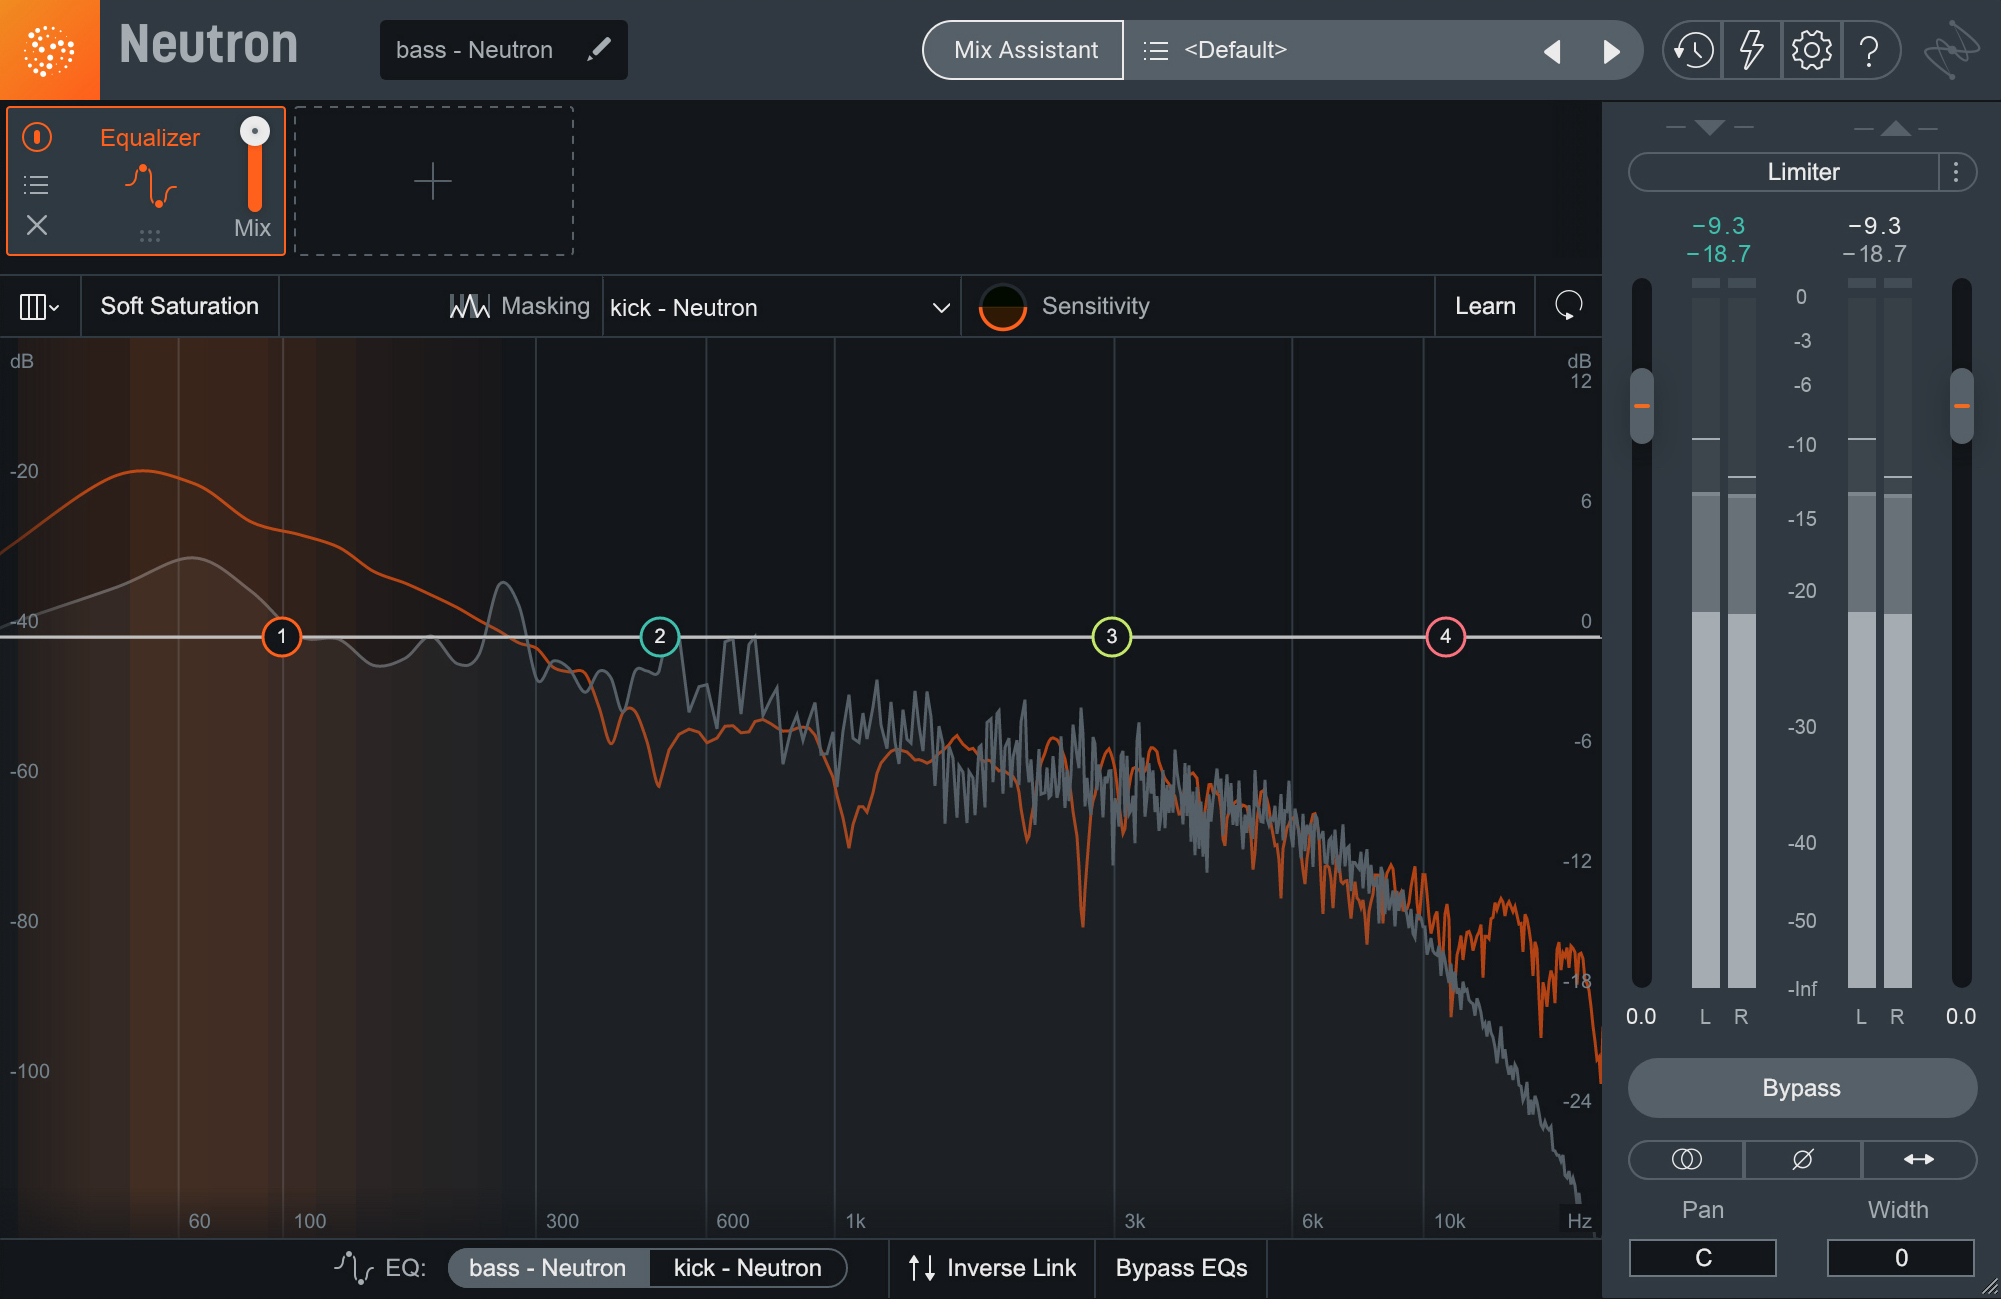
Masking Meter in Neutron
The Masking Meter helps you see which frequencies overlap between your kick and bass which lets you make intelligent EQ decisions. For example, I’ll typically cut the main frequencies the kick occupies from the EQ on the bass track, creating a little pocket for the kick to punch through. Be careful not to cut with too wide of an EQ band, though, otherwise you’ll be taking away too much of the substance of your bass.

Carve space for the kick and bass using the Masking Meter in Neutron
5. Build a band
Since most of the instruments used in EDM are synthesizers and samplers, you have the opportunity to mix all sorts of sounds together to create a new atmosphere in new and original ways. But, with this freedom often comes the desire to mix too many sounds together. When selecting the instruments you want to use for your track, it helps to envision yourself building a live band.
In genres like rock and country, bands utilize several instruments to create a full sound, but each instrument fills their own space and serves their own purpose. A folk band wouldn’t have five bassists, they would have only one or two instruments handling the bass. And a rock band with nine lead guitarists playing at once would just be plain ridiculous.
When selecting the sounds you want to use in your EDM composition, make sure each instrument has a place and a purpose. Decide what vibe you’re going for and then build your own electronic “band” accordingly. This will really help during mixing because you will have fewer elements competing for attention in any given frequency range. The bottom line: be intentional with your sound selection. Don’t just layer synth after synth because you can.
6. Automate your ambience
In more “organic” genres like rock and folk, ambience is used to create a realistic space around an instrument or band. But, in EDM, where the sounds are often digitally crafted, ambience can be used almost like another instrument. Don’t be afraid to use automation on your reverb to breathe a little extra life into your mix.
For instance, in dubstep productions, it’s not uncommon for producers, as Andrew put it, to “automate a lot of effects on the snares.” He suggested that if you’re crafting a four-bar loop, you could “add a little bit of reverb, but on the second hit, increase [the reverb] a little bit, and on the fourth hit, bring in a sixteenth note delay.” That way, a cumulative effect takes place, and the reverb “rings out as it spins around. You’re trying to create this loop that isn’t too repetitive. You want to make it interesting.”
To put this into action, let’s automate the size of the reverb on the synths as we get closer to the drop. It helps build more hype and auditory interest because the perceived space of the song is changing. Hear it in action in the examples below.
The size of your reverb isn’t the only thing you can automate. Try playing with modifying the decay, damping, or even panning of the reverb over time to create some interesting soundscapes.
7. Start mixing at -10 dB
One of the best tips about mixing EDM deals with gain staging (managing your volume levels). If you’re like me, you know that everything sounds better when it’s louder. So it’s tempting, when mixing, to keep turning up the volume of each track. But, this technique will save you so much time having to continuously turn down all the elements of your mix to avoid hitting the red on your master output.

Set your bass and kick volume to -10 dB
When beginning to mix a new track, it helps to set your kick and bass volume faders to -10 dB and keep them there. Then, adjust the volume of all your synths, percussion, and vocals until you achieve a good balance. Starting from the bottom up, and setting your low end instruments to -10dB will typically allow for plenty of headroom for the rest of your mix and help you avoid clipping on your master channel.
7. Make your own uplifters
Uplifters (also called “sweeps” or “risers”) are used quite heavily in just about every genre of EDM because they help with the transition from one section of a song to another. If you’re not sure what they are, here’s an example of a white noise uplifter:
Uplifters are very effective at helping build up the energy in your track, but using the same white noise sample as everyone else is just plain boring. Instead of just throwing in some white noise, you can create your own unique uplifters with just a few steps. Here’s a not-so-secret recipe for bringing an interesting flavor to transitions…
First, take an existing sound from a composition and put it on a new track. I find that shorter sounds, like a synth pluck or vocal chop, work best for this technique, so here’s what I’m starting with:
Then, add some reverb to it with


Neoverb Pro
The final step is to export this sound to a new WAV file and then play it in reverse. The final product is an original uplifter that’s all your own.
Don’t bore your listeners with the same uplifters they’ve heard a million times before. Give ‘em a sonic treat by making your own.
Andrew also gives an interesting tip to build an uplifter: “Whatever synth you’re using, put an arpeggiator on it—it doesn’t have to be complex—and draw in pitch information, slowly bringing the pitch up an octave or two octaves, so for each round it’s getting higher and higher.”
8. Create contrast in your mix
One way to add interest to your mix is to create contrast so that certain instruments or sections can really shine. Keep in mind, listeners aren’t just hearing that wobbly bass line, they’re hearing it in context of what’s around it. It’s all about perception. You can’t have “lows” without “highs.” You can’t have “wide” without “narrow.” And you can’t have “full” without “empty.”
For example: if you want your drop to sound really wide, make the build pretty narrow (I like using the free


Ozone Imager V2
9. Wear different hats
This thread led to the broader discussion of how to pace yourself as a producer, with Andrew offering opinions that could get you out of a creative rut, should you find yourself stuck.
“Some guys say that you should have sound design days, which are different from music writing,” Andrew said. “You go into your studio with the express idea that you’re gonna make sounds—you’re going to sit in front of your synthesizer or your soft-synthesizer, and you’re gonna make patches. Custom patches, cool basslines. Spend three hours making twenty different patches, not with the idea of making music, but just making cool sounds.”
Then, “on another day, you come in and you’re wearing a different hat. You use the sounds you’ve created to write a song—and that’s a different mindset.”
However, the opposite approach is also valid. “Other guys will just build it as they go, which can be cool too.” Here Andrew gave the example of Ill Gates, who plays to large audiences around the world. “He’s called The Finisher because he often gets called to finish people’s tracks. He can bang out a track in three or four hours—a solid, really good track. But he’s had to work at that.” However you operate, the ultimate key is to keep yourself from getting stuck.
“It is about getting it done,” Andrew said emphatically. “The biggest pitfall is to get locked into this, ‘I’m gonna create a drum loop’ and ‘I’m gonna make this bass loop’ mindset, but where do you go from there? It’s great that you got this loop, but now what? You need to train yourself to know when something is good enough, and to not get hung up on the right kick drum. You need to finish the track. This is why some people wear different hats.”
10. Keep it interesting
The key to crafting a catchy tune is figuring out how to nail down the repetition, without letting it get boring. Since most EDM producers use loops in their productions, repetition is built into nearly every genre of EDM. But, finding ways to spice things up each time a phrase repeats is one of the main ways to keep listeners engaged with your track. Here are some ideas to freshen things up and keep them interesting:
- Add a new instrument each time a phrase repeats.
- Switch up the percussion rhythm at the end of a phrase.
- Increase or decrease the complexity of your melody for different sections.
- Add effects and automate their parameters over time.
- Throw in random sound effects that only occur once in your song.
- Use silence to draw attention to what happens next.
As for other production tips to keep it interesting, Andrew says, “don’t be afraid to throw curve balls. You’re leading up and leading up, and you think it’s going to drop on the downbeat, but it doesn’t have to happen on the downbeat. You can give it an extra beat just to f**k with people. That’s fun.”
The key to keeping people entertained is to give them enough of what they expect, but enough of something new to pleasantly surprise them. There are so many ways to switch things up, and this is where you get to flex your creativity and develop your own style. If your mix is sounding dull, think outside the box to find your own, unique way of throwing the listener a curveball.
11. Use vocals in your song
One surefire way to get your songs to connect with a larger audience is to use vocals. Since EDM typically lacks the use of many “organic” instruments, having a vocal in your mix can help your song connect with listeners more easily.
Using


Nectar Pro
In Nectar Pro, you can even add effects like Pitch Correction, Reverb, and Harmony to get the vocal sounding just the way you’d like, making it easy to get professional sounding vocals quickly and easily.
Whether you snag a vocal sample from Splice, hire a top line writer on Vocalizr, or record your own vocals, including a human voice brings an organic quality to your track that helps listeners resonate with your song.
12. Check your mix with a reference
Have you ever gotten a mix to sound amazing in your studio space, but then you listen to it on other speakers and it sounds terrible? The problem is that, in today’s world, most EDM music producers are working out of home studios that aren’t acoustically treated for professional mixing. What sounds good in your apartment studio doesn’t necessarily translate well to car audio speakers or huge club sound systems.
Andrew advised that if you don’t have a subwoofer in your studio, you should “find another way to figure out what’s going on down there.” He recommends something like a SUBPAC—a wearable bass system that you can put on your chair. That way, you’ll feel the lowest frequencies, even if you can’t hear them.
But above all, Andrew recommends using reference tracks. “I don’t care if you’re a veteran or not. I’ve known a ton of engineers—especially mastering engineers—and they carry around a CD wallet with them. Depending on what kind of music they’ll be working on, they have their library of reference tracks.”
iZotope’s


Tonal Balance Control Pro
13. Know your music production tools
Having a handful of really great production tools that you know how to use well is so much better than having a ton of tools you know very little about. When I’m producing and mixing EDM, I tend to stick to just using a couple plug-ins, but using them a lot. The more you get to know your tools, the better and faster you’ll be at using them.
Andrew recommends using


Ozone 11 Advanced


RX 10 Standard


Insight Pro
One thing I love about iZotope products is that they come with very intuitive user interfaces, so once you learn how to use one, you pretty much know how to use them all. Not to mention, with cross-plug-in communication, many of the iZotope plug-ins can interact with each other to further speed up your workflow. All the plug-ins referenced in this article are available with a


iZotope Music Production Suite Pro: Monthly
