How to set proper vocal levels in your mix
Learn essential techniques and tips to achieve balanced vocal levels in your audio recordings.
Getting the vocal right is tough, and setting its level (i.e., volume) is deceptively difficult. Make the vocal too loud, and you have something that sounds like karaoke – a vocal that sounds pasted onto a backing track. Set it too low and no one can hear what the singer is saying.
You’d think it would be easy, but leveling vocals takes practice to intuitively understand. In this article, we’re going to take some of the guesswork out, so that you can quickly figure out how to set vocal levels for your mix.
Follow along with iZotope Nectar, a powerful vocal mixing toolkit that can level your vocals with ease.
What level should the vocals be?
Proper vocal levels change from song to song. Not only that, the right vocal level changes from genre to genre: different kinds of music have their own conventions. A pop vocal is usually mixed pretty loud in relation to the other instruments, while a metal vocal can nest a little lower by comparison.
Making matters complicated, different attributes of the vocal contribute to differing levels.
Understanding vocal levels
No two vocalists are the same, and rare is the plastic throat that can accomplish successful mimicry. Sometimes Jimmy Gnecco from Ours really does sound like Jeff Buckley, but just as often he sounds like himself. Differences in the physical makeup of every vocalist’s cords account for innate changes in perception: two singers might measure the same level on a meter, but one can sound drastically louder than the other, even if they’re singing the same part in the same register.
This brings us to the concepts of registers and ranges: the natural range of a vocalist varies widely from singer to singer. Some baritones sing soprano lines with ease; some can’t.
Tastes also change over time: the pop hits of today trend toward the higher notes, with modern singers belting at the top of their range – but this wasn’t always the case. In the 1980s, male pop singers often crooned in deeper dulcet tones. The Smiths, The Cure, and Duran Duran are prominent examples.
The register of the voice has a dramatic effect on how loud a vocal might feel in the mix. A lower, bassier line might get buried in the frey, while ear-splitting high notes might always feel too loud.
A lot of this depends on arrangement as well. If many instruments cloud up the vocalist’s natural register, you’ll have a hard time hearing the vocal. This is why Billie Eilish tunes like “Bad Guy'' are so midrangy in their instrumental approach: her vocals handle all the high end.
Indeed, setting the right vocal level depends as much on the rest of the tune as it does on your vocals.
Tips for setting up vocal levels in mixing
With all this said, we can still give you a blueprint for achieving the right vocal mixing levels for your mix.
1. Get a static mix going right away – vocal included
It can be tempting to polish up your instrumental tracks and plonk the vocal on top. Don’t do that: you’re kneecapping yourself by not accounting for the vocal. Instead, work on getting a good static mix at a reasonable level, leaving the vocal track in as you secure the balances. Just let the faders and pan pots do the work at first. This can take away a lot of the tumult.
2. Spot-check your work with a brief change in perspective
You’ve just done the rough balances. Now, it’s time to check your work: turn your monitors down very low, and switch playback speakers if you can. Pay attention to what you hear: is the vocal audible? Is it absolutely drowning everything else out?
I’ll cover more on this later. But for now, run the exercise, and evaluate your work.
3. Control the gain before processing
Don’t worry, we’ll talk about compression and EQ and all that good stuff soon, but we’re still not out of the woods of pre-production. Certain syllables or words or phrases might be too loud, while others are too quiet.
We should handle this now, so don’t needlessly clamp a compressor in a bad way, or feed some saturator with too much signal, resulting in too much distortion. Yet we ought to use a gentle hand here: we don’t want to destroy the singer’s evocative performance.
So here are some things we can try:
First, we can clip-gain the obviously offensive regions, which is possible in most DAWs. We simply isolate a region that needs to be taken up or down, and we change its gain:
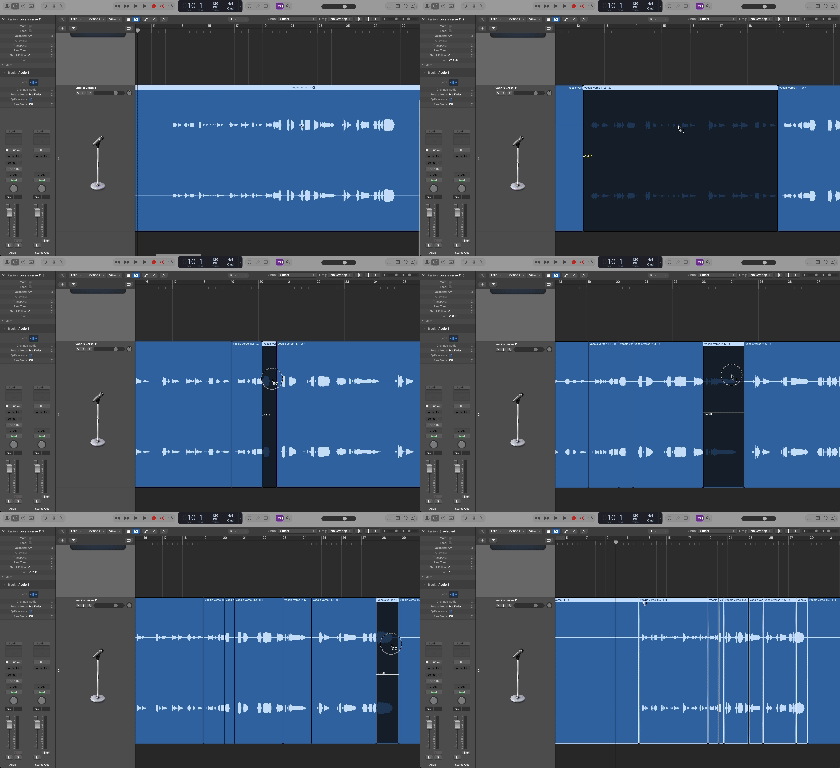
We can take clip-gaining one step further in DAWs such as Logic Pro and Reaper by strip-silencing the vocal track and normalizing each region to a predetermined LUFs target, say -23 LUFs short term.
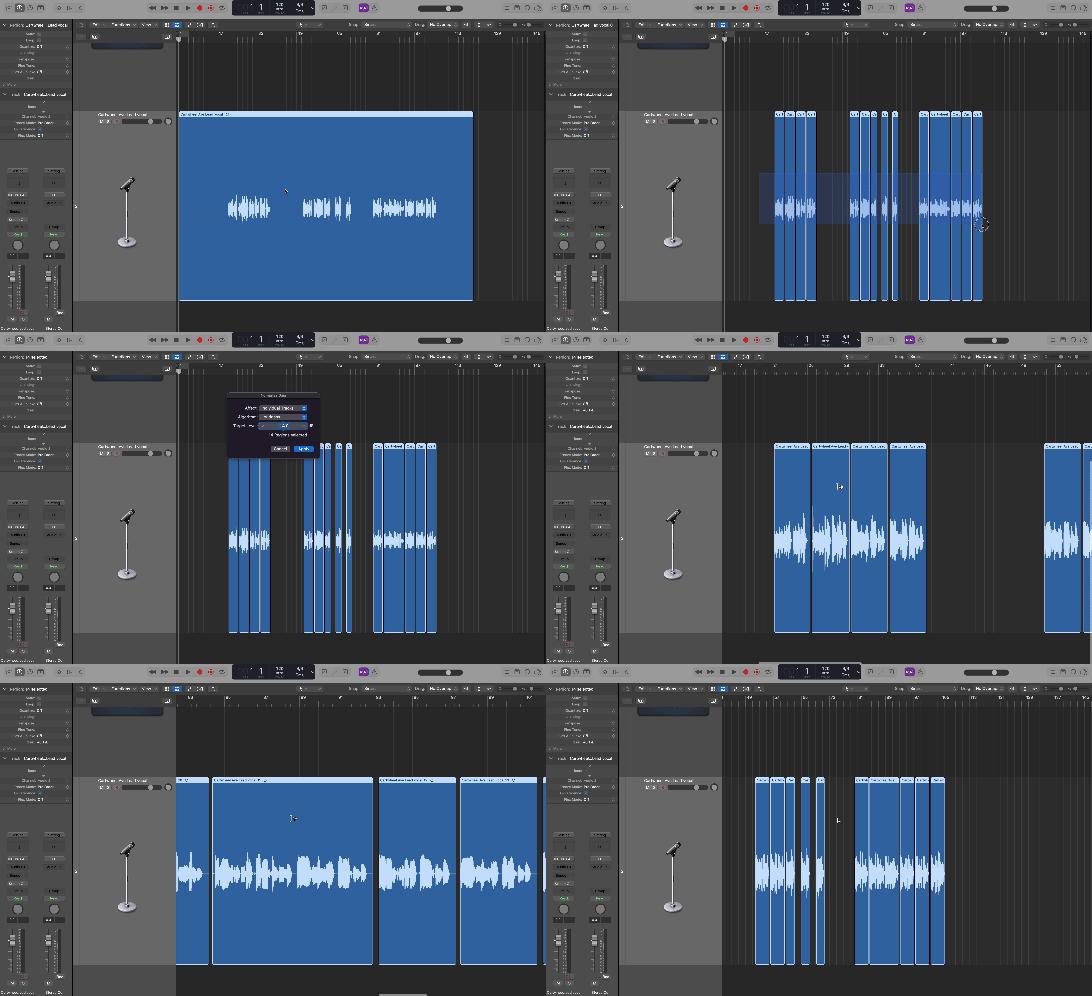
Both of these approaches have benefits, but they also carry significant drawbacks.
Clip-gaining can take a lot of time, especially if you’re new to mixing. Time, as you’ll learn, is money. But even taking money out of the equation, time always works against you in the mix: spend too much time mixing, and you lose objectivity. The mix suffers as a result.
As for chopping up the regions and normalizing all of them in one swoop, this is more useful in post-production than music, where clip-gaining is basically half the job: region-based normalization will create problems along the way, and it’s no big deal to correct them as you go when leveling a podcast or a TV show.
For music, region-based normalization often fails you, as meters aren’t ears; you’ll find that some regions are way too loud, or much too quiet, because you flattened them out against some arbitrary numeric standard.
A third tool exists: auto-levelers. These are plug-ins that attempt to act more like automatic clip gaining than compressors. Quite a few have hit the market, but ALM (Auto-Level mode) found in Nectar, might just be one of the best.
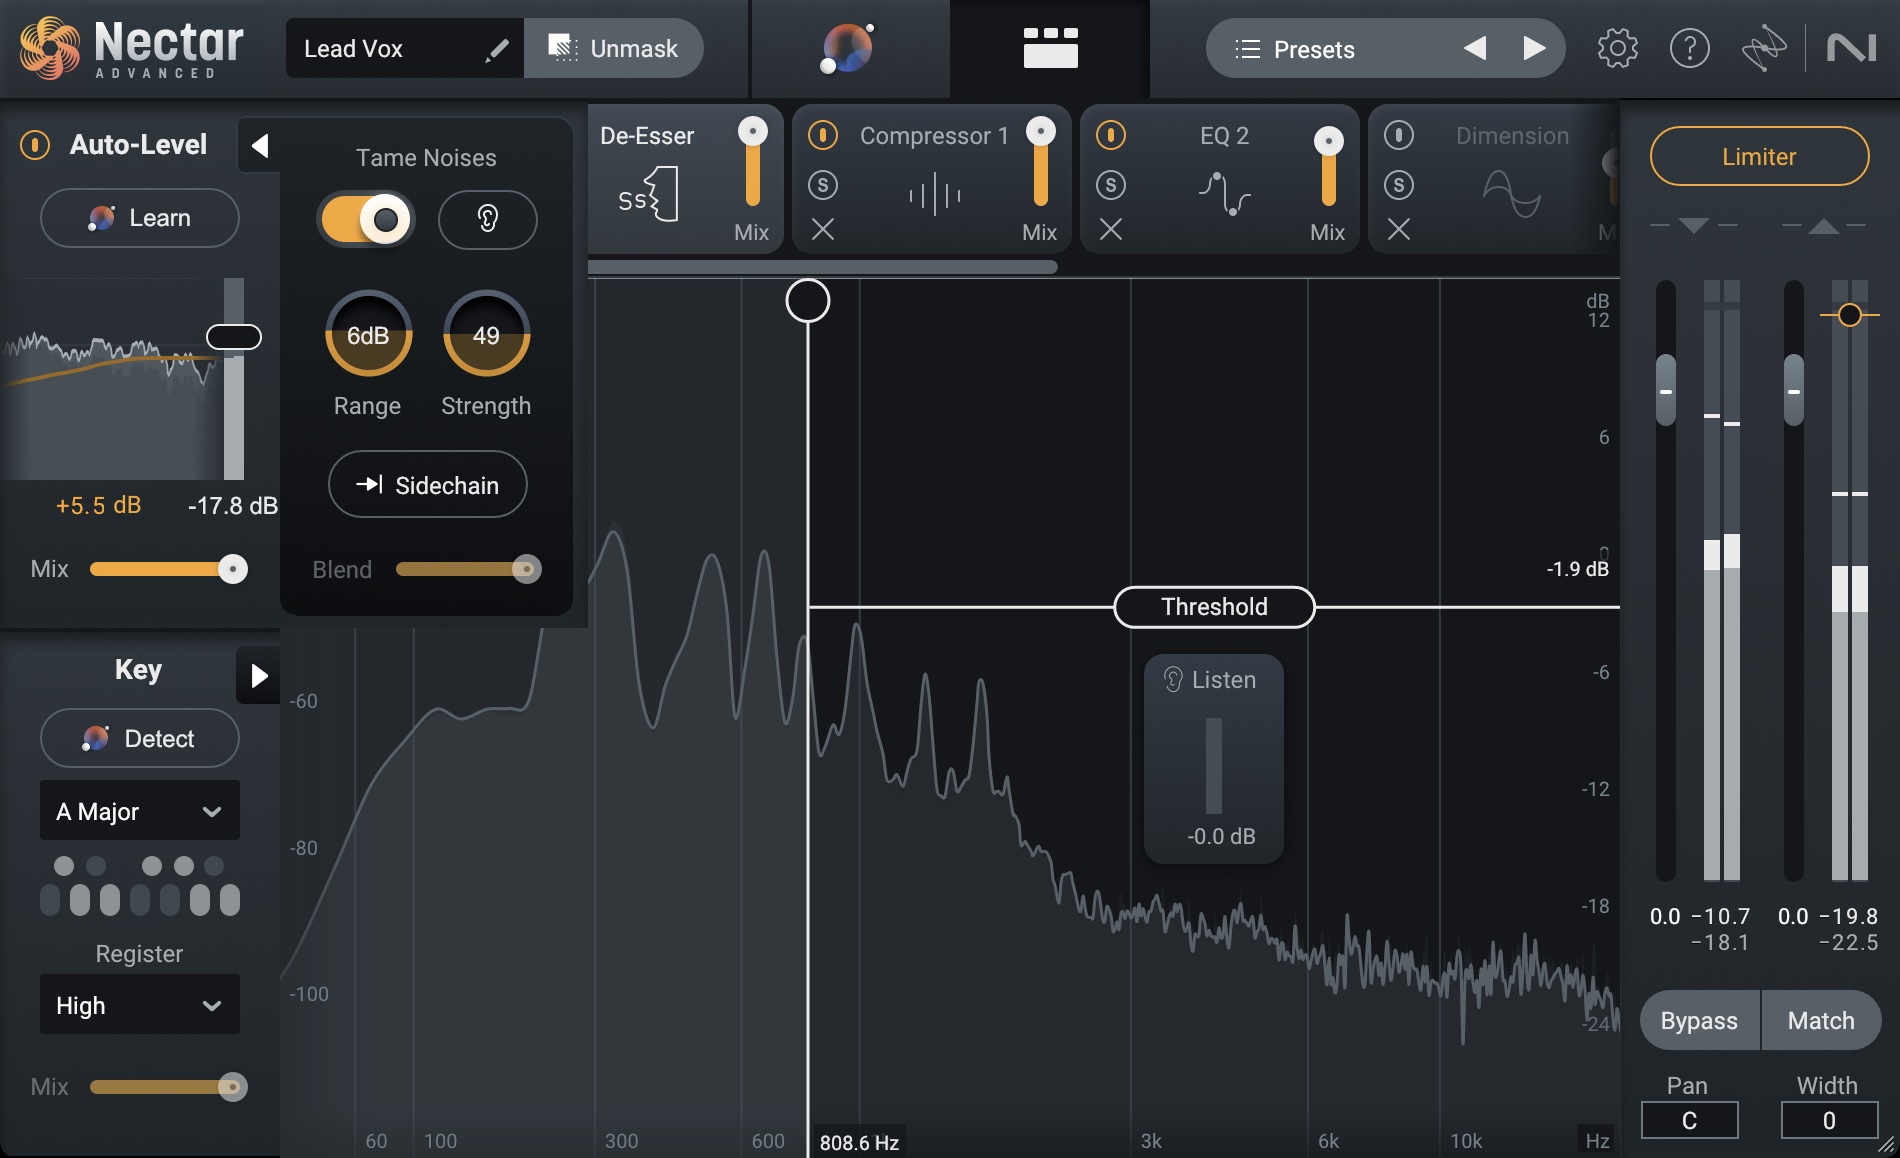
Auto-Level mode in Nectar 4 can help you set vocal levels to be balanced throughout your mix
Watch the video below to see it in action.
Auto-levelers can take a lot of the guesswork out of clip-gaining, preserving a natural feel as you even out the dynamics. My personal recommendation is to keep a conservative range, around 3 dB instead of the default six, as this sounds more natural.
4. Use compression and EQ
After the level is roughly ironed out, you are now ready to use tools such as compression and EQ to their fullest advantage. Explaining compression in detail is outside the purview of this article, but I can boil things down to some few essential points:
- A more consistent level at this stage will help you choose which, if any, compressors are appropriate. Perhaps you only need clean compression – the kind of thing Nectar or Neutron offer. Maybe the sound would benefit from something with more grit (a Purple Audio MC77) going into something with that opto-polish (Native Instruments VC2A).
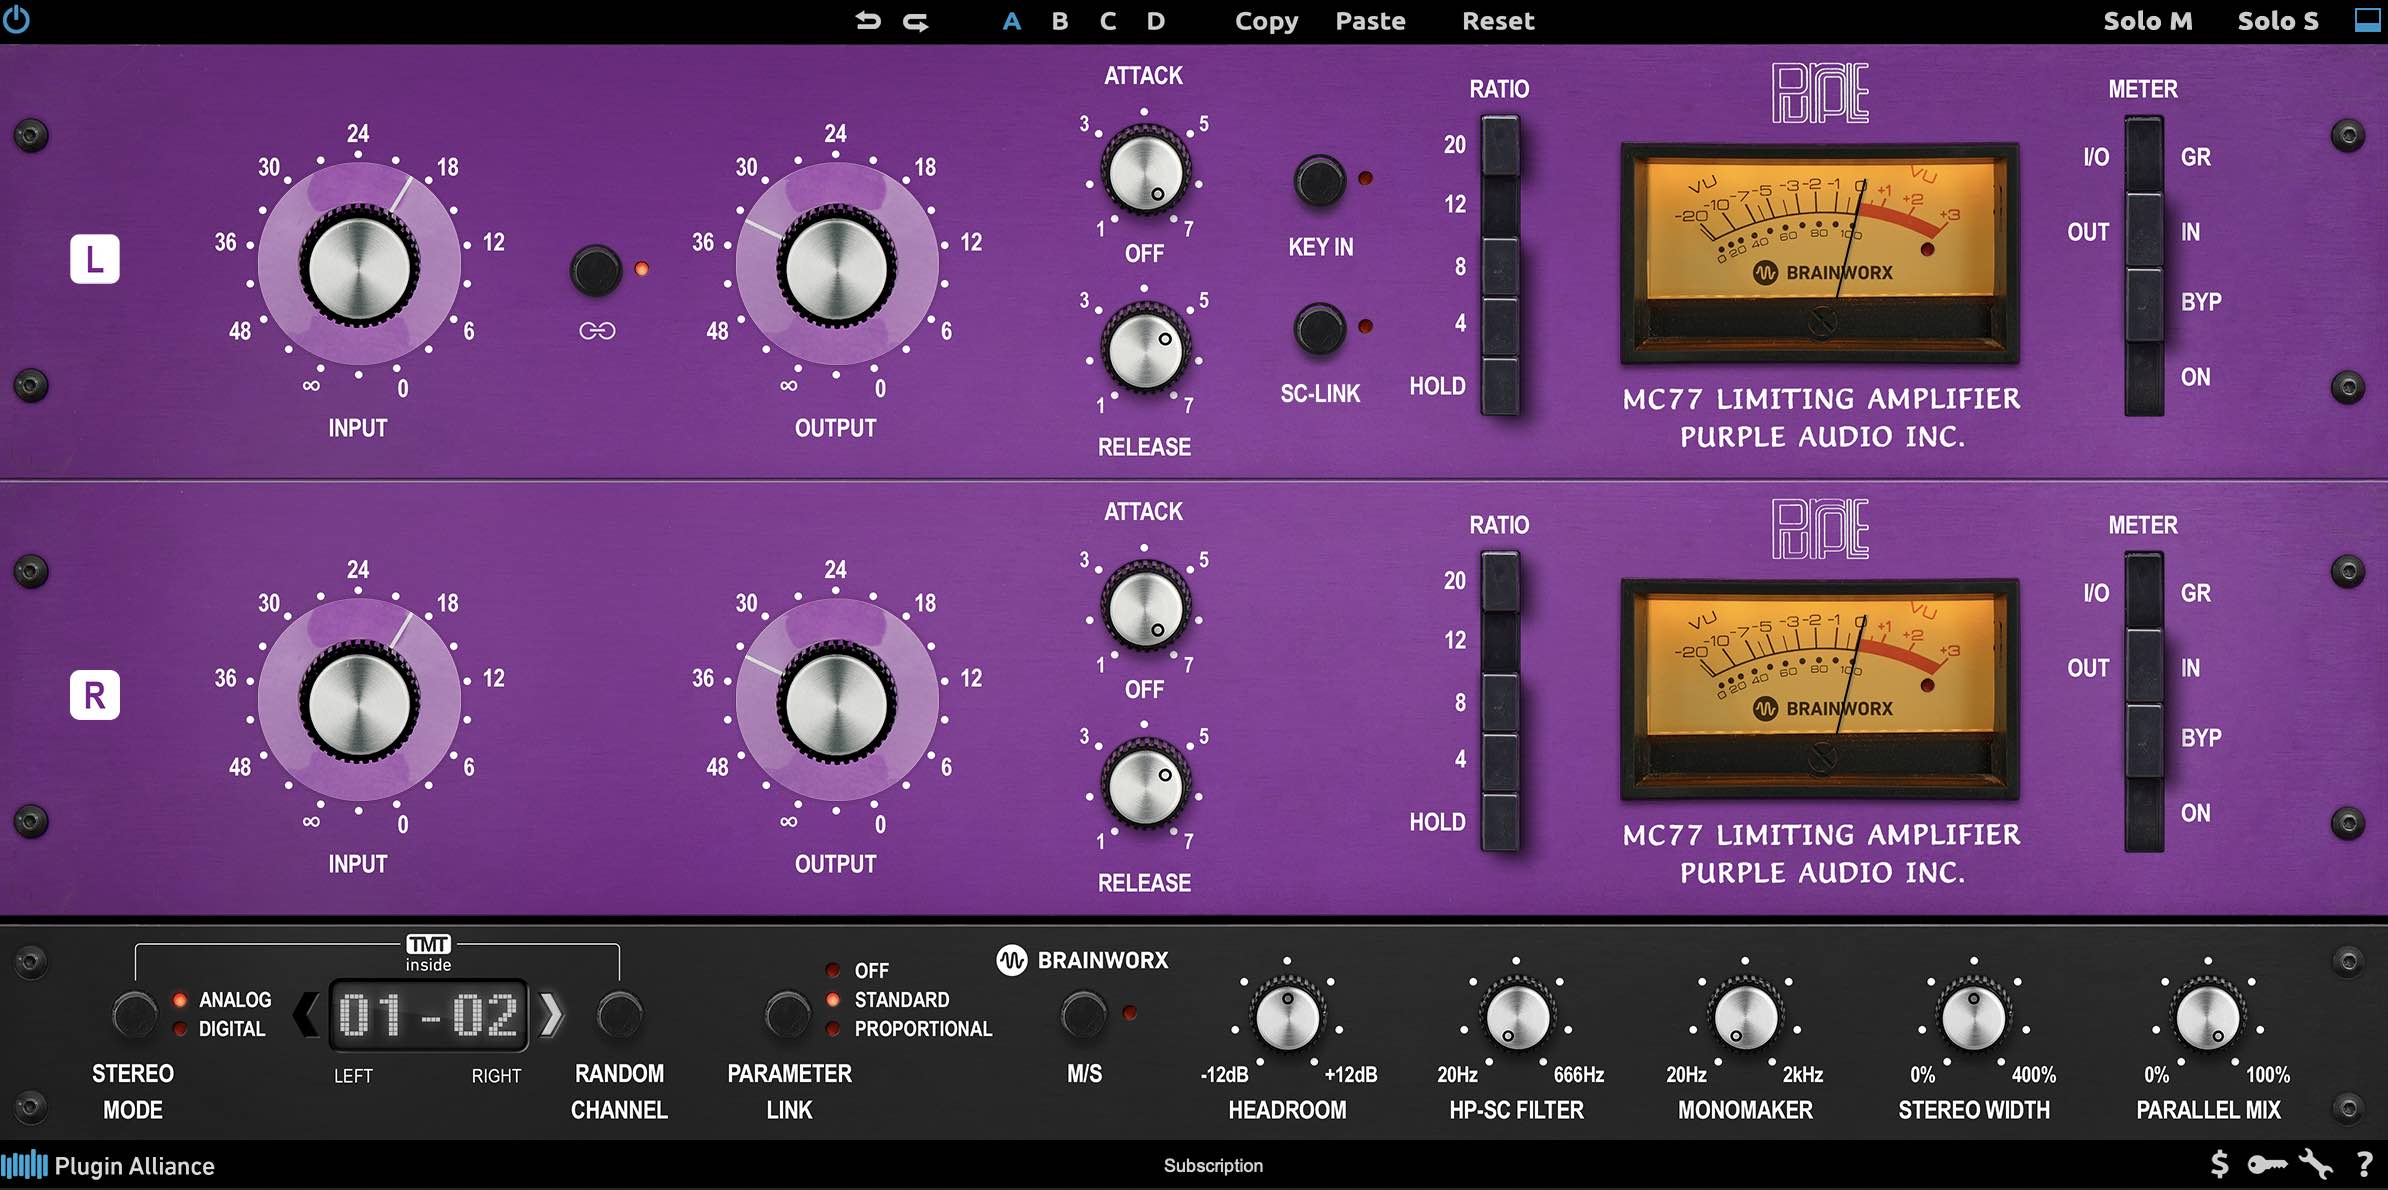
Using the Purple Audio MC77 compressor can help you even-out your vocal levels
- Pay attention to where you put the equalizer, as placing it before the compressor will either emphasize or de-emphasize aspects of the signal hitting the dynamics processor. Often this can be advantageous, but sometimes you don’t want to mess with the compressor’s tone.
- Don’t overdo the compression unless you specifically want that effect – all the work of leveling aspects of the vocal ensures that we don’t need to make the compressor work too hard.
5. Use volume automation
As the rest of your mix takes shape, you might find aspects of the vocal’s level need to be tweaked: suddenly a word might not be loud enough, where before it was just fine.
This is where volume automation comes into play – the process of changing the volume of the audio after the processing chain. Watch how to do it below.
Automating volume on a vocal ensures that you aren’t changing the level of the signal feeding any compressors or saturators in your chain. It makes a wonderful counterbalance to clip-gaining before your plug-ins. As you reach the end of your mix, you might find yourself doing both, clip-gaining raw audio into or out of compression, but automating words that need to sound the same, only loud.
How to judge your work
Throughout the process, you need to find ways to judge your vocal level work. Here’s a few tricks:
1. Lower the volume and switch playback devices for a change in perspective
We touched on this before, but let’s get more in depth:
First, set the volume of your playback system way down, lower than you’d ever mix. Then, complement this change in volume with a change in playback systems.
My personal favorite for this task is my computer’s built-in speakers, as they are shockingly different from my mains, and they’re emblematic of the typical listener’s playback device.
Many are the times I’ve caught issues when switching from loud, high-fidelity monitoring to low-volume listening through low quality speakers. It’s not just level issues you’ll notice – tuning and de-essing problems also stand out when perceived over computer speakers. Something about cheap monitors really highlights when a vocal is wrong.
Now, I don’t recommend actually mixing on this kind of system. You’ll miss a lot of issues in the arrangement if you do. Nor do I advocate mixing at lower levels all the time, as this throws off the frequency balances necessary for achieving a mix that translates.
But for this spot-check of vocal level, switching up playback devices and turning the volume down works wonders.
2. Level-match your song to a reference and see how your vocal compares
If you want to see how your vocal actually sits, a reference track is a great tool for the job. Take a commercial release that inspires your particular song and level it to match your mix. This is easily done in plug-ins like ADPTR Metric AB, Ozone 11, or by ear and meter.
Usually. you’ll be bringing the reference down to match your mix, as the mix tends to come in at a lower loudness level than a final master
Flip between your mix and the reference. Ask yourself if the vocal is sitting at the same relative volume.
I can tell you to watch meters as you do this, but practically that isn’t much help: this is a “feeling thing” more than a metrical observation. Consider how loud the reference’s vocal feels in your head as the music hits your ears, and then flip back to your mix – are you getting the same feeling? Or is it hitting your ears more softly? Adjust to match.
3. Use Ozone 11 to check your work
I often say that assistive mastering technology can be a useful teaching tool – and here’s a prime example: run your mix through Ozone’s Master Assistant. Make sure you’ve selected a target profile that matches the genre you’re mixing in.
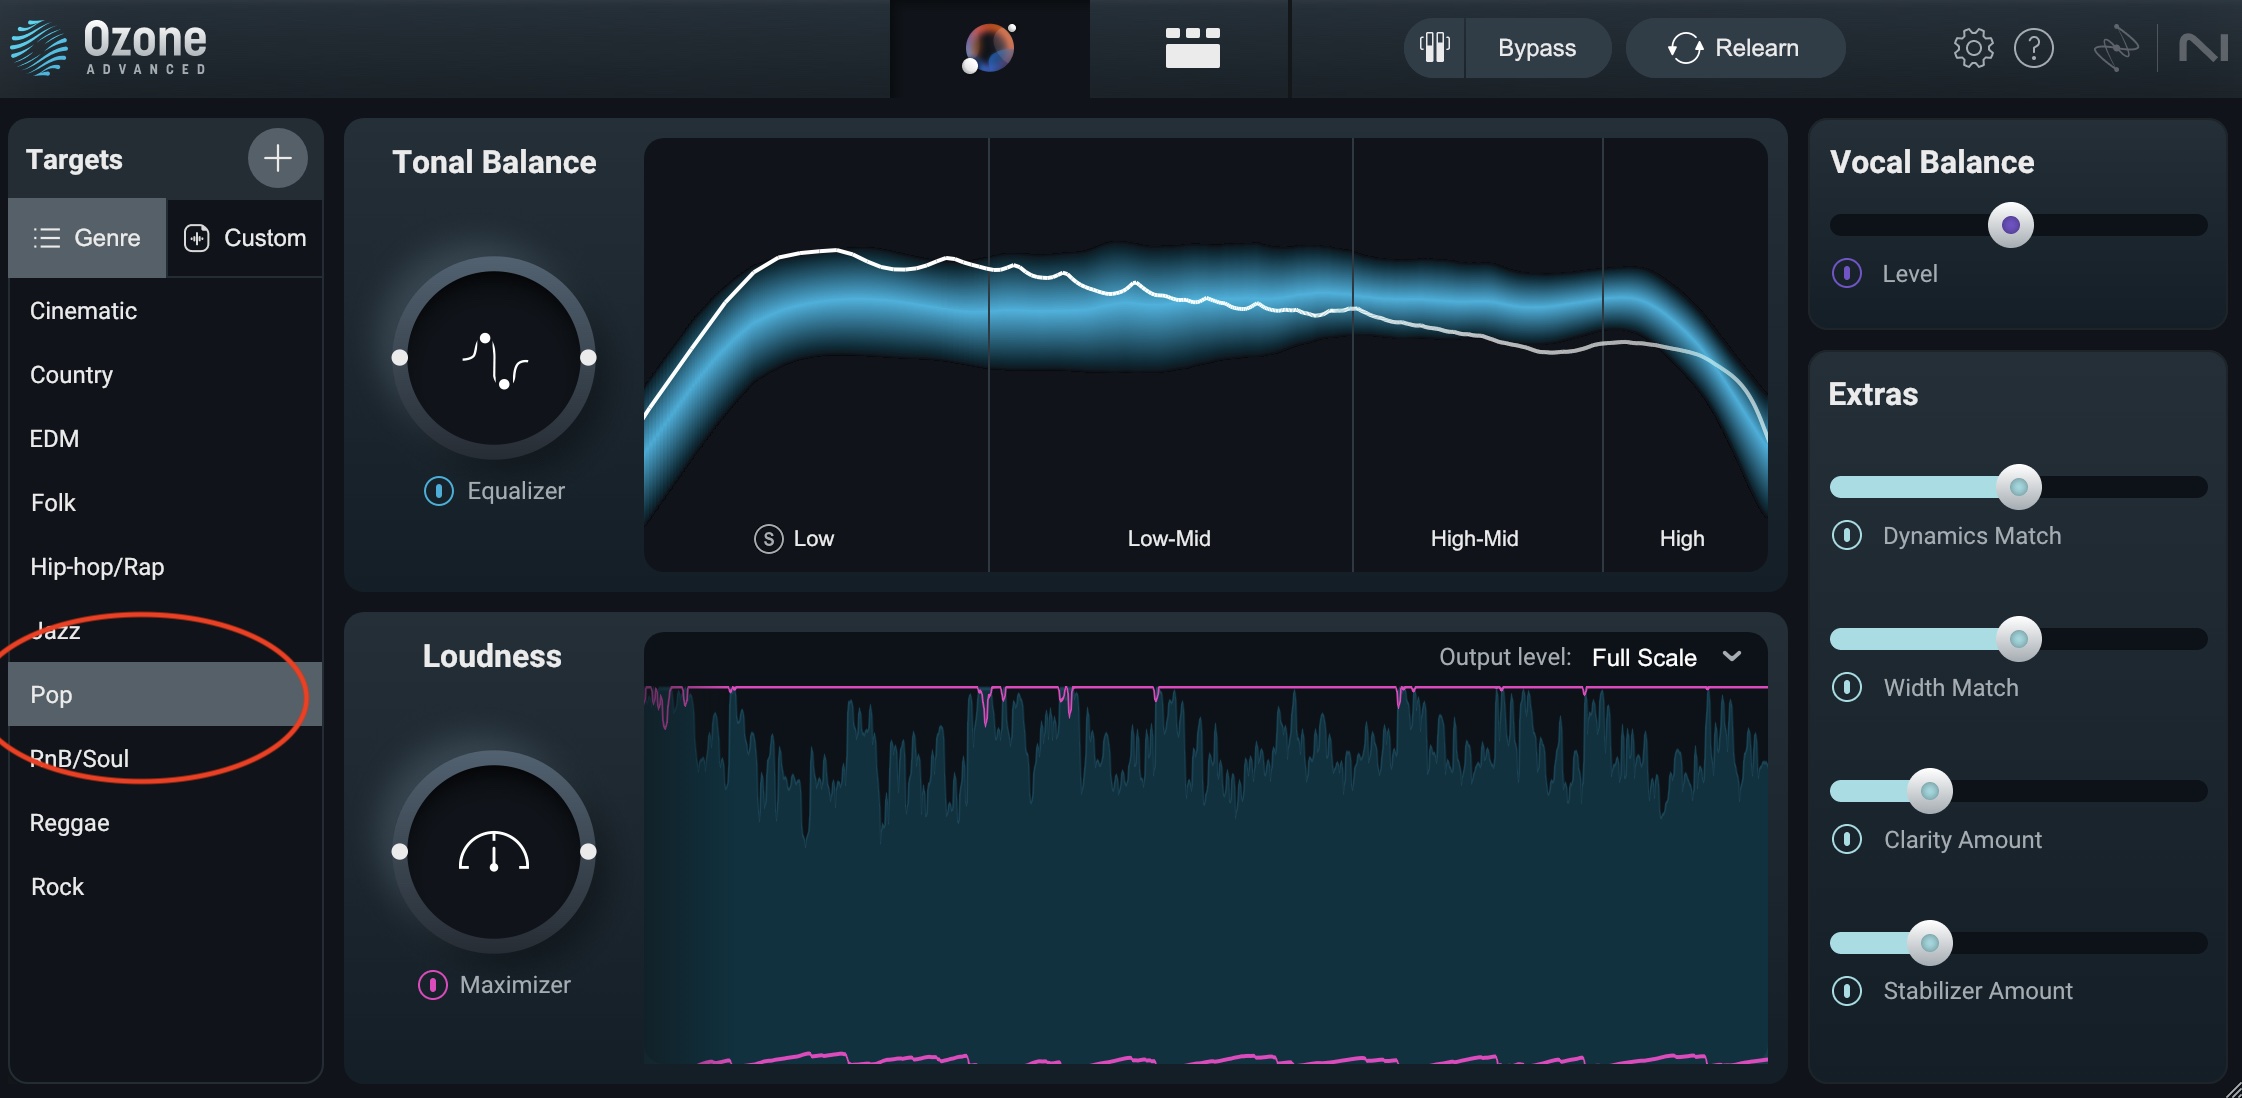
Target profile of the genre you are mixing in within Ozone Master Assistant
Pay attention to whether or not Ozone has instantiated a Master Rebalance module.
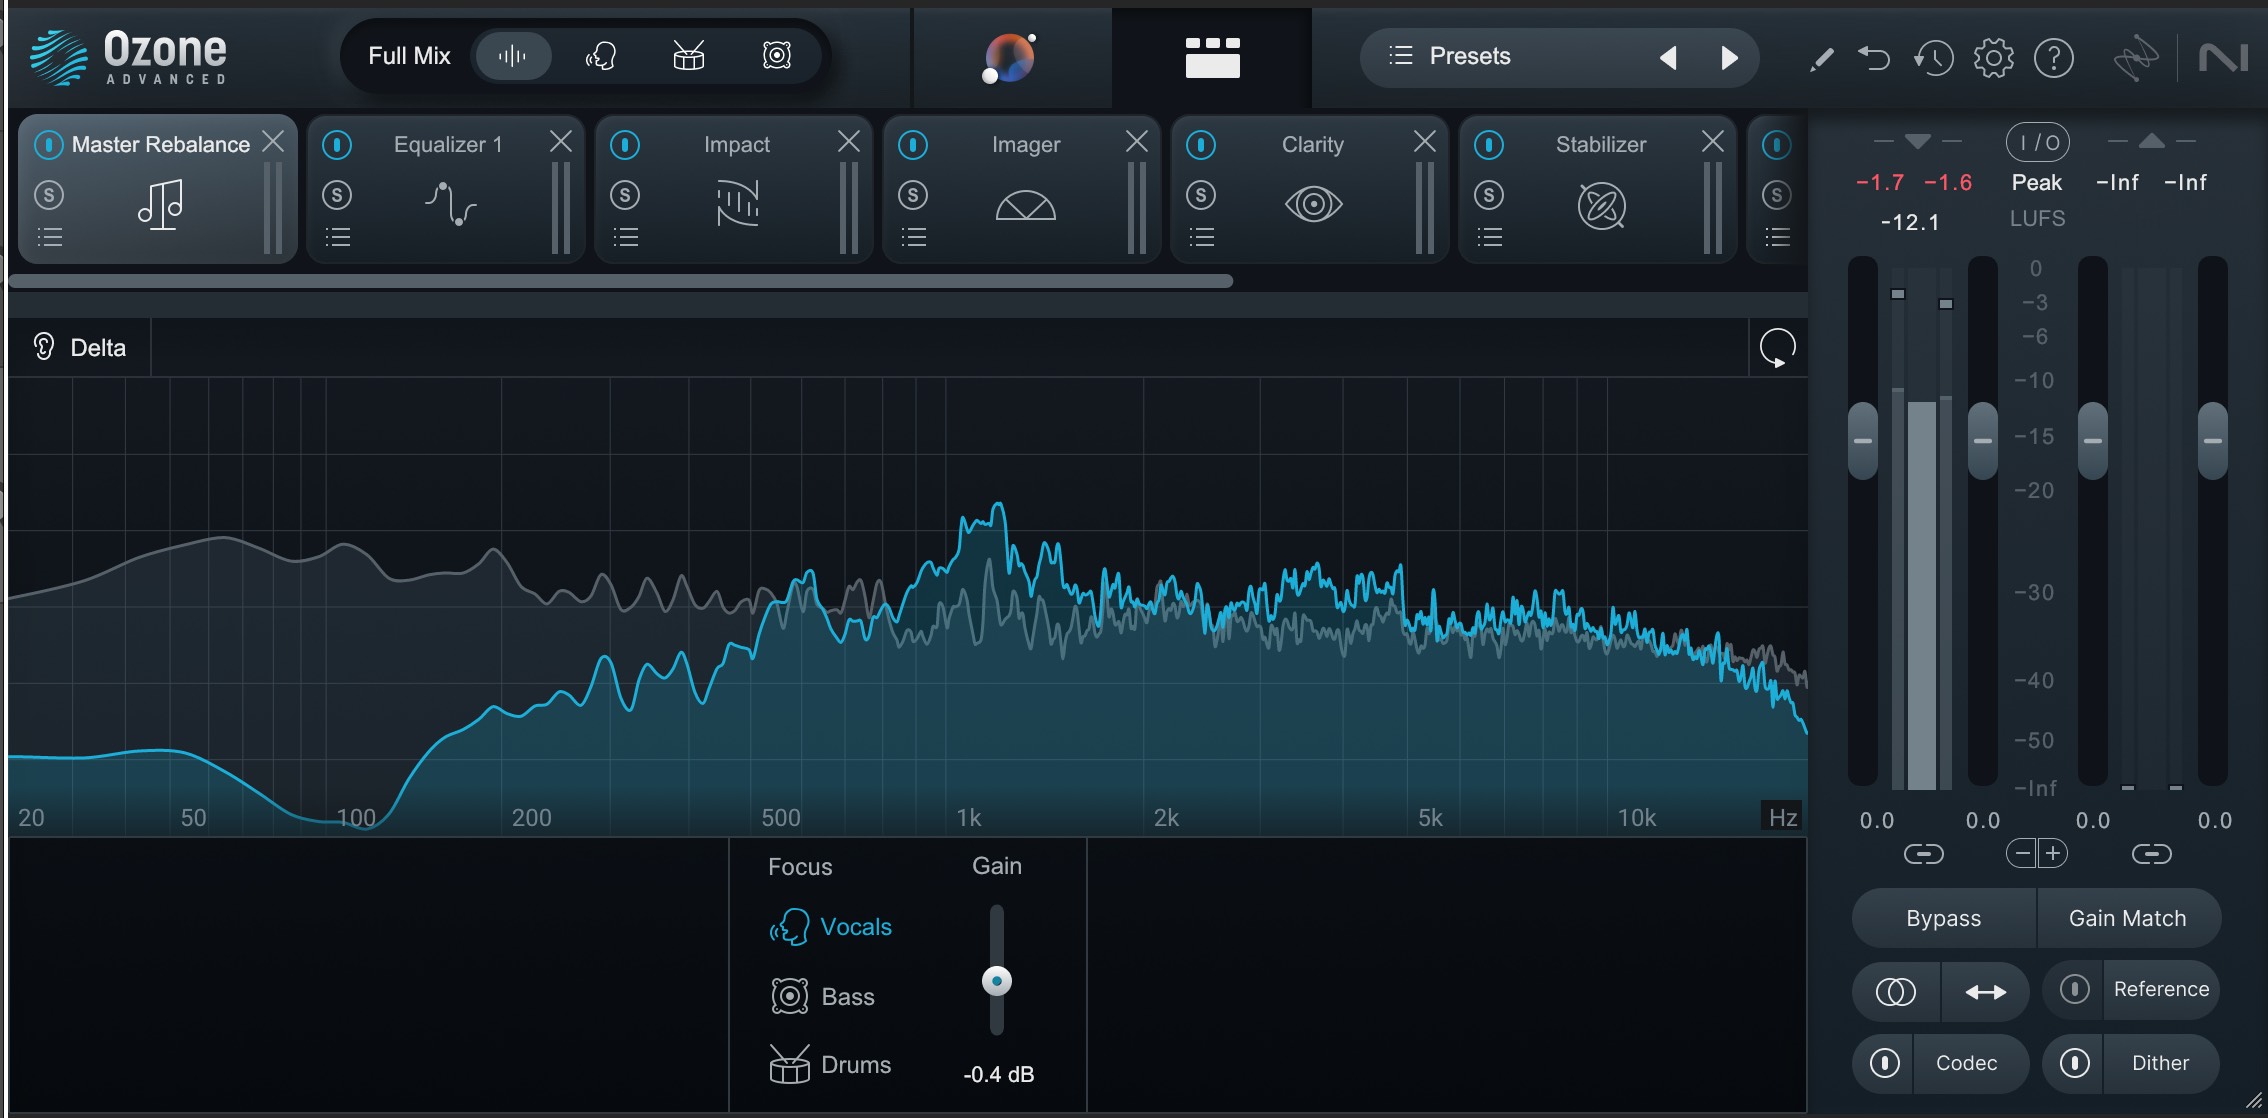
Using Ozone Master Rebalance as a way to check your vocal levels
Is the Master Assistant tweaking your vocal? If it is, is the module making your vocal louder or softer? Try following its suggestions in either case: turn off Ozone altogether, and adjust your vocals by whatever dB target Master Rebalance suggested.
How does it sound? Is it more in line with what you’re looking for out of your vocal? Feel free to run the previous two spot-checks – turning down to volume and reference matching – to hear if this new level is fitting the bill.
Using Ozone in this way helps us remember something else we shouldn’t forget:
4. Keep mastering in mind
We still live in a world where most popular music is delivered at exceedingly high loudness targets. Sure the occasional audiophile release exists, and yes streaming normalizations are ostensibly “a thing,” but most label-made masters come in hot. They often take quite a bit of punishment to get there, including aggressive clipping and/or limiting.
When the dynamic range is made so small by these tools, you don’t actually need your vocals as loud as you’d think – in fact, boosting them will cause the limiter to dig into the vocals rather than the transient material, causing obvious distortions that don’t sound good.
Despite what you may think, good mixing engineers always keep the final mastered product in mind, and engineer their work accordingly. Good mastering engineers tend to be bolstered by good mixes.
Start setting proper vocal levels for a clear, defined sound
Now that you have a roadmap for how to level your vocals, you should feel confident in getting a balanced, clear vocal volume in your mix. And while we’ve shared many ways to do this, make sure to give Nectar’s Auto-Level mode a try first – it’s free with a demo.
