The Basics of Granular Synthesis
Granular synthesis doesn’t get much attention in music production. In this article, we cover what it is, how you’re already using it, and some granular sound design techniques.
Standard synthesis methods (subtractive, FM, etc.) mostly require the user to manipulate oscillating waves, a technique that has been used for decades. These methods are familiar and easy to work with, making them the main focus for synthesists and sound designers.
Because it doesn’t exclusively function on oscillating waves, granular synthesis doesn’t get nearly the attention it deserves. However, it can use any sound to create a totally new one. The timbres and articulation possible through granular synthesis make it an important technique for any sound designer to investigate.
Additionally, the concepts behind granular synthesis allow for crucial functions in manipulating audio, and because of this are already found in many software synthesizers and DAW functions.
In this article, we’ll cover what granular synthesis actually is, how it’s probably already used in your software, how it can be best used in a sound design context, and some audio examples of granular synthesis in action.
What is granular synthesis?
The term granular synthesis is a rather unspecific one, as it can cover all systems that utilize the concept of granulation.
Granulation is a process in which an audio sample is broken down into tiny segments of audio.
These segments are called “grains.” You may see a different number from source to source, but a grain generally ranges from 1–100 milliseconds in length.
The original sample is split into a series of smaller samples. This original series, in chronological order, is called the “graintable.” Theoretically, if grains were played in this order at the speed of the original sample, the output would play back that original sample.
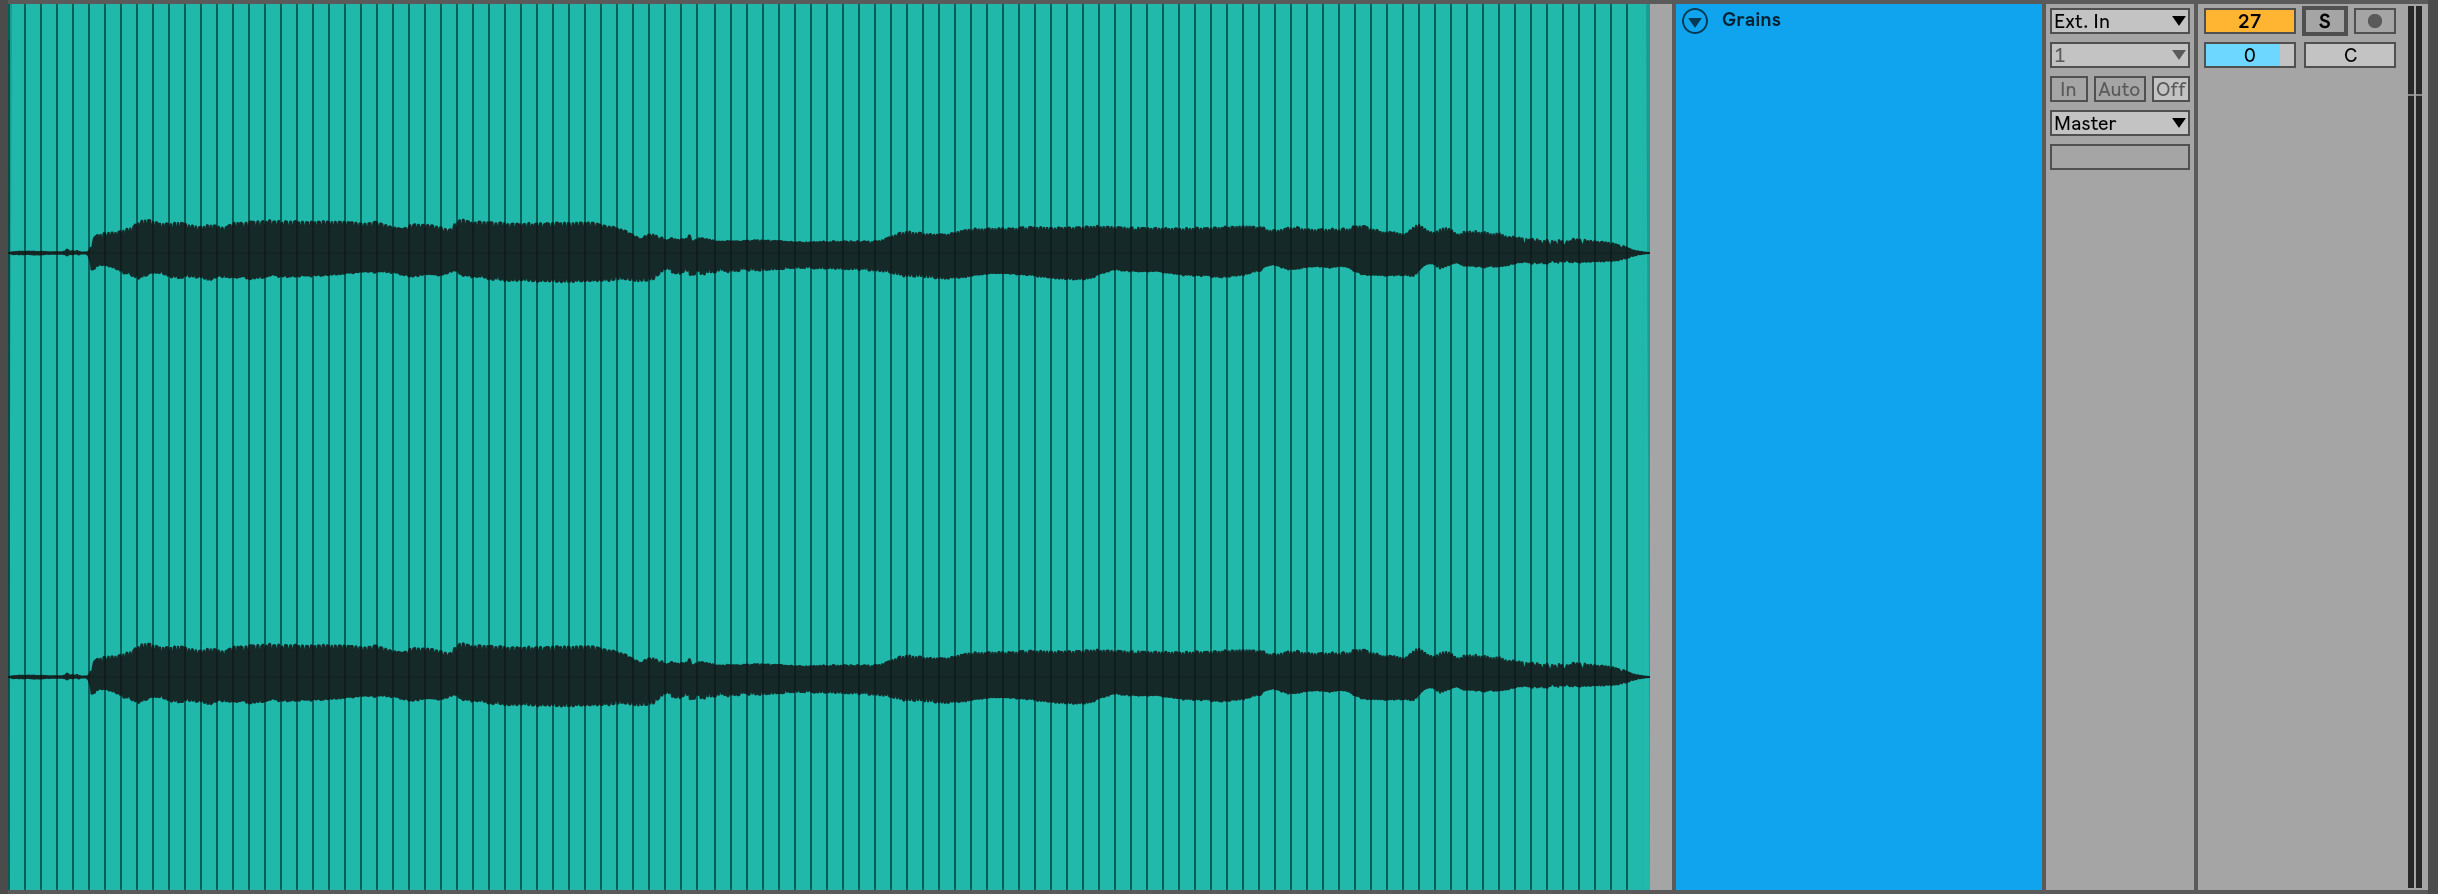
Sample broken into grains
Think of this process kind of like a movie projector playing a film off of tape. Each frame on the tape is a snapshot of the action. Played in order at the proper speed, the frames recreate the footage caught by the camera. Grains in an audio sample function the same as these frames.
We as sound designers can have a lot of control over audio grains. Each grain can be individually manipulated, as can the overall arrangement of the grains.
We can play grains back in different orders, individual grains can be looped, grains can be layered, grains can be omitted and skipped over; the possibilities are endless!
After creating a new sequence of grains, volume cross-fades will be applied to blend from one gain to the next in a process called “smoothing.” The shape and length of the cross-fades (called the “window”) have important roles in determining the tone of the resulting sound.
With the infinite audio samples that you could use as source material and the extensive manipulation that can be performed on each grain, the sound design potential here is worth looking into.
However, understanding granular synthesis in the abstract like this might be a bit overwhelming. To make more sense of it, let’s see how granulation already affects your production...
You’re already using granulation!
Have you ever adjusted the pitch of an audio sample without adjusting its speed, or vice versa? Granulation makes this possible!
In physics, and in equipment like a tape machine or record player, this should be impossible. Playing an audio sample at a different pitch requires playing through the sample at a different speed.
For these examples, we’ll be using this short audio clip, a female vocal singing the lyrics “I’m on fire.”
Let’s say I wanted to pitch the sample up. This would entail that I wanted it to play with higher frequencies—meaning more cycles per second. We can cause more cycles to be played per second by stretching the audio to be shorter, which is effectively the same as increasing playback speed. As a result, speed and pitch are increased.
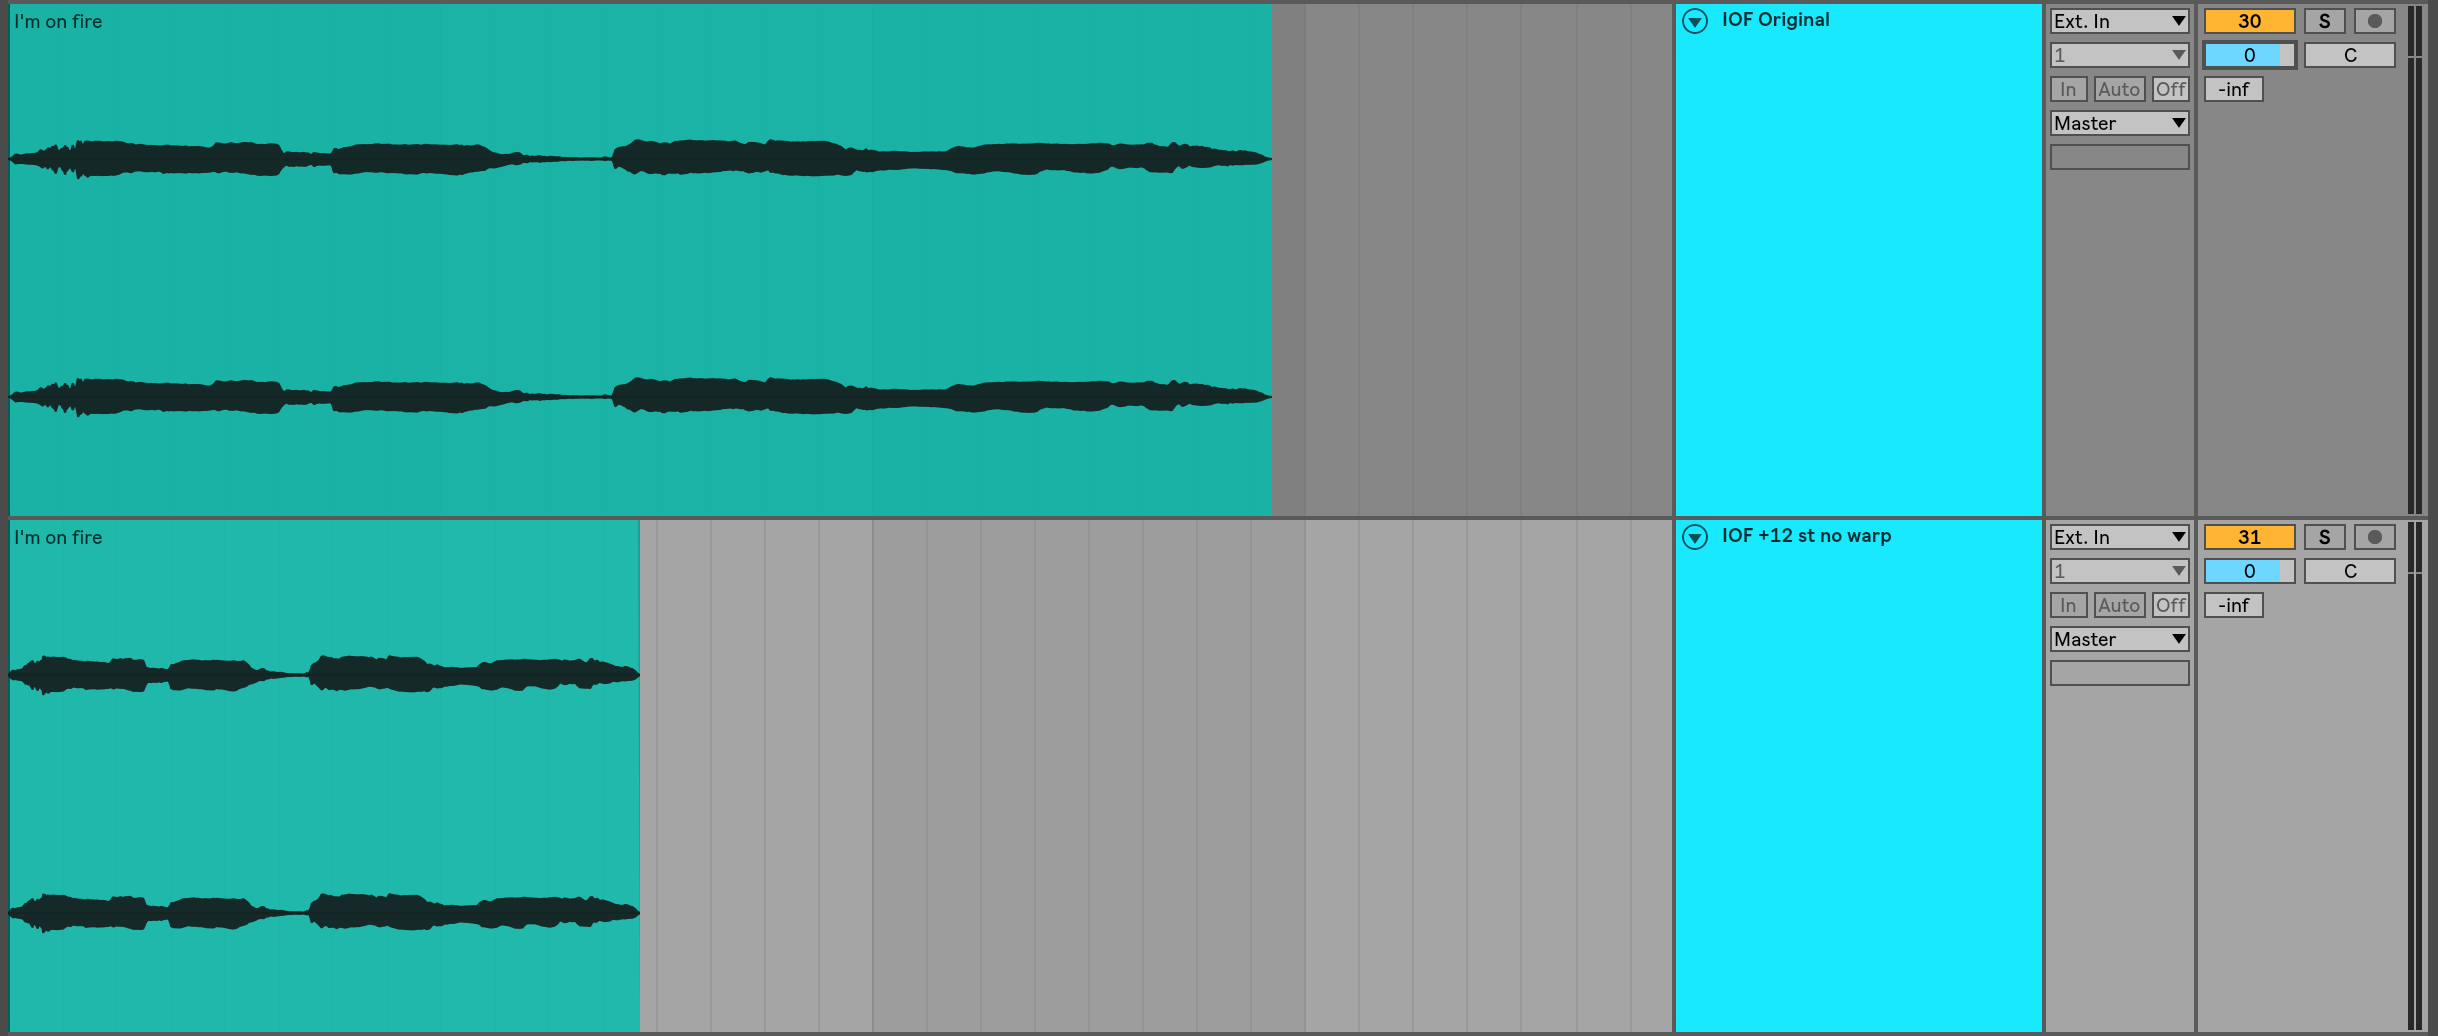
Stretched shorter
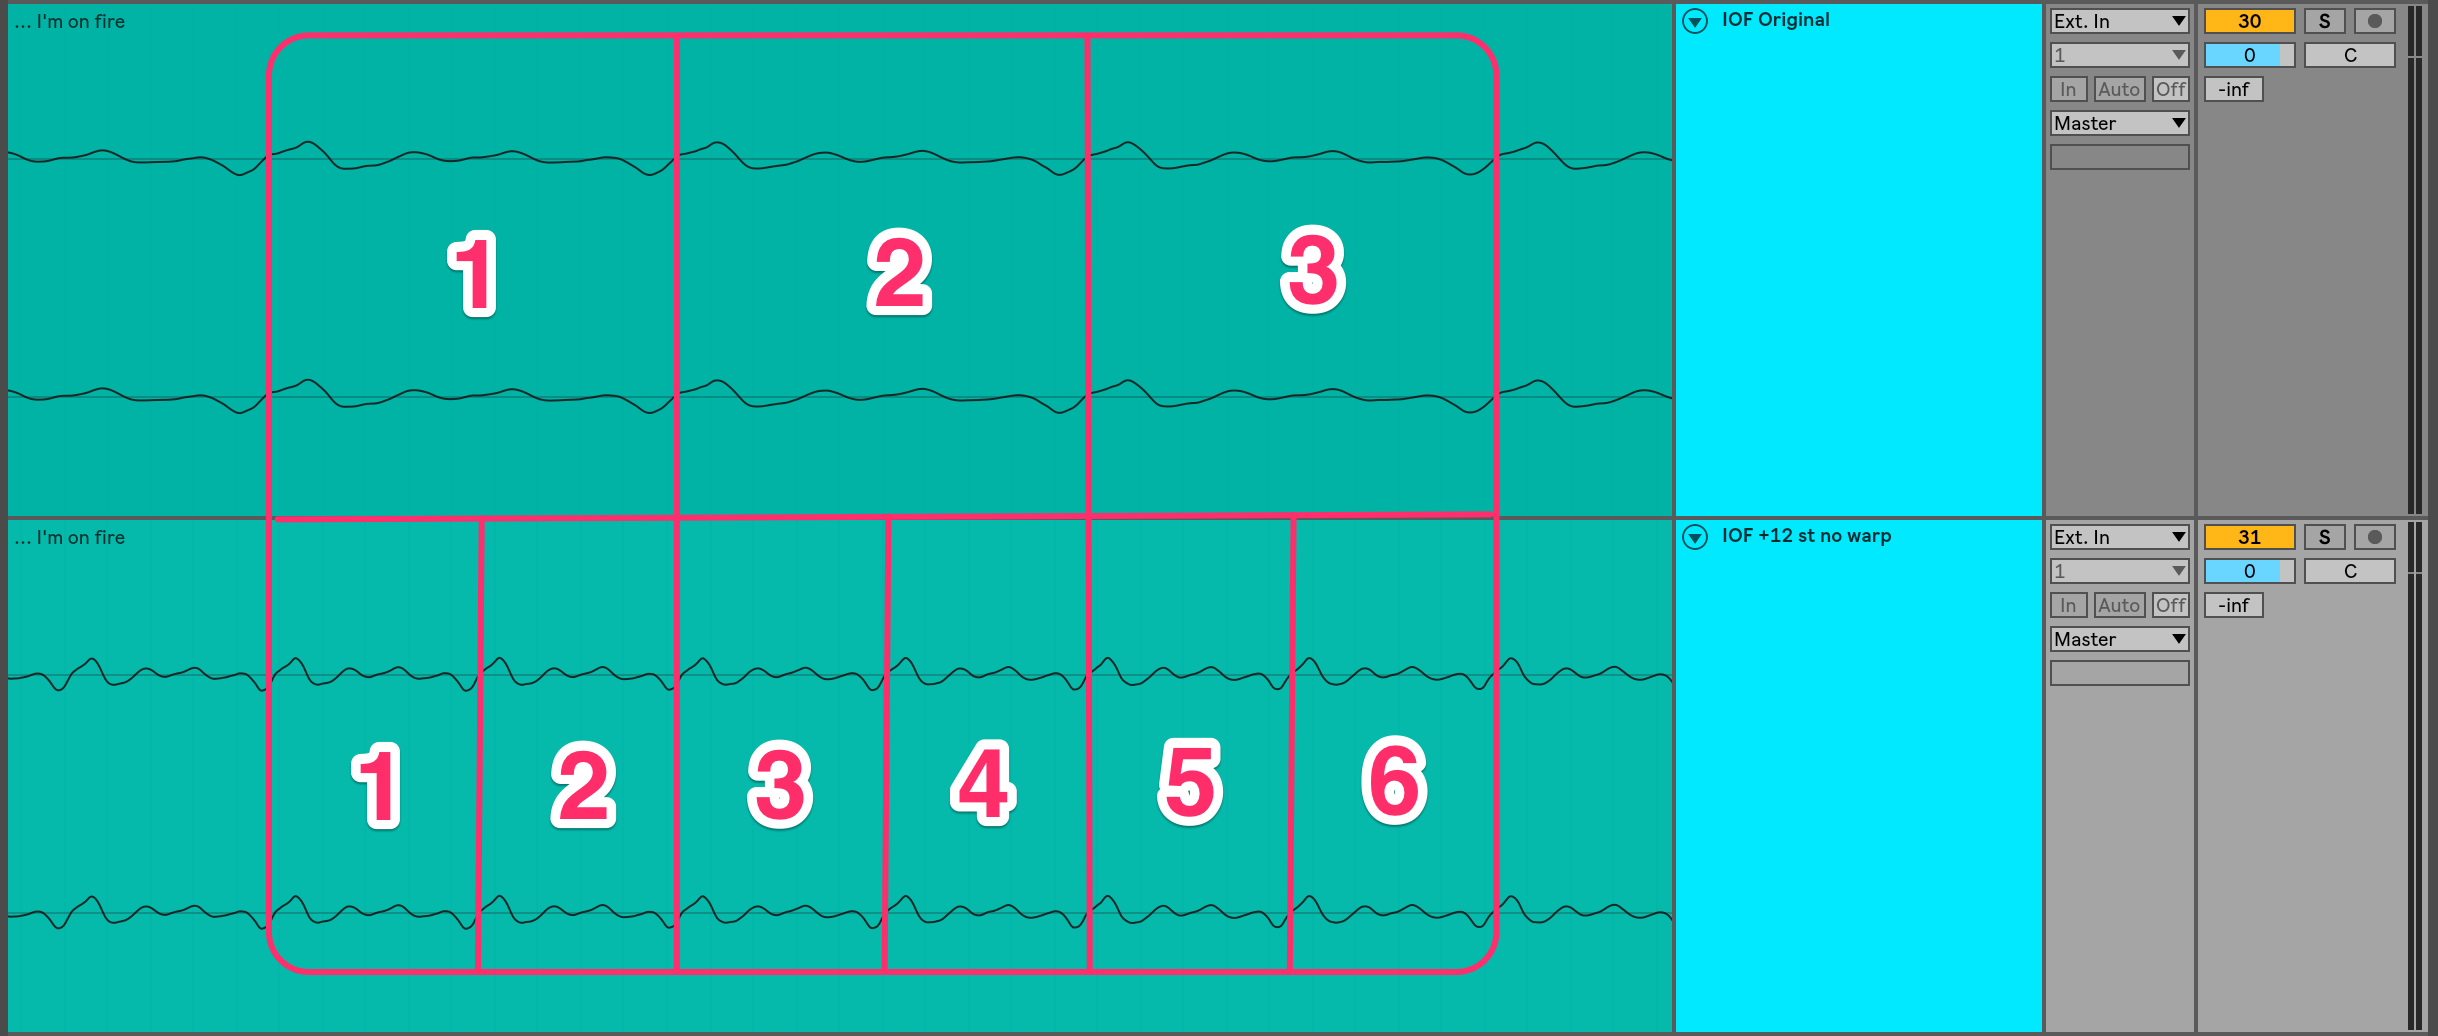
More cycles in the same amount of time
The same link occurs between lowering pitch and slowing playback, as lower frequencies translate to fewer cycles per second. We can stretch audio longer, which is effectively the same as slowing playback speed. This will decrease cycles per second, lowering the speed and pitch.

Stretched longer

Fewer cycles in the same amount of time
As you can see, playback speed and pitch are innately linked. However, many DAWs and other software allow for the individual adjustment of each without affecting the other (known as time-stretching and pitch-shifting respectively). Take Ableton Live’s Audio Warping, Melodyne’s pitch correction, and the Amazing SlowDowner to name a few.
How in the world are they doing this…?
Granulation, that’s how! We’ll explore the use of granulation to decouple pitch and speed in Ableton, as it uses granulation for some of its audio warping features.
Granulation in time-stretching and pitch-shifting
Let’s start with time-stretching, adjusting the playback speed (and therefore the length of an audio sample) without changing the pitch. Once again, here’s our original audio sample:
Here it is again, this time at half the speed (or double the length), but preserving the pitch. I’m using the “Texture” Warp Mode in Ableton here.
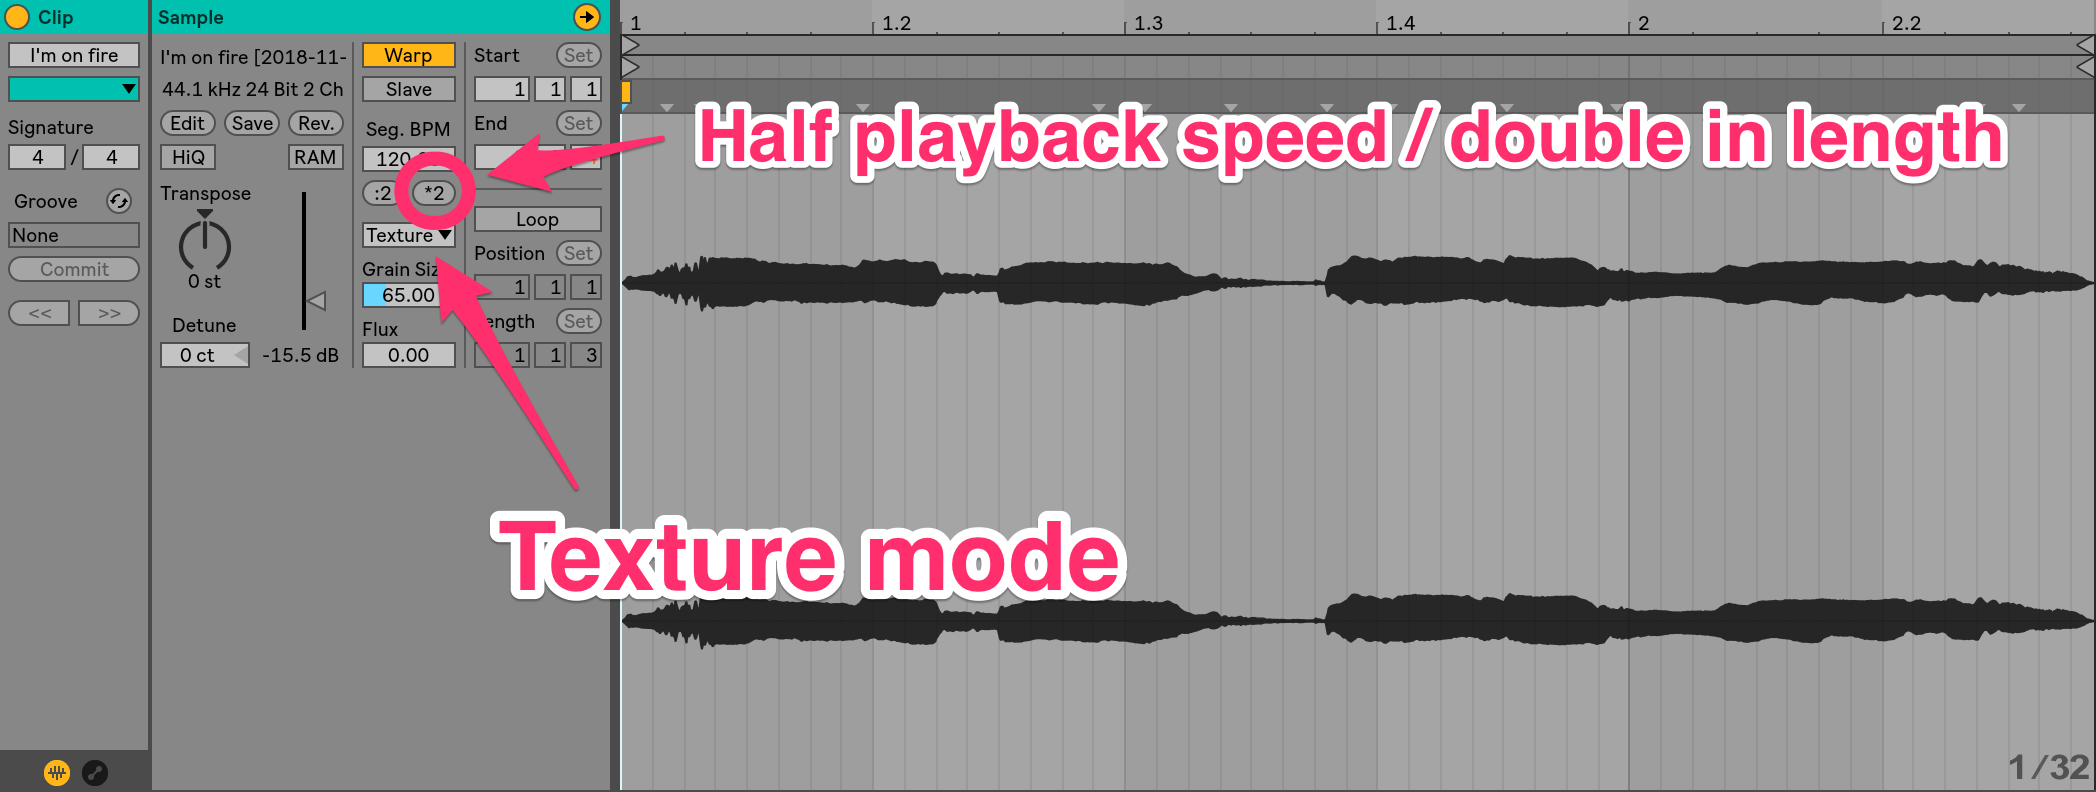
Same Pitch, /2 Speed
Somehow, Ableton is able to sustain the notes longer while keeping the pitch the same. However, there is an audible stuttering sound. Maybe this stuttering is a clue to how Ableton is doing this...
Many sounds, though they may sound complex in real-time, are nothing more than a series of sustained waveforms, molding from one to the next. Take a look at segments of the word “fire” from the sample we’re using:
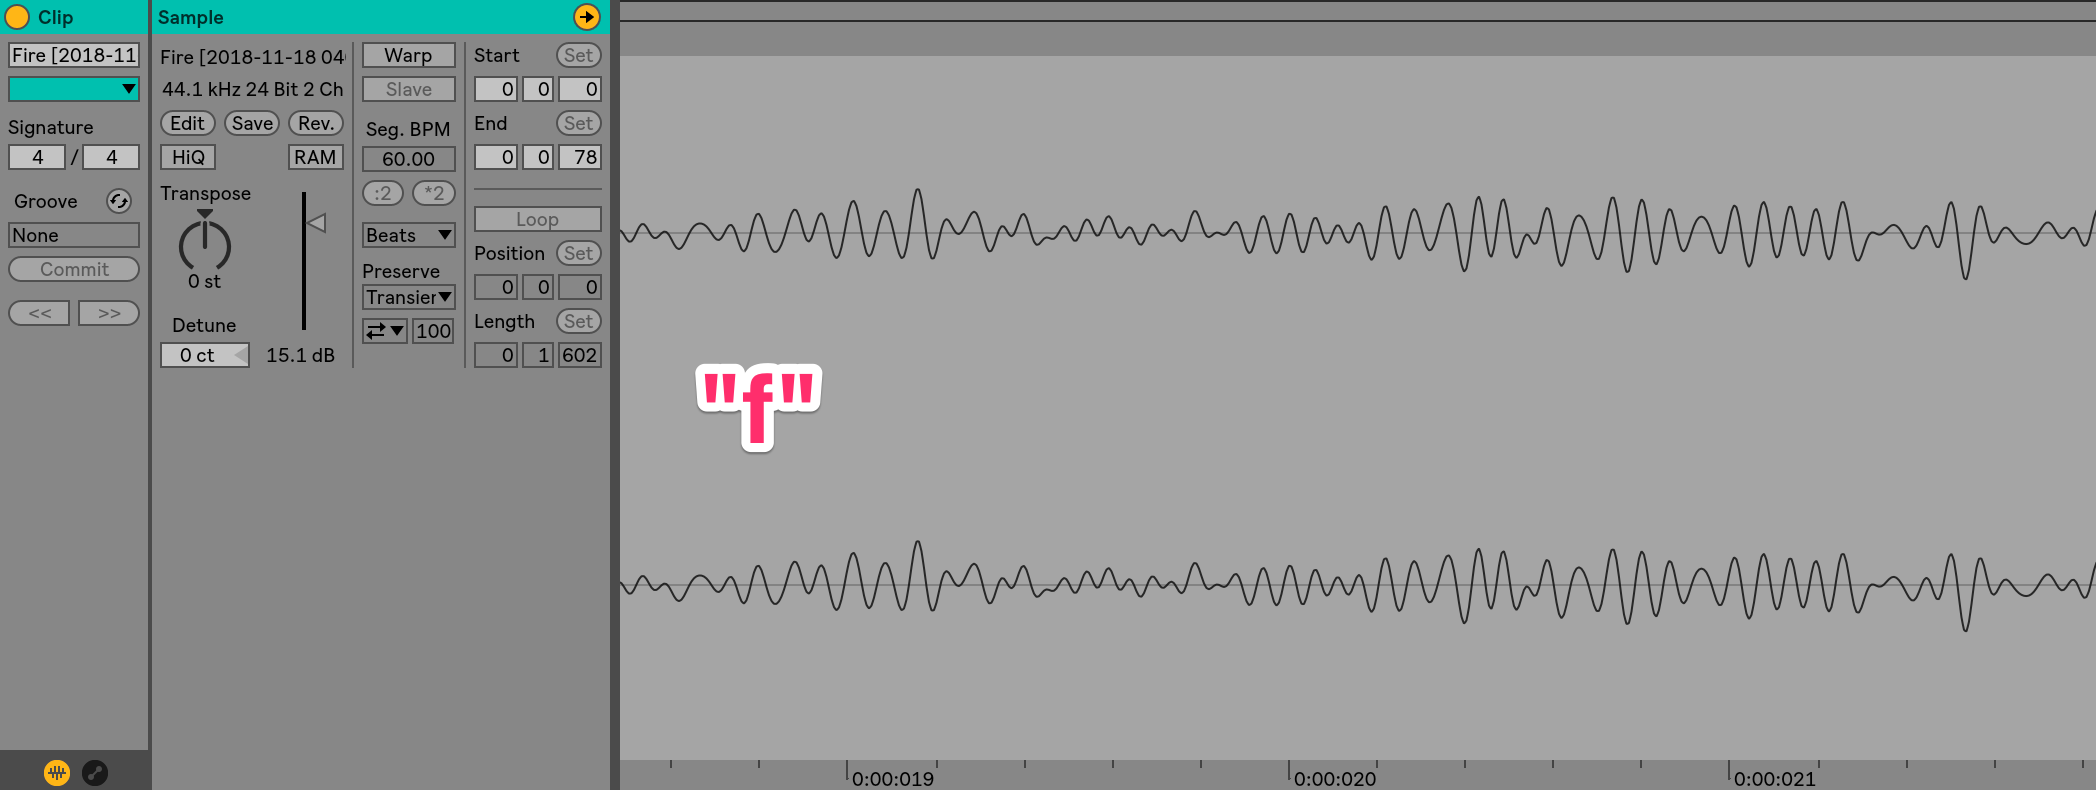
"f" waveform

"a" waveform

"i" waveform
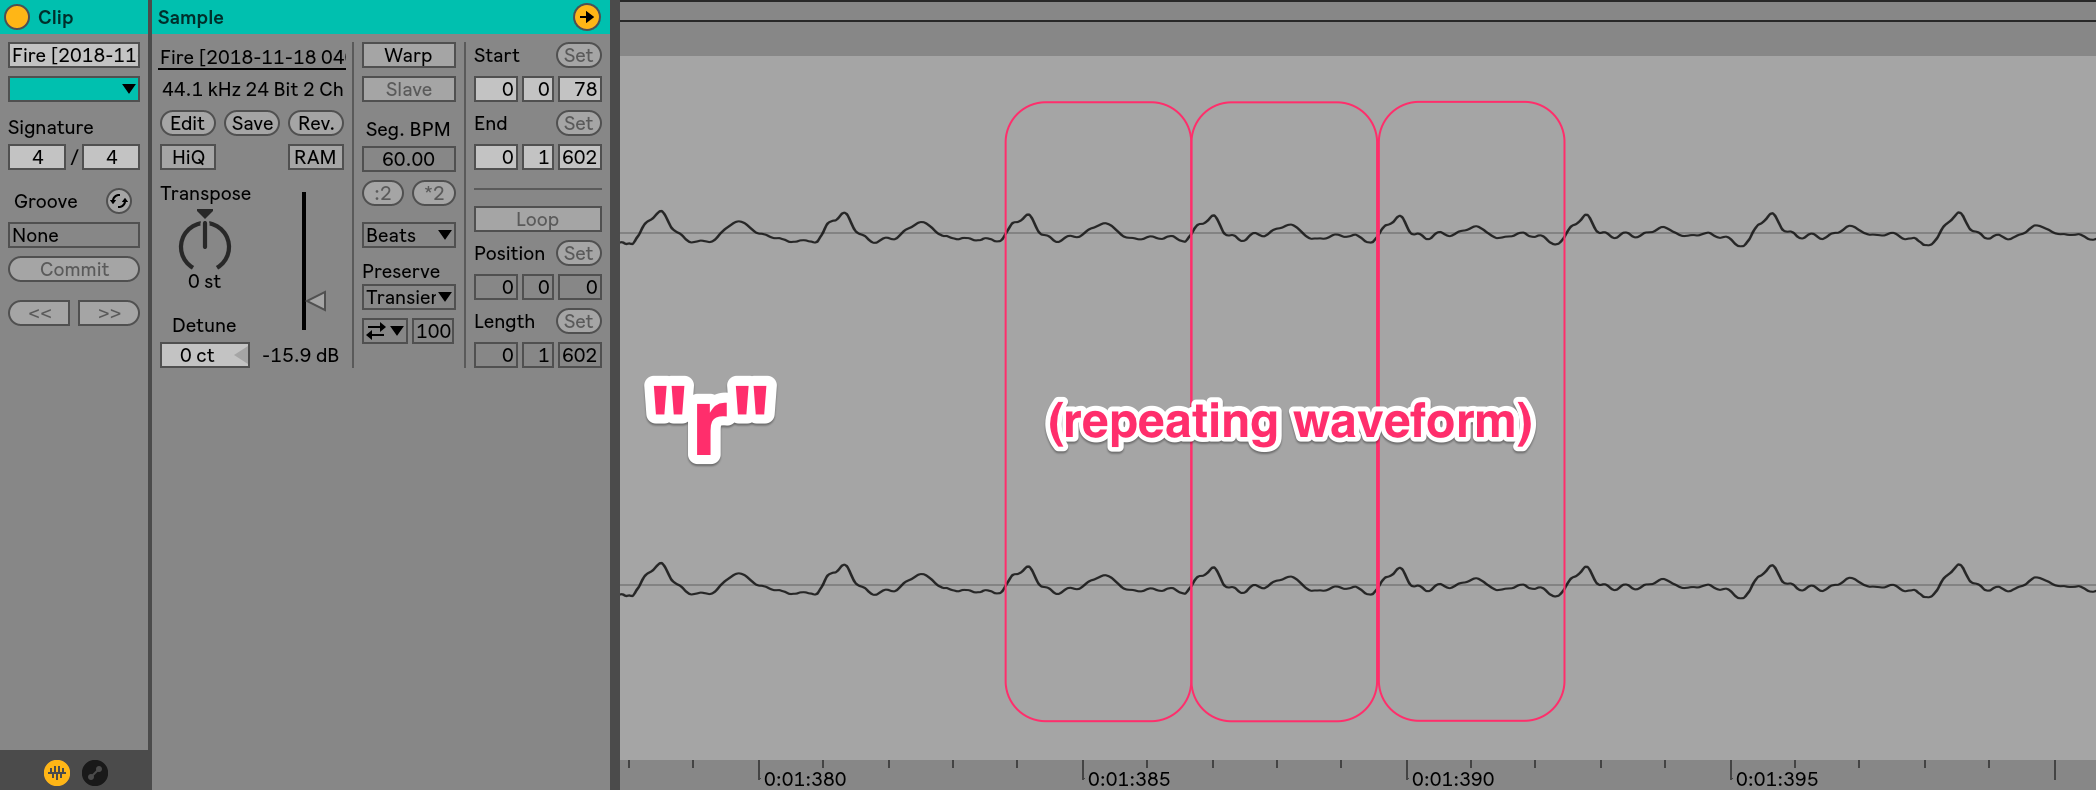
"r" waveform
The first sound, “f,” is more or less a blast of random noise, as many consonant sounds are. However, notice that the other three vocal sounds (“a,” “ɪ,” and “r,” which is soft and held like a vowel in the vocal performance) are each mostly comprised a single repeated waveform. Essentially, these vocal sounds function similarly to a sine wave coming out of an oscillator-based synthesizer.
How would we cause a sine wave to last longer? Simply continue repeating the waveform! Therefore, any of these vocal sounds could be sustained by simply repeating more cycles of the specific vocal waveform. This is what a vocalist is manually doing while sustaining a note.
Ableton needed to sustain the notes longer to decrease the speed of the vocal sample. It did so using this concept of looping sustained waveforms.
Ableton has actually granulated the sample and is looping grains in the audio sample. Warping algorithms identify repeating waveshapes (usually the most recently-played grain in the graintable), and loop them to sustain notes longer.
With a bit of crossfading (this warp mode has sharper crossfades, hence the stuttering), the notes simply sound elongated. Each grain is kept at the same pitch, but the sample seems to last twice as long. Effectively, the speed is decreased without changing the overall pitch.
This is even more obvious if we do this with a drum groove, in which the transient sounds of the drum hits can audibly be heard stuttering.
Time-stretching can also be performed in the other direction, doubling the speed (or shortening the sample), without changing the pitch:
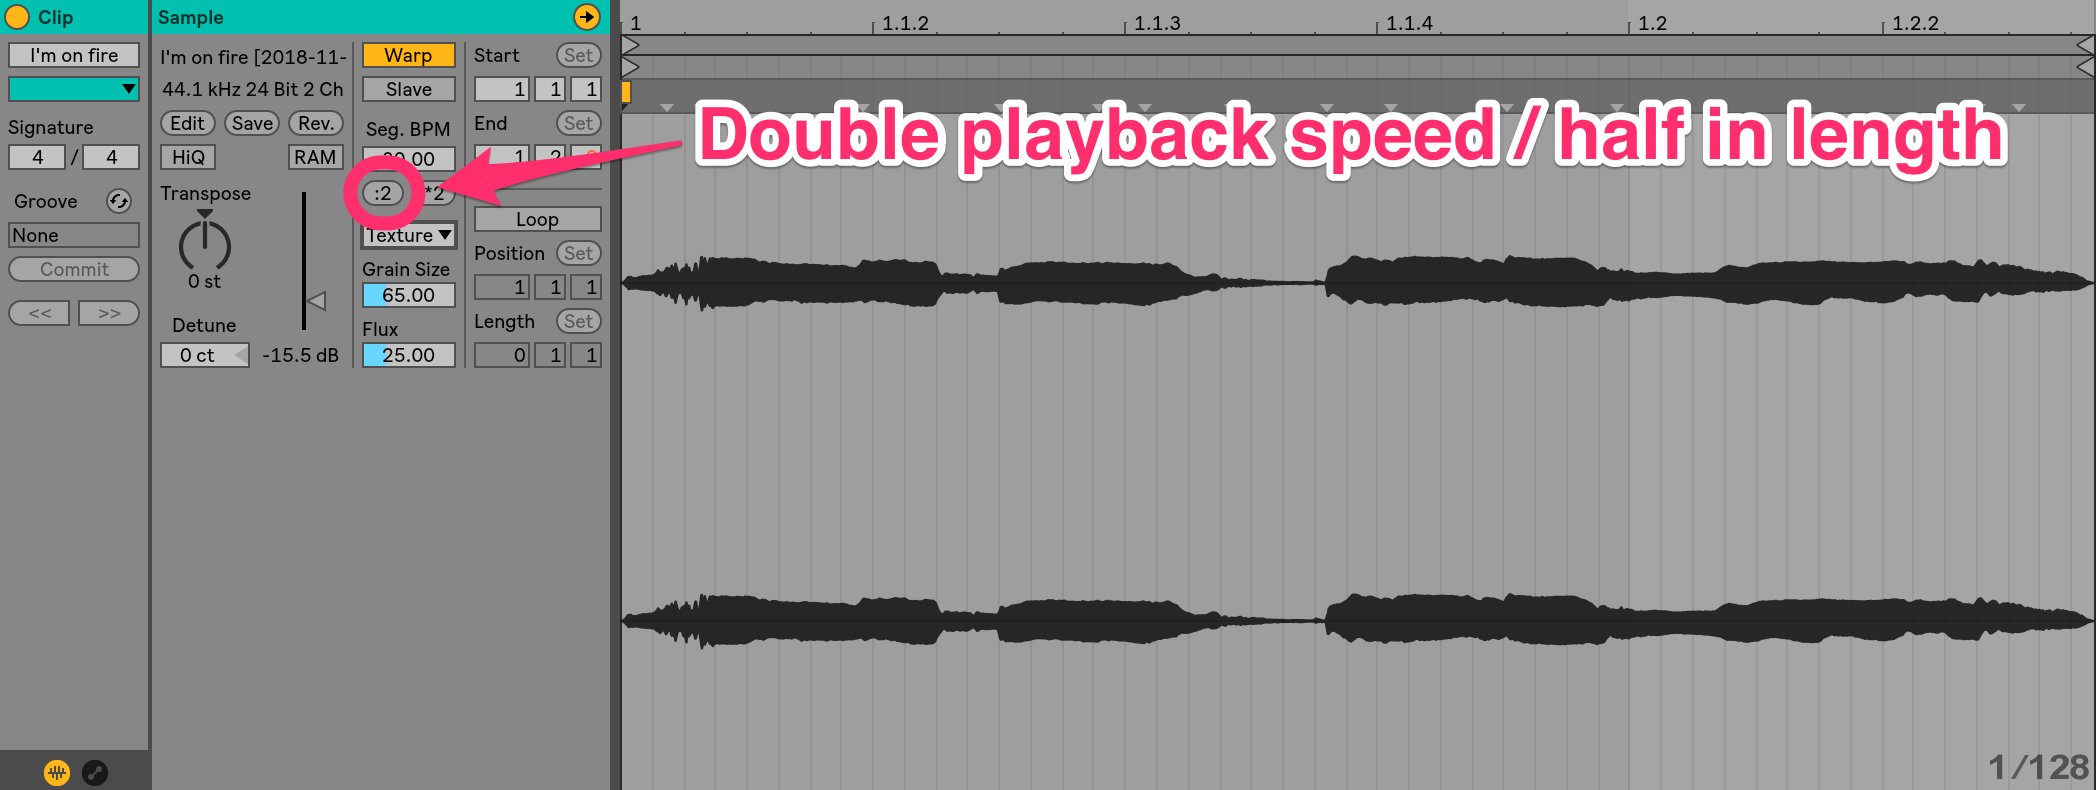
Same Pitch, x2 Speed
Pitch is preserved while speed is increased. But again, we can hear weird stuttering. And again, a granular process is at work here. This time, to play the sequence back faster, grains in the graintable are being skipped. By taking out grains and stitching the remaining ones back together with crossfades, we can effectively increase the playback speed without changing the pitch.
With the advancements of granulation technology over time, increasingly advanced warping algorithms are designed to perform this process as smoothly as possible. Ableton’s “Complex Pro” Warp Mode, though more CPU-intensive, is able to do just that. Here are the half-speed and double-speed examples from above using a more sophisticated warping algorithm.
Pitch-shifting, adjusting an audio sample’s pitch without affecting its playback speed/length, is possible through similar processes.
Let’s check this out at the waveform level. Here’s the word “fire,” isolated from the vocal sample that we’ve been using:

“Fire” isolated
Let’s say that I want to raise the overall pitch of the sample, but keep its current timing and phrasing. Remember, pitching up the entire sample would usually shorten the sample, messing up the timing.
But with granulation, we can preserve the original phrasing!
To demonstrate this, let’s chop the word “fire” into a bunch of little clips of audio, which we’ll treat as our “grains.”

“Fire” grains
Let’s say that we want to raise the pitch of this audio sample an octave without affecting the timing from the vocal performance. Bear in mind that you won’t often be shifting the distance of an octave, especially in subtle pitch-correction software like Melodyne.
With the grains locked in place, we can simply increase the pitch. Each grain will be separately adjusted—independent of timing. Let’s pitch all of these grains up an octave.
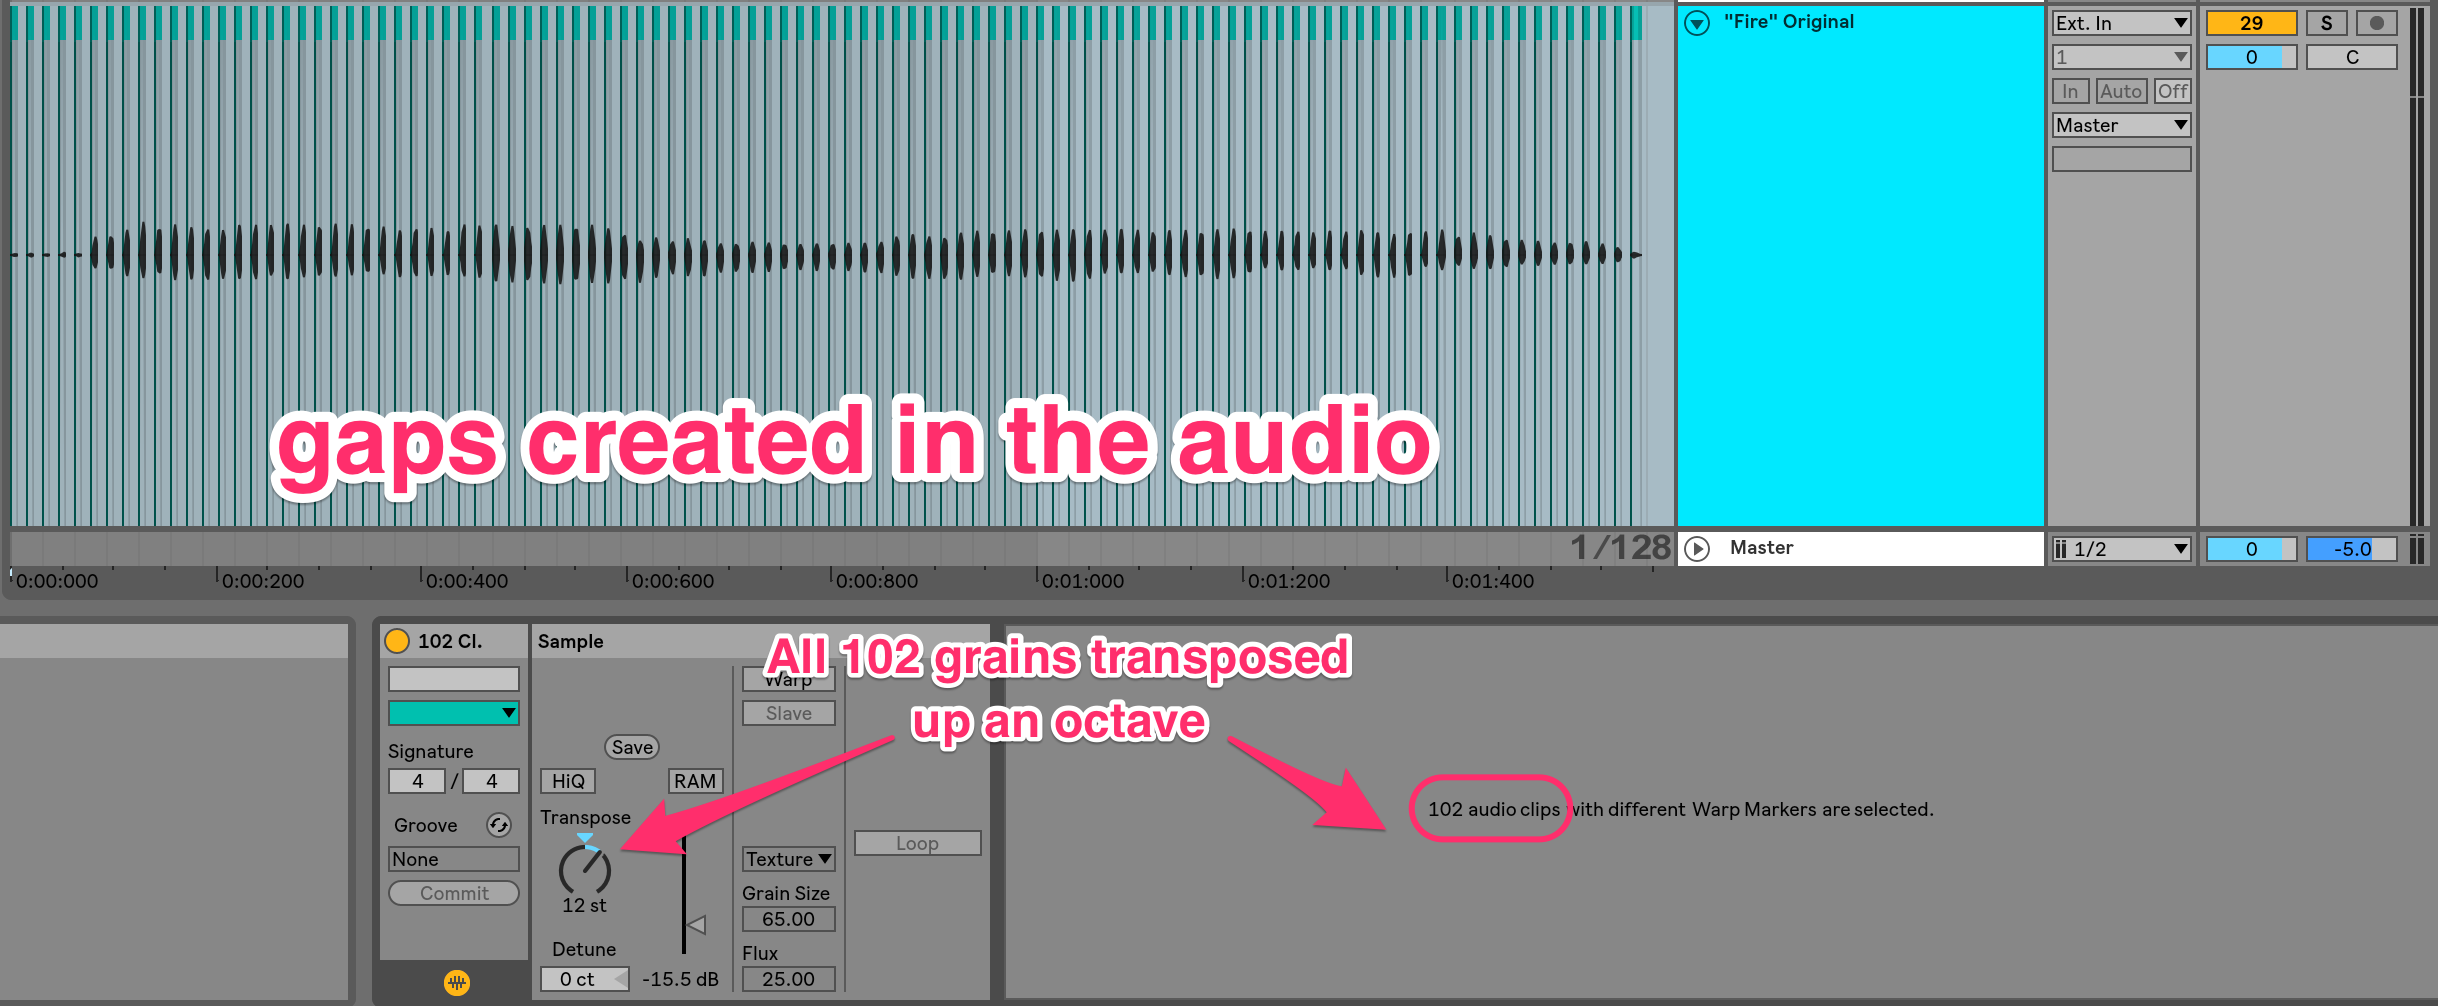
"Fire" +12 st no smoothing
See and hear how the grains have been shortened, now with audible gaps between them. However, the timing of the overall vocal phrase is preserved.
As before, granular synthesis can eliminate these gaps by looping grains on repeating waveforms. This helps to sustain notes through the gaps we just introduced, using crossfades to smooth the transition between grains.
Overall, the pitch is raised, all while preserving the speed, length, and timing of the original sample. With the crossfades, granulation is nearly able to completely smooth this out (which is amazing, because doing this manually would take forever…)
Here’s what Ableton’s “Complex Pro” mode is able to do:
Again, the same concepts are used if we want to play the sample at a lower pitch without adjusting speed. In this audio clip, the chopped-up grains are now pitched down an octave.
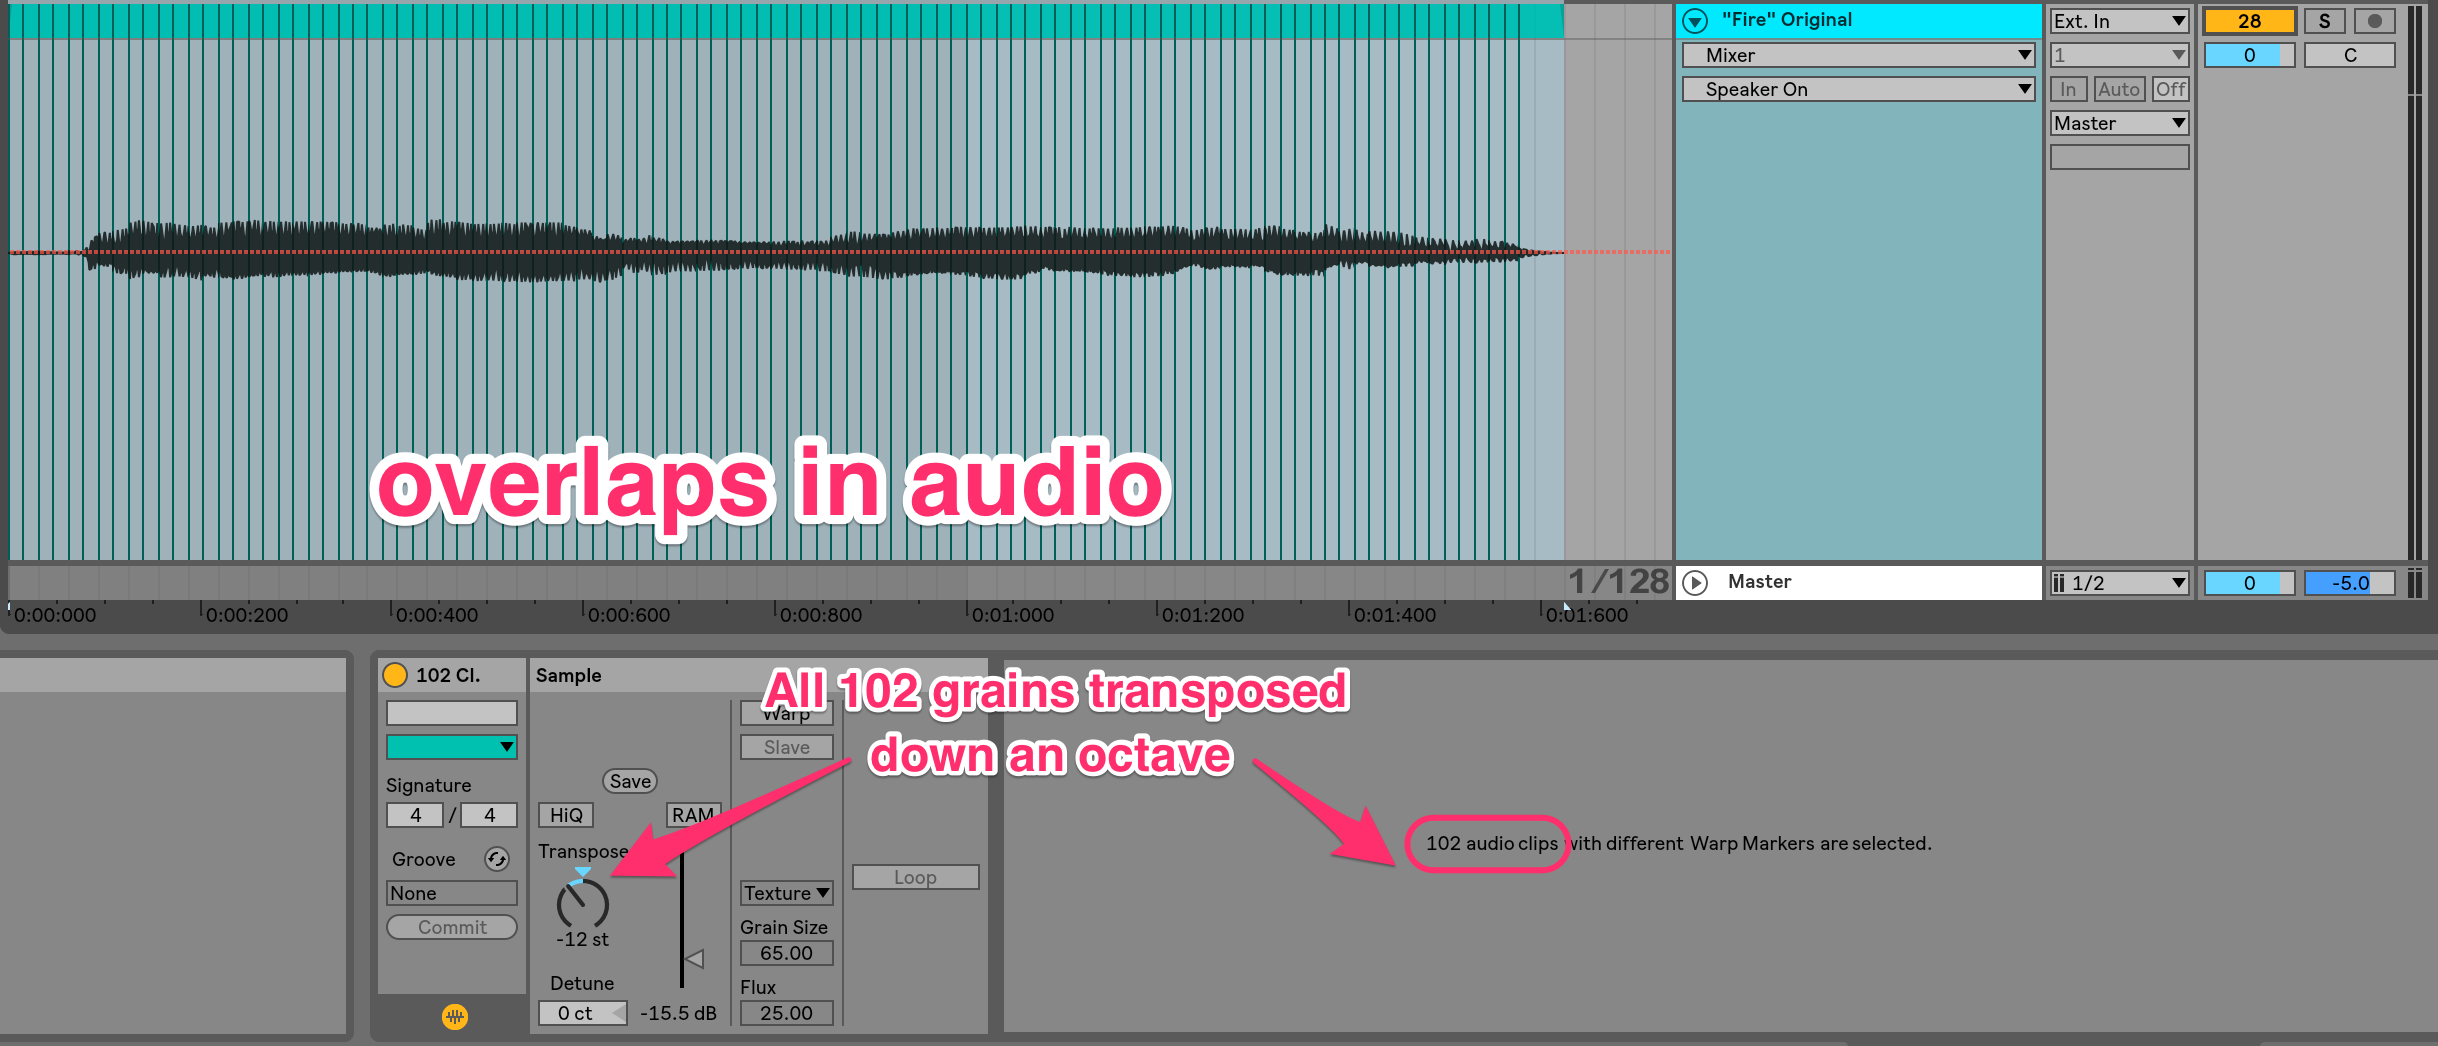
"Fire" +12 st no smoothing
You should be able to hear that the audio is an octave lower, and with the same timing as the original sample. But it might be tough to hear under that annoying buzzing noise. As you would expect, the grains have lowered in pitch, each becoming longer. Each grain now overlaps the one after it, and my lack of cross-fades has created a string of clicks.
If we went in and carefully drew crossfades between the grains to eliminate the overlaps, we would effectively have the original speed with a lower pitch. Notice that this is the equivalent of skipping grains in the graintable, as we did when we sped up a sample with a constant pitch.
Again, this would be incredibly time-consuming to do manually, so it’s great that granulation can do this for me more smoothly:
Keep in mind, there are some technologies that do not rely on granular synthesis, such as Variable Time and Variable Pitch features of RX 7, that can result in smoother results.
Without granulation, the incredibly useful option to independently adjust speed and pitch might not be possible.
Using granular synthesis in sound design
It’s difficult to speak definitively on how to use granular synthesis, as its capabilities are pretty broad. With an audio sample broken into a string of grains, any kind of processing, stretching, and arranging can be done to create another interesting sound. Each granular synthesizer has its own parameters and processes, which in turn determine how you should use it.
Because of its eclectic nature, granular synthesis is best used as a textural technique, often for drones, pads, and interesting noise layers.
Here are a few software synthesizers that use granular synthesis. Note that some DAW’s come with a granular synthesizer:
- Granulator II for Ableton
- Granulizer for FL Studio
- Malstrom for Reason
- Absynth by Native Instruments
Most of these synthesizers function similar to samplers, using an audio sample as the raw input. Many synths will have default libraries of samples to use, but you should also be able to import your own.
Usually, synthesis will start by using an adjustable window to define a “grain” in the audio sample. Audio within the window—the grain—will effectively be used as a wavetable. This wavetable is repeated to create a sustaining sound.
Many granular synthesizers will have these common parameters to adjust the window and playback:
Length (or similar word): the length of the grain in ms or Hz
Position (or similar word): the start point of the grain located in the original audio sample
Smoothing (or similar word): adjusts the crossfades between grains
Distance (or similar word): increase or decrease gaps of time between the grains
Many of these parameters can be randomized grain-to-grain, modulated with an LFO, or modulated with track automation. Some synths can organically blend grains from elsewhere in the sample during playback, using parameters like “Spray” (or similar word) or by randomizing Length and Position.
Granular synthesis in action
One of the handiest uses of granular synthesis is in creating a slowly evolving drone, with parameters like those above being automated using long automation lines. Ever-changing soundscapes can be created, as clever automation and sample choice can create some interesting timbres.
Keep in mind that you don’t have to make drone music to use granular synthesis. Any part of a drone like this can be extracted and inserted into a sampler to make a totally new instrument!
Let’s make something! I’ll be using Monolake’s Max-for-Live device Granulator II, by Robert Henke.

Granulator II grain page
Granulator II has two pages, one for controlling the grain and another with filters, FM, and the overall amp envelope. I’ll spend the majority of my time in the grain page here.
I’m going to use this tank drum sample that I found on Splice as my original audio sample, as the audio content is rich with interesting padded timbres and textural transients.
I start by setting up a repeating MIDI pattern. Granulator II has polyphonic abilities, allowing for the creation of even more interesting sounds. Here, I have MIDI notes alternating between a perfect fifth (C to G), a perfect fourth (C to F), and an octave (C to C).
By all being perfect intervals, this piece won’t really sound like it’s in a major or minor key, making the drone sound even more floaty and ambiguous.

MIDI clip for granular
Next, I loop the MIDI clip, hit play, and manually adjust parameters, listening for interesting timbral changes. Part of the beauty of granular synthesis is just getting your hands on the synth and exploring the sample.
For example, I notice that adjusting the position will cause the window to scrub over transients from the tank drum. This creates an interesting fluttering texture, as some grains from the transient will come through. I create automation to control this accordingly.
I sit and adjust other parameters, eventually finding something that I like. Together, a bunch of different parameters can be automated to create an entire arrangement from one sample. This is my final result. As you can see, I automate the following parameters, from top to bottom:

Full granular automation
“Grain” - measured in Hz on Granulator II, defines the length of the grain (aka “Length”)
“Grain Random” - measured from 0 to 100, randomizes the length of the grain
“FilePos” - the start point of the grain, located within the sample (aka “Position”)
“Spray” - measured in ms, randomizes Position within x ms of FilePos
“Freq” - simply the cutoff freq of a LFP filter on the filter page, I’m automating this frequency
We can further smear the audio together by drowning it in delays and reverbs, creating a lush, ambient space.
Conclusion
With these examples, it should be clear how useful granular synthesis can be. The potential it gives in sound design and its ability to decouple pitch and playback speed make it an invaluable asset to any producer or sound designer.
And on top of that, it’s just a fun way to make new sounds. If you give this a go, try linking parameters on your granular synth to knobs on a MIDI controller. By combining the sonic possibilities of granular synthesis with expressive automation, we can create sounds that are nearly impossible to make through standard synthesis methods.


