Beginner Tips for Writing Music to Picture: Film, TV, and Beyond
Learn the basics to get the ball rolling on writing music to picture—from SMPTE timecodes to sync points, tempo, and meter changes.
With the amount of music work there is in the world of film, TV, and all other sorts of visual media, sooner or later, you're bound to land a project that will require you to write music to picture. Whether the music is for a commercial or a video game, keeping things in sync is essential. In this article, you’ll learn the basics to get the ball rolling on writing music to picture—from SMPTE timecodes to sync points, tempo, and meter changes.
Import your video into the DAW
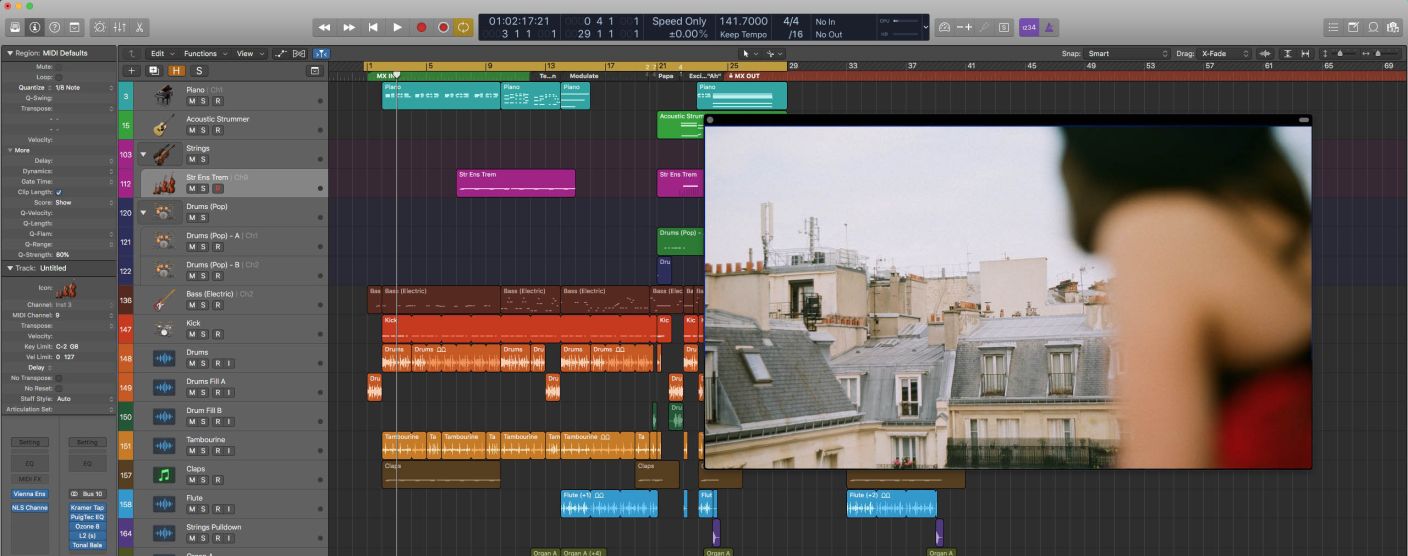
A basic step, but a crucial one. Sure, you could, in theory, have your video open in your favorite video player and try to play it in tandem with your DAW session, but most modern DAWs will allow you to actually import the video into your project. This means that you're able to play the video in synchronization with your session so you can see and hear how things are lining up in real time.
Get the start time lined up
One of the biggest mistakes first-timers make is that they don't set the correct start times for their music cues. If you have a video that's 20 minutes long, but the music doesn't start until 12:46, make sure that you adjust the start time of your session to match that. After all, you don't want 268 bars of silence. Most DAWs will allow you to set this up. Logic Pro X, for example, lets you do it; just follow this file path: File>Project Settings>Synchronization. There, you'll be able to adjust the timecode where Bar 1 is placed.
So in the above example, I would make sure that Bar 1 plays at 01:12:46:00. This will adjust the placement of the video accordingly and make sure that Bar 1 is at that specific timecode.
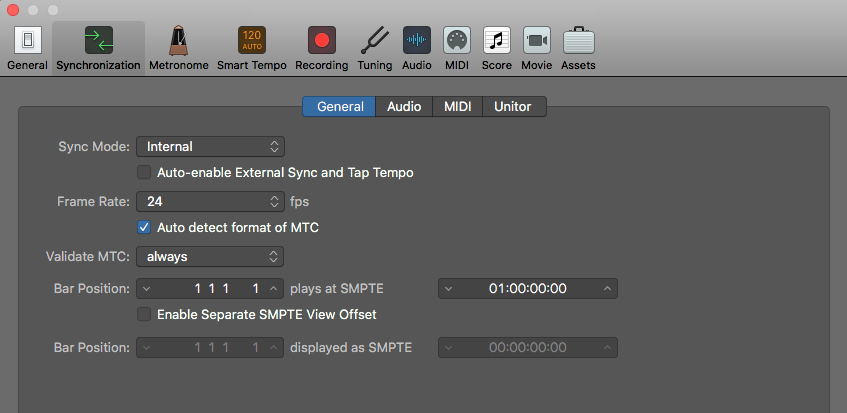
Synchronization settings in Logic Pro X
A quick primer on SMPTE timecodes:
Movies consist of moving images. Each second of footage has around 24 frames (still images), with the most common frame rates being 23.976, 24, 25, and 29.97 frames per second (fps). To standardize how time is read and written when it comes to video, the Society of Motion Picture and Television Engineers (SMPTE) established a timecode specification which consists of four blocks of digits:
HH:MM:SS:FF
The first two digits represent hours, the next two represent minutes, and the third pair represents seconds. For the most part, this is just like the time you're used to reading. The only difference is that final pair of digits. Rather than sub-dividing seconds into milliseconds, SMPTE Timecode uses frames. Each frame is numbered, starting at 00. At a frame rate of 24 fps, that last block of digits in a timecode would range from 00 to 23, inclusive (a total of 24 frames). So if a director sent you a note referencing the timecode 01:24:36:12, you'd know to look at the first hour of footage, 24 minutes, 36 seconds and 12 frames in.
Historically, all video was created on reels of film tape. Since these reels were very heavy and also had limited length, there was only so much footage that you could put on a single reel. Because of this, a feature-length film would have been split into multiple reels, each consisting of roughly 20 minutes of footage. As such, since no reel ever exceeded an hour, the hour representation (HH) evolved to represent reel numbers instead. So 04:12:33:16 meant that you were to look at Reel 4, 12 minutes, 33 seconds and 16 frames in. Since the first scene of the whole film started on Reel 1, the movie would begin at 01:00:00:00 (rather than 00:00:00:00).
Nowadays we work with digital video files that can have almost limitless durations, but this historical timecode notation has remained. This is why, by default, most DAWs align Bar 1 to start at the first frame of video—at timecode 01:00:00:00.
Sync points
One of the first things you'll want to do is to identify your sync points. Sync points (also called “hit points”) are important moments in the video where you want the music to synchronize with the picture to accentuate a moment. The two most basic sync points that each cue will have are the point in the video where you want to start the music—also called “music in”—and the moment the music should finish—”music out”. A cut to a new scene can also be used as a sync point.
Additional sync points may include any moment that you deem worthy of attention, like a character slamming a door or making a sudden realization. What separates a regular song from music that's written specifically to picture is the marriage between the score’s musical elements and the film’s visual elements. If you want to write emotional, dramatic, and affecting music for picture, write your music so that musical accents line up with your sync points.
Take this iconic finale scene from E.T. in which Elliott is saying goodbye to his alien friend. Notice the relationship between John Williams’ score and the moment E.T.'s finger lights up. He decided to write in such a way that the music swells up and the downbeat of the phrase lands perfectly on that moment. At the same moment, the low brass comes in and the chord resolves. This shift in the music makes this moment musically, visually, and emotionally special.
Spotting session
Figuring out where sync points should go can be a difficult task. This is why it's important to have a meeting with your film's director to figure out some important details. This meeting is called a spotting session. During the spotting session, you should watch the film together and discuss each section regarding the music. Where should the music come in? Where should it end? Are there any important sync points that the director wants to emphasize? And most importantly, what emotions should the music be conveying?
Notice that I'm not asking what the music should be like; whether it should be major/minor, fast/slow, or even what instruments should be playing. That's because you will get all those answers from the emotion driving your story. Think of what instruments and sounds you associate with each emotion. Your natural musical instincts should guide you in the right direction, so trust them.
Tempo considerations
When it comes to synchronizing your music to what's happening on the screen, tempo is going to be your best friend. Adjusting the tempo of your piece by even 1 BPM can make a big difference over time—let alone changing the tempo by 10, 20, or 40 BPM—so if you want to make sure that your music ends on a downbeat, but the current score spills over into the next scene, try adjusting the tempo of your entire piece.
If you speed up the song a bit, you may be able to hit the end point you’re looking for. There's always a tempo that will allow you to synchronize to a hit point perfectly (in this case, the “music out” point), and it's not uncommon to use decimal points in tempos (like 142.6 bpm) to get spot-on with your synchronization.

Tempo matters when synchronizing to hit points.
Meter changes
The most effective musical sync points are achieved when the sync point lands on the downbeat of a bar. This allows the musical phrasing to flow naturally, all while synchronizing to the picture. However, sometimes the type of tempo you'd need to set to get your sync point and downbeat lined up would drastically alter the feeling of the music. This is when you should look at your second best tool: meter changes.
Say you have a solid tempo in 4/4 that you don't want to alter too much, but in this tempo, the sync point lands on the third beat rather than the first. Changing the time signature somewhere before you reach the sync point will allow you to naturally make up for this displacement. All you have to do is turn one measure into a 2/4 bar earlier in the piece, then switch back to 4/4, and now your sync point lands on the first beat. Where you place that 2/4 bar is entirely up to you. Find a good musical spot where it will go unnoticed. On the other hand, it's also not uncommon to create the meter change right in the measure leading up to the sync point. This makes the sync point stand out even more, which can be a useful device in certain situations.
Stay out of the way
One of the most important tips I'm going to share with you is to keep it simple. So many people try to get overly creative and busy with their music, and, of course, there's a time and place for that. However, if you're writing music to picture, especially commercials and film, the most important stuff is what's on screen. Your music should support what's happening on the screen, not distract from it. Keep this in mind as you write.
For instace, if a character is talking, we need to understand what they're saying, so you should keep your busy musical phrases out of the way of the dialogue. The scene above is a great example. Notice that John Williams simplifies the music as we hear E.T. say, "I'll be right here." He essentially shifts to a sustained chord that doesn't move. This allows the audience to focus our complete attention on the characters. He then brings the main theme back right after E.T. finishes speaking. This is a very effective way to make sure that the music never gets in the way of what's important—the story.
Conclusion
I hope that these tips will help guide you as you write music to picture. And between film trailers, TV shows, movies, commercials, PSAs, logo reveals, video games, and even those in-flight safety videos, there's a ton of music to be written.
