Live Drums vs. Sampled Drums: When to Use Which
Everybody wants a great drum sound, but what exactly does that mean? And how do we go about getting one? We compare live drums vs. sampled drums and the in-between.
Everybody wants a great drum sound, but what exactly does that mean? And how do we go about getting one?
Hiring a drummer and booking primo studio time is often worth it, but the budget for this can be steep. Likewise, you could rely on samples or drum-programming software, but programs like BFD or Superior Drummer are instruments in their own right; without proper manipulation, they can sound fake (and a drummer will always know the difference).
Sample replacement and sample augmentation are two other options, but there are drawbacks to sample trickery: a uniformity of sound is hard to avoid, and a tendency to over-polish with sample replacement might suck the authenticity out of an otherwise substantial and powerful mix.
With so many options at your disposal, how do you know which to choose?
First, ask yourself a question of function:
Is this a demo or a final mix?
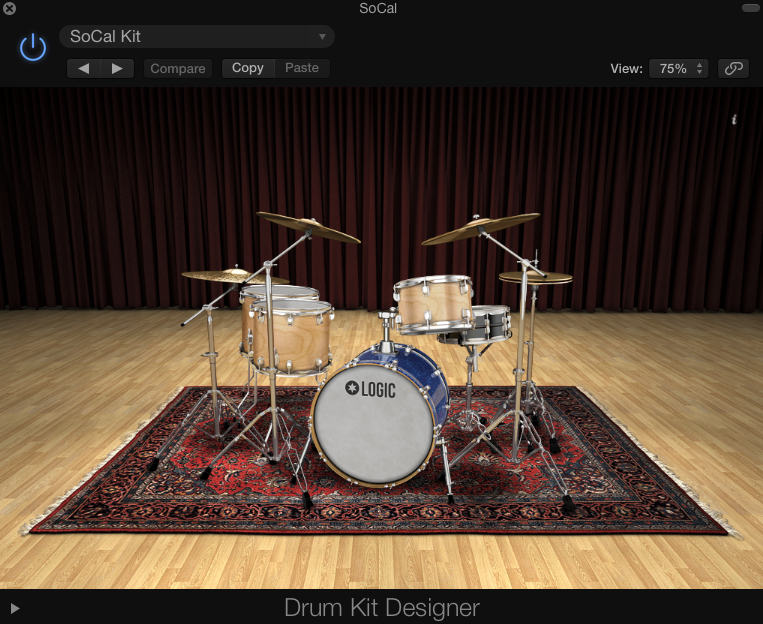
If you’re working on a demo for your fellow musicians—and if you’re not a drummer in your own right—programming drums is probably the way to go. Some DAWs, like Logic Pro X, have “virtual drummers” that sound quite good, if not entirely real. You can elicit easily-tweakable drum parts in a variety of styles and timbres. Also, with some creative mixing, you can use these sampled parts as complements in your final mix, if such a move is called for.
Even if you are a drummer—hell, even if you’re the drummer playing the record—it may actually benefit you to program parts for demos, as stepping away from the drummer’s mindset can help you focus on the big picture.
As a drummer myself, I often get carried away in the moment, thinking of how to cram the best fill into a measure, or how to delay my hi-hat to give the arrangement some swing. An arranger is concerned less with flashy drum performances and more with the needs of the song as a whole. Hanging up my drumsticks and putting on my arranger cap even helps in the long run when I am the drummer on a project: invariably, what I play in response to what I’ve programmed is more musical than what I’d execute otherwise.

Drum Kit Designer in Logic Pro X
Consider the genre
Before making a choice between synthetic and acoustic drums, consider the genre. This might seem obvious, but it’s still worth putting down, because the wrong choice might send you down the wrong road.
If you’re working in one of rock’s more modernistic styles—of the sort Imagine Dragons employs—it may behoove you to program drums, even if guitars and basses are coming in the old fashioned way. See, that particular genre calls for a synthetic touch when it comes to the drums. If you know where you’re standing in terms of genre, the choices for how to produce a drum sound become a lot more clear.
Now, perhaps you’ve decided you want to go for something with a real drum sound, but your budget is prohibiting you from hiring a great studio. Maybe you’re stuck with an eight-channel interface, a basement, and the drums you’ve had since you were thirteen.
Are you out of luck? Hardly. Here’s where sample replacement and sample augmentation come in.
Sample-replacement vs. sample augmentation
Sample replacement involves substituting one drum sound for another. Oftentimes I’ll receive a kick drum that, for one reason or another, is virtually unusable. Perhaps it distorted the mic pre in a particularly harsh manner, or maybe a bad cable was used and nobody noticed. Here I might reach for sample replacement.
Sample augmentation is more of an additive process. In sample augmentation, you would edge in a drum sample into the mix to complement the sound of an existing drum—not to replace it.
Either process can be accomplished in most DAWs, using MIDI to replicate/replace the audio of your drum hits. If that’s too complicated, you’ve got freestanding software solutions: from Drumagog to Superior Drummer, you’ll find a whole slate of third-party programs that make sample trickery easier. A simple Google search will give you the “how-to” for setting up a sampled drum sound—this article is more of a “when to.”
And so, onward to some common mixing scenarios:
When a drum isn’t giving you the whole picture, try sample augmentation.
If the kit sounds good, but perhaps the kick drum doesn’t give you all the information you need, this might be a case for sample augmentation. Say the kick suitably hefty in the low end, but when it comes that ever-important transient snap, it’s just lacking, with no high-mids worth boosting. Here you could augment the kick with a bass-drum sample that carries a fair amount of click, checking for phase-alignment between the two samples so you’re not accidentally creating a muddied transient response. Edge the sample in till you’ve got the right balance, and you’re good to go.
When there’s a technical problem in the recording, try sample replacement.
We alluded to this issue when defining sample replacement. But let’s cover how to find the right sample to swap out for your bum drum hit.
When auditioning samples in a drum library, look for a hit that blends in with the timbre of the drum in the overheads. Let’s take a distorted kick drum as an example: it’s no use replacing that kick with a sound out-of-whack with the original drums. Using your overheads as the “big picture” of your sound, you can find a kick drum that blends with what’s already there. Play your kick sample solo’d with the overheads when looking for a suitable sample replacement, and you’re likely to find the right match.
Of course, you can also use a non-malfunctioning kick hit from the same song, if one happens to be on hand. Tips on more naturalistic drum replacement will be covered toward the end of this article.
When the drums sound “cheap” or “dead,” try sample augmentation
Sometimes drums are recorded in basements, in living rooms, and other locales that don’t sound “expensive.” This is fine if that’s the vibe of the tune; I wouldn’t dream of adding a sample-replaced hit on Elliott Smith’s Either/Or. But if the tune needs to feel pricey, sample augmentation might be the ticket.
Here I try to find samples that a) timbre-match the original drum; and b) fit the idea of what I’d like to get out of the overall drum set. So if the snare drum is suitably beefy, but lacks a cracking attack, I might try to locate a sample that complements the beef but adds its own, fitting thwack.
It’s about finding the right complement, and then blending the sample in to achieve the most appropriate balance; when you close your eyes, it should all sound like one drum. After you’ve found the right mix, be sure to group all the drums together in volume so you can’t upset the balance. Then go about your mix as normal.
When playing around with listener expectations, try sample replacement
This production technique is my favorite way to use sample replacement creatively. In essence, you preserve the very human feel of the drums, but swap out all the sounds for obvious, synthetic samples. You might have to do extensive gating and muting to isolate the hi-hat and cymbal hits, and it might take a bit of time, but the rewards can be unique—a perfect blend of the human and the mechanized. I like to use this trick with classic synthetic drums. A bank of sounds from a TR-909 is a perfect place to start.
This technique can help delineate a bridge section, or any part of the song that needs differentiation, but it must not break with the artist’s preferred style. A band that already uses blends of real/synthetic sounds might benefit from this exercise, but a traditional heavy rock outfit or America four-piece might not. Context is key, and always run it by the client first.
When marrying organic sounds with synthetic elements, try sample augmentation
Rather than sample-replace a sound outright, you can also augment the existing drum with a synthetic element that fits the genre. For instance, in a heavy metal tune, I might add some kick-click to cut through the sheer amount of guitars. On a neo soul arrangement, I could very well add an MPC-style snare to the drums to signify the genre’s conventions. I might also, in a hip hop track with a live kit, tie an 808 to the kick drum.
In the latter situation, I’d probably duplicate the kick track and go about muting anything too busy for an 808, as they tend to benefit from having ample room to decay. Again, context is key.
If the kit has character—and fits the arrangement—leave it alone
Sometimes a drum kit might not sound the way you’d prefer, and yet it works fine for the material (again, see Elliott Smith’s Either/Or). Other times, you think a drum might not be able to give you your desired consistency, tone, or ambiance, but in the mixing process, the innate sound turns out to work quite well. What is more, it provides plenty of its own character.
Do not necessarily fall down the rabbit hole of sample augmentation/replacement because you see all your peers doing it on YouTube. Compression, equalization, harmonic saturation, and reverb can go a long way in getting you the sound you’d like. If the tune is more natural in vibe—or if the drummer specifically stated an antipathy toward samples—try to get the most you can out of the kit itself.
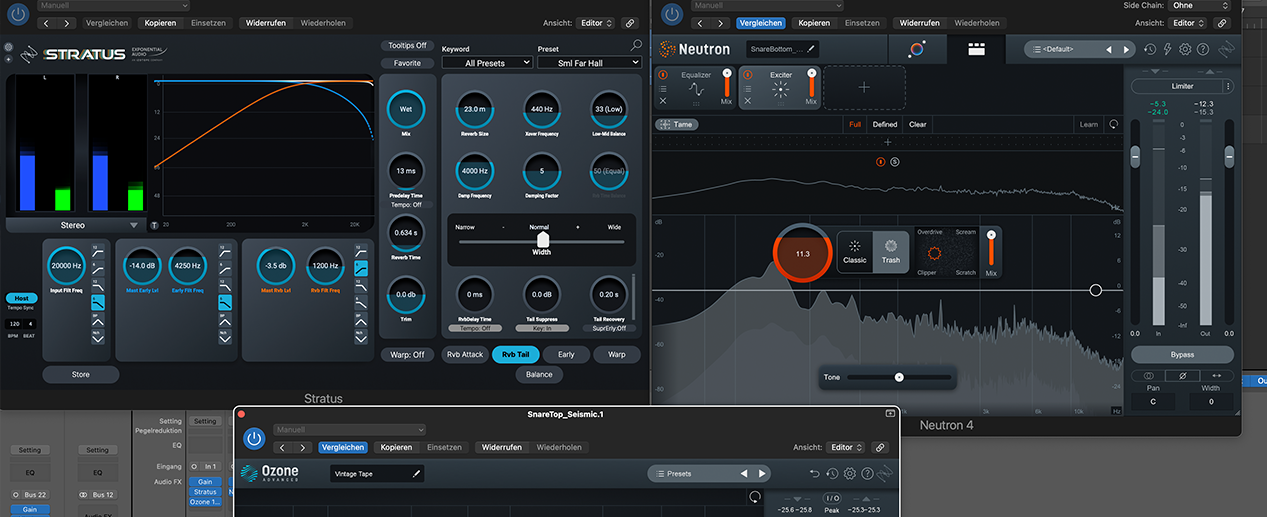
More and more these days, I’ll look for other solutions before turning to sample trickery, fixes such as multing a kick drum, finding its click, and processing it to give me the attack I crave. Perhaps I’ll mult a snare and put it through Neutron 2’s Transient Shaper to deemphasize its attack and boost its sustain; this process, followed by judicious EQ to take out body and emphasize ring (as well as a little tight verb for room sound), can give me all I need in sustain without having to resort to a sample. What is more, the kit retains its own character—character that the drummer brought to the equation.
The opposite is true however: Don’t avoid sample replacement to be contrary or cool; just learn to know what serves the arrangement and the mix.
Two Sample Augmentation Mix Tips
When you’re going for a naturalistic drum sound, you don’t want to give away the fake. As a rule, I tend to edge in the sample level-wise until it’s giving me what I need, using as little sample-augmentation as I can get away with. Also, I try to EQ the real and sampled snares in a complementary fashion, and often this involves a psychological trick: As I search for frequencies to attenuate in the sample, I pay close attention to the real drum until I feel as though the real drum sounds right. It’s a bit of a mind game, but it works.
Keep in mind, however, that the sample has most likely been processed to death already, so very little equalization should be needed. If you find you’re twisting yourself in a pretzel with the EQ, perhaps you should try a different sample.
On another note, sometimes i’ll blend a little of the sampled drum into the overheads’ auxiliary channel. As the overheads usually comprise two mono tracks panned for stereo, I’ve frequently got them going to a dedicated buss for processing. I’ll often send a miniscule bit of the sample to this buss so that it receives/contributes to the processing. I find this tends to glue it all together a little more.
Conclusion
Topics such as how to massage programmed drums to sound more real—or how to cut and program your own sample library—will hopefully be covered in future “how-to” articles. For now, take this “when-to” piece to heart, and remember the following:
As with all of producing and engineering, the goal is not to make the best sounding drum sound possible, but the most appropriate, with propriety deemed first and foremost by the artist and the producer. Always ask yourself, “what does this song need?” Keep in mind that you are of service to the sound, not the other way around. That way, you’ll always come to the right choice, no matter what it is.


