Learn Stutter Edit 2 in 10 Minutes
Learn how to use Stutter Edit, one of the most powerful and addictive effects plug-ins, in a matter of minutes. Follow along with audio examples.
In 2011, iZotope partnered with electronic music pioneer and sound design guru BT to develop the world’s first live remixing plug-in, Stutter Edit. At long last, we’ve teamed up again and are back with


Stutter Edit 2
This plug-in is stuffed to the brim with creative effects and parameter controls, but not to worry: we’re here to help you learn everything about Stutter Edit 2 in minutes. Let’s get started!
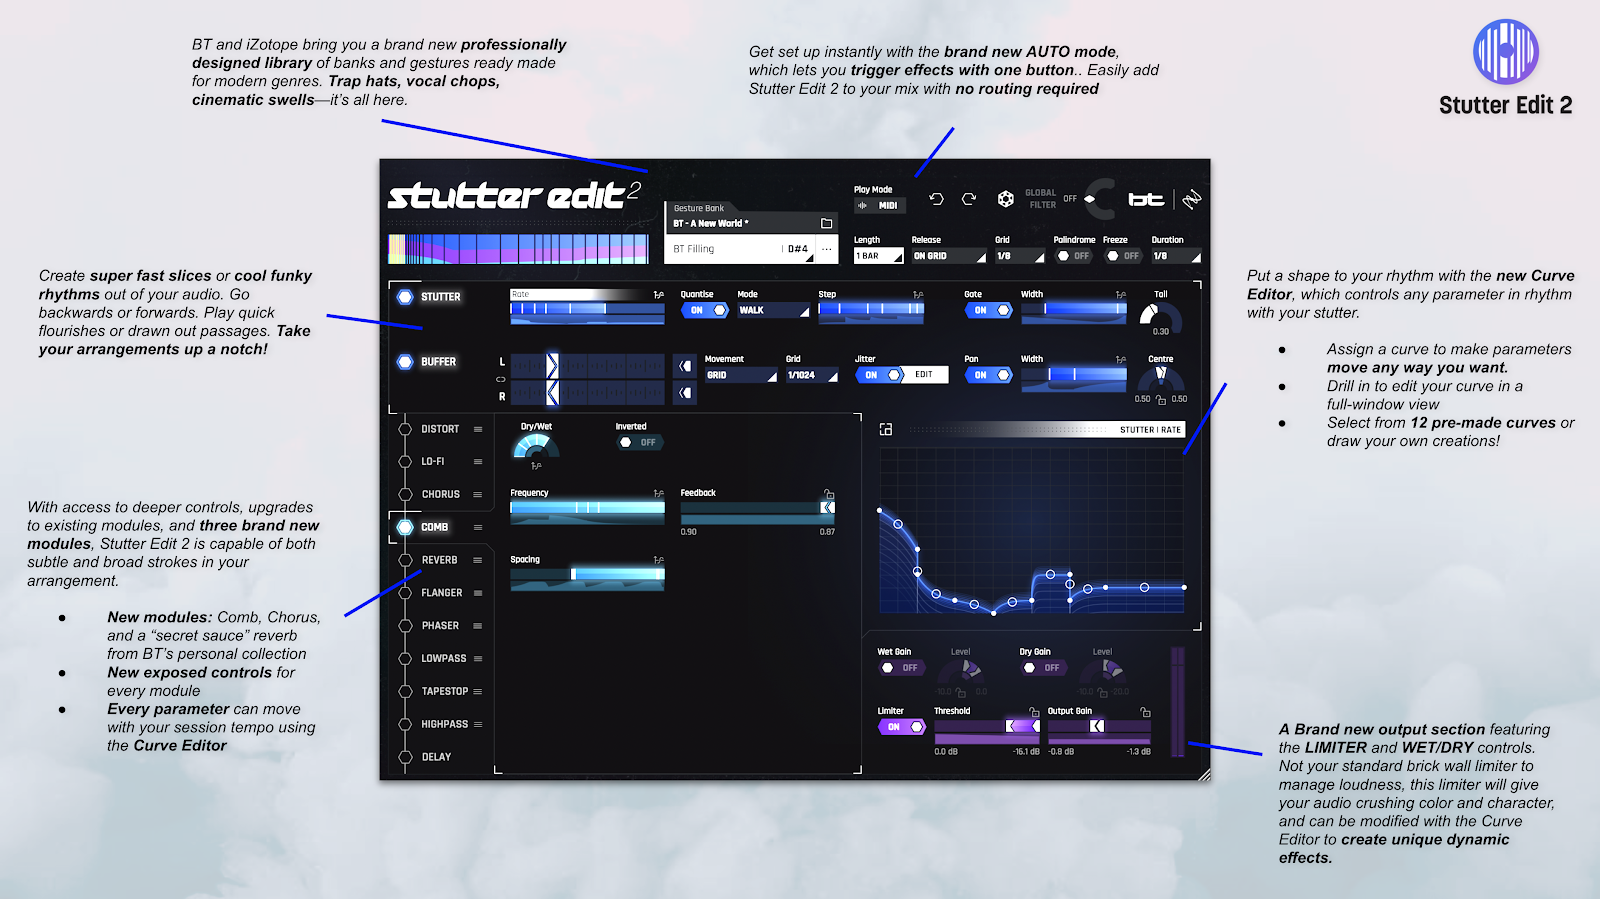
Overview of Stutter Edit 2
Immediately create with Stutter Edit 2 Gestures
Things may look complicated at first glance, but once you get to know the basics you’ll be creating your own unique Gestures in no time!
Just like its predecessor, Stutter Edit 2 is an audio effect plug-in that helps you create and perform amazing rhythmic effects via preset-like effects called Gestures. Each Gesture is a unique, tempo-synced, audio-mangling effect, mapped to a note, key, or pad on your favorite MIDI controller. Gestures, like presets, are organized into Banks.
Every Gesture in Stutter Edit 2 is a combination of different modulating effects. A single note can trigger a sonic explosion of insane filter movement, stutters, bit crushers, modulated reverb tails, chopped-up distortion, and more. Each Gesture can be customized to your heart’s content, so you can modulate the rhythm and pitch of your audio for synchronized gate effects, dramatic swells and drops, and whatever else you can dream up.
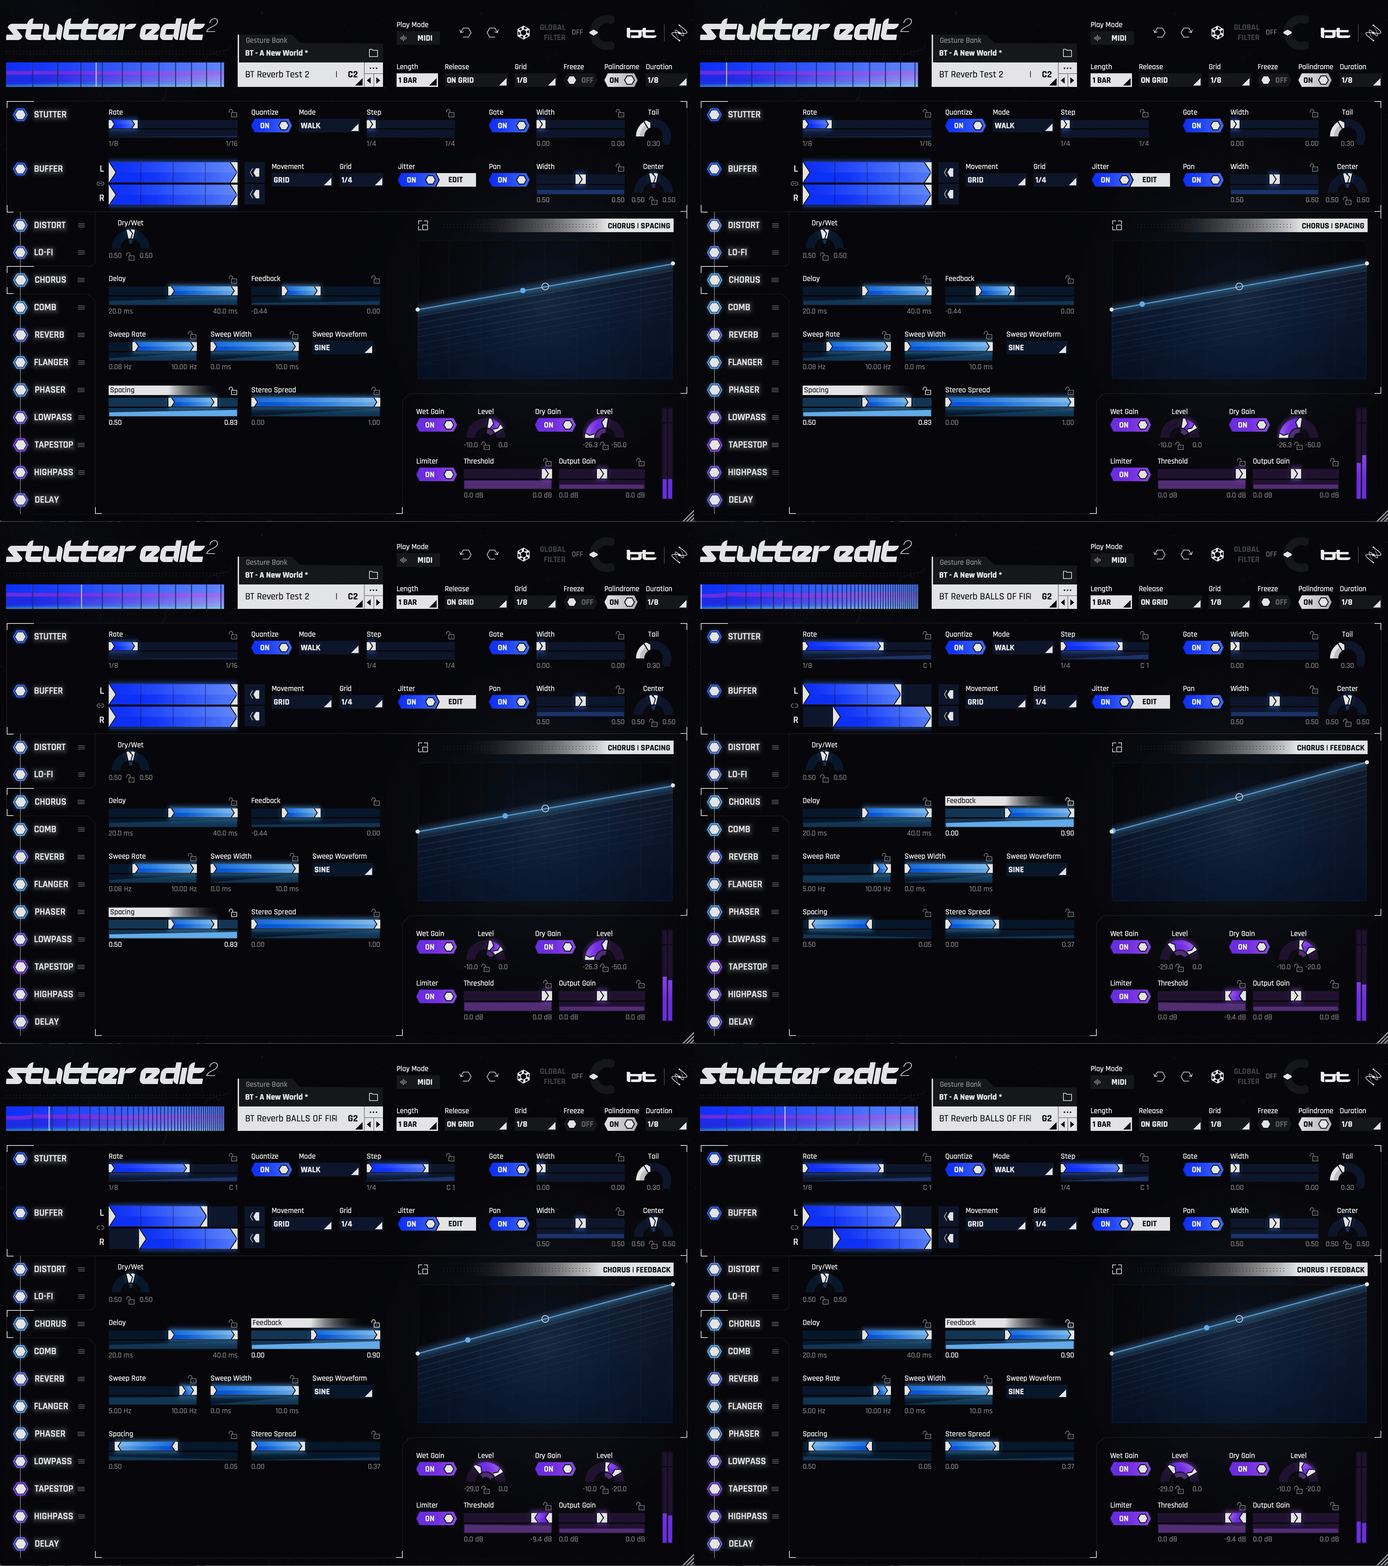
Use Auto Mode to quickly audition Gestures
The new Auto Mode makes creating with Stutter Edit 2 a breeze. Just load up Stutter Edit 2, engage Auto Mode, choose any Gesture, and press play to start hearing the effect immediately.
Auto Mode is great for quickly auditioning Gestures to find the ones you like. You won’t have to worry about pressing or holding keys, and can concentrate on designing and customizing your Gesture. Auto Mode also makes Stutter Edit 2 easier to use when mixing, as you have the freedom to place it on sends and returns without worrying about MIDI signals and routing.
Using a MIDI controller is ideal for live performance, but Auto Mode allows Stutter Edit 2 to act as a standard audio effect—no MIDI triggering required! Outside of using a controller, there are a number of ways to trigger Stutter Edit 2 within your DAW:
- Auto Mode
- DAW piano roll
- Hardware with MIDI capabilities
- Laptop keyboard
NOTE: The process for setting up a MIDI track to control Stutter Edit 2 differs depending on your DAW. For DAW-specific setup instructions, just open up the Play Mode menu, switch to MIDI, and read the instructions in the plug-in window.
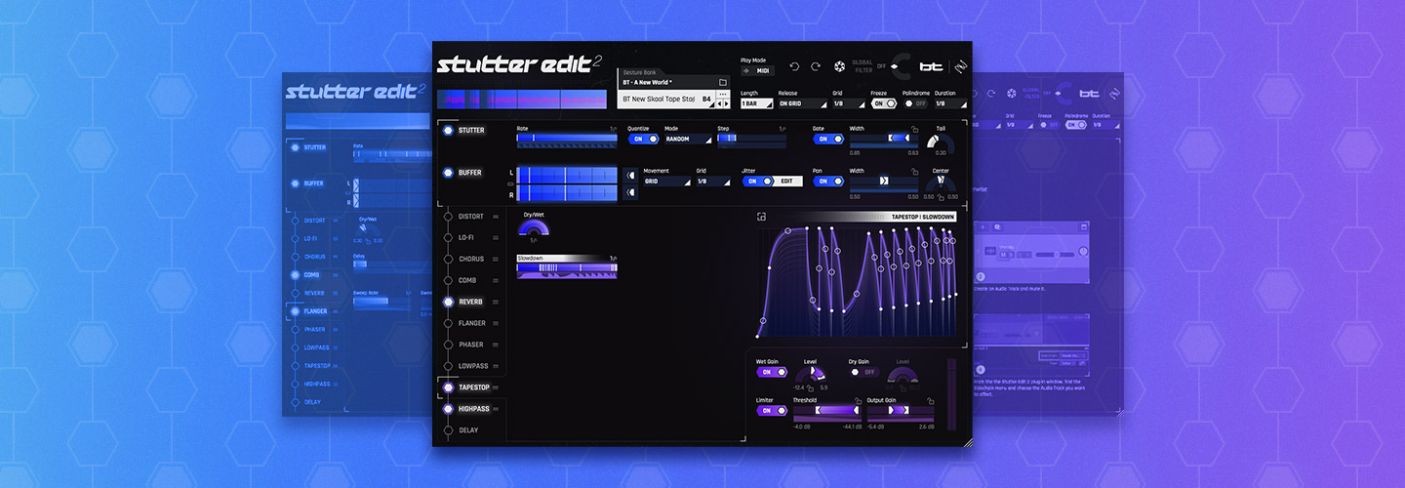
Get familiar with the Gesture Control Panel in Stutter Edit 2
Those familiar with the original Stutter Edit will remember the Stutter Matrix: the area of the plug-in’s UI that defines the rhythmic values of the stutter effect. In version two, the Matrix receives a complete design overhaul, becoming the Gesture Control Panel. The Gesture Control Panel is the global control area that changes how the plug-in responds to your MIDI input, and how closely the Gesture you chose syncs with your session tempo.

The Gesture Control Panel in Stutter Edit 2
The Gesture Control Panel has lots of parameters and controls, but never fear, we’re here to walk you through it. Let’s go through the process of setting up a basic Gesture.
How to set up a basic Gesture in Stutter Edit 2
- To start, select a Gesture from the Gesture Bank, or use the Default Gesture as your starting point.
- Use the Length dropdown menu to determine the duration of your Gesture’s cycle. You can choose lengths from sixteenth-note triplets to two bars. Shorter lengths can impart FM-like textures on a sound, while longer lengths can create smooth and evolving effects.
- Use the Release menu to choose the way your Gesture ends. There are five Release options to choose from:
- On Grid: After a MIDI note ends, the Gesture itself waits until the next Grid point (1/8, 1/16 etc.) before ending.
- Full Gesture: The entire Gesture will play through from start to finish, even if you only tap the note. This is useful for continuous or repeating effects.
- Latch: The Gesture will play and hold until you trigger it again (or trigger another Gesture). This is useful for playing longer Gestures that change during your arrangement, or syncopated Gestures that you might want to spill over into the next bar. It’s also helpful for performance if you don’t want the effect to drop out between Gestures.
- Instant: The Gesture will end instantly when the MIDI note triggering it ends. This is useful for faster performances with different short Gestures.
- Stick: Similar to Latch mode, but the effect will lock itself onto the end of the Gesture’s timeline.
- The Grid menu determines the rhythmic value on which the Gesture begins and ends. For example, if Grid is 1/8, the Gesture will always start exactly on the next eighth note.
- For more advanced, glitchy effects, Freeze can be used to capture part of the audio buffer—determined by the Duration parameter—and repeat it indefinitely.
- Finally, enable or disable Palindrome to choose whether the Gesture reverses direction or starts over, respectively, when it reaches the end.
Once these settings are configured, it’s time to get into the really fun stuff: Stutter and Buffer.
How to use the Stutter and Buffer modules in Stutter Edit 2

The Stutter module in Stutter Edit 2
The Stutter module controls the note values Stutter Edit 2 uses to create rhythmic edits. Rate allows you to set the speed at which your stutter pattern slides from the beginning to the end of your configured range, as defined by the blue Range control. The wider you set your Range, the more rhythmic variation you will hear in the stutter effect. From there, you have a few more options for creating a stutter.
Do you want a smooth stutter effect or a choppier, “gridded” feel? With the Quantize mode off, Stutter Edit 2 moves smoothly from the lowest to highest note values set by the Rate parameters. For example, if you choose 1/8 for the bottom of the range, and 1/128 for the top of the range, the Stutter’s length will slide between those two note values.
If Quantize is on, the plug-in will “lock” onto different rhythmic values as Stutter Edit 2 moves through the Rate control timeline, in accordance with the Mode and Step parameters.
Step determines how long Stutter Edit 2 stays on each of the Rate note values while moving through the timeline. After selecting note intervals in the Rate parameter, Modeaffects how the selected notes are played, and the order in which they’re played. The Mode menu offers a number of choices to change the manner of Stutter’s performance:
- Free ignores note values, instead holding whatever stutter length is closest to the progress of the curve. This can produce more jarring, atonal effects.
- Closest steps only among the values in the Rate parameter.
- Walk moves through the Rate parameter note values by moving up one note with each new step.
- Skip moves through Rate parameter note values in a pattern: up two notes, then down one note (or down two notes, up one note, depending on the curve direction in the TVM).
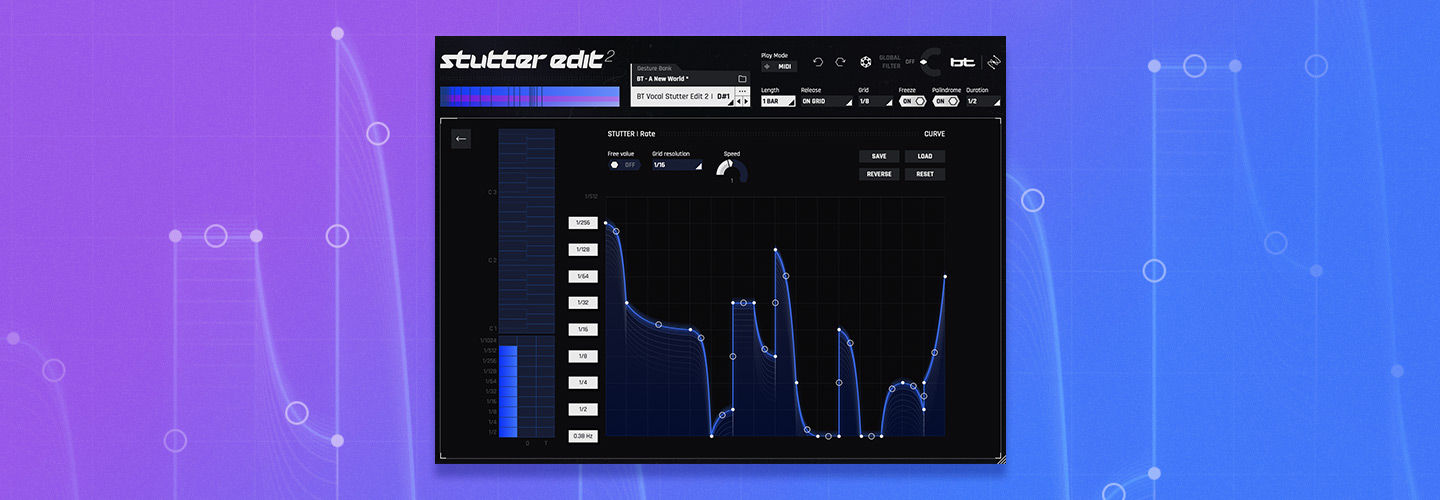
- Stagger moves through Rate parameter note values in a pattern dependent upon the curve direction in the TVM, or Time-Variant Modifiers—see the screenshot below.
- Random moves erratically through the Rate parameter values.
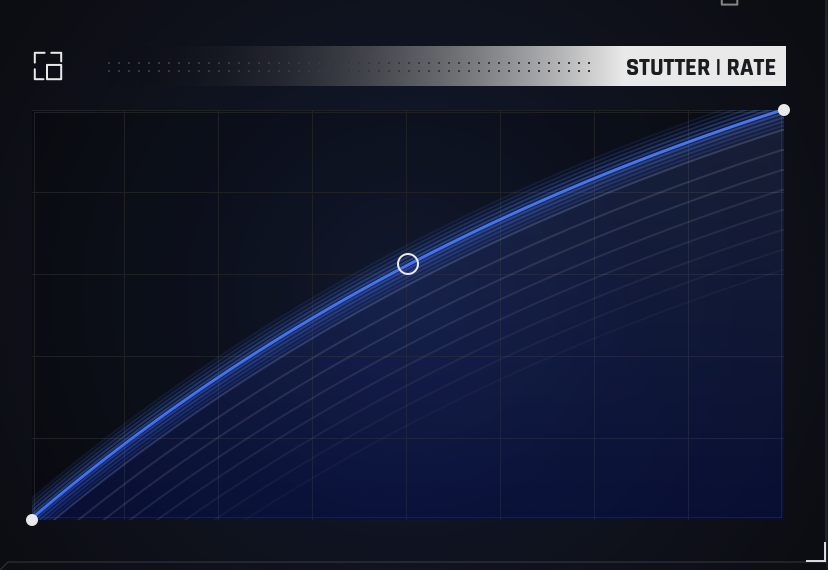
Time-Variant Modifiers are envelope curves that can be mapped to each individual parameter of Stutter Edit 2. This image displays the Stutter module’s Rate TVM, but the UI will display the envelope curve of any selected parameter.
The Stutter module is also equipped with a number of additional features that help you sculpt the shape and character of your Gesture, like Gate.
Gate changes the envelope of the audio sampled for the Gesture for unique rhythms, and Width determines the rate at which the repeating audio will be gated. The lower the number, the faster the repeating audio will be cut off. Finally, Tail sets the release portion of the gate, with lower values producing a choppier effect, and higher values extending the effect of the Gate.
The Buffer module in Stutter Edit 2
The Buffer module alters the way audio stored for playback through Stutter Edit 2 is performed. The Buffer Position is represented graphically as the L and R displays to the right of the Buffer enable button.
When observing these displays in the TVM, the left and right nodes determine where playback from the buffer begins or ends. The buffered audio’s left and right channels can be edited independently, or linked together by clicking on the Link button located between the L and R labels. You can also reverse the playback direction with the Reverse button to the right of the L and R Buffer Position displays.
Movement determines how Stutter Edit 2 chooses the Buffer Position from the Grid Range—more on that in a moment—in one of three ways:
- Slider moves smoothly between the range handles.
- Grid causes the Buffer Position to lock to the last grid point the timeline passes.
- Random enables the Buffer Position to come from anywhere between the range handles.
The Grid itself slices the buffer into pieces based on rhythmic values—sixteenth notes, quarter notes, etc.—with which the other Buffer Position controls interact. Next in the effect chain is Jitter, a highly-customizable module that adds an adjustable amount of offset to the Buffers. You can use the Edit button next to the Jitter button to display a number of adjustable parameters for tweaking the effect on a micro level. The Buffer section is then rounded out with three stereo image controls: Pan, Width, and Center.
Use effects for ultimate creativity
One of the most powerful additions to Stutter Edit 2 is the brand new Effects Section. This includes 11 different signal processors, each with a number of respective parameters that can be mapped to a TVM curve of your design. The best way to learn these is simply to dive in and get your hands dirty!
Experiment with Stutter Edit 2 as a performance and sound design tool
Now that we’ve covered the operation of Stutter Edit 2’s many, many modules and effects—that wasn’t so bad, was it?—it’s time to get into the plug-in’s utility as a live remixing tool, as well as a sound design powerhouse.
Stutter Edit 2 as a performance tool
Each MIDI note triggers a different Gesture, giving Stutter Edit 2 instrument-like playability which allows you to incorporate it into live performances. Turn repetitive sections, buildups, and breakdowns into interactive experiences for you and your audience!
As your audio plays, use your MIDI controller to jam along with Stutter Edit 2 and pick out some Gestures that catch your ear. You can also record everything you play to MIDI clips in order to edit them later on.
Stutter Edit 2 as a sound design tool
In addition to real-time remixing, Stutter Edit 2 can be used as a powerful sound design tool for creative music production. While short, fast-paced Gestures are generally more appropriate for live performance, you can also use Stutter Edit to transform larger sections of audio by playing more drawn-out sustained notes (a great way to use the new Auto Mode to loop and audition the Gesture instantaneously without routing MIDI!)—it’s an easy way to recycle old sounds to make them fresh again.
Stutter Edit 2: further learning
After spending some time with Stutter Edit 2, you’ll want to dive into the individual modules and tinker around for a deeper understanding of just how much it can do.
Choose a preset and go through your controller key by key to see which effects are triggered and how they work together. Listen to how your tinkering affects the Stutter Edit sound and use this information to build some next-level effects.
For more ideas on how to make the most of this plug-in's potential, be sure to check out our tutorials on getting started with Stutter Edit 2.
We can’t wait to hear what you come up with. Happy glitching!
