8 Common Audio Restoration Mistakes
With more recordings being created in sub-optimal spaces, audio restoration is becoming essential to the editing and mixing processes. Here are eight common audio repair mistakes and how to avoid them.
With more recordings being created in sub-optimal spaces, audio restoration is becoming essential to the editing and mixing processes. This means there are tons of opportunities to improve a subpar audio signal—but there are also unparalleled ways to mess things up more than ever before!
We’ve compiled a list of the most common mistakes in audio restoration. The list is geared primarily towards music operations, though post-production people may find useful tips as well. If you feel guilty of some of these, fret not: we all have been at one point or another. The important thing is to learn and move on. May this list provide one such learning opportunity!
1. Improper labeling and management of noise-reduced files
This is a nasty, potentially large problem masquerading as a minor hiccup. Any time you commit an audio-restoration tool to a track, be sure to do so only on a copy of that audio. Not just a copy within the DAW, but a whole new file. Never apply this processing to the original, and likewise, save the new track with a name that clearly indicates the processing you’ve applied (as in, File_Name.Date.RX_Dclick, File_Name.Date.RX_Dclick_Dnoised, etc).
It’s quite risky to do destructive editing on the original track since it’s possible you’ll have to revert to the original file later down the line: perhaps, in context, you’ve denoised too much and need to start again; maybe, after the mix is said and done, the sound design scheme doesn’t call for noise reduction after all; maybe certain phrases do, and other phrases don’t. All cases are possible, so it behooves you to give yourself the option.
Also if the tracks are not clearly labeled, you won’t know which is which, and you’ll spend lots of time auditioning files, guessing and second guessing which file is the appropriate one for the context. No. Better to save yourself the headache later on by being more organized throughout the whole process.
2. Over de-noising
This is the number one issue in audio restoration, I’d wager—especially for making speech sound more natural and presentable. Read these words carefully, and live by them: do not de-noise too much.
Too many podcasts, films, and other works of art are afflicted by over-denoising. How can I say this so cavalierly? Simple: I’ve heard the artifacts. I’ve heard them in TV shows, movies, on podcasts (the worst offenders), and in music. When you start to hear them, these artifacts are impossible to ignore. They are so weird that they have earned a nickname in the business: space monkeys.
Don’t afflict your dialogue track with space monkeys!
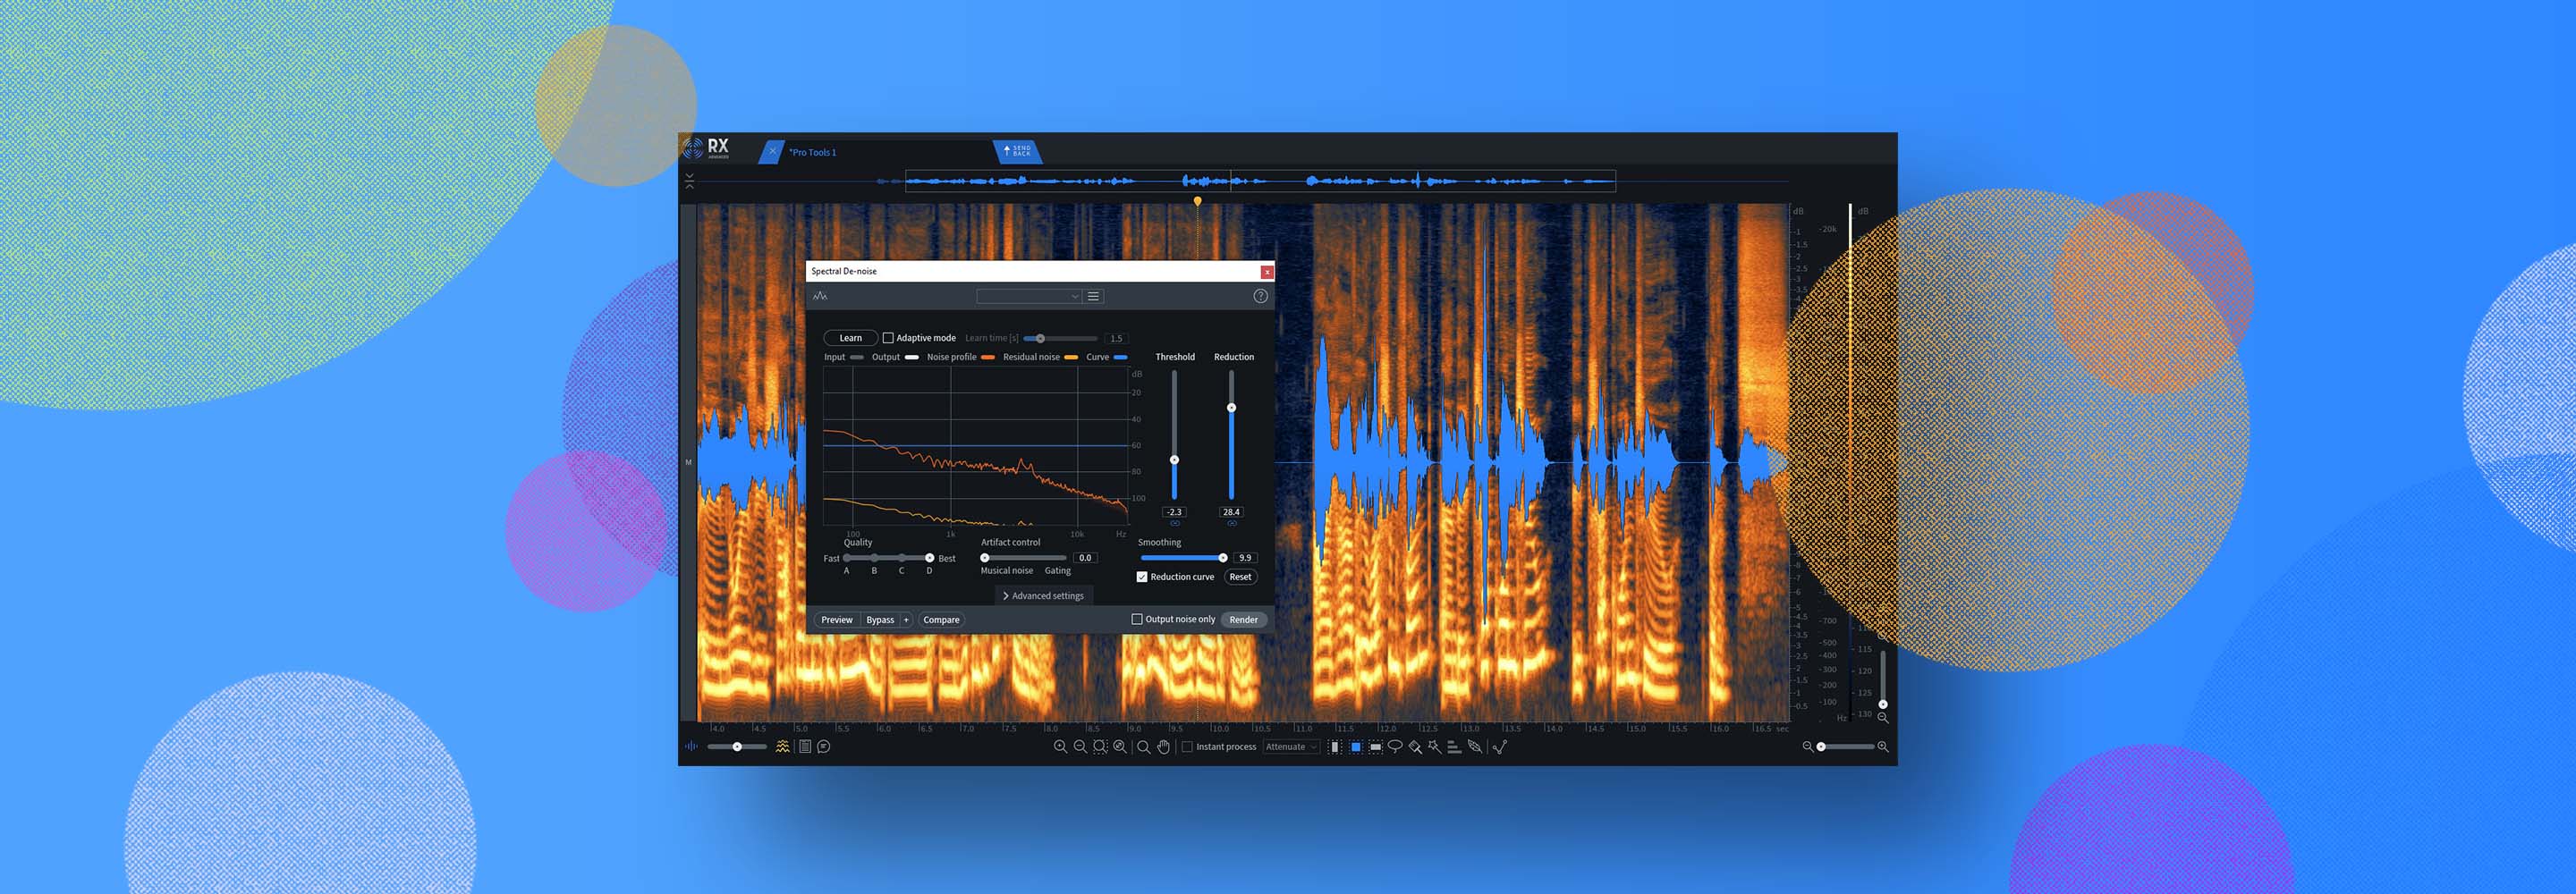
Here’s how you avoid the process: de-noise to a place where you notice significant artifacts, and then back off the reduction slider until you don’t hear the artifacts anymore. Then you should probably even back up some more!
Tune your ears: listen to sibilance, sounds that begin with a hard R, plosives, breaths, and fricatives; whooshing noises can be observed around these normal vocal phenomena. It’s not dissimilar to the ringing of a bad MP3 encoding.
You don’t want obvious artifacts in these signal because they belie the processing. Even to the lay-listener, they subliminally communicate a feeling of inferiority—a feeling of audio under construction. Such artifacts make you sound unprofessional, in other words. Also, they can objectively sound really, really bad, and might be an obstacle toward people enjoying your work.
Feel free to listen to the noise-only output of the module as a starting point, as it will give you a good idea of what you’re taking out. However, pair monitoring the noise-only output with the method mentioned above to make sure you’re not inducing artifacts.
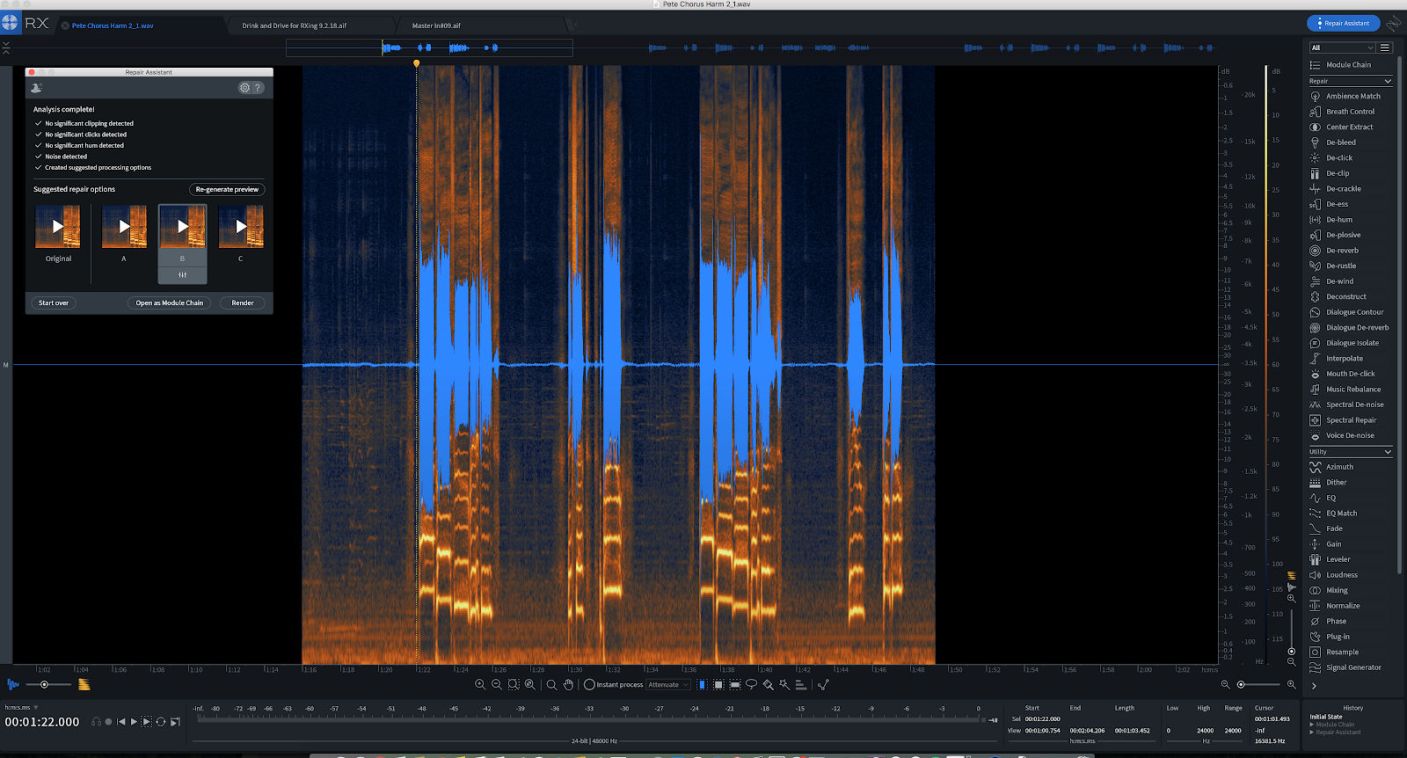
If you’re unsure how to go about eliminating noise issues tastefully, RX gives you a handy new Repair Assistant, which, among other things, provides three processing intensities (light, medium, or aggressive). This is an excellent shortcut for tuning your ears to what needs to be done within reason.
3. Improper use of background noise in the context of noise-reduction
Once a noisy vocal (or bass—or heck, even a noisy dobro, which recently came through my studio) is sufficiently denoised, it’s not enough to drop it back in. You must massage audio around it so that everything fits the context.
Say we’re talking about an acapella vocal phrase: if there are small amounts of ambiance petering in and out of each word, that could be very distracting. A bit of verb might hide the process.
Perhaps we’re talking about a line of dialogue: If there are trace amounts of atmosphere surrounding the line, you need to pick an appropriate room tone that gels with the noise left in. One can even get creative with this: an outdoor scene with obvious gusts of wind can make use of a well-placed zephyr to mask the occasional flare up of noise, especially if this noise couldn’t be reduced without artifacts in the first place.
4. Improper order of processing
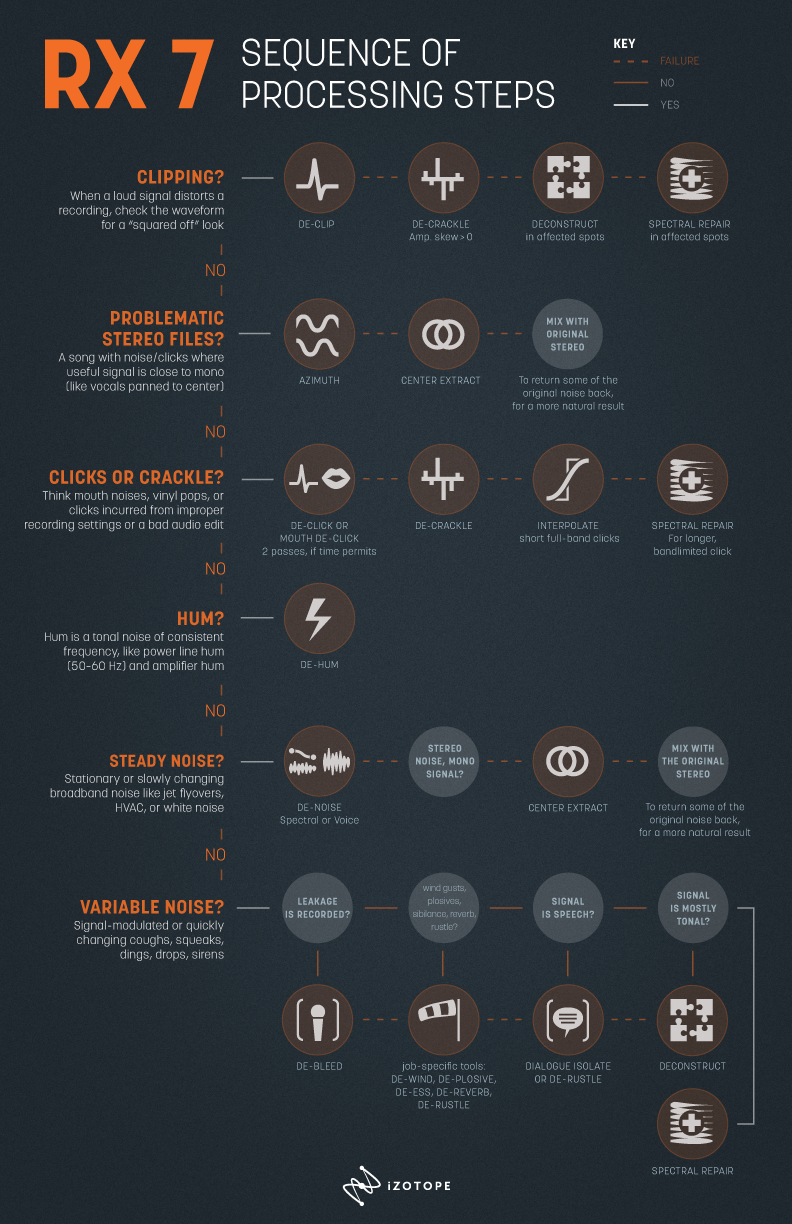
The order in which you implement audio restoration processes can gravely affect the result. For instance, if you had some tonal noise in the background—say a hum—it might not be so good for the noise-reduction algorithm, nor would the noise-reduction algorithm work as well for the hum. Likewise, removing something like a click could cause more artifacts if it’s already working with a noise-reduced signal.
In general, try to isolate tonal problems in a region first and massage those, followed by intermittent clicks, then crackles, then any leveling issues, and de-noising after that.
We suggest the following flowchart of processing steps for audio repair as a general guideline. Click here to open the chart in a new tab at full size.

5. Relying on broad-strokes processing
I’ve spent a lot of time teaching people in my circle how to use RX, and the most prevalent mistake I see, amongst noobs and old hands alike, is over reliance broad strokes processing, by which I mean piling on the processes without a subtle hand. It’s an understandable mistake: it seems easy to find the module that best corresponds to the problem, run audio through the mill in drastic measures, and hope for the best.
Friends, I’m here to tell you that this is not the way. As many tutorials will note, processes like RX often work best when used multiple times, at subtler values. In a difficult bit of noisy dialogue, you may be more successful reducing noise with multiple passes at different settings than you would with one heavy-hitting pass. You can better tailor the process each time to minimize artifacts, and thus, secure a more artful result.
Take something like a plosive, for instance: De-plosive, nine times out of ten, will do the trick. However, sometimes it does the trick—but then leaves an artifact, due to its surrounding material. Should you give up? No! You can select the resulting noise with the paintbrush tool, and then attenuate it or replace it with Spectral Repair; be subtle and surgical, and the work will pay off handsomely.
6. Failure to address issues within specific frequency regions
Sometimes you get a stubborn piece of noise that lurks in the corners of a given frequency range. It could be a siren that escalates from around 500 Hz to 1.5 kHz. It could be a random percussive noise that only exists from 1–7 kHz or so. Good thing, then, that RX gives you the ability to surgically choose material located within these small bands—even in a noncontiguous way!
Yet I rarely see people doing this when I’m showing them the ropes of RX. This relates to the broad-strokes problem outlined above: people are looking for quick ways forward, and to some extent, RX can give you just that. But for seamless, artifact-free correction, going in deeper pays off. All the modules can work within specifically governable frequencies if you use the paintbrush tool, the lasso tool, the wand tool, and others; it is a mistake not to make use of them. Try any tool from the Gain module to Spectral Repair on a frequency specific basis, and you’ll experience control you didn’t realize you had!
7. Not using software in standalone or AudioSuite modes
RX allows for real-time use with many of its modules, but sometimes a track is too unruly for processing in real-time. Perhaps the offending noise varies in intensity, pitch, and direction (if stereo).
Also consider that, depending on your DAW, restoration software can introduce small latencies in real-time processing. This is a no-go if you’re working on post-production projects where sync is the most important factor.
Thankfully, RX exists as a standalone application that addresses audio restoration issues in powerful ways, allowing you to hone in on specific durations of time, or specific frequencies, or individual channels. Processing such audio offline also circumvents sync issues, I find. Most DAWs have ways of communicating with RX’s standalone app, so you should be able to get around to the application at all times.
There are other region-specific ways of employing audio restoration in shorter-lived problem areas. A DAW like pro tools allows you to AudioSuite specific regions, which is one such workaround, with Dialogue Isolate, De-rustle, Music Rebalance, and Breath Control all available as AudioSuite plug-ins in RX 7.
8. Working too quickly
Time is of the essence against a deadline. And sure, sometimes you don’t have time to go slow on a noisy dialogue track. But it really pays to make that time.
Take the Voice De-noise module: you could batch it all in one go, but you may get a stray space monkey here or there. Batch the whole thing in one go and you might have to compensate for a whole host of problems later. But if you de-noise phrase by phrase—tuning the learn function to the noise around each phrase; adjusting the parameters to best suit each phrase—you’ll get a more seamless, artifact-free results.
Also, as a side note: try to avoid use the De-click or Mouth De-click modules on a whole track—it’s not practical, and it may be triggered to ruin otherwise good audio. Go bit by bit and reduce the clicks where you can manually.
Conclusion
The metaphor of a double-edged sword applies quite well to audio restoration. It has the power to excise unwanted noises with great accuracy and little side effects. Abuse this tool, though, and you could wind up with a product far worse than where you started—or even worse: a destroyed original file, with no hope for going back to the source to start again.
So be careful as you trudge the happy road of audio-restorative destiny, and remember what Spiderman said: “With great power comes great responsibility.”


