6 Ways to Use a Low Pass Filter When Mixing
From a single control, low pass filters give us a great deal of power over the tone and feel of our mix. Get tips for when to employ them in a session and how to listen for telltale signs of over-filtering.
Audio filters are often used to remove specific frequencies and shape the tone of an audio signal. But how do you go about using them effectively in your production? In this tutorial we’re exploring how to use a low-pass filter, a common filter EQ used in mixing that removes high-frequency sounds from an audio signal and can bring clarity to your mix.
Follow along with this tutorial using a free demo of iZotope


Neutron
What is a low-pass filter?
A low-pass filter (also known as a high-cut filter) is a type of audio filter that is used to remove high-frequency sounds from an audio signal. It is called a low-pass filter because it allows low-frequency signals to pass through, while attenuating (reducing the amplitude of) higher-frequency signals. If you’ve been around a DAW, you’ve doubtlessly seen a low-pass filter in the wild.
This is how to set a low-pass filter, demonstrated in iZotope Neutron.

Example of a low-pass filter in Neutron
Don’t want to hear anything above 5 kHz? Add a low-pass filter EQ, and watch the frequencies fall off steeply or sharply, depending on how you tune the filter’s slope, pictured here.

Slope parameter of a low-pass filter in Neutron
Given that a low-pass filter chiefly affects the highs—and a high-pass filter chiefly affects the lows—it’s pretty easy to get these two types of audio filters confused. Just remember this: a low-pass filter allows the lows to pass, eliminating high-frequency material as need be. A high-pass filter allows the highs to pass, eliminating lows as need be.
Now that we know what a low-pass filter is, how do we use it? How do we know which frequencies to set it to, and how steep to set the slope? That, of course, depends on why we’re using the low-pass filter.
1. Remove unwanted frequencies
Low-pass filters are fantastic tools for dealing with problematic high-frequency issues, such as hiss from a noisy recording, unwanted resonance from badly miked guitars, and things of that nature.
These kinds of grungy degradations might not sound like much on their own—but remember, the mix will see an awful lot of treatment on its way to the master.
Let’s listen to a bass part with some distortion from virtual pedals and amps.
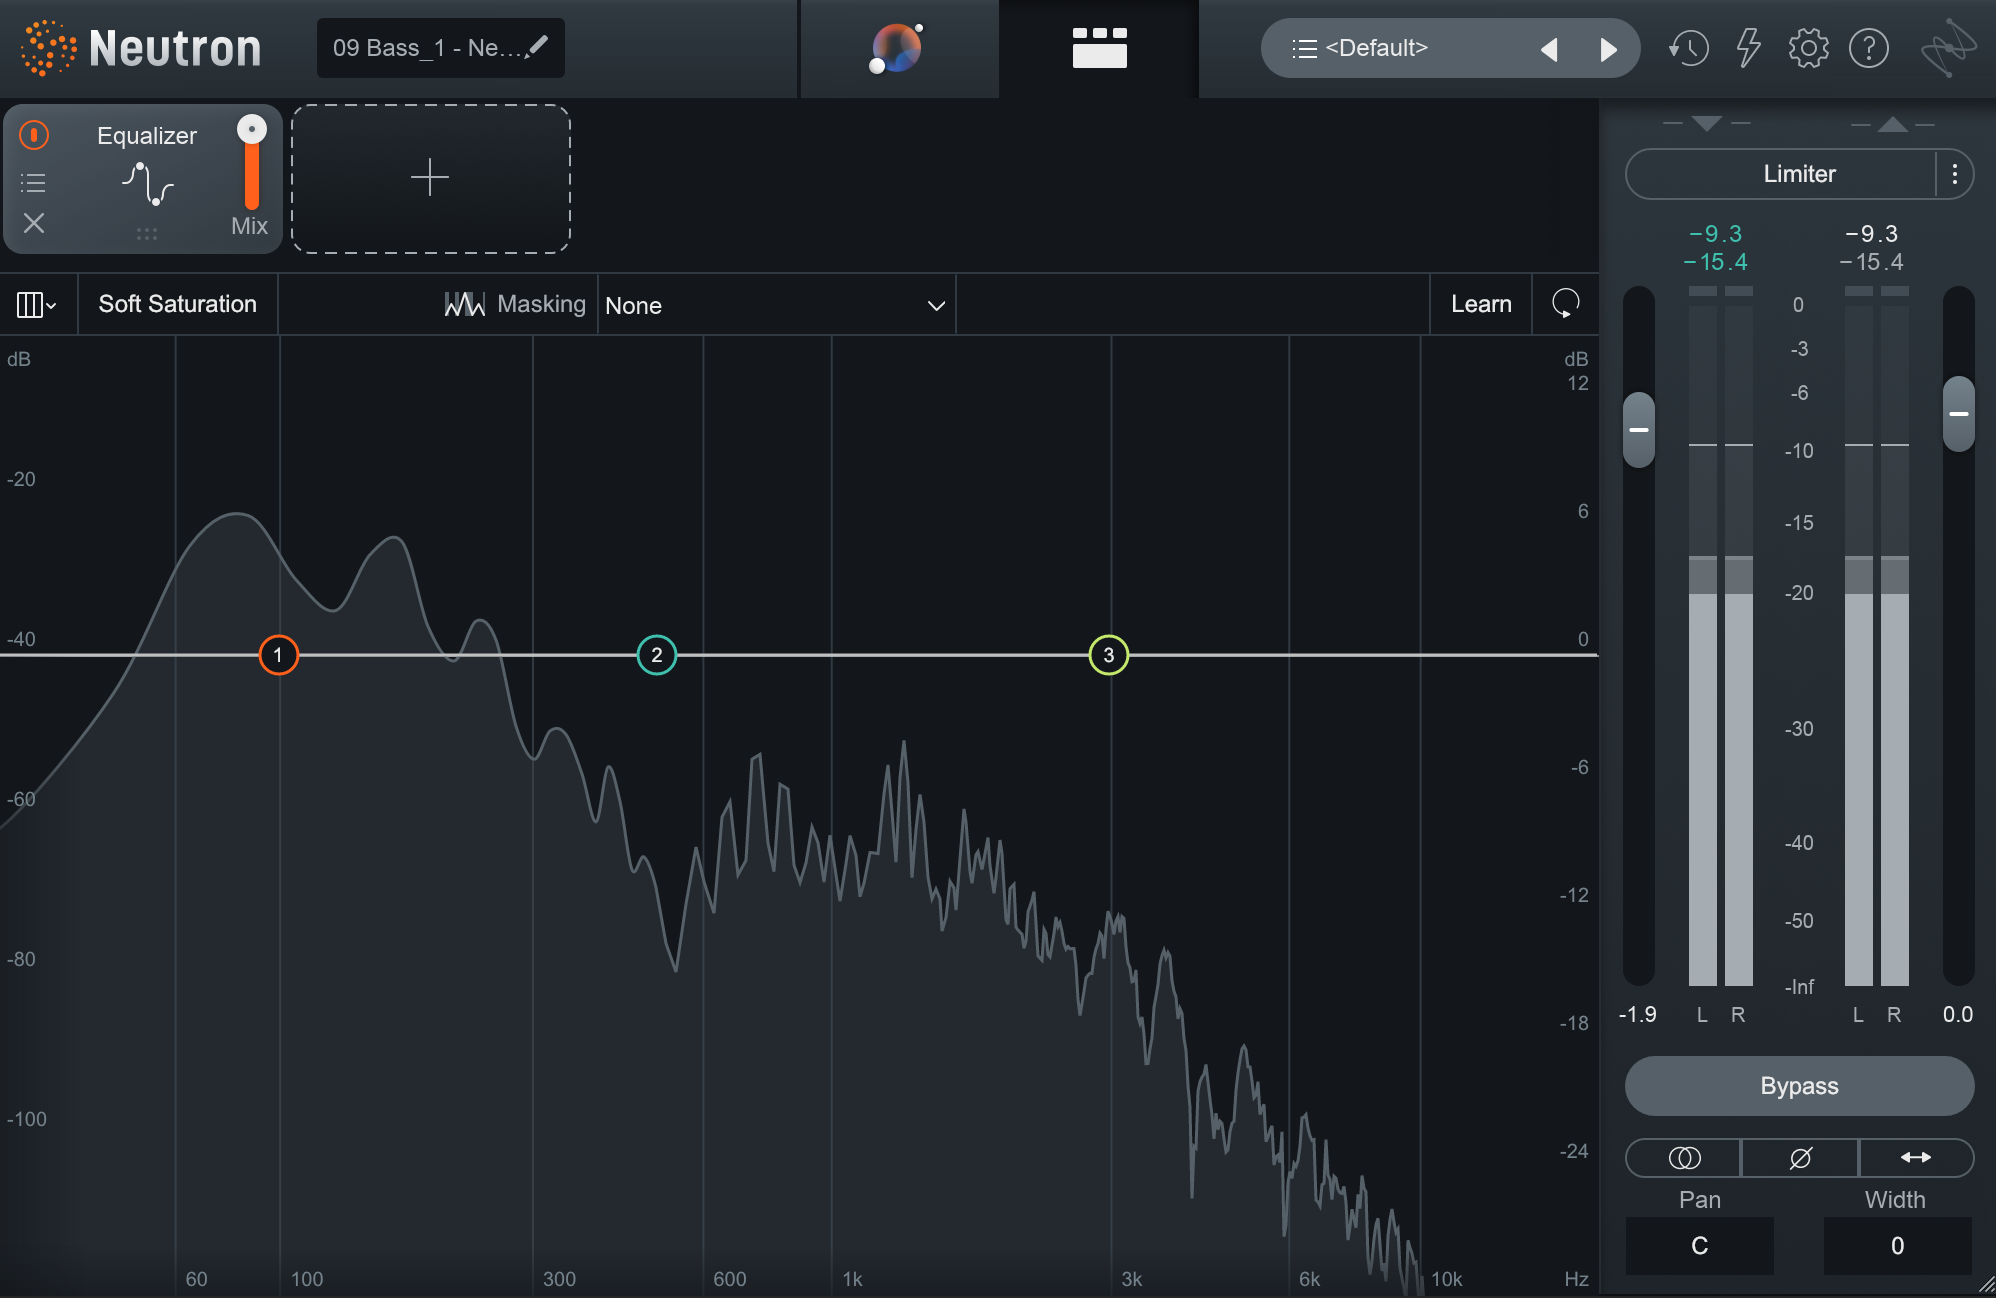
Frequencies of bass part with distortion
This grungy part might see level boosts, compression, saturation, sub-mix compression, and then a further level boost in mastering. Each of these processes will bring the high end into sharper focus. So, that barely present 6–10 kHz range might wind up rubbing against vocals, drums, synths, and more.
Better then to low-pass what we don’t need at the outset, like so.

Distorted bass with a low-pass filter
Now we don’t have to worry about those unwanted high-end frequencies getting amplified later in the mixing and mastering stages by further processing.
2. Create a sense of depth
As a mix engineer, we want to create a mix filled with depth—a sense of physical distance between the front and back of the soundstage.
Think about the way we perceive sounds in our daily lives: the further away something is from us, the less bright and less loud it is. We might struggle to hear our own thoughts when we walk by city traffic, but find the motors and horns blend into a more controlled tone a block or so away from the action.
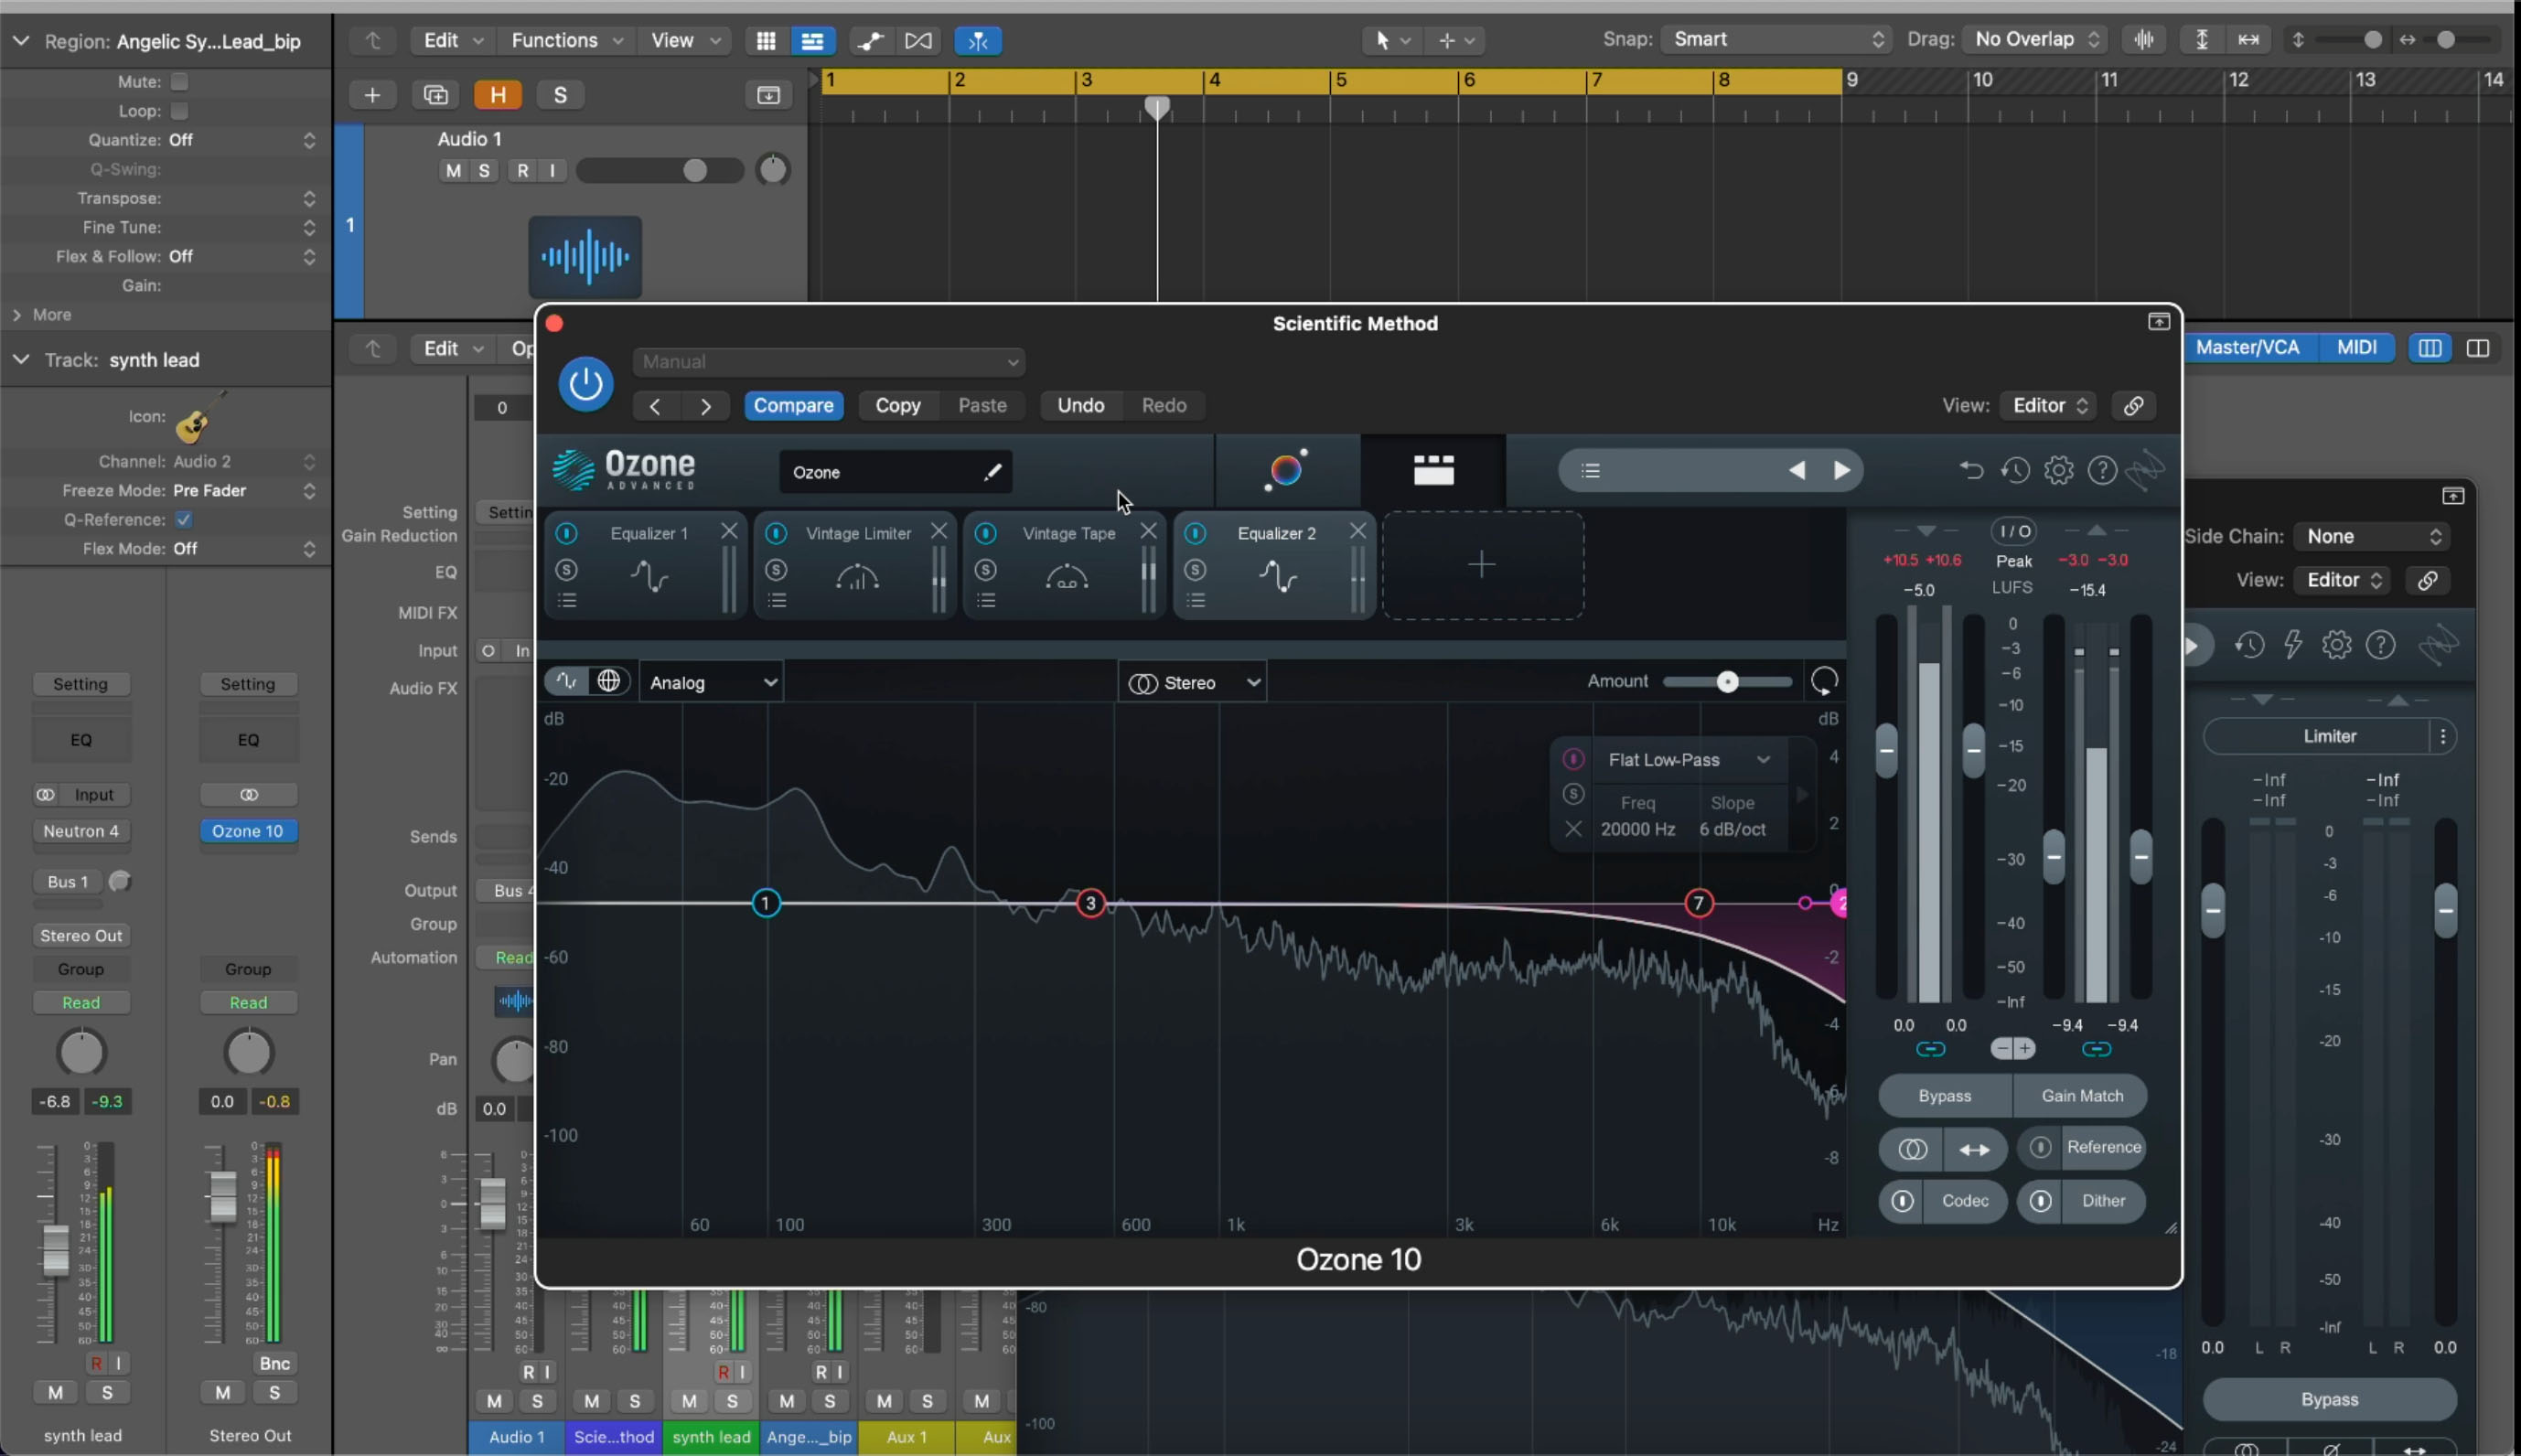
This same idea can be brought into the studio. By filtering off the top end and turning down the level of instruments, we push them toward the back of the mix. Observe in this video how to create more depth in your mix by implementing a low-pass filter with iZotope Ozone in the video below.
Generally speaking, we usually keep vocals, drums, and guitars further up front, and percussion, pads, and keys sit a little further away. This is not a hard and fast rule of course.
3. Reduce frequency masking
Sometimes instruments clash. Think about a drum kit and an acoustic guitar: These two instruments seem like they might serve completely different functions. However, they can compete for attention in the treble range, particularly when an acoustic guitar player strums aggressively; such playing often conflicts with the hi-hat or cymbals.
Here, we can use low-pass filtering to help one instrument move out of the way of another. I like to ask myself, which instrument is the winner, and which is the loser? I do this while rubbing my hands together and laughing maniacally, but you don’t have to; just make the determination and use a low-pass filter on whoever you deem to be the loser.
The problem of frequency masking becomes even more of an issue when vocals come into the picture. A project with multiple sweeping synths and vocal layers will often sound cluttered, as all of these elements are competing for the same frequencies.
A beginner might try to fix the problem by turning up the top-end of the vocals so they stand out—but this can lead to an overly-bright, ear-fatiguing mess.
In these cases, you might find it better to low-pass the trebles on sounds that don’t need as much emphasis. If what you like about a synth track is going on in the mid-range, turn down those highs so the vocals come through more easily. Crispy snares can also conflict with vocals, and might serve the overall groove better when slightly muted.
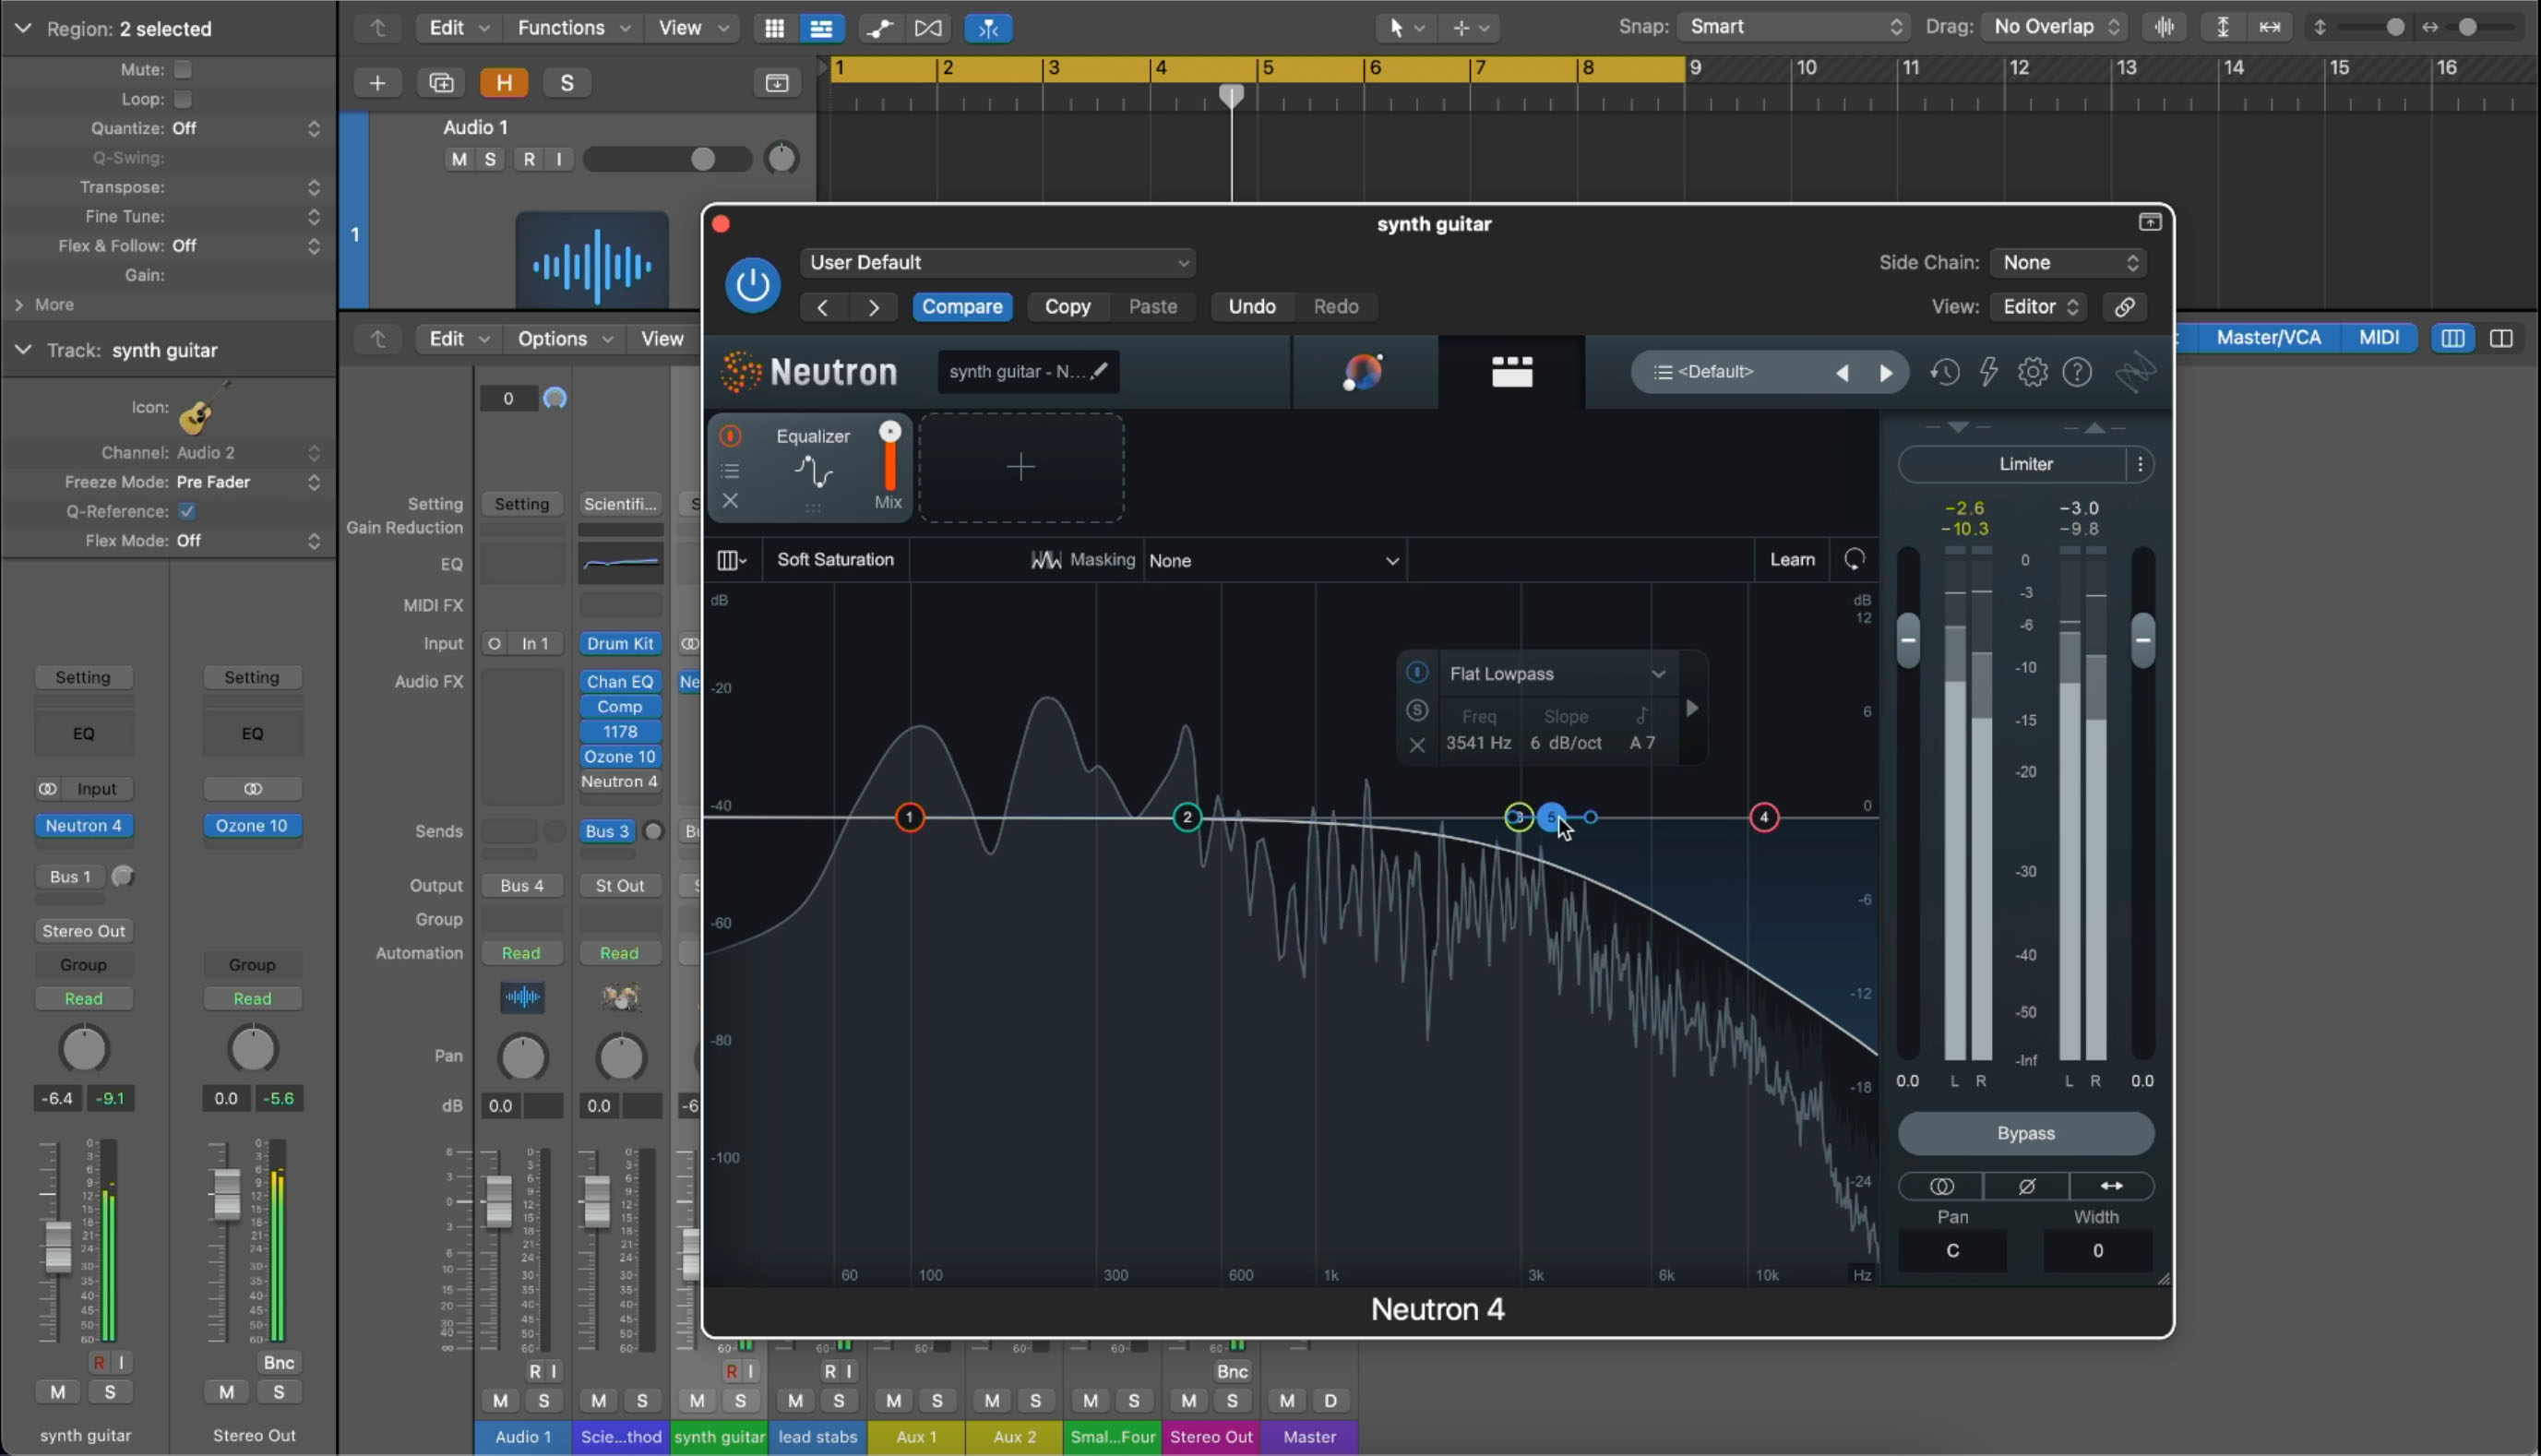
Again: pick the element you want to keep bright, and play around with the others, as demonstrated in this video.
4. Add clarity and bite to your instruments
There are times when you would like a pointed, better-defined sound for a particular instrument in your mix, and this can be done using a low-pass filter. Neutron has two kinds of low-pass filters: flat, and resonant. I’ll show you the resonant one below:
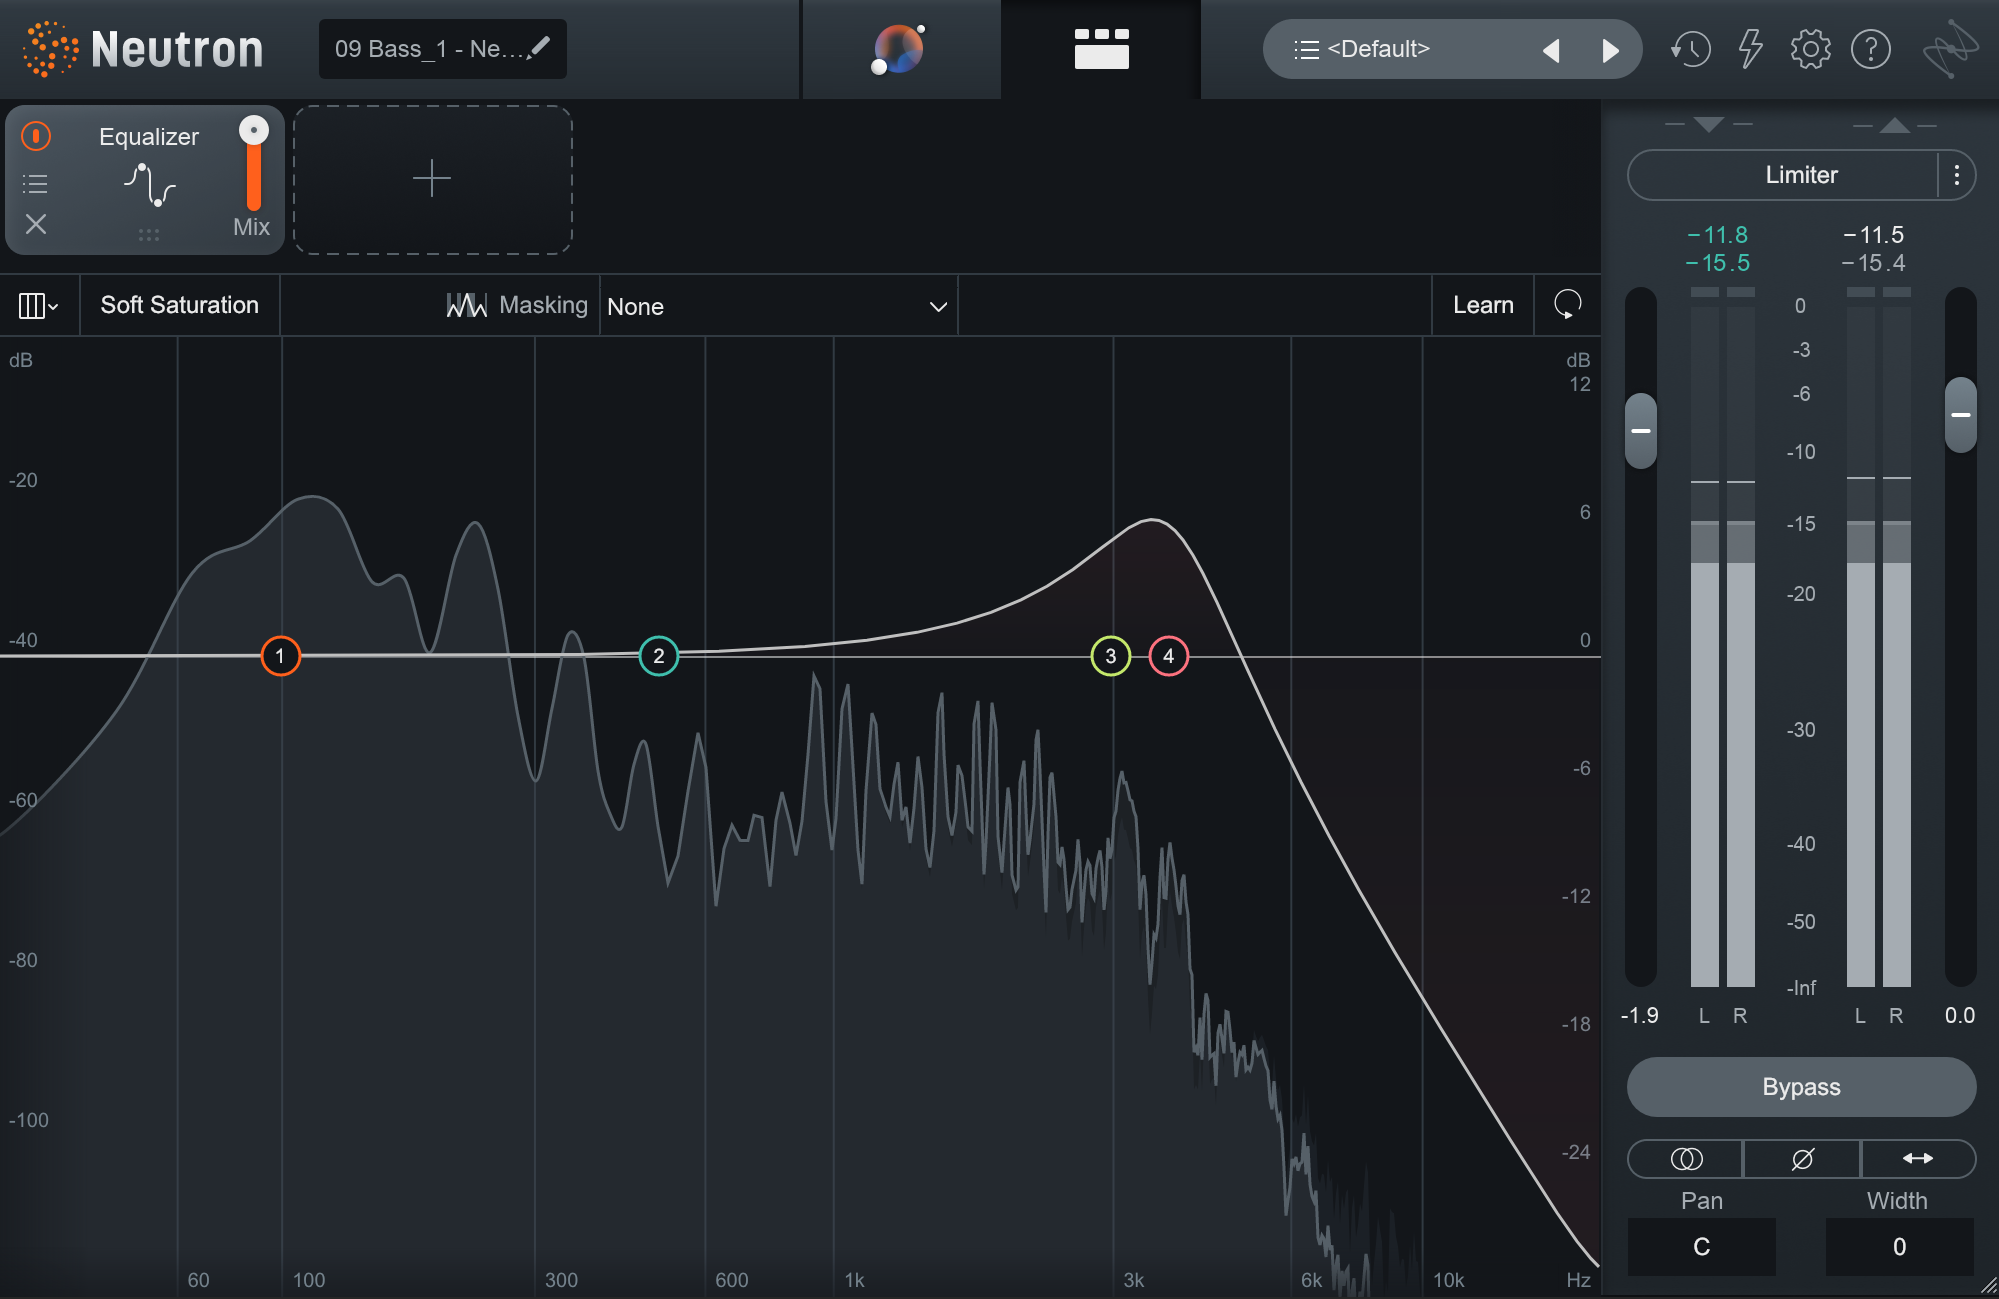
Resonant low-pass filter in Neutron
The resonant low-pass filter actually adds a bit of high-end cut right before the slope. In fact, the steeper the slope, the more you’re boosting before the roll-off. This type of filter can be quite helpful in adding a fine point to your sound—a kind of clarity that won’t rub against other high-frequency elements.
Let’s take our bass from before and put a drum loop behind it, like so:
The bass is a little dull here, but simply adding highs will conflict with our compressed cymbals. How about a resonant low-pass filter?
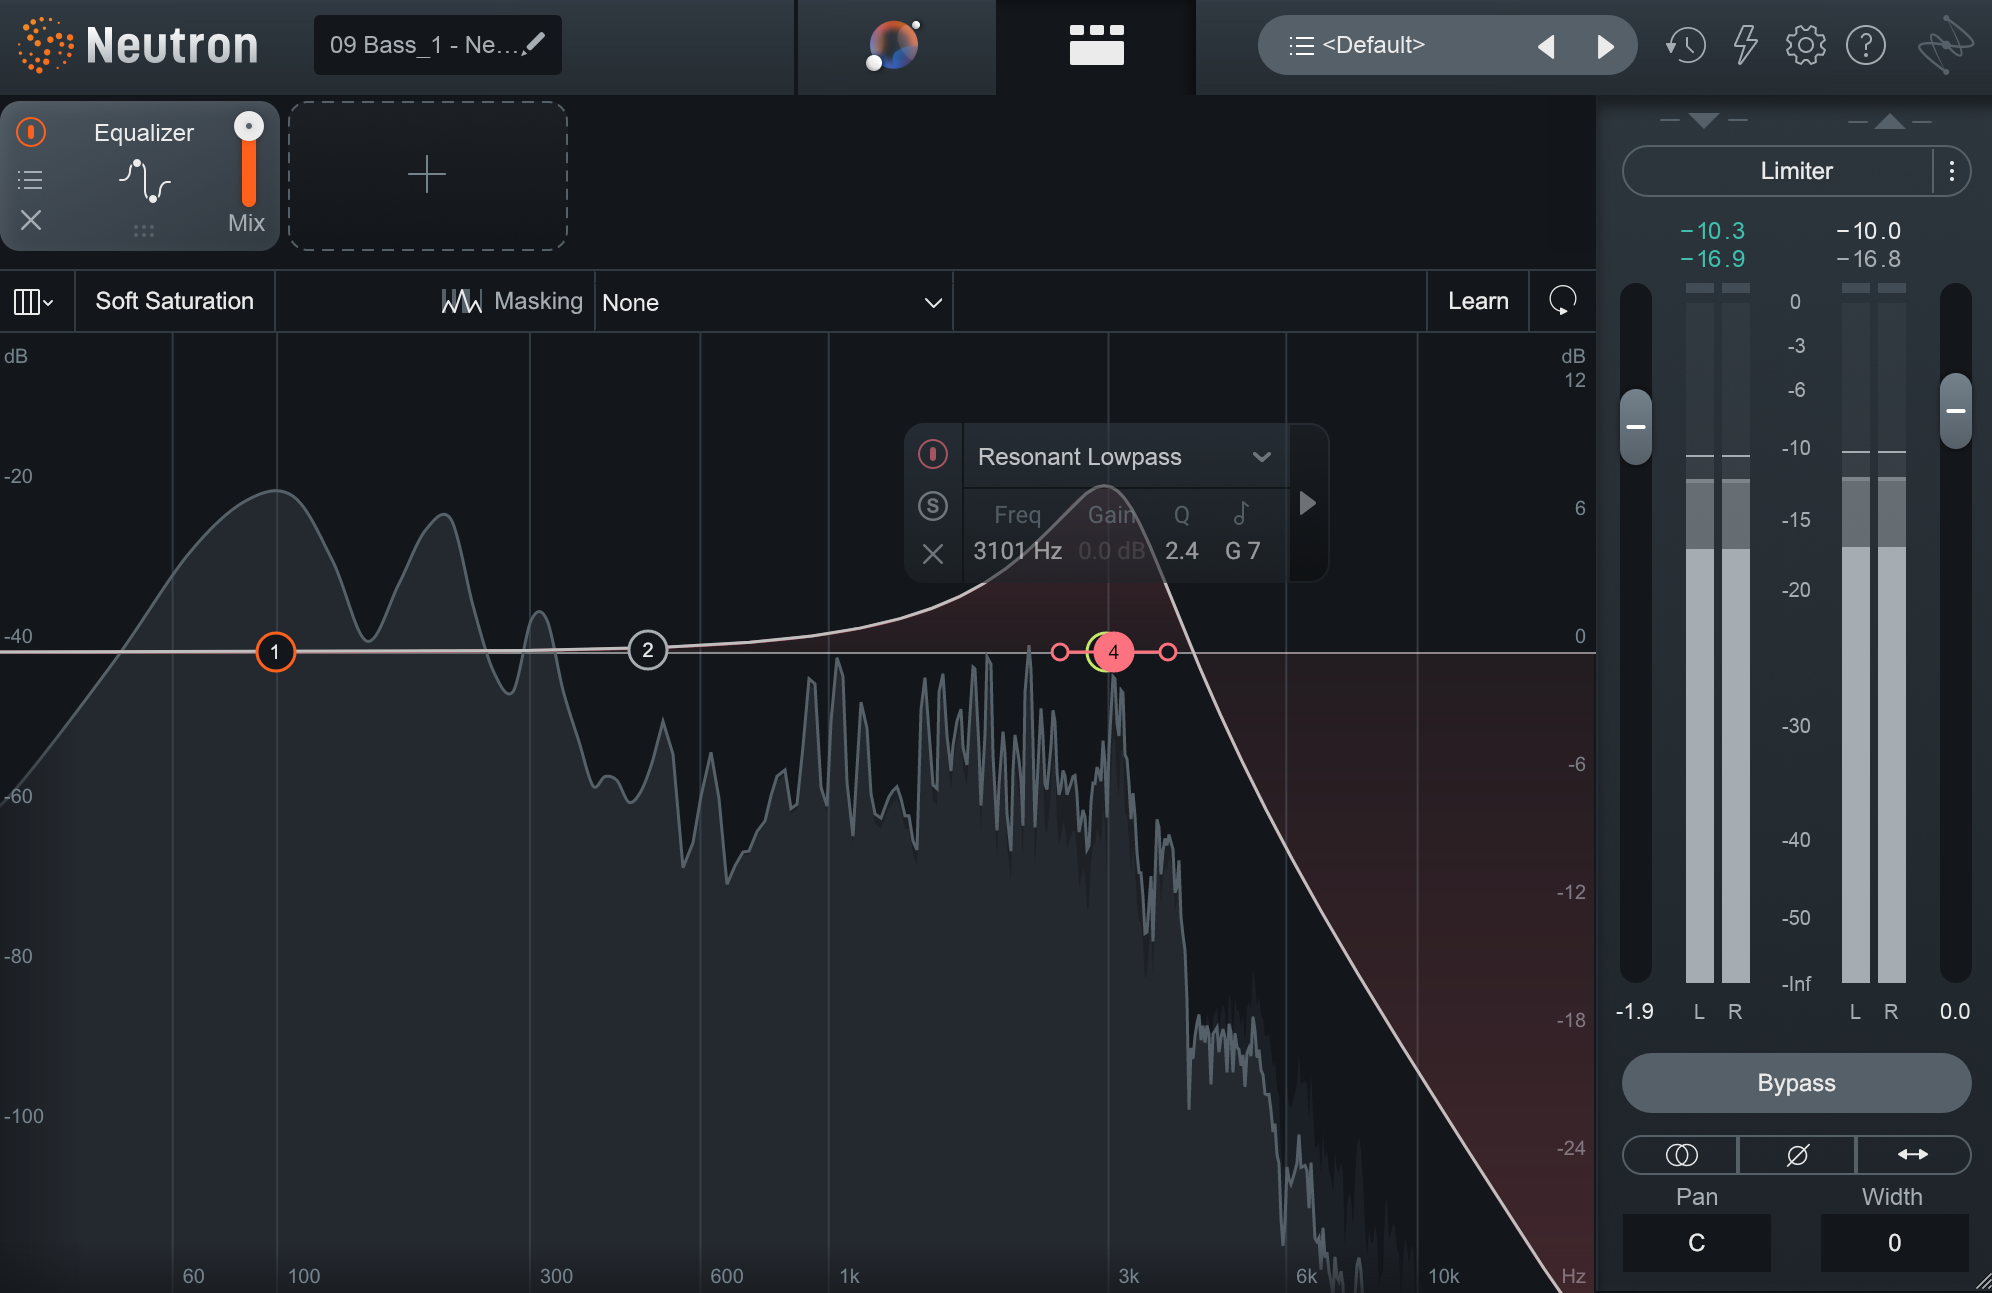
Resonant low-pass on bass
Now our bass sounds more lively, with better definition in the mix. Try it yourself on instruments that need a bit of high-end cut, but not too much aggression up there.
5. Create interesting moments
We sometimes get songs that need a little spice in the arrangement department. Maybe the second verse is a carbon copy of the first. Maybe the bridge feels just like the chorus.
In situations like this, we can use low-pass filters in a more creative way, enhancing the arrangement in the process.
Let’s take our previous example and double the length of the phrase.
That’s pretty flat and boring after a while. However, if I add a rather aggressive low-pass filter the first time round on both the drums and the bass, we get an infusion of energy and a moment of arrival.
Definitely be in communication with the band or the artist about decisions like this—it truly works best when they trust you.
6. Refine your effects buses
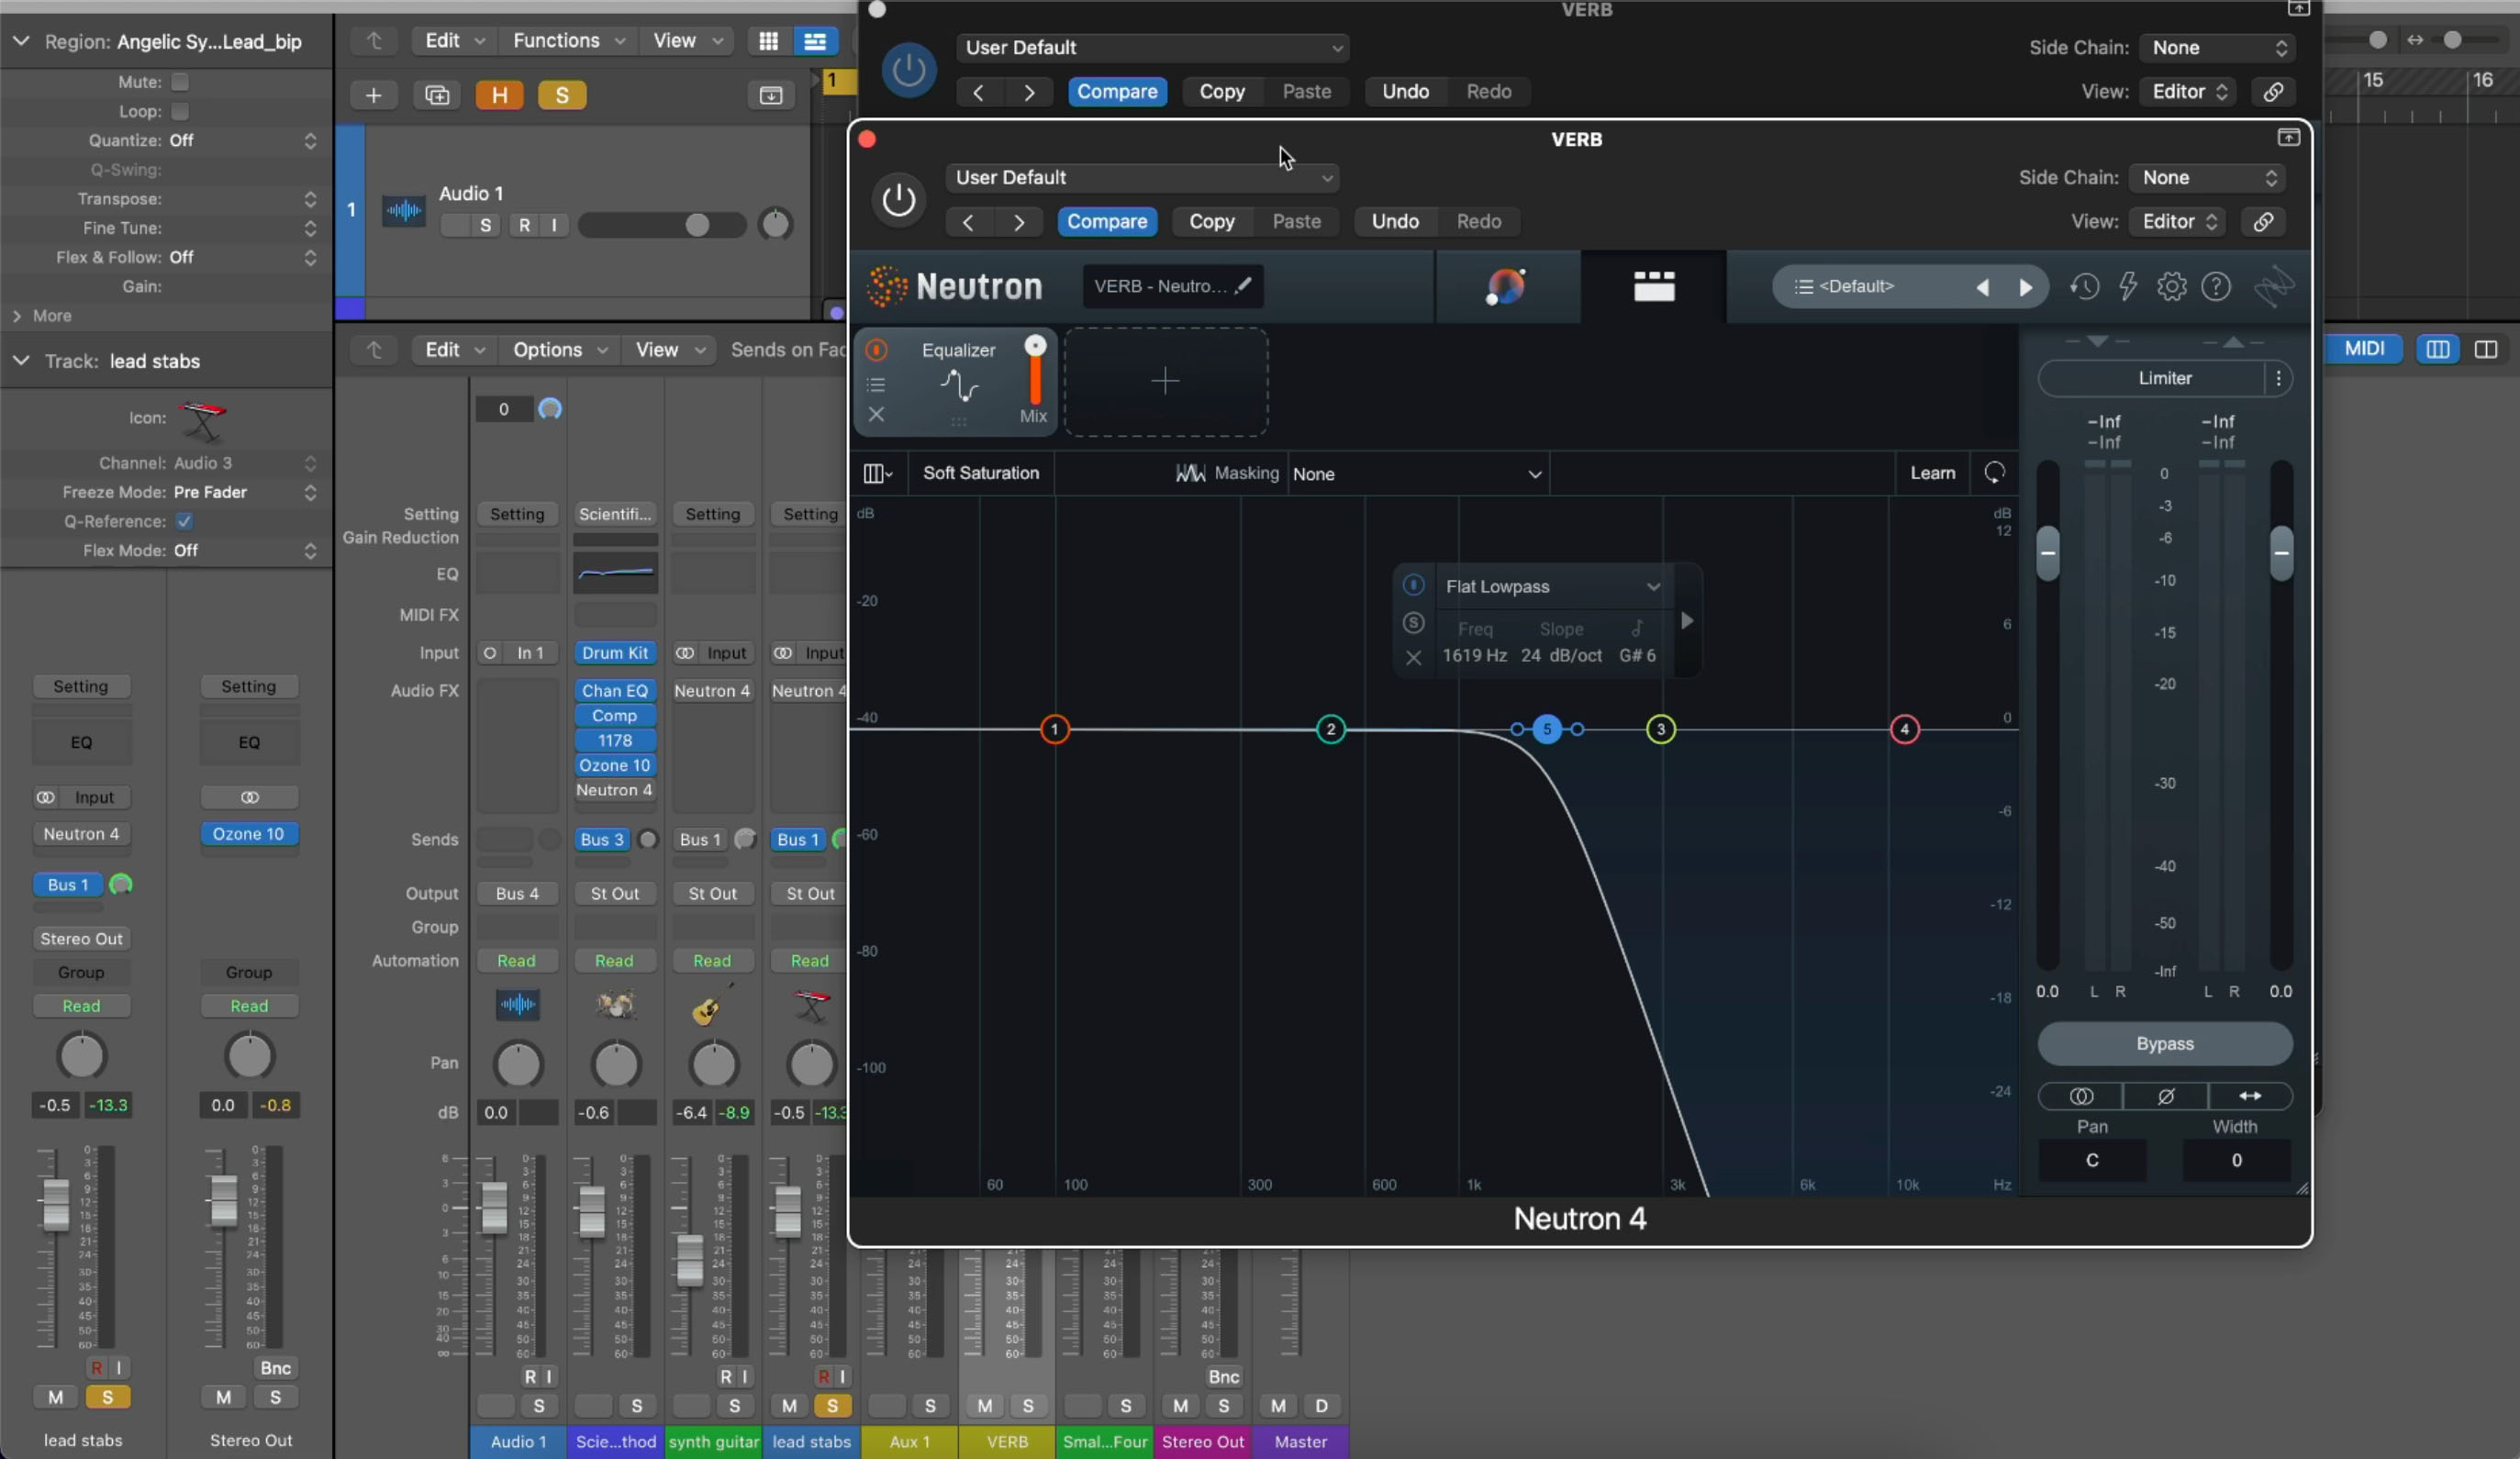
We often use mix buses for applying delay and reverb to instruments. Here you can see that the vocal feeds the reverb, which we can now blend into the mix however we see fit. We are in a perfect place to control the volume of the affected track.
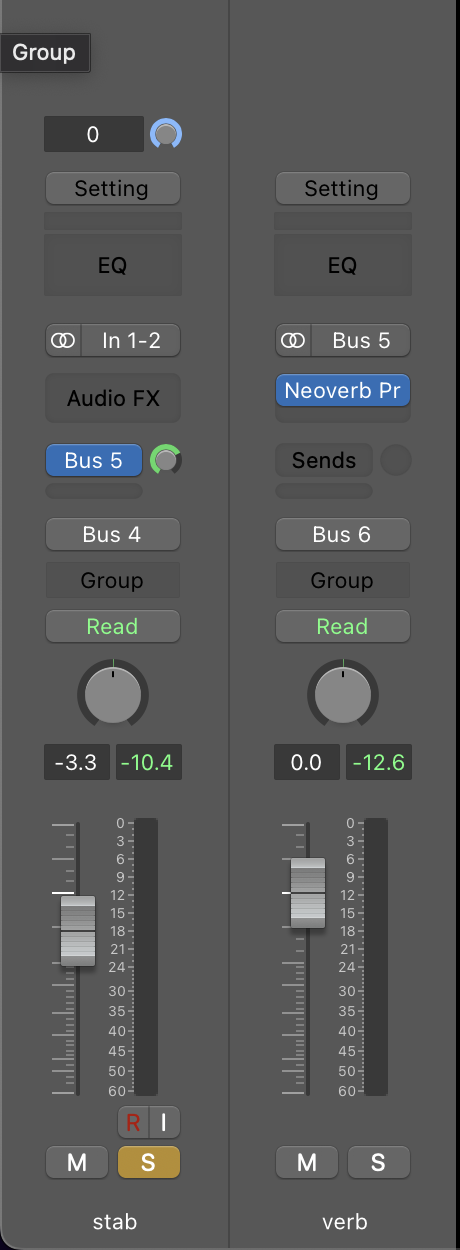
Bussing in Logic
Here you can see that the vocal feeds the reverb, which we can now blend into the mix however we see fit. We are in a perfect place to control the volume of the affected track.
But there are other elements besides volume we ought to control—especially once these elements have fallen prey to the washy amplification of a reverberation plug-in. A bright and brash vocal fed to a reverb will result in an overtly brash and bright effect. This effect might be too much for the mix itself.
This is where low-pass filters can come to the rescue again. Simply apply a low-pass filter either before or after the reverb, and we can now control the high end excitement.
Keep in mind that you have options here. You can introduce a low-pass filter before the reverb, or slap it on after. It could very well sound different, depending on the reverb. Let's take a listen to what that sounds like in the video below.
Don’t let the low-pass pass you by
Now you see how valuable a low-pass filter can really be to create clarity in your mix. If you want to learn more about filtering—or equalization in general—I encourage you to read about how to use a high-pass filter and gain a deeper understanding of equalization (EQ)in mixing.
And if you haven't already, download your free demo of iZotope


Neutron
