
5 Tips for Mixing a Better Chorus
Looking to make your chorus stand out? Learn how to create contrast between similar sounding verses and choruses, what plug-ins to use, and when to incorporate creative effects processing into your chorus.
All paths lead to the chorus, well, at least they usually do. A chorus can be so many things, but it is often the part of the song you want the audience to remember, sing along to, or be used as a familiar and emblematic place of the song to return to—usually twice, maybe more! For the sake of this tutorial, let’s say that the chorus is an important moment you want to direct attention to, as well as differentiate between previous and subsequent sections of your song.
From a songwriting perspective, you’ll use different chords, notes, and lyrics to make that obvious. From a production and engineering standpoint during the mixing stage, we can cultivate and highlight a unique sonic aesthetic, as well as employ a variety of engineering ideas to make the chorus count.
Mix a better chorus by:
- Keeping your mix organized
- Leaving headroom
- Being thoughtful when arranging and editing
- Using audio effects like reverb or distortion to create impact
- Automating panning to make a chorus sound wide
- Bonus tip: implementing a master boost
Follow along with this tutorial using iZotope plug-ins, including


Neutron


Insight 2


Neoverb


Music Production Suite 7
1. Mix organization can help you make a better chorus
Regardless of what you plan to do to make the chorus stand out in the mix, there are few ways you can set yourself up for success. Staying organized is really important. Clearly label your tracks, and make sure you know where everything is. I like to organize from top to bottom with groups of similar tracks, and within that, their order of appearance in the song.
Sometimes, it can be useful to snip and divide up one track into two or more tracks between sections. For instance, if a guitar continues from the verse into the chorus, but an effect pedal was kicked on for the chorus, it can be easier to just move the chorus section onto a new track. Say for this example, you were going to want to automate an EQ, pan, and volume. Well, now there’s no extra time automating that single track, just put your settings on the new track for that certain section. This will also make it easier to make changes down the road instead of fumbling with layers of automation between sections of the song.
2. Leave headroom for your louder moments in the chorus
When you start to make a balance of your mix, make sure to leave yourself plenty of headroom on your master bus! It might be nice to set your balance at a point of the song where the majority of the arrangement is happening, and even in a louder moment, to see how much headroom you have.
I also like to have a VCA assigned to all of my outputs to my console, which if you’re just in the DAW, would be to your master fader. That VCA will act as an attenuator to pull back anytime I need an extra bit of wiggle room…which might even be early on! Being aware of your headroom will allow you to make a volume jump up into your chorus and have plenty of mobility for moment making with the arrangement you are working with. Using iZotope’s


Insight 2
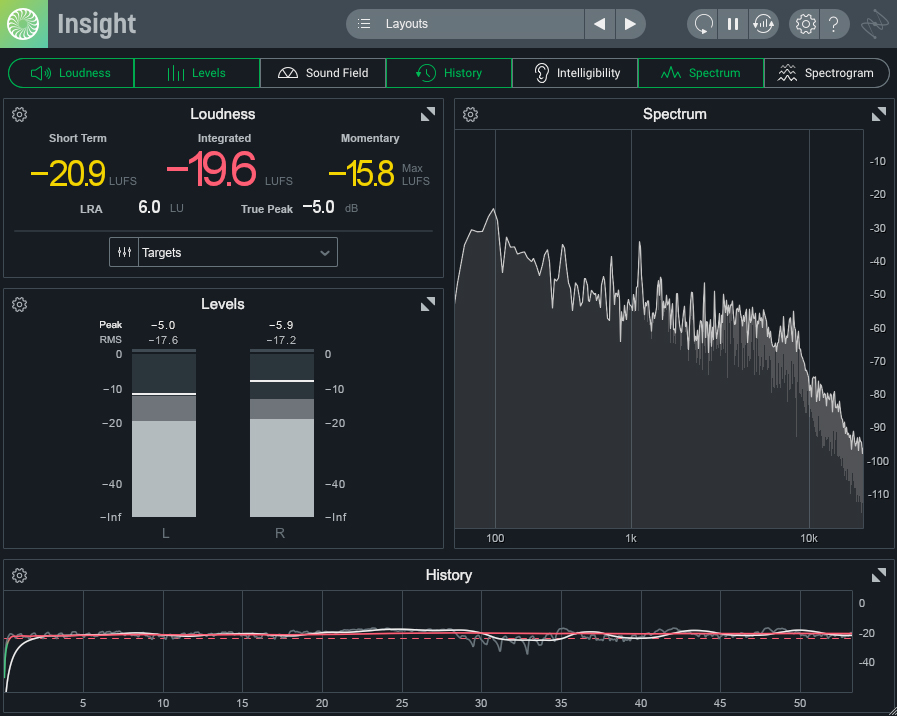
Use Insight on your master bus to watch metering
3. Thoughtful arranging and editing can make the second and third chorus special
Let’s say your song goes intro, verse, chorus, verse, second chorus, bridge, third chorus, outro. If you have involvement in the songwriting and arrangement (choosing which instruments and parts go where), you can make some easy choices to make the chorus stand out in the mix. If we have a standard band arrangement of drums, bass, guitar, and vocals, we can think of something new to put into our chorus to make it stand out.
A keyboard pad or counter melody, some percussion, vocal harmony, or an additional guitar might be what you need to achieve lift off and differentiate the verse from the chorus from an arrangement perspective. If you don’t have involvement in the writing and recording, but you have a lot of tracks that go through the whole song, you could play with cutting out redundant doubles or less crucial tracks in the verse, and having them come back in through the chorus.
An easy way to arrange a song is to give the chorus a little something extra, but what happens when we get to the second, or even third chorus?
Again, if you’re in the writing and recording process this might be easier when it gets to the mix, but if the folks who made the song gave you (the mixer), a lot to work with, and some creative license (which you can ask for!), you can employ some of the same ideas about editing the arrangement I talked about above.
For example, let’s say there’s a vocal harmony that goes through every chorus, but not a lot of difference is happening between the first and second chorus. That harmony helps make the chorus vocal stand out and make it special, but it happens all the time and the song feels a bit redundant. You could try perhaps, cutting it out for the first chorus, bringing it in on select lines on the second chorus, and then leaving it in the whole time for the third. This idea could be rearranged and played with for just about any track on a song with a similar issue.
If the song has reached the mixing stage and still feels a little flat or repetitive when it gets to that second or third chorus, try cutting any of the choruses in half, or take off a repetition of the chord cycle, and see if the flow is more exciting!
4. Use audio effects like reverb and distortion to make an impact with the chorus
Using a new or modified effect when you get to the chorus is a classic and cool way to give the chorus a unique vibe. If the chorus is getting “bigger” (as it often does), the answer can be as simple as changing your main vocal reverb to something a bit longer. Try adding a bit of extra pre delay, brightness, in addition to your decay in


Neoverb
Another reverb idea: If there’s a drum fill that really stands out in the chorus, maybe make a new instance of Neoverb and send it to that verb just for that moment to make something new happen.
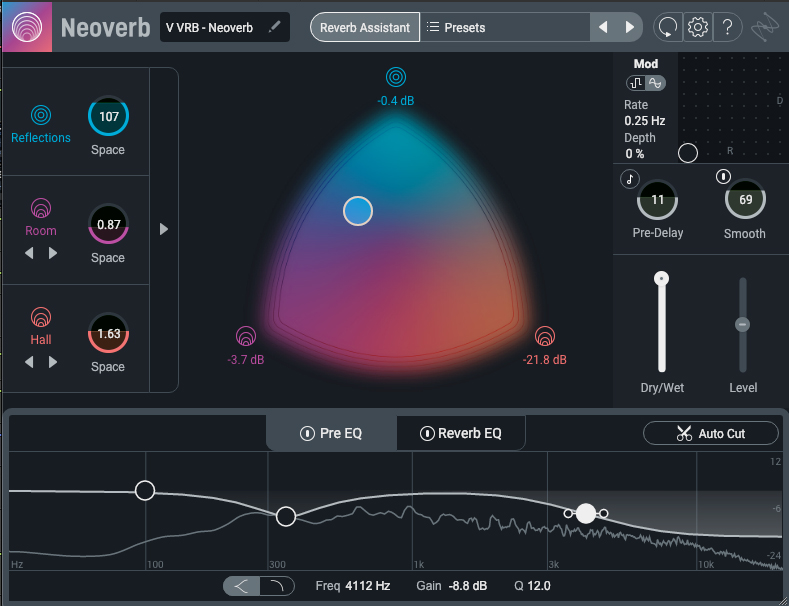
Neoverb has Pre EQ and Reverb EQ settings in the bottom of the window
If you’re trying to up the ante and add some intensity to the chorus, you could use the new Trash mode in Neutron 4 Exciter Module to saturate and distort your drum bus, or a parallel drum bus (where you send select drum elements into this new effect), to add some extra presence and volume. I’ve done the same with vocals, bass, and keys—it can be used on any part of the mix, even a group of tracks all together!
In general, adding a unique effect to certain elements of the mix for the chorus can be an easy way to make something exciting happen without changing the arrangement. Use your gut and think of what adjectives the new section makes you feel. Using reverb and delay for something big or dreamy, chorus for something psychedelic, or distortion for something intense.
5. Automate panning to make a chorus sound wide
Another great way a mixer can create some difference and excitement between sections of the song is to automate panning on tracks between sections. This works especially well if you have a more intimate or sparsely arranged verse, and a big chorus to jump into. However, it’ll also add some movement if you have a static arrangement going through the whole song.
A common automation method in each scenario would be to have a more narrow mix in the verses, and a wider mix in the choruses. We can achieve this type of panning by finding a good sounding place to leave elements that are sitting on the sides, say, a couple guitars, or a guitar and a keyboard, that is less than 100% hard panned in the verses.
I like to try 50-75% to start, but sometimes, something in between works well, too! Then, when you hit the chorus, automate your panning hard to each side for the “big” effect.
Now, when you do this, sometimes it’ll sound quieter, especially in speakers. That’s because we lose volume as we move to the sides, so you might need to add a volume bump to compensate for the change as well. Pan yourself back in for the next verse, or not! Maybe that verse first was the only time the song wanted it.
Deciding how quick to pan is something that just takes a bit of trial and error. Sometimes a quick snap out will be too noticeable and you’ll want to do a quick fade of the pan automation line.
Additionally, by inserting Neutron on your tracks, the Visual Mixer can also help you understand where things are placed in your mix, and see where your next move could be. This might be especially useful if you have several things you’d like to move for your big chorus moment.
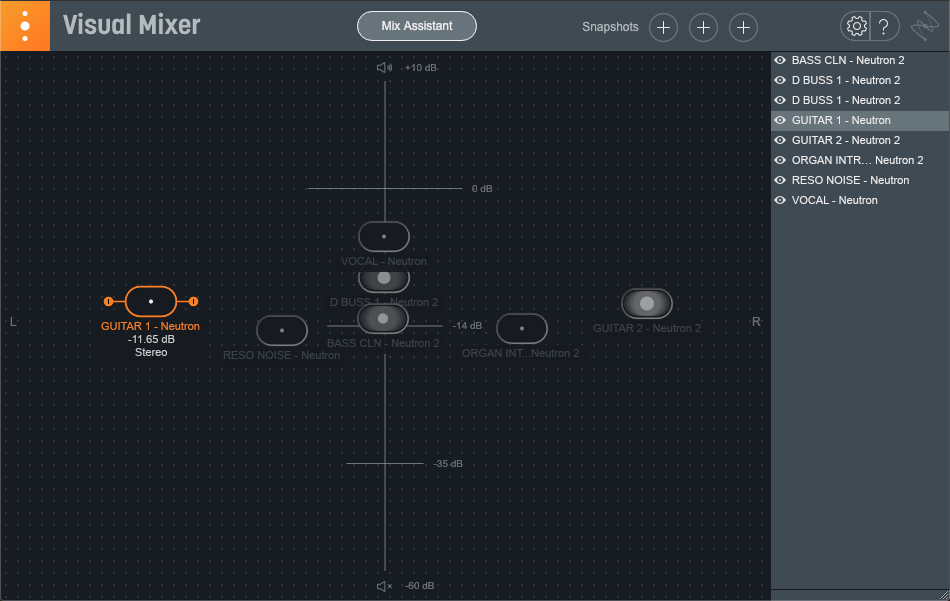
Using Neutron’s Visual Mixer to assist with panning
Bonus: Utilize the master boost
I usually leave this for last, which is why I put this on the bottom of the list! If you’re at the final stage of mixing and that chorus still needs to achieve a bit more lift off, it might be time for the master boost. Open up the volume automation of your master fader and try a small bump just for the chorus. Usually, I move in 0.5 dB increments. A small move is usually noticeable, and I’m not sure I’ve done more than 2 dB, which is almost 20% of a perceived change of volume, so tread lightly!
Depending on the genre of the music and the song, it will feel more appropriate to make a master boost, and one that’s more noticeable. Hopefully you’ve left yourself some headroom. It’s important to check a metering tool like Insight to make sure you’re not going into the red or clipping as you make this change.
Mix a better chorus in your session
It really is the details that count when you’re mixing, that’s the part that you’re signing on for. When you make those big moments happen, sometimes it’s just one little move that makes it all come together. By trial and error, experimenting, and some patience, you’ll be sure to make each chorus as special as it can be.
Make sure to check out the plug-ins used in this tutorial, including the new


Neutron 5


Insight 2


Neoverb


Music Production Suite 7
