What is distortion in music? When and how to use it
What does distortion mean in a musical context? How should you use distortion as a creative effect in your DAW? Find out in this article, and follow along with audio examples.
Distortion can be a powerful tool for audio engineers. In the right hands, distortion can add all sorts of flair to a track, fill out thinly recorded signals, and help a mix sound loud without reading loud on the meters. But unintended distortion can absolutely ruin a track. That’s why we have so many articles on how to repair tracks with unwanted distortion.
In this article however, we’ll cover what distortion is as well as how to use distortion, with use cases in the mixing and mastering process.
Follow along with iZotope


Trash 2
What is audio distortion?
Distortion refers to the altering or deformation of an audio signal’s original waveform. Technically, any kind of audio processing (EQ, compression, time-based effects, etc.) alters an audio signal, but in audio production, the term is used to describe either intentional or undesired sonic destruction.
Distortion as a creative effect
Distortion can be used intentionally as a creative audio effect. Think of classic rock guitar riffs or punk rock vocals, and chances are you’re picturing intentional and obvious distortion. Some audio engineers also like to apply subtle distortion to an audio signal to emulate the behavior of famous hardware pieces. Such distortion can make things feel more alive, more dense, more thick, and what have you.
Let’s show off distortion used as a creative effect in both subtle and over-the-top ways using the Trash distortion plugin.
Here’s an audio loop taken from the artist P4NTL3R.
There’s not much being done here mixwise. But let’s say I wanted to add some subtle, analog-style distortion to the electric pianos. I could do that within Trash by choosing one of the subtle, “saturate” styles.

Saturate options in Trash
Trash can let us blend four different kinds of distortion across an X/Y blend pad, so we don’t need to limit ourselves to just one type of gentle saturation. Here I’ve got a blend going.

Four types of gentle saturation
Take a look at how we’d blend them in the following video:
This is quite subtle – but what if we chose something more drastic? Well, with Trash’s X/Y pad, we can put two subtle distortions on the left, two more creative ones on the right, and blend to taste.
Unwanted distortion
Distortion, however, can arise from unintended scenarios in both the digital and analog side of things. Here’s a classic analog problem: clipping distortion, in which a signal exceeds the maximum level an audio system can handle, and sounds distorted as a result. This problem is handled with the technique known as gain staging, covered in this article.
Perhaps a signal wasn’t converted properly from a high sample rate to a lower one, incurring aliasing distortion. This too can happen in the hands of inexperienced engineers.
Sometimes, you’ll need to repair a distorted audio file. Maybe you’re working with files that weren’t recorded and mixed properly and you don’t have the option of redoing any of it. If that’s the case, you can use an audio repair plugin like


RX 11 Advanced
Check out our video tutorial on how to use RX to remove clipping distortion from audio recordings.
But ostensibly, we’re here to explore distortion, not remove it.
Types of distortion
Here are a few kinds of distortion you might come across in mixing and mastering.
Harmonic distortion
Harmonic distortion refers to what happens when a processor (analog or digital) adds to or enhances the overtones of the original signal. As a reminder, overtones are multiples of the base frequency – or fundamental. So if the fundamental is 100 Hz, overtones would occur at 200, 300, 400, etc. Hz. As the overtones increase in level – or, as more overtones are introduced – they rub and resonate against the original signal. It can appear subtle and warm, or it can become overblown and edgy. Either way you cut it, you’re working with harmonic distortion.
Transformers and tubes are examples of analog components which, when pushed hard enough, add these kinds of harmonics. Tape saturation – in which you drive a real or virtual tape machine – also adds harmonic distortion. All of these are available to you in Trash, particularly in the “Saturate” section of the Trash module.
Let’s hear a few of these on piano, added tastefully to bring out harmonics without overblowing anything.
That’s the control for our experiment. Now let’s hear the difference among three subtle harmonic saturators in Trash.
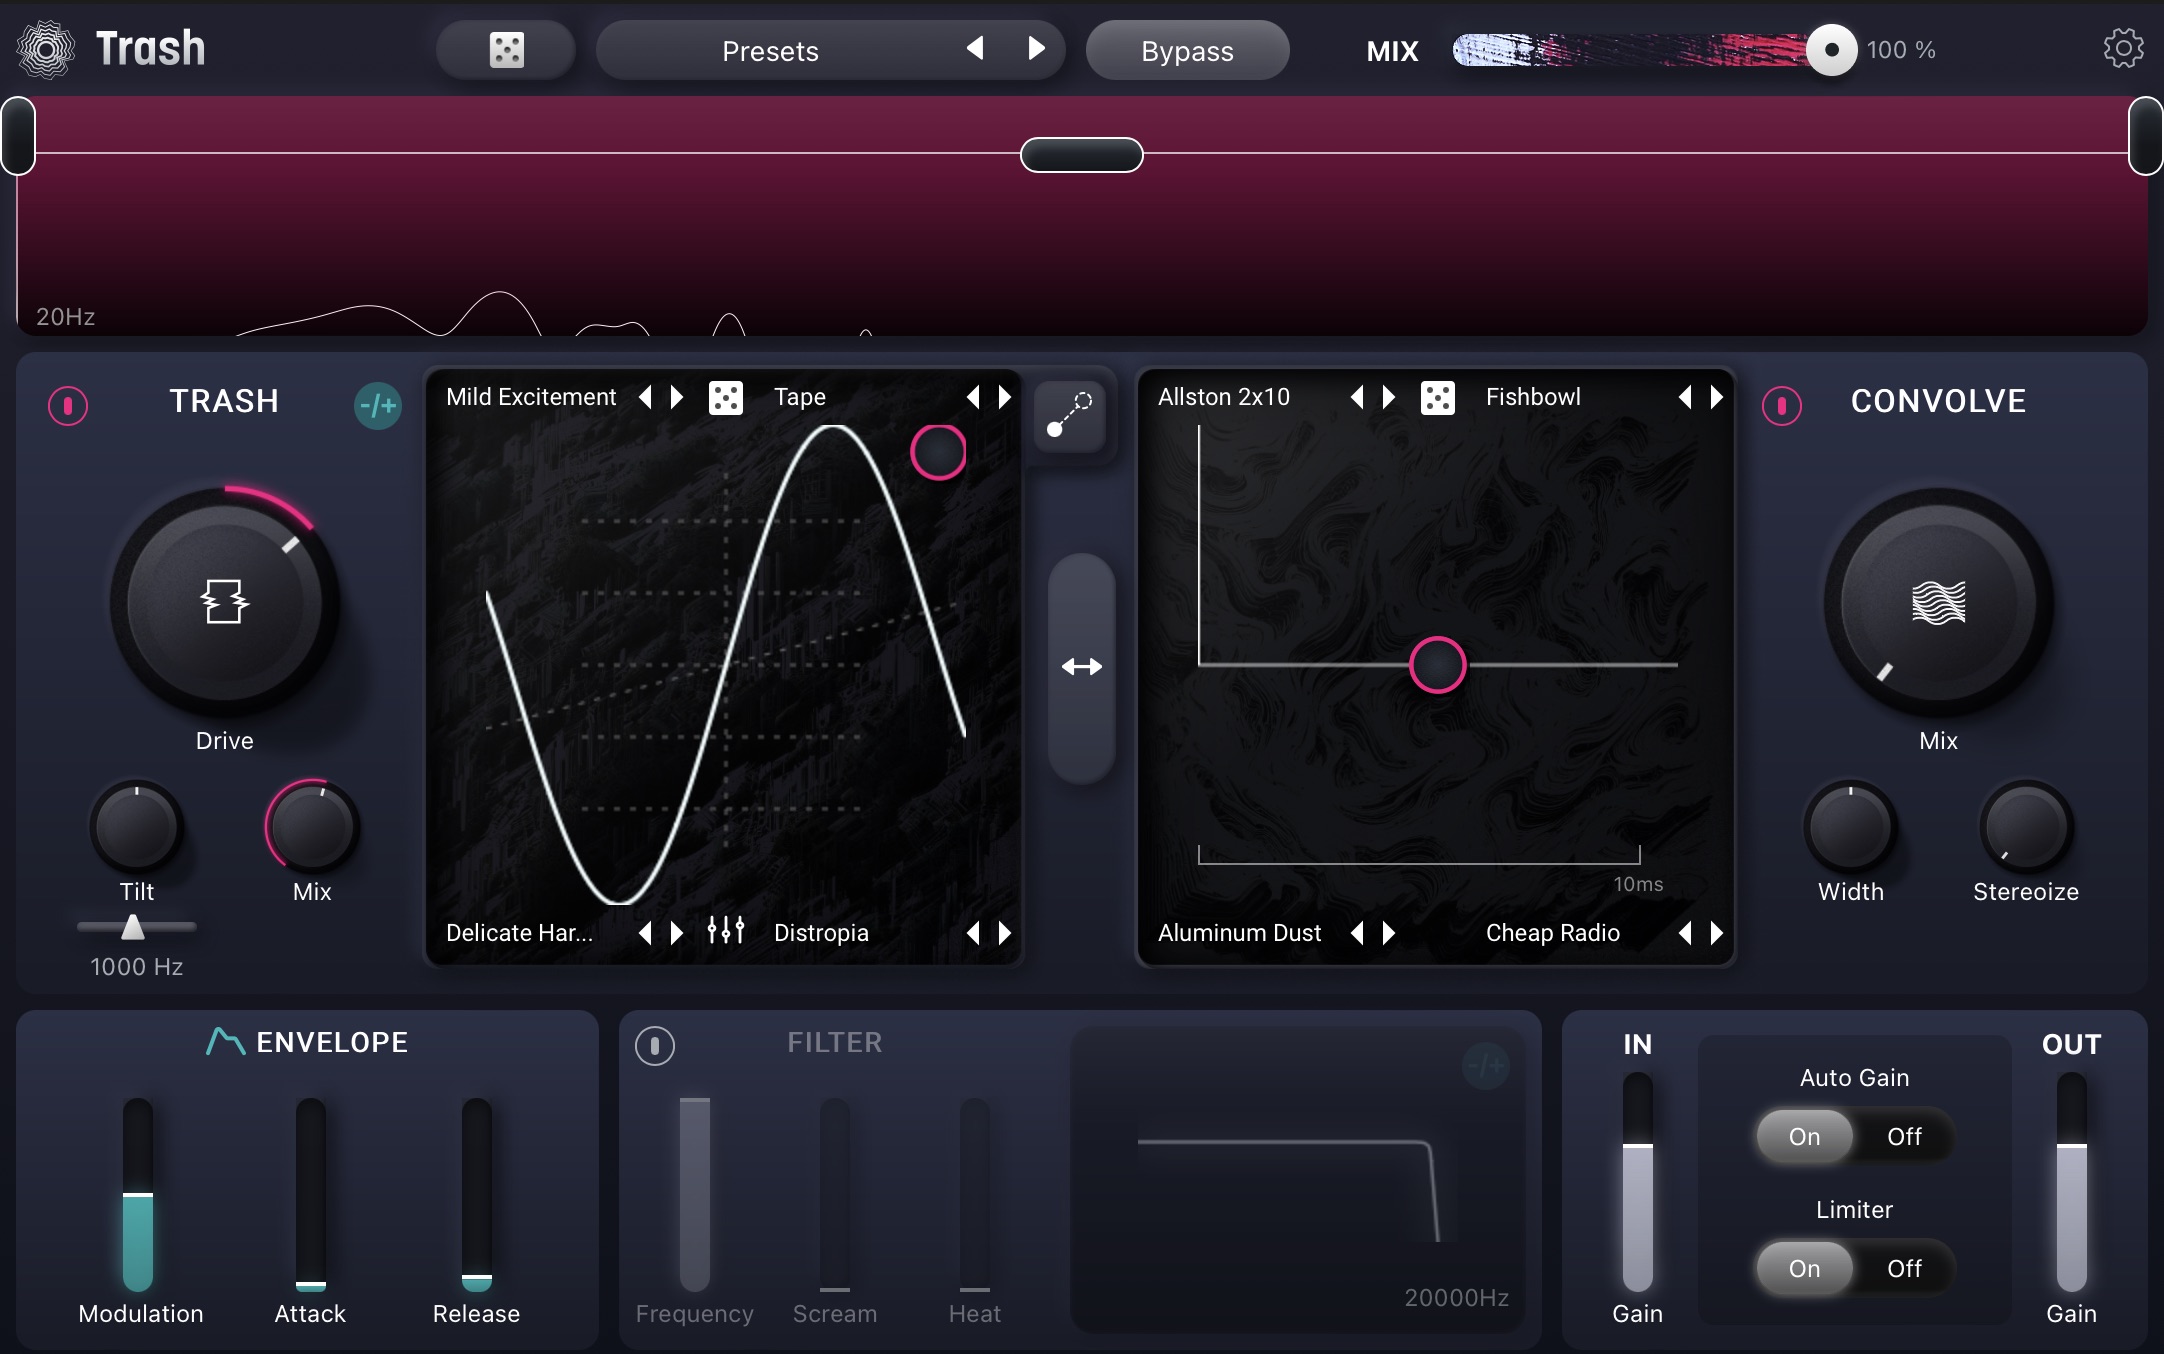
Tape on piano
Tape saturation on piano
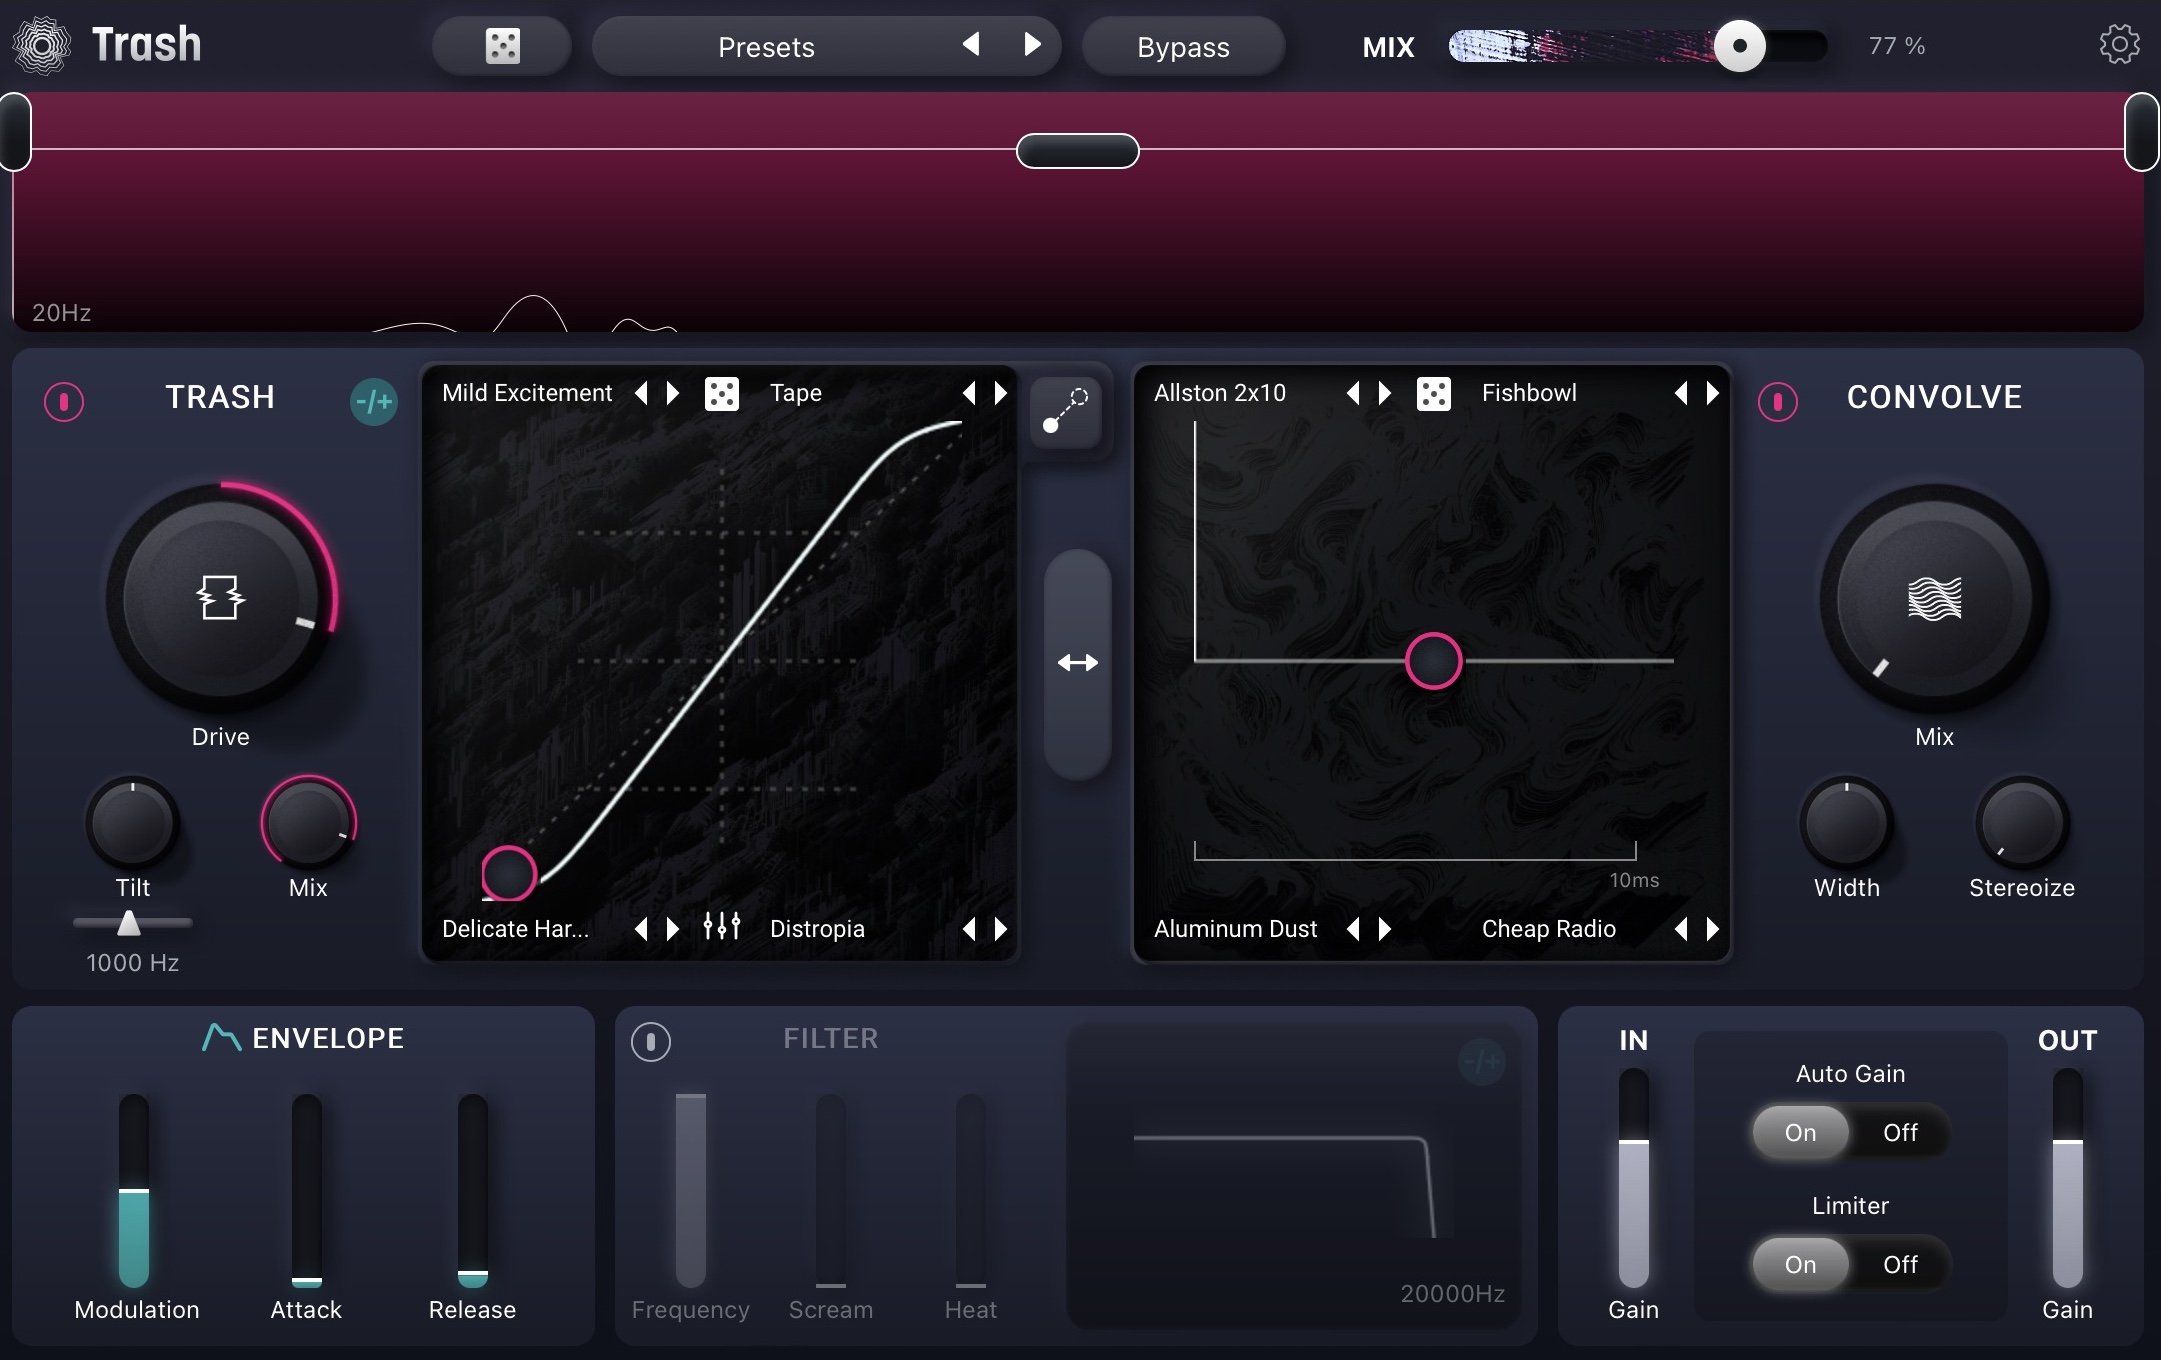
Delicate harmonics on piano
Delicate harmonics on piano
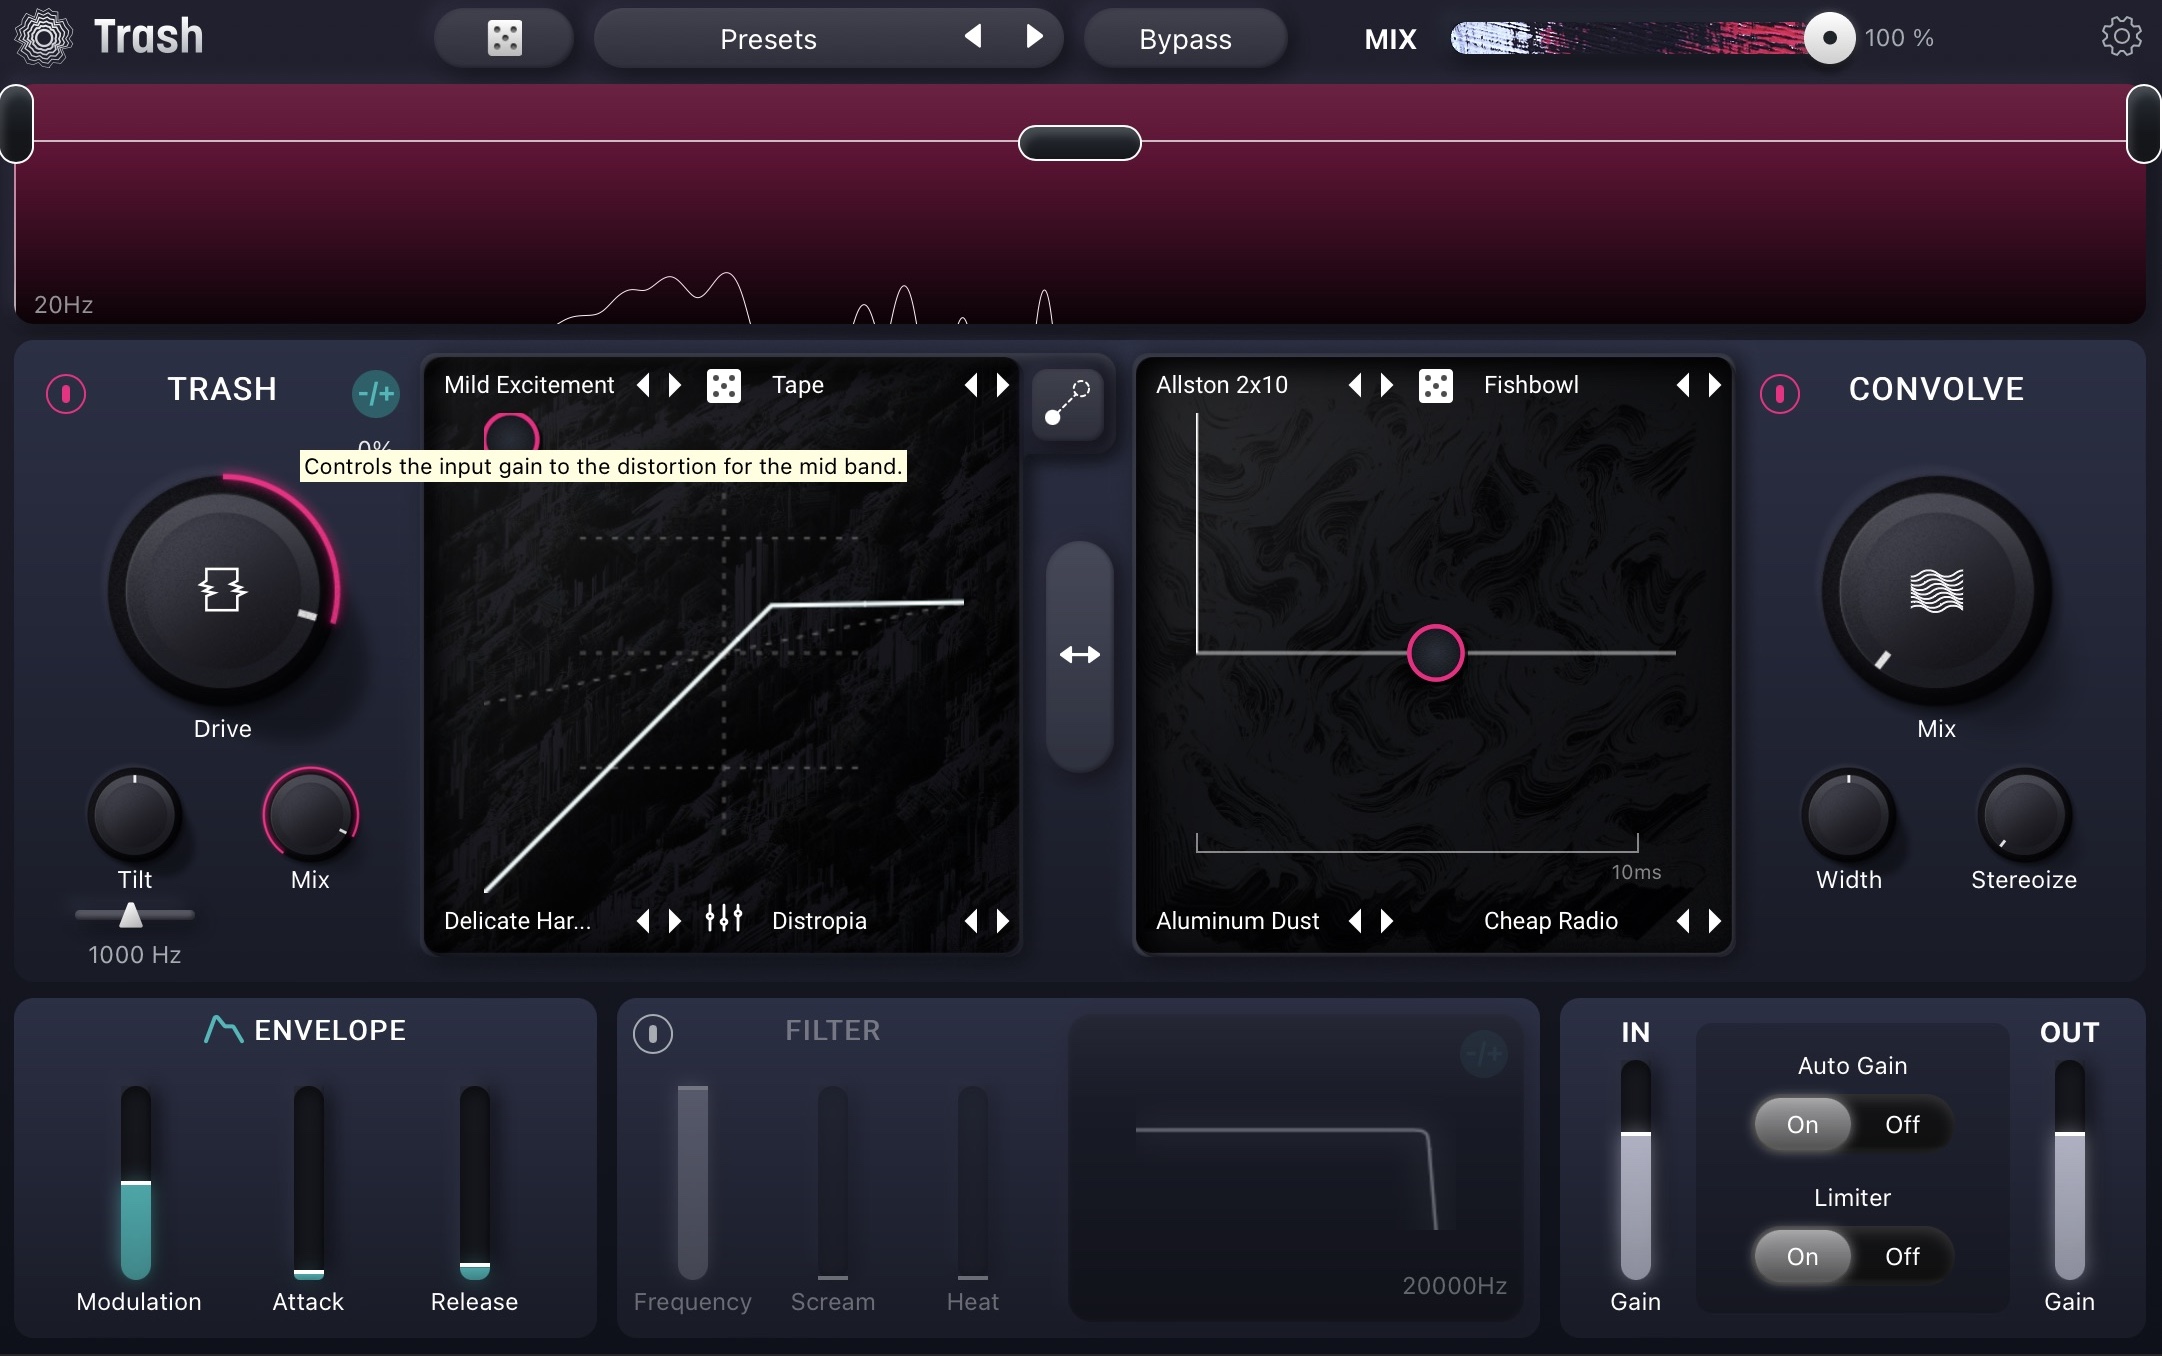
Mild excitement on piano
Mild excitement on piano
Harmonic distortion can “fill out” or “bolster” a weak frequency range without tilting the apparent tonal balance too much. But pushing hard into harmonic distortion can color the sound more than you’d want to. And, it’s such a seductive effect that it’s hard to know when you’re overdoing it. So do be careful in your applications of it, especially in mastering.
Clipping
Clipping distortion refers to the act of overloading a processor—of pushing it beyond its maximum capacity or operating level—and creates a type of harmonic distortion.
In the analog world, this is as easy as driving the input of an amplifier circuit too hard, as typified by the Amp Drainer module in Trash:
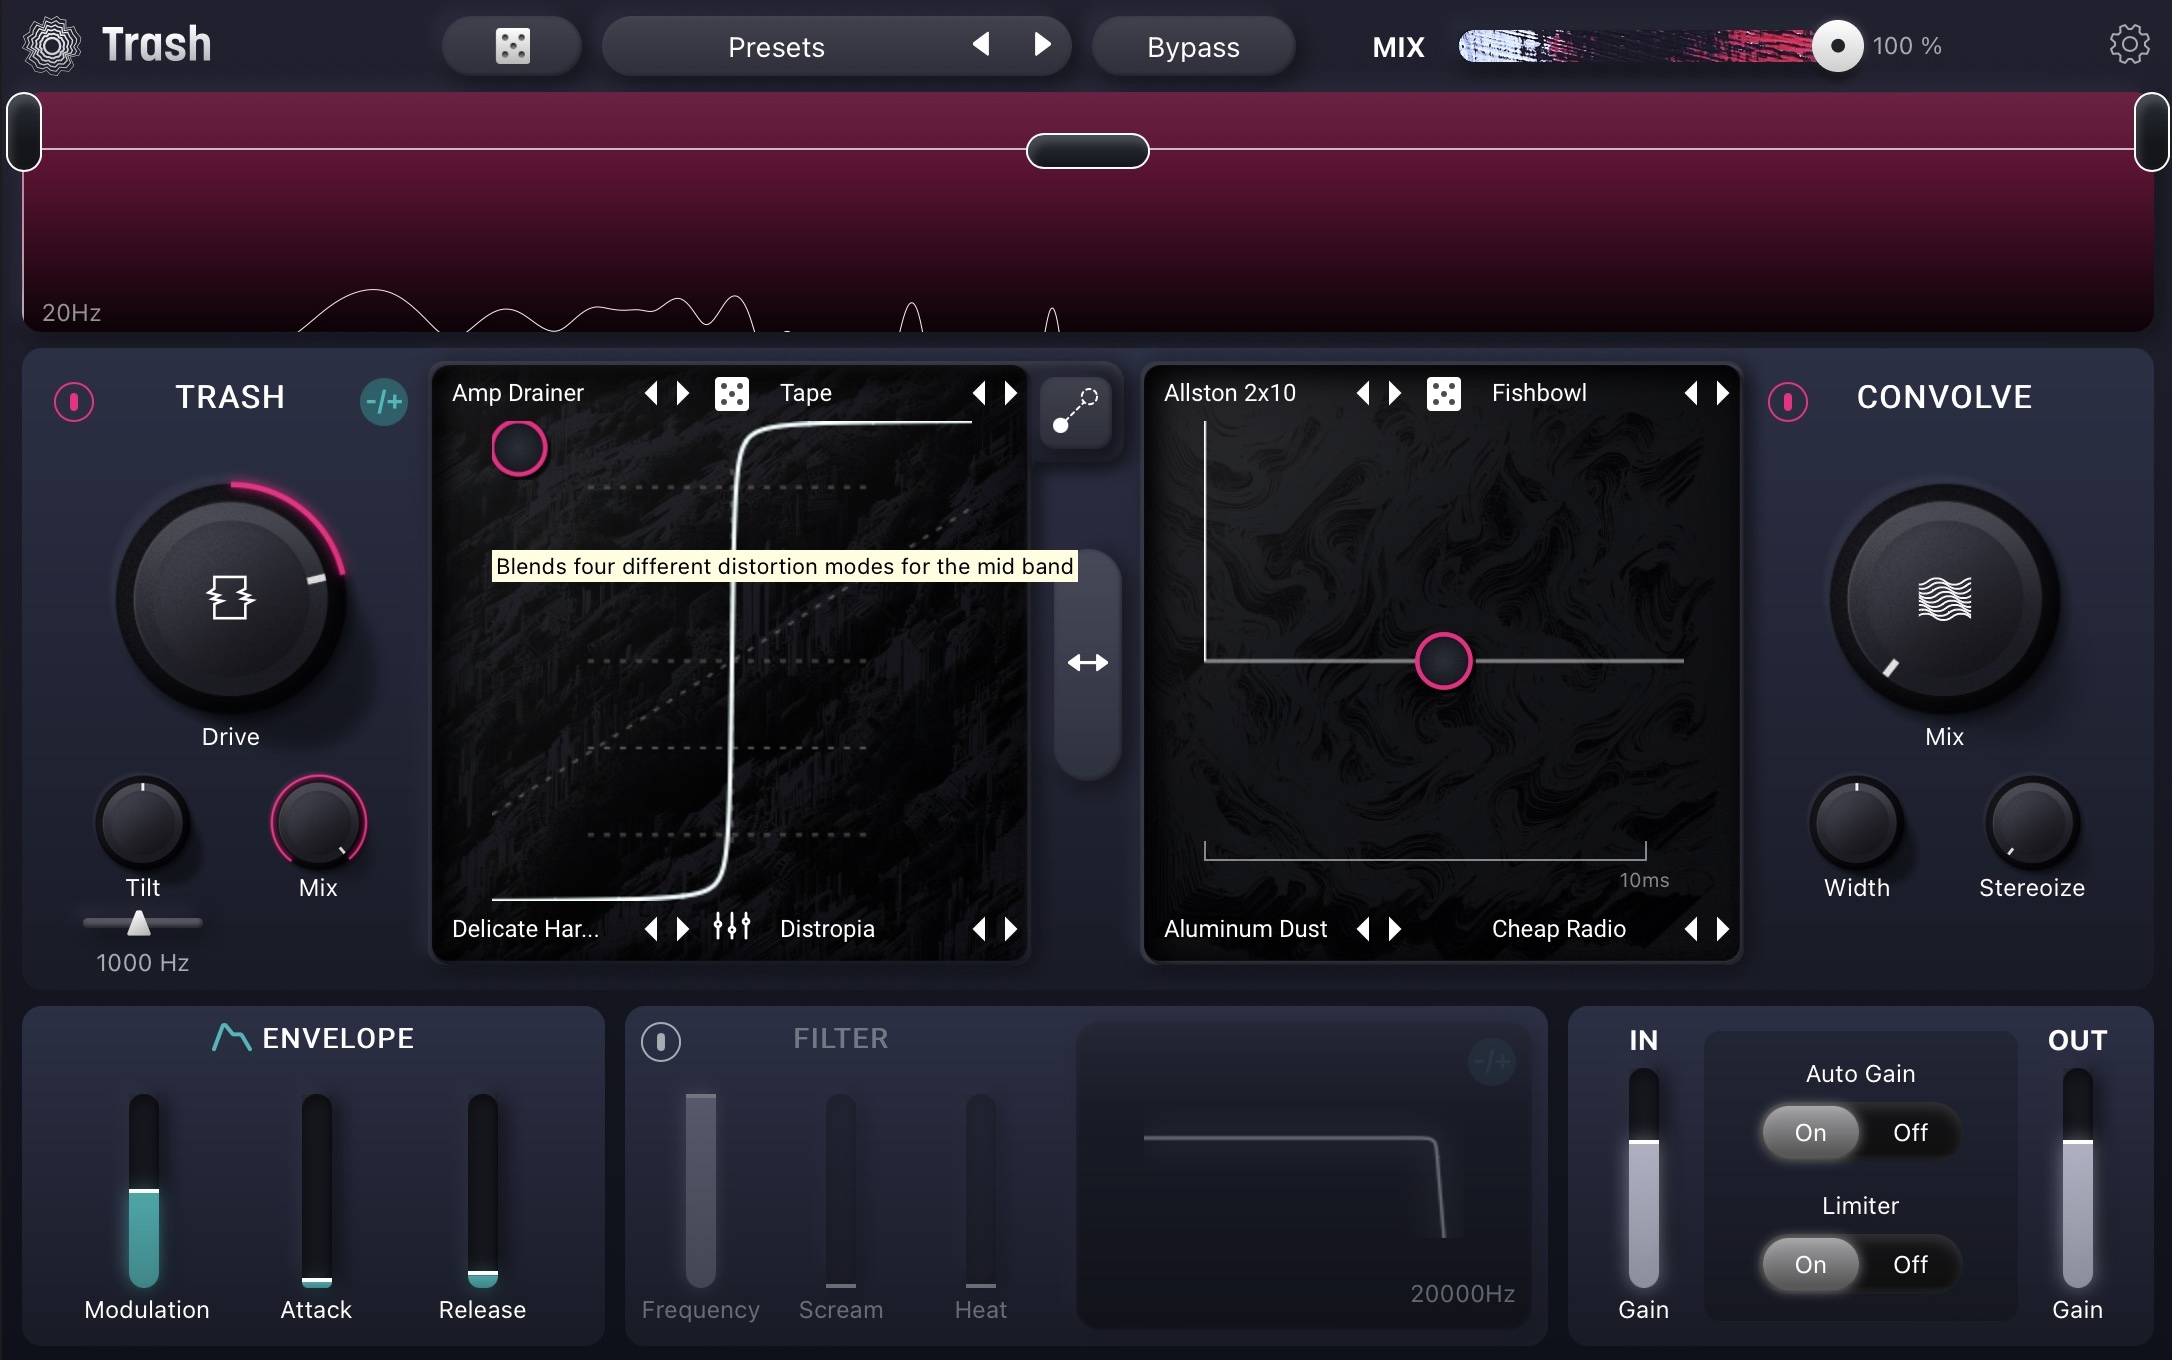
Amp Drainer on piano
Digital clipping, on the other hand, involves pushing a fixed-point digital signal past 0 dBFS.
Common fixed-point bit-depths include 16 and 24-bit, although these days almost all DAWs operate at 32 or 64-bit floating point for internal operations. Floating point systems have much higher clipping points – like over 1,000 dB higher.
As of now, it’s very hard to isolate digital clipping in the floating point world, because the analog system required to monitor audio would distort long before the digital signal even got close to clipping.
But I digress. This is the big takeaway: analog and digital clipping both sound exciting when done well. They can make signals appear louder without taking up headroom, giving you the ability to raise the overall level of the signal.
But they can also generate inharmonic components that color sound in a horrible way. And, without proper monitoring, it can be hard to distinguish a good amount of clipping from too much clipping.
Inharmonic distortion
While harmonic distortion adds musically related overtones to a signal that can sound quite natural and pleasing, inharmonic distortion has the opposite effect. Inharmonic distortion introduces overtones that are not musically related to the input signal. As such, inharmonic distortion can sound nasty, unnatural, grungy, and wrong. Sometimes wrong is just what the doctor ordered – fuzz distortion being a prime example, or bit-crushing in the digital world. Other times you need to be quite careful.
There are a few types of inharmonic distortion, some of which we’ll discuss a little more below. Aliasing and truncation both result in inharmonic distortion that sounds distinctly digital, but analog devices can exhibit inharmonic distortion too. Of note, is “intermodulation distortion” which happens any time a signal contains multiple frequencies—so pretty much all music, unless you’re into listening to sine waves—and runs afoul of a nonlinearity.
Intermodulation distortion—or IMD—creates tonal products that are both higher and lower than the original frequencies in the signal, and with a full frequency signal like music, this can quickly turn into a noisy mess. The tricky thing about IMD is that it often accompanies harmonic distortion, so making sure you strike the right balance is an important skill to develop.
Aliasing
Aliasing is a digital phenomenon, occurring when the frequency content of a source is higher than half of the sample rate. This point of no return is called “The Nyquist Frequency” or simply “Nyquist.” Instead of being captured and printed, these “too high” frequencies bounce back down upon hitting Nyquist, and become folded into the audible band in an unmusical, inharmonic way.
So if you’re recording at 44.1 kHz, any signal present above 22.05 kHz would alias. When recording an analog source, whether with a mic, instrument DI, or through analog hardware, this isn’t typically a problem. This is because any analog to digital converter worth its salt includes an “anti-aliasing filter” to removed frequencies above Nyquist before they get turned into a digital signal. However, because so many nonlinear processes create distortion well above 20 kHz, aliasing happens frequently in a purely digital environment.
Observe a sine sweep from 20 Hz – 20 kHz:

Sine sweep in RX
Now observe what happens when I add subtle harmonics with a distortion plugin commonly used in mixing.
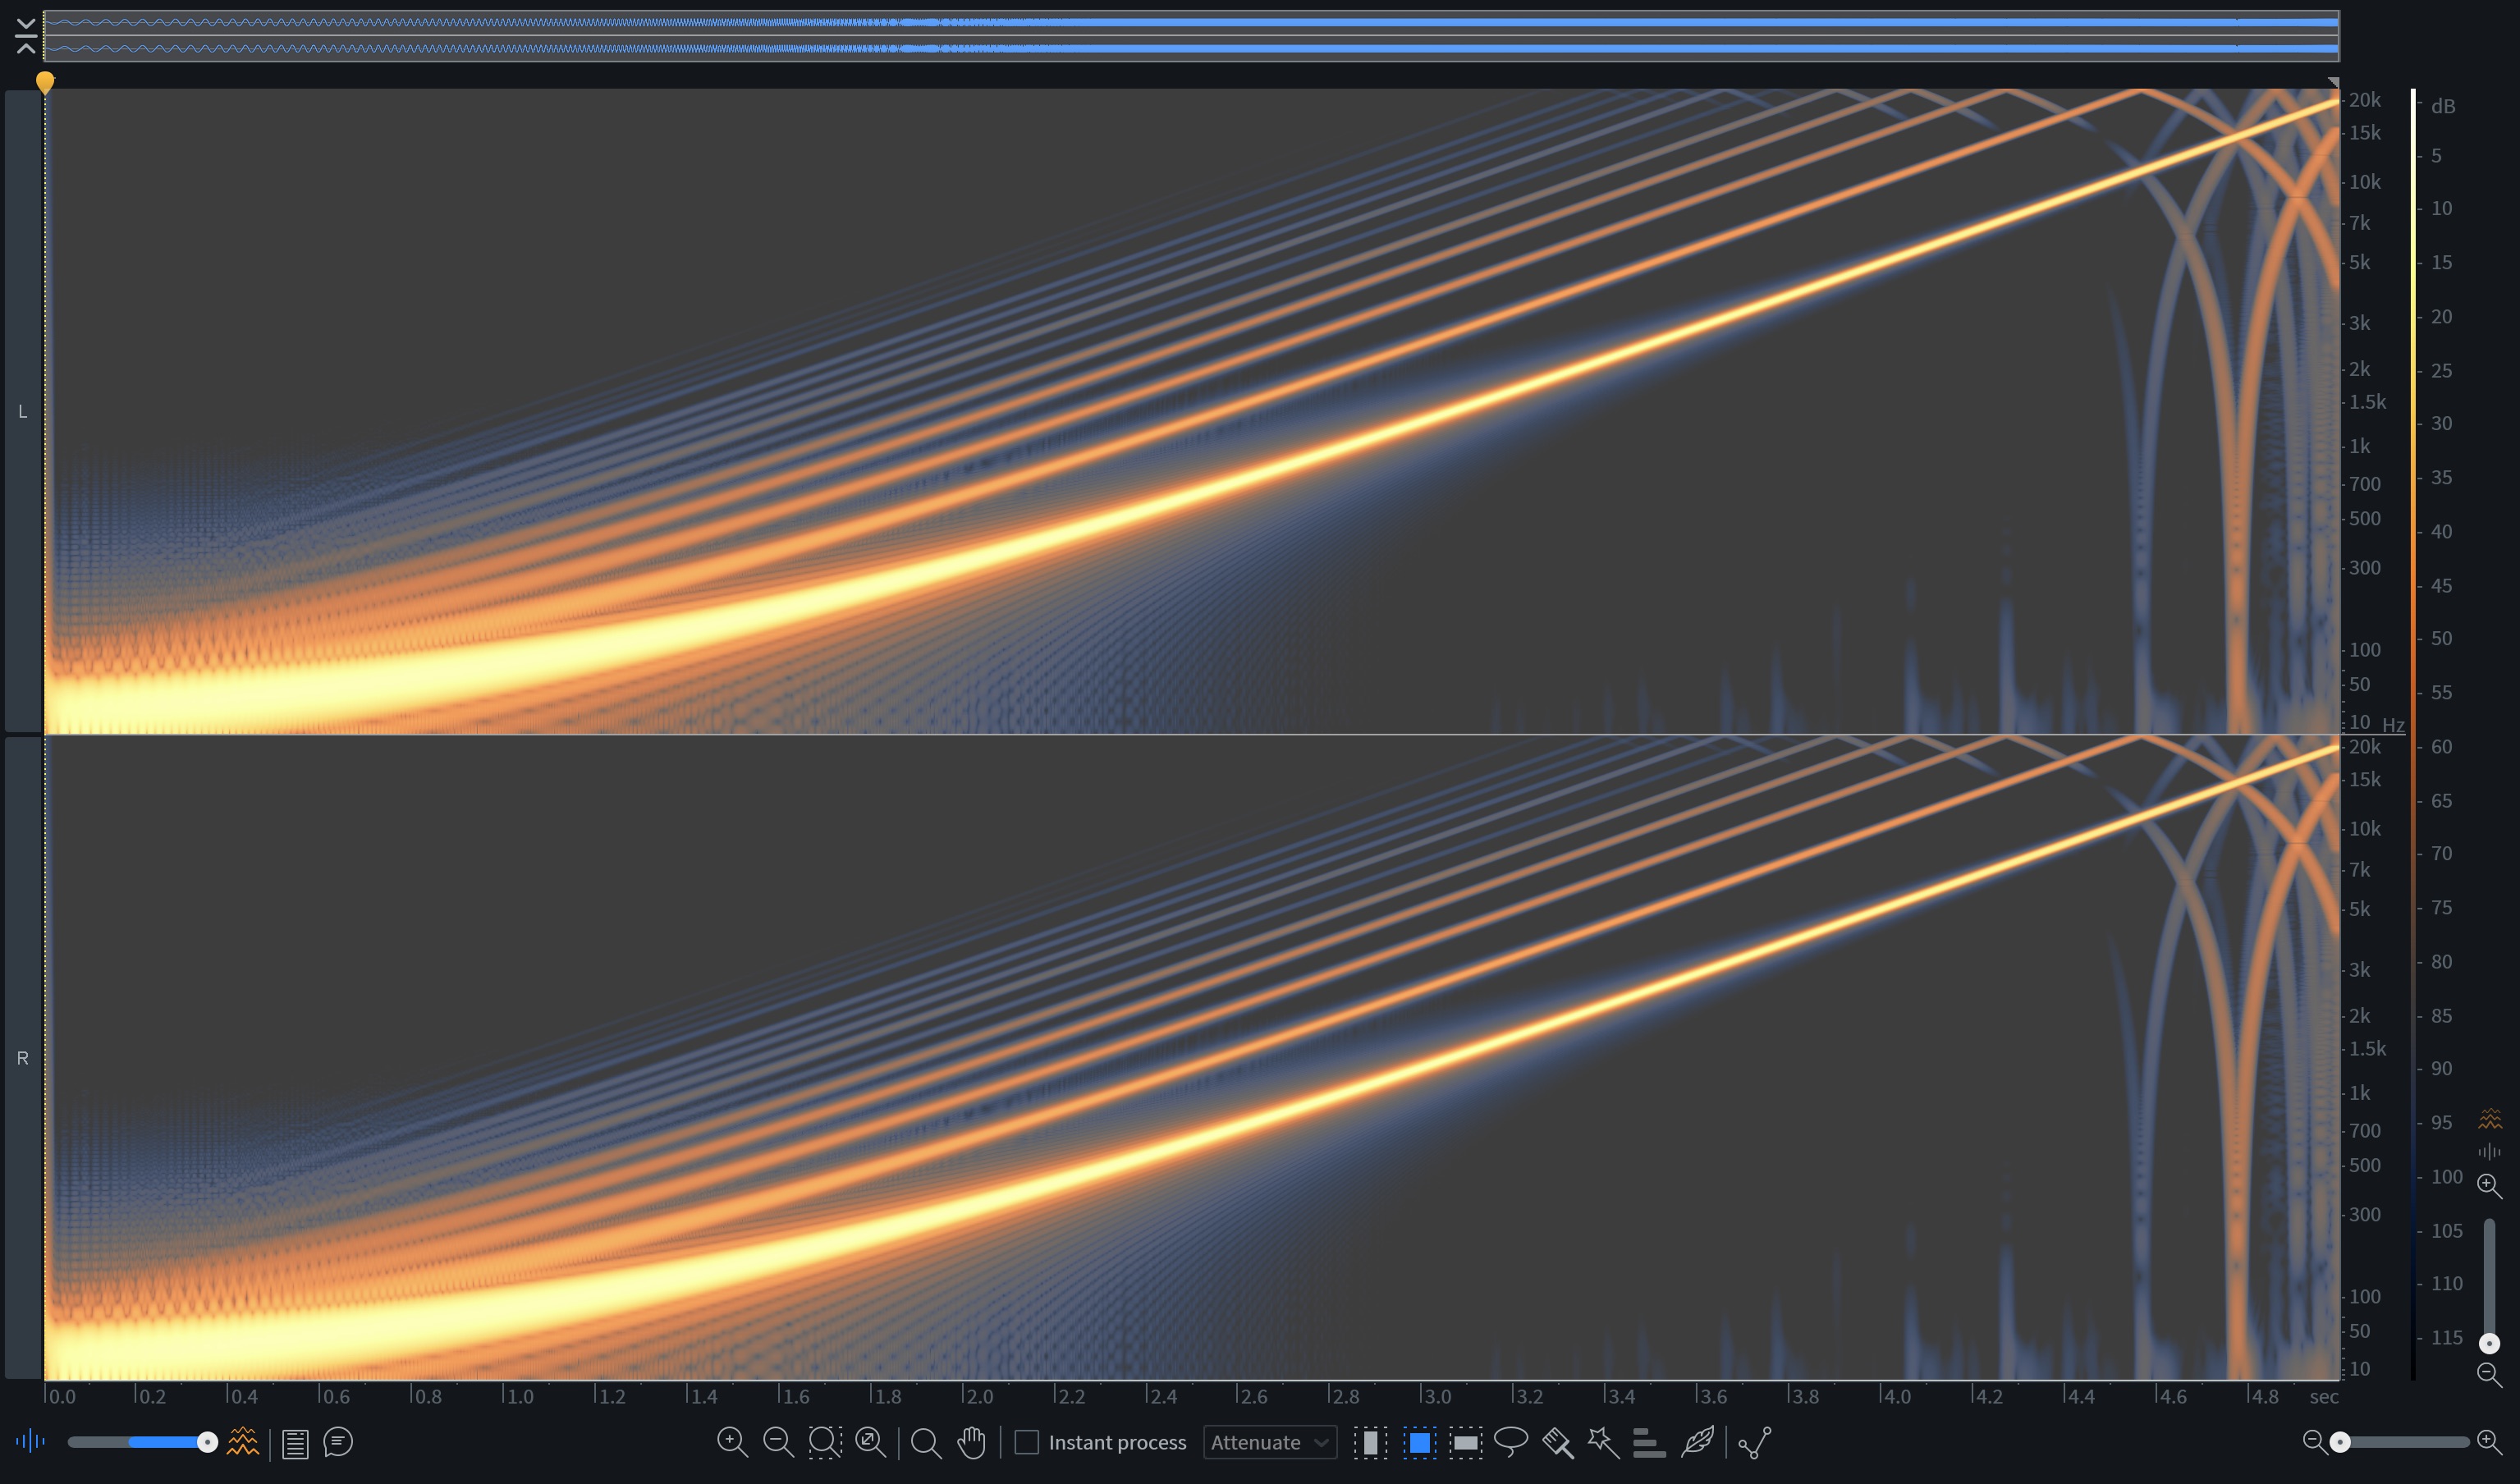
Sine signal with its head cut off
Yep, we’re seeing aliasing in action here.
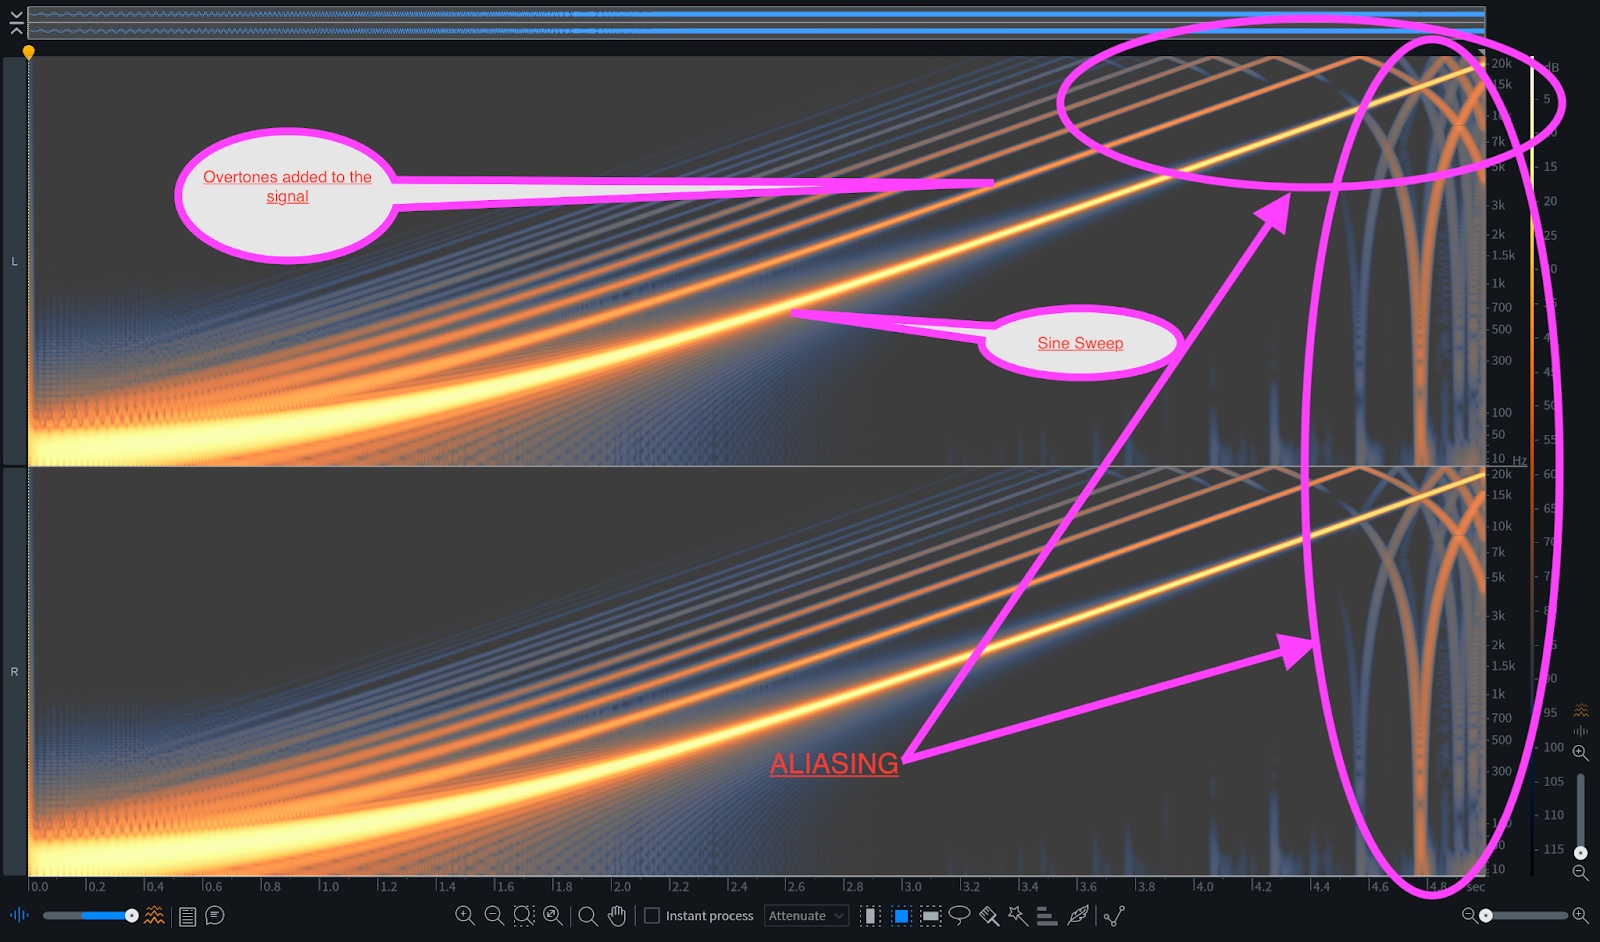
Aliasing in action
All of that circled stuff that looks like it’s reflecting or bouncing back down is aliasing.
We can use aliasing to creative effect in Trash by means of the Iris Aliasing algorithm found in the Trash module.
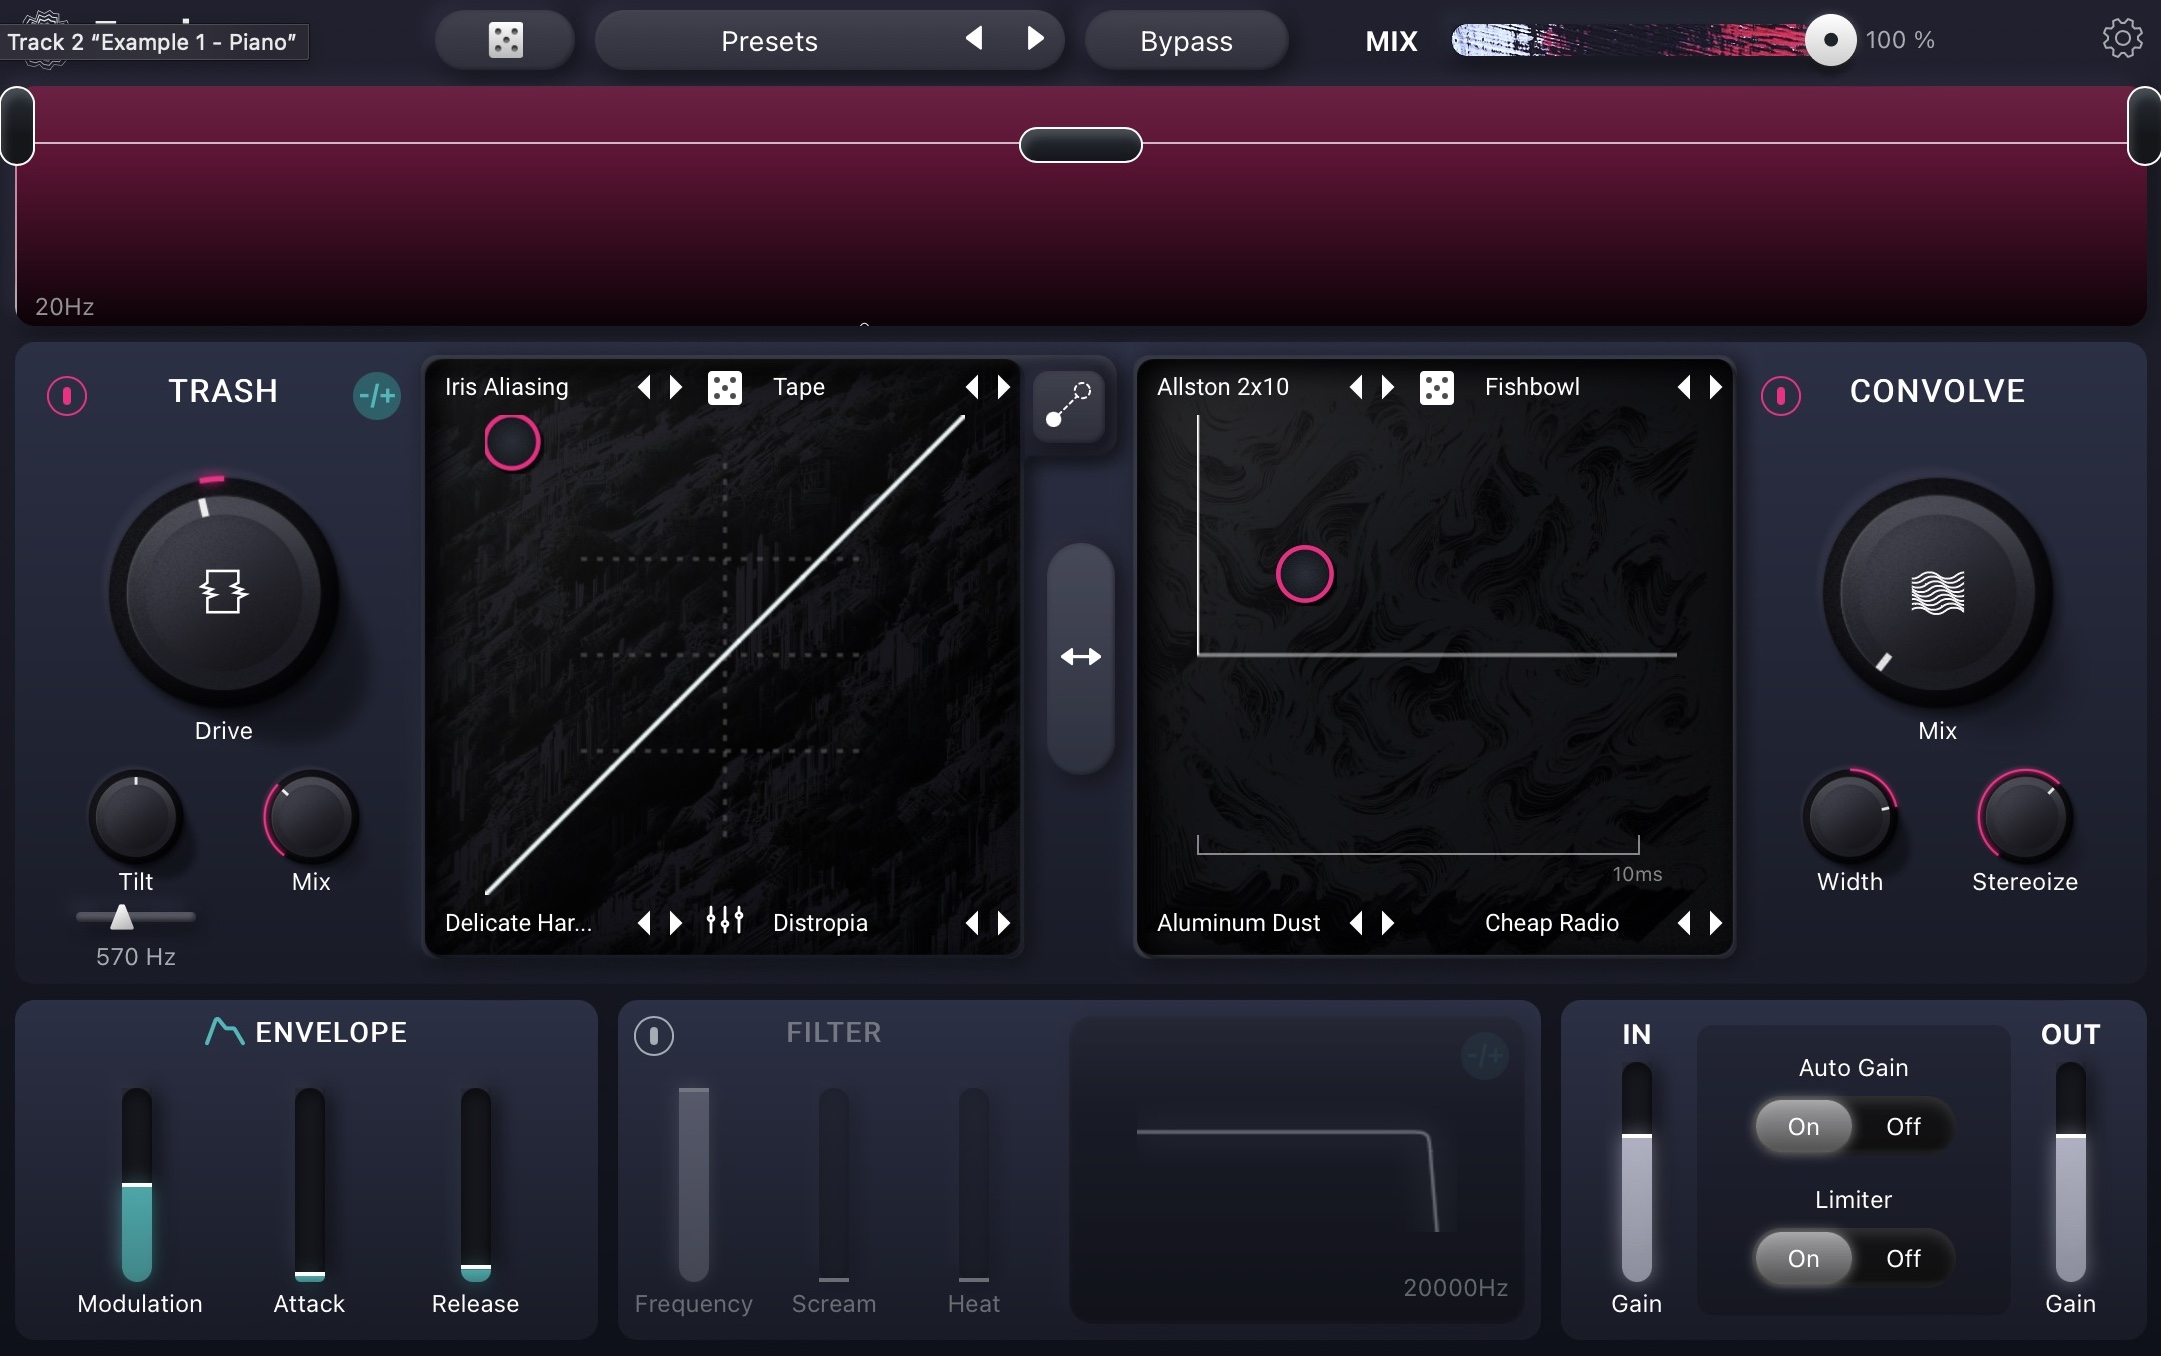
Aliasing on piano
Aliasing on piano
Here, the aliasing has been “tuned” to emphasize some musical resonances of the piano. We controlled the relative pitch of the aliasing effect by playing with the Drive control, and we dialed back the mix just so.
Truncation distortion
Truncation distortion is caused by reducing bit-depth – without dither – when playing or rendering an audio signal. Going from a 24-bit to a 16-bit signal without dither would incur truncation. Going from 24-bit to 8-bit without dither results in truncation distortion that’s quite audible.
We can simulate Truncation distortion in Trash by means of the “Rusty Bits” algorithms.
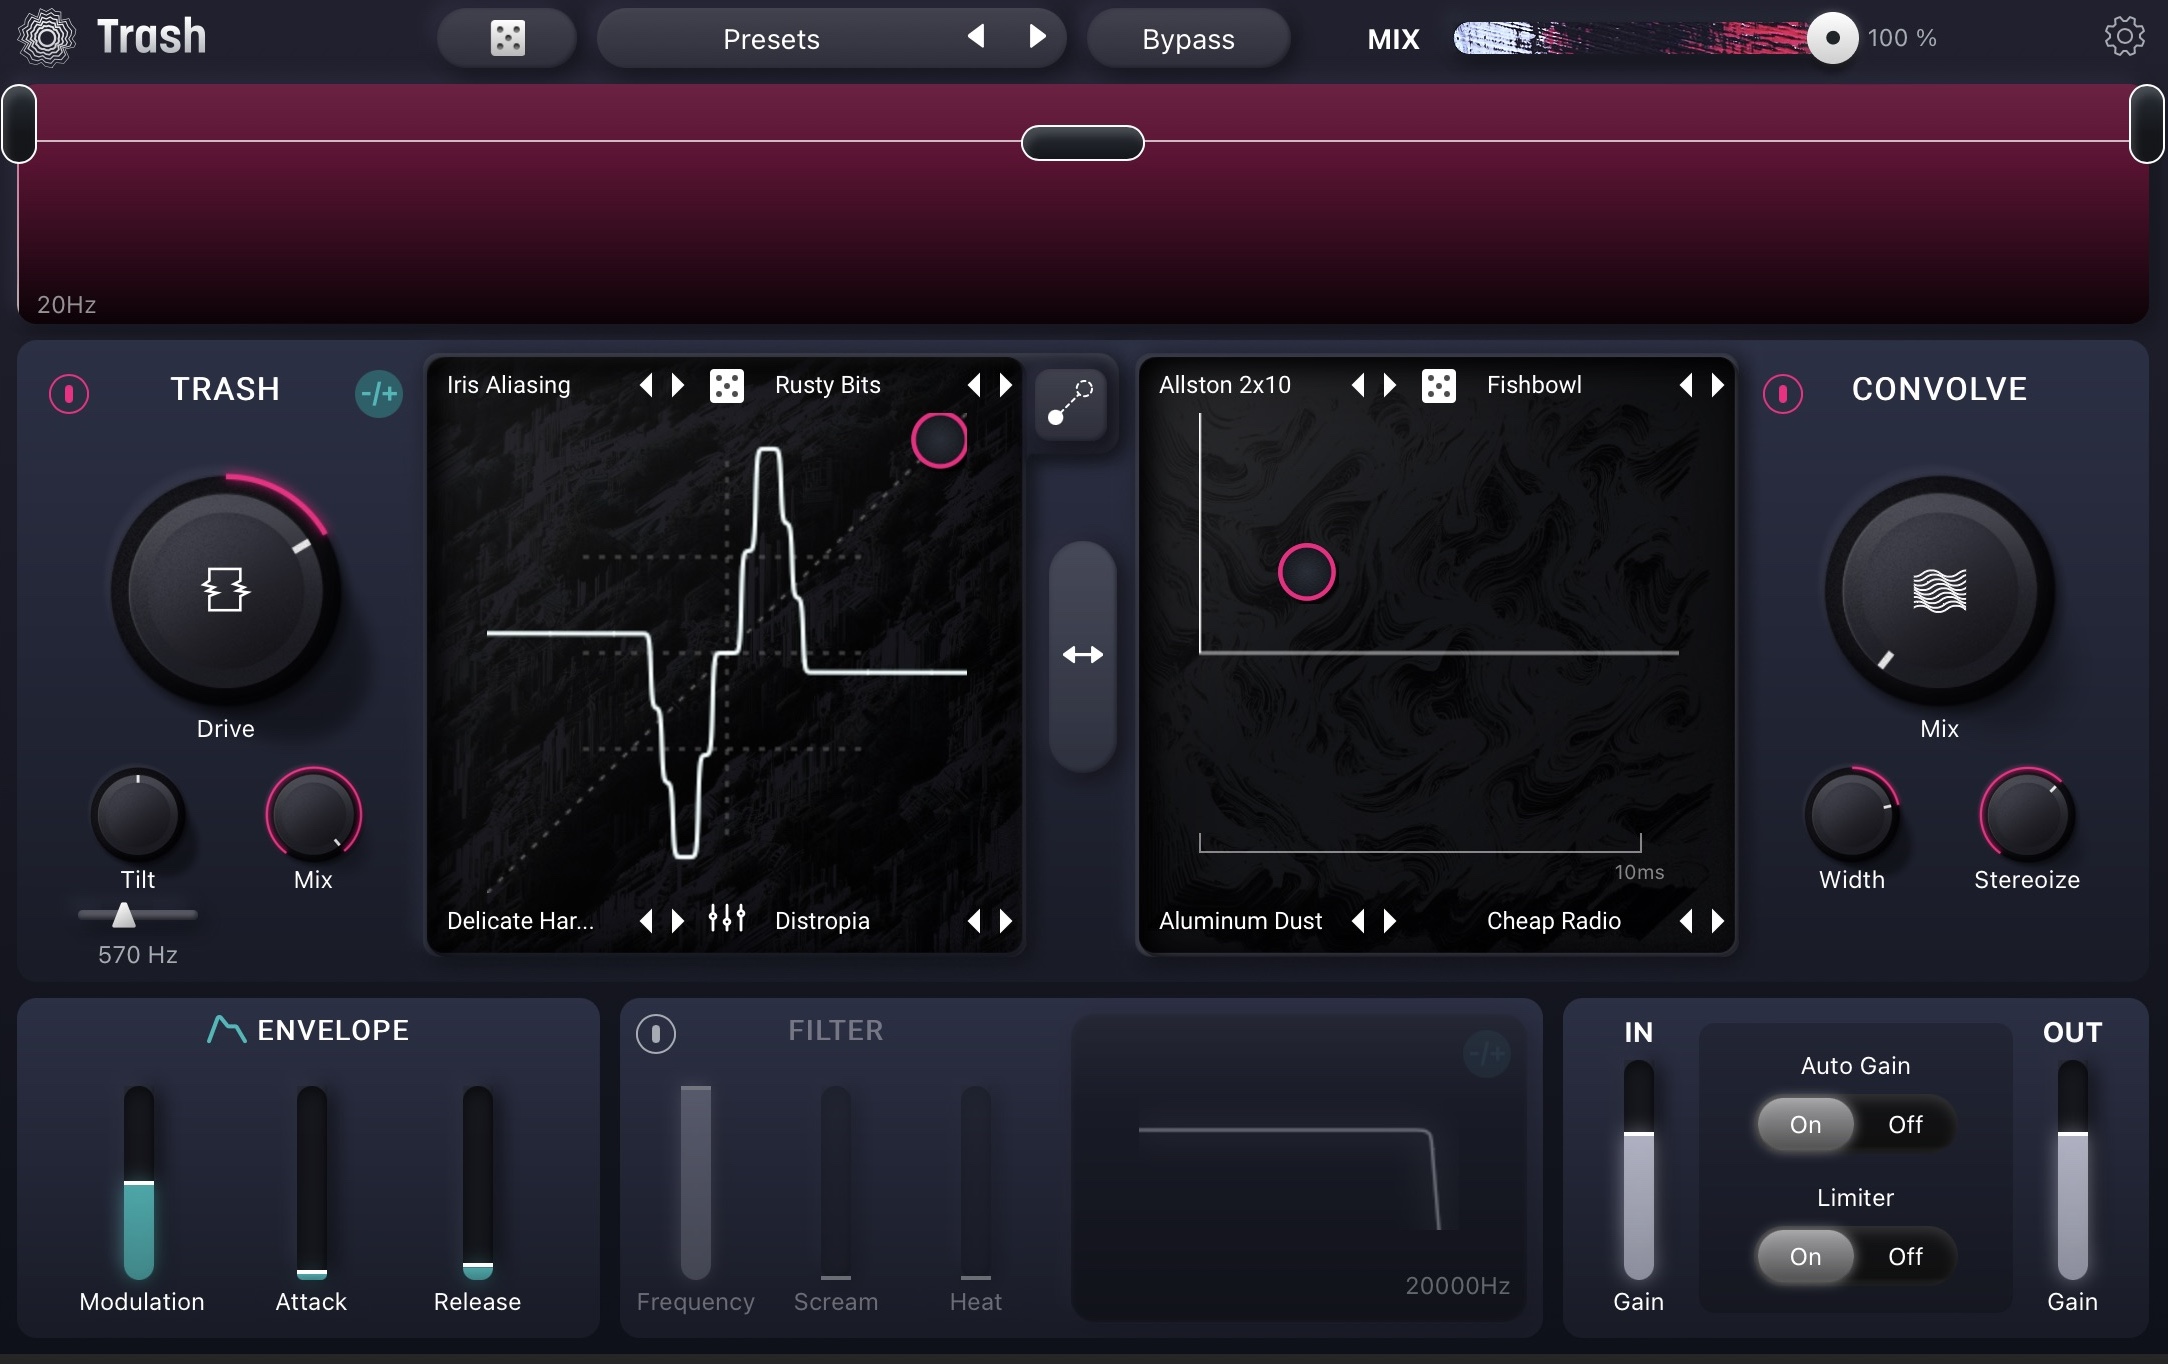
Truncation distortion on piano
Truncation distortion on piano
Bitcrushing
Aliasing distortion and truncation are often grouped into a kind of distortion processor called a bitcrusher. Bitcrushers usually provide controls for reducing the sample rate and bit-depth – a.k.a. word length. They’re one-stop shops for introducing aliasing (via sample rate reduction) and truncation distortion (via bit-depth reduction).
Bitcrushing is a fantastic sound for the right situation. But when it doesn’t work, it really doesn’t work.
You can make your own bespoke bitcrusher in Trash by blending aliasing and truncation algorithms together, like so:
These are only some of the most common distortions you’ll encounter in the engineering process, but they’re enough to cover useful tips. They’re also good umbrellas: “overdrive” – the effect found on most amplifiers – might seem like its own thing, until you realize it’s a form of clipping distortion.
Why and how we use distortion in mixing and mastering
There are many reasons to apply distortion in both mixing and mastering scenarios. I’ll show you some frequent situations where distortion can help, and how to achieve the desired effect.
Distortion for harmonic enhancement
We can use subtle harmonic distortion to fill out missing frequency ranges without resorting to EQ. Whereas EQ obviously tilts the balance, harmonic distortion can have a more subtle hand; you can think of it as “filling in the holes” of an underwhelming frequency range, rather than boosting it outright.
The Oven, by Plugin Alliance, is particularly good at illustrating this effect.
Using distortion for a lo-fi sound
Sometimes we use distortion as a way of recreating the sound of low-fidelity recordings to achieve a vintage aesthetic.
Aliasing and truncation distortion can get us a certain kind of lo-fi sound reminiscent of early digital systems. Let’s go back to that example from the artist P4NTL3R.
I’ll use these trash settings on the drums to get a lo-fi sound.

Lo-fi Trash drums
And here is the before and after side-by-side.
Lo-fi drums with distortion
Subtle compression
Distortion can also restrict dynamic range in a subtle way. Distorted guitars, for instance, are naturally compressed, which is why compression on top of them can be gratuitous.
Take a look at this screenshot, in which we can actually see the compression effects of distortion in action. This is Ozone’s Vintage Tape, and we are looking at how the dynamics of the signal are impacted: As we drive the “tape” harder, the signal compresses more. I can show you exactly what I mean when I run my tape settings through Plugin Doctor:
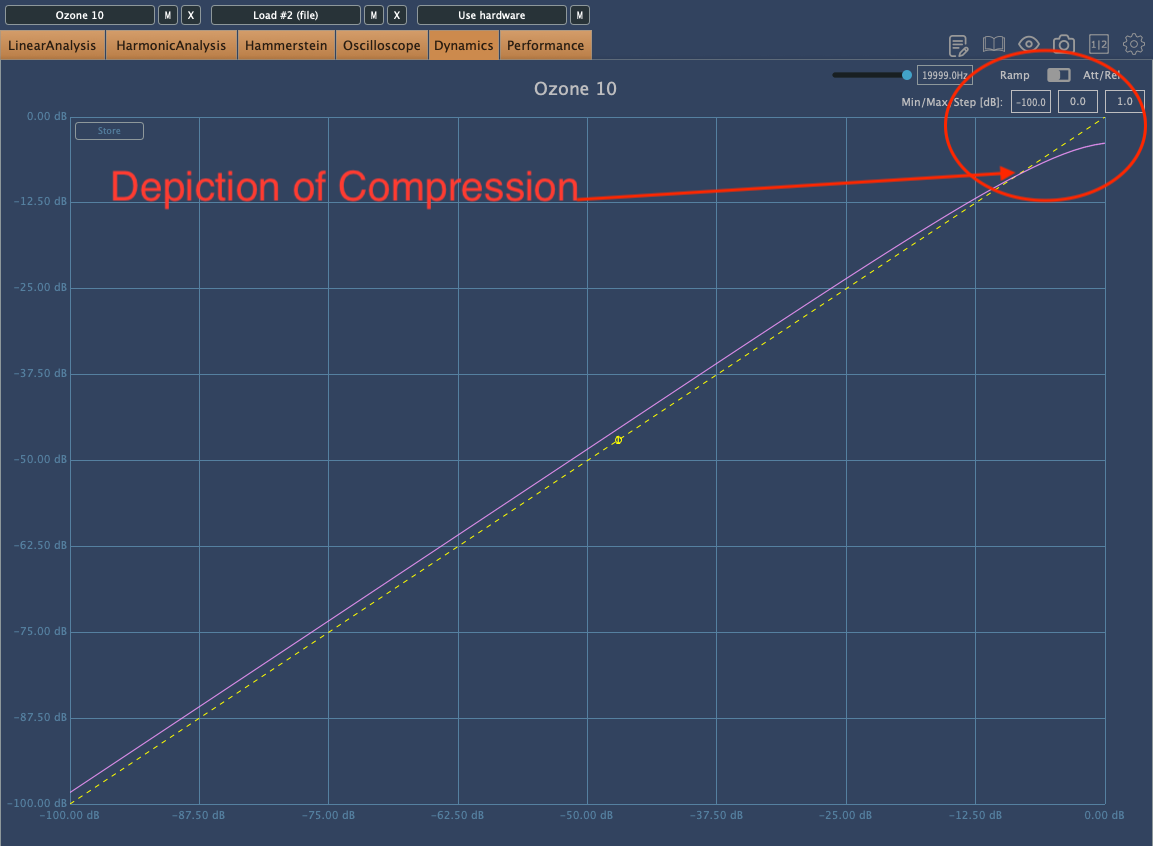
Vintage Tape compressor
This compression actually changes depending on the frequency content: in the top corner of the screen, you can see the frequency of the test tone that Plugin Doctor is using to measure the dynamic characteristics of the plugin.
If I change the frequency, the behavior of the compression changes.

15–250 hz
You might’ve heard that tape compresses higher frequencies more than lower ones; these two screenshots are certainly an example of that.
Unlike traditional compression, this effect doesn’t add attack or release characteristics to the sound, giving tape compression an inherently naturalistic feel.
By way of example, this is a screenshot depicting the attack/release curves of a typical compressor:
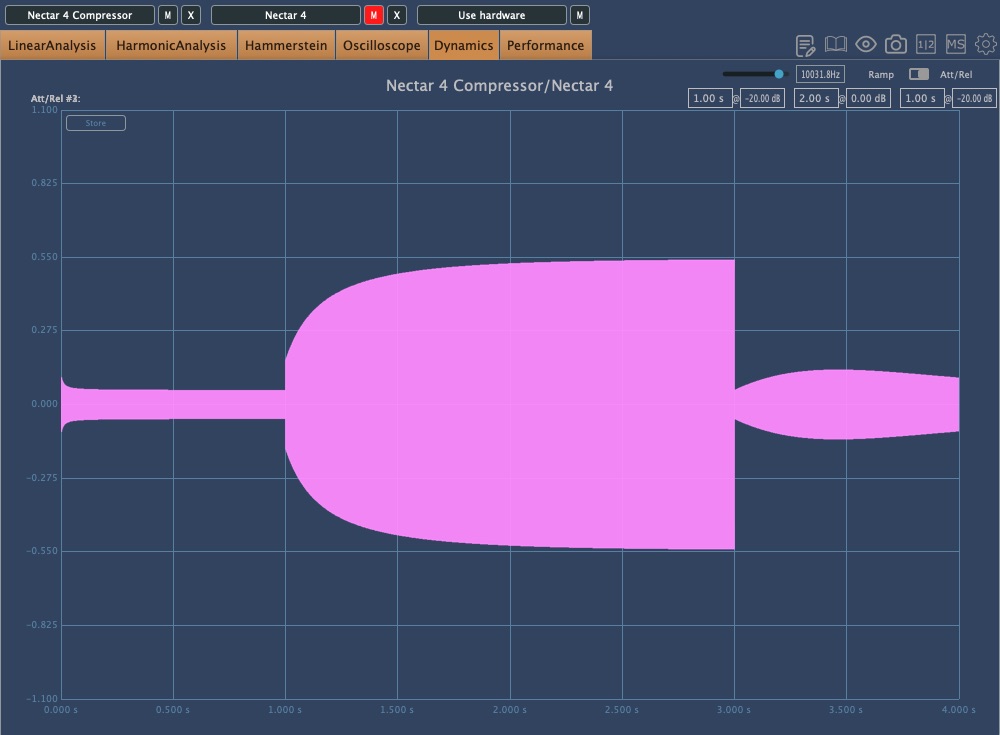
Nectar compressor with fast attack and slow release
The curves pictured above indicate a specific shape to the attack and release times as the signal is compressed. Contrast this to our Vintage Tape algorithm:

Illustration that tape compression doesn't have time-constants
Note the absence of any curves – this shows how time constants are not a factor with tape saturation. The compression effect is both “timeless” and non-linear (an EQ would be linear).
Taming transients and maximizing loudness potential
Distortion can also round off transients, and this can be helpful to achieving a louder mix without killing the impact entirely.
By way of example, here’s a drum loop pumped through the following setting in Trash.

Trashed drums for dynamics control
Drums with distortion
Roughly speaking, these sound like similar volumes. But here’s the thing: the non distorted version peaks at -2.72 dBFS, whereas the distorted drums peak at -3.4 dBFS – almost 1 dB quieter.
Now you can see how it works: In the context of your mix, you’d probably be able to push the distorted drums up 1 dB higher than the non-distorted drums. This is why many engineers put distortion on transient material – it helps them get a louder mix.
Get started fuzzing things up with distortion
This article shows off some of the more common ways to apply distortion in the mix. Use them as a foundation of sorts, and build off of them to create your own takes on this classic effect. Just remember to distort responsibility: if you think it sounds great in the moment, do yourself a favor and back off the effect by ten percent. Then ask yourself if that’s enough. Chances are, it is!
And if you haven't already, feel free to try all of the different types of distortion available to you in iZotope Trash. You can even get Trash Lite free.
