Swing and Syncopation: Understanding DAW Groove
In this article we break down two of the grooviest features found in most DAWs: swing and syncopation. Follow along with audio examples.
What is groove, exactly? As music producers we talk about groove all the time, but it can be difficult to explain in great detail. Groove is a feeling, a vibe, a special quality that makes music sound good.
Even though the concept of groove seems elusive, it can be broken down into concrete terms using two key DAW features: swing and syncopation.
A brief history of groove
In electronic music production, swing has to do with how far a sequence deviates from the metronomic grid. The further you push a sequence off grid, the more swung it is. Without any swing, a sequence is considered “straight”—the individual notes are evenly spaced and quantized. In some musical styles, like Detroit electro, this kind of machine-like accuracy is helpful, whereas others seem to work better with rhythmic variation.
Swing dates back to the 1930s, when it was originally considered a jazz genre and playing style that emphasized slightly delayed 1/8 notes. Bandleader and American pianist Duke Ellington championed swing, on full display in his song “Skin Deep” (skip to 30 seconds for the drums). By the 1980s, drum machines featured swing settings that could produce loose and lively grooves. The Linn LM-1 was the first drum machines to incorporate swing (called ‘shuffle mode’) proving that machines can groove too.
Swing and syncopation in practice
Today, all DAWs come with editable swing parameters used to approximate organic sounding, unquantized music. Although swing can be applied to any instrument, it is mainly used in reference to drums, which will be the focus of the following audio examples.

I’m using Ableton Live, but this article is applicable to all audio software: Reason, Logic Pro, Cakewalk, Fruity Loops. You can also do this in BreakTweaker, which even allows you to run multiple sequences at different tempos to produce evolving rhythms.
Important notice: Breaktweaker is no longer available for purchase from iZotope. We are continually developing new products, services, and solutions to enable and innovate on journeys in audio production. We occasionally need to retire older products in order to focus our resources and development efforts on building new, innovative products and features. Support for this product will remain in effect for 12 months from your date of purchase up through October 27, 2023.
Let’s start with a drum loop without any swing, i.e. a “straight” groove.

Basic 4/4 drum pattern with a kick, snare and hi hat.
Here we have a 1/4 note kick drum pattern that produces a note on each beat, met by a snare on the second and fourth beat, also called the backbeat. There’s a 1/16 note closed and open hi-hat pattern too. No swing has been applied yet. For some extra aesthetic richness and warmth, I used Vintage Tape.
Between the kicks and snares, I’ve added a rimshot playing a 1/16 note. This new sound introduces syncopation, a rhythmic device used to break up the straightness that can occur when every note in a sequence falls on the expected beat.
Like swing, syncopation has its roots in acoustic music, and is closely attached to jazz drumming, although it was introduced much earlier with 14th century European music. Syncopation can occur before or after the beat, and is intended to add an element of surprise or playfulness that goes against a track’s main rhythm.
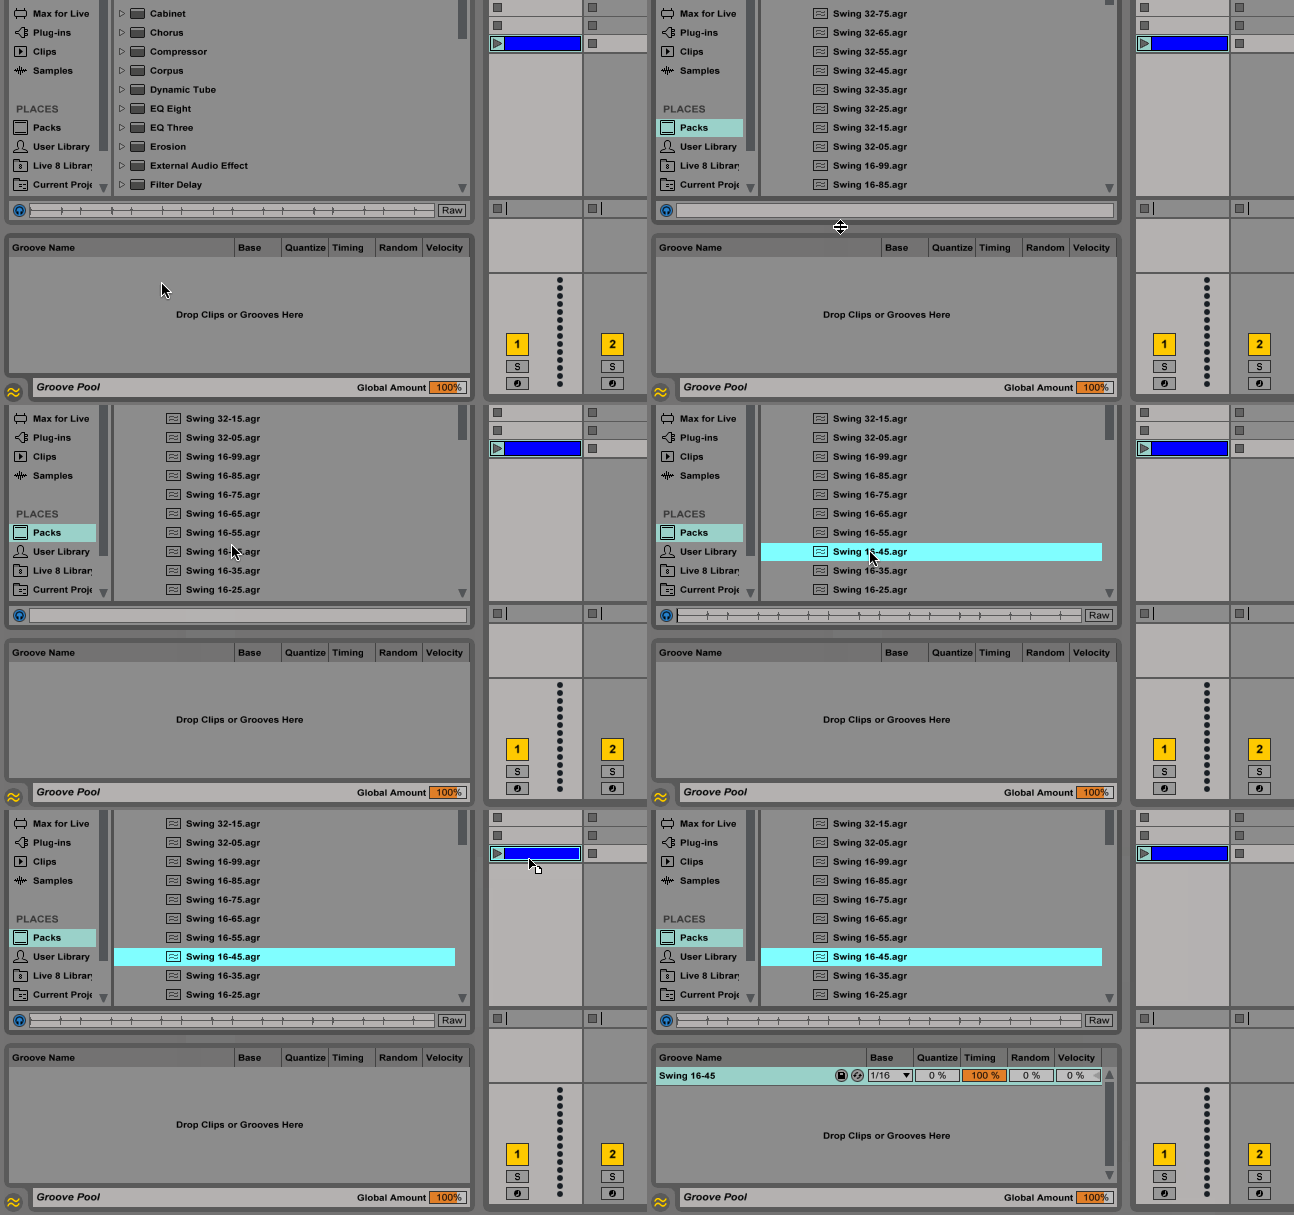
But even with syncopation, the entire pattern is still locked into a straight grid. We can introduce some groove using swing. In Ableton Live, press Groove Pool to access a library of previewable groove files. Then select one and drag it onto a clip, this will immediately apply the groove settings.

I’ve chosen a swing value based on a 1/16 note pattern—it pushes the second and fourth 1/16 note forward in time, making them sound late while everything else remains quantized to the grid. This somewhat mimics the slight timing delays that a drummer introduces when they perform. Swung patterns (as opposed to straight) are generally more effective at getting people to move and dance. Here goes:
The swing frees up space for the sequence to breathe and a skipping groove becomes noticeable. In Ableton Live, hit Commit to apply the swing to your clip permanently. This will move your drum pattern depending on the swing settings, making the timing differences clear.

You can also separate the individual sounds of your drum rack to different tracks. Rather than a global swing value, each sound will have it’s own, offering more rhythmic possibilities. The intensity, velocity, timing and randomness of a swing file can be adjusted to your liking.
Find your own groove
The swing settings offered by modern DAWs can quickly inject sequences with sophisticated rhythmic energy and feel. If the music you make demands quantization, find other ways to spice up your programmed patterns—either through syncopation or placement of drum sounds.
Whenever you can, let your own natural groove into your production. Instead of inputting notes via step-time, try to play them out on your MIDI keyboard or sampler. If your recordings are too loose, apply quantization at 25–50%. This will tighten things up while keeping some personality from the original.
Another way to approach groove is by extracting the template from live recorded drums or other instrument parts. If you recorded a great keyboard section, for example, you can use that as the template for your drums or bass patterns. You can also extract a groove files from samples. In Ableton, the groove will appear in Groove Pool menu under the same name as the clip.

Whatever you choose to do, focus on being rhythmically creative. Quantization and preset groove files have their place in electronic music production, but letting your own groove flow through you will lead to results no one else can produce.


