8 RX 8 Tips for Content Creation
Whether you work with podcasts, videos, or music, these RX 8 tips for content creators will help you breeze through editing your audio content.
When you say the words “content creator,” what do you think of? Some people think of podcasters, others think of video bloggers, online tutors, influencers––it’s a pretty long list, and it gets longer every day. But all content creators share the need to edit audio quickly and effectively, with results that can stand up to the expectations of their audiences.
Fortunately, iZotope has just made content creation a bit easier with


RX 11 Advanced
If you’re not sure how RX can help you with content creation, read on. I’ve got eight tips here that will guide you through some basics—and it’s not all about dialogue, either!
This article references a previous version of RX. Learn about 

RX 10 Advanced
Jump to one of the tips below:
- Tip 1: Get rid of noise with Spectral De-noise
- Tip 2: Remove noise from voices with Voice De-noise
- Tip 3: Make mouth clicks disappear with Mouth De-click
- Tip 4: Get rid of the room with Dialogue De-reverb
- Tip 5: Correct interview audio with Dialogue Isolate
- Tip 6: Spectral Recovery, a miracle cure for crushed audio
- Tip 7: Breath Control, because so many speakers have none!
- Tip 8: Special bonus black magic, the upgraded Music Rebalance
1. Getting rid of noise: Spectral De-noise vs. “the old way”
Back in the not-so-good ole days of digital audio, if a voice for broadcast had noise behind it, there wasn’t a lot you could do about it. Early DAWs provided the platform for editors to go in and remove noise between words by literally chopping it out and leaving silence in the gaps. This worked, but it didn’t sound particularly natural.
To illustrate this, here’s a chunk of noisy audio and an example of what this ‘manual gating’ sounds like:
And here’s what it looks like in practice, using the Gain module—set to "–infinity"—on selected sections:
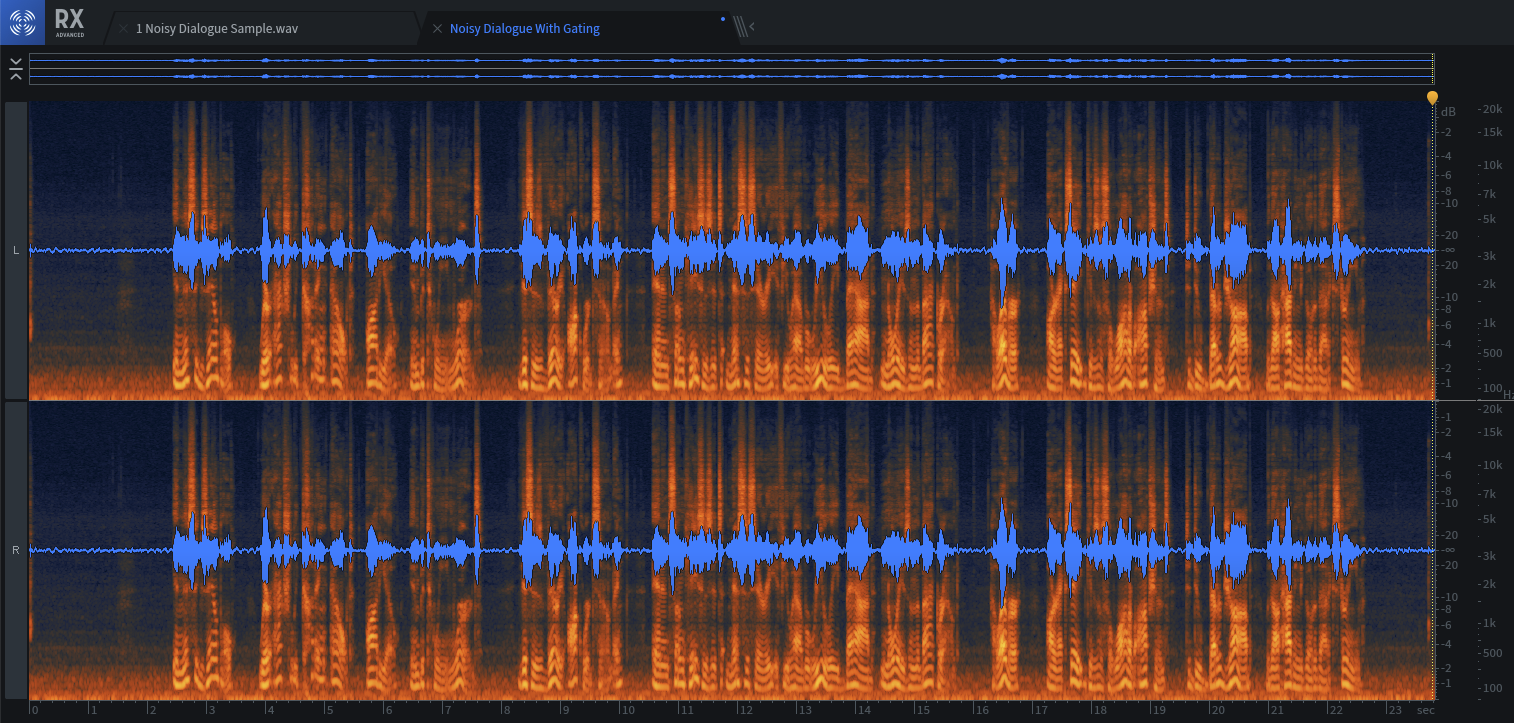
Here’s some noisy dialogue that needs cleanup…

...but this doesn’t need to be how you do that cleanup.
Luckily, we don’t live in the Dark Ages anymore; it’s been possible to remove background noise a lot more nicely than this for quite a while now, and


RX 11 Advanced
In this example, I kick in Spectral De-noise halfway through the file. You can see the section of audio chosen for the noise spectrum in the screenshot below:
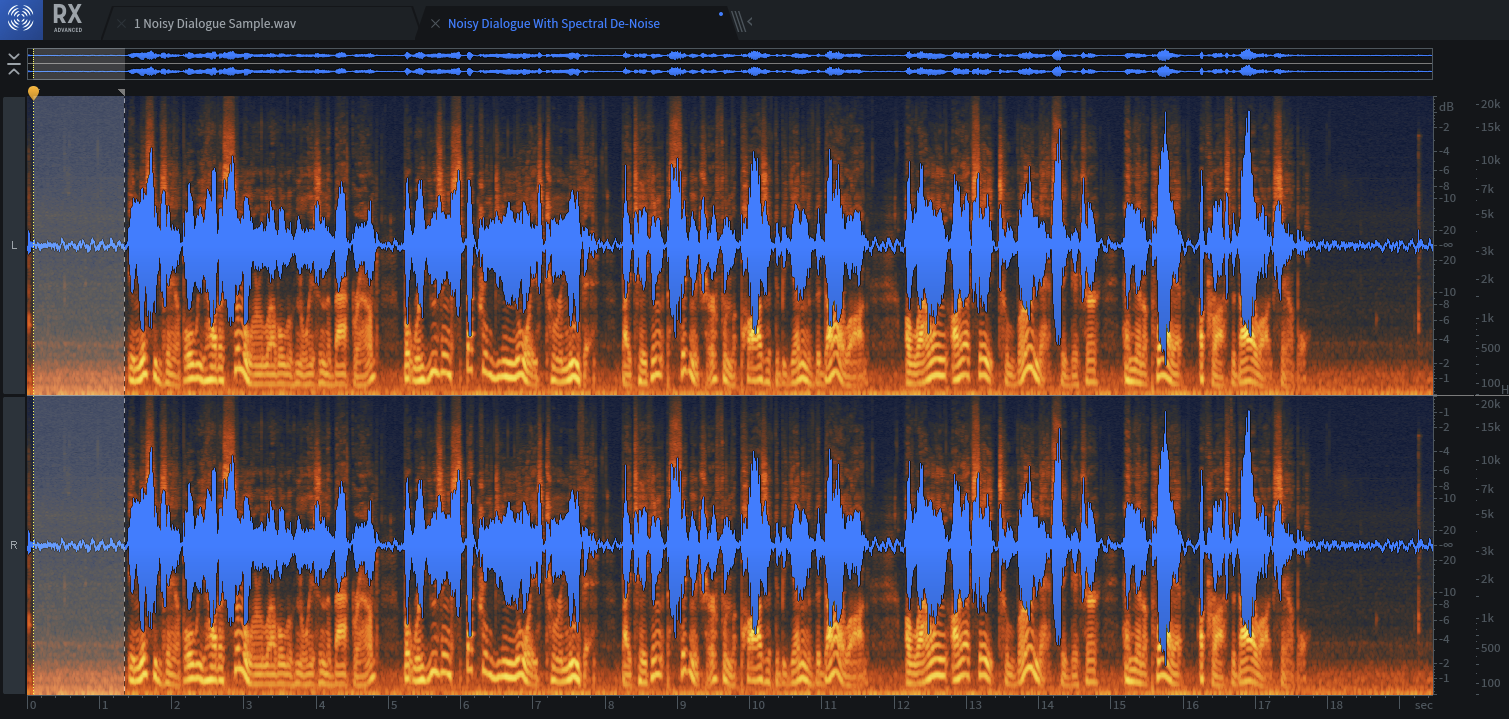
The noise profile for Spectral De-noise is chosen from the chunk of audio highlighted in the screenshot above.
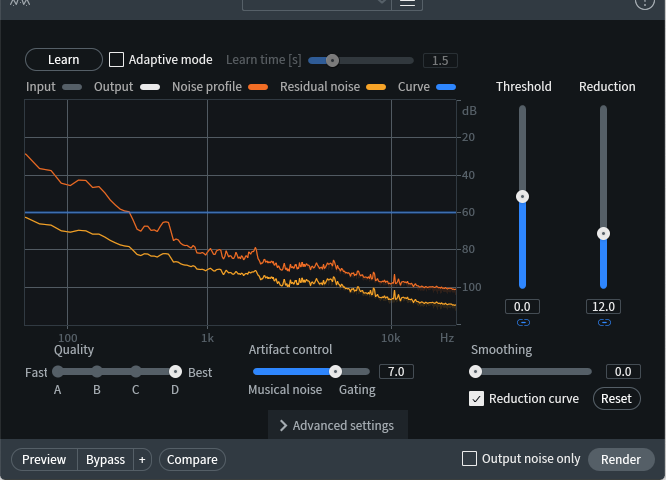
The noise profile for Spectral De-noise is chosen from the chunk of audio highlighted in the screenshot above.
And the audio sounds like this, with Spectral De-noise turned on halfway through:
Good stuff, huh? And we’re just getting started…
2. Voice De-noise: a specialized approach to noise removal
Spectral De-noise can of course be used with any kind of audio, and it does a very good job with voices. However, RX has a number of tools specifically tuned to cleaning up dialogue, and we’re going to spend a lot of this article going through them and showing what they can do.
Given what we’ve just discussed, the obvious place to start our tour is with the Voice De-noise module, which has controls optimized for the task.

Voice De-noise kicks in halfway through the file shown above. The playback head marks the start of processing.
Voice De-noise is a fascinating module to play with. It’s actually an intelligent, frequency-based noise reduction tool that learns the sound of the voice being treated, then uses that data to remove noise while retaining vocal character. Here’s what the module looks like:
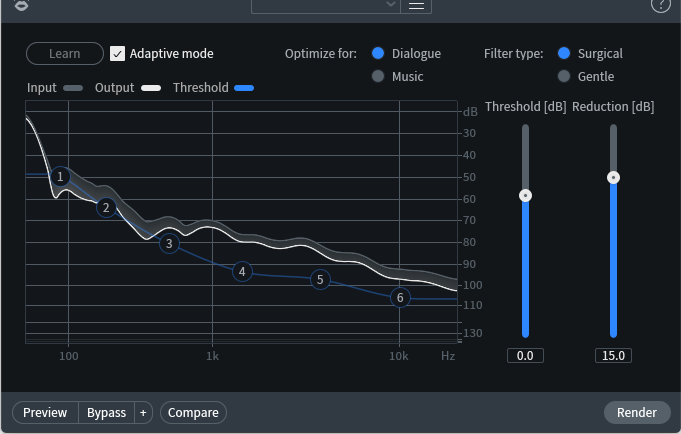
RX 8 Voice De-noise
And here is what the results sound like, with Voice De-noise turned on halfway through:
To make the contrast really obvious, I cranked the Reduction amount way up. In practice though, you’d want to make multiple passes with less Reduction to avoid artifacts.
3. Make mouth clicks disappear
Mouth clicks (also called mouth snaps) are one of the more unpleasant aspects of voice recording. Most speakers can’t help them; when the speaker opens their mouth, the separation of their lips produces an audible click. Back in the Bad Old Days, editors would have to chop these out one at a time.


RX 11 Advanced
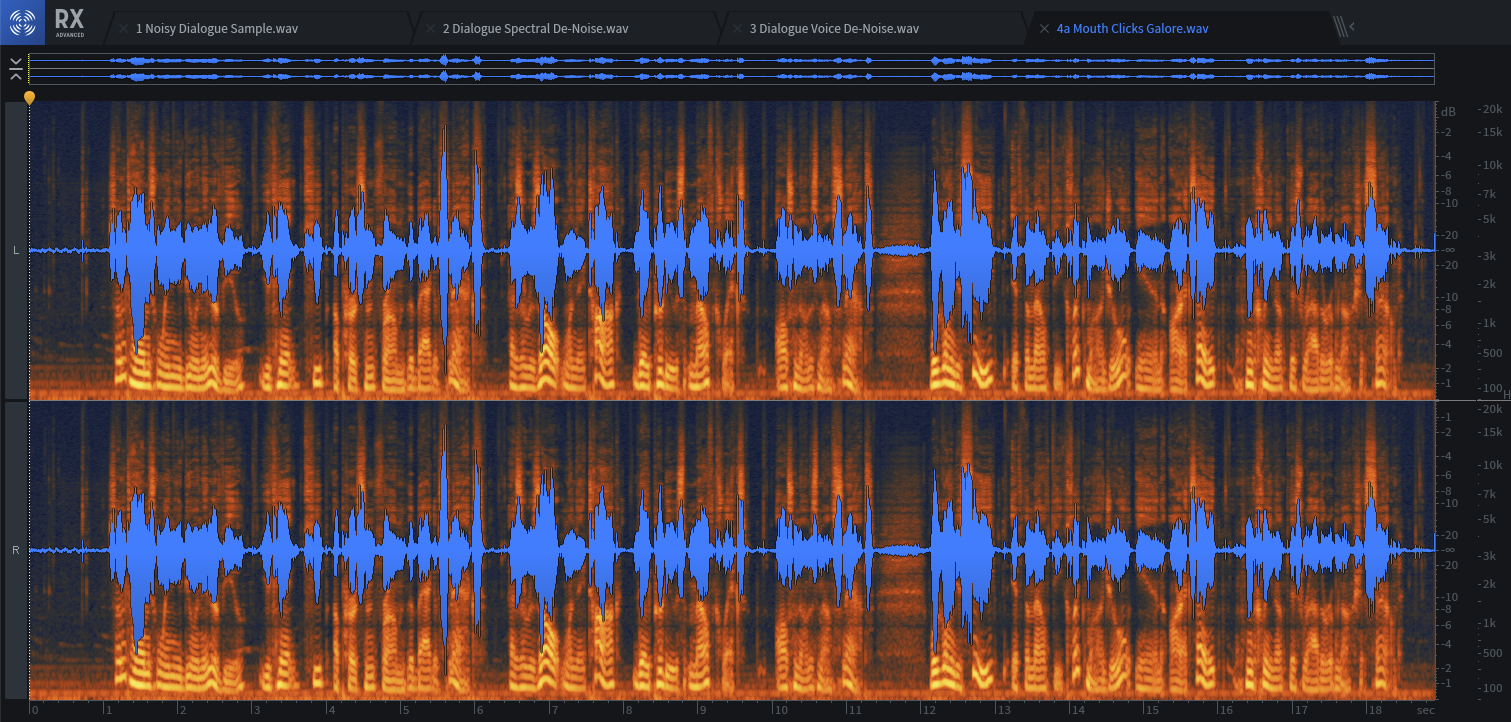
It’s hard to see the mouth clicks in this screenshot; they’re the tiny vertical lines that appear in pauses before words.
The Mouth De-click module looks like this:
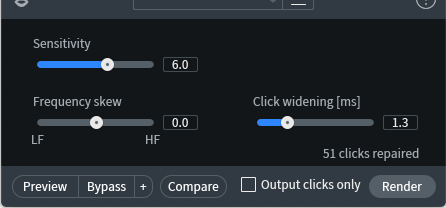
Mouth De-click module in RX 8
If it looks a bit like the regular De-click module to you, that’s because it’s largely meant to work the same way, with click widening to smooth out the fixes made.
Here’s an audio sample of a very clicky voice (sorry—it really does sound kinda gross) and the results of one pass with Mouth De-click on fairly aggressive settings. It doesn’t get them all, but there’s no rule that says you can’t attack artifacts with other tools, right?
4. Get rid of the room with Dialogue De-reverb
Remove reverb from a voice? As recently as a few years ago, this would have been considered black magic. As it turns out, though, the basic idea behind this trick is the same one as is used in convolution reverbs: the tool learns the “fingerprint” of the reverb.
Technically, if you had a hyper-accurate impulse response for this specific reverb fingerprint, you could remove reverb through deconvolution. But since you’ll likely never have that perfect impulse response, convolution doesn’t really help us here in practice.
Thankfully, Dialogue De-reverb is here to save the day, as it can find and remove reverb from voices with surprising accuracy.

Reverb is seen as ‘tails’ after words; they’re smaller and shorter after the playback marker, where Dialogue De-reverb has done its job.
In this example, I turn on Dialogue De-reverb halfway through the sample, as shown by the playback head in the screenshot. The reverb here is a fairly standard room sound, but I was surprised at how well this module works with even cavernously large reverbs, as long as the voice is exposed—this is more “sound design” than “real world” as an application, but still fascinating.
5. Correct interview audio with Dialogue Isolate
I have to admit, this next one was a lot of fun to record!
We’ve all heard it before: interviews with people who just do not want to sound good on mic. They handle stuff, they wave their arms and squeak their chairs, they do their very best to obscure what they’re saying—and they expect us to wave a magic wand and clean it up. Well, we don’t have a magic wand, but we do have the next best thing: RX 8's Dialogue Isolate module.
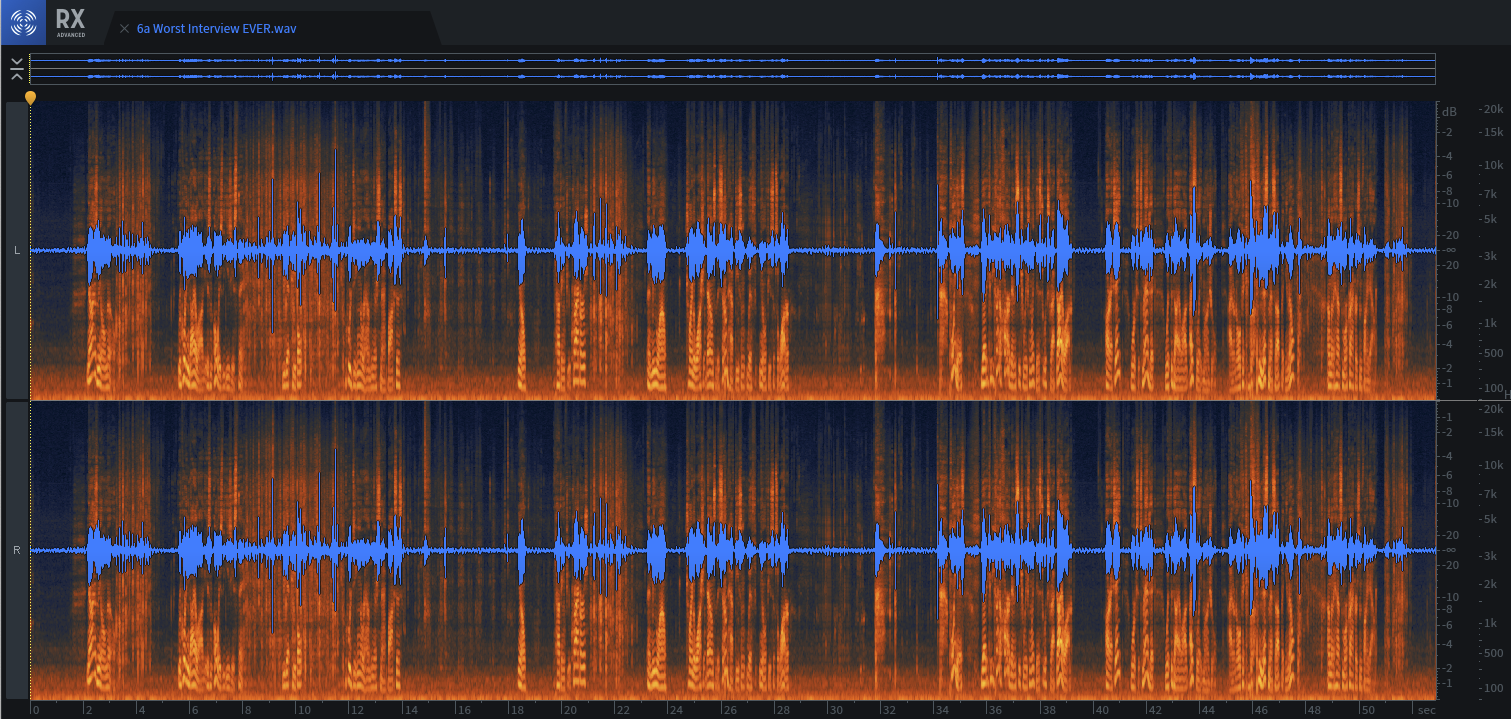
Just looking at this waveform cannot communicate the horror of this interview. Check the audio file if you dare…
Dialogue Isolate, like many of the modules in RX 8 and other iZotope products, uses machine learning to great advantage. The module listens to the audio and ‘learns’ where the voice is and what it’s supposed to sound like, then removes everything else. The module looks like this:

Dialogue Isolate module in RX 8
Pretty simple, huh?
The setting shown here is very extreme. It’s trying to pull noise all the way down to silence with no regard for ambient sound. As you might expect, the result of such an extreme setting is a bit clipped and artificial-sounding.
Again, I’ve done it this way here to illustrate the power of this module in handling truly awful material. And if it does this well on nightmares like the example below, imagine how it will work at gentler settings on other environmental noises that aren’t quite so obnoxious!
6. Spectral Recovery, a miracle cure for compressed audio
Every time iZotope announces a new version of


RX 11 Advanced
I won’t spoil all of RX 8’s surprises here, but its new Spectral Recovery module is one of those treatments that just makes you gasp. Check it out:
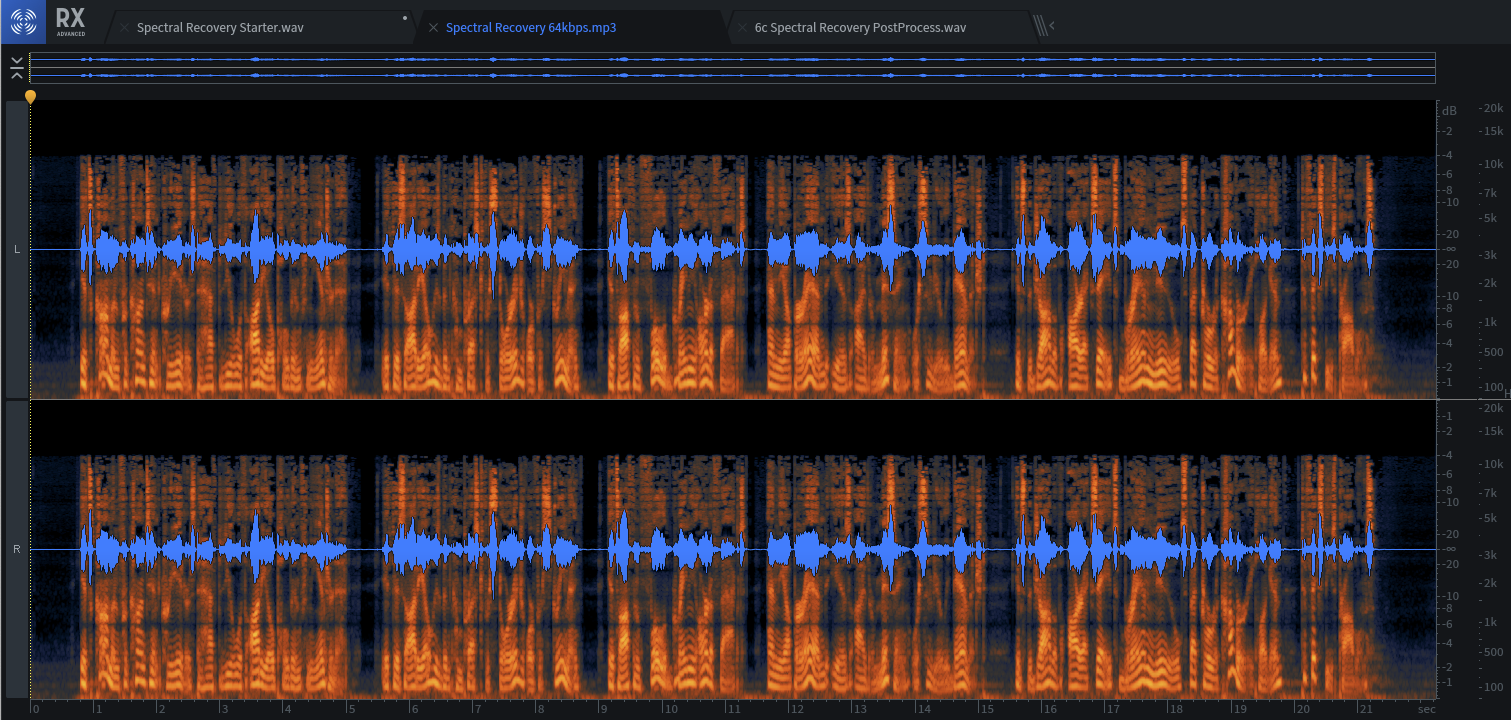
This audio file has been brutalized by lossy compression to 64 kbps MP3. Grainy high-mids, and the highs are GONE!
This previously-nice-sounding voice track was subjected to the sort of sonic indignity that is unfortunately quite common in the world of digital content downloading and streaming. It’s been forced into a 64 kbps MP3 format, which simultaneously makes everything up to about 12 kHz sound grainy and gritty, and completely erases everything above 12 kHz. Yuck!
When these highs are mangled or outright destroyed, they’re gone forever, right? Silly question—this is RX we’re talking about! Spectral Recovery uses its machine-learning education to analyze the frequency spectrum of music that’s been harmed by lossy compression, figures out what has been lost, and gently puts some of it back.
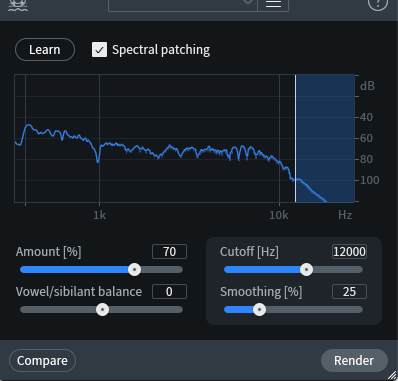
The Spectral Recovery module in RX 8
You define the frequency above which things are gone, dial in the other settings to taste, and hit the Render button. Because Spectral Recovery is such a powerful function, it's one of the few modules in RX 8 that can't run a Preview, but the Compare button is right there, making it straightforward to figure out if your settings are working nicely.

You can see the breaths as wisps of broadband audio in the pauses between phrases. They must go.
And here’s what you get, at least in this case.
This processing has to be heard to be believed. Here are: the original file, the file after crunching down to 64 kbps MP3, and the restored file after Spectral Recovery.
7. Breath Control, because so many speakers have none!
While putting the files together for tip six, I discovered something interesting about the original recording (6a). In that example, for whatever reason, my breathing was much more noticeable than elsewhere. It made for an interesting test of RX 8’s Breath Control module.
Breath Control is one of those modules you’ll find yourself using all the time. While the occasional breath intake is good for realism in a lead vocal, it’s usually just a distraction in spoken dialogue–and this module makes controlling it quick and easy.

You can see the breaths as wisps of broadband audio in the pauses between phrases. They must go.
Breath Control combines elements of event recognition (like De-click) and downward expansion (like a noise gate) to grab breaths and momentarily squash their levels way down. The vertical meter in the center of the module interface is a gain reduction meter of sorts, lighting up every time it detects and deals with a breath.

As you can see, Breath Control has gently ducked most of the breaths out of the way.
8. Special bonus black magic: Music Rebalance
There are other voice-centric modules in


RX 11 Advanced
(I’ve discussed Music Rebalance in detail in a three-part series of articles that you can find here: Part 1 | Part 2 | Part 3)
Sometimes a content creator needs to do heavy-duty disassembly of audio provided from outside sources. Everything I’ve described up until now is focused on spoken dialogue, but what if you need something more? If you work in the world of music production, it’s not out of the realm of possibility that you might be handed a field recording or finished mix, from which you need to extract pertinent material with as little bleed as possible.
If that sounds like something you might need to do, you should be sitting down for this last tip.
As you might remember from my previous series (you did read it, right?), Music Rebalance uses more machine-learning tech to isolate various components of a mix. You can adjust gain for four different groups of musical elements—vocal, percussion, bass, and “other instruments” (guitar, piano, synths, etc.). That’s great for working with poorly mixed stereo tracks, but what if you want to just get rid of an element that’s in your way?
Music Rebalance not only separates these elements from a mix, but can now split them out for automatic stem separation in RX 8!
Once again, we turn to my colleague Todd Barrow for our audio example; Todd has graciously granted me permission to play with his lovely country-rock track “Guadalupe River.” I selected this verse, opened Music Rebalance, left all of the Gain sliders at 0, and pressed the new Separate button… walked away for several minutes, came back, and I was met with four new audio files in separate tabs in RX 8!
I don’t have room to show you all the graphics, but here’s an excellent example of what I saw:
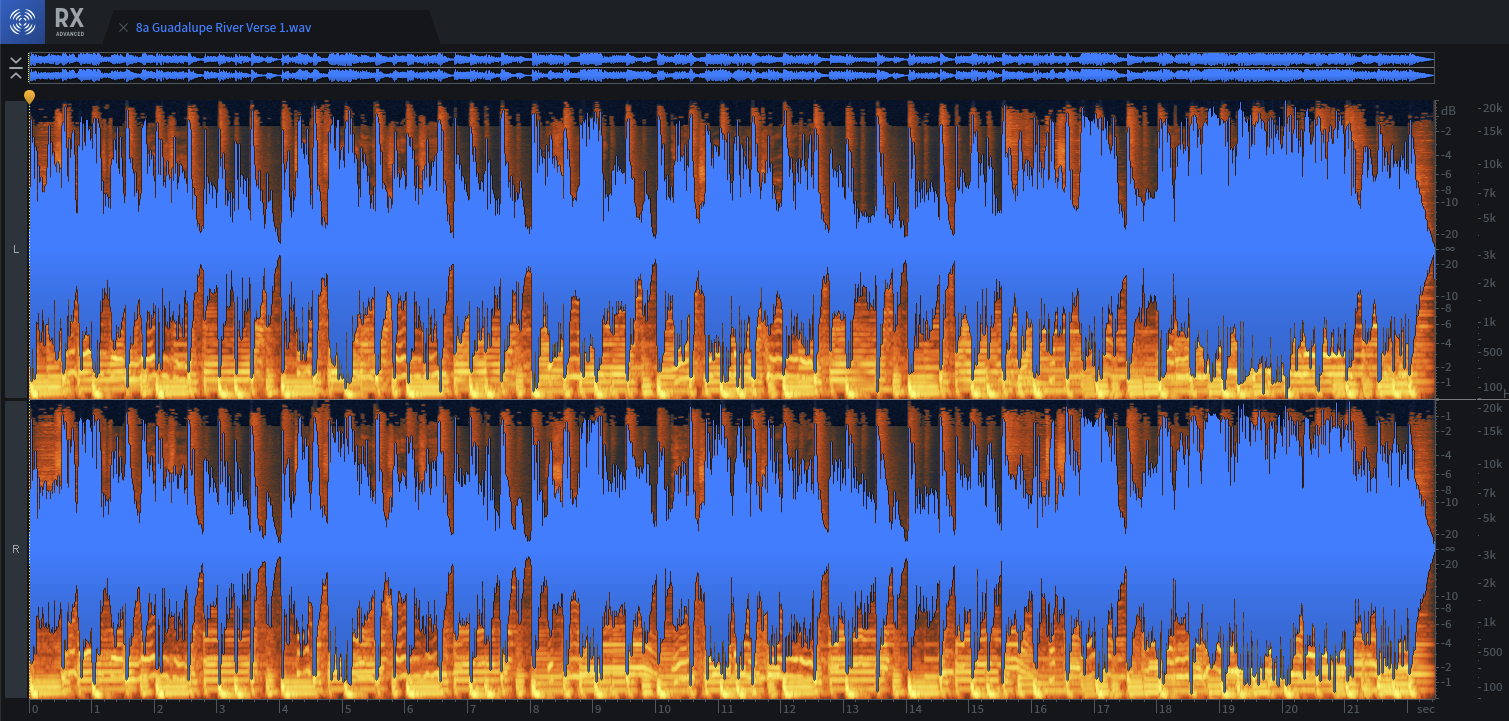
The first verse of Todd Barrow’s “Guadalupe River” – a straight-up track with guitar, bass, drums, and lead vocals...

...and this is the Vocal stem pulled out of the song by Music Rebalance. Wait until you hear it. No, REALLY.
As you’ll hear below, the extraction of the vocals, in particular, was remarkably good. Here is the original track, and all four stems pulled from it with one click:
The takeaways
There are obviously a lot more than eight tips for content creators using


RX 11 Advanced
I hope you find these tips an inspiring start to your explorations of content editing in RX 8. Until next time, stay safe, stay kind, and stay connected!

