Mixing Music: 4 Rules You Should Know When to Break
Mix engineers are often taught to follow some hardline rules. However, a time and place exists for these rules to be broken when mixing music.
When we’re taught how to mix music, we’re often told some hardline rules to follow. For the most part, these rules exist for specific reasons and serve as training wheels for the beginning producer.
They should generally be followed, but there’s a time and place for these rules to be intentionally broken. This can lead to noticeable improvements in your mix, point out problems that would have gone unnoticed, or create interesting effects that make the mix more unique.
Today, we’ll cover four of these “rules” when mixing music, and the opportunities you should look for to break them. We’ll include several audio examples for you to hear this in action, but it’s best for you to try breaking these rules in your own mixes. You may or may not notice some improvements, but at least hearing the effect on your own mixes can more easily show the benefits of breaking the rules.
“With the exception of kick and bass, cut out low frequencies.”
One of the first concepts we learn when getting into mixing is to assign each element (instrument, vocal, any sound) its own space in the frequency spectrum. Bass and kick drum are in the lows; snare, instruments, and vocals in the mids; hi-hats in the highs; this and level are the basis of balance in the mix.
By using EQs, it’s possible to mold each element’s frequencies in a way that they all fit together. Getting rid of unnecessary frequencies allows greater clarity for—or less masking of—elements that take up those frequencies.
All frequencies are important in the mix, but low end is the foundation of the rest of the mix. Without a solid, clear low end, many mixes can sound sloppy and unstable. Therefore, we’re generally taught to cut low end out of everything that isn’t a specific “low-end element” like kick drums or basses.
As with many on this list, this rule should generally be followed. This especially applies when mixing raw recordings or samples, as they can have a bit of sonic garbage in the low frequencies that muddy up a mix.
Additionally, bass-dominant genres of music (e.g. electronic music, hip-hop) are innately reliant on a clear low end. Harsh EQ cutting for non-bass elements can potentially work if you’re looking for extreme, surgical separation for elements in the mix.
However, this “rule” can cause beginning mixing engineers to cut low frequencies too hard. While the frequency separation is nice, doing this can weaken the element that’s being cut.
Vocals and many instruments and drum sounds have a lot of weight in the low-mids (here we’re talking about the range around 100–250 Hz). Cutting too much will allow the kick and bass to come through more cleanly, but will take away from presence in other elements.
The main problem is either setting the filter cutoff frequency too high or using a higher pole number on the high pass filter.
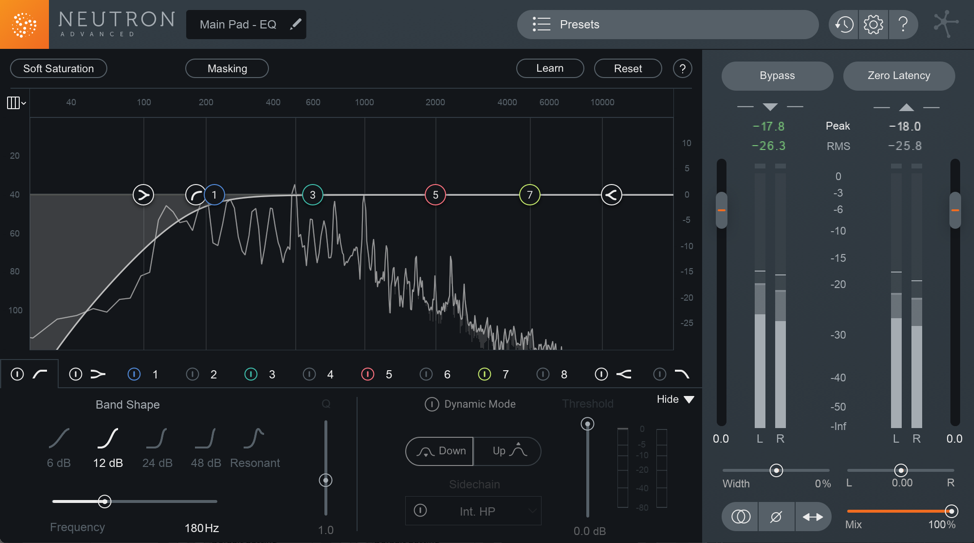
The cutoff frequency for the high-pass filter (HPF) is the most obvious adjustment that can be made. Male and female vocals can often contain key frequencies for presence below 200 Hz, even down to 100 Hz. Any instrument played in a similar register (often keys, synths, guitars, etc.) will naturally have those frequencies as well.
Let’s hear this in action. In this hip-hop beat, the main melody and harmony are provided by the key synth. In the first audio example, the cutoff frequency of the synth’s HPF is set at 180 Hz. In the second, the cutoff frequency is set to 250 Hz. Listen to the added weight allotted by having the cutoff frequency lower:

Synth HPF 180 Hz

Synth HPF 250 Hz
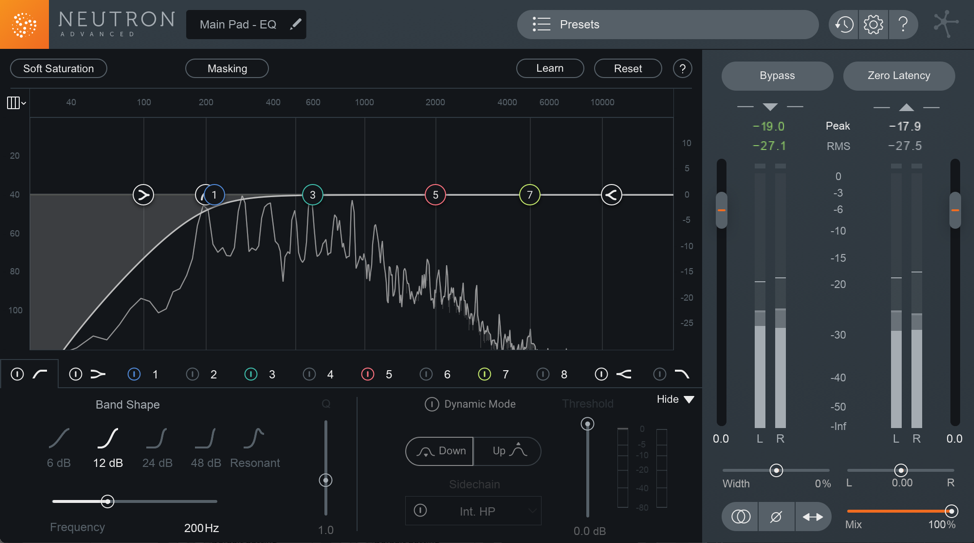
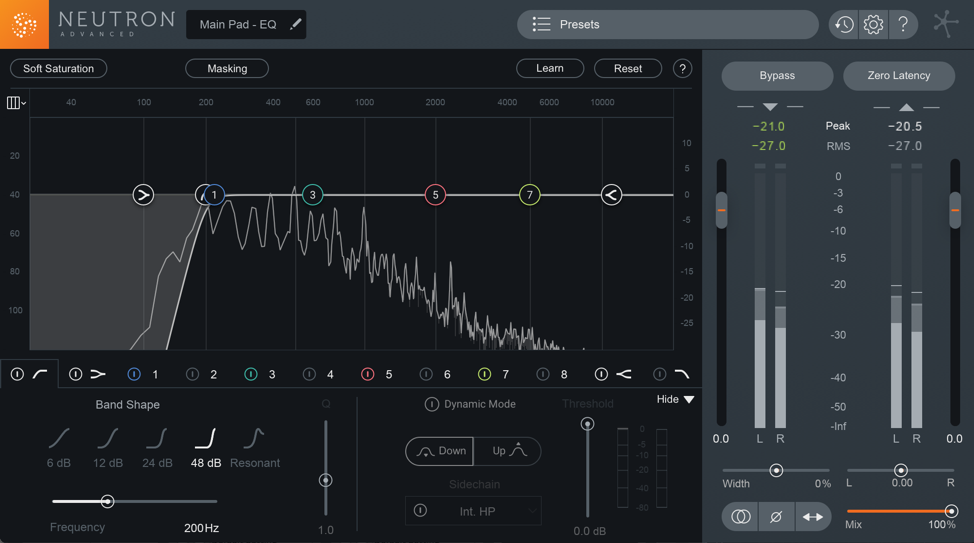
We can even see a difference by simply changing the pole number for the HPF. By allowing some more lower frequencies through the filter, although at a low level, some of this weight can be preserved without adding too much mud to the mix.
Listen to the same synth, this time with a 12 dB / oct HPF at 200 Hz and a 48 dB / oct HPF also at 200 Hz:

Synth HPF 12 dB per oct

Synth HPF 48 dB per oct
The difference is subtle but still noticeable. Make sure that you’re not over-cutting, as this can over-sterilize a mix and make each element sound less organic and natural.
“Everything needs to be audible in the mix.”
Again, this is generally a great rule to follow. In fact, the ability to clearly hear all elements in the mix is often the main factor of a “good” mix. This is related to the last rule, as frequency separation between elements is part of the process in making all elements audible.
Panning decisions and the level of each element also help to give each element its own space. A great technique to make sure everything is audible is to mix at low volumes. This will allow you to hear if anything doesn’t have this space, as that element will drop out or become masked by others.
However, it’s important not to take this “rule” too literally. Yes, the main elements in your mix should all come through clearly. But it’s easy to develop the mentality that anything which isn’t completely audible is just causing unnecessary masking of main elements.
Mixing music is nuanced, creative, and full of fine detail work and subtlety. Not everything has to be right in the listeners face, and the “mess” that inaudible elements cause can actually be beneficial.
Lower-leveled elements can be used for ambience (in place of over-using reverb) or to add texture to other sounds. In the case of percussion, shakers and such can steer the groove by emphasizing certain beats, even if the percussion sounds are very low in the mix.
You’d be shocked to hear the drums isolated in some of your favorite songs, as there are often hidden percussion layers that get buried in the full mix.
While most elements will be audible in your mixes, there are a couple ways to mix hidden elements. Remember that they should ideally fit with the groove or an instrument to not be distracting; this way they melt into the mix.
First is barely audible. The easiest way to find this point is to move the channel’s volume fader until the element is undetectable. Slowly move the fader up a dB or two and find a level that you like the element in the mix. This is obviously a good level if you want something to still be noticeable but play a support role, like ear candy.
Next is barely inaudible. We already actually found this point, just where the element is not audible. While not heard by the listener, it undeniably fills space that feels empty without it.
Check out the following examples. In the first, a shaker is set to a level where it’s barely audible. In the second, the “inaudible” shaker is muted. Chances are you didn’t hear the shaker until going back to the first example. The shaker, even at a level where it isn’t really audible in the mix, fills everything out and helps the groove as well.
While not a standard technique, knowing when to under-mix an element can add something interesting and unique to an otherwise lifeless mix.
“Your mix should already sound like a mastered track.”
It’s important to keep in mind that mastering is only supposed to polish an already great mix. Theoretically, a perfectly mixed track wouldn’t necessarily need mastering, other than to bring it up to a standard level for distribution. Because of this, you shouldn’t be counting on mastering to take a 50% mix to 100%; the mix should sound as finalized as possible.
Unfortunately, this leads to the tendency to compare your mixes to mastered tracks and attempt to replicate the sound. However, the two processes serve completely different purposes and shouldn’t be conflated.
Anywhere from a small amount to a ton of compression can happen in the mastering stage, so it could seem like a good idea to take care of this compression in the mixing stage. As a result, beginning mix engineers can have the tendency to over-compress everything, which can suck all the dynamics out of a mix.
It’s a good idea to leave final compression and gluing to the mastering step. Use the mix stage to focus on balance. Only compress what you need to and be selective with what takes center-stage in your mix.
A simple mastering chain with light compression can be made and bypassed on your master channel if you feel the need to check what a mastered version would sound like. This gives you the option to occasionally check if your mix “sounds like a mastered track already” while allowing you to focus on mixing.
“Mix music at mostly low listening volumes.”
We already mentioned the benefits of mixing at low volumes, low enough that you’d be able to have a normal conversation easily with someone else in the room while the track is playing.
Main elements that drop out should be more present in the mix. Additionally, your mix should be as impactful at a low volume as it is played loudly. We’re often seduced by loud music, otherwise, the Loudness Wars wouldn’t have happened in the first place.
Because of this, we can often overlook mixing issues when listening at loud volumes. Our perception of balance is skewed and our mixes can suffer.
All that being said, it’s still worth mixing at loud volumes too, but you should do so sparingly and intentionally.
Before saying anything else, remember: If you’re trying to make music and audio into a career—or at least to be able to enjoy it as a hobby—you’re going to need your ears. Listening to music at high volumes can cause permanent damage to your hearing, risking your ability to work accurately or even work at all.
Just like low volume listening helps to find elements that are too loud in the mix, high volume listening can help to reveal loud elements in the mix. Anything that jumps out as being particularly loud probably needs to be lowered in level.
Additionally, harshness in the mids, high-mids, and highs can be more noticeable at high volumes. Human ears are sensitive to these frequencies, and loud volumes will make this harshness obvious.
Occasionally checking a mix at a loud volume is especially important for tracks that are intended to be played at loud volumes. For example, it would be important to make sure that a dance track that is expected to be played at festivals isn’t painful at loud volumes.
At the end of the day, your mix should be checked in as many settings as possible to ensure that the highest amount of people will have a positive listening experience when they hear it. This includes different volume levels as well as different types of playback systems (e.g. monitors, laptop speakers, phone speakers, car speakers, headphones, earbuds, etc.)
Conclusion
Millions of engineers have tried their hand at mixing in the several decades the craft has existed. Countless hours of trial and error have given us some standard rules to follow, rules which are often the best choice to achieve a great mix. These rules make a great foundation for the beginning mix engineer, allowing more people to enjoy the world of audio production.
However, every innovation is made from someone ignoring the standards finding a new way to do things. This extends to mixing as much as anything else. Finding times to break the rules can lead to everything from tangible improvements to interesting sounds that could define a genre or time.
While there are ample opportunities to break these four rules, feel free to go against the grain and break any other mixing rule you’ve heard. Following the rules can be best to achieve a crystal-clear mix, but commercial success is possible regardless.
Always have the vocal be the clearest element in the mix? Led Zeppelin’s “Carouselambra” has the vocals intentionally lower in the mix:
Always pan the snare center? Tell that to Tyler, the Creator on “Yonkers,” who pans it pretty hard left. Be creative, be bold, think outside the box and your mixes will reap the rewards!


