How to Use Match EQ in Ozone 9
Learn all the ways you can use the new Match EQ module for audio mastering in Ozone 9 to bring the tone and vibe of your favorite artists to your music.


Ozone 11 Advanced
Let’s dig in, and learn how to use Match EQ in Ozone 9. In this piece you’ll learn:
No more compromises
While Match EQ was previously a somewhat discreet mode within the main Equalizer module, it is now its own, dedicated module. If you’re an


Ozone 11 Advanced
You can now tailor the frequency range in which Match EQ is working. This has many powerful implications, but here are a few key ways this could be used:
Getting the low end dialed in
Truly accurate low-frequency monitoring is one of the hardest things to get right in small home studios. If you love what you’ve got going on in the mid and high frequencies, but are unsure of your low end, put Match EQ to work by scanning one of your favorite references with a great low end and limiting the action area to below 250 Hz or so.
The music’s in the mids
It’s been said many a time that music lives in the midrange and once you get that right, everything else can fall into place. If you’re having trouble getting the midrange to be present and solid enough, without being harsh or muddy, try limiting the action area to between about 250–2k Hz for low-mids, or about 2k–8k Hz for high-mids.
Silky-smooth highs
Small changes in the high frequencies can have a big sonic impact due to the sensitivity of the ear in this range. If you’re struggling to get this balance just right, let Match EQ help you out by limiting the action region to above roughly 6k–8k Hz.
Save those favorites
Of course, no one wants to have to load all of their favorite references into the timeline of a session to capture and try snapshots from each reference, only to have to do it all over again for the next song. That’s where two other time-saving workflow enhancements come in. Match EQ now allows you to capture reference snapshots directly from


Ozone Advanced
To capture a reference snapshot from a song loaded into the Referencing panel, follow these steps:
Step 1: Open the Referencing panel by clicking “Reference” (below the I/O meters), load the song you want to capture a snapshot of, and enable reference playback with the power button. Optionally, select the portion of the song you want to capture the snapshot from (maybe a final chorus?).
Step 2: Switch back to the Match EQ module, press play in your DAW, and click the “Capture” button. You should hear your reference track play back, and see a spectrum snapshot start to build. Once the spectrum settles, click “Stop” in the reference capture panel, stop your DAW, and turn off the reference panel.
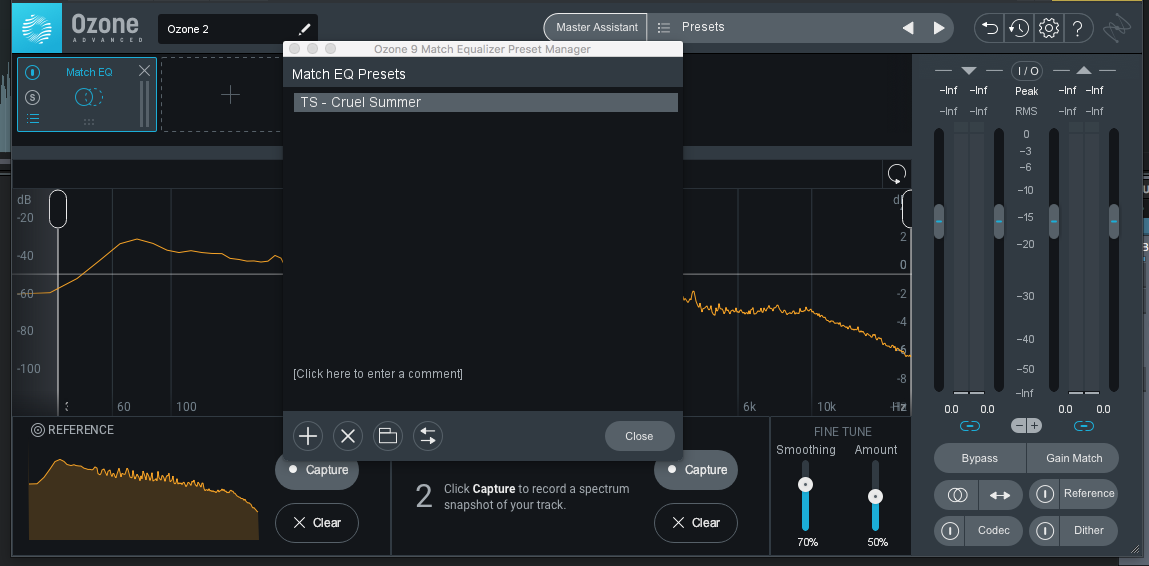
You can save your reference snapshot for future use by opening the Match EQ preset manager and clicking the “add preset” button. This will save, not only the reference spectrum snapshot, but also the Smoothing and Amount parameters, along with the frequency bounds.
This opens up some really cool possibilities. For example, once you’ve captured a bunch of references and saved them as presets, you can then capture a snapshot of your song and scan through your reference presets to find the one that really works best to bring out the character and vibe you’re after.

Store references as presets
Trust, but verify
To make sure you’re not overusing Match EQ, create a custom target in the improved Tonal Balance Control from a folder of your reference tracks. If you’ve never done this before, start by placing copies of your favorite reference tracks in a folder you can easily navigate to. Using the same tracks you used to create your reference snapshot presets in Match EQ is a great way to start, but the more references you can feed


Tonal Balance Control 2
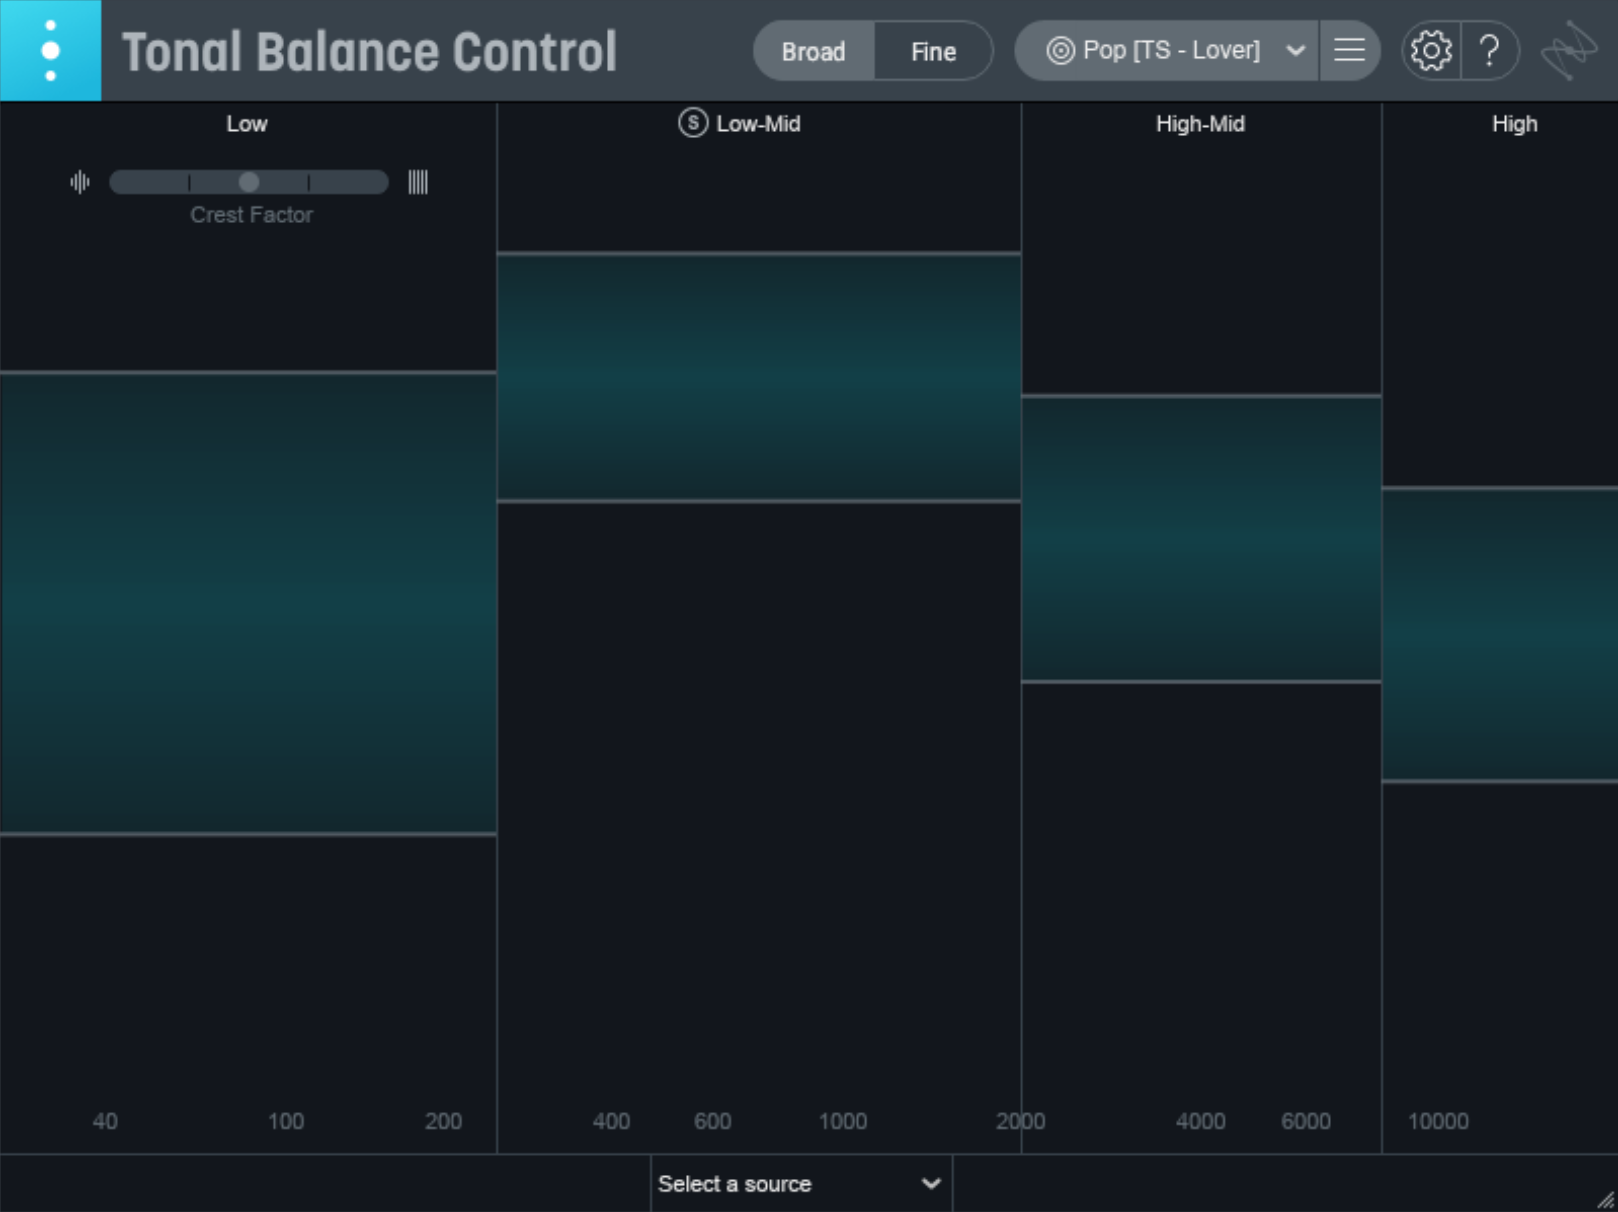
Once you have your tracks collected in a folder, click the menu button to the right of the target curve selection menu, select “Create target from folder,” select and open your folder of reference tracks, and save your custom target. Now you have custom broad and fine views, tailored from your reference tracks, which you can use to check the tonal balance of your song while adjusting Match EQ.
Match EQ at work
Let’s take a look at how we can put this all together while using Match EQ on an example song. We’ll start with Adara’s “Death of a Star,” a big pop production, not entirely unlike what you might find on Taylor Swift’s new album. First, here is “Death of a Star,” with just a little limiting to get it up to a good level.
Before I go much further, I’m going to load all of the songs off of Swift’s Lover album into


Tonal Balance Control 2

A custom target curve in improved Tonal Balance Control 2
Then I’ll load two songs off of Lover, which I think might be good candidates, into


Ozone Advanced
#1: To achieve the sort of broad-strokes adjustment that I’m after, smoothing is going to be an important component. Here I’m liking about 70%.
#2: Because these songs are in different keys, the fundamental bass note is very different. I don’t want Match EQ to take out too much of my low end, so I’m going to limit its lower bounds, in this case to 35 Hz.
Now I can jump between my two presets, checking in Tonal Balance Control 2, and see which one I like more.
Here it is using Lover’s “Cruel Summer” as a reference:
And alternatively, using “Paper Rings” as a reference:
It’s worth saying that the source mix is very good, so the changes are on the subtle side. For me, though, using “Cruel Summer” as a reference does just enough to tame the high end and shape the midrange for a contemporary pop sound, all in just a few minutes.
Conclusion
If you’ve never tried Match EQ before, there’s truly never been a better time. And if you have, I think you’ll love the improvements. Between the dedicated module—and component plug-in in


Ozone 11 Advanced
I can’t wait to see and hear all the other creative ways people find to use this. Here are a few ideas I've come up with:
- Match takes recorded on different days, or with different mics.
- Try low or no smoothing as a resonator effect, a la vocoding.
- Save the tone of a kick drum, guitar, synth, vocal, or more from one of your own productions to get a similar tone on future projects without using the exact same source and chain.
- If you have access to multitracks of some of your favorite artists' productions, capture and save the sound of some of their individual channels to emulate their tones right within your session.
So go load up Match EQ, play around, and let us know what you come up with!

