How to Program and Layer Electronic Basslines in Your DAW
We show you how to produce one of the most important, but fussy song elements: basslines. Learn how to program bass that sounds good across multiple listening environments.
What makes a good electronic bassline? Sometimes, a perfectly tuned sub does the trick. Even a single repeated note can pack a punch. At the right time, bubbling acid squelches are the answer.
Basslines differ greatly from one genre to the next, but one thing they have in common is the ability to get toes tapping and people moving. Naturally, as a music producer, this is something you want to achieve with the basslines you program in your DAW.
Basslines are notoriously tricky to produce. Without proper EQ and layering, they won’t play well with other song elements, leading to mixes that sound muddy or lack punch.
Through this article, we’ll show you how to make the right decisions when it comes to producing delicious electronic basslines. We’ll focus primarily on layering and EQ and touch on effects processing and compression.
The sub layer
Many basslines follow the root note—the first note—of a chord progression or melody. If you’re new to production, this is an uncomplicated path to writing good basslines, without having to fuss with much music theory.
Our bassline will follow this chord progression. We’re using Ableton Live as our DAW.

EDM chords in Ableton
On a new MIDI track, we’ve copied over the root notes—A, G, and C, then F, F, F, and C—to trigger a sub bass synth. Here, the role of the sub bass is to support the chords like a pillow, occupying the lowest end of the frequency spectrum. To avoid frequency masking between the synth and sub, we removed everything below 100 Hz on the chords using EQ. If not, the lowest frequencies in the synth will clash with the sub bass, making it difficult to hear both elements with clarity.
We also did some EQ sculpting on the sub, rolling off (engineer-speak for applying a low pass EQ curve) everything above 100 Hz. Even though it is a low-frequency waveform, there is still a lot of other frequency content in the sound. Notice the difference in the density of the waveform after it is low-passed.
As a rule of thumb, remove all frequencies that do not improve an instrument’s definition or ability to communicate a message or feeling. Sub bass does not need high end, the same way hi-hats do not need low end.

The midrange layer
Next up, the midrange layer. We copied the same root note MIDI clip to a new track with a synth occupying a range from around 300–3000 Hz, or 3 kHz. The purpose of this layer is to add a sense of presence to the bassline, which is helpful if you want it to be heard clearly through laptop speakers and ear buds.
Here it is paired with the sub bass, then joined by the chords.
Because the chords have a lot of midrange content, this layer was approached with caution. Using the volume slider, we slowly brought the layer into the mix and stopped once the bass sounded rich and full. When you do this at home, keep an eye on your EQ settings. Trim or boost frequencies if your mix does not sound balanced.
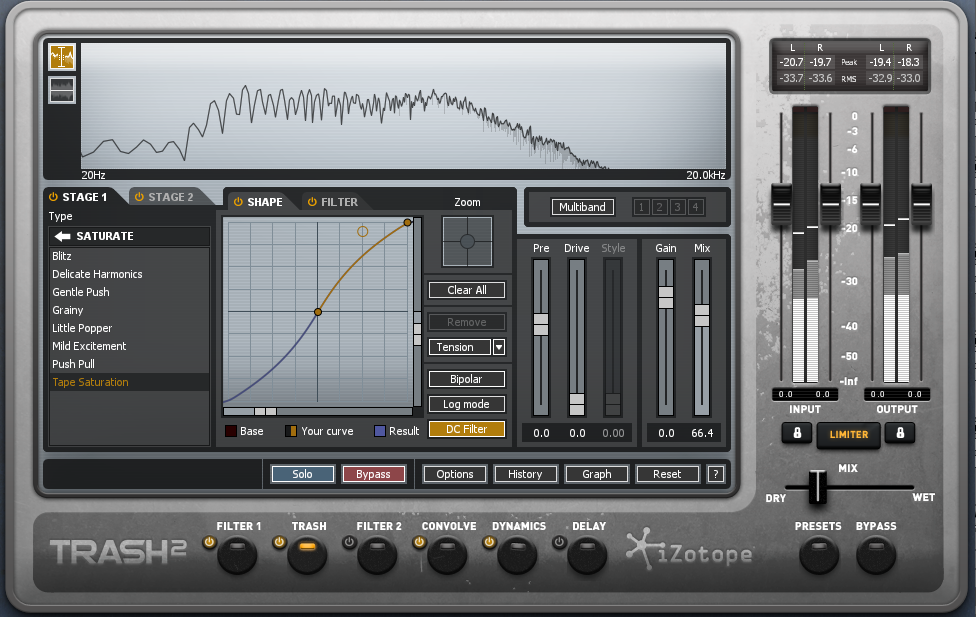
To add some crunch, we applied distortion engine Trash 2.

The top layer
The third layer of our electronic bassline contains only high frequencies and is used to add texture. Once again, we’re using the chords’ root notes. Depending on the presets you use in your DAW, you may need to shift MIDI notes up an octave or two to get a higher pitch sound.
Here you are more free to experiment with whacky tones and effects that color your bass sound. Ours has been filtered with a wah that sweeps through the signal. And all frequencies below 3 kHz have been EQed out.
With only the bass solo’d, you can hear the layer—an analog-type click—before the chords are brought in.
Adding drums
The next step is adding drums. Whether you add them before or after you construct your bassline a similar issue is likely to arise—whenever a kick drum and bass occur simultaneously, they bump into each other instead of forming a whole. Remember frequency masking? There simply isn’t enough sonic space to fit both sounds in the same low frequency range. And it doesn’t sound great:
The easiest way to avoid this is to sidechain the bass to the kick. This means that everytime the kick lands, it will momentarily quiet the bass so it can do it’s thing. The kick takes priority over the bass during the attack portion, and the bass swells back up during the sustain portion. Read more on creative sidechaining.
In Neutron 2, turn on the sidechain compressor, set the input to Ext Full, then route the kick drum into the plug-in using your DAW’s send channel. This effect can be as subtle or extreme as you want it be.
As you arrange your song, use automation to bring each bass layer into the mix separately. For example, slowly introduce the midrange layer as the song builds during the intro, then bring in the sub for the drop. Incorporate the top layer for the second drop. These tricks will contribute to a greater sense of excitement and song flow. If you work with a vocalist, you’ll need to make room for their voice too.
Conclusion
While we suggest following this article when it comes time to program and layer your own baselines, we also realize that every session is different, and that you will have to trust your ears to determine exactly which frequencies need to be cut, and which effects should be applied. A little bit of both can make a huge difference.
The idea is to separate your baseline into three sections based on frequency content—subs, mids, and highs—and then find the settings that allow each section to gel together, along with the rest of your track. Test your mixes on as many high-quality speakers as you can to get the most accurate bass response.


