How to Learn a Synthesizer in 3 Easy Steps
Using Iris 2 we take you through how to learn any synthesizer in just three steps.
With new synths coming out all the time, how could one be expected to keep up? It can be especially hard if you’re not a synth-person by nature. Indeed, if I say the word “modular” and you think “well, that’s an annoying corporate buzzword,” this article is for you, because what we’re going to do here simple: I’m going to lay out my easy, three-step process for learning any soft-synth in a way that’s sure to stick.
Instead of focusing on cramming every detail of the synth into your poor, overloaded noggin, we’re going to use your innate sense of creativity to explore the instrument, and ultimately, to demystify it. This article should be particularly helpful to all you preset people—to anyone who loves to slap on a preset, but feels overwhelmed in tweaking its settings.
The game is simple: you are going to open your favorite DAW and compose a short loop, four to eight measures in length. You’re only going to allow yourself three tools for this task: your faders, a limiter on your master bus, and the software synth in question, spread out across however many tracks it takes. That’s it. Okay, maybe some metering on the master outputs if you’d like. But really, that’s it.
The faders will help you balance the level of each track. The limiter is there to protect you from going into the red on the occasional peak. With the synth, it’s a bit more complicated: yes, you’re going to use the instrument to compose music and create soundscapes. But eventually (and this is key to the process) you’re going to use the synth as a mixing tool—as a means of creating fully fleshed out sonic arrangements. The plan is to get as close as possible to a finished, polished product; in doing so, you’ll test out the limits of the synth’s filters, oscillators, envelopes, and effects.
Fair warning: This piece is going to assume you like to compose music. If you don’t, and you only cycle through synthesizers while mixing as a form of sound replacement (to supplement cheesy synth patches from a client, for example), you’re still welcome to stay and read.
Important notice: Iris 2 is no longer available for purchase from iZotope. We are continually developing new products, services, and solutions to enable and innovate on journeys in audio production. We occasionally need to retire older products in order to focus our resources and development efforts on building new, innovative products and features. Support for this product will remain in effect for 12 months from your date of purchase up through October 27, 2023.
1. Play with presets
Yes, we’re going to start with presets. Don’t let that turn you off, for presets make excellent teaching tools, equipped as they are with the designer’s idea of the synth’s quintessence. In creating a piece of music with presets, you will get a feel for the synth’s innate timbre, as well as its capabilities (not to mention its CPU load across multiple tracks). Also, you’ll see just how versatile the synth can be; its limits will be exposed as you stack its unaffected tones against each other.
Psst! Download free Iris 2 presets.
As you’re composing, ask yourself, “how close can I get to a finished product using just the presets, the faders, and the limiter?” If the answer is “very close,” then ask yourself why it’s so close. Do more than ask; seek the answer by investigating the panels of the synth, investigating the graphic user interface (GUI), locating where the filtering section is, where the effects are located, etc.
After you compose your piece, play elements of the loop in solo and watch the GUI in action. See what’s happening in front of your face. Are there any animations that indicate a modulation affecting a parameter? Try to trace where this modulation might be coming from: is it linked to an LFO, an envelope, or something else? It doesn’t matter if you don’t know what an envelope generator or an LFO happen to be; just watch how the GUI interacts with what you hear.
One other word of advice here: It’s been said by better people than me that you can divide an arrangement (or mix) into several key categories—bass, percussion, harmonic content, sustaining harmonic content (i.e., pads without rhythm), melodic content, and effects. Therefore, try to compose your loop accordingly, so that everything will gel into a coherent picture; look for a bass sound that grabs you, some percussion that fits, chordal sounds you can stab, harmonic sounds you can sustain, a nice lead, and whatever effects suit the sound design.
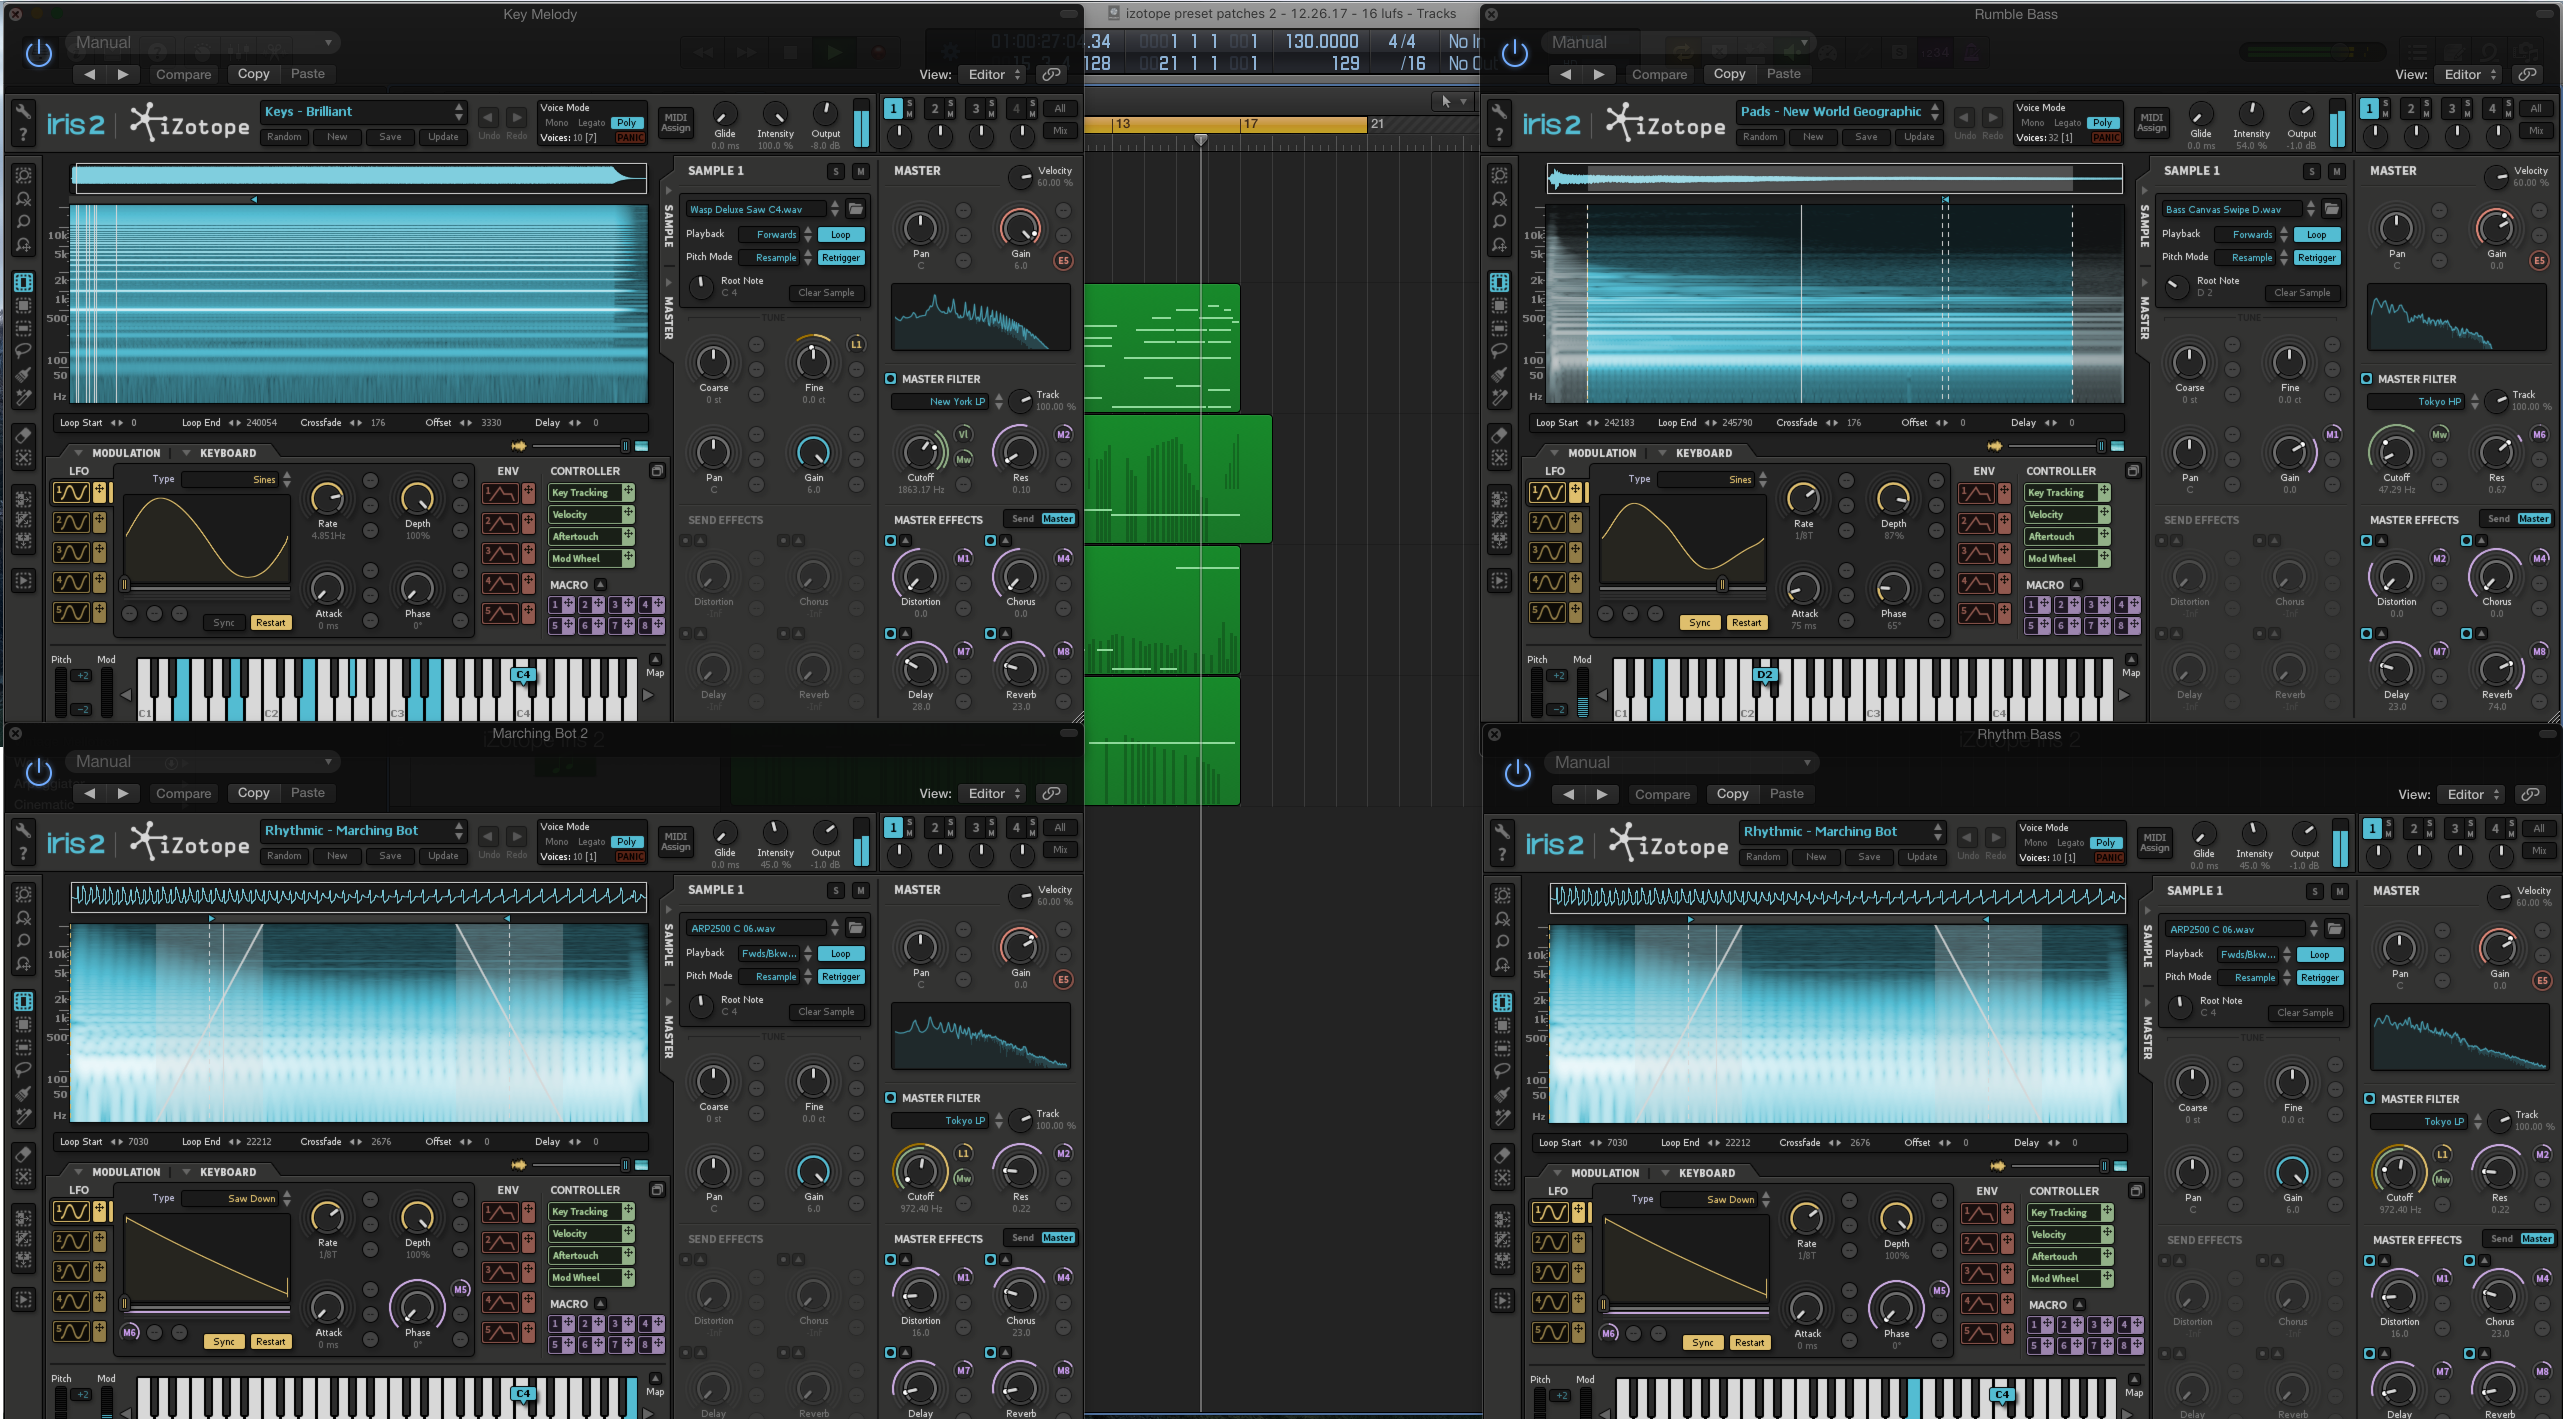
For this article, I was given a copy of Iris 2 to work with, iZotope’s sample-based synthesizer, which luckily I had never used before. I started off by making the following loops. I’m sharing them with you as I created them, warts and all. Warts are part of the process—that’s how we learn. This is where we start, and you’ll definitely get a kick out of where we end up.
Am I proud of these compositions? Does it matter? No. All that matters is what I was able to glean from the exercise—to hear the buzz of the first example’s synths, and the rounded quality of the timbre second; to hear how Iris handles stereophonic space in its effects; to examine how its spectral filtering works in the context of presets. Going back and looking at the GUI in these examples, we can see these attributes in action.

Example 1
Example 2
From all of this we draw conclusions about how the synth works, how it sounds, and ultimately, how to tweak its parameters internally.
After composing a couple pieces, it’s on to the next step.
2. Tweak the presets
In the previous exercise, I told you to watch the GUI—to note any oddity you saw, any animation that indicated modulation. Here is where that homework begins to pay off, because when we go about tweaking the presets, we’ll start by using what we’ve noticed thus far in scouting out the graphics—the animations that indicate modulation, the various different windows that show us effects, filtering, and global parameters like gain and panning.
Step two is much like step one, except we will be tweaking the heck out of our presets.
If you recall, the object of each step is to get as close to a finished product as possible with only the synth, the faders, and a limiter on the master bus. So we are not tweaking for the sake of tweaking here; we’re tweaking for the sake of the overall mix. To do this, we’ll have to make use of panning, level, any filtering we can find (this of this as EQ), any effects (time- and modulation-based), as well as envelope-shaping, distortion, and whatever else we can find. Distortion and envelope shaping are particularly important, for they help us clear sounds out of the way of other elements in the mix, or focus sounds that need to be brought to the forefront.
Here’s what I came up with for step two in learning Iris 2:
In the first example, the chords are created from a pad called “African Sunrise.” I highlighted what I wanted to hear using Iris’s spectrogram, slapped a low-pass filter on the sound, and linked the filter to the modwheel of my MIDI controller, so I could open and close it while playing.
That percussive sound up top, the one that sounds like a wood block? That’s actually a preset involving sampled chanting; it comes with Iris. I investigated the GUI to see which envelope was controlling the hit, and shaped the attack, decay, release, sustain, to be very, very short. Distortion and a band pass filter helped with the ring.
This is actually the same sound you hear later on, in your right speaker or headphone, looping about in a rhythmic manner. Sounds different though, doesn’t it? Well that’s because I highlighted a portion of the spectrogram that interested me, panned it, added delay, and filtered it differently.
I learned to do this by the actions I took in step one—observing the GUI as I listened back to my work in solo. Thereupon, I could see where the filters resided, where the macro-effects lay, and how everything worked in general.
I could go on by telling you how, in the second sample of this batch, the bass is filtered and distorted from a preset called “celery stalks.” I could tell you how I layered/distorted wood block presets to approximate tuned snares (at least, in my mind), or how I took a lead-synth preset and linked the mod-wheel to control the pitch of one of the oscillators. But really, none of that matters.
What matters is how you tweak these presets, how you form synaptic connections with the presets. For you see, it is the act of making these connections that will help you remember the intricacies of the synthesizer for years to come. This is why it’s important to spend time on this step—to compose multiple tweaked loops. The more you practice (with this end goal of a finished loop in mind each time), the deeper your connection will be to the instrument.
There is one last step in this exercise, and it’s the most fun. Also, unless you were already familiar with synthesizers, you wouldn’t be able to do it straightaway without steps one and two—at least, I wouldn’t. You can think of this step as your final quiz in the synth, and it goes as follows:
3. Create loops from scratch
Here, we will create full sonic pictures from scratch, abandoning presets altogether. If you’re using a more conventional synthesizer, this means getting down to the oscillator level and working with sine waves, square waves, and all the other waves in the ocean of synthesis; from soup to nuts, you’ll go from oscillator to modulator to effect, using everything at your disposal to create drums, bass, leads, effects, pads, and more.
How can you possibly do this? With the knowledge you’ve accrued through tweaking the presets! In the previous exercise, you messed about extensively, and in doing so, you hopefully learned how the synth’s modulators communicate with various/assignable parameters, as well as which special effects are on-hand for morphing, mangling, and shaping your overall sound.
At this point, you still might not be able to differentiate an LFO from an envelope generator on a written exam. However, you should have your own, internal, and proven understanding of how various modulators relate to each other within the context of this synth.
In the case of Iris 2, the virtual instrument mostly uses samples to generate its sounds, much like a wavetable synthesizer. So I opted to take samples from my private collection and use the knowledge I acquired in tweaking presets to get a whole loop.
Here’s a sample of a garage-y snare and hi-hat hit:
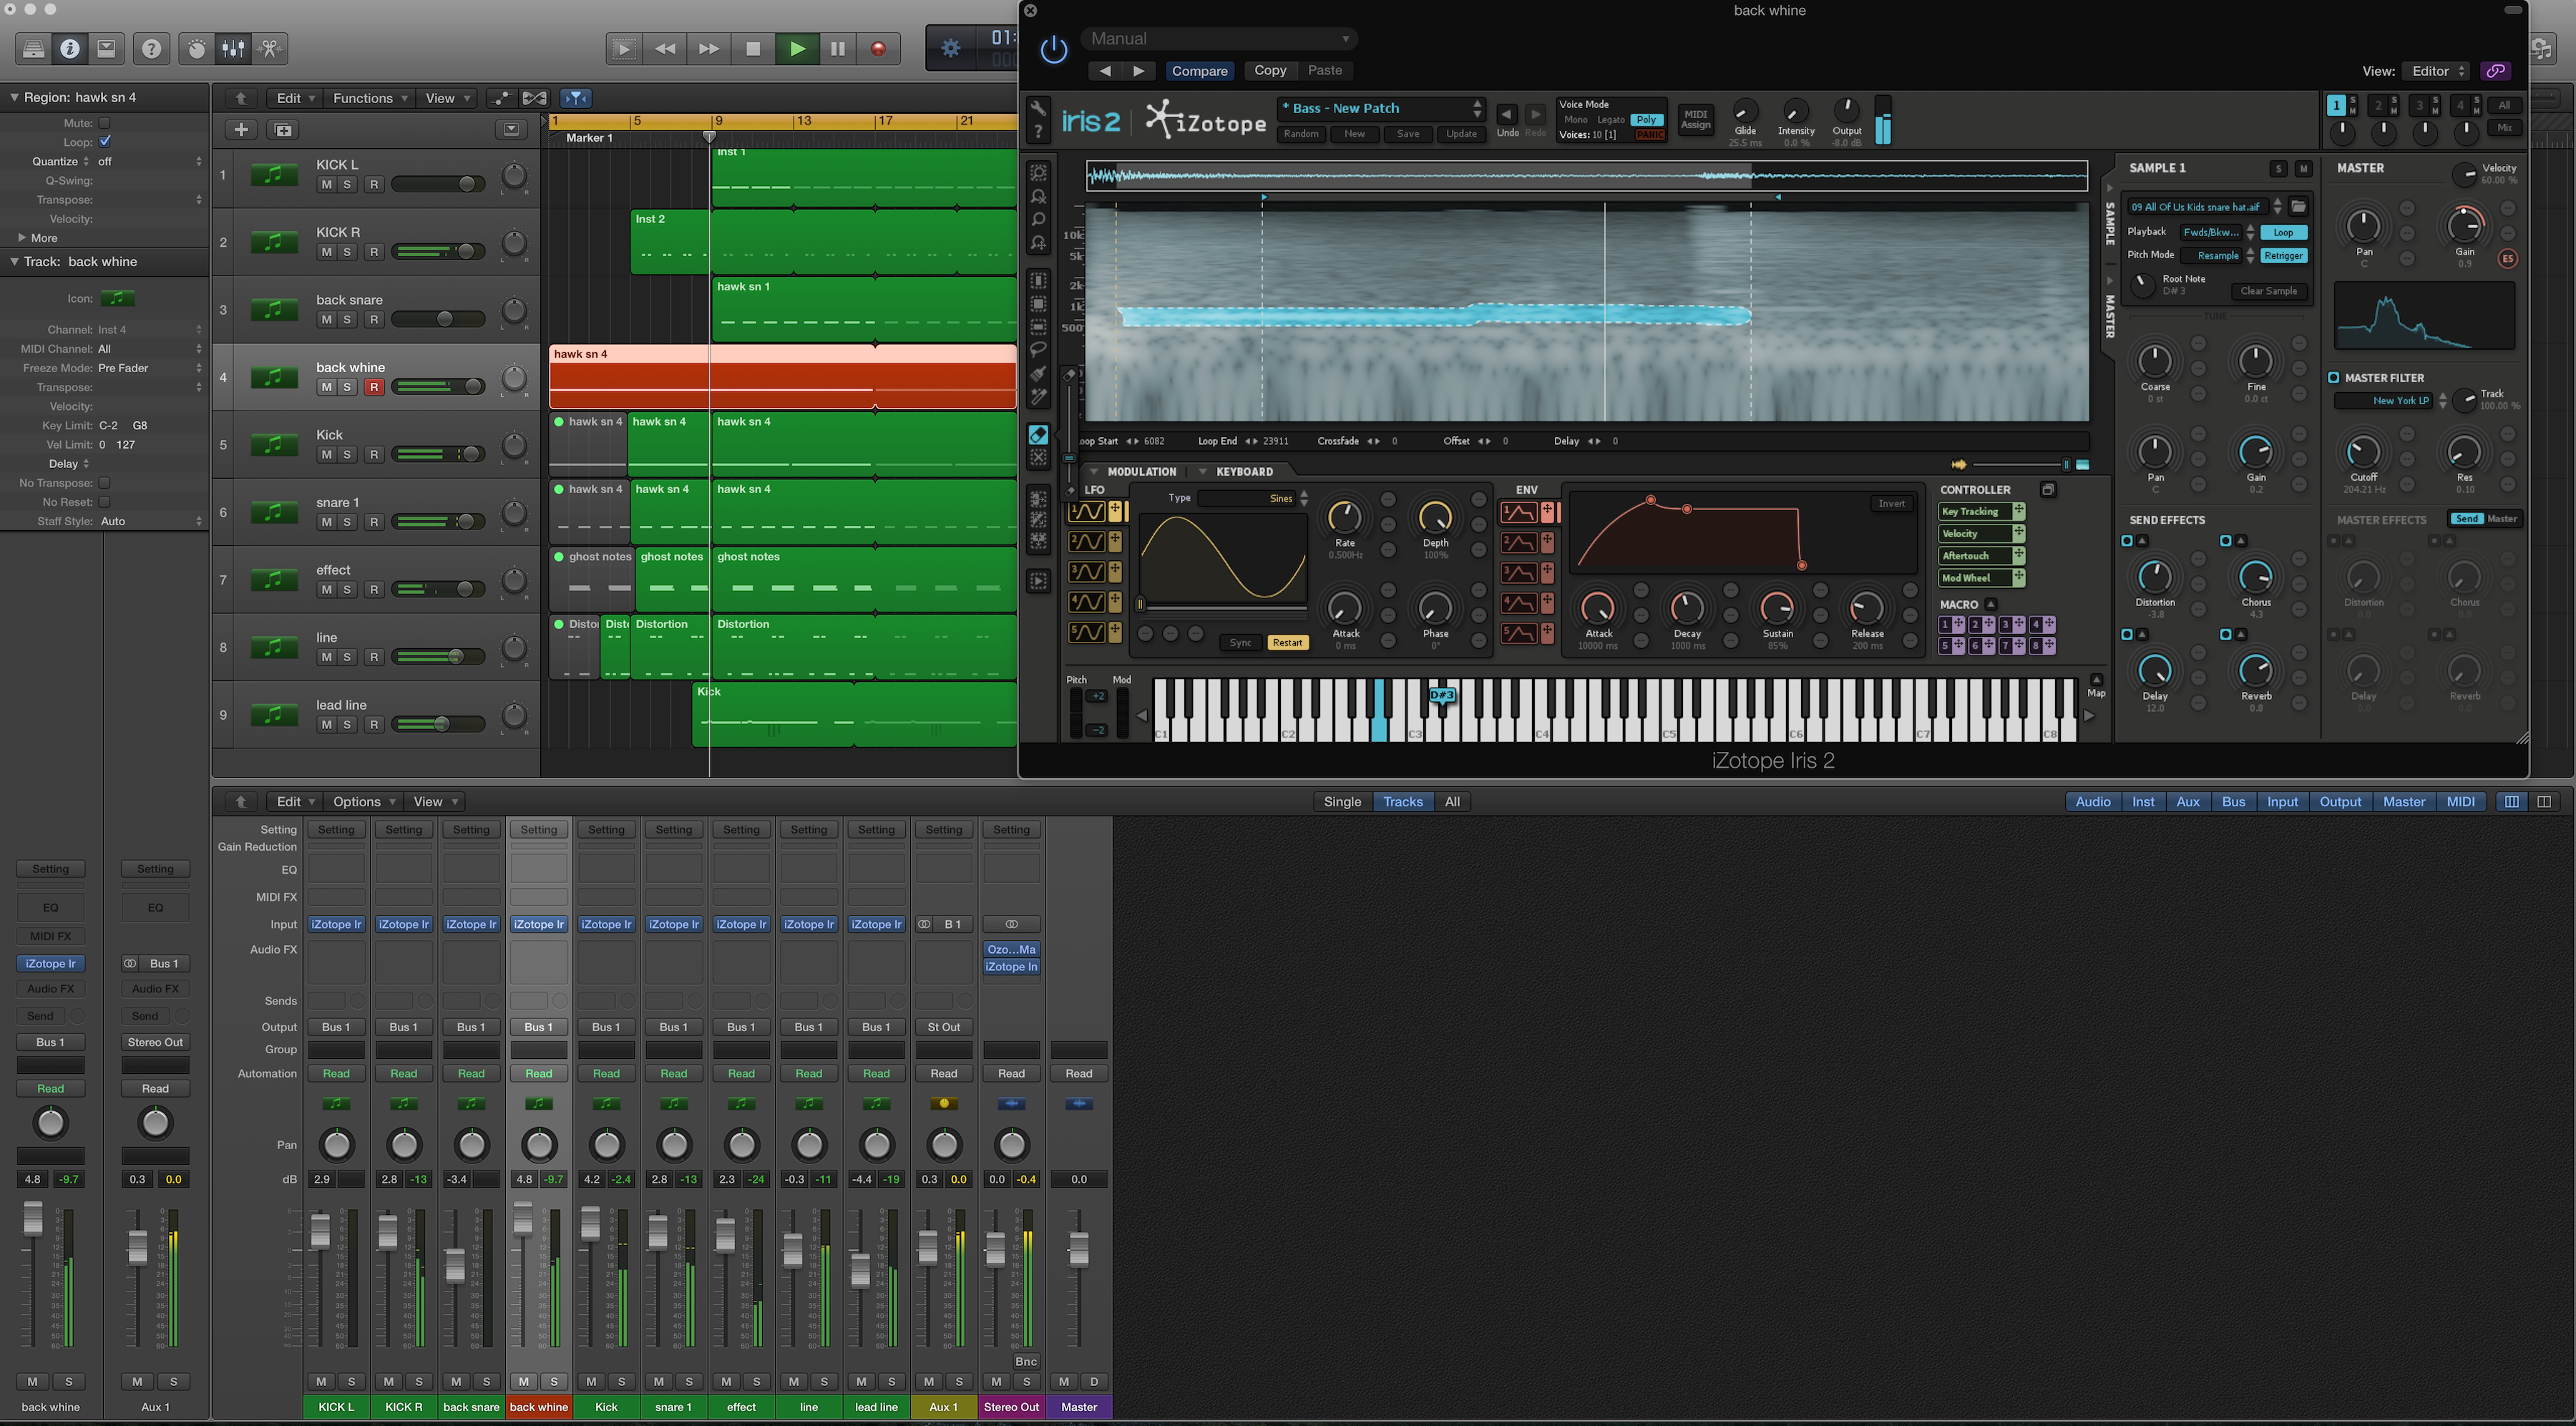
I could describe how I modulated this simple sample over and over again to create a whole loop, but perhaps pictures work a little better. Here are screenshots of how I manipulated the ghostly tone at the beginning.
Example 5
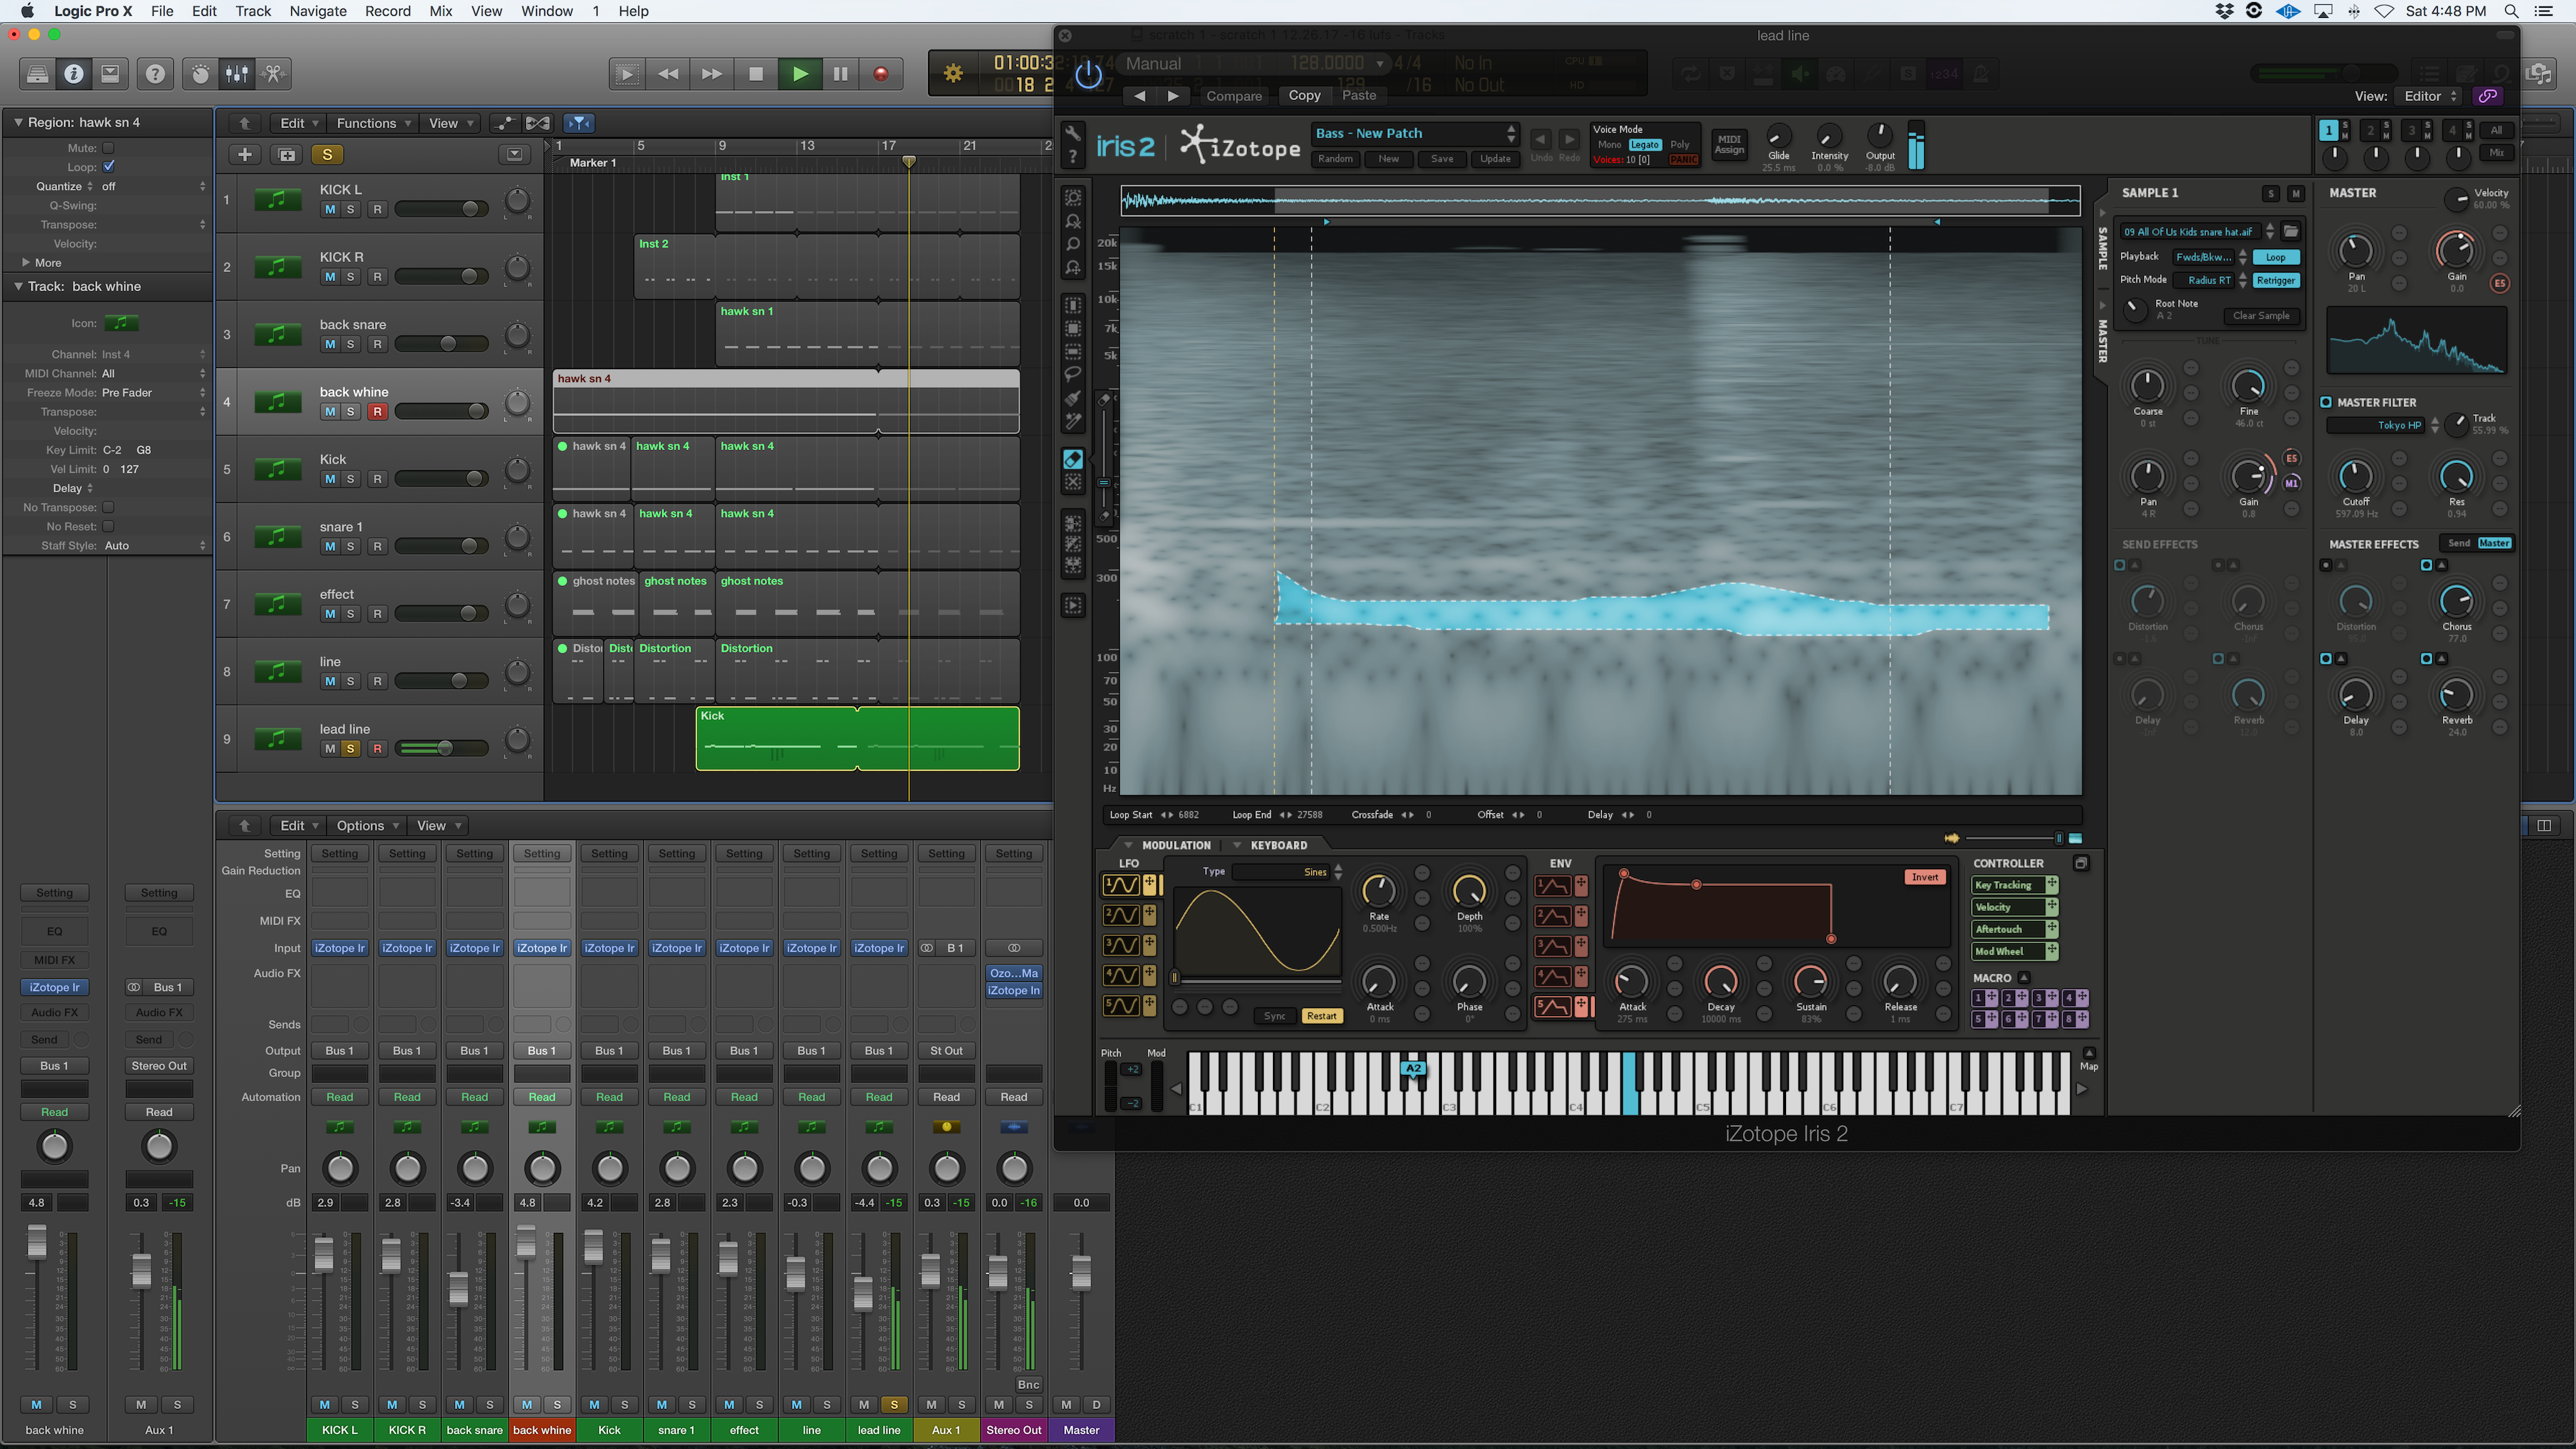
Example 5 - after
This can be repeated with all sorts of samples. Take a listen to this hit, for instance:
A simple slice of music—it’s a snare hit with a high, bell-like synth.
Well, here’s what we ended up with
And here are screenshots of the lead synth, the snare, and the whines in the background:

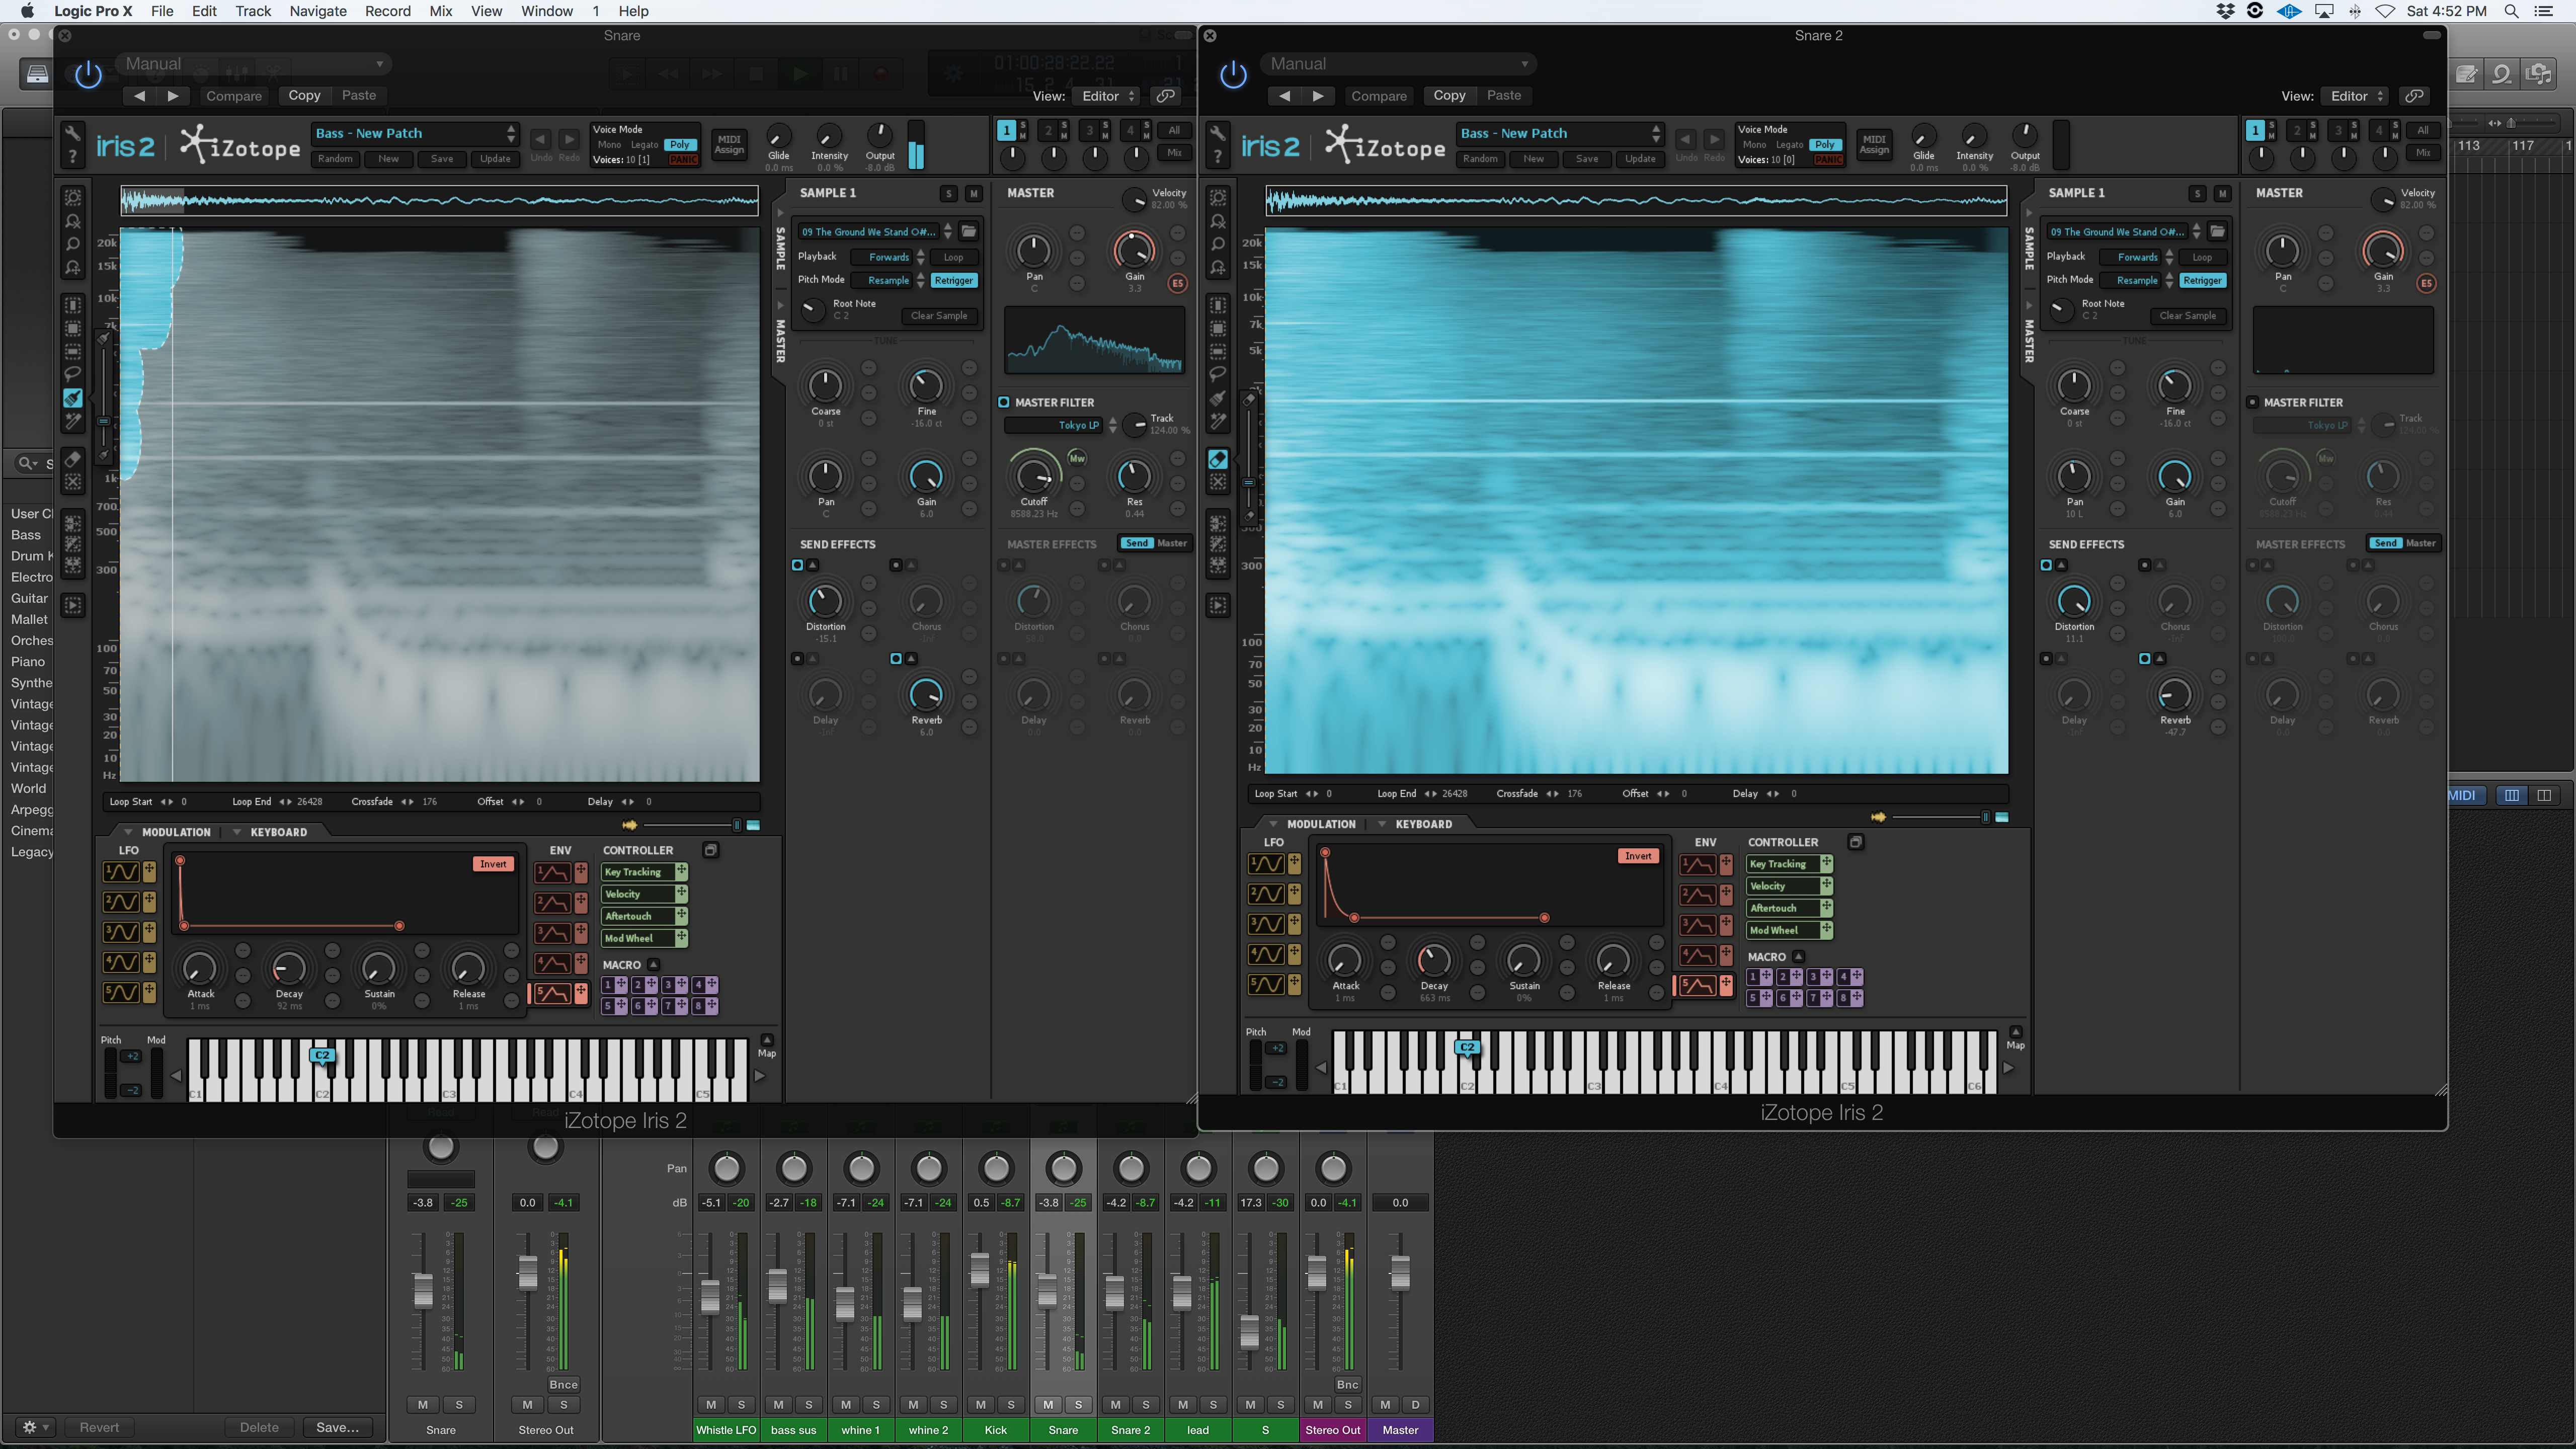

They say a picture’s worth a thousand words—but what about a loop of music, one that you used to teach yourself an instrument? What’s that worth?
Conclusion
By the end of this three-step exercise, will you know your synth from soup to nuts? If you do it thoroughly, yes, but even if you don’t, that’s not quite what this game’s about.
See, this exercise is meant to instill a personal knowledge of unfamiliar synthesizers—a way of getting around that will stick with you.
How many times have you tried to learn your synths academically? To say, “okay, there’re my oscillators, here are my LFOs, and…where are my envelopes?”
For me, the answer is “far too many times.” I don’t know about you, but I’ll put on a tutorial, be impressed with the sonic palette, sure—but ultimately, it all goes in one ear, and out the other. Heck, I could even sit there with a tutorial and the synth, playing over what I just heard, and I’d still forget what I’ve learned ten minutes later.
This process, however, seeks to strip away the rote memorization and turn your brain toward creative tasks. Remember how I told you to aim for a final, mixed project? Ask yourself a question: did any of these examples sound completely mixed to you? I won’t be offended if you said no, because of course they don’t!
The bass disappears on laptops; elements could be balanced better with just a little bit of equalization—equalization we staved off, because it would need require another plug-in.
But that’s not the point here. The point was to distract ourselves from the boring task of memorizing the synthesizer’s ins and outs by redirecting our efforts into something creative. Essentially, we are tricking ourselves into learning by sheer necessity, under an imposed set of limitations.
I did not end up with a finished sounding mix. But you know what I did walk away with? A concrete understanding of a soft-synth I’d only used for a few hours. Now, I know what it does, in what areas it excels, and how to integrate it into my next project. Personally, I look forward to it.

