How to Clean Up Voice Recordings for Videos, Podcasts, and Streaming
Whether you’re making podcasts, videos, or streams, learn how noise reduction software can help you quickly and easily clean up your voiceovers for professional-sounding content.
It's never been an easier or better time to be a content creator. Between your phone or laptop, you truly have everything you need to build a massive audience.
But once you've recorded a few videos or podcasts, your ears may have perked up to some common recording issues. Namely, that it's a lot harder than it looks to nail a pro sounding voiceover!
There’s a lot to watch out for when recording the human voice—background noise, plosives, weird mouth sounds. And believe me, your audience will let you know if any of that stuff is noticeable.
That's why I've come to rely on


RX 11 Advanced
Learn how to:
Follow along with your copy of


RX 11 Advanced
This article references a previous version of RX. Learn about 

RX 10 Advanced
NEW: Discover the new VEA AI-powered voice enhancer plugin that can give you polished voice recordings in seconds.
Getting started with RX
Now if you're anything like me, looking at RX for the first time can be overwhelming. And I wouldn't blame you! I've spent many years looking at waveforms of recorded audio. At first, the orange flames of the Spectral Editor in RX were very intimidating.
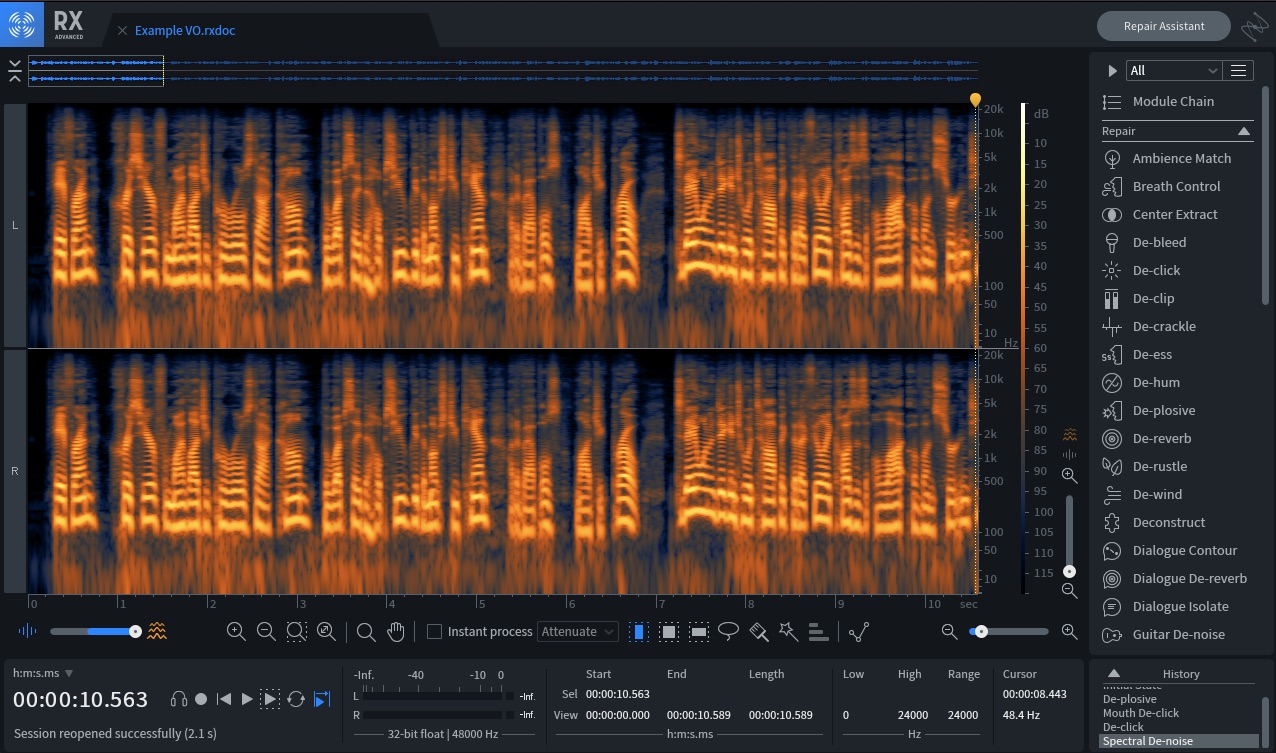
RX 9 standalone audio editor
While you can use the RX modules as plug-ins for your preferred DAW, I recommend getting to know the RX standalone audio editor for 3 reasons:
- The Spectral Editor allows you to easily locate and fix problems in your audio in a way that isn’t possible by looking at waveforms in a DAW.
- You can process individual phrases, words, or even frequencies individually, as opposed to processing the entire recording as a whole.
- Thanks to the Restore Selection in RX, you can easily “flip through” the processing choices you’ve made to see if you’re making a positive impact to your dialogue.
The Spectral Editor shows how much energy is present in an audio file over the frequency spectrum. Think of an EQ. EQs usually show us sound from left to right. The left side is the low-end of the spectrum. While the right side is the high-end:

RX EQ module
The Spectral view instead shows us sound from bottom to top. The bottom of the window is the low end, while the top of the window is the high end. For example, the bulk of my voice hangs around 100–700 Hz, with energy as high up as 15000 Hz:
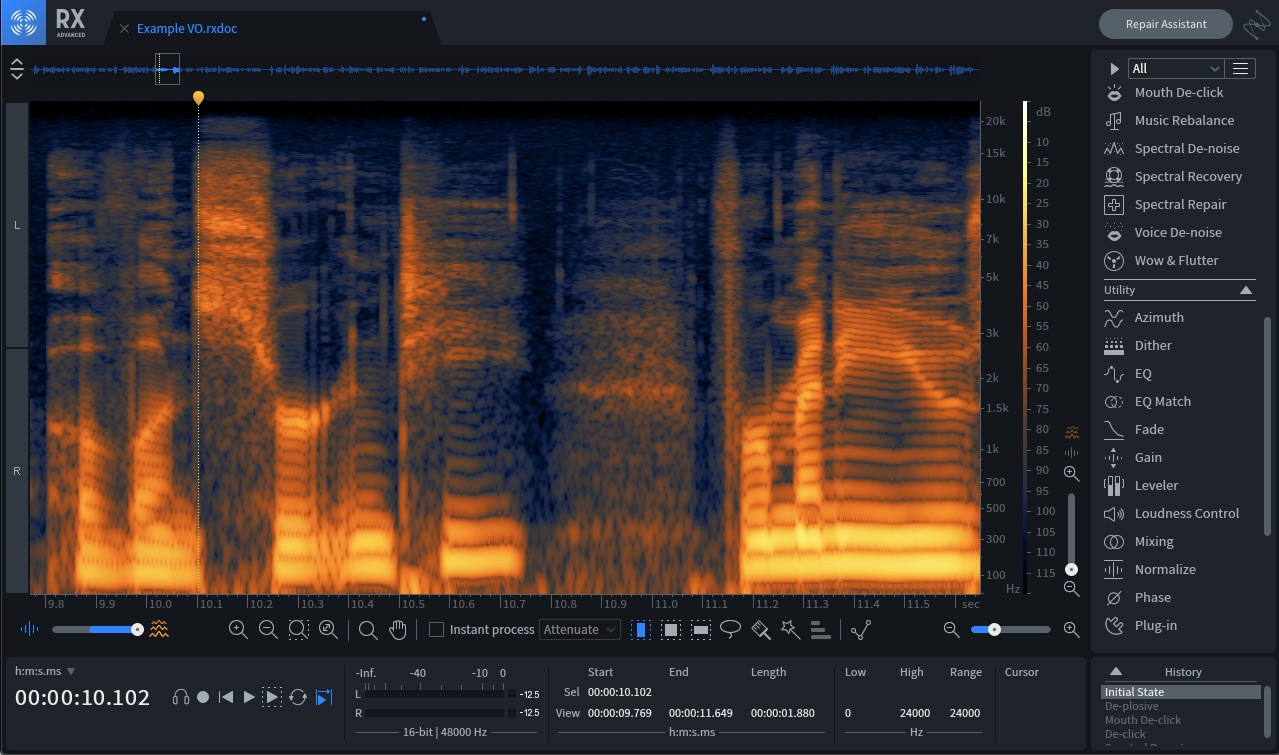
Fortunately you don't need to spend a ton of time looking at the visual editor for our purposes. Instead, you can fall back on the visual editor only if you're struggling to deal with a specific problem.
How to clean up voice recordings
Let's turn our attention to the right-hand side of the editor in RX and load some modules for cleaning up your voiceovers.
Use RX De-plosive for reducing plosives in voiceovers
We're going to start with De-plosive for removing plosives. Plosives are bursts of air hitting the microphone capsule from consonants like "Ps" and "Bs”.
But hold on—how do you know which module to even start with?
iZotope has a fantastic audio repair masterclass with engineer David Barber. And in that masterclass David explains his methodology for cleaning up dialogue.
In a nutshell, David recommends prioritizing your dialogue issues from worst to least problematic. Or to imagine another way—what noises, when removed, will make the other problems easier to fix?
Every recording is different. But for my own voiceovers, I've decided:
Plosives are the worst and most obvious offenders and can get in the way of denoising if not managed.
Mouth clicks and smacks are the next most aggravating issue.
Background noise is problematic, but is far less distracting to my audience than the first two.
This is why we'll start with De-plosive.
First, let's change the Frequency Scale of the Visual editor. Hover your mouse over the frequency scale in RX and right click (or hold Control and click). When you do, a menu offers you an option for Frequency Scale. Let's change our view to Extended Logarithmic.
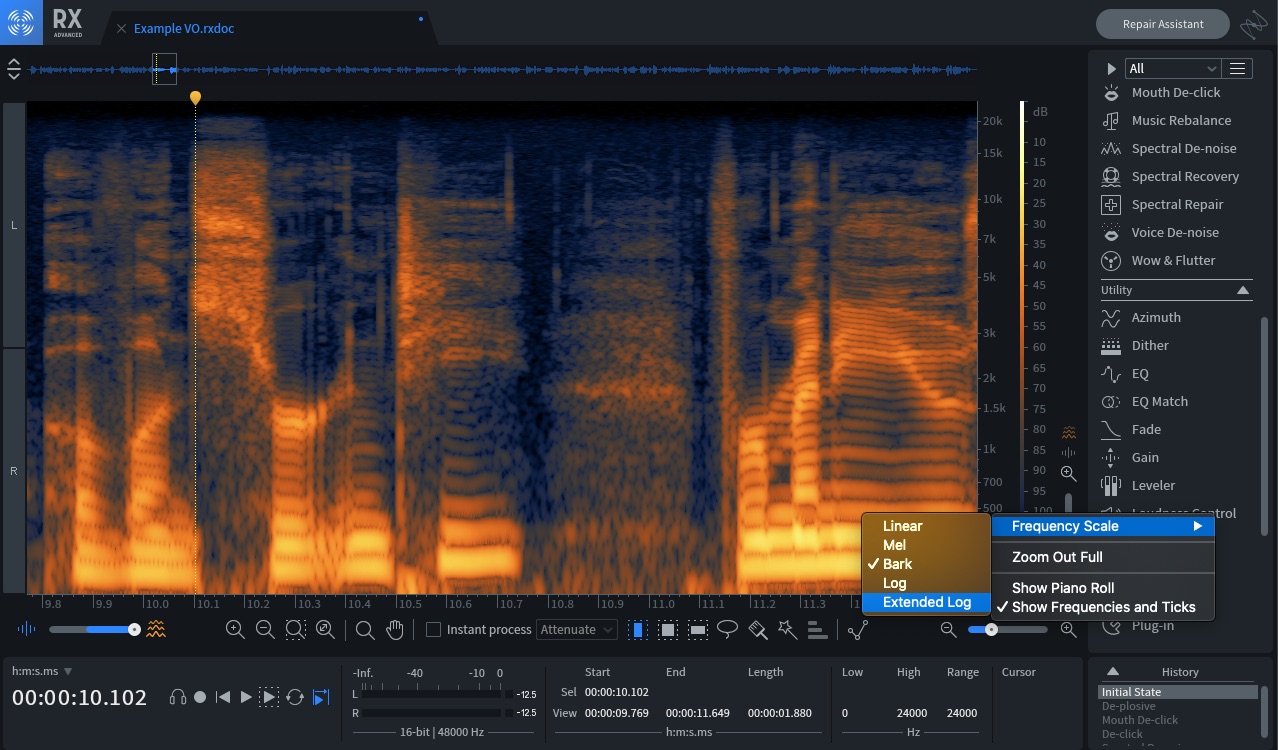
Changing frequency scale of Spectral Editor
Extended Logarithmic allows us to see the very bottom of the frequency range in finer detail. And here is where you may notice some intermittent, but significant, bursts in orange.
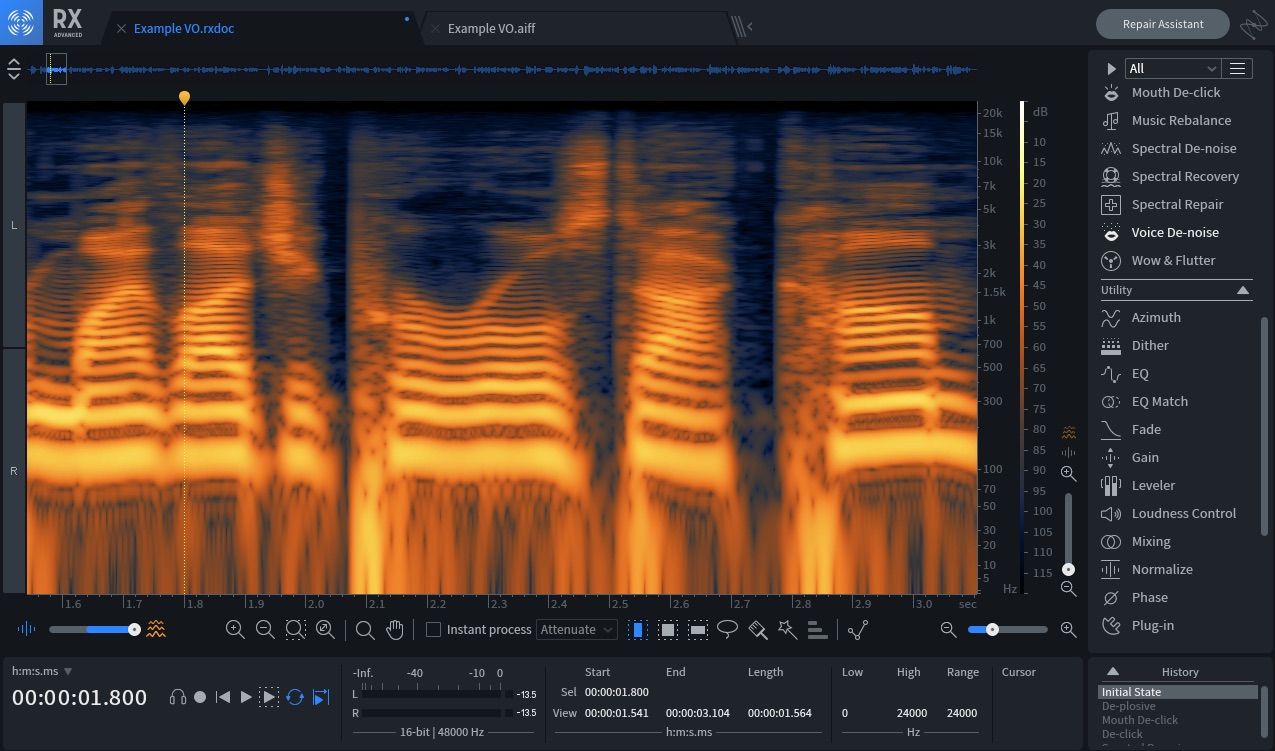
Plosives visible between 0–100 Hz in the Spectral Editor
These short narrow bursts are plosives. For example, the "P" in "pizza" can pack an audible punch against your microphone. This is why it's often recommended to use a pop filter when recording your voice. But even with built-in pop filters on microphones like the classic SM7B, plosives can still make their way into your recordings.
One solution to plosives can be to use a high pass filter on an EQ and remove everything below a certain frequency:

High pass filter using EQ module in RX
But I’ve found that a high pass filter can be a pretty blunt tool for reducing plosives. A high pass filter doesn’t discriminate the body of your voice from that of a plosive. It doesn’t know that you only want to remove those plosives, and not the low end of your voice!
De-plosive is much more precise in its efforts. Click De-plosive on the right-hand side of RX to open it:

De-plosive module in RX
From here you can set the following:
- Sensitivity: How sensitive De-plosive is to plosives.
- Strength: How aggressive De-plosive is when reducing plosives.
- Frequency: How far plosives reach up the frequency spectrum.
And because we set our Frequency Scale to Logarithmic, we can see exactly how far up the scale that is. In my case my plosives can go as high up as 120 Hz. So let's set the following:
- Sensitivity: 5.0
- Strength: 5.0
- Frequency: 120 Hz
Not too aggressive, but also not too delicate. When we click Process, RX analyzes, identifies, and removes the plosives in my voiceover. Let's check out the before and after:
Before & After RX De-plosive
Way better, right? And with a single click, we've applied De-plosive to the entire recording. Fast, easy, and natural-sounding removal of plosives.
Use RX Mouth De-click for eliminating mouth noises in voiceovers
Next up, let's manage lip smacks and mouth noises using Mouth De-click.
It's surprising how much noise our mouths make when we talk. Day-to-day, you might never notice. But when you put a mic in front of someone? Well, that's a horse of another color. The worst still is when your audience notices the sounds your mouth makes. If your audience notices, you can be sure they’ll let you know how gross it sounds.
Mouth noises crop up when our mouths are a little too dry. Our tongues start to stick when we talk, and the result is audible spitty sounds.
To combat this, one is to keep a glass of water close by to sip on while you record. But even still if you're recording over a long duration of time, mouth noises can creep up. This is why I use Mouth De-click as a matter of course every time I clean up my voiceovers.
Let's click on Mouth De-click to open the module. From there you're treated to another three handy controls:
- Sensitivity: How sensitive Mouth De-click is to the mouth noises in your recordings.
- Frequency Skew: Do your mouth noises tend to be higher or lower in frequency?
- Click Widening: Causes Mouth De-click to extend the length of time it reduces mouth sounds.
Most mouth noises tend to be higher in pitch, short, and frequent. So I set the following for my own voiceovers:

Mouth De-click module in RX
What's great is that you can click Preview to listen to how effective Mouth De-click is in reducing mouth noises. And you can even click Output clicks only to hear only the mouth sounds that are being removed.
Once you're satisfied with your settings, click Process to commit Mouth De-click to your audio. Let's take a listen to my own before and after results:
Before & After RX Mouth De-click
Not bad, right? Thank goodness for Mouth De-click!
Use RX Spectral De-noise for reducing background noise
Before we dig into Spectral De-noise, it's worth pointing out that not all background noise is bad.
In fact, a little background or room noise can actually help "glue" a voiceover together. Remove too much noise and your audio can sound weird or distracting. We’re all used to a little bit of ambient noise in our daily lives. But if the noise in a recording starts cutting in and out throughout a voiceover due to aggressive denoising, it becomes more distracting than the original noise. So don’t assume you always need to remove noise in your dialogue.
In my particular case, I rent an office space that I use as my studio. For half the year my studio is pretty quiet. But during the spring and summer, it's a slightly different story.
You see, the air conditioner in my building causes the air ducts to emit a very audible resonance. So much so that once on a podcast one of my co-hosts asked, "do you hear that sound? What is that??"
That's the kind of background noise that can be distracting (obviously). So if you find you have background noise that's distracting to your voiceovers, RX can help.
RX has several de-noising tools to choose from. Two of which include Voice De-noise and Spectral De-noise.

Spectral De-noise in RX
You're probably assuming we should use Voice De-noise, right? I mean, we're dealing with voiceovers. So it makes the most sense to use the tool with "voice" and "De-noise" in the title.
However, I like to use Spectral De-Noise instead. And I like to use it for one specific function:
Output noise only
Output noise only allows you to listen to only the noise you’re cutting from your recordings. So as you dial in the module, you can make sure you don't over-process and end up “de-voicing,” and not just removing distracting noise. If you start to hear your voice creep into the Output noise only preview, you know you've gone too far.
First we need some noise for Spectral De-noise to learn. That's why every time I sit down to film, I record 30 seconds of "silence." This is me just silently sitting in front of my microphone as I record. From that noise I’m able to teach Spectral De-noise what I don't want in my recordings.
Let's load that noise into RX and take a look:
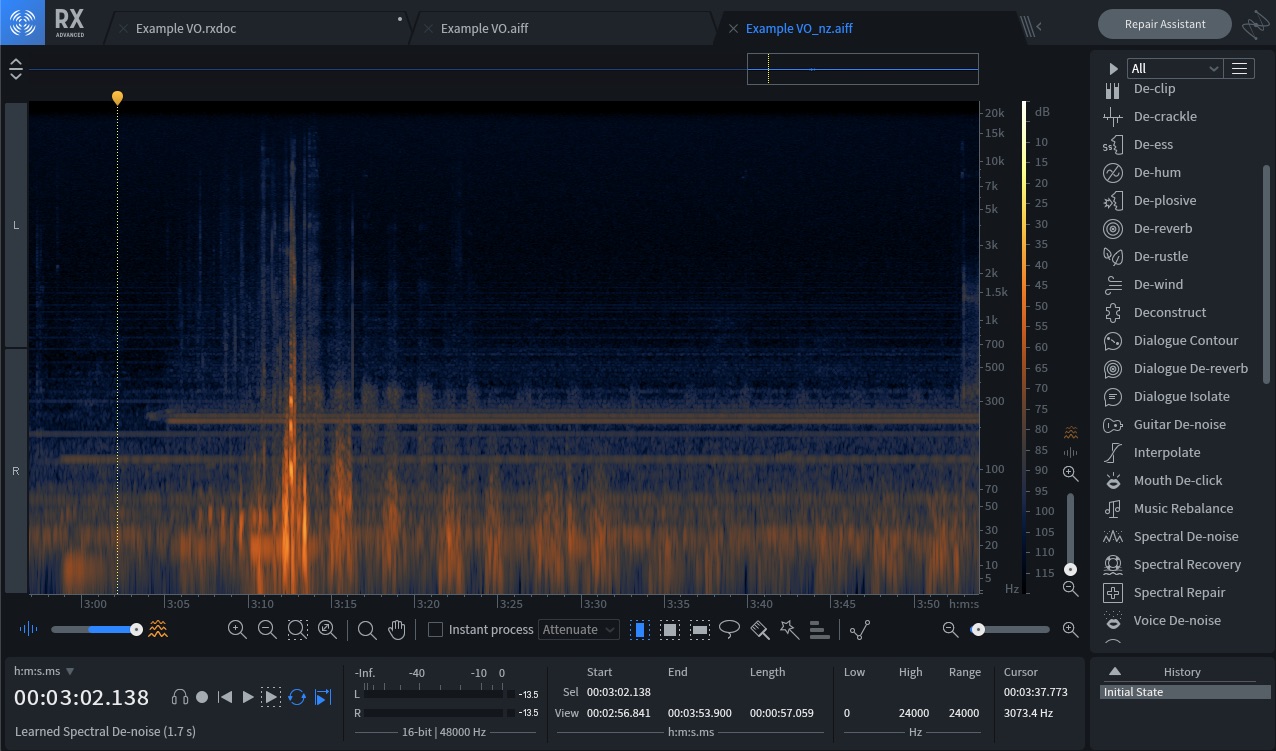
Noise profile of my studio. Notice the very obvious noise from my studio AC around 230 Hz
Notice that horizontal line that cuts across the audio? That's the air conditioner in my studio rearing its ugly head. You can even take a listen to it:
Let's select a part of the noise where it’s clearly just the noise in the room:

Spectral De-noise learning the noise profile
Then let's open Spectral De-noise. And in Spectral De-noise we'll click Learn to have the module learn this section of audio:
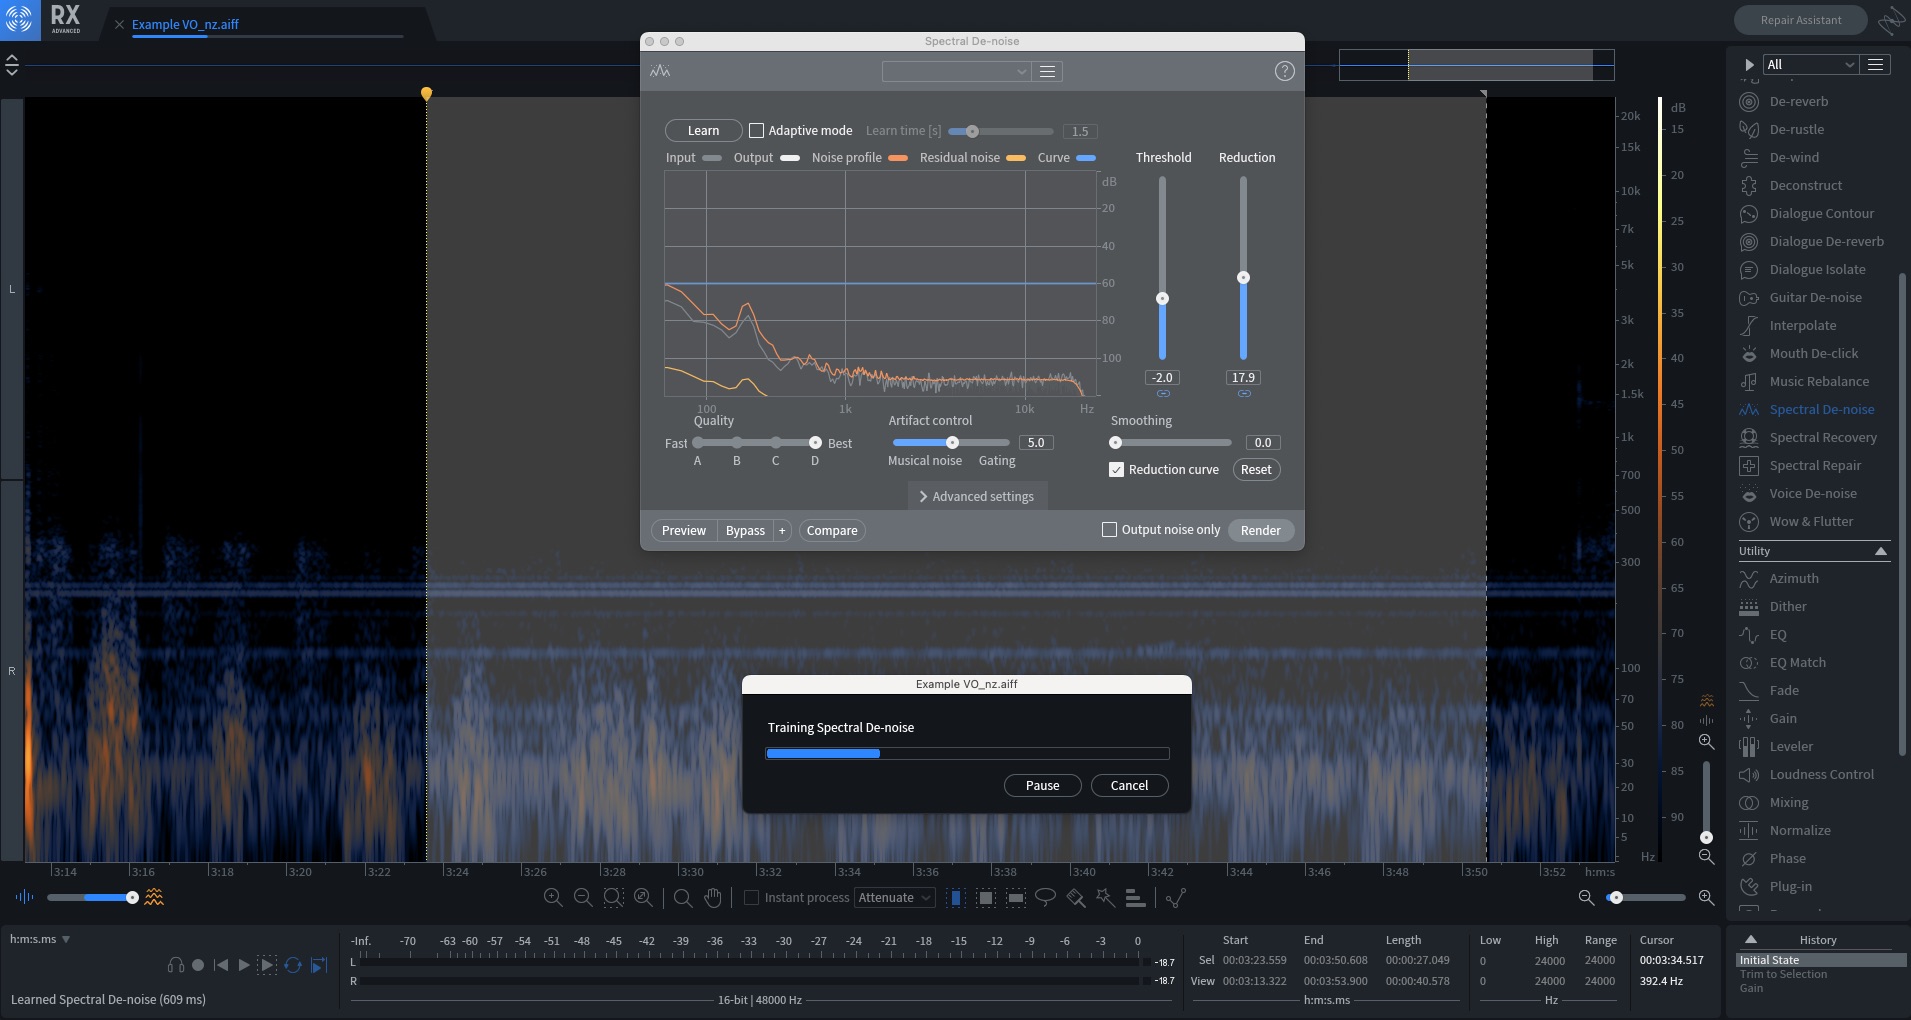
Spectral De-noise learning the noise profile
Spectral De-noise now knows what we don't want in our voiceovers. We just need to apply the results to our voiceover recording. So let's return to our voiceover by clicking on the tab at the top of RX.

Reducing noise in the voiceover based on the noise profile analyzed using Spectral De-noise
From here you'll need to set the following:
- Quality: I like to set this to Best
- Artifact Control: I leave this set to 5
And then I click Preview. As I preview, I'll adjust the Threshold and Reduction sliders until the noise is reduced to a tolerable level without altering the quality of my voiceover. Be sure to enable the Output noise only in Preview to hear how much you're removing from your voiceovers.
Create professional sounding content
If you follow the steps above, your voiceovers should experience a marked upgrade in quality. No longer will your recordings be plagued by distracting and uncomfortable plosives, mouth sounds, or noise. And by using RX first, you’ll have a much easier time giving your voiceovers that radio shine with EQ and compression. Get your copy of


RX 11 Advanced
