How to Bring Dynamics Back to a Mix
It feels impossible to bring dynamics back to a mix during mastering, but it’s not! Here are a few tips and tricks to bring life to an overly-processed mix.
There is a general thought that mastering will kill mix dynamics in exchange for loudness. Most people think mastering will make things louder, which means a more compressed, less dynamic result. Although this might be true in some cases, a good mastering engineer will make a track loud while still preserving the song’s dynamics.
What happens when a mix that is overly compressed, has no dynamics, and lacks transient definition is sent to mastering? Can nothing be done to bring some life back into the mix? Fortunately, a lot can be done, and a few tweaks can very well save those dynamics. Here are a few tips and tricks to bring life to an overly-processed mix.
Analyze
You should always listen to the track first and make notes on what you think needs to be done. It’s especially important to do this when trying to reintroduce dynamics, and taking notes on what needs to be done can be extremely helpful. Listen for the drums. Can you hear the transients? Can you differentiate between the bass and the kick drum? Are the guitars just one big mesh of sound? Does the song sound bigger when the hook comes in, or is the entire song at the same level? Do you have headroom to work with? Answering these questions will help you come up with a plan and avoid feeling overwhelmed by all the possibilities.
Headroom
One of the unfortunate results of having an overly-compressed mix is the lack of headroom. If you receive a heavily compressed mix without any dynamics, there is a very good chance the peak level is at 0 dB, and very close to clipping. This limits what you can do without distorting the audio.
Here’s an example: you receive a track that peaks at -0.2 dBfs. If you add an EQ and boost a frequency by 0.3 dB, the track will distort. Peaks can even exceed 0 dB if you cut with an EQ. When this happens, the first thing you want to do is give yourself headroom to work with. In this case, lowering your input to around 3 dB is a good starting point.
On the other hand, you can also have a mix that is heavily compressed but still has lots of headroom. This usually happens when the output of the Maximizer is set to -3 dB, for example. Even though you have headroom, the mix has no space to breathe. In this case, there is no need to adjust the input level of your processors.
Dynamic EQ
Once you’ve come up with a plan and made modifications to provide sufficient headroom, it's time to start mastering. One of the best and most flexible ways to bring dynamics back is with a dynamic EQ. The possibilities are endless, but here are a few ways to start:
Focus on recovering the transients in the rhythm section, starting with the kick drum. Set your dynamic EQ band for upward expansion and try to isolate the frequency that contains the attack—the sound of the beater. The kick drum is usually mono and in the center channel, so setting the EQ to Mid/Side mode could help pinpoint the different parts of the kick without altering panned mix elements.
Note: Remember to disengage the Mid/Side mode, as Mid/Side compression in mastering can alter the mix’s stereo image. Check out this episode of the Are You Listening? video series to learn when Mid/Side compression can be helpful.
Once you find the frequency containing the sound of the beater, set a fast attack and release on the dynamic EQ band. You want the EQ to “expand” that frequency as soon as it’s triggered and then release it, creating an emphasized transient. You can do the same thing with the body of the kick using another band. Remember, a little goes a long way.
Try doing the same thing with the snare, or any other percussive instruments that could benefit from added punch—but be careful not to modify other instruments in the process. Guitars tend to get pretty mushy and lose attack when they are overly compressed. This is especially true of distorted guitars. Using this same technique, you can bring some life back to the guitars by making the band in the dynamic EQ “pump” a little. Set your threshold in a way that will make it trigger up and down constantly. Even 0.5 dB can make a big difference.
Listen to the following track by Stereo Dawn. I overly compressed the master on purpose for this example, but let’s call that version the original.
Using dynamic EQ, I tried to bring some transients back to the kick and the guitars. Since I adjusted the input gain to allow more headroom, I’m using Gain Match in Ozone 9, which matches the level before and after processing. This means I don’t have to worry about the level change from the original to the mastered version, and I can accurately hear what Ozone is doing to the mix.
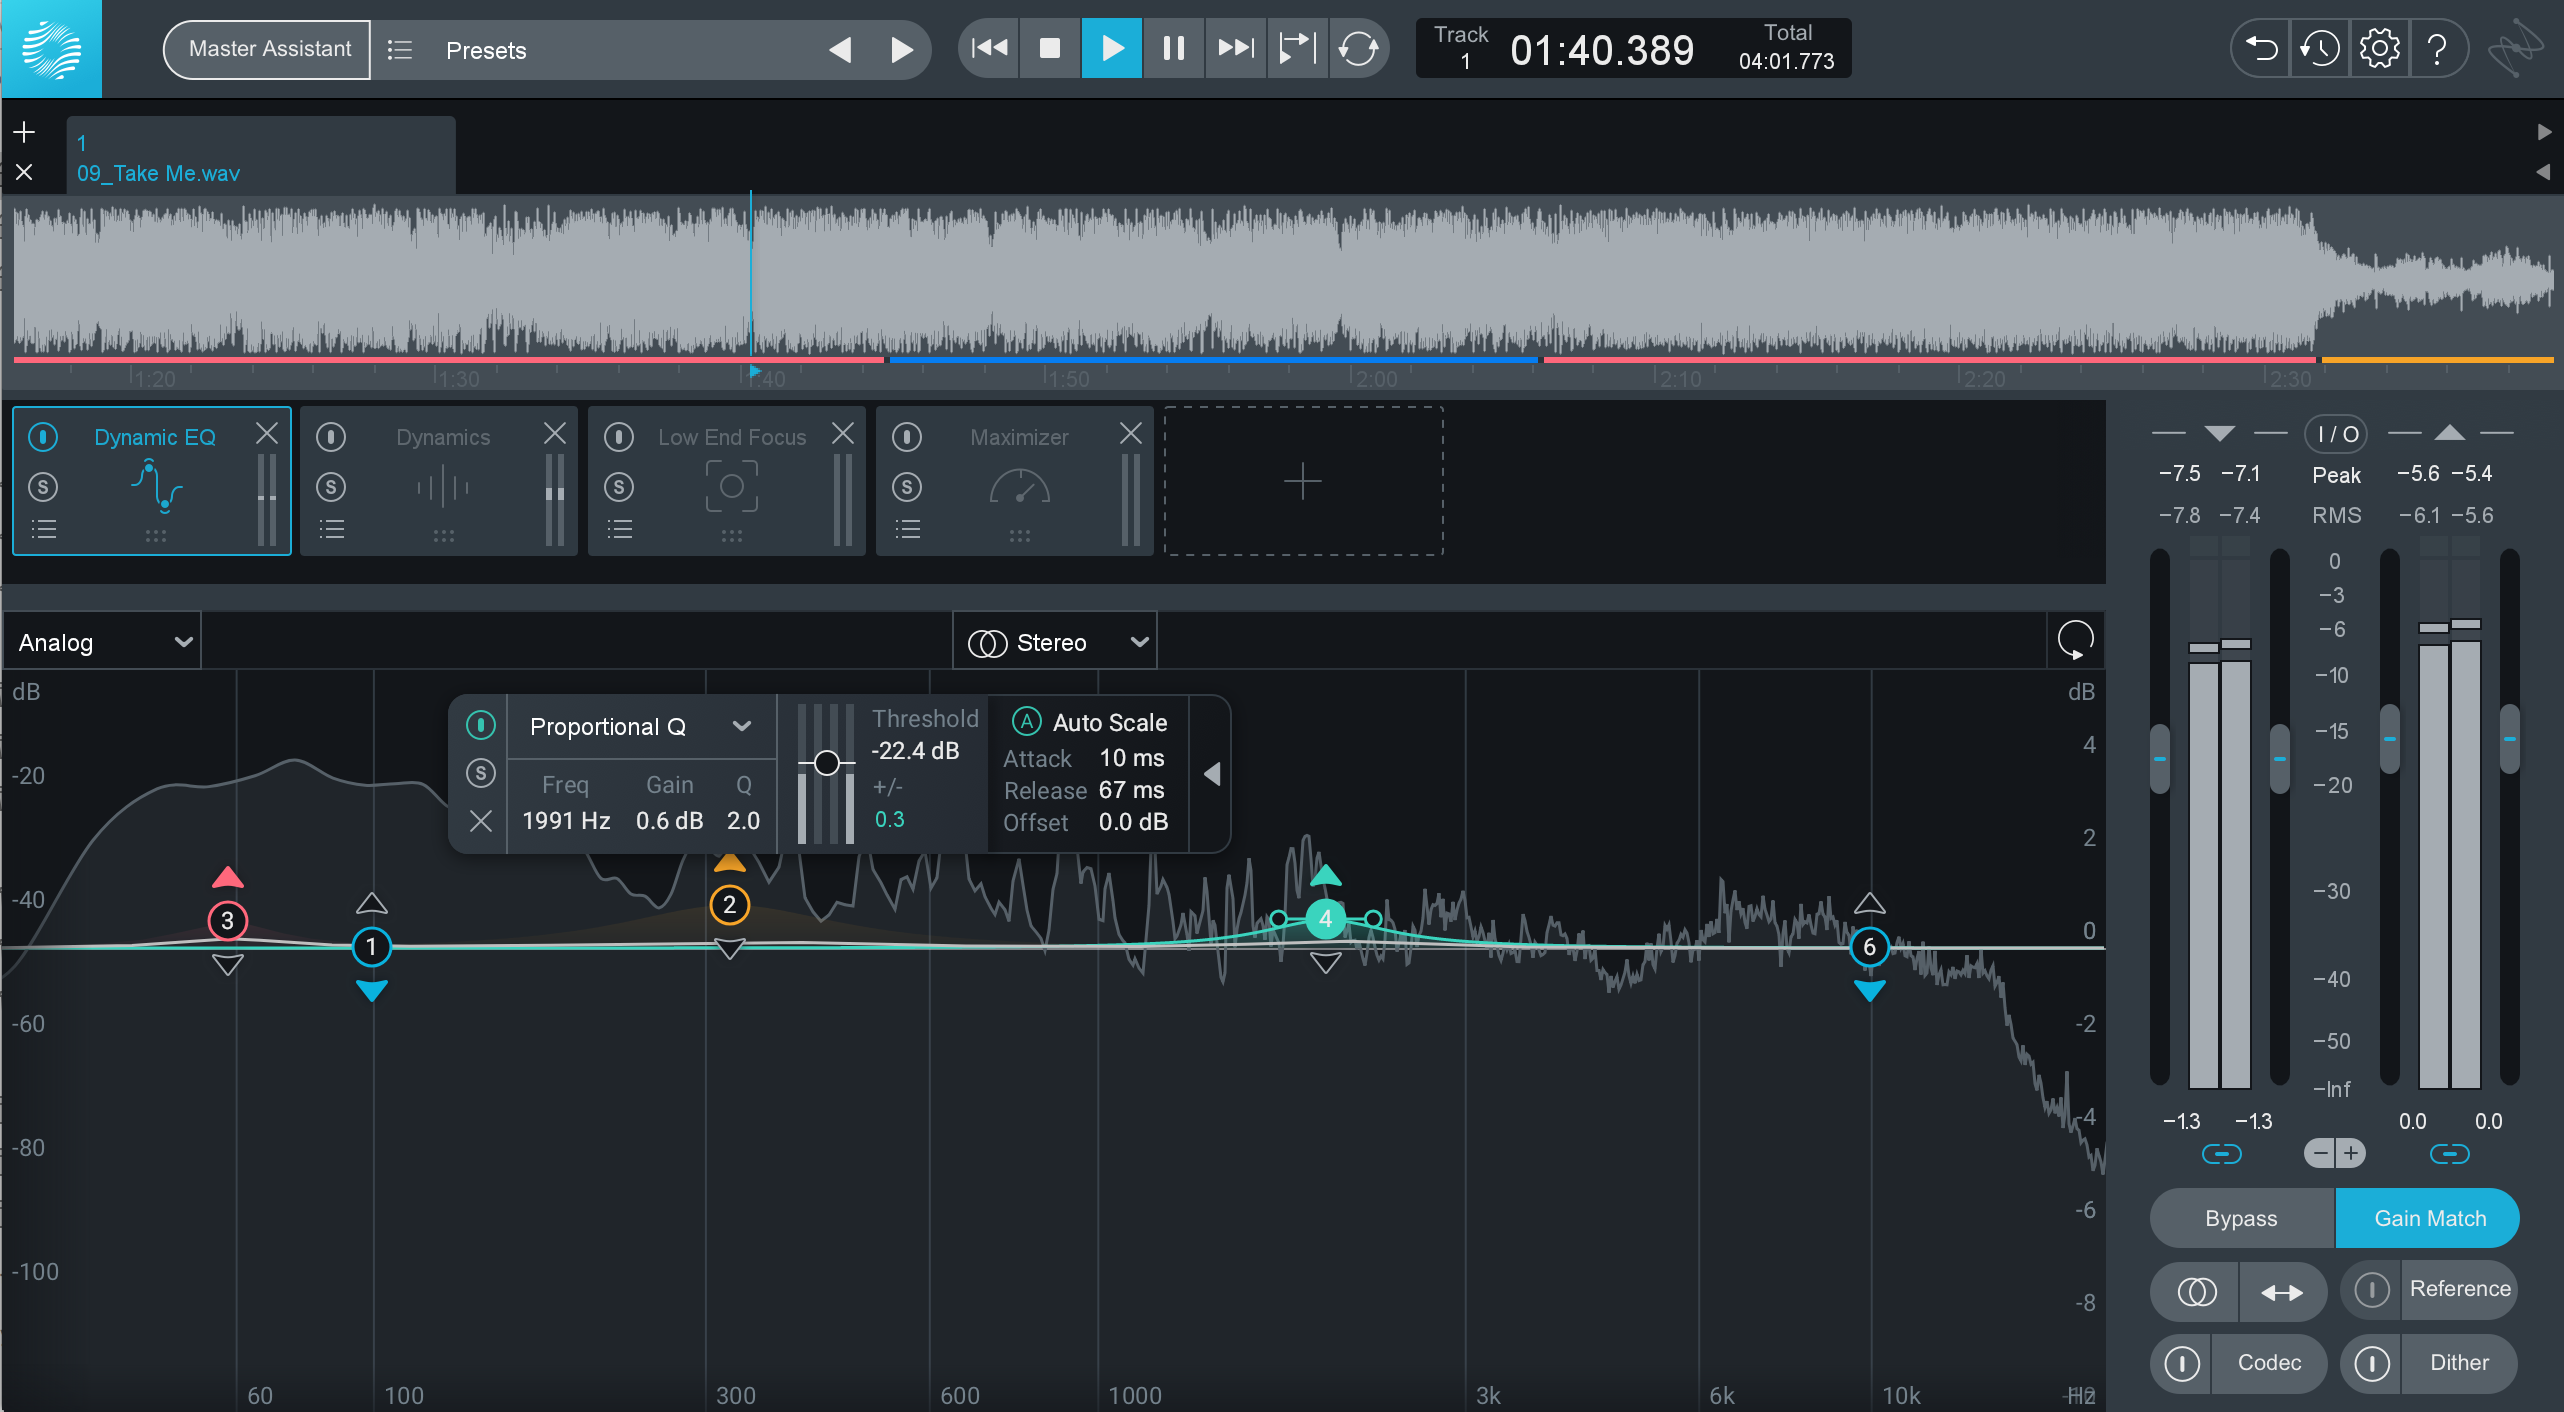
Dynamic EQ in Ozone 9
Parallel compression
Parallel compression will not always work, but it's worth a try. Start by trying to make your compressor pump dramatically. Set the parallel slider to 100% wet so you hear what your compressor is doing first. I find that setting it to Peak Detection Mode with a medium-to-slow attack and a fast release will do the trick. Think of it as creating huge mountains and valleys for the entire track.
Now comes the magic: drop your wet/dry fader to 0% and slowly raise it. You don’t want to hear the compressor when it’s engaged, but you want to miss it when it’s bypassed. It’s a very subtle effect that will really help create some movement. If you’re in Ozone, remember to listen to your work with Gain Match on.
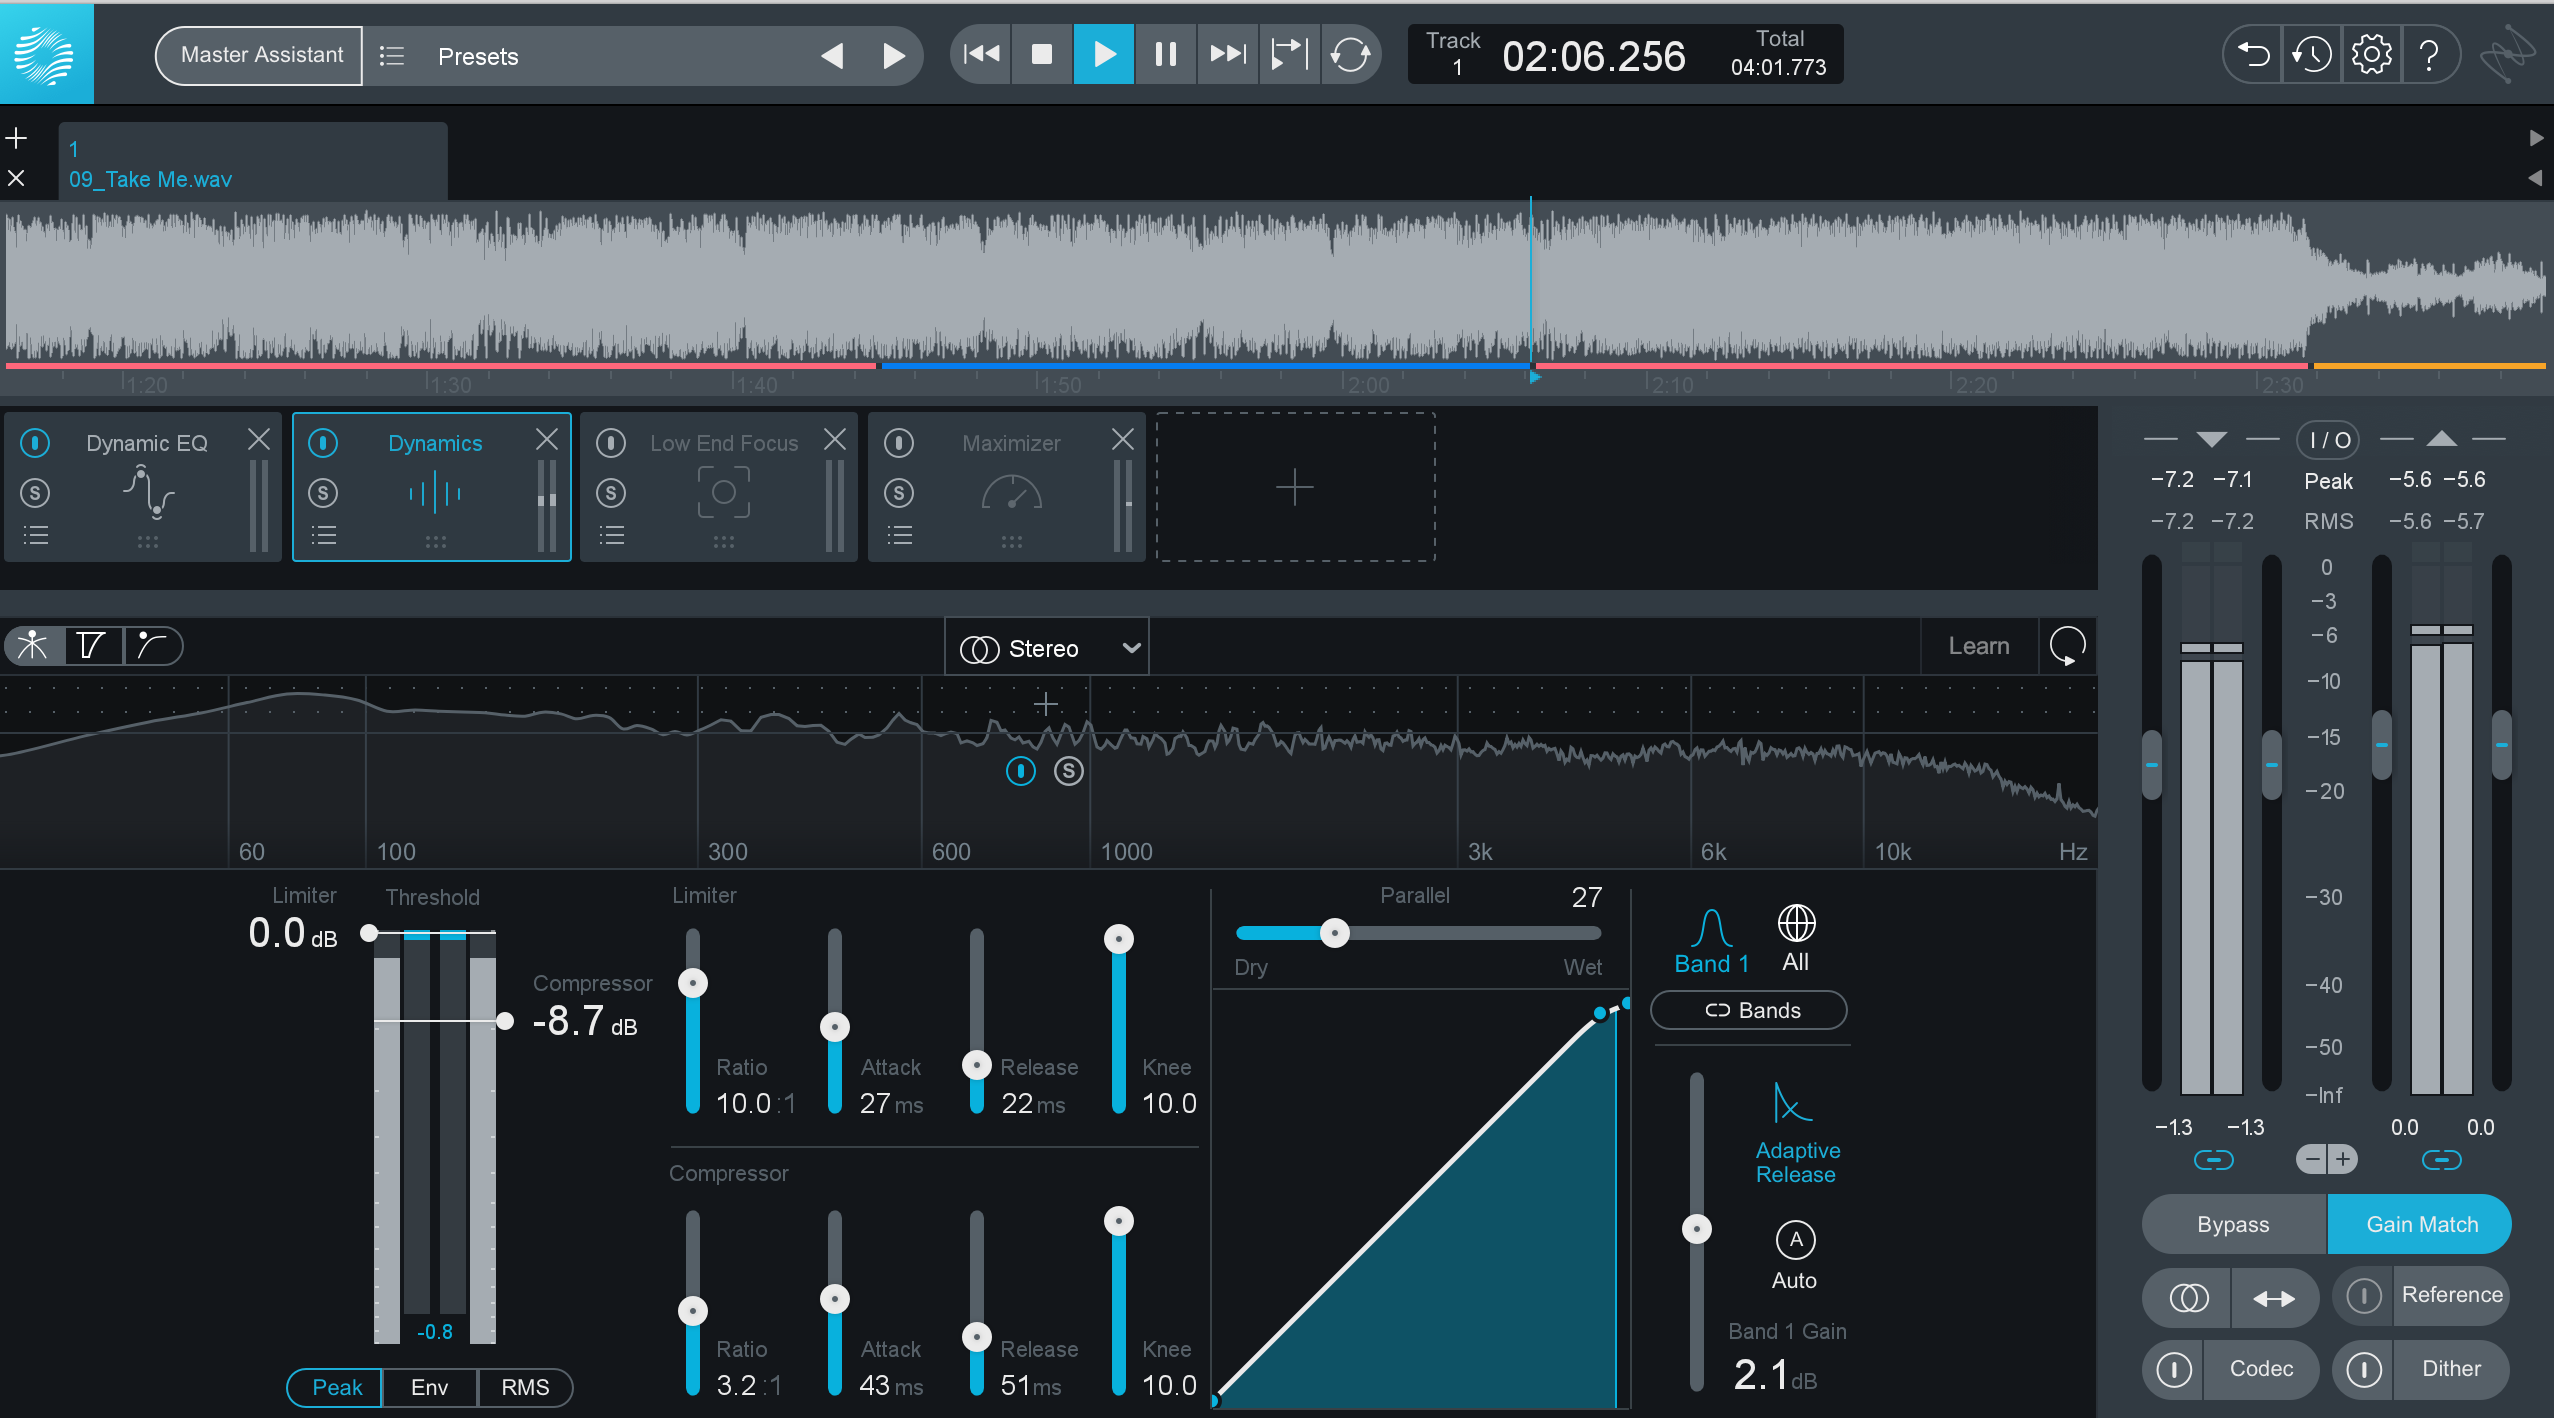
Parallel compression can help bring life back to a mix.
Low End Focus in Ozone
Low End Focus is one of the new features in Ozone 9, and can help tighten your low end and bring back some punch. It’s fairly simple to use: isolate the frequency range you want to modify and add a little bit of contrast. If you feel the song needs a little more low end, the Gain function can also do the trick.
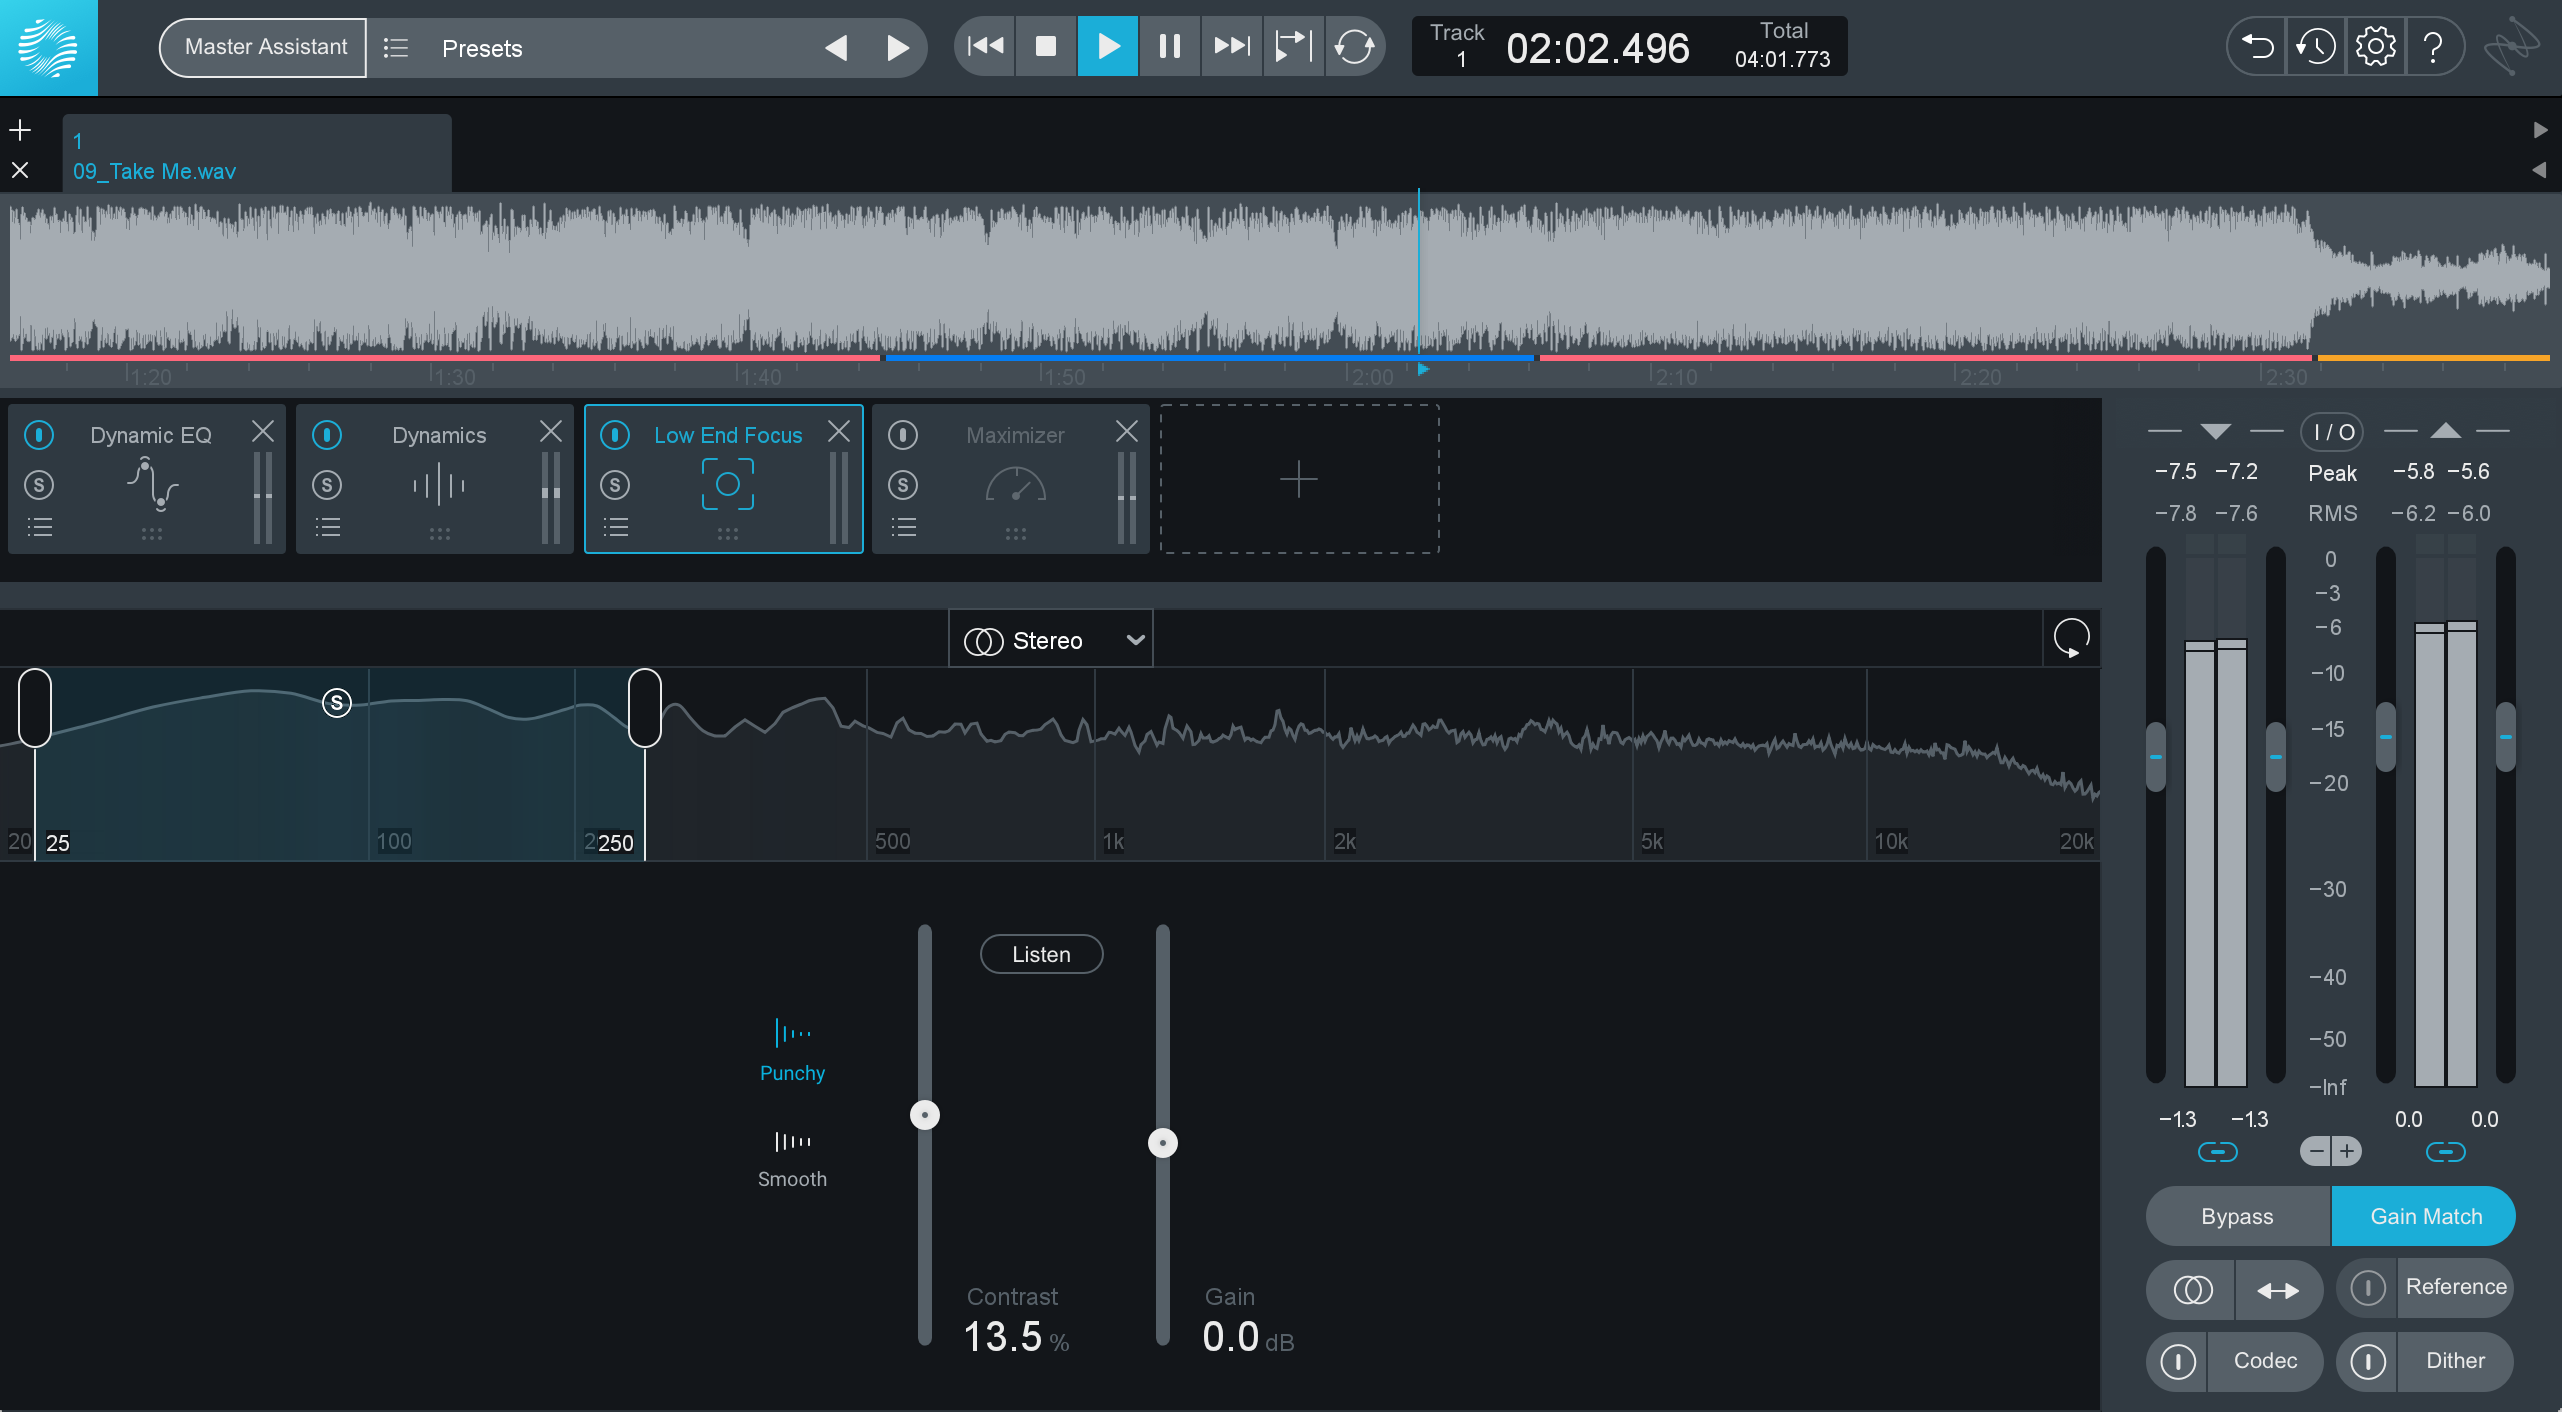
Low End Focus can help tighten your low end.
Automation
The efficacy of automation depends on how compressed the song is, and whether you need to create even more dynamics between sections. First, try to restore some contrast by introducing minor gain changes between sections. If this feels too heavy-handed, try having slightly different settings on the verses and hooks. Something as subtle as bypassing parallel compression on the verses and adding it to the hooks can be enough to make the hook pop.
Finalize
The last thing you address is bringing the level back up, especially if you dropped it to create more headroom. The changes you made added some gain to the signal, but it still might not be enough. Adding a Maximizer at the end of the signal chain will help increase the song’s overall loudness, but be careful that this doesn’t undo your newly created dynamic motion. Be sure to go back and modify anything you hear that might be causing a conflict.
Even though you have individual processors, they are all working together and need adjustments as you add more effects. Keep in mind that Gain Match can really help you hear what you’re doing to the sound. Once you’re almost done, listen to the track with Gain Match disabled. Hopefully, your master now sounds punchier and more dynamic.
Conclusion
Mastering has a reputation of killing dynamics just to make the track loud. Now you understand that the opposite can be done, and quite successfully. A little bit of tweaking can go a long way. Hopefully this article has given you some ideas—remember to experiment, and most importantly, have fun!
