How to Fix Audio Clipping
Learn what audio clipping is and how to use the De-clip module in iZotope’s RX audio repair software to repair distorted or clipped audio.
Audio clipping is every audio engineer's worst nightmare. In the past, the only way to fix audio clipping was to re-record the audio that had clipped in the first place. But thanks to some amazing advancements in technology, audio clipping doesn’t have to be the bane it once was. In this article, learn how to easily fix audio clipping using iZotope’s RX De-clip plug-in.
Hear the difference of audio that’s clipping and then de-clipped, especially on the word “audio” below:
In this article you’ll learn:
Follow along with this tutorial by starting a free trial of iZotope’s


iZotope Music Production Suite Pro: Monthly


RX 11 Advanced
What is audio clipping?
Audio clipping is when you push the loudness of your audio signal that you’re recording past the threshold your system can handle. It’s called this because your equipment will actually “clip” off the top of the waveform—meaning that whatever audio information was supposed to be present there gets lost for good.
Here’s an example of audio clipping present in a vocal:
And, here is a visual of the waveform of this same audio:
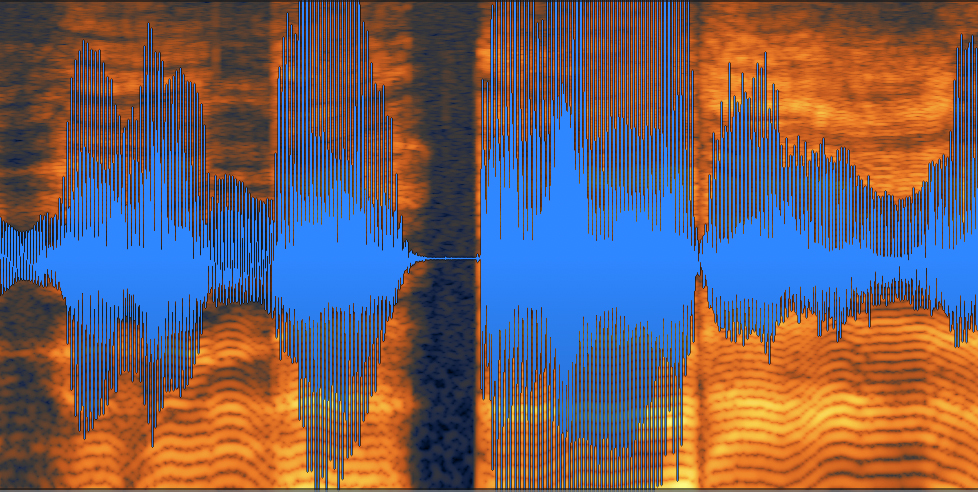
Audio waveform with clipping
Notice that there are sections of the audio that surpass the maximum level threshold and get “clipped” off. This causes the distortion you’re hearing on the word “audio” in the vocal example above.
Without the right tools, if you received audio that had clipped, you would likely have to re-record. Which, depending on what you were recording, could be a long, laborious, and expensive undertaking. Luckily, the RX De-clip plug-in is here to save the day.
Let’s dive into how to use it to fix audio clipping for music and non-music purposes.
How to fix audio clipping
Using the De-clip plug-in that comes with RX, you can fix audio clipping quickly and easily. De-clip is designed to help repair analog and digital distortion by rebuilding the peaks of clipped audio—processing any audio above a given threshold, and interpolating the waveform to be clearer and free of distortion. There are two versions of the plug-in—one that works within the standalone RX Audio Editor application, and another that you can load as a plug-in within your DAW. Let’s take a look at how to fix audio clipping using both versions.
Before you de-clip a signal, it is essential to decide what approach you will use to deal with the following problem:
- Your audio was clipped because it was too hot
- Your de-clip the signal redrawing the peaks of the signal
- The peaks are clipped again because you increased the level with the De-clip tool!
There are two strategies you can choose. One is to lower the level of the signal before declipping to avoid clipping the resulting repaired signal. Alternatively, if you must maintain the same signal level, you can enable a limiter to restrict the new peaks. In the second case, the result will sound better and less distorted than the clipped audio, but may be somewhat compromised by the limiter.
Fix audio clipping using the standalone RX Pro for Music Audio Editor
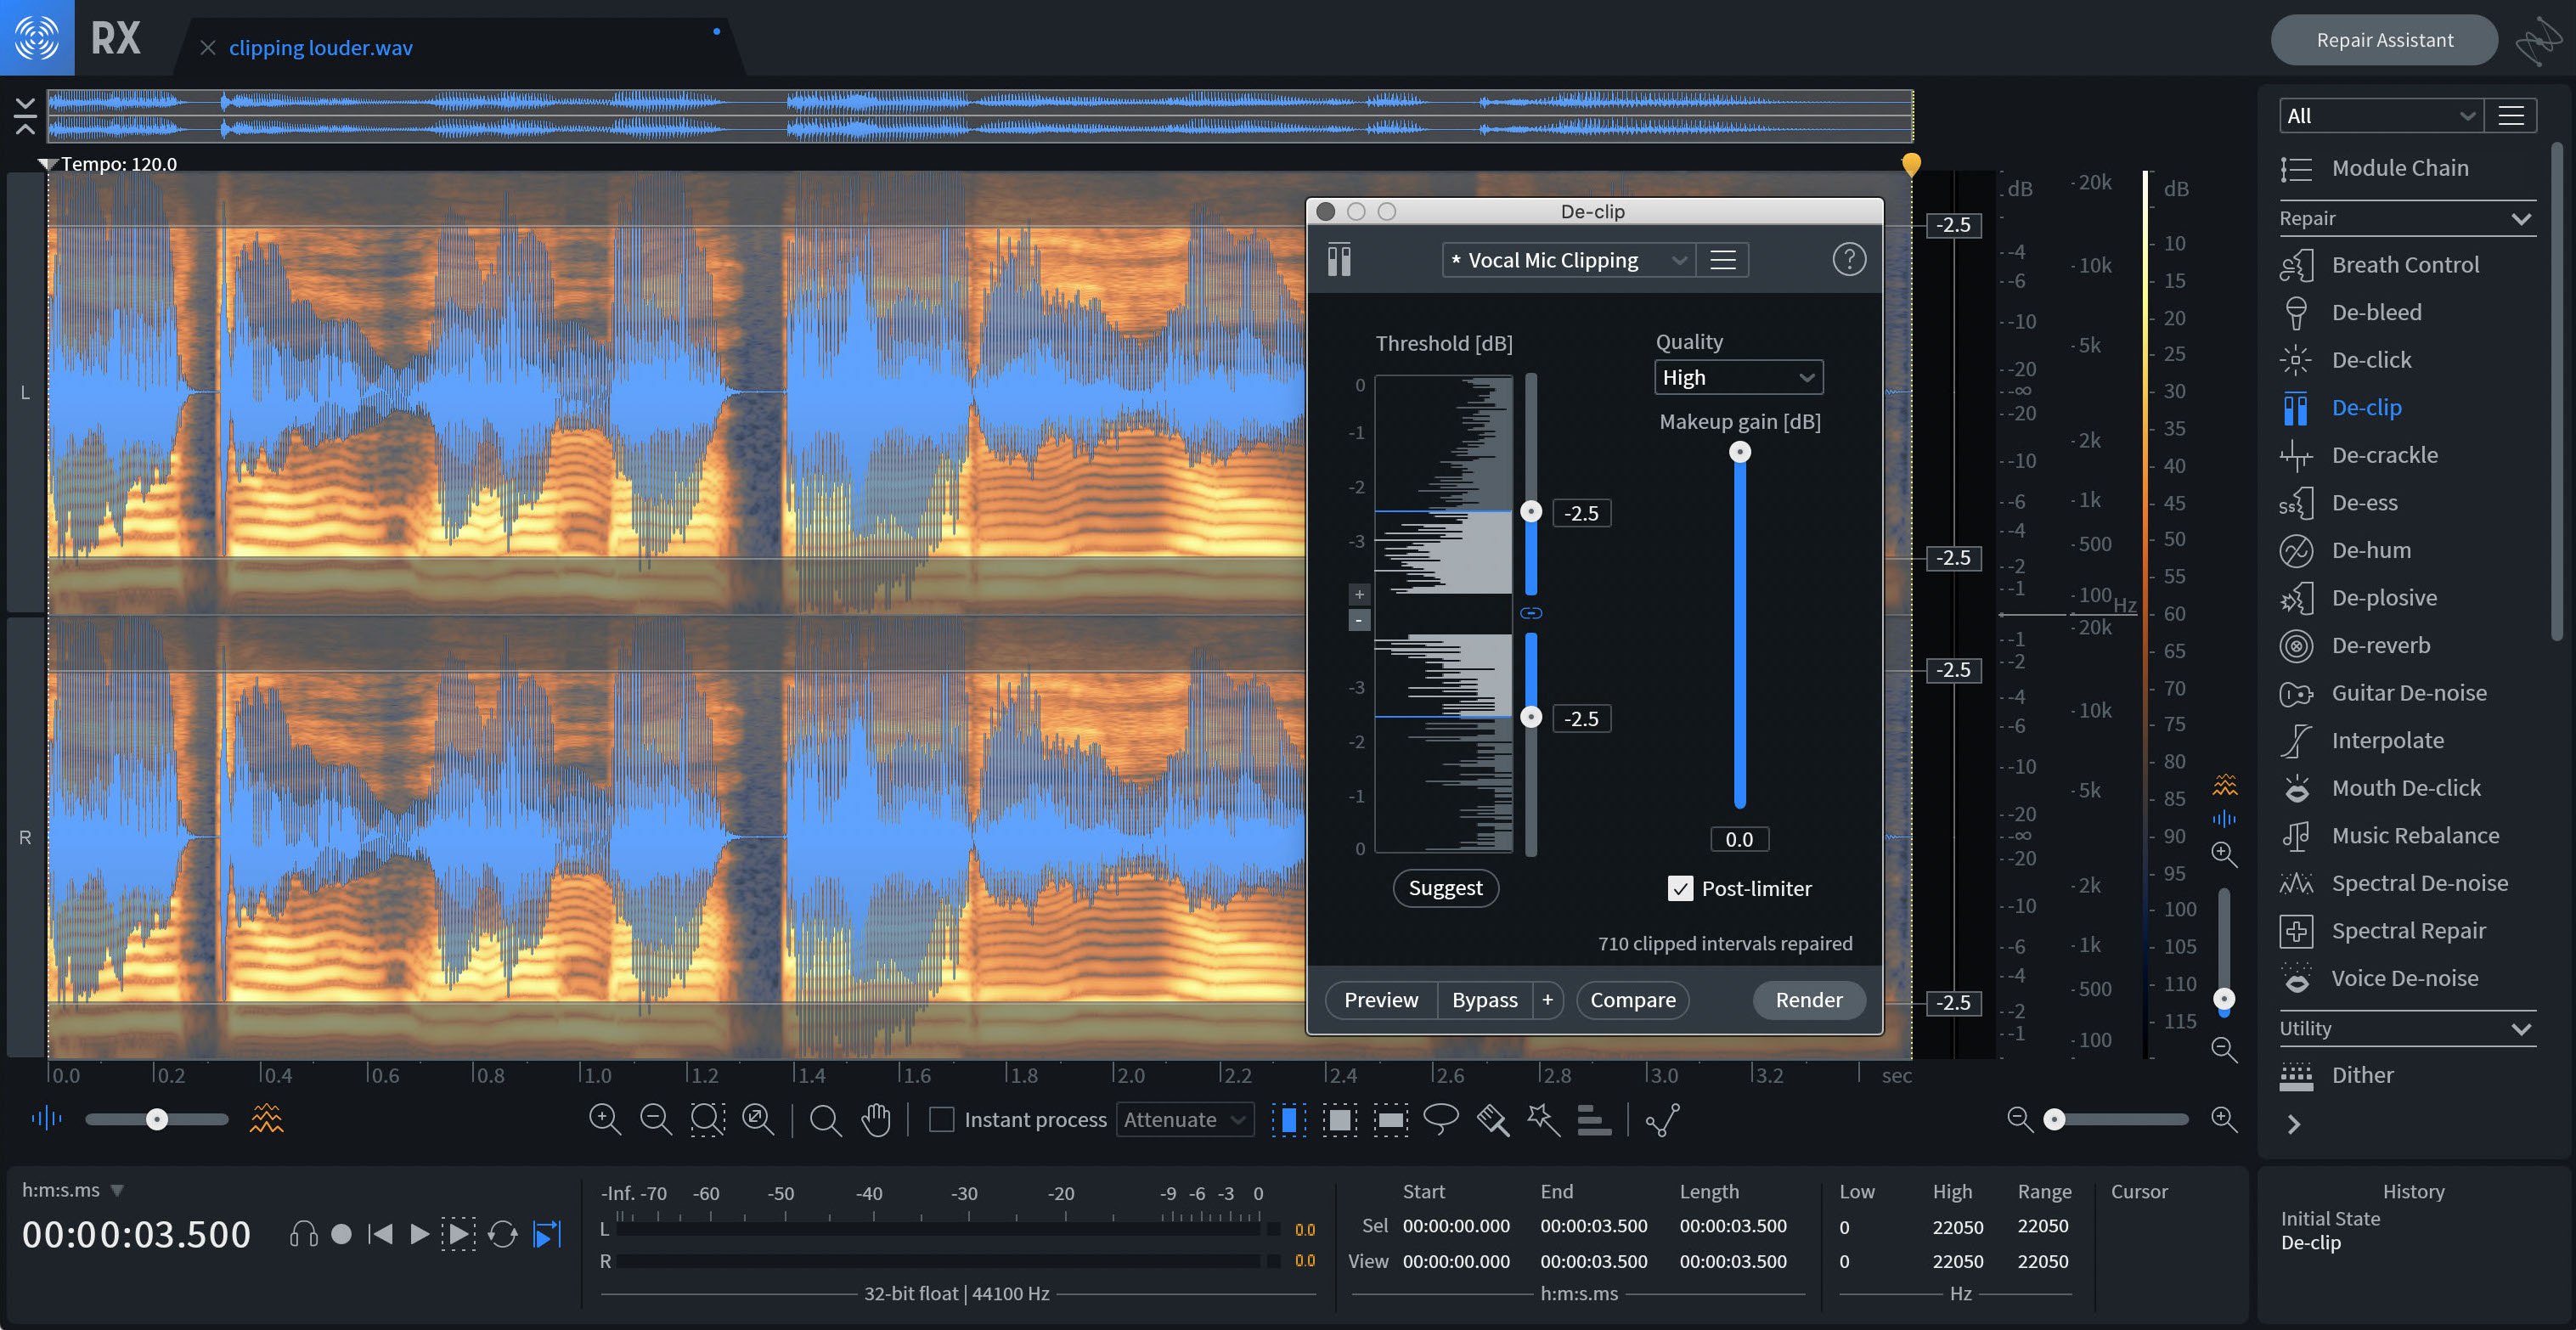
Standalone RX Pro Audio Editor
- Open your audio file in the RX Pro Audio Editor application.
- Open the De-clip module from the menu at the right.
- Click Suggest to have the De-clip module analyze your audio and set the threshold automatically.
- Click Preview to hear the results.
- Adjust the Threshold slider and Quality setting to the right of the Histogram if necessary.
- Once you’ve found the desired settings, click Process to repair your audio.
Fix audio clipping using the RX Pro for Music De-clip plug-in in your DAW
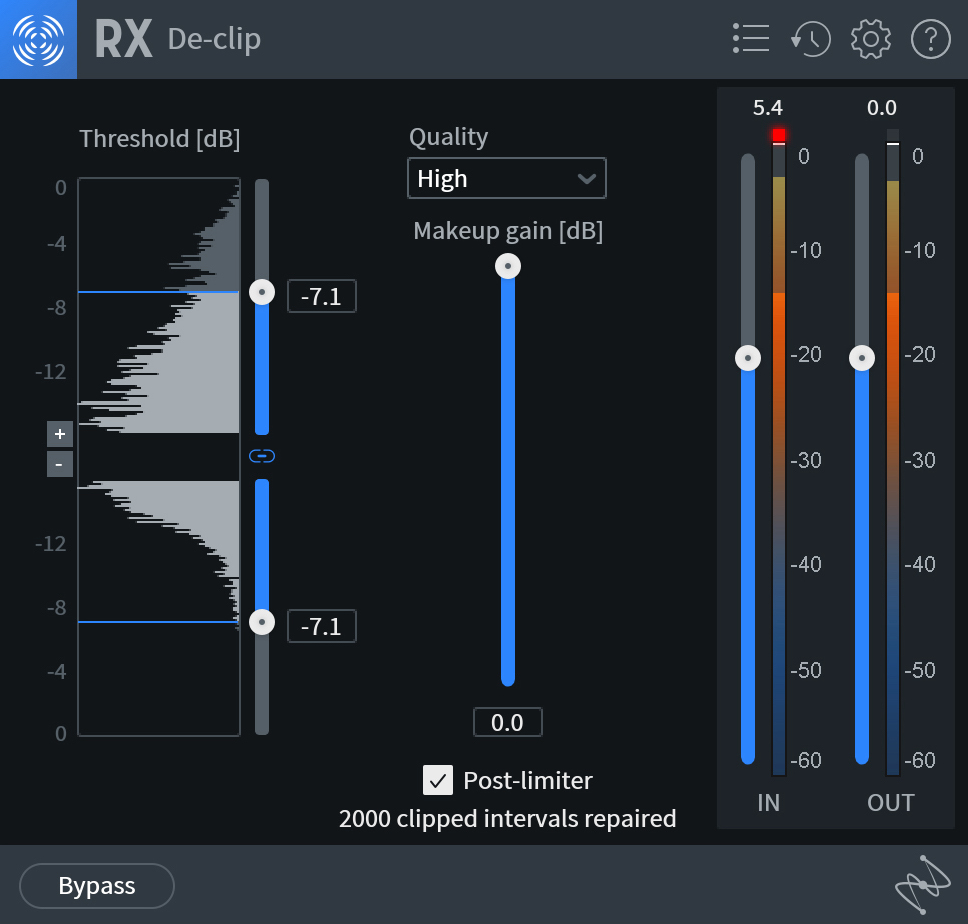
RX Pro for Music De-clip plug-in
- Load an instance of the RX De-clip plug-in onto the track that contains audio clipping.
- Select a preset from the drop down menu, or set the threshold manually to identify where the De-clip algorithm should begin processing.
- Click Play in your DAW to hear the results and then adjust the threshold and Quality settings as necessary.
- You can leave the De-clip plug-in on your channel strip. Or, to save on CPU, you can bounce the repaired audio to a new track and delete the original audio track.
De-clipped audio: end result
To demonstrate, I took the original audio clipping example from above and ran it through RX Pro for Music’s De-clip plug-in in my DAW. Here is the final, repaired audio:
And, here is what the audio waveform looks like after De-clip worked it’s magic:
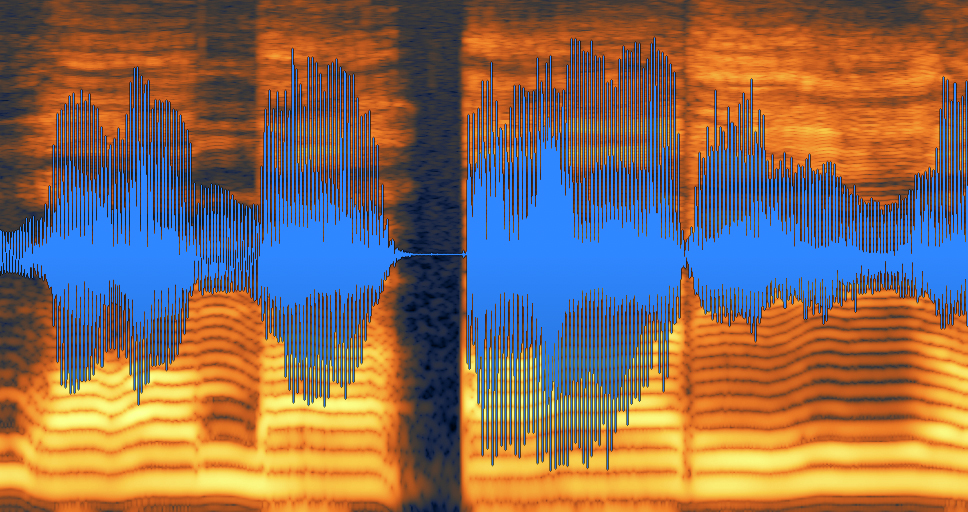
Audio waveform after RX De-clip
You’ll notice the audio was fully repaired. It no longer contains any distortion, and the waveform now has plenty of headroom before it passes the threshold and causes clipping. RX De-clip works like a charm!
Additional tips for fixing audio clipping with RX
Along with RX De-clip, there are several other tools at your disposal to help fix audio clipping on your recorded tracks.
Adjust the Makeup Gain
In redrawing the waveform, the De-clip process causes an increase in peak levels. The Makeup Gain control can be used to prevent the signal from clipping after processing. As an extra measure of protection, engaging the Post-Limiter option applies a true peak limiter after processing to prevent the processed signal from exceeding 0 dBFS.
Adjust the quality
There are three quality modes in RX’s De-clip module: Low, Medium, and High. The Low setting processes very quickly, and the High setting processes more slowly but is capable of achieving better results in some instances. In many cases, you will find that the Low setting yields great results. You can use the Compare feature in the RX Audio Editor application to try multiple modes and preview the results.
Zoom on the Histogram
A histogram is an analytical tool that displays how many samples are present at a given signal level over a window in time. The longer the line for the histogram is, the more energy is present at that amplitude. It's important to note that clipping can still occur on tracks with a low amplitude, and it can be hard to set the threshold and visualize the clipping on the Histogram with these tracks. The small + and - buttons to the left of the Histogram in the RX Audio Editor application are designed to help with this. Click on these to change the amplitude scale and you’ll be able to set threshold values as low as -64 dB.
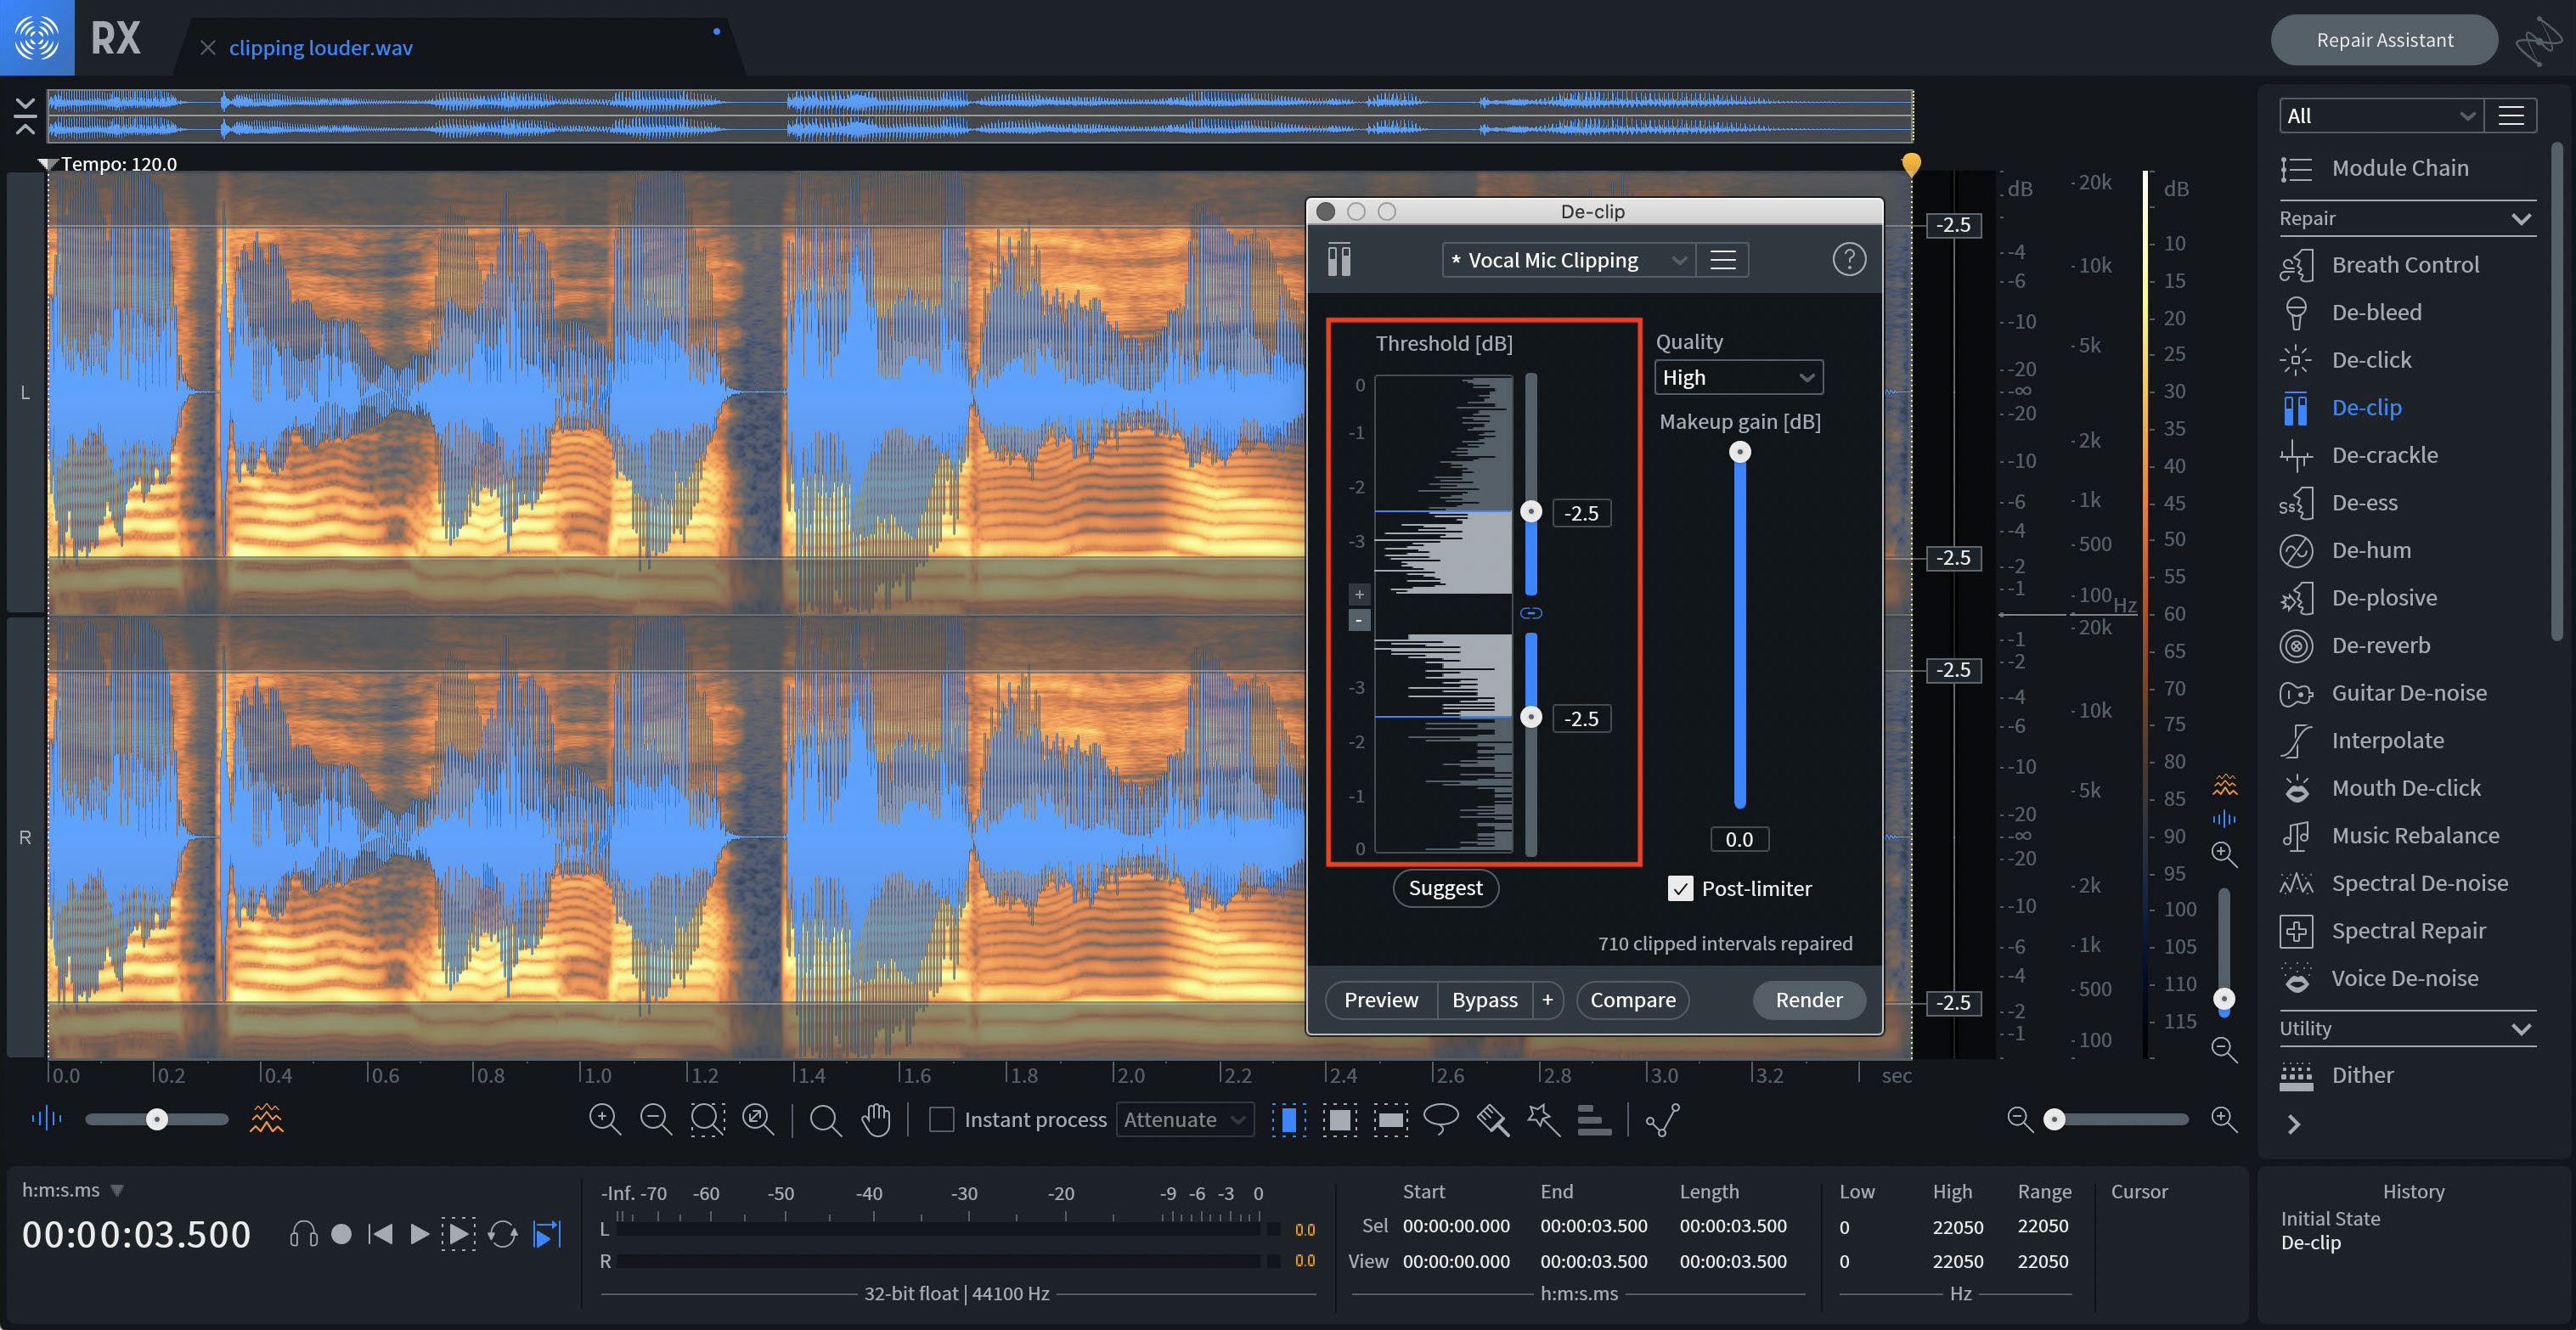
Setting the threshold in RX De-Clip's histogram
Try De-crackle
If some distortion artifacts remain after running your audio through De-clip, open the De-crackle module in the RX Audio Editor. This module can help mitigate any artifacts of the distorted signal that De-clip wasn’t able to repair.
Start de-clipping your audio
Got clipping? Save yourself the hassle of re-recording, and simply fix it with RX Pro for Music De-clip. You can get access to De-clip (and the entire lineup of repair tools included in


RX 11 Advanced
