Clipping in mixing explained, and how to use it
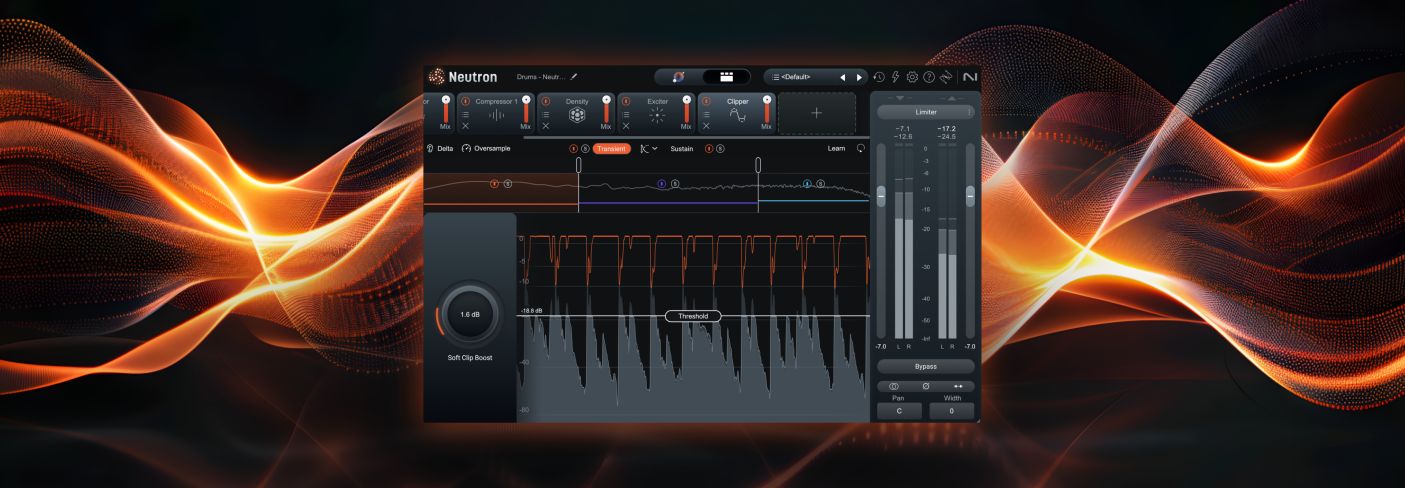
Neutron 5 offers a clipper that can be used in stereo, mid/side, and in transient/sustain modes. Read on to see how to use it in your mix.
Clipping often gets a bad rap, but when used with precision, clipping is a powerful tool in the mixing process. Tasteful clipping can help you preserve headroom, control dynamics, keep the groove of a part intact, and achieve a commercially loud song when it is appropriate to do so. Clipping has its creative uses, but its utilitarian benefits bear close scrutiny.
Neutron 5 comes stocked with an intuitive clipping module, one that can be used in stereo, mid/side, or in transient/sustain applications. It can sound clean and colorless, or it can give you classic soft-clipping tones associated with grimier genres. Whether you use it in full-band mode or in multiband applications, you are likely to get a lot out of this module – but only if you know how to use it.
So let’s dive in.
What is clipping in audio?
Clipping occurs when an audio signal exceeds the limits of a piece of gear or playback system, causing distortion as a result. When you drive a tube line-amp really hard – or juice the makeup gain stage of a hardware compressor – you are clipping in the analog domain.
But you can also clip a digital device. On some kinds of material, many mastering engineers prefer the sound of clipping their analog-to-digital converters over brickwall limiting.
Yes, traditional digital clipping can incur harsh distortion when used badly, as the peaks of the waveform are cut off right at the top of their crest. But used subtly – and usually within the confines of an aggressive song with plenty of underlying distortion – hard clipping can remain in the audible shadows, netting you a louder signal, while avoiding the softening artifacts of limiters.
Soft clipping, on the other hand, provides a smoother alternative, gently rounding off the waveform peaks to maintain musicality. This method allows you to push your tracks louder with a certain amount of color – color that can mask the innate distortion while suiting the material.
Why use clipping in the mix?
Clipping has traditionally sat within the wheelhouse of mastering engineers, done subtly at the stereo track level. But some mixing engineers have been playing with clipping for many years too – particularly in metal, EDM, and modern pop genres.
Yes, newbies often clip their mixes unintentionally, creating horrible sonic results in the process. That’s not what I’m talking about. When a careful engineer uses clipping in the mix itself – often on a track or buss level – they can actually rustle up serious sonic benefits:
Simply put, clipping can help manage levels in your mix without introducing compression artifacts, adding undesired density, affecting the tonal balance, or altering the overall character of your mix.
But only if you do it right!
Clipping vs. compression
Why use clipping to manage dynamic range over something else, such as compression?
Well, truth be told, you’ll often find yourself using both. But compressors utilize attack and release controls that change the behavior of the sound. They can greatly affect the groove of material, or add artifacts due to their timing controls.
To illustrate this, we’ll take a look at a compressor’s attack and release behavior in PluginDoctor.
Here are our compressor settings:
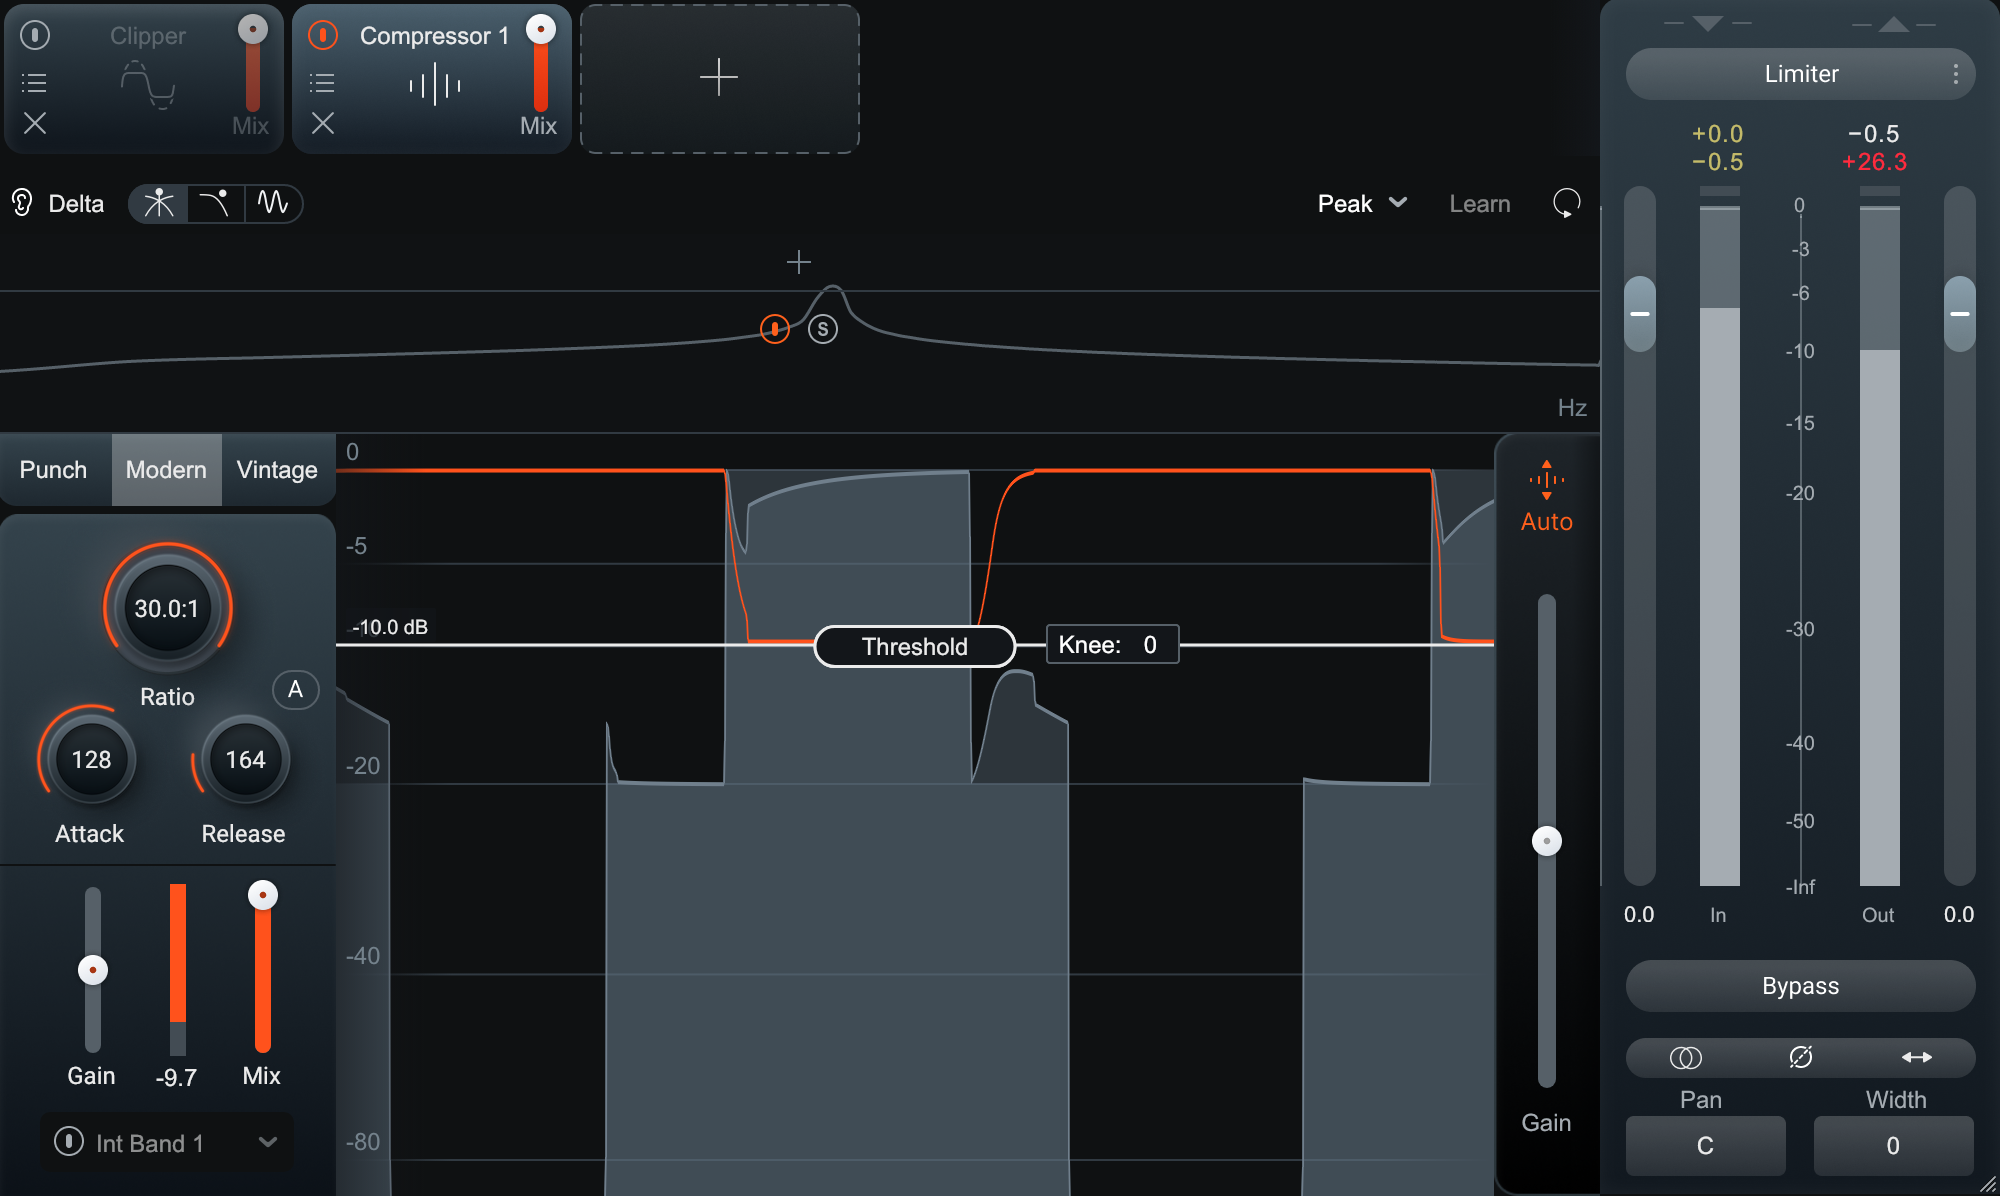
Compressor settings
Now, let’s take a look at the attack and release behavior of our compressor in PluginDoctor:
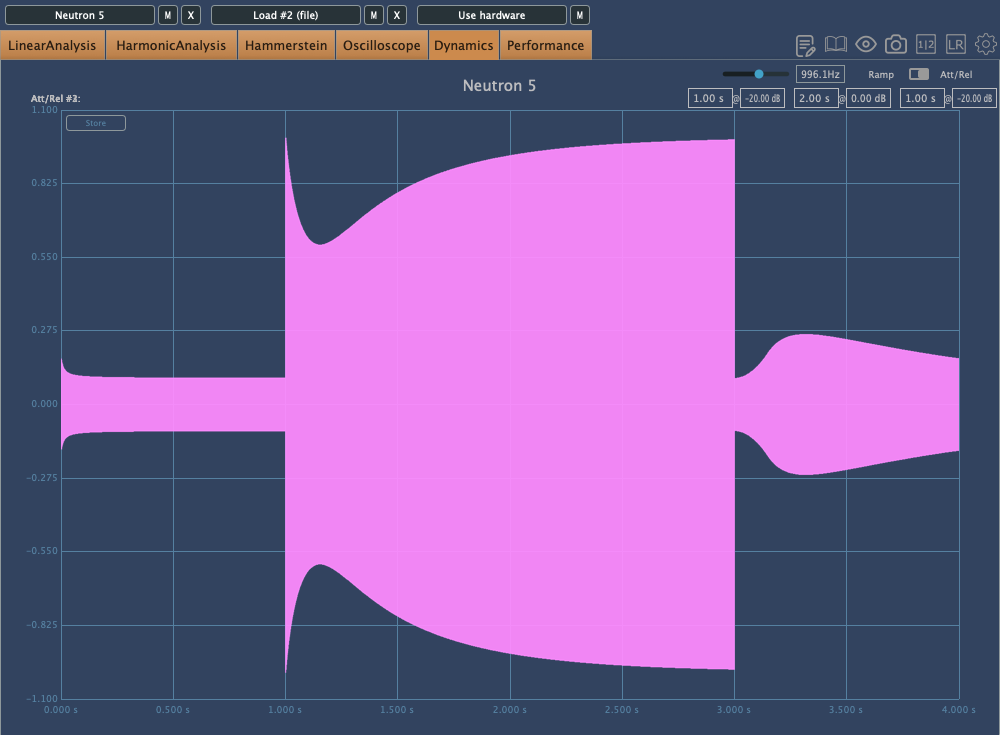
Compressor in PluginDoctor
In this test, a loud blast of intermittent sound is played into the compressor; the graph depicted above shows how attack and release controls respond to this sudden sonic spike.
Note the roundness of the curve at 1 second; that’s the attack. Note the behavior at 3 seconds; that’s the release.
A hard clipper, on the other hand, behaves like this:
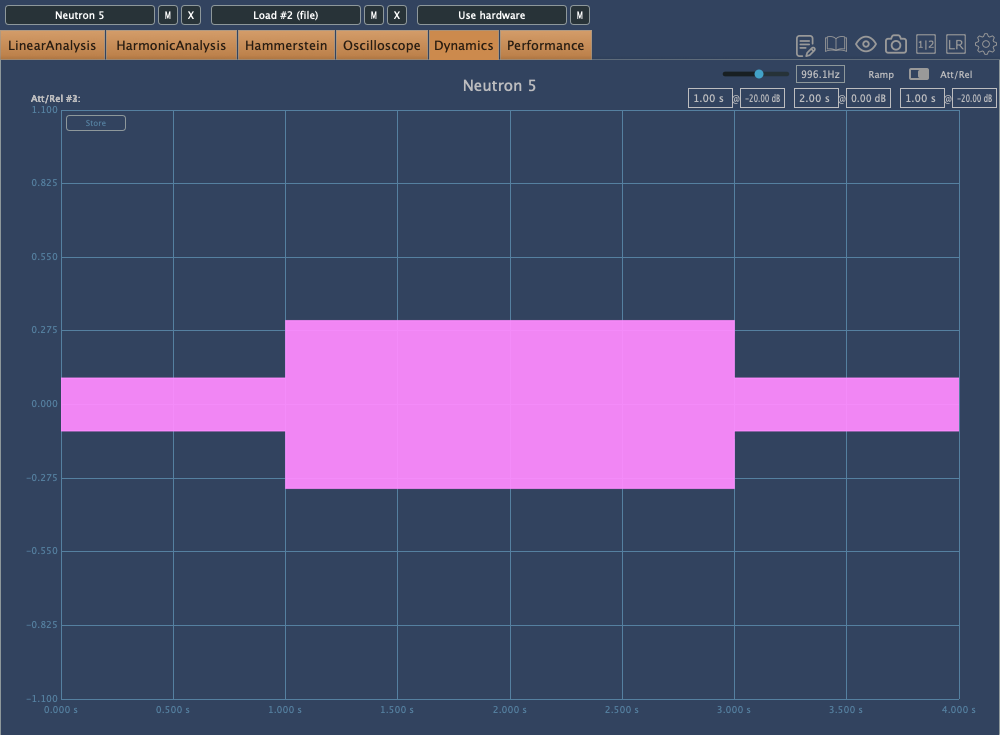
Hard clipping in PluginDoctor
No roundness here, just a hard stop to how loud the sound can get—the hard ceiling of the clipper’s threshold, which is set to -10 dB in this case.
So, you don’t get a change in the behavior of the sound. Instead, what you get – depending on how hard you hit the clipper – is the introduction of distortion.
As discussed before, this distortion isn’t necessarily bad. Depending on the material it can go one of three ways:
- The distortion sounds horrible, and should be avoided
- The distortion is effectively masked by the inherent distortion of the material
- The distortion actually produces a noise that contributes to the punchiness of the material.
When to use clipping during mixing
First ask yourself what type of music you’re working with, and what type of artist you’re working with.
Are you working on a gentle, acoustic track? Are you working in a genre like folk, classical, or traditional jazz? Is the artist you’re working with quite specific about how much they want their material altered? Do they shy away from distortion? Have they specifically told you they want their music to retain a large dynamic range?
If the answer to any of those questions is yes, think very carefully before clipping. Clipping is most audible on gentle acoustic material – and make no mistake, this is a destructive process that will both tamp down dynamic range and add distortion to the sound.
Now here’s another set of questions:
Is the music you’re working on already quite distorted? Is it already quite dense? Is it naturally bombastic? Are most of its elements synthetic? Has the artist specifically requested a loud product? Are the references they gave you full of pleasurable distortion?
If the answer to any of those questions is yes, then clipping can be a viable technique for managing levels.
How to use hard clipping at the track level
For this example, we’ll use a tune by the artist P4NTL3R called “FOX GYM.” Here’s what it sounds like as a static mix:
Now let’s examine Neutron’s Clipper.
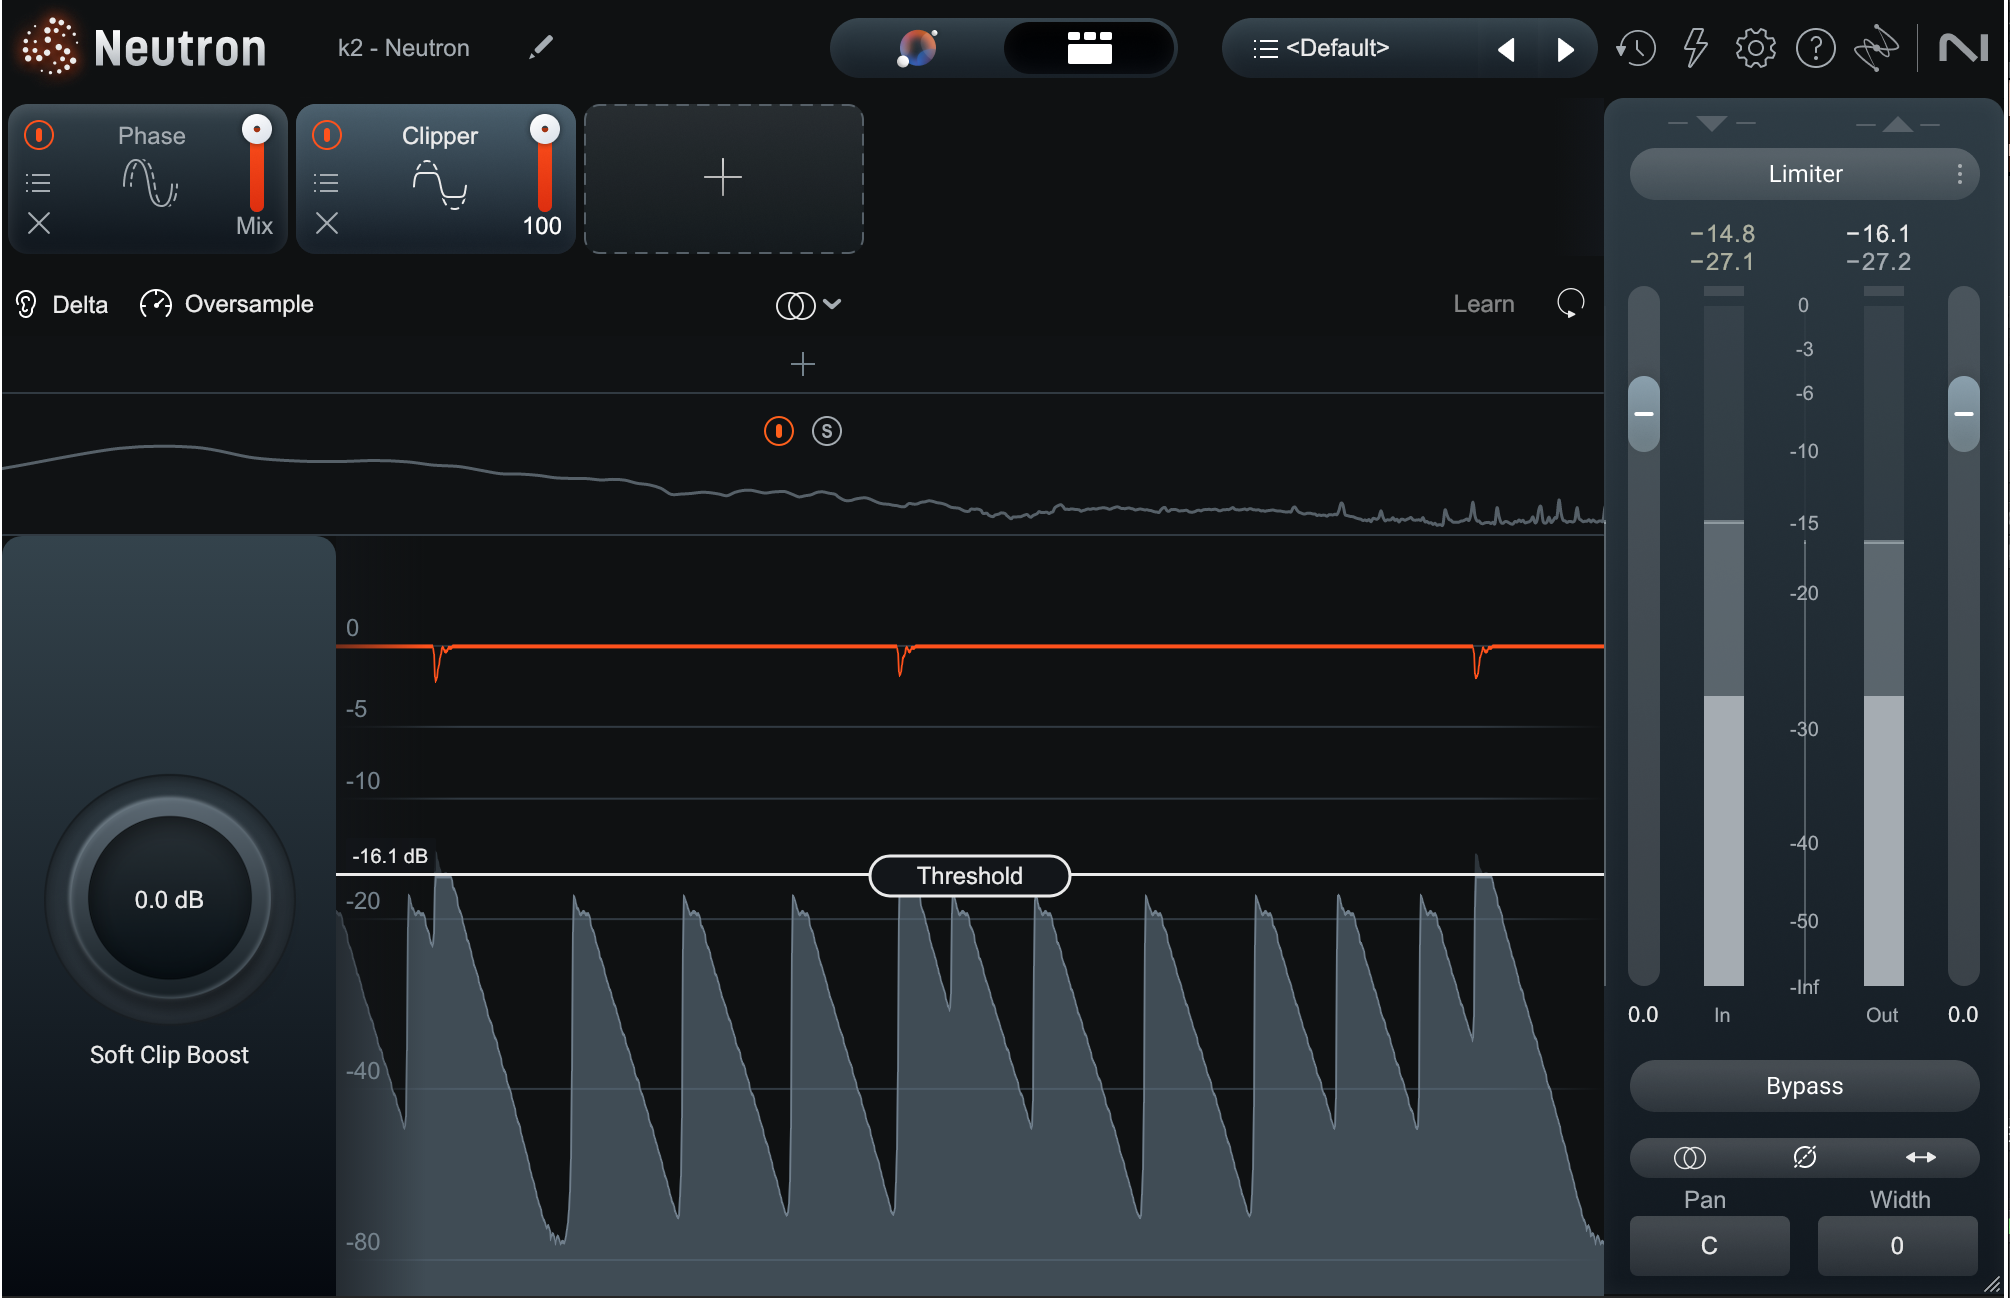
Neutron Clipper
You’ll notice the clipper has a threshold control. This is our adjustable ceiling, above which clipping will occur. You could drive the input into the threshold, but in this application, I prefer to drop the threshold, creating an artificially lower dBFS ceiling.
Neutron’s GUI gives you a good graphic of when and what you’re clipping, but I like to flip on the Delta button to monitor the clipping artifacts.

Neutron Clipper Delta
This way I can hear exactly what I’m adding to the sound.
So, we’ll take a drum loop:
We’ll bring the threshold down.
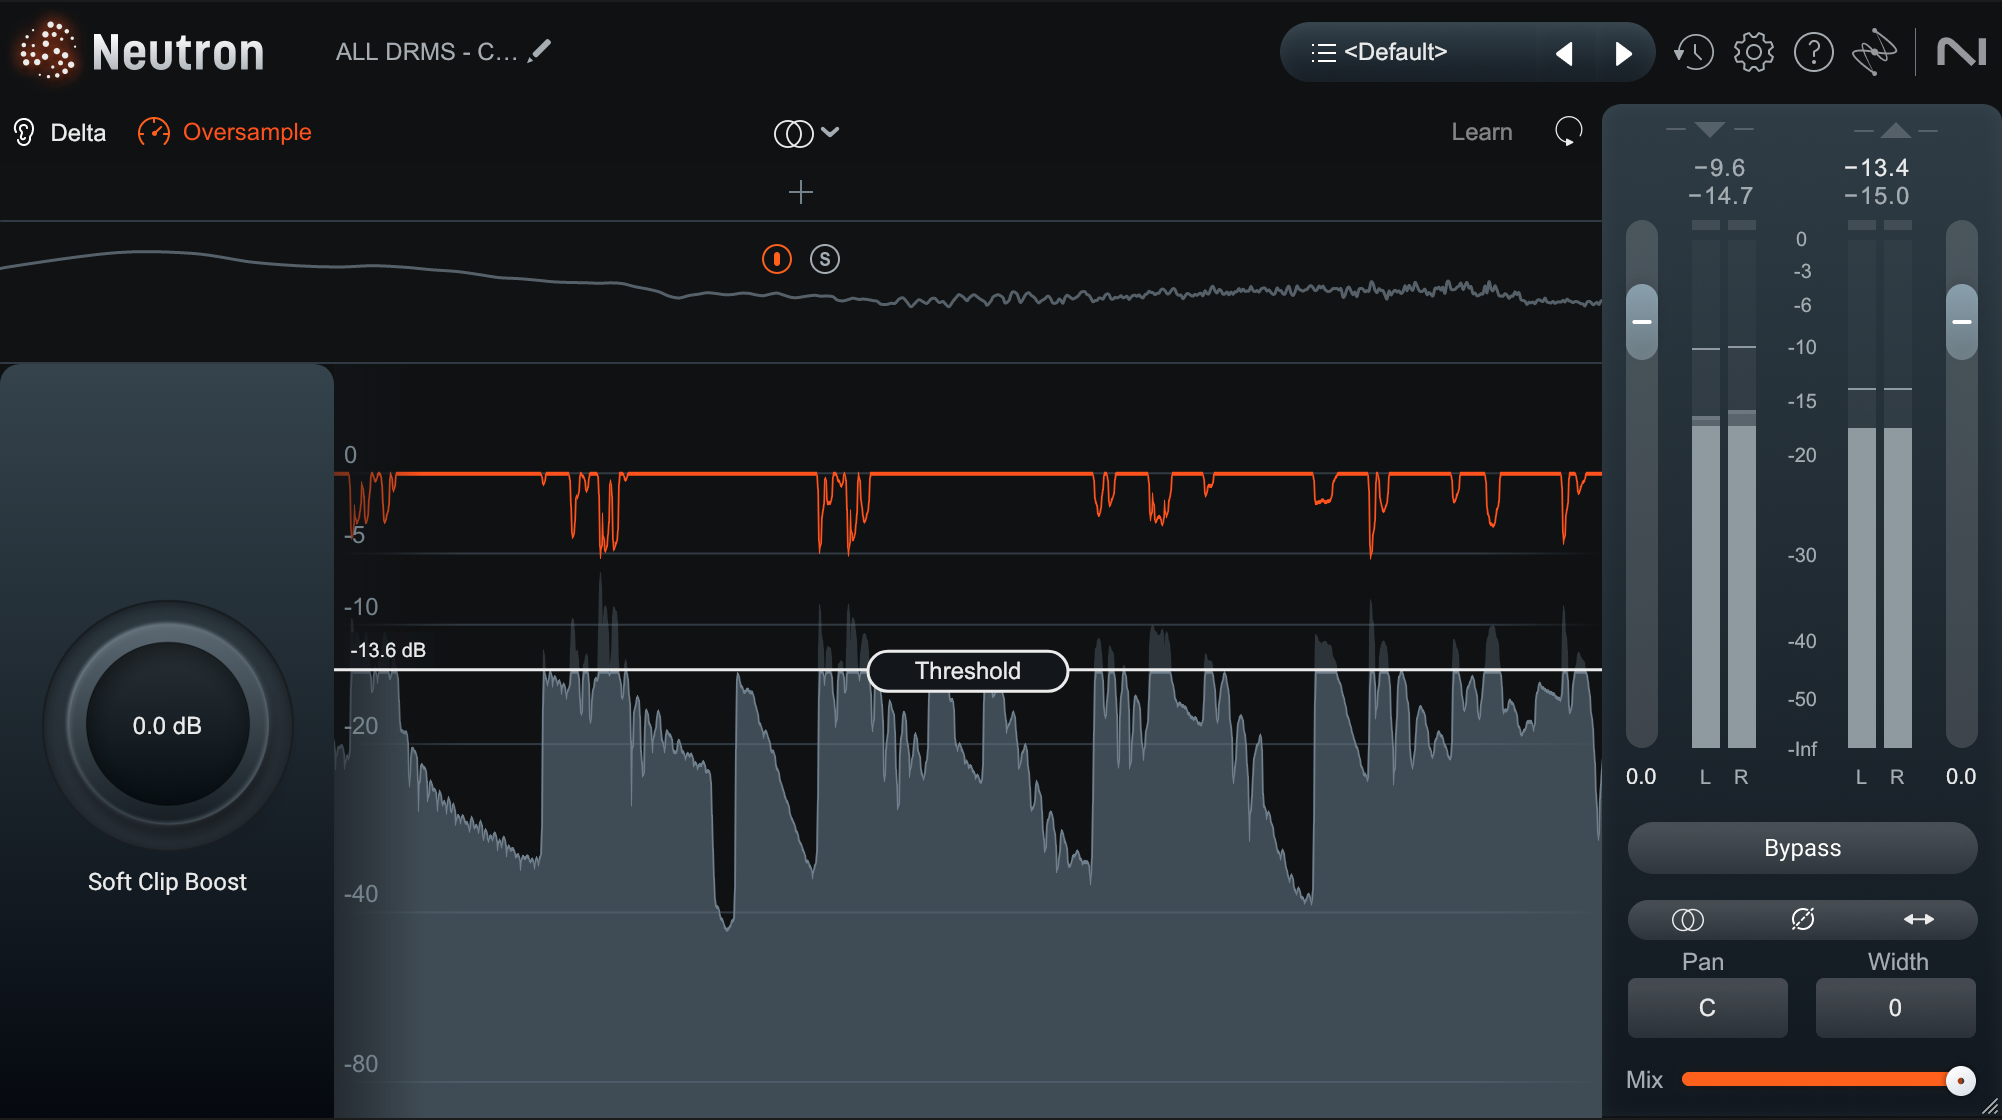
Threshold
We’ll listen.
I definitely overdid it here. To confirm, I’ll check the Delta.
Yep, too much clipping for me – so I’ll back off the threshold by 4 dB.
That’s a lot less clipping. Let’s listen to the final product:
Our drums don’t sound overcooked, and they measure the same RMS and LUFS integrated as before. However, the clipped drums measure a full 3 dB quieter in the peaks – giving us more headroom in the overall mix.
Clipping at the bus level
It’s not uncommon for engineers who employ judicious clipping to use it again at the bus level, whether on submixes or the main stereo out. This is especially true for modern metal mixes, where it seems clippers are used in many a pro’s arsenal.
The key, again, is to use the process subtly. You also might want to investigate Neutron’s multiband capabilities at the buss level, as well as its ability to work in either mid/side modes or transient sustain modes.
Let’s take our our static mix again, and add clipping at the track level:
This track measures -18 LUFS integrated, -15.26 RMS, and -3.69 dBTP.
Let’s apply the following multiband clipper settings to the stereo mix:
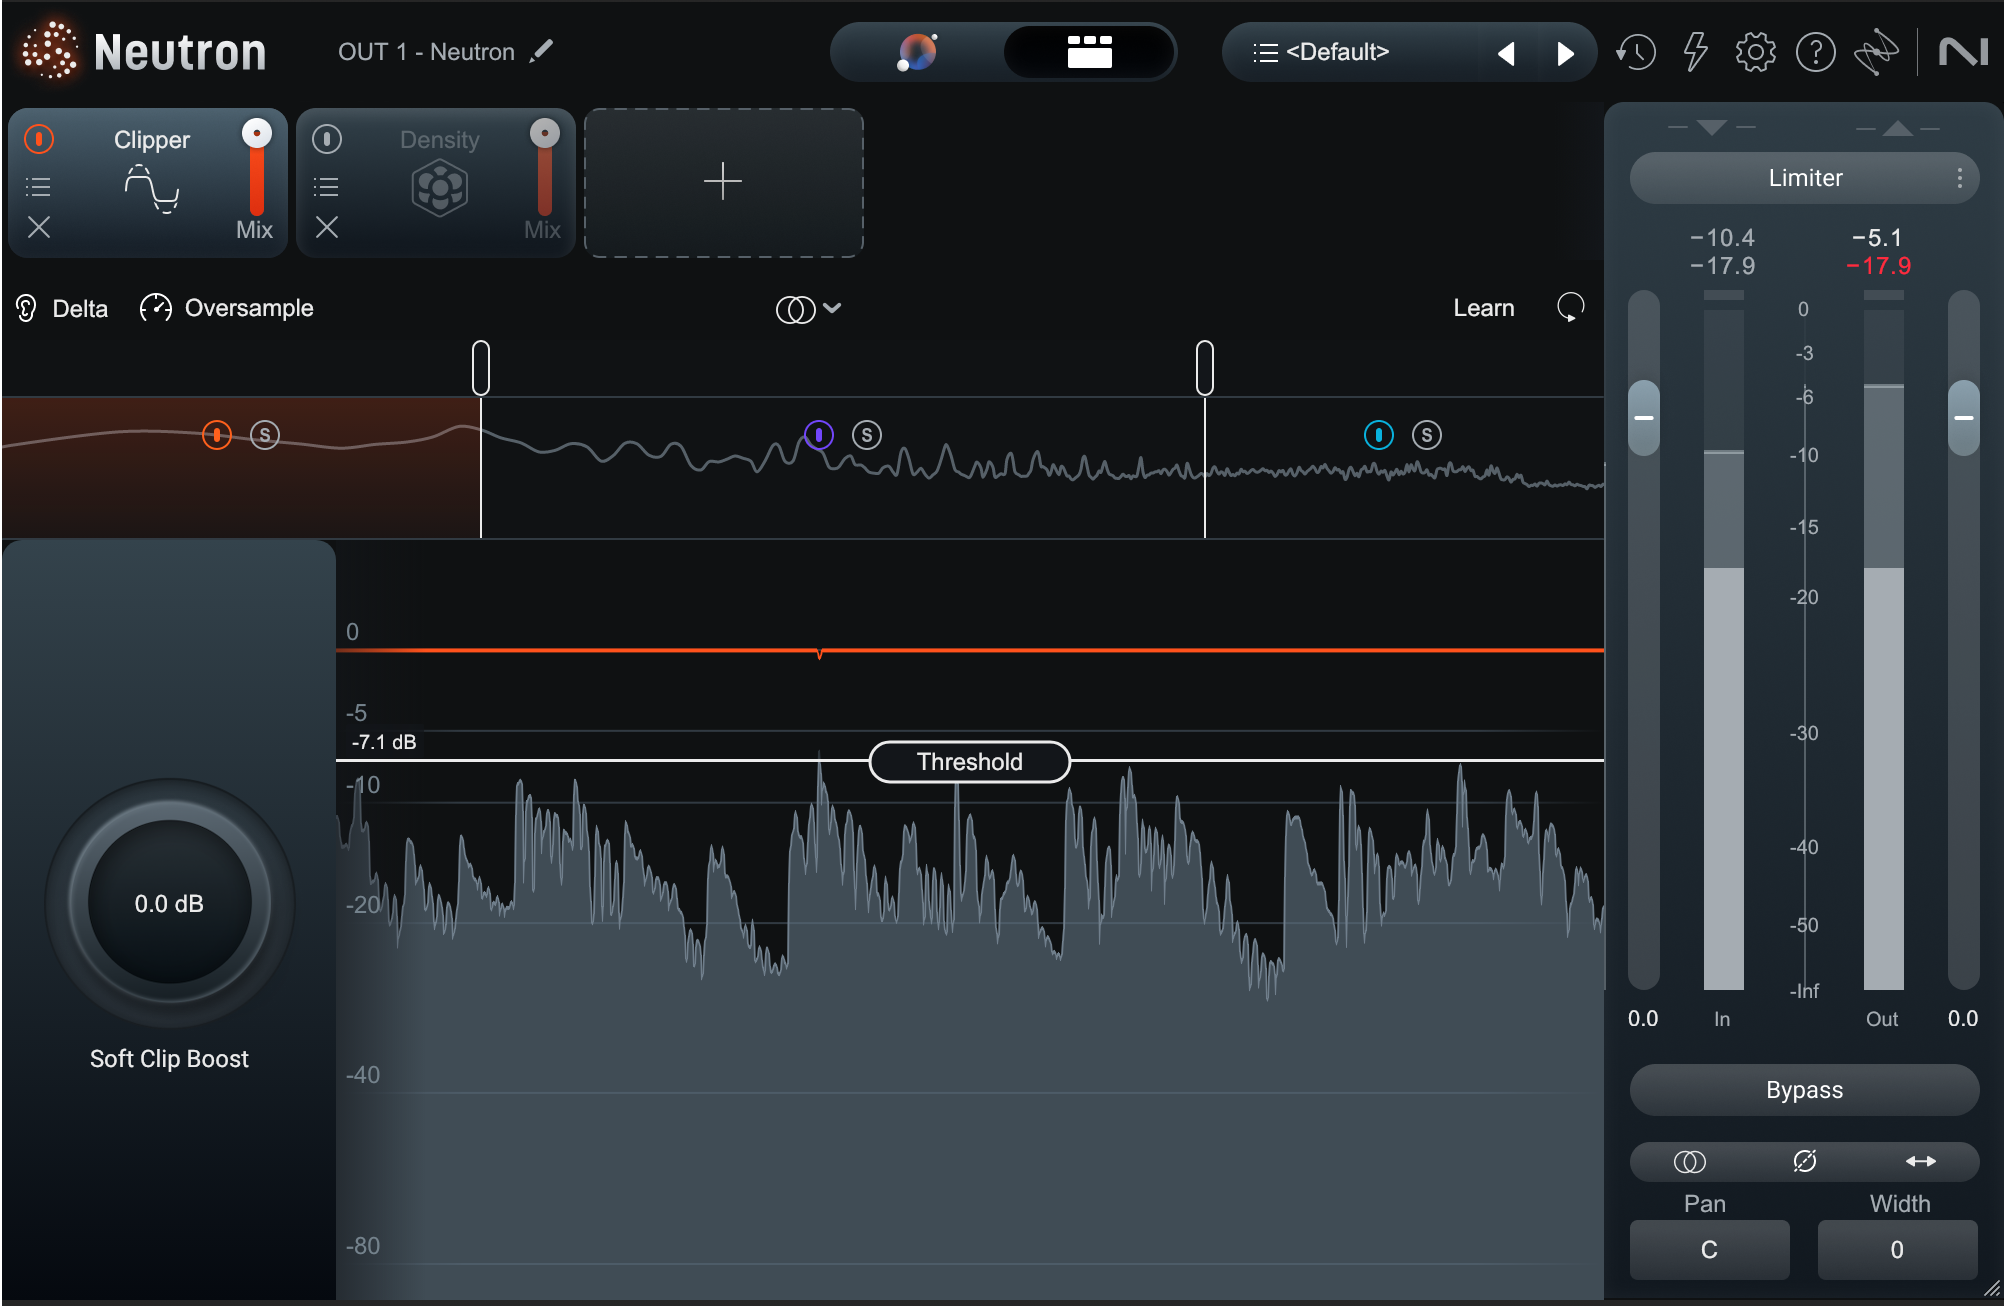
Multiband clipping on stereo bus
Once again, we pay careful attention to our clipping by monitoring the Delta signal extensively:
Not too bad, not too much distortion. The final product sounds like this:
Sounds pretty good, and we’ve got a dBTP measurement of -4.07, saving us an extra half a decibel of headroom when it comes to mastering.
We can also flip the clipper into mid/side mode, clipping the mid channel and side channel independently. This can sometimes be more transparent. You be the judge with the following settings:

Multiband M/S clipping
Soft clipping in the mix
If regular clipping in Neutron has a utilitarian purpose, soft-clipping is a more creative endeavor. As covered above, soft clipping tends to round off the waveform peaks as the material crosses into hard clipping. Functionally, this adds a certain kind of harmonic distortion, as well as a boost to perceived loudness, rather than the peak level.
I can illustrate this visually in PluginDoctor. Remember how our clipper, set to -10 dB, looks in the dynamics measurement window:

Hard clipping in PluginDoctor
If we add 6 dB of soft clipping to the signal, we get this:
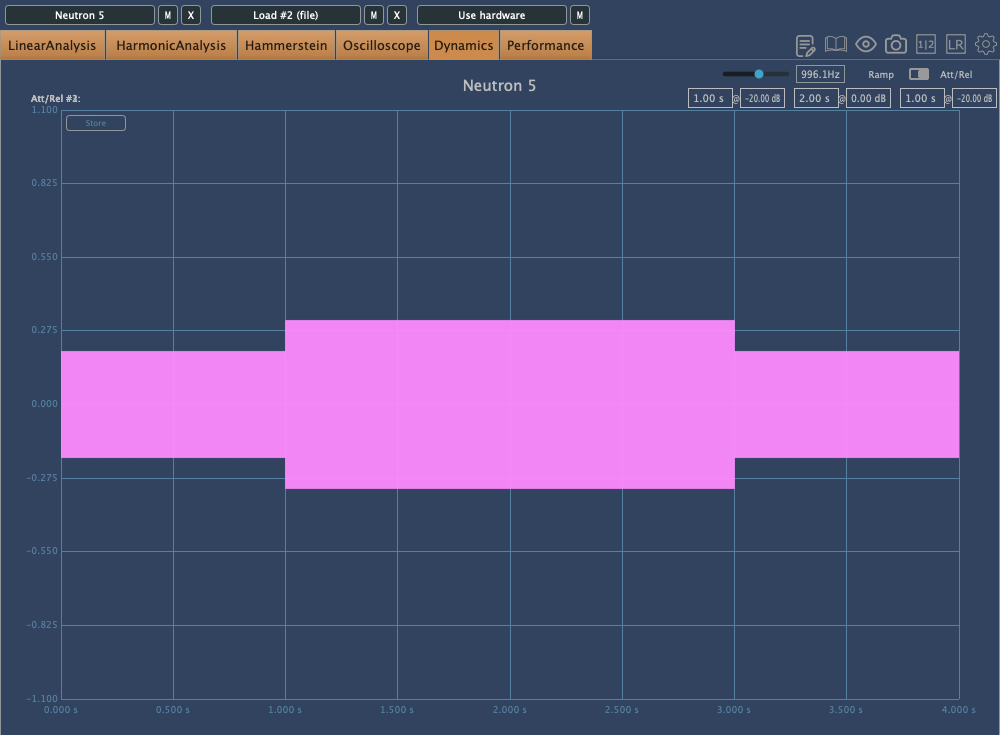
Soft clipping in PluginDoctor, 6 dB
The signal has been effectively raised by 6 dB before it hits the clipper – giving us a boost in perceived loudness without affecting the peaks.
Now here’s the thing: this rise in apparent loudness comes with distortion. However, we can use this to our benefit.
Remember our multiband hard-clipped stereo bus example?
If we want to alter the sound creatively, we can try adding the soft-clip boost directly to the low band. Here’s about 1.2 dB of it.
Now we’ve altered the tonal quality, rounding off the low end in a pleasant, pillowy way. We’ve also increased the RMS by about 1 dB – though not at the expense of the peaks: they’re still coming in just a little under -4 dB.
Want to get really creative with soft clipping? Try using Neutron’s clipper in its transient sustain modes. Here’s how I’m going to set it up for the stereo buss of our track:
In the Transient portion of the signal, I’ll use these settings, with no soft- clipping boost:

Transient hard clipping
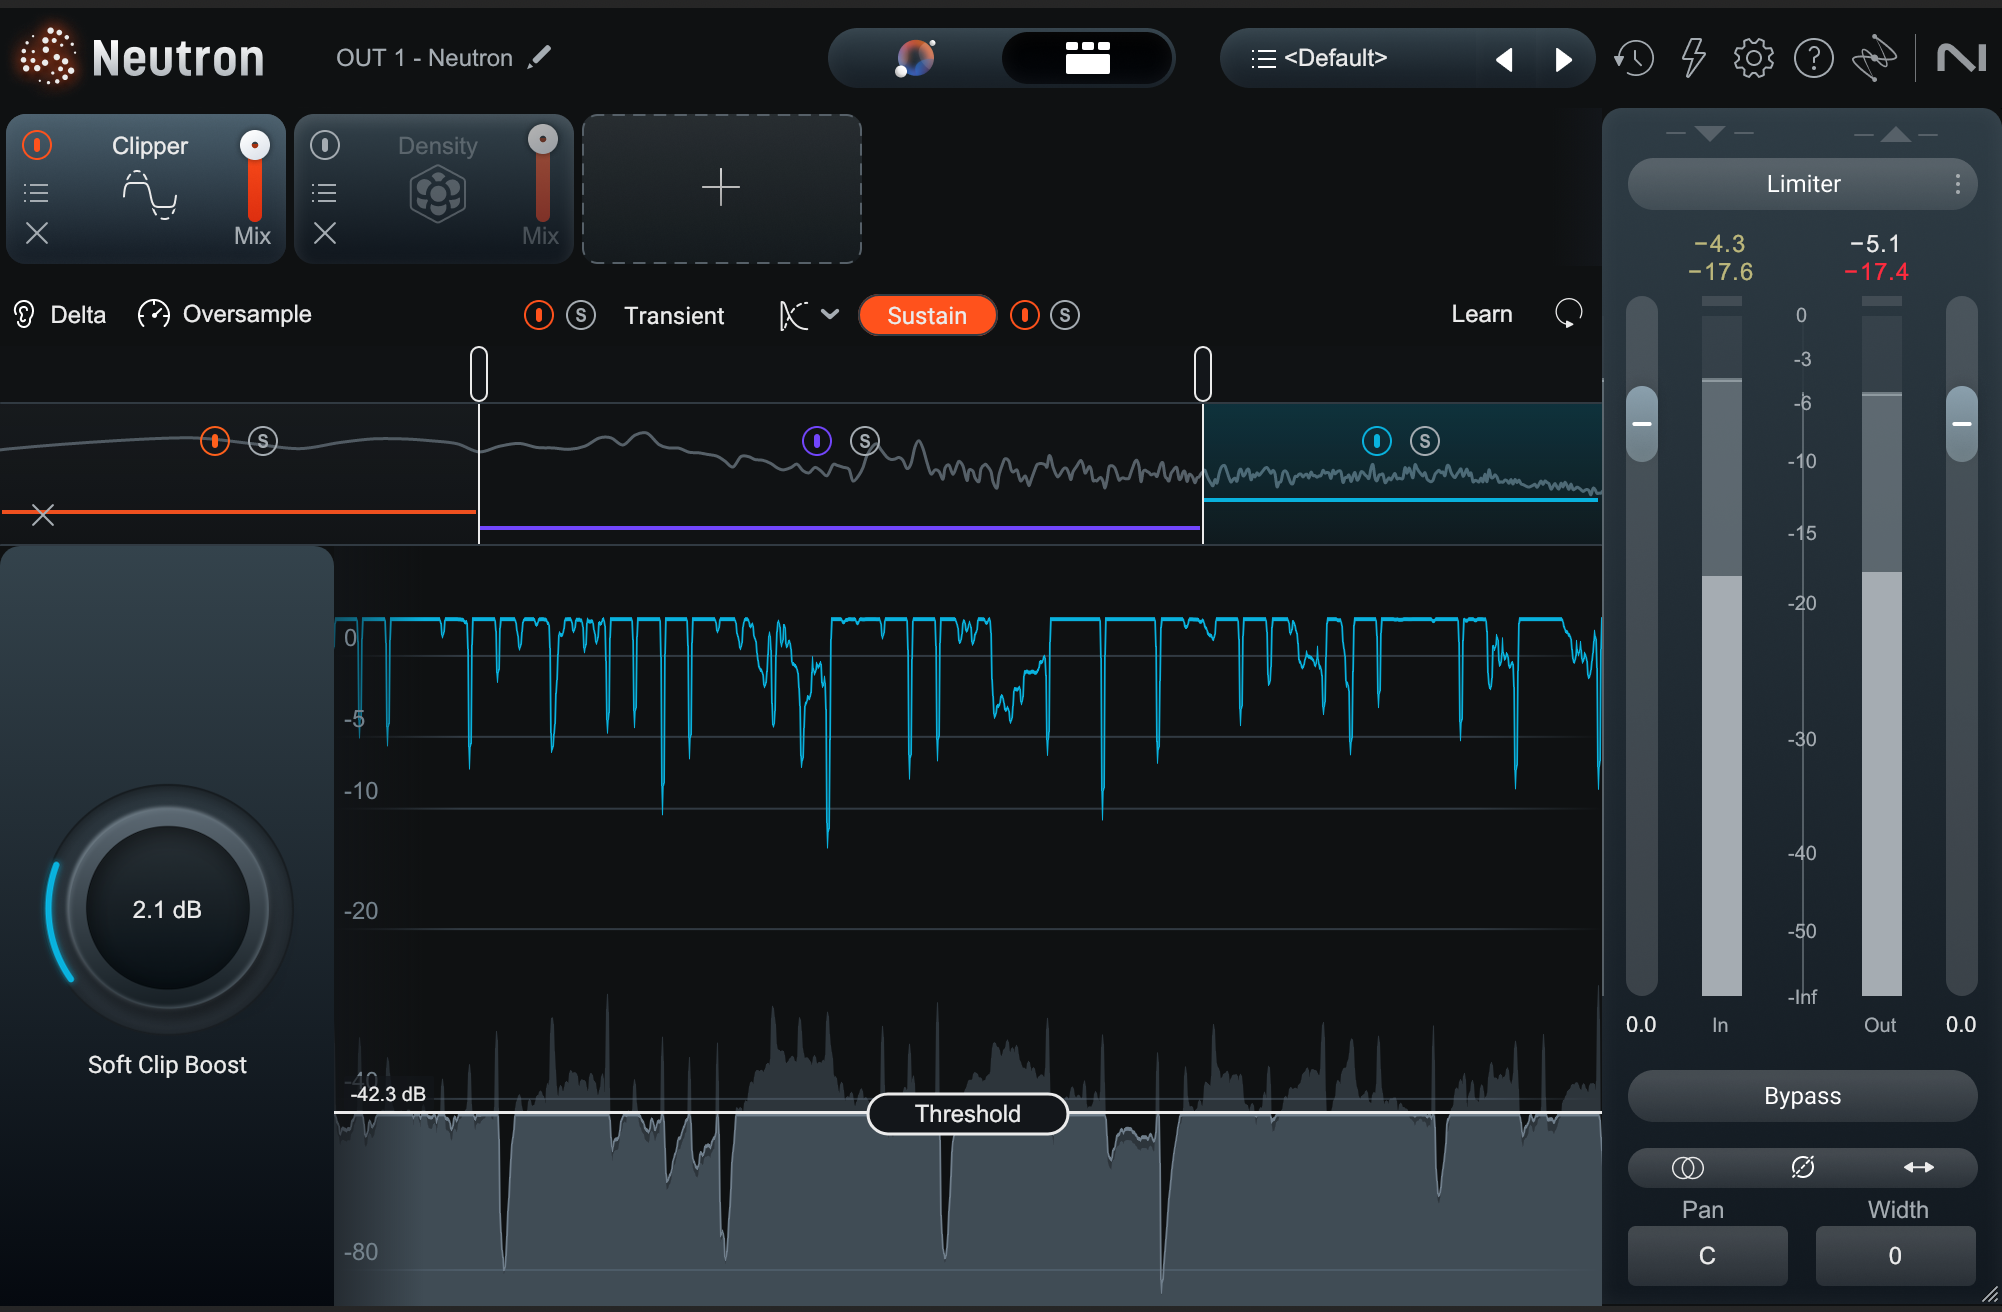
Sustain hard clipping
Here’s the result:
It’s certainly different in character to the original mix – though it still has plenty of headroom. A bold choice, but one I would advise using with caution: in general, you ought to use soft-clipping carefully to add color to your material, but only if it requires the color. Think of soft- clipping as another flavor of saturation. That’s exactly what it is after all.
Try Neutron’s clipper today
By now you should hopefully see how clipping instruments in certain mixes can help you preserve headroom, enhance aggressive elements, and reign in dynamic range without destroying the groove of a performance.
Do remember, however, that clipping requires finesse. It’s not a one-size-fits-all solution. Always monitor that Delta signal to make sure you’re not introducing too much distortion, and be sure to only use this tool on material that calls for it.
