8 Tips for Automating Neutron
Go beyond level and panning automation with these mixing tips to automate all sorts of parameters in Neutron to save time and bolster creativity.
This article references a previous version of Neutron. Learn about 

Neutron 5
I’m a fan of unconventional automation—of manipulating parameters other than the fader or the pan pot. Perhaps an EQ curve, or the apparent width of a sound source, deserves the automated treatment.
Now that Neutron has arrived, we have ample opportunities to automate a whole host of variables in one CPU-friendly channel strip plug-in. So I thought it wise to dive into things we can automate in Neutron for creative and utilitarian effect.
1. Automate the width parameter
Neutron sports a built-in width adjuster. You’ll find it has its own sound, different from other tools, including


Ozone Advanced
But friends, what if you automated the stereo width parameter? Seems weird, but this is a remarkable sound design effect: slapping Neutron 3 on your instrument bus, you can draw in all sorts of widening effects for a variety of purposes. Say you want your chorus to feel wider than the verse; simply up the width by a subtle margin for the choruses. A small amount will suffice, perhaps as subtle as what’s shown in these screenshots:
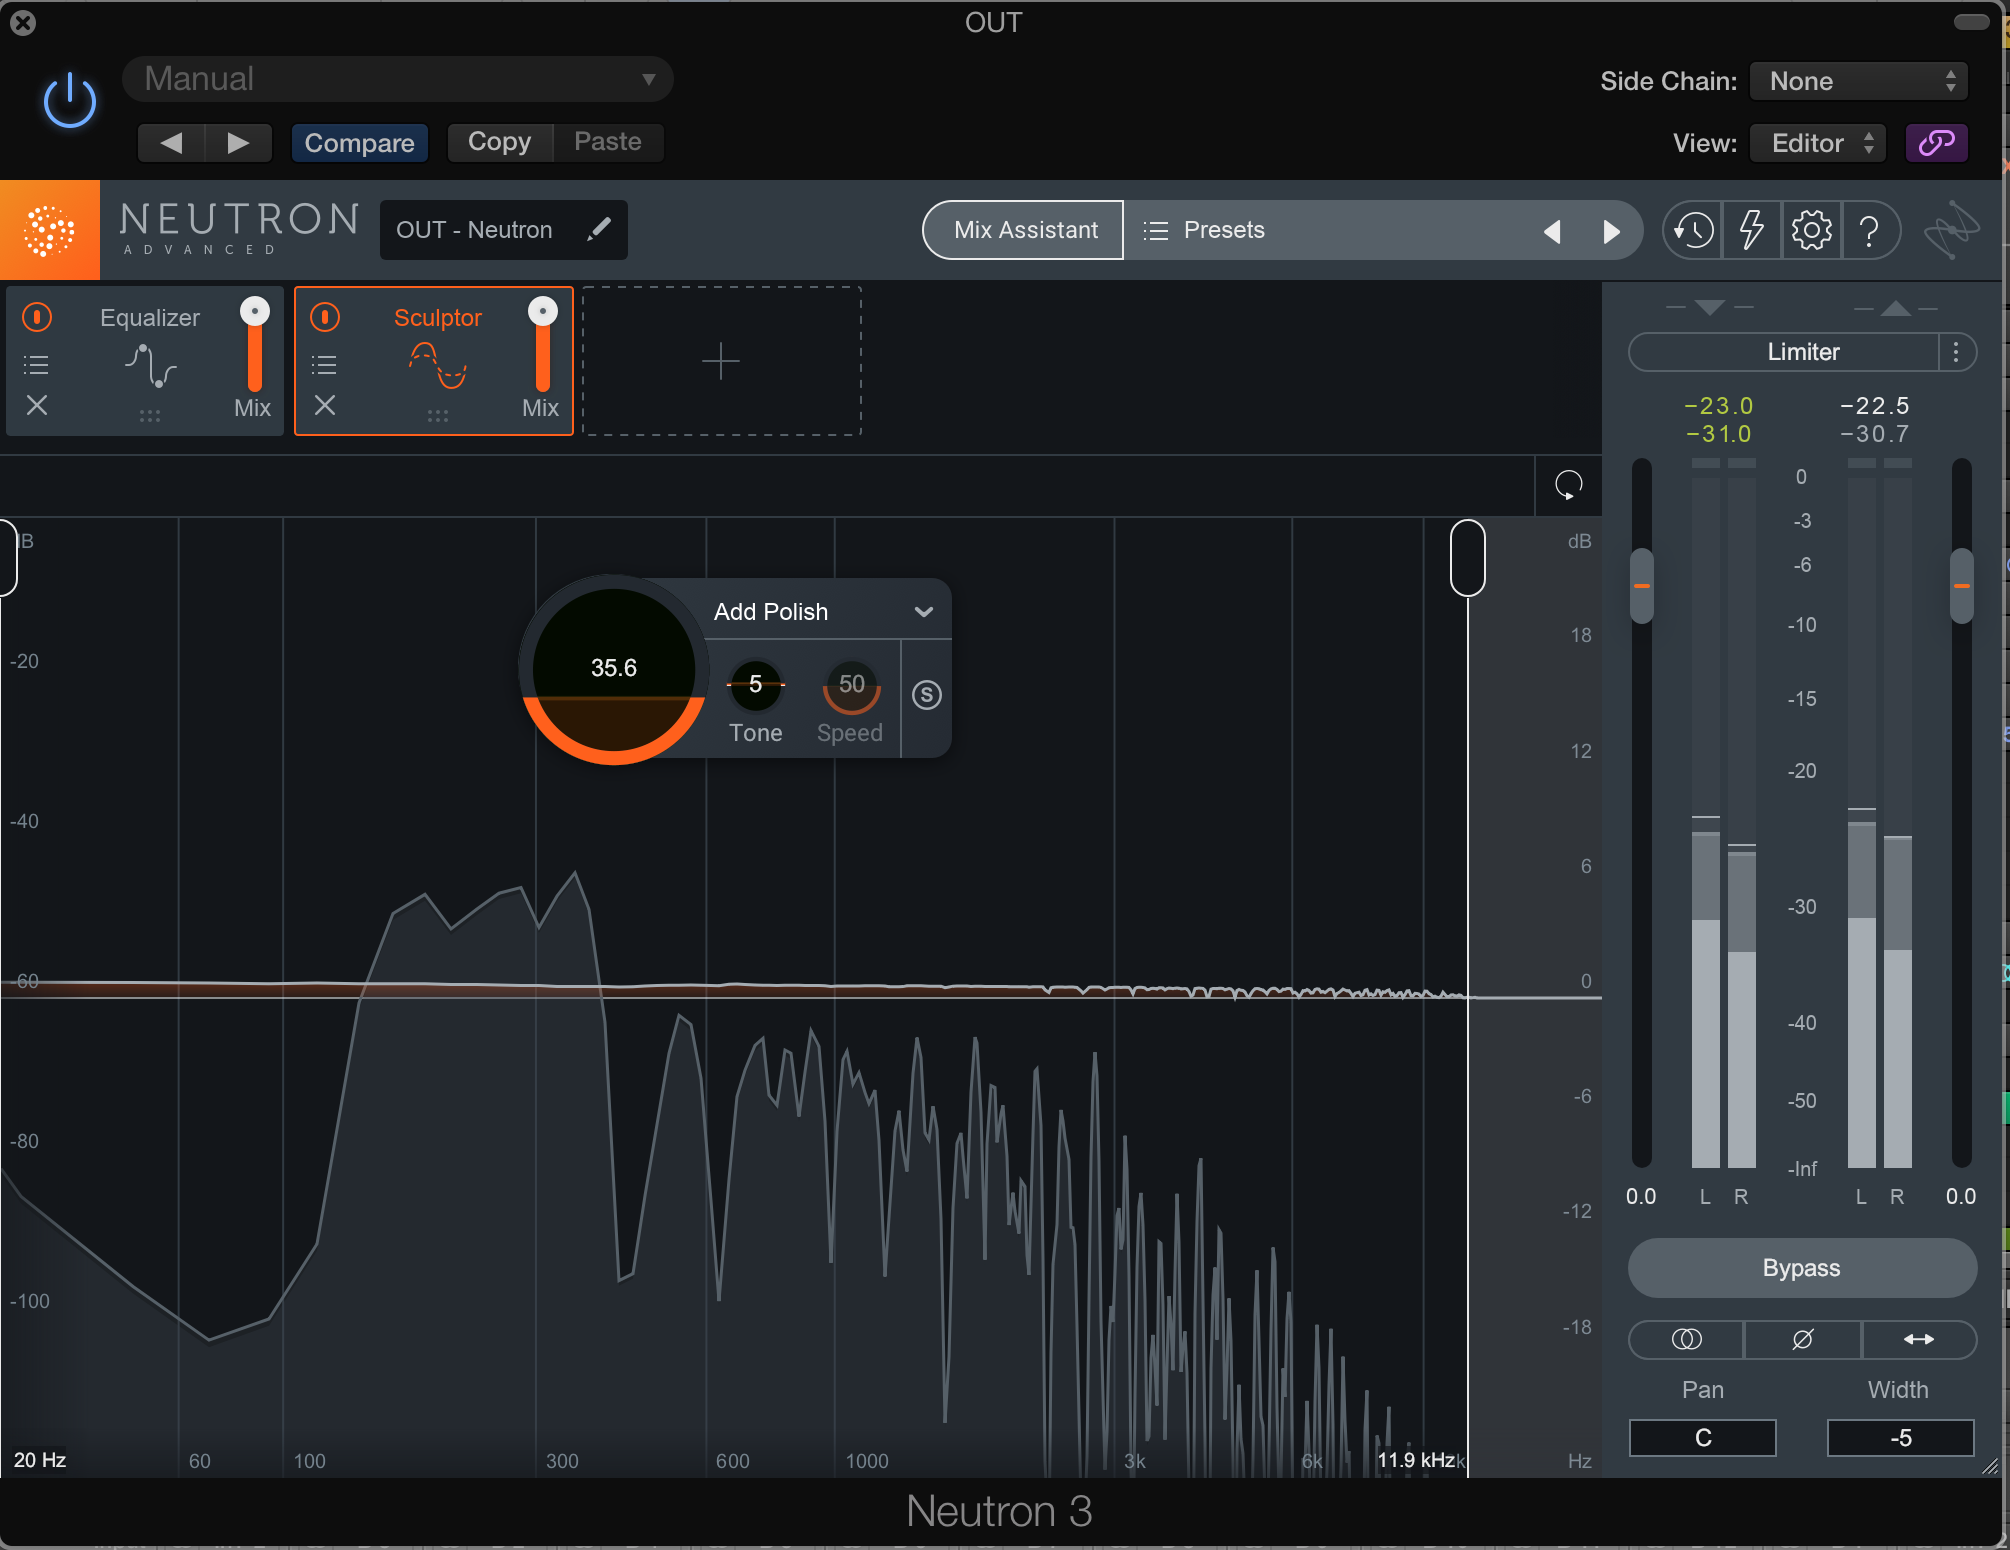
Verse Width
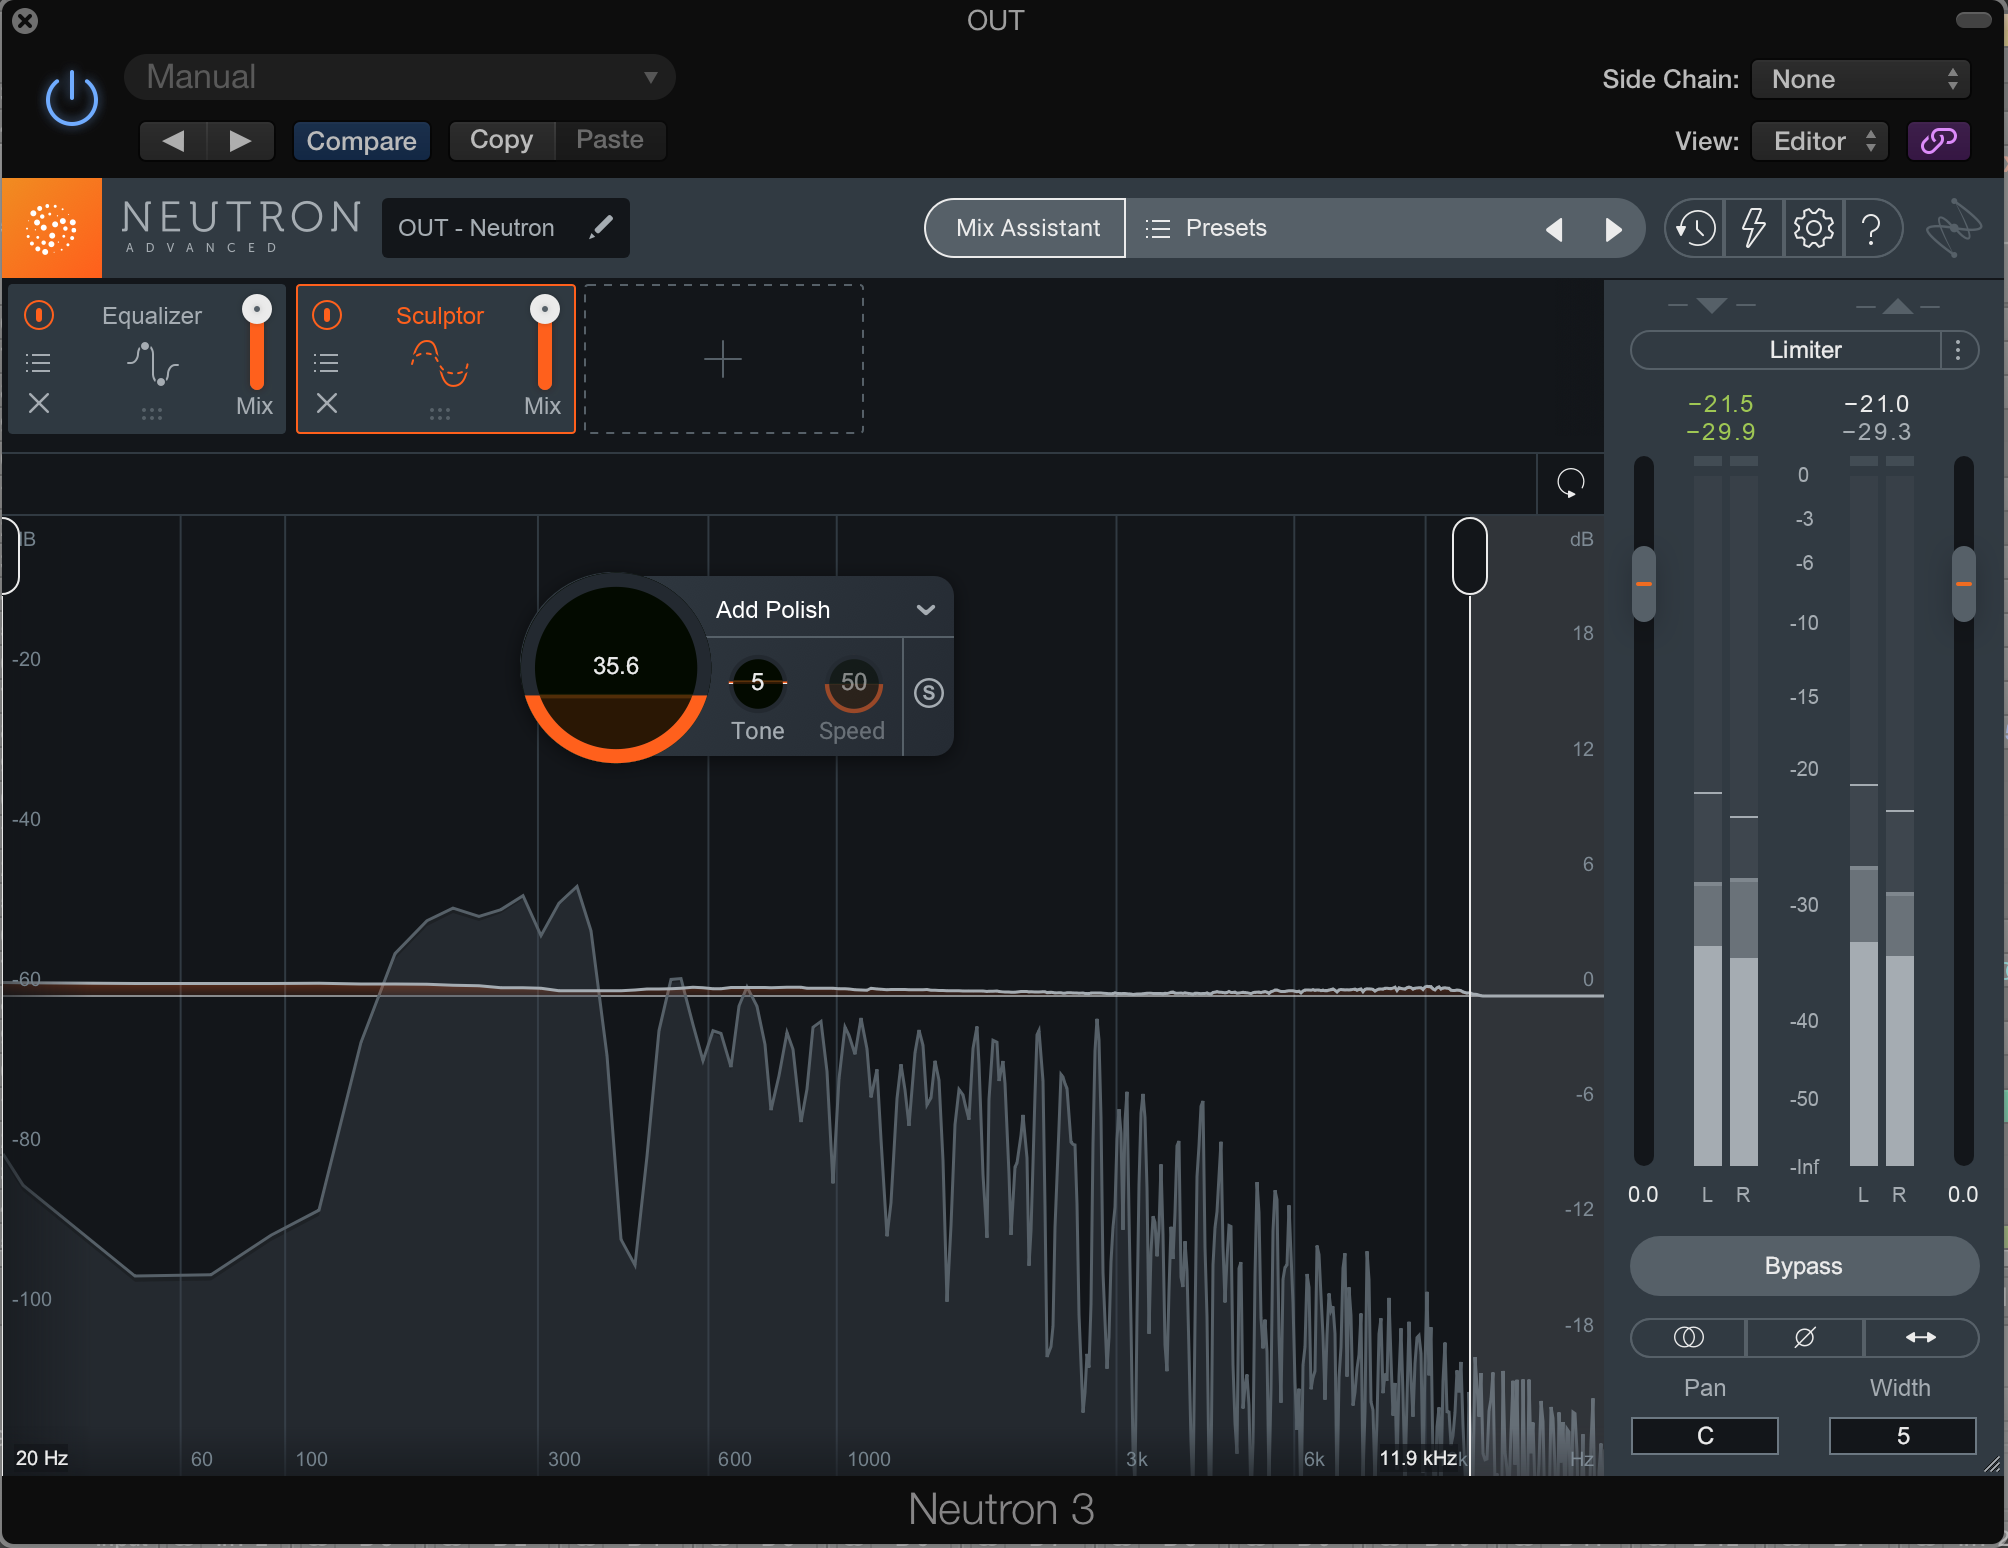
Chorus Width
For a more noticeable effect, try collapsing the stereo image on the kick hit and expanding by the time you hit the snare; this technique could suit faraway synth elements in a down-tempo future-pop tune. Accomplish this effect by drawing in the curve, or play it in real time with your mouse.
Adjusting the width parameter allows us to create a wide variety of effects, both utilitarian and esoteric.
2. Automate the treble and bass between verses and choruses
Often times, engineers need to create apparent differences between sections without making the mix technically louder—this has been referred to as “illusory dynamics” in a previous article. Within Neutron 3, you can use EQ automation to achieve illusory dynamics, either on a bus level, or with individual instruments.
Open an instance of Neutron 3 on your instrument bus and pull up the EQ. Instantiate a low-cut or low-shelf to shave off some bass and do the same for the highs. Keep the slopes gentle—we don’t really want to hear the filter here.
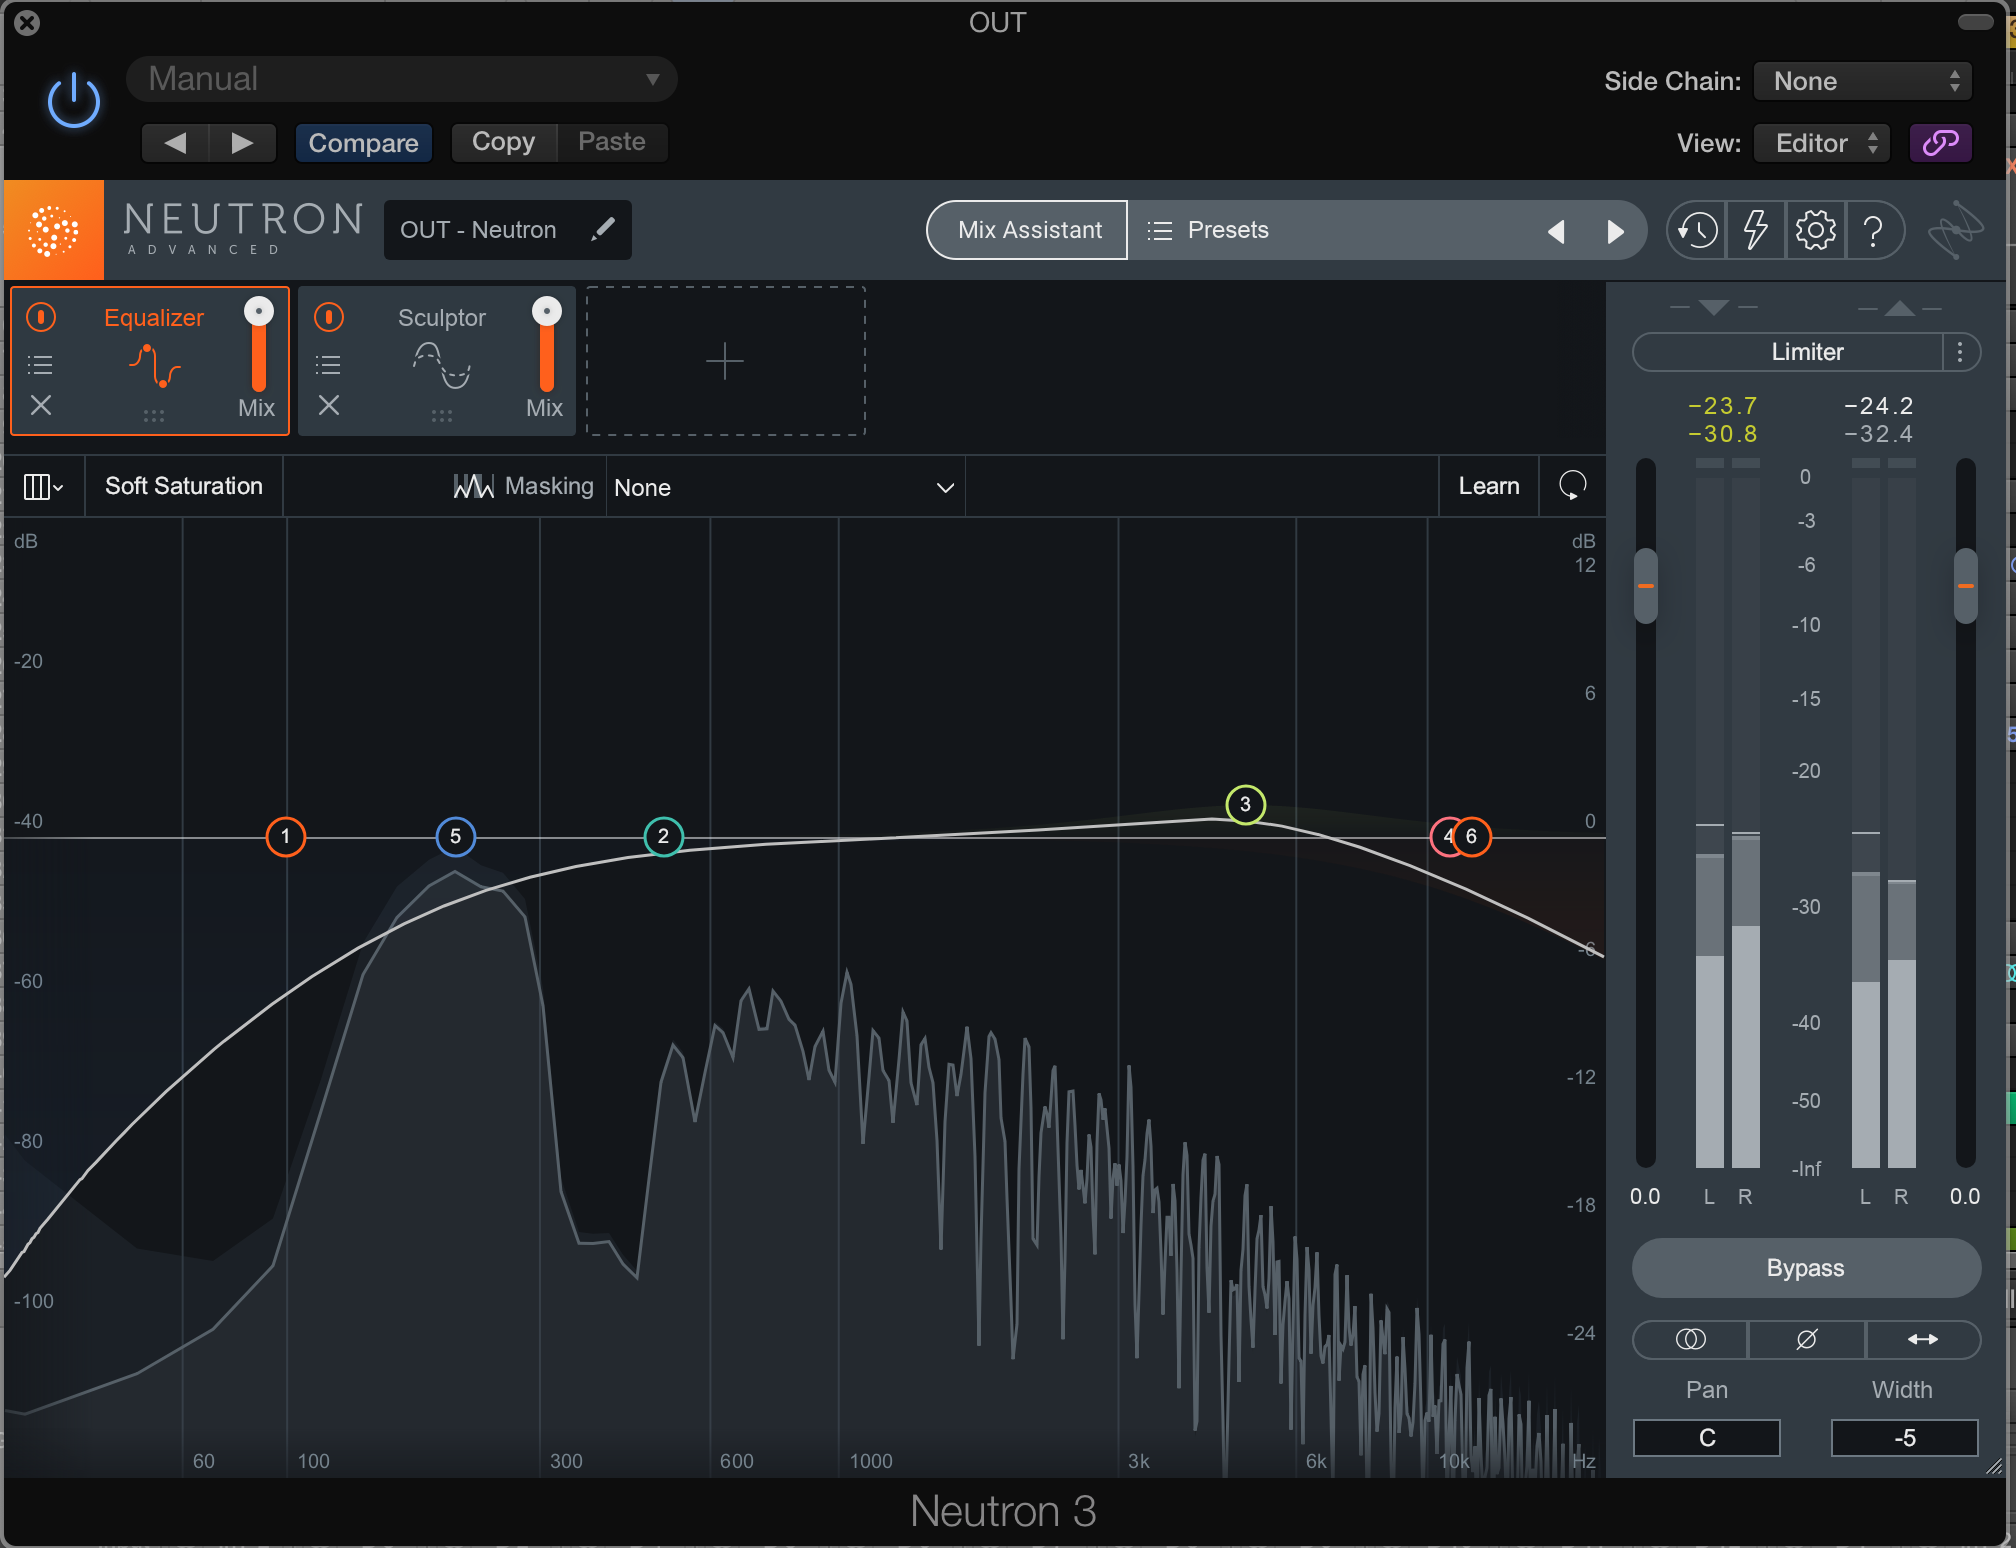
Verse EQ
When it comes time for the chorus to kick around, switch off these filters for a full-frequency response.
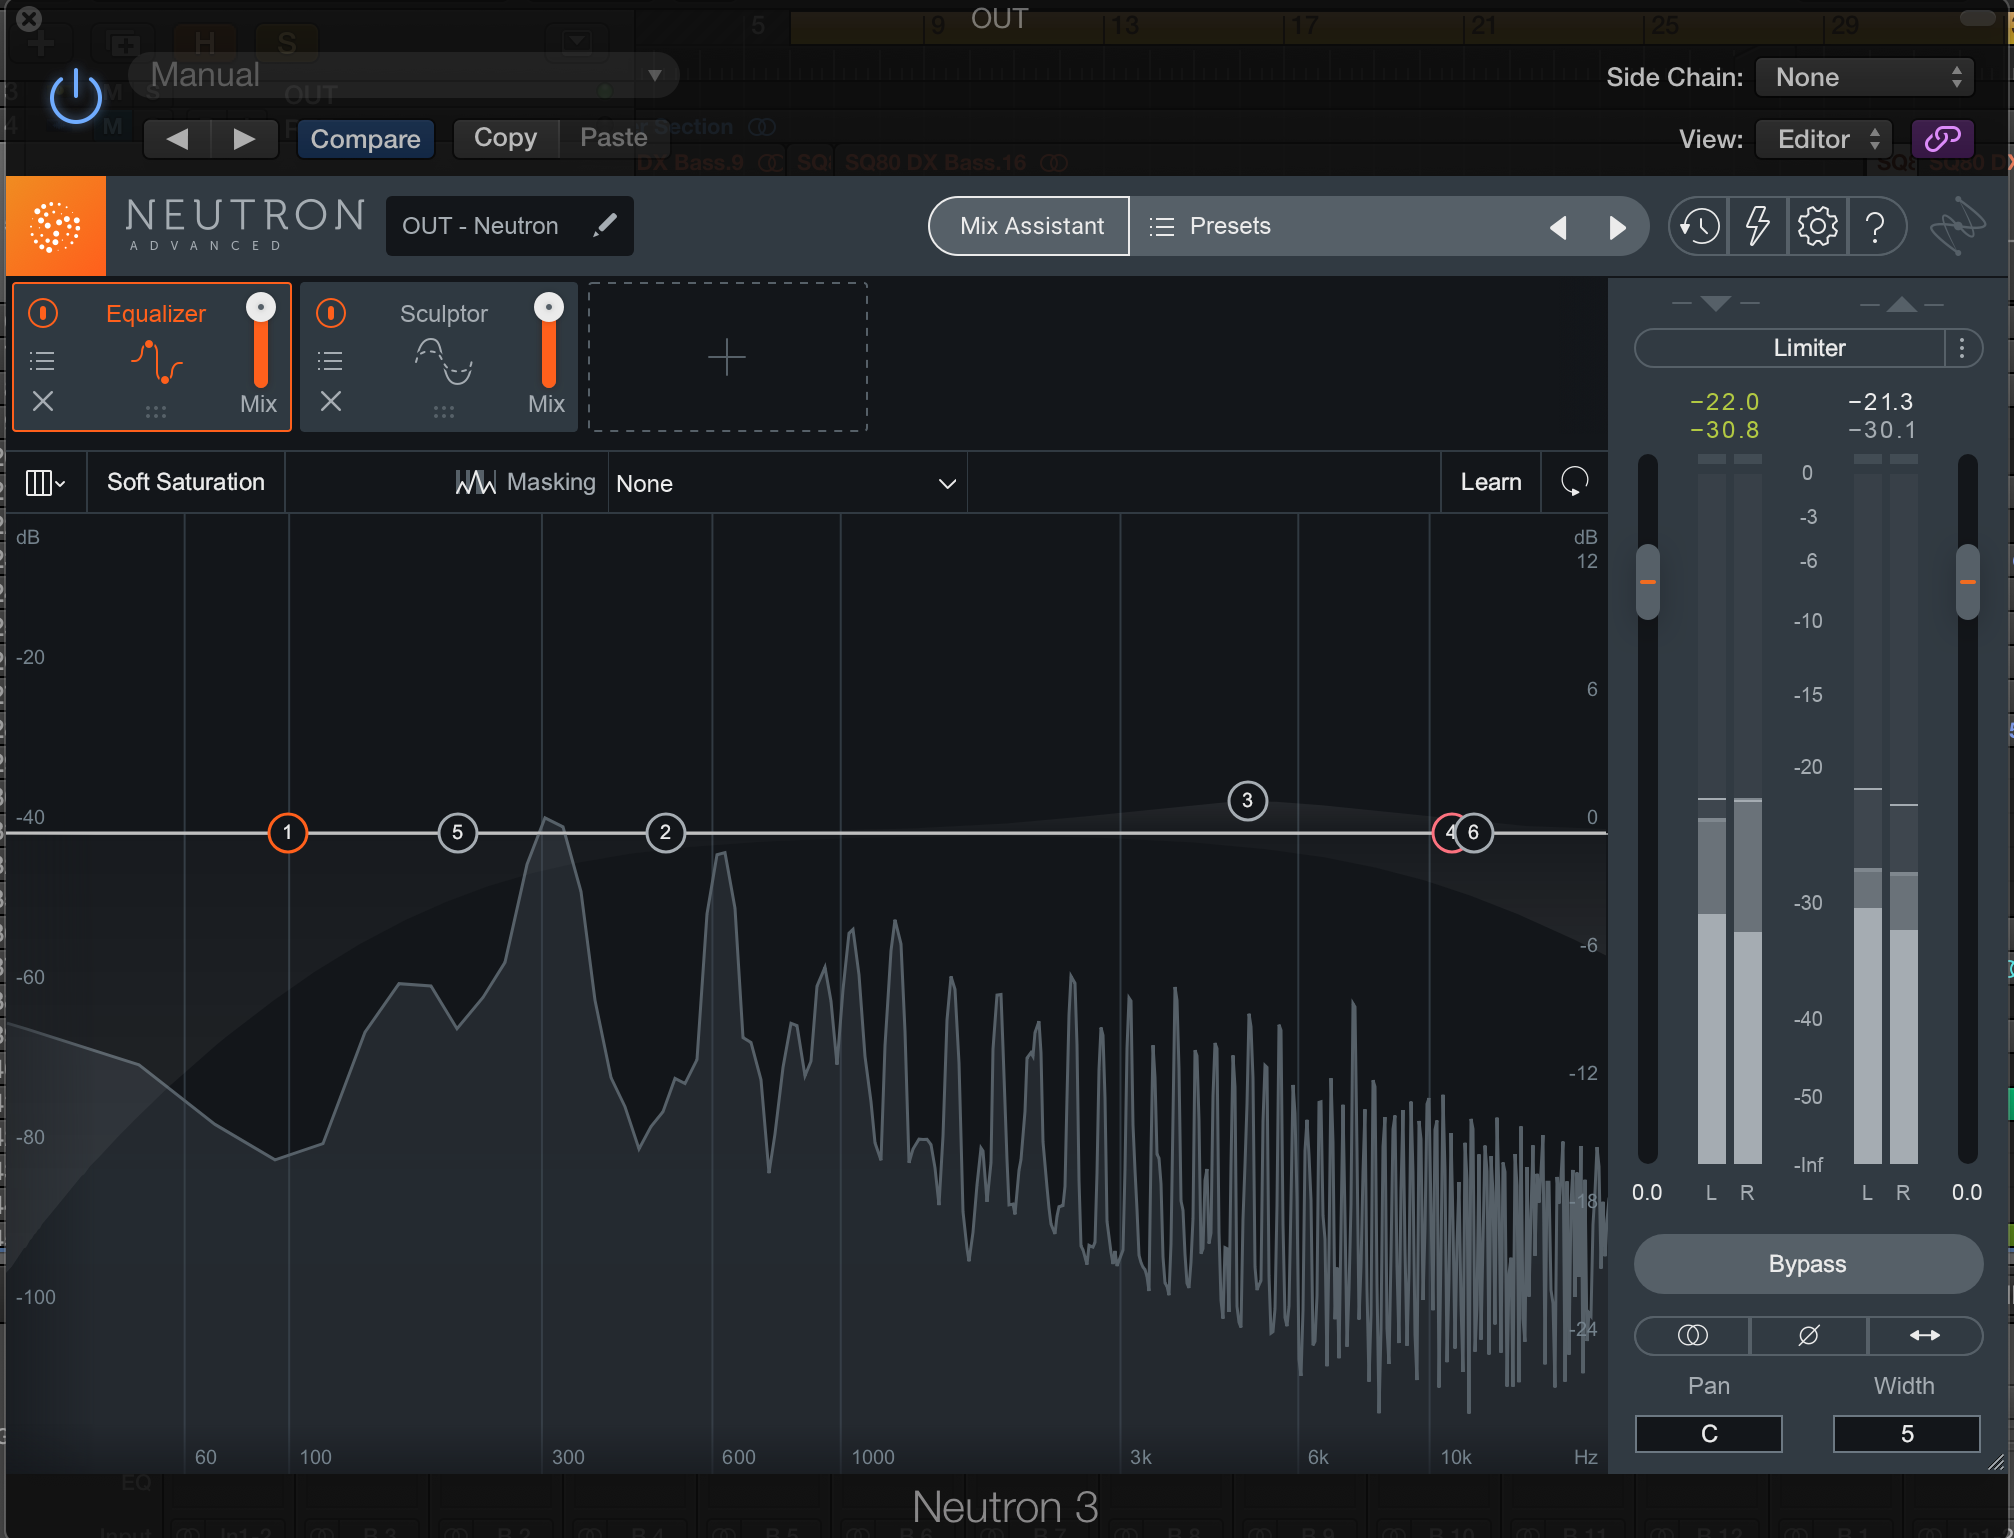
Chorus EQ
This trick, combined with the one above, can add a jolt of excitement to different sections of a tone without doing much to influence the technical loudness.
If you were to take this technique to its idiosyncratic conclusion, you could create sweeping auto-filter effects right in the EQ section of Neutron 3. Simply instantiate a parametric boost and sweep it around, writing your automation moves as you do. Consider driving an instance of the exciter module right after the EQ—as you move through different frequency bands, you’ll hit the exciter in different ways, which can add to the creative effect.
3. Automate Sculptor on a drum bus for an entirely different sound
Think of the classic drum change-up for the bridge—a rock tune going to a “canned” drum sound for the breakdown. Many are the times we strive to make the drums feel different on a bridge, with the compressed, distorted “canned” timbre being something of a go-to. To achieve this effect, we may have to set up whole new chains of processing on separate tracks, or bounce the drums down to their own stem and achieve the processed sound across one new drum track.
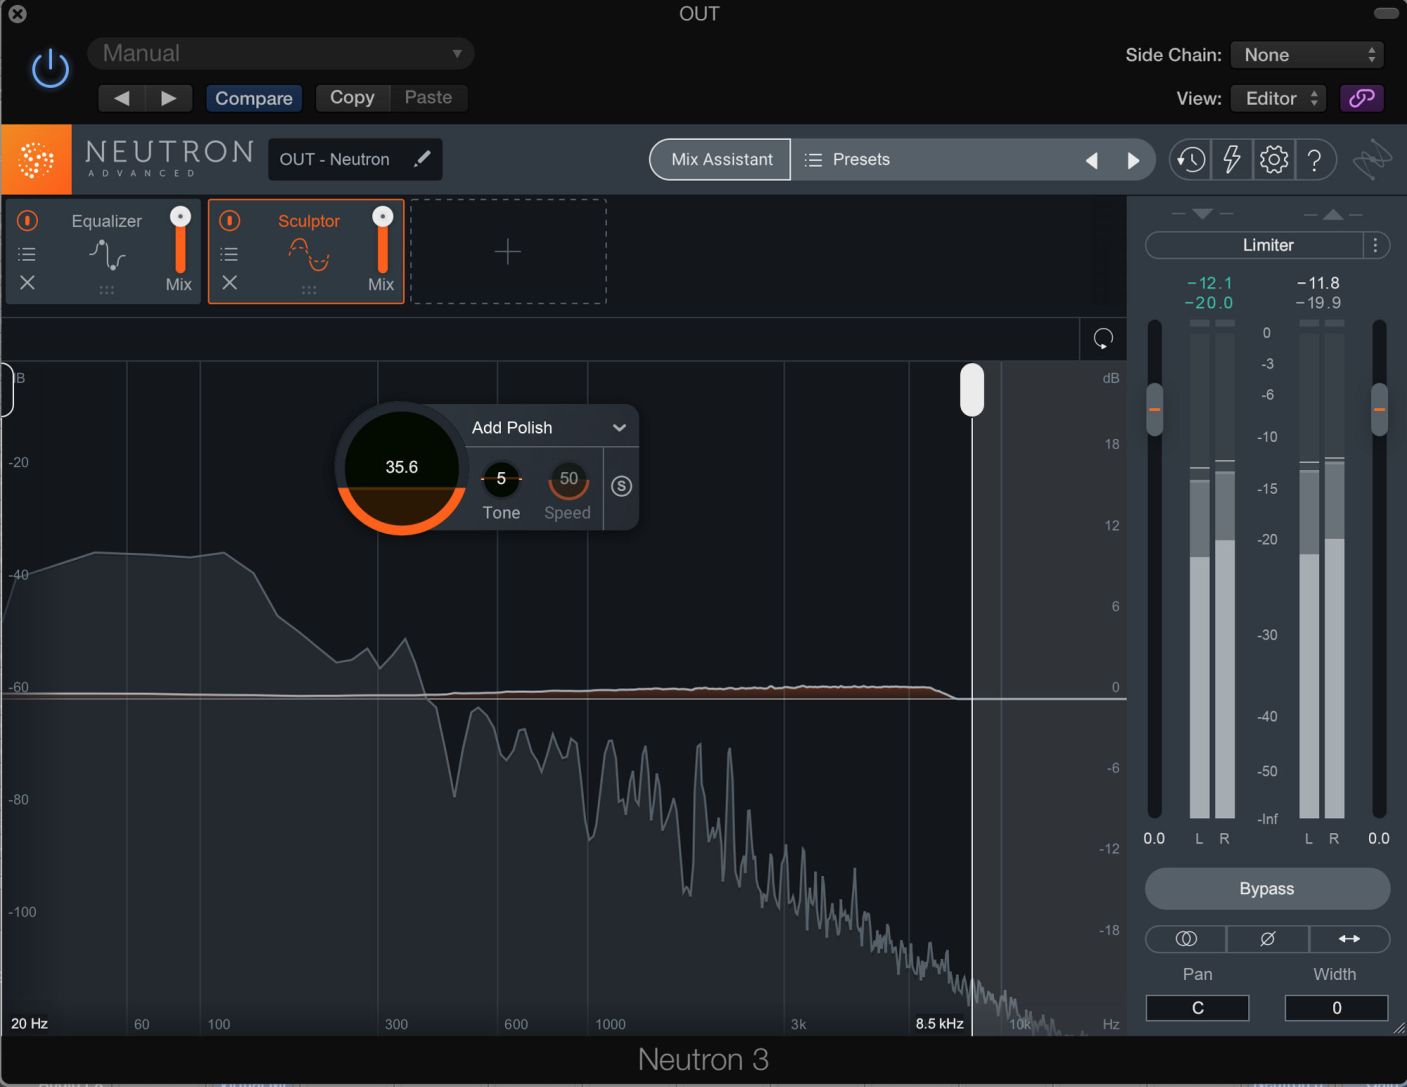
Sculptor invites us to experiment in new ways. What if we got a drum bus to sound completely different by automating Sculptor for one section? It wouldn’t be so tough to do, and we could turn something like this:
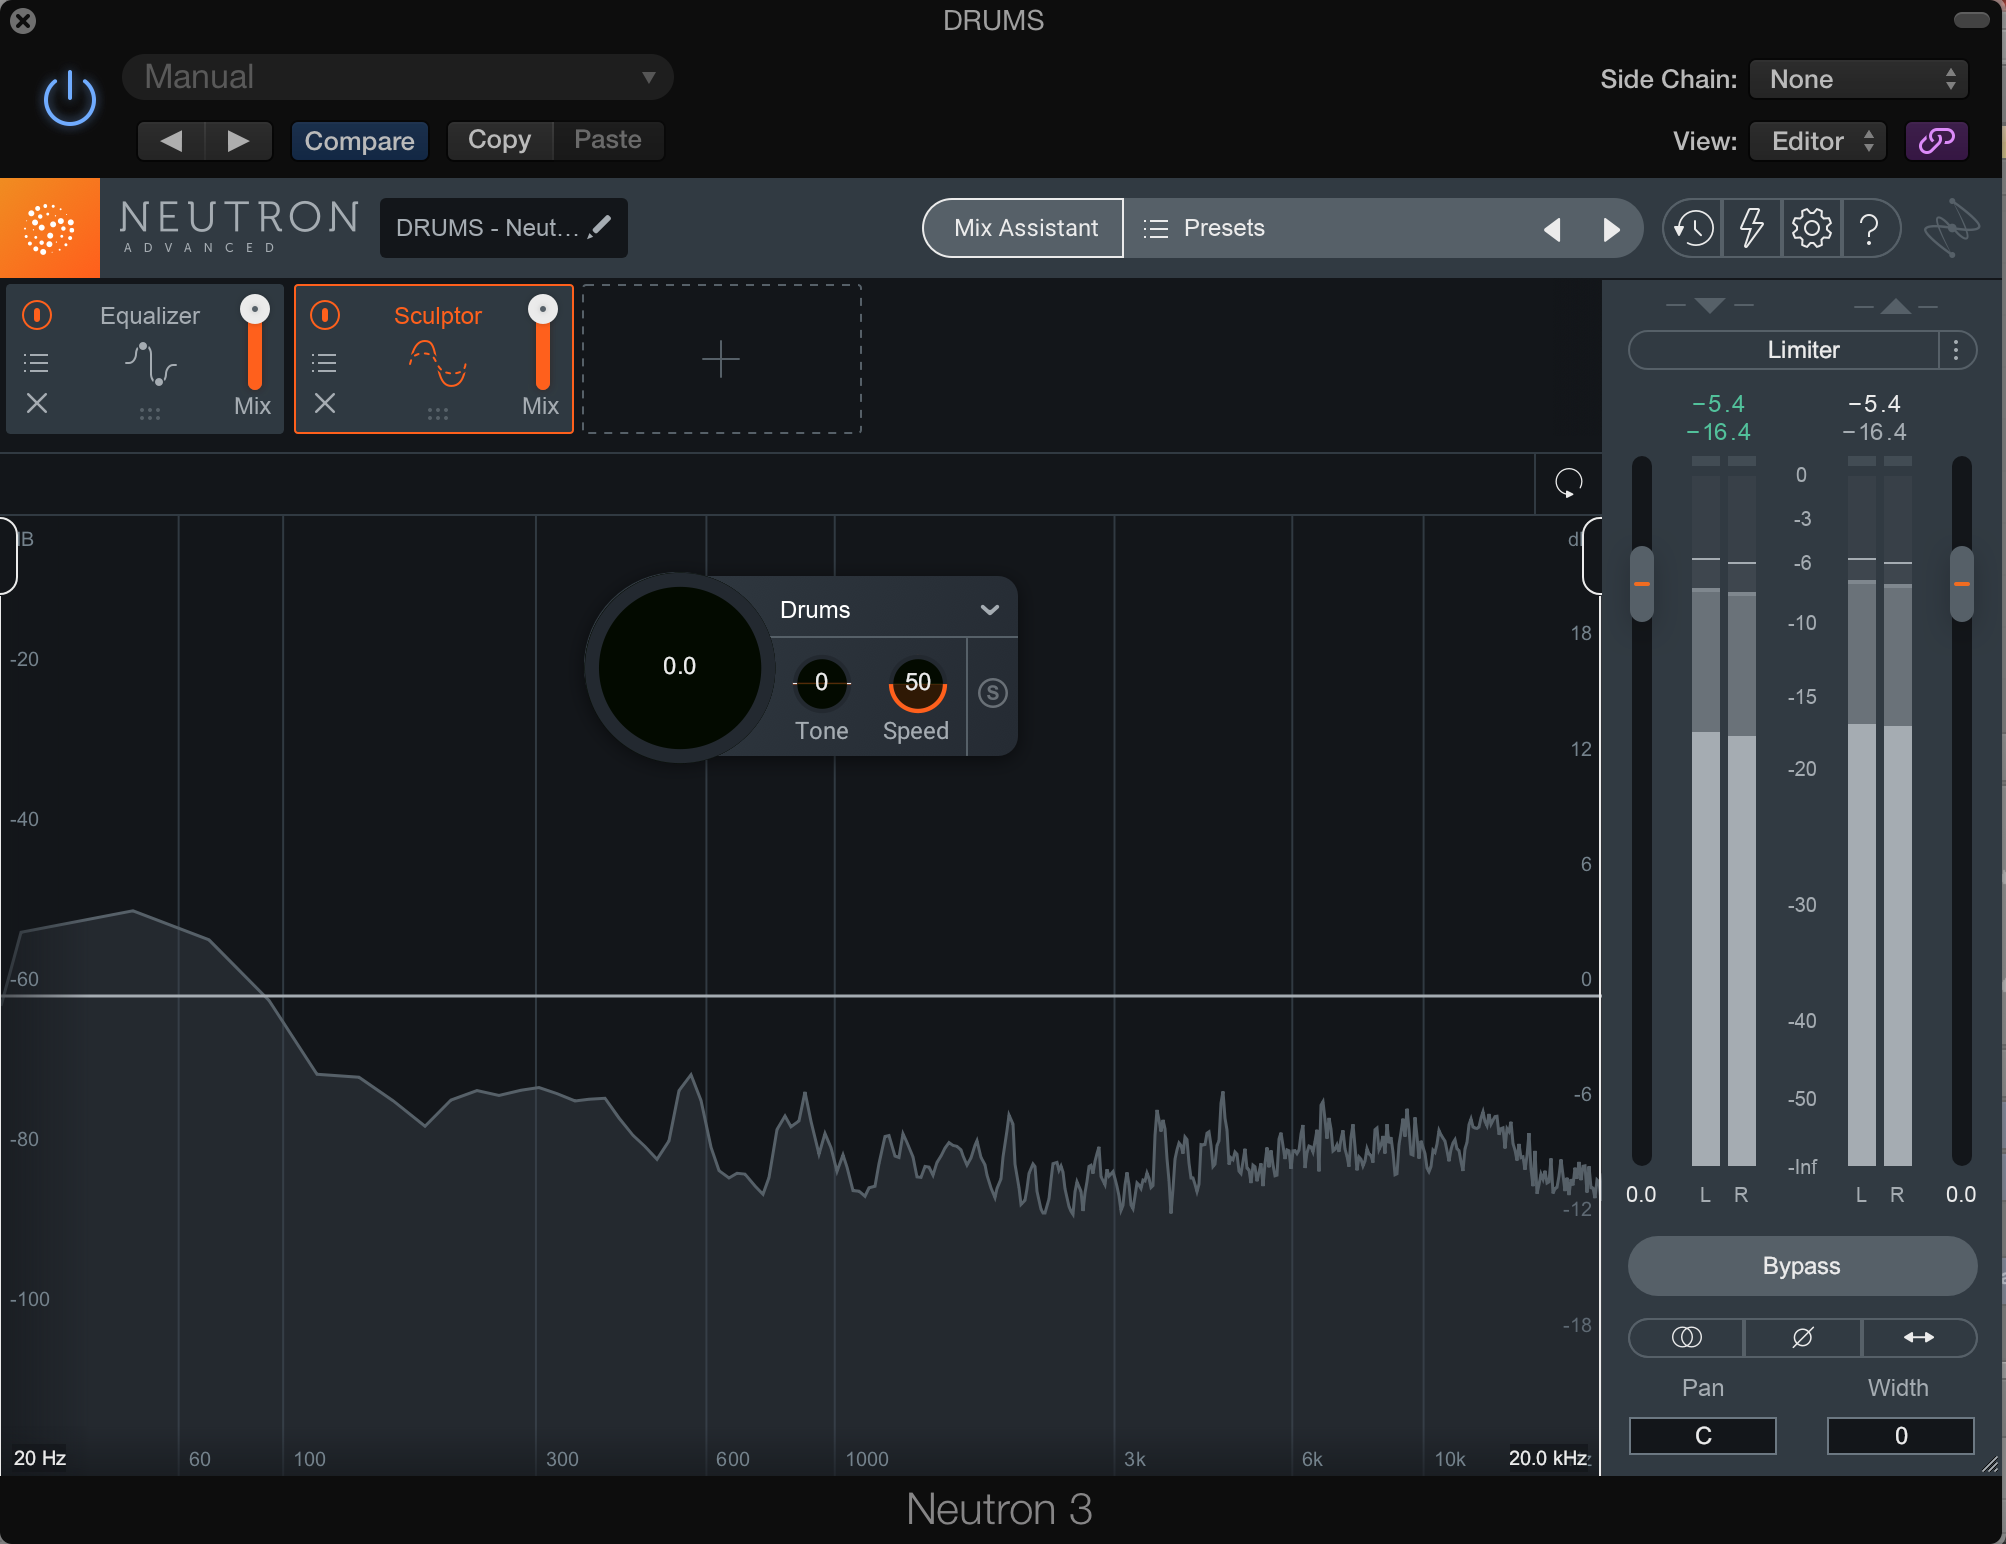
Drums, no Sculpting
Into this:
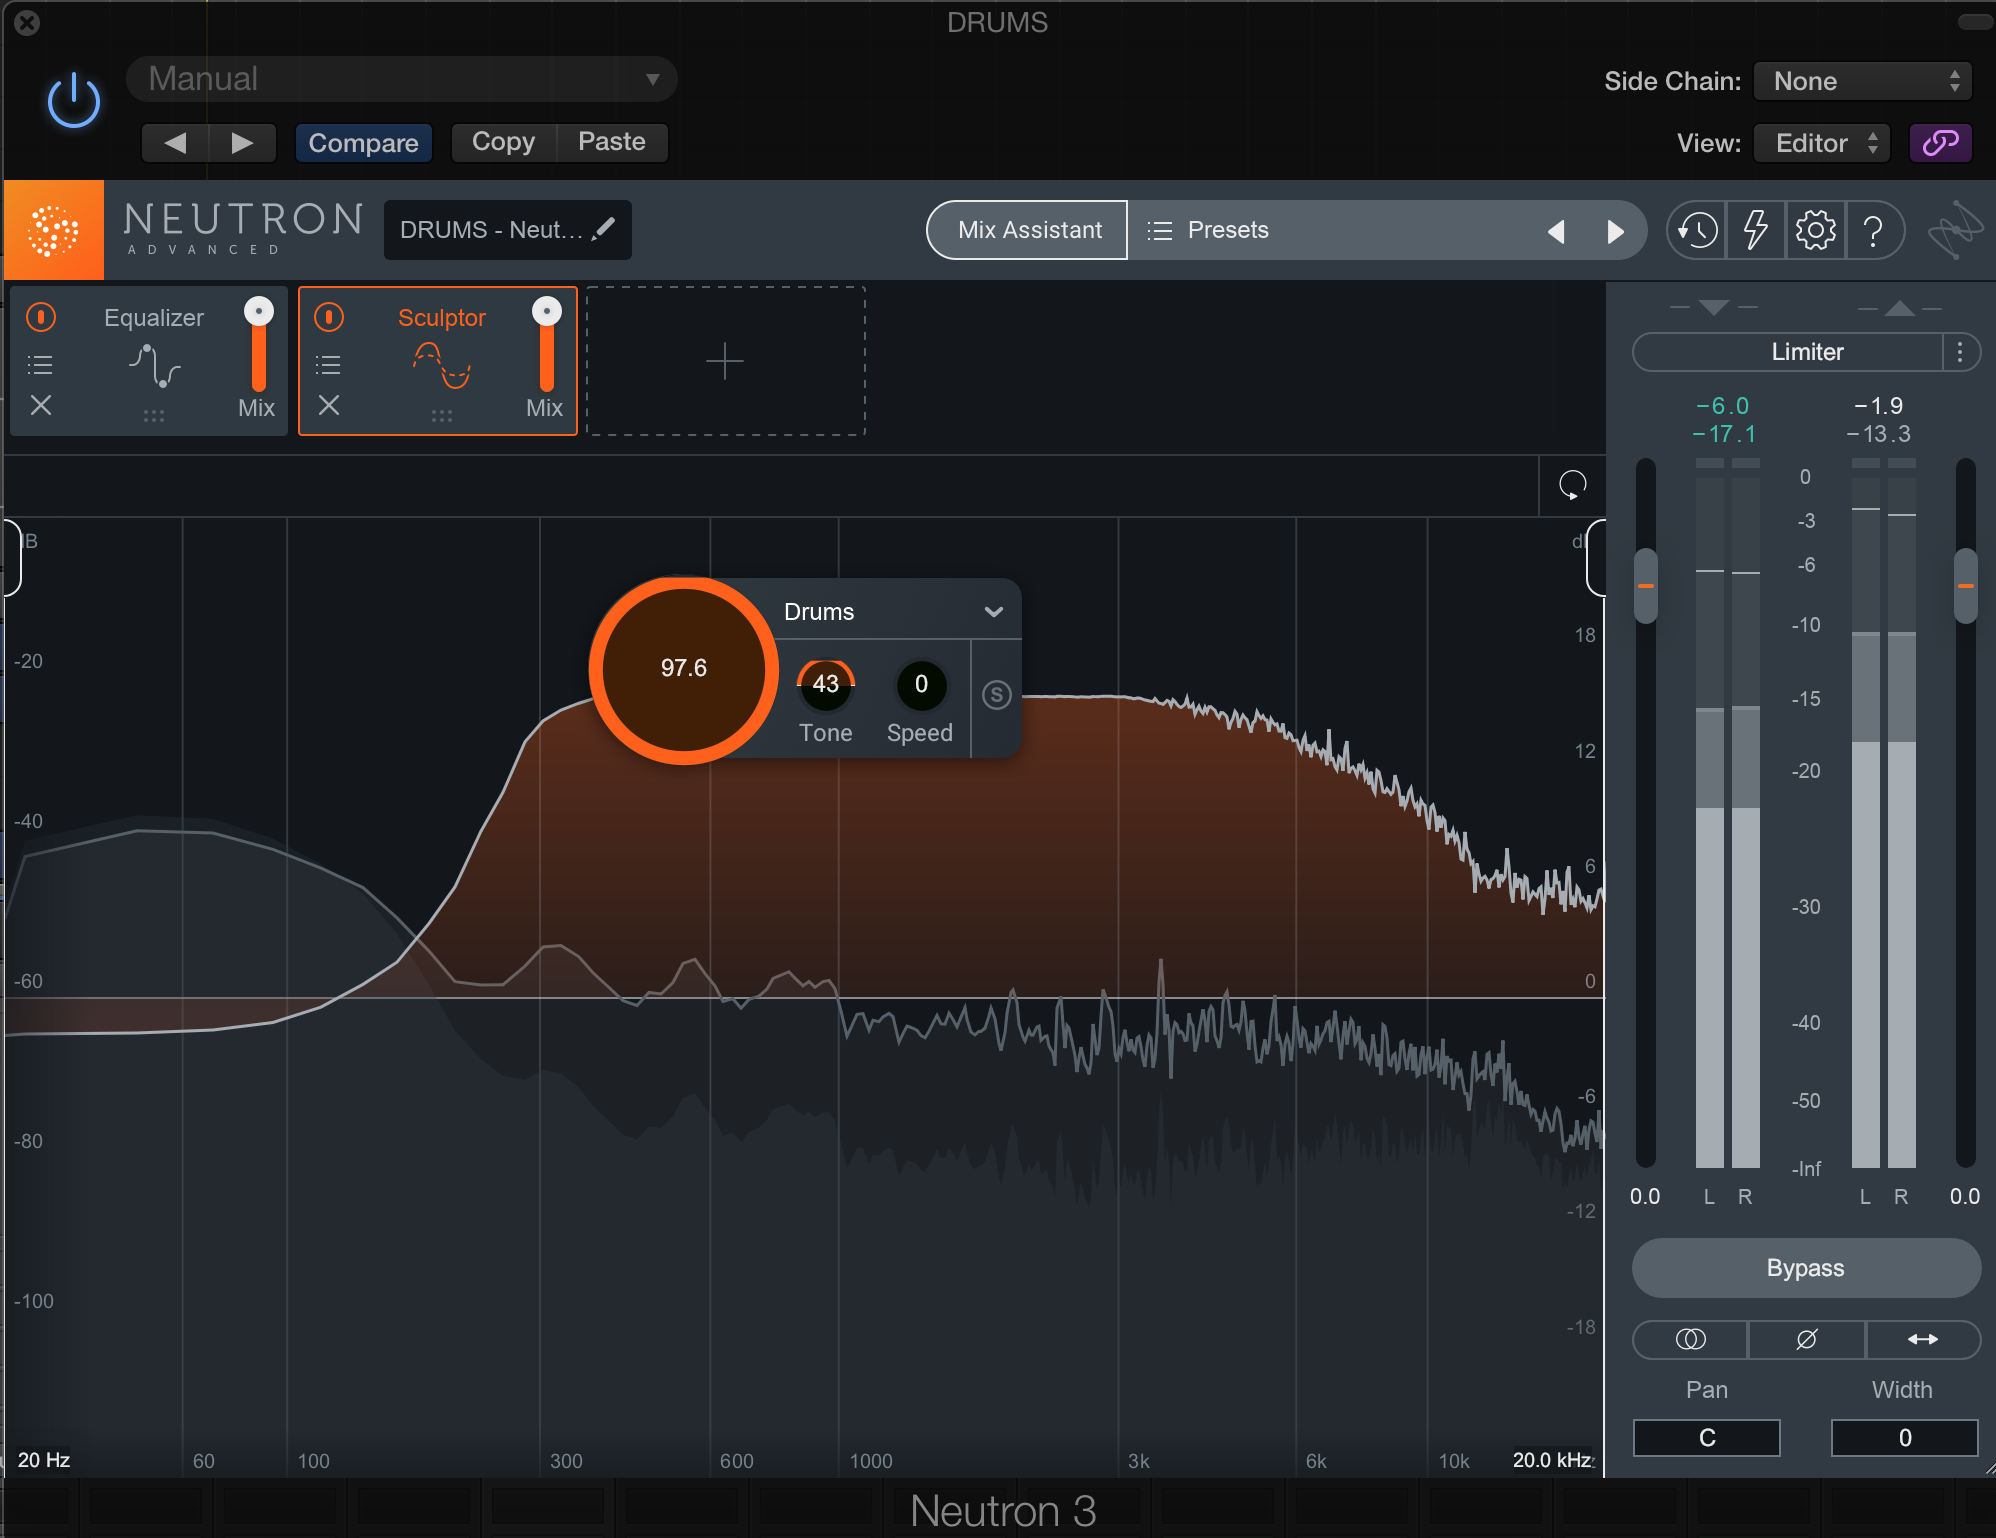
Drums, extreme Sculpting
Note that when we manipulate the Action Region, we can now solo everything that’s in between them, like so:
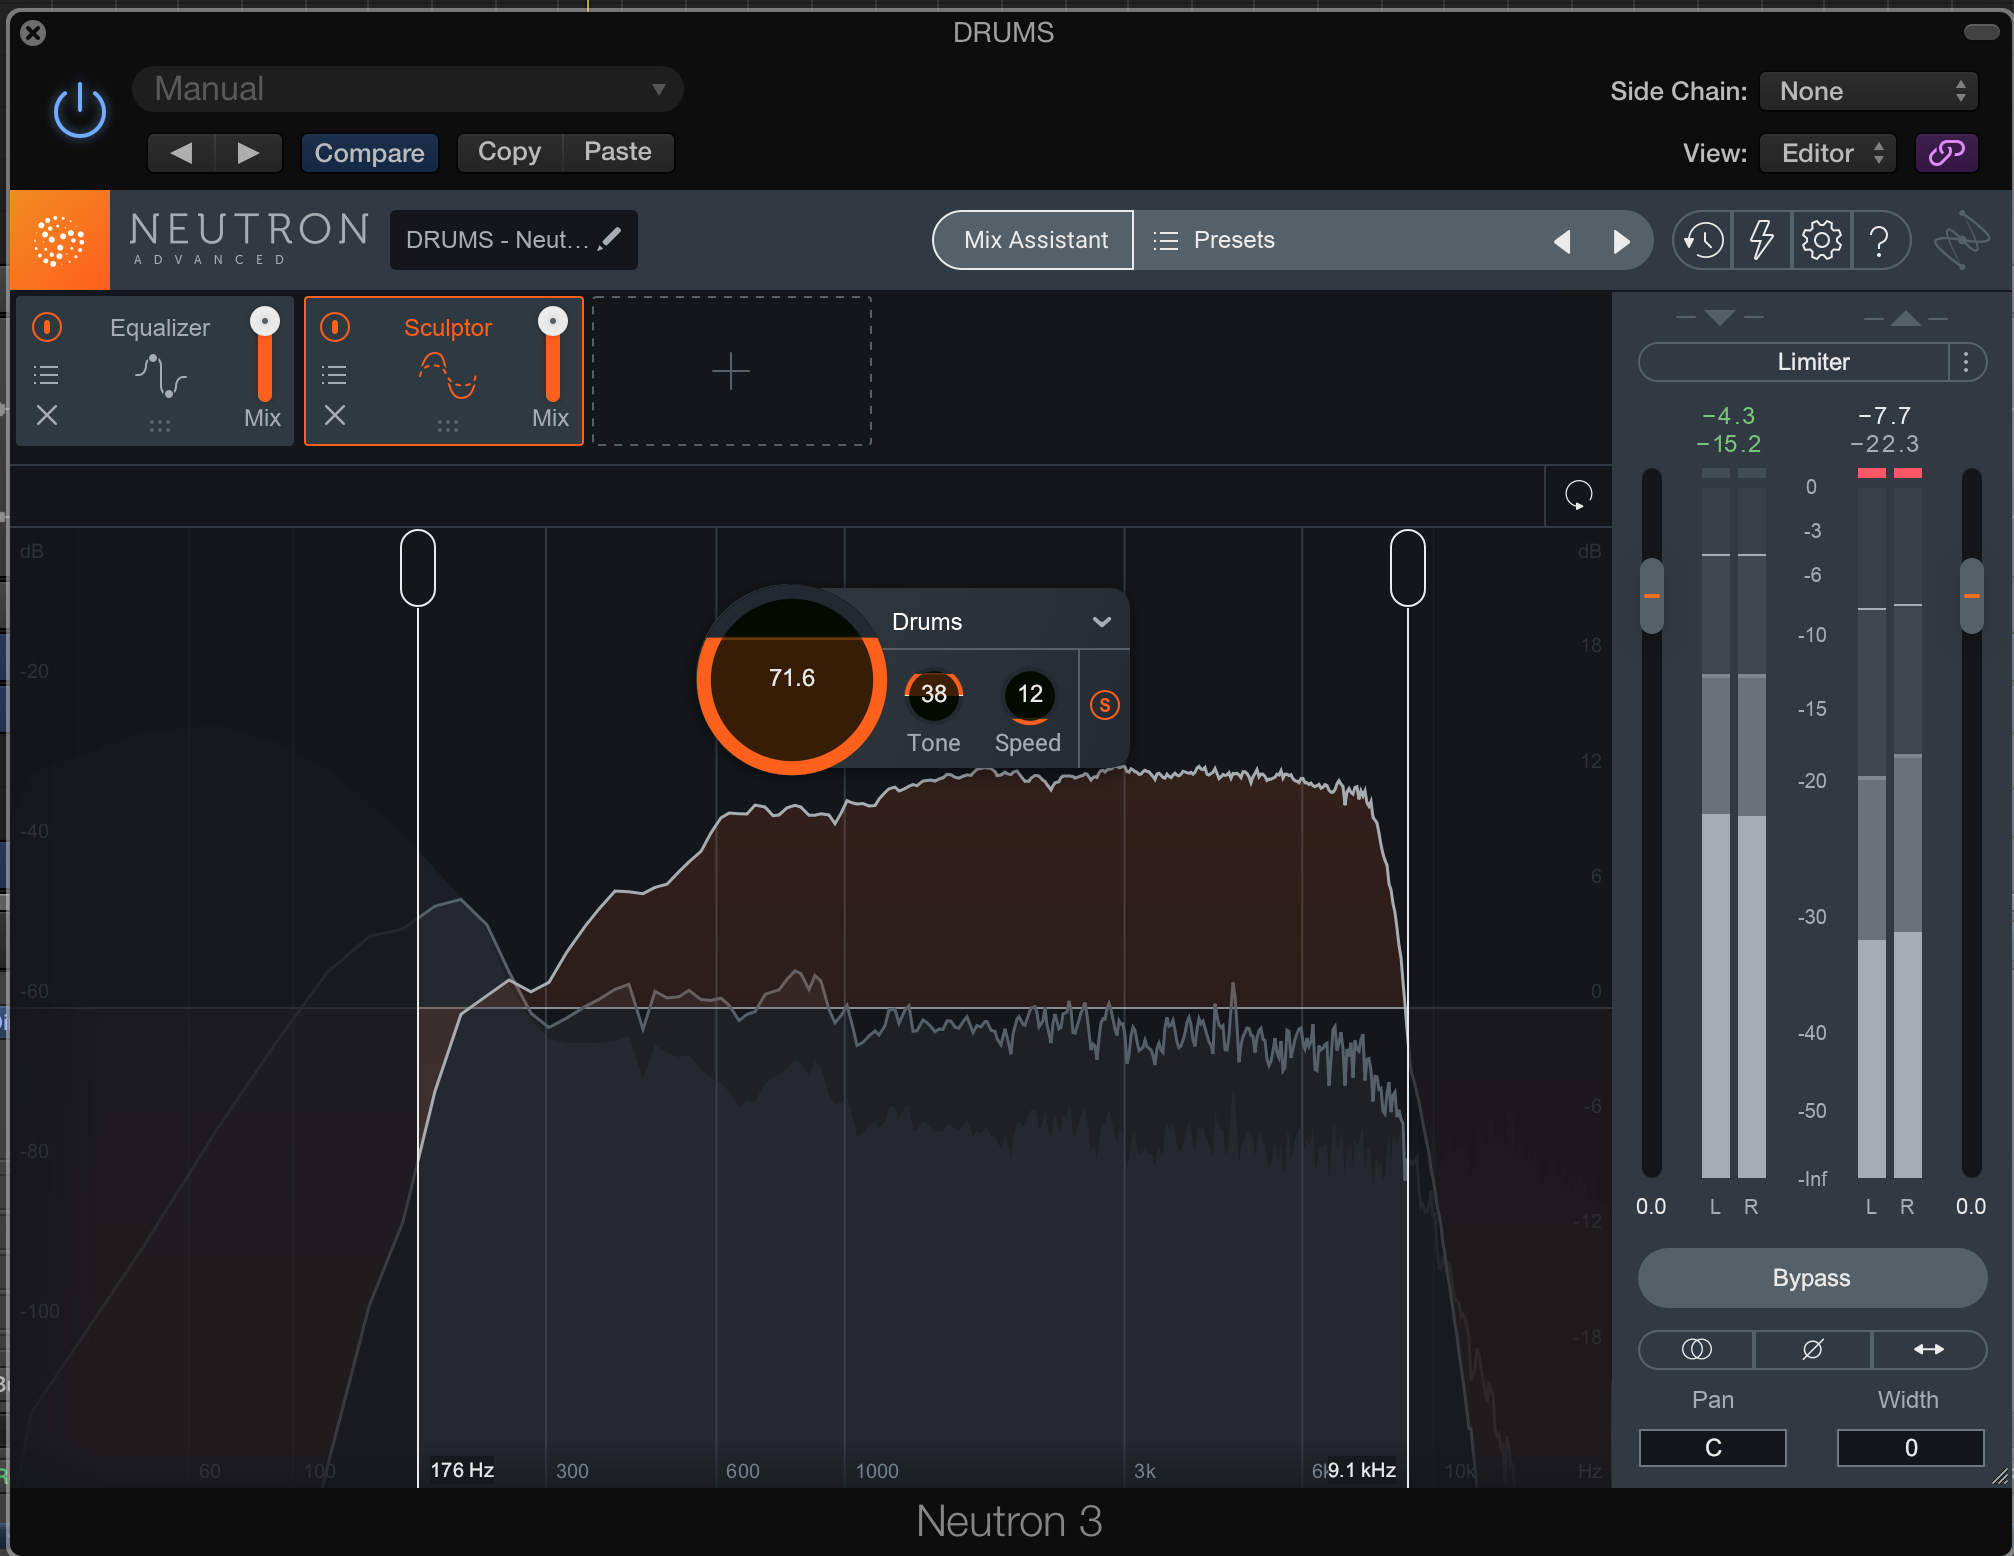
This too can be used for effect. You’ll find that using Sculptor in this manner yields a sound not yet instantly recognizable—yet. So give it a shot, and see how it sounds.
4. Automate Sculptor’s Action Region for different sections
As Sculptor is the newest member of the family, it’s worth diving into some other aspects suitable for automation, and this tip is more utilitarian than creative: if you’ve got Sculptor shaping a bus that changes radically from section to section, you can change the Action Region position to better suit the part of the song you’re aiming to sculpt.
Let’s talk drums again: on the bus, say we have Sculptor handling the high-hat based verse handily, but as soon as we can get to the chorus, the cymbals start to aggravate the algorithm. Not a problem: we can automate the position of the Action Region’s lower boundary, bringing it in to 2 kHz or so, and now the cymbals should calm back down. Make sure to return the Action Region back to its original position for the next verse.
5. Automate the Transient Shaper for glitchy or spacey effects
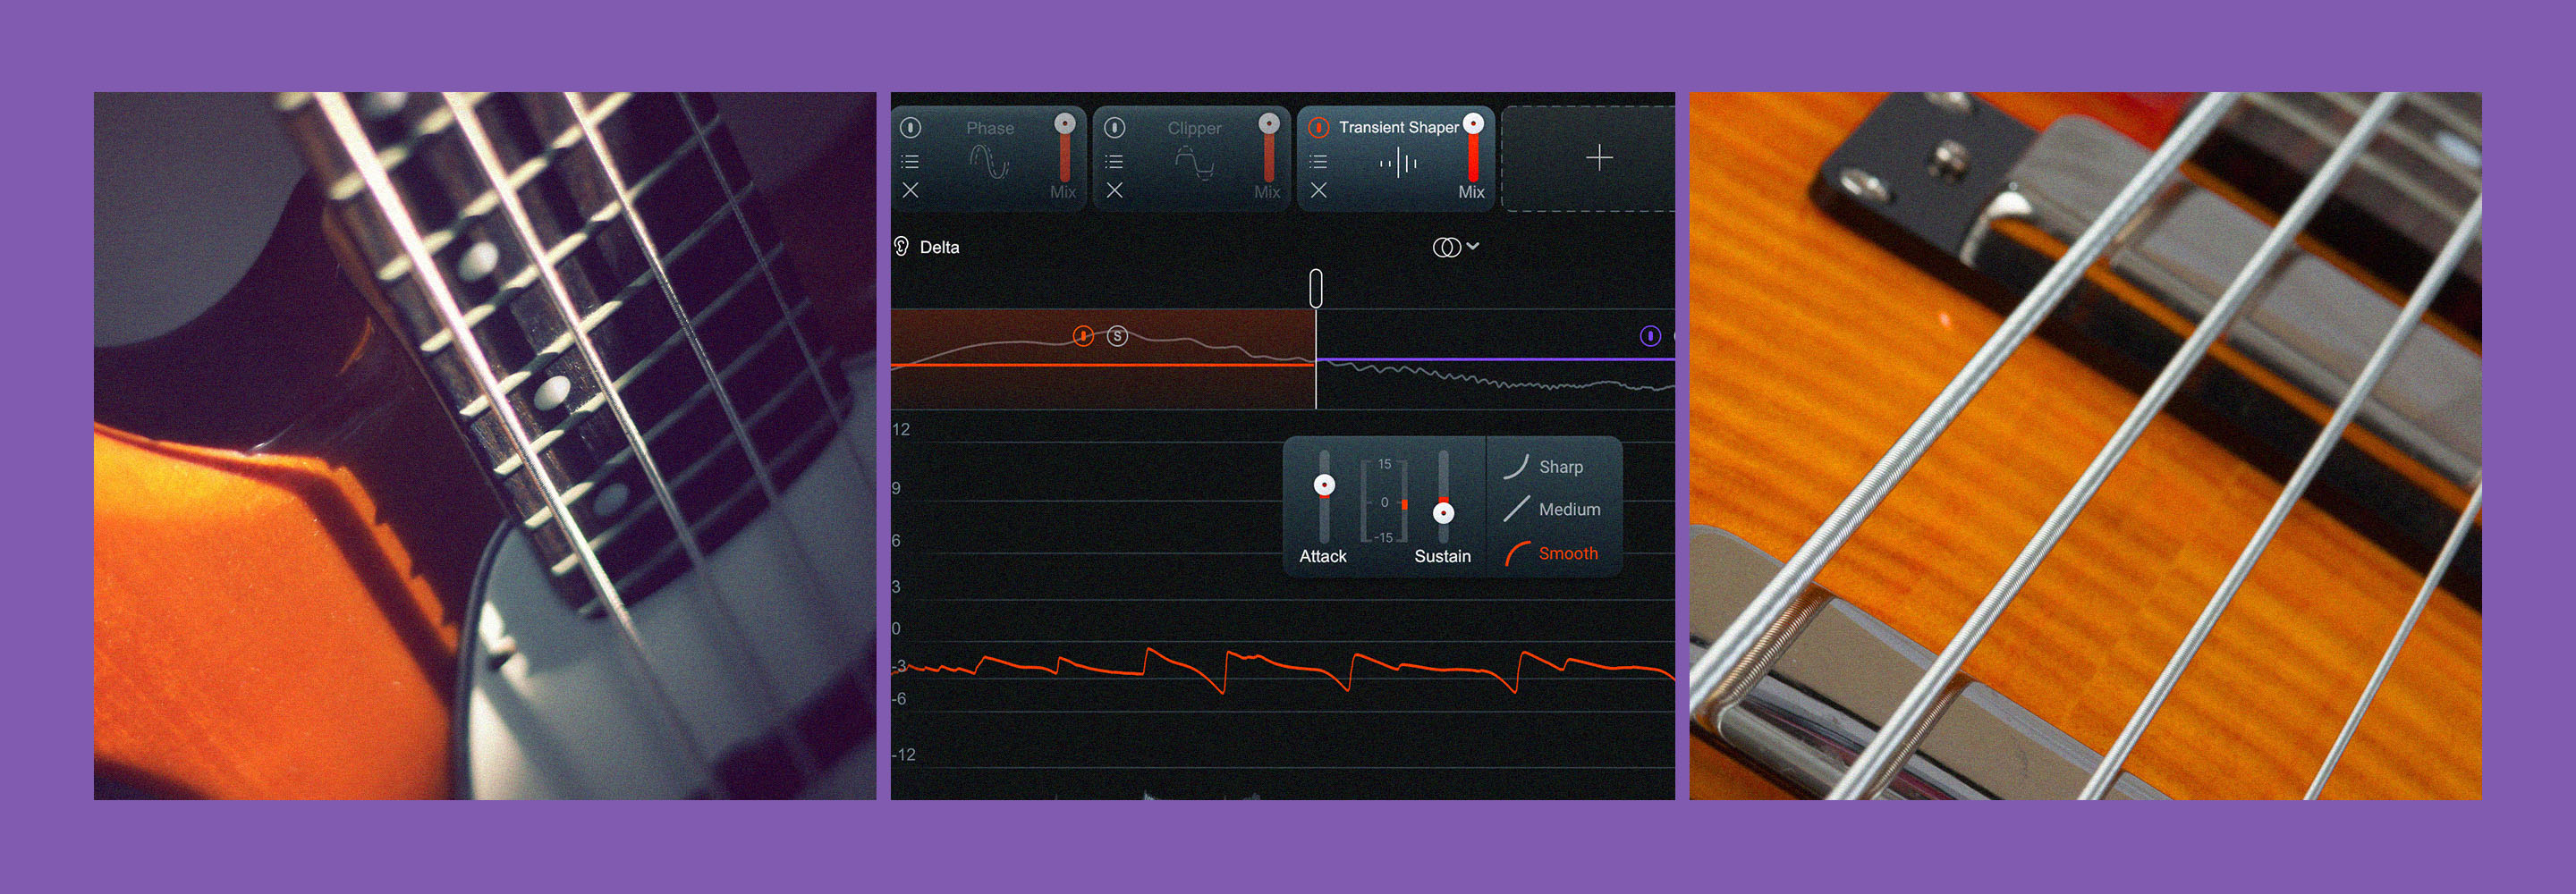
One of the more effective modules in Neutron 3 to automate is the Transient Shaper. It can emphasize the front end of a transient (with the attack slider), or the backend of an instrument’s atmosphere (with the sustain parameter). Neutron ups the ante with selectable multiband functionality so you can affect different frequency ranges of the track in discrete ways.
What happens when you automate parameters in the Transient Shaper? A lot. You can emphasize the roominess of drums in certain sections and cut them into glitchy, artifact-ridden pieces in other sections (indeed, increasing the sustain parameter on the room mics for a bridge is another way to differentiate that section).
Try multing a room mic, putting on a Transient Shaper, automating its sustain, and feeding that to an EA reverb, about 35% wet. Automate the Transient Shaper to give you more sustain in the verse and more attack in the chorus, and see what this mult gets you. It might be a lot!
Pro Tip: You can seemingly put singers in whole new environments, using an automation in Transient Shaper to suddenly bring out the room where before things sounded tight. Use the process in multiband and suddenly you can push and pull different aspects of the sound in various directions, making for truly weird bits of sound design. If your piece requires you to blur the line between producer and engineer, this is a great mix-based tool to obfuscate the boundary. It won’t be subtle, but it will make an impact.
6. Automate harmonic distortion into lifeless tracks
You can help sampled acoustic drums feel more real at the mix stage by automating the exciter parameters. In doing so, you could add or detract intensity from each hit, giving the illusion of more snare stick, a thoroughly stomped kick drum, or a thwacking a ride cymbal at intervals you yourself dictated.
You can utilize the same principle in other elements—really, any sound that requires a more varied intensity. Say you’ve got a synth part played on an instrument without touch-control. The velocity doesn’t change in level from note to note, and this is a detriment to the overall music. Songs are meant to move forward in time. Yes, the producer envisioned a static feel for this part, but we can help get better by automating the drive section of Neutron 3’s harmonic exciter and running it in parallel. This gives us a feeling of life—a feeling of being played by a human. In a very real way it now has been played by a human; you are that human.
7. Automate Sculptor’s Action Region in parallel to help lifeless tracks
For a similar effect utilizing a different methodology, consider Sculptor again: changing the Tone knob yields different sounds, as does changing the speed and the amount of processing offered. The solo button, when the Action Region is enacted, is also an interesting tone shaper. This region is even more interesting when constantly in motion.
Unless you wanted to really draw attention to unconventionality, I wouldn’t suggest making these automated parameters the main event in your processing. Go hog wild on the manipulation, but then run Sculptor in parallel, backing off the wet/dry slider in the top pane. Next time you have a lifeless keyboard part or drum hit, try this technique in parallel and you may find it’s more suitable to the task than excitement.
8. Automate the input and output stages
The genesis of this technique came out of my conversation with Ike Schultz, where he advised maintaining digital headroom, sometimes with trim plug-ins before and after processors. Here’s an interesting way to implement that concept into an automatable situation.
Say you’ve set up a clean guitar going into a Neutron compressor; it’s attack, release, threshold, ratio, and knee are perfect for the song. In the chorus, the part doesn’t change—it just distorts, like a good 90s alt rock tune. The guitar player stomped on a pedal, so it’s all happening one track. The compression now sounds all wrong for the chorus.
Sure, you can set up a new track, find the right moment to cut, orchestrate your fades, and re-jigger the compressor to give you what you need. That’s a multistep process though. What if there was a quicker way?
Let’s start by automating a drop in the global input stage and a corresponding boost in the global output stage. How do we calculate the drop in level correctly? By ear, is the correct answer. But let’s also try using the meters: we analyze the gain reduction in the clean section, and back off the input until we see the same behavior in the distorted chorus. Then, we make up the output by the opposite amount.
Why not just gain the guitar region down, you may be asking? Let’s say we’ve got EQ coming in before the compressor from another plug-in; if you gain the region down, you’re also hitting the EQ differently. As established before, we like the tonality of this guitar part—the compression is just too strong for the section.
Why not just automate the compressor itself here? Because the behavior of a compressor depends on the inter-activity of each parameter—especially the threshold and ratio. We won’t get the same behavior, and thus the same character, if we mess about with these parameters.
So, we automate the I/O level, and that takes care of the issue!
Conclusion
We couldn’t end this piece without a customary dire warning: always be careful when automating. While automated effects can go a long way, you must always remember that mixing is an art of balance, and every tool is a compromise for that in some regard.
Everything you do affects everything else down the chain, from downstream processes on a track to the relation with individual elements. Be aware of your surroundings at all times—and always remember to return your track to its original settings when you’re done automating it. With automation comes an inherent responsibility that cannot be ignored.
Some of the links in this article have been updated to reflect the latest product versions.
