How to mix bass: 7 tips for a solid foundation
Discover seven essential bass mixing tips to create a powerful, punchy low end.
When it comes to mixing, getting your low end right is crucial to a well-balanced product. Too much bass can swallow up the mix, and too little can leave a track lacking power and warmth.
In this article, I’ll cover seven tips for how to mix bass guitar plugins within the Native Instruments universe.
A word to the wise: these tips aren’t sequential, so feel free to bounce around when trying them out for yourself. Now, are you ready to get low? Let’s get started!
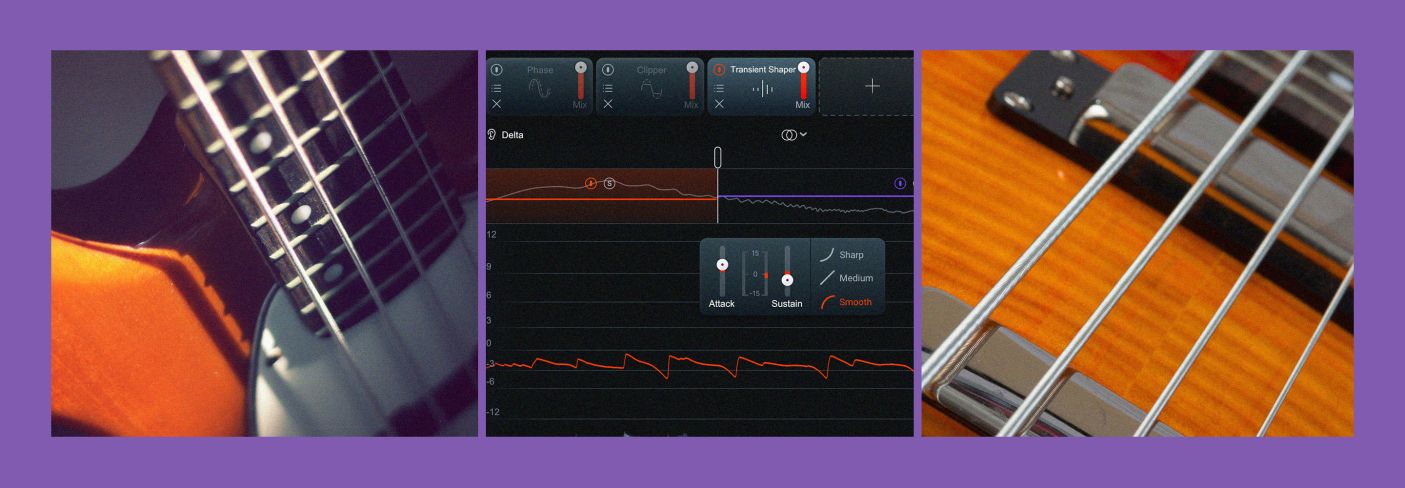
Follow this tutorial using plugins included in iZotope
![]()
![]()
Music Production Suite 7
Learn more
1. Use the detection filter on your compressors
When it comes to adding compression to your bass, you want to be careful not to over-compress the low end. If you just slap a standard compressor on your bass track, all of the frequency bands will trigger the compressor to act upon the signal. Since low frequencies produce more energy than high frequencies do, this can sometimes cause too much compression to be applied to low notes that were played with intentional emphasis.
One trick for getting a warm, yet present, sound is to use a detection filter within your compressor.
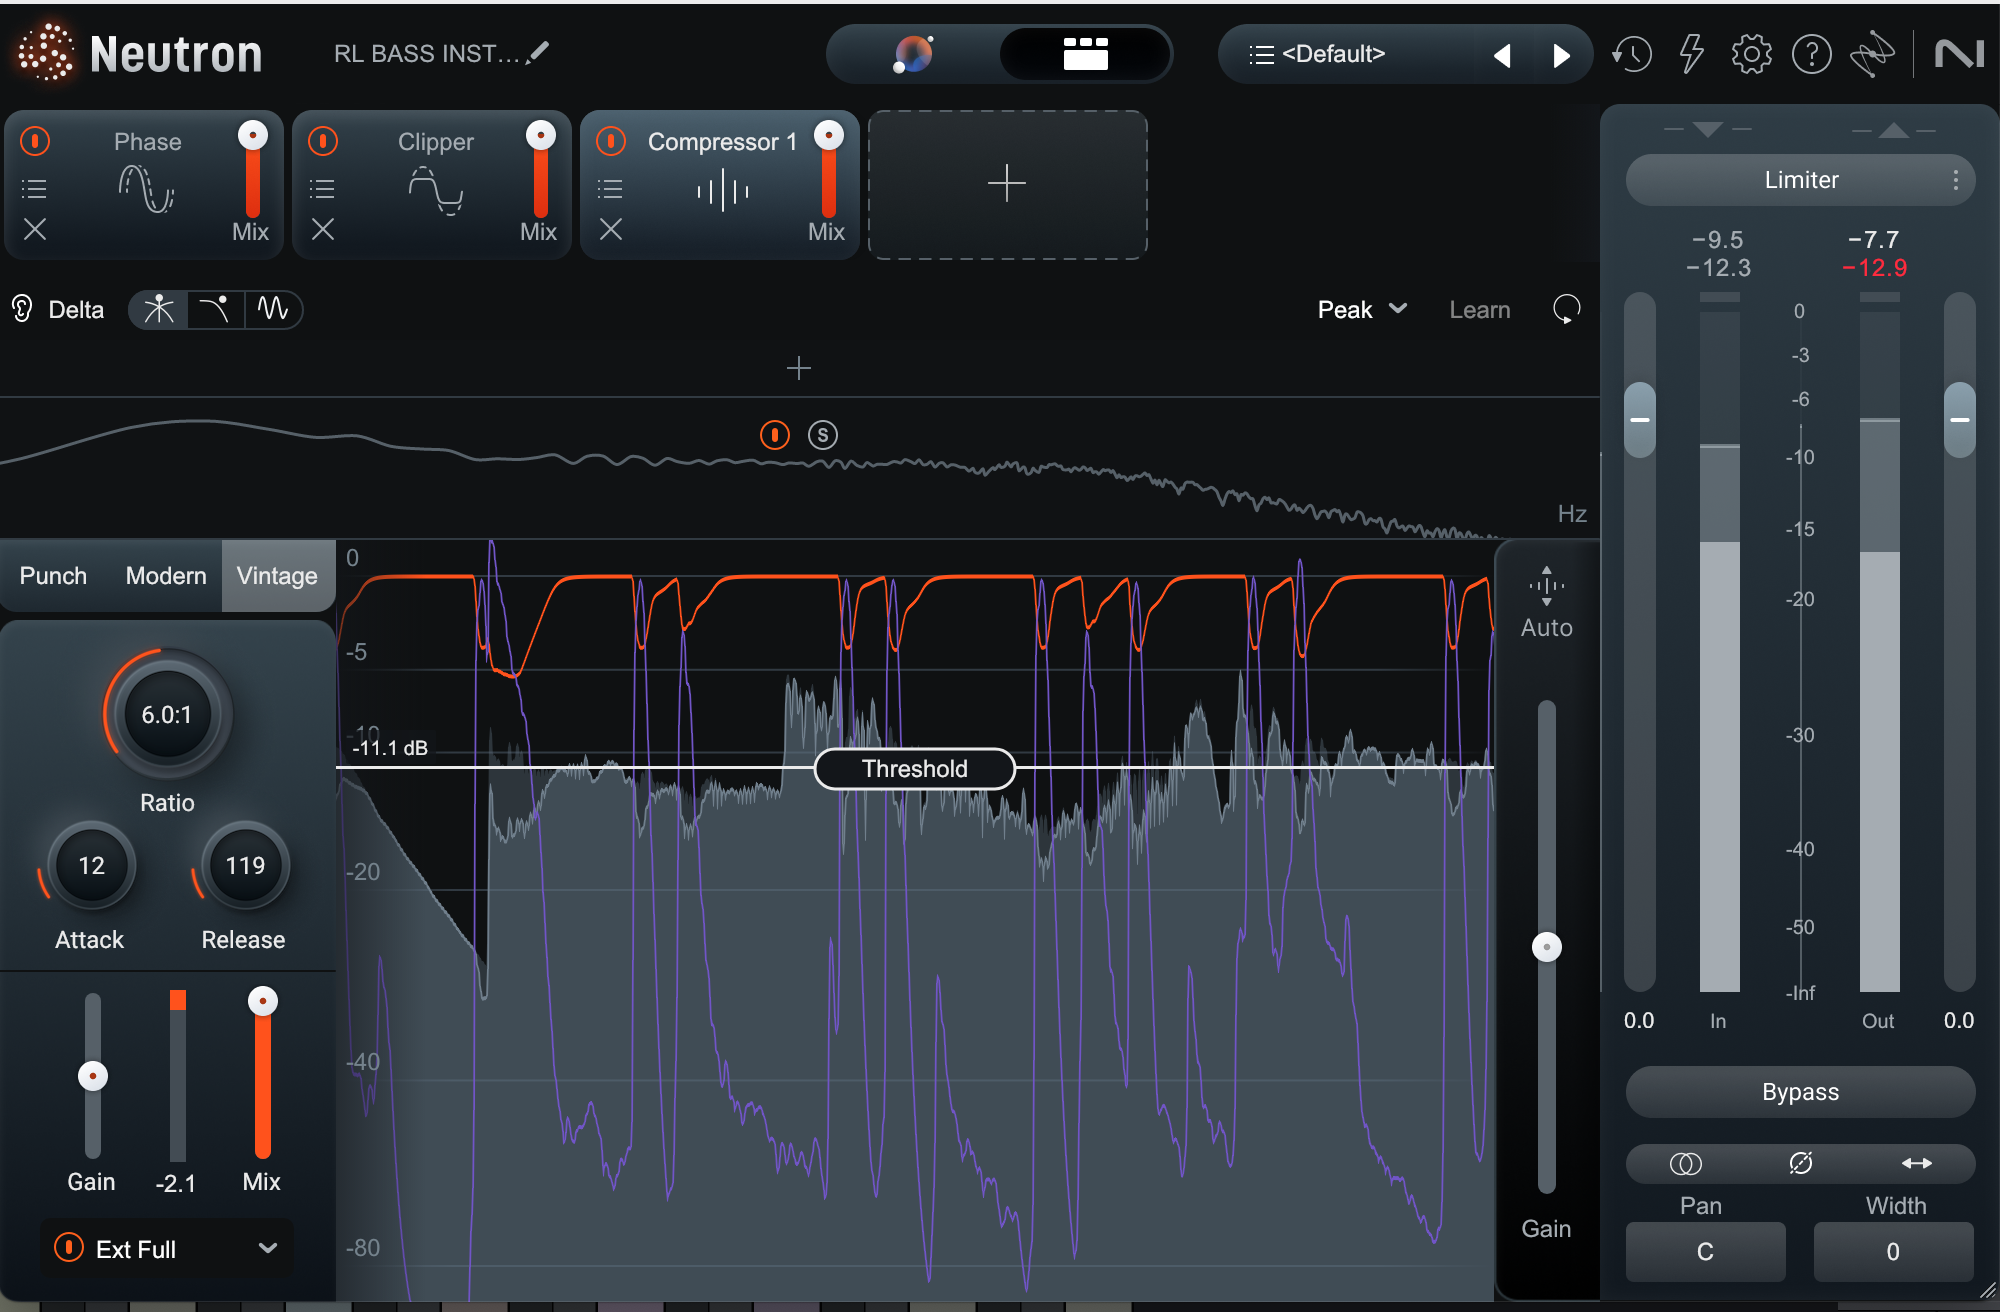
The detection filter in Neutron’s compressor allows you to filter out the low frequencies so they bypass the compressor without triggering it. This allows your low end to remain dynamic, while still applying compression to anything above the frequency band you set.
To set your detection filter in Neutron's compressor, simply click into the detection filter spectrum view (located at the top left of the Compressor window). Then, enable the detection circuit filter and set your high-pass frequency to about 400 Hz. This will prevent the low frequencies from triggering the compressor, allowing you to add compression only to the higher frequencies in your signal so your bass sounds crisp and punchy.
Neutron detection filter in the Compressor
People tend to use colorful compressors on the bass – often something of the optical variety, or an FET such as the 1176. Luckily, Native Instruments has versions of these compressors that have sidechain detection filters for achieving similar results:
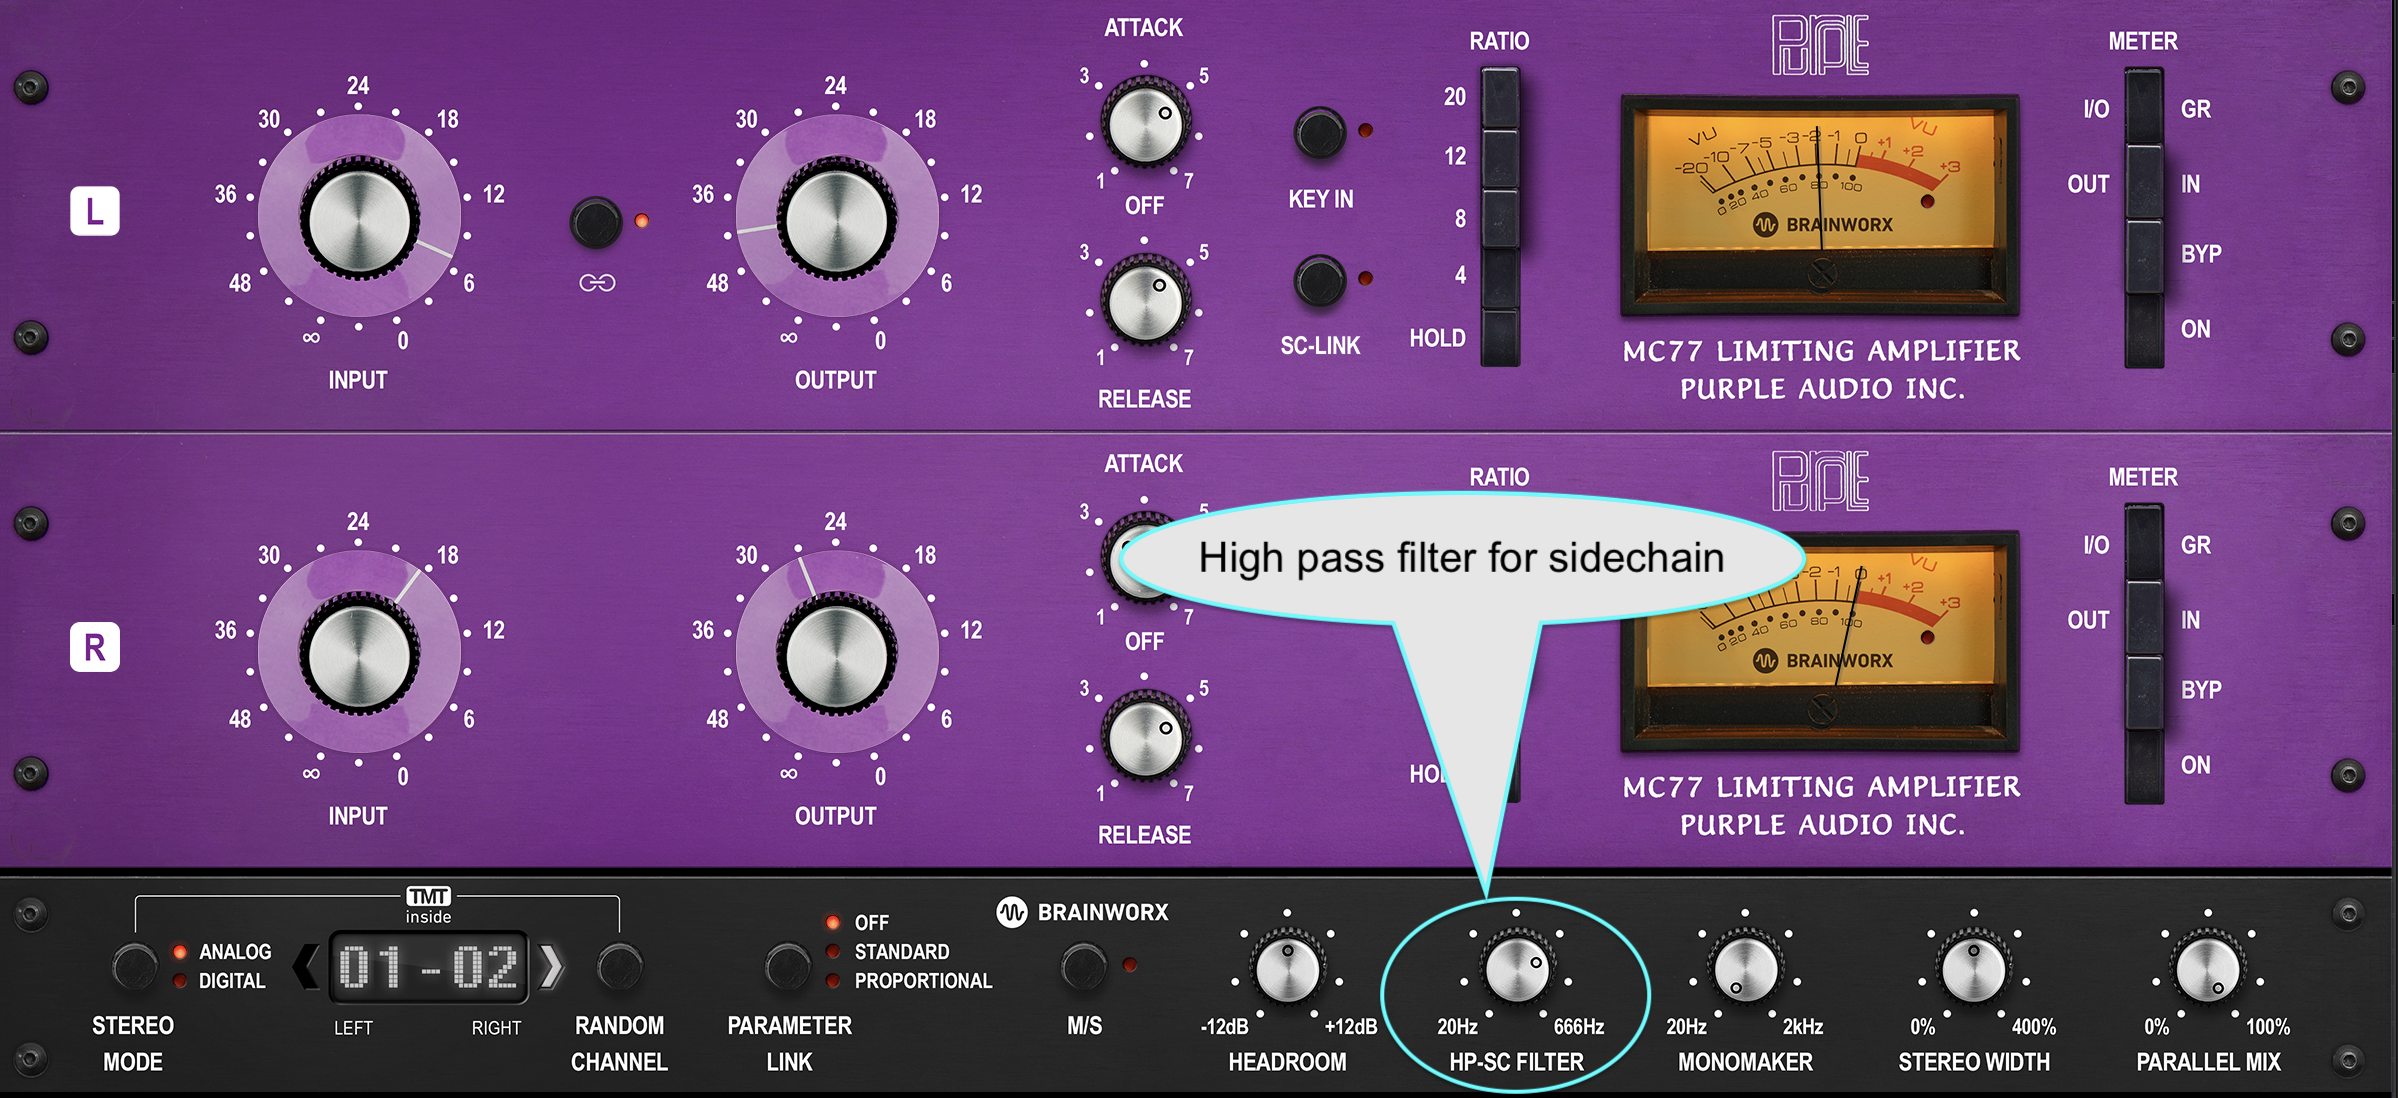
Purple Audio MC77 compressor
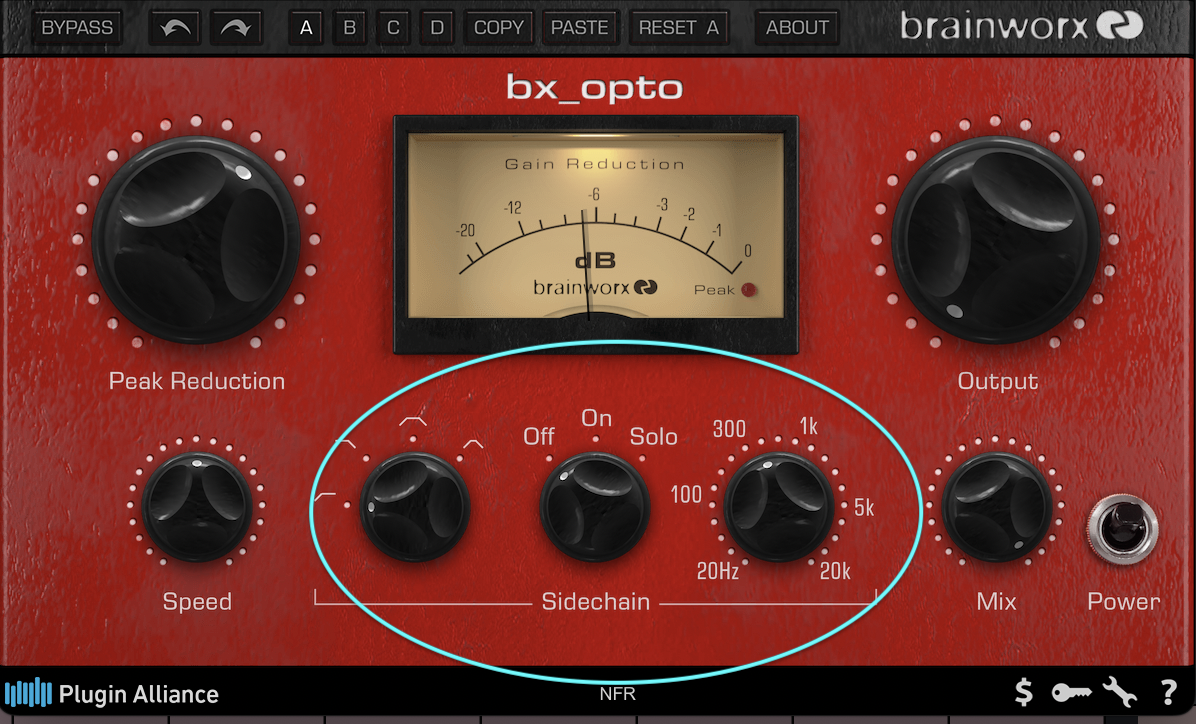
Brainworx bx_opto compressor
2. Trigger sidechain compression with the kick drum
In many genres, the bass guitar and kick drum frequently play simultaneously throughout a song, especially on downbeats. This leads to multiple instruments occupying the low-frequency area at the same time.
One method to prevent them from fighting is sidechaining, a type of compression whereby one signal ducks another in real time. In our scenario we’d give the kick priority in the initial attack, then let the bass take over for the sustain. So, how do you achieve that?
The key for this trick is to have the kick drum make a compressor quickly duck the bass, and only when the kick is played.
In the Compressor module of Neutron (inserted on the bass track), activate “Sidechain” and assign it to “Ext Full.” This allows the sidechain to receive an audio signal from another track in your session. Then, set the sidechain input to come from your kick track. This is the only tricky part of the process, as it varies slightly depending on your DAW.
Bass sidechain compression in Neutron
Want to hear this trick in action? Here’s a loop in which the drums and bass are fighting a bit:
And here’s what it sounds like with the settings pictured above:
Notice how we can hear the drums better, and the groove has also been improved? That’s a hallmark of good sidechain compression.
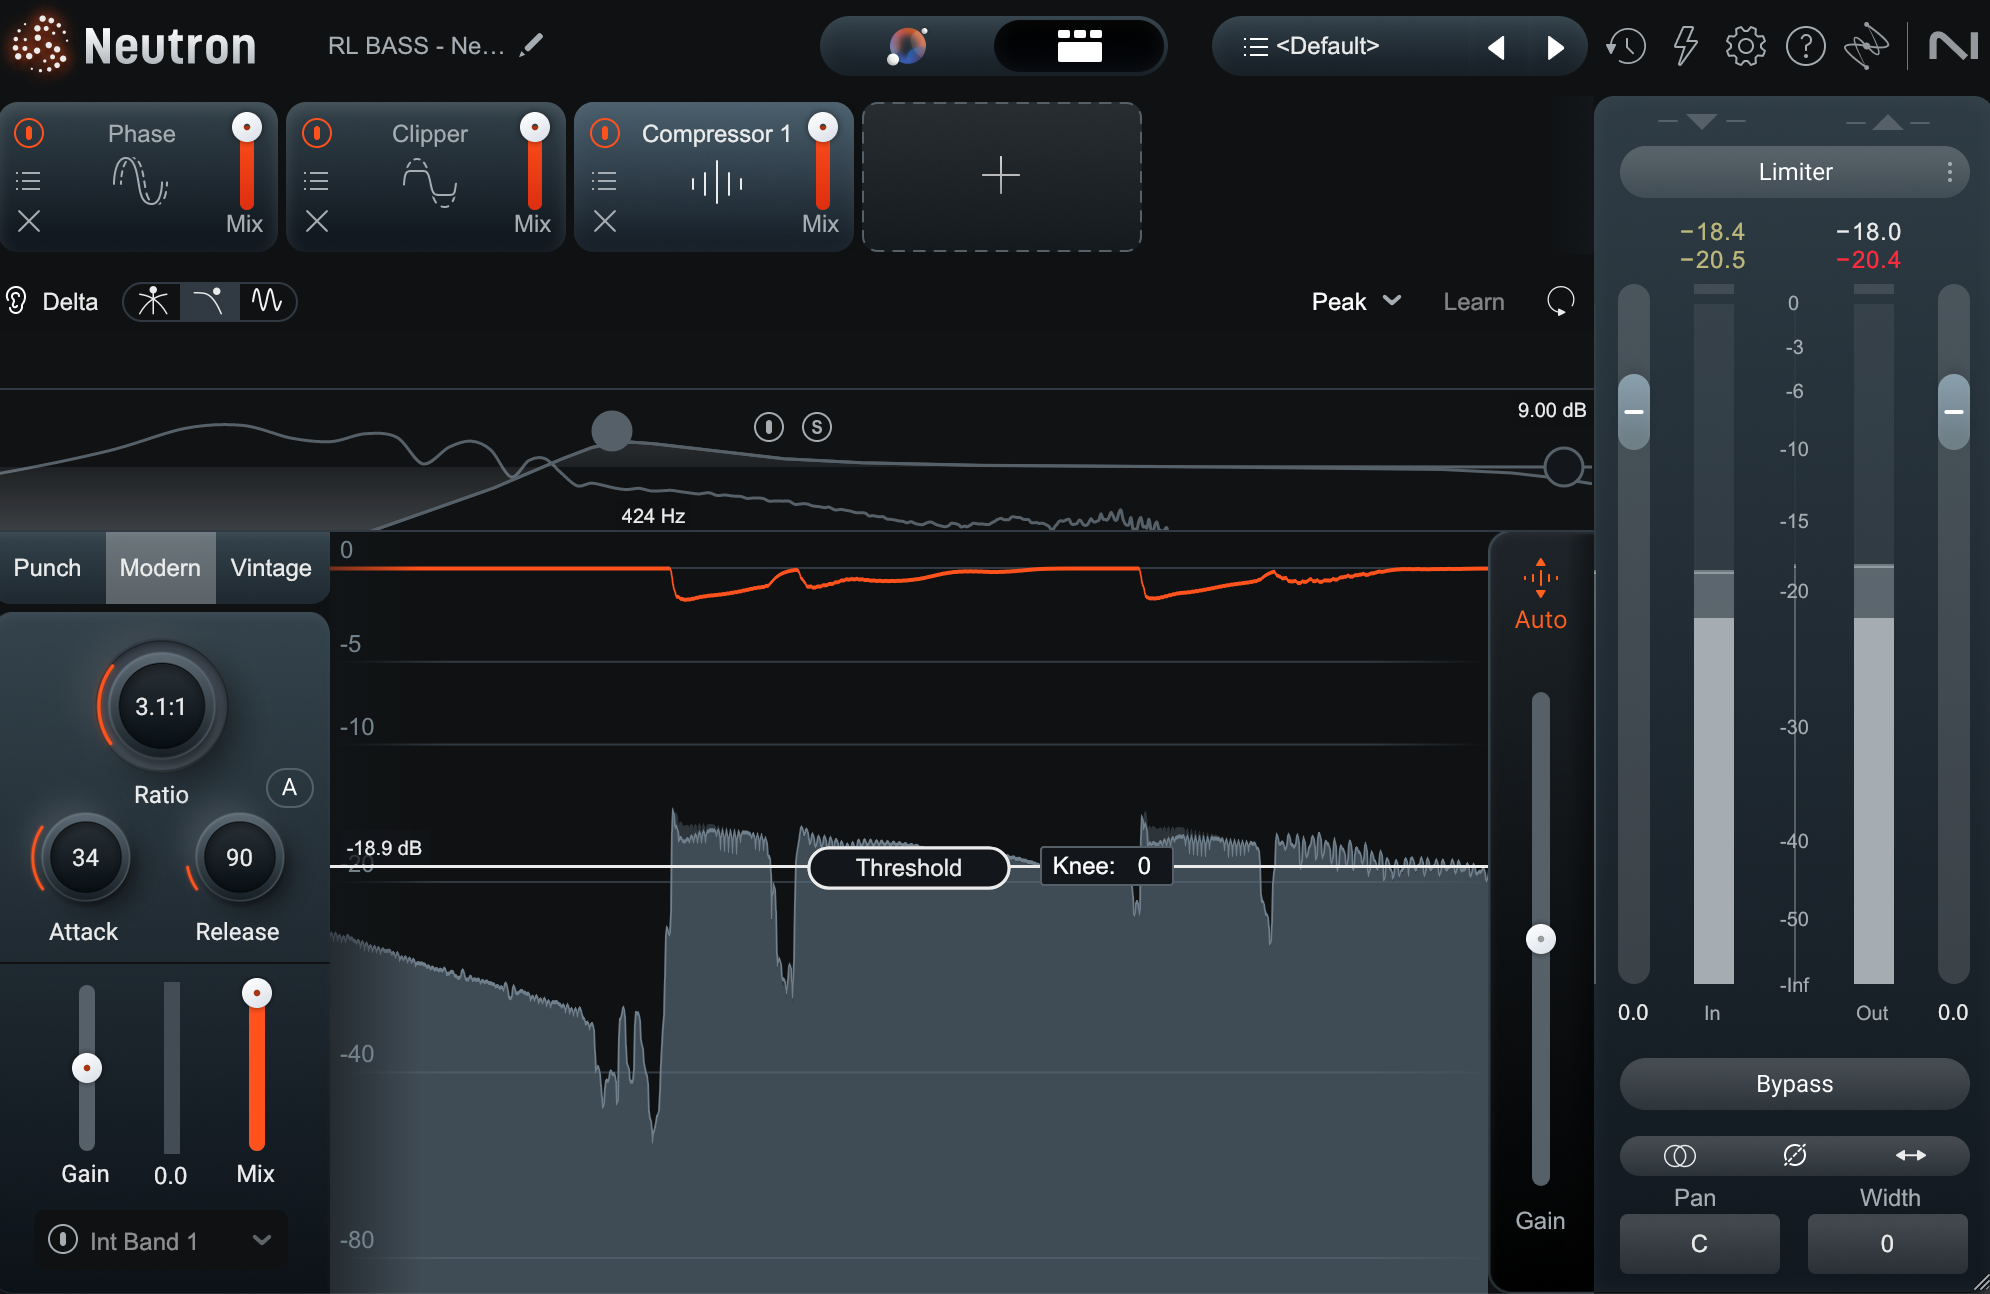
3. Add power and kill flub with Transient Shaping
When you need either more or less sustain from a bass track, EQ isn’t the best solution.
Adding or subtracting low end with an equalizer will change the overall sound of the bass, as the EQ will impact all parts of the waveform, not just the transient hit or the lingering sustain.
The solution is to separate transients from sustain material. For instance, the Transient Shaper module in Neutron gives you single or multi-band control of the attack and sustain, allowing you to craft a more detailed bass envelope.
The following image shows the Transient Shaper with two bands activated
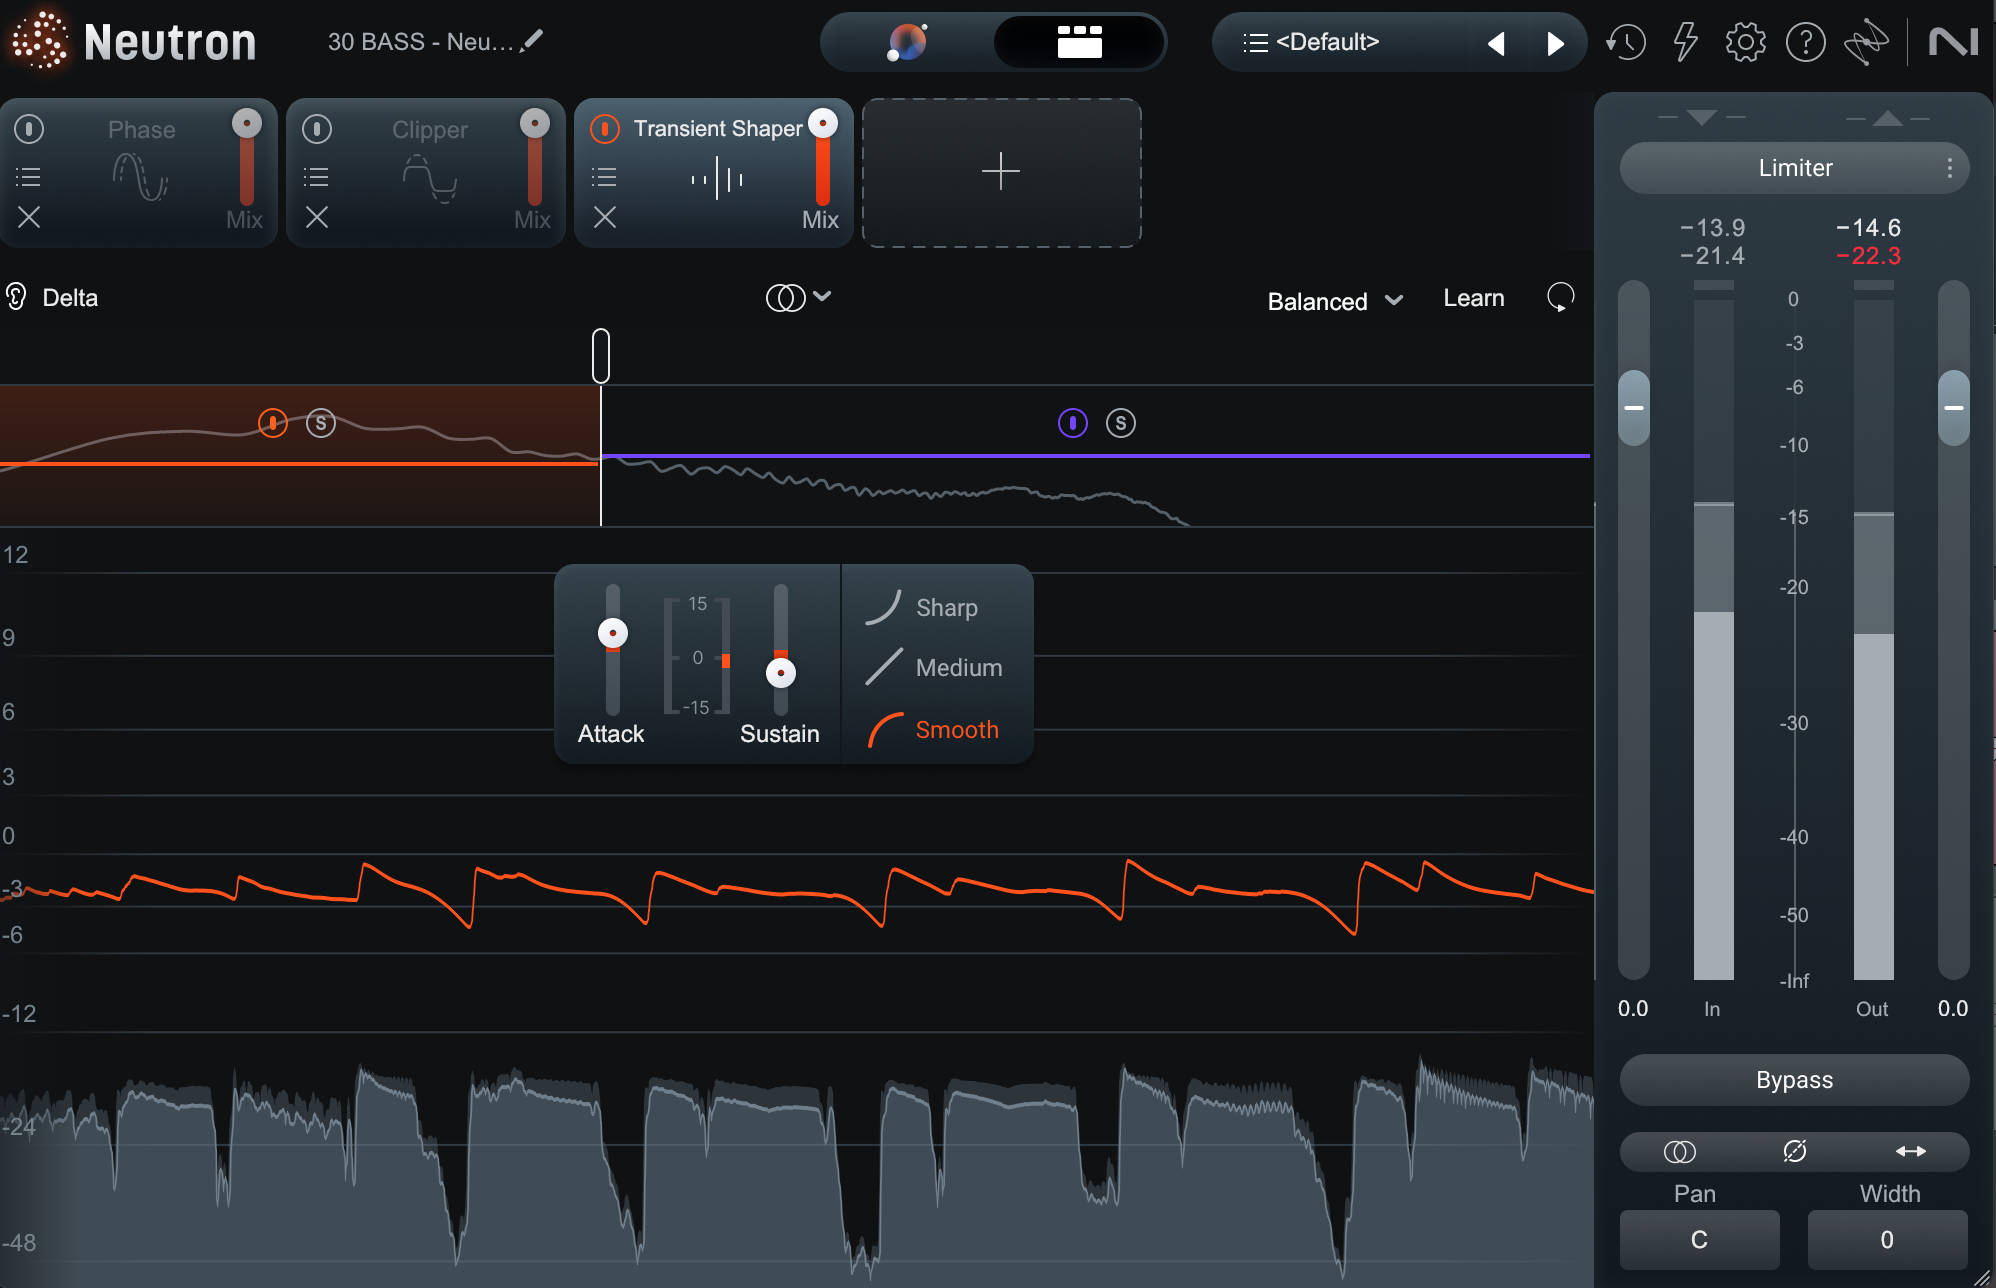
Low band transient shaper in Neutron
In the low band, we’re cutting sustain and adding attack. We’re doing something similar in the high band as well, but we’re using different proportions.
Why are we doing this?
Big, blooming, lingering bass can be a problem. Such low tones might seduce you in headphones but over big sound systems, long and loud lows lead to mud. Low-end frequency buildups are a headache for achieving perceived loudness in mastering. Since Neutron's Transient Shaper gives you control of your bass’s envelope, you can use it to home in on the sound needed for your particular track.
Let’s use the kick and bass loop we’ve been pulling from so far:
It’s grooving, but we have potential bass bloat problems here. We’ll use the settings in the transient shaper pictured above and get something more manageable:
4. Hit some tape hard for extra grit and mojo
Many bassists and audio engineers love the tone of a bass guitar recorded hot to analog tape. The subtle compression and harmonics resulting from the process seems to suit the instrument. If you’re like most “commoners,” you don’t have an analog tape machine.
But that’s okay, because Native Instruments has great virtual options—including Kiive Tape Face, SPL Machine Head, and Ozone.
Observe this loop:
The bass is sounding a bit weak. Some of this is a loudness issue, but if we add tape saturation as we increase the level, we can add a wonderful foundation to the mix:
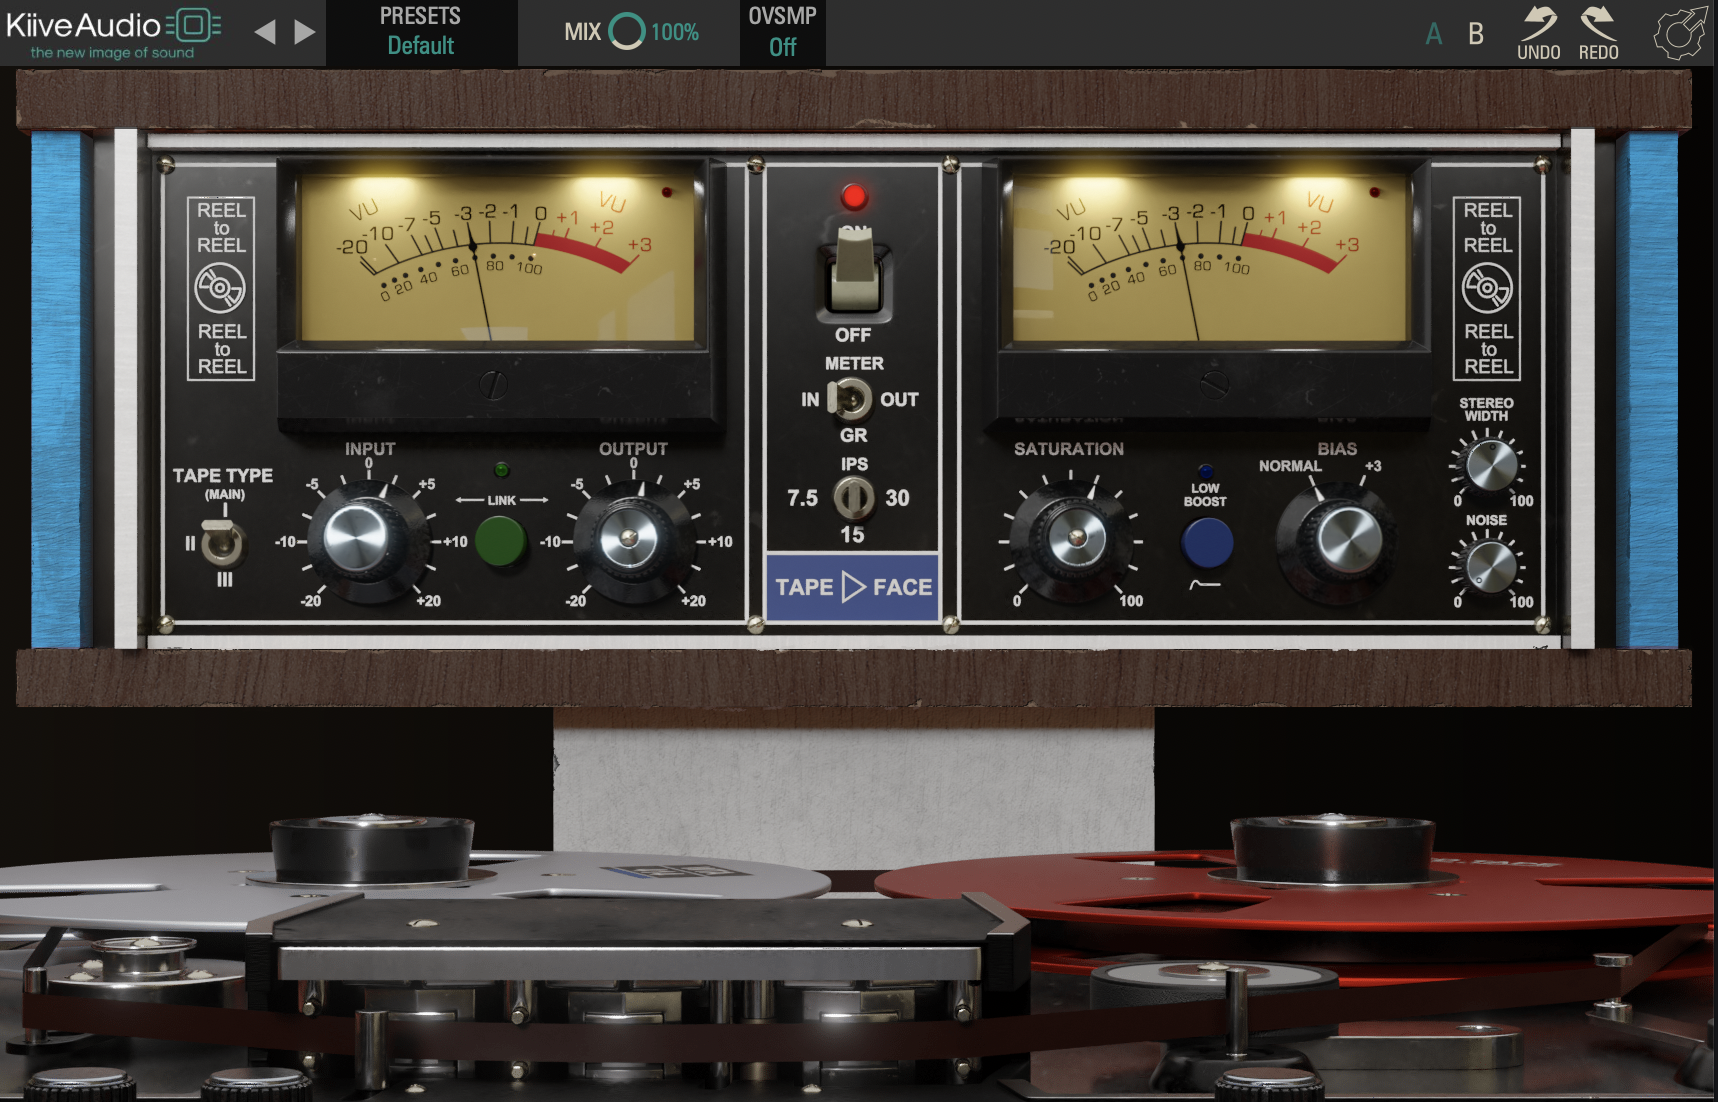
Full mix with Kiive Tape Face on the bass
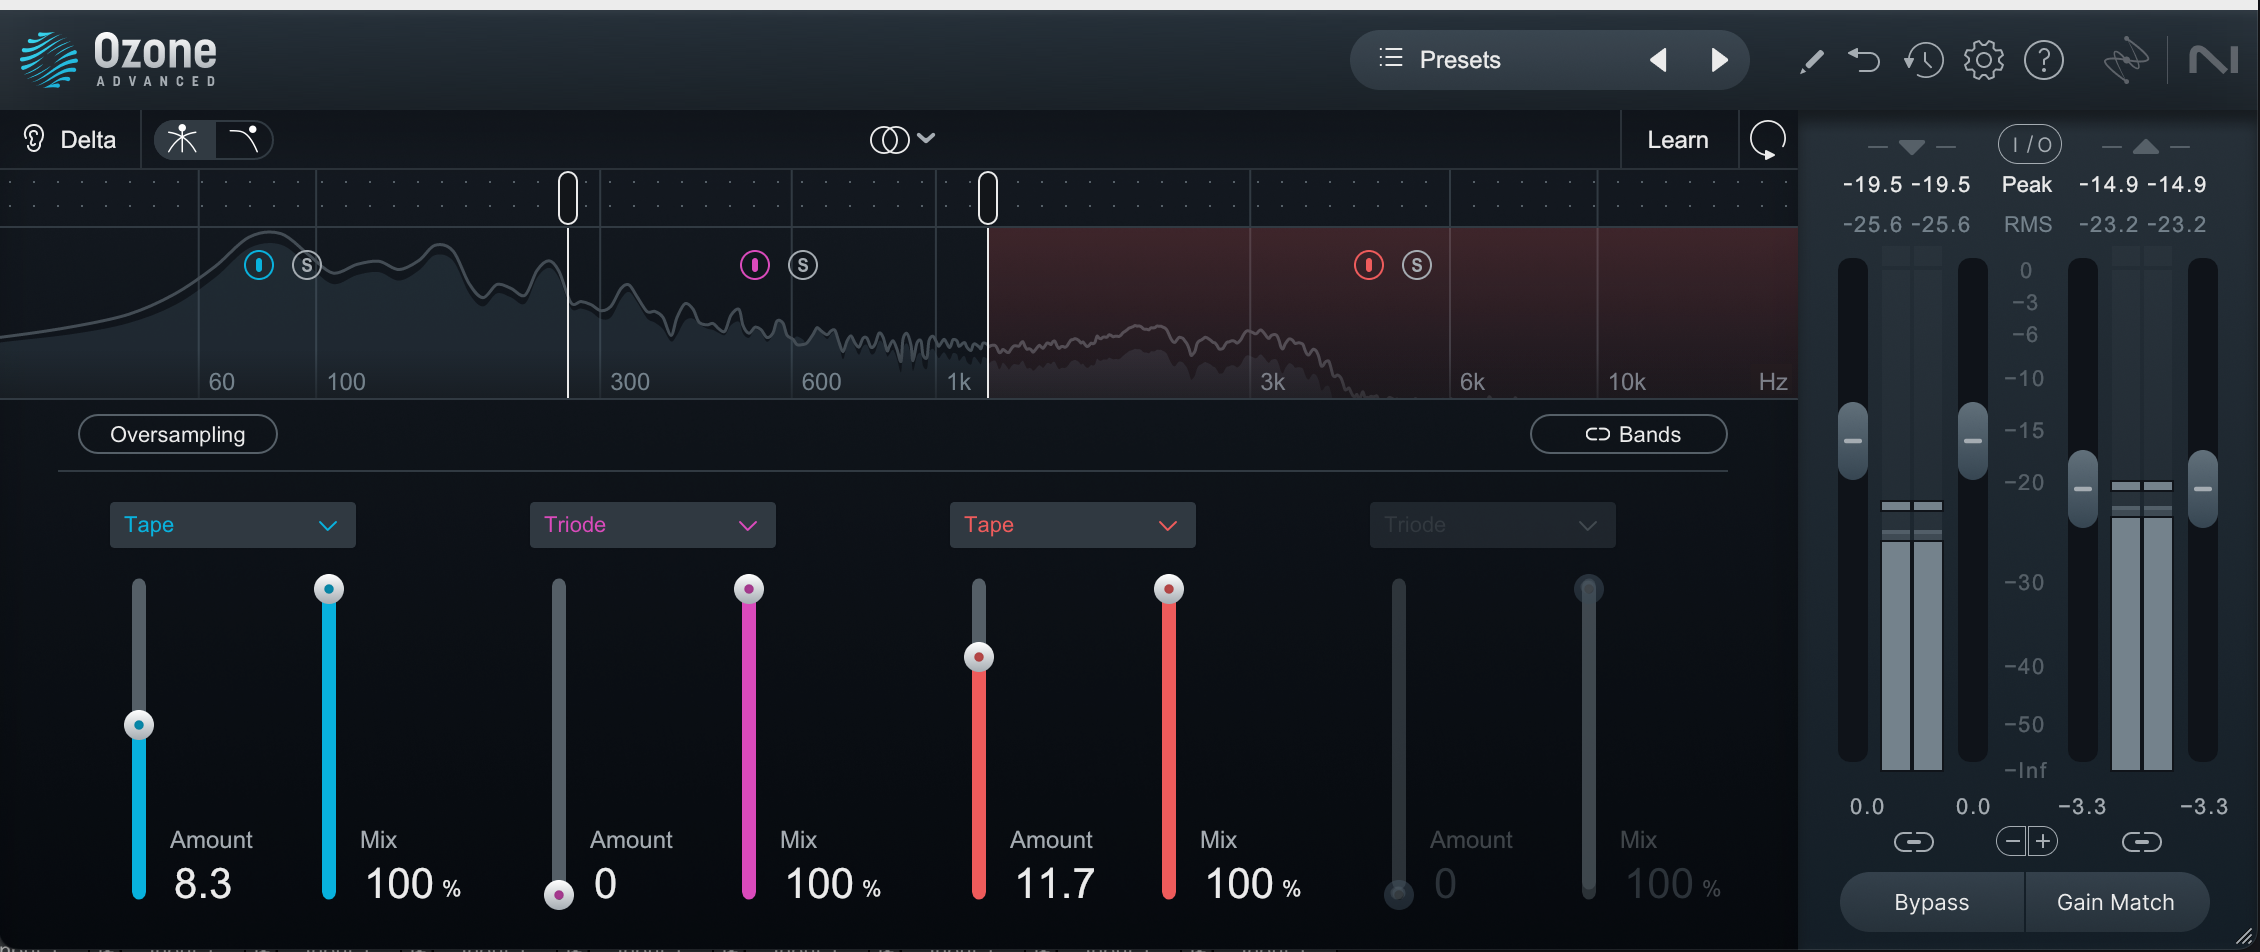
Full mix with Ozone Tape Exciter

SPL Machine Head on the bass
Give it a go in your mix – but make sure to A/B this effect with a straight loudness boost. Perhaps the grit isn’t what you need.
5. Clear up muddiness with Inverse Link
In syncopated kick and bass arrangements, it can be difficult to make both instruments clearly audible and working together to create a solid low end. One approach to fixing this issue is to “carve out space” from either the kick or the bass.
For example, upon boosting at 95 Hz on the bass, you would cut at 95 Hz on the kick. This minimizes the likelihood of the two instruments fighting for attention in the frequency domain. Thankfully, Neutron's Equalizer has a handy Inverse Link feature that makes the process very easy.
To activate Inverse Link, load an instance of Neutron onto both the bass and kick tracks.
Then, open Neutron on your bass track and click “Masking” at the top of the Equalizer window.
At the button of the GUI you’ll see options to communicate with other instances of Neutron.
Select your kick track from the dropdown menu and choose Inverse Link. Now any time you make a boost to a frequency band on the bass, Neutron will automatically create a cut of the same amount on the kick’s EQ.

Using Neutron Inverse Link EQ
Although the example in the image above only shows one boost/cut using the Inverse Link feature, you can add multiple EQ adjustments to help sculpt the sound of your low end and clear up muddiness.
You’ve actually been hearing the inverse link function all along on our groovy synth bass part: the screenshot here is taken from that particular track.
PRO TIP: Inverse Link can also help if your bass frequencies are butting heads with your guitars. Essentially you can use Neutron’s Inverse Link feature to quickly clean up any frequency areas where too many instruments are competing for attention.
6. Quickly achieve parallel processing in your plugins
Parallel compression and parallel saturation are common tricks for sprucing up an electric bass guitar sound.
In typical analog and DAW setups, parallel processing requires a significant amount of signal copies and/or routing. Each Neutron module has a master Mix control, enabling independent parallel processing for up to six processors with no additional setup.
Many Plugin Alliance processors also have mix controls, so you can add just a touch of Maor Appelbaum Mastering & Hendyamps THE OVEN or the Black Box Analog Design HG-2MS.
Check out Neutron’s Exciter for instance:
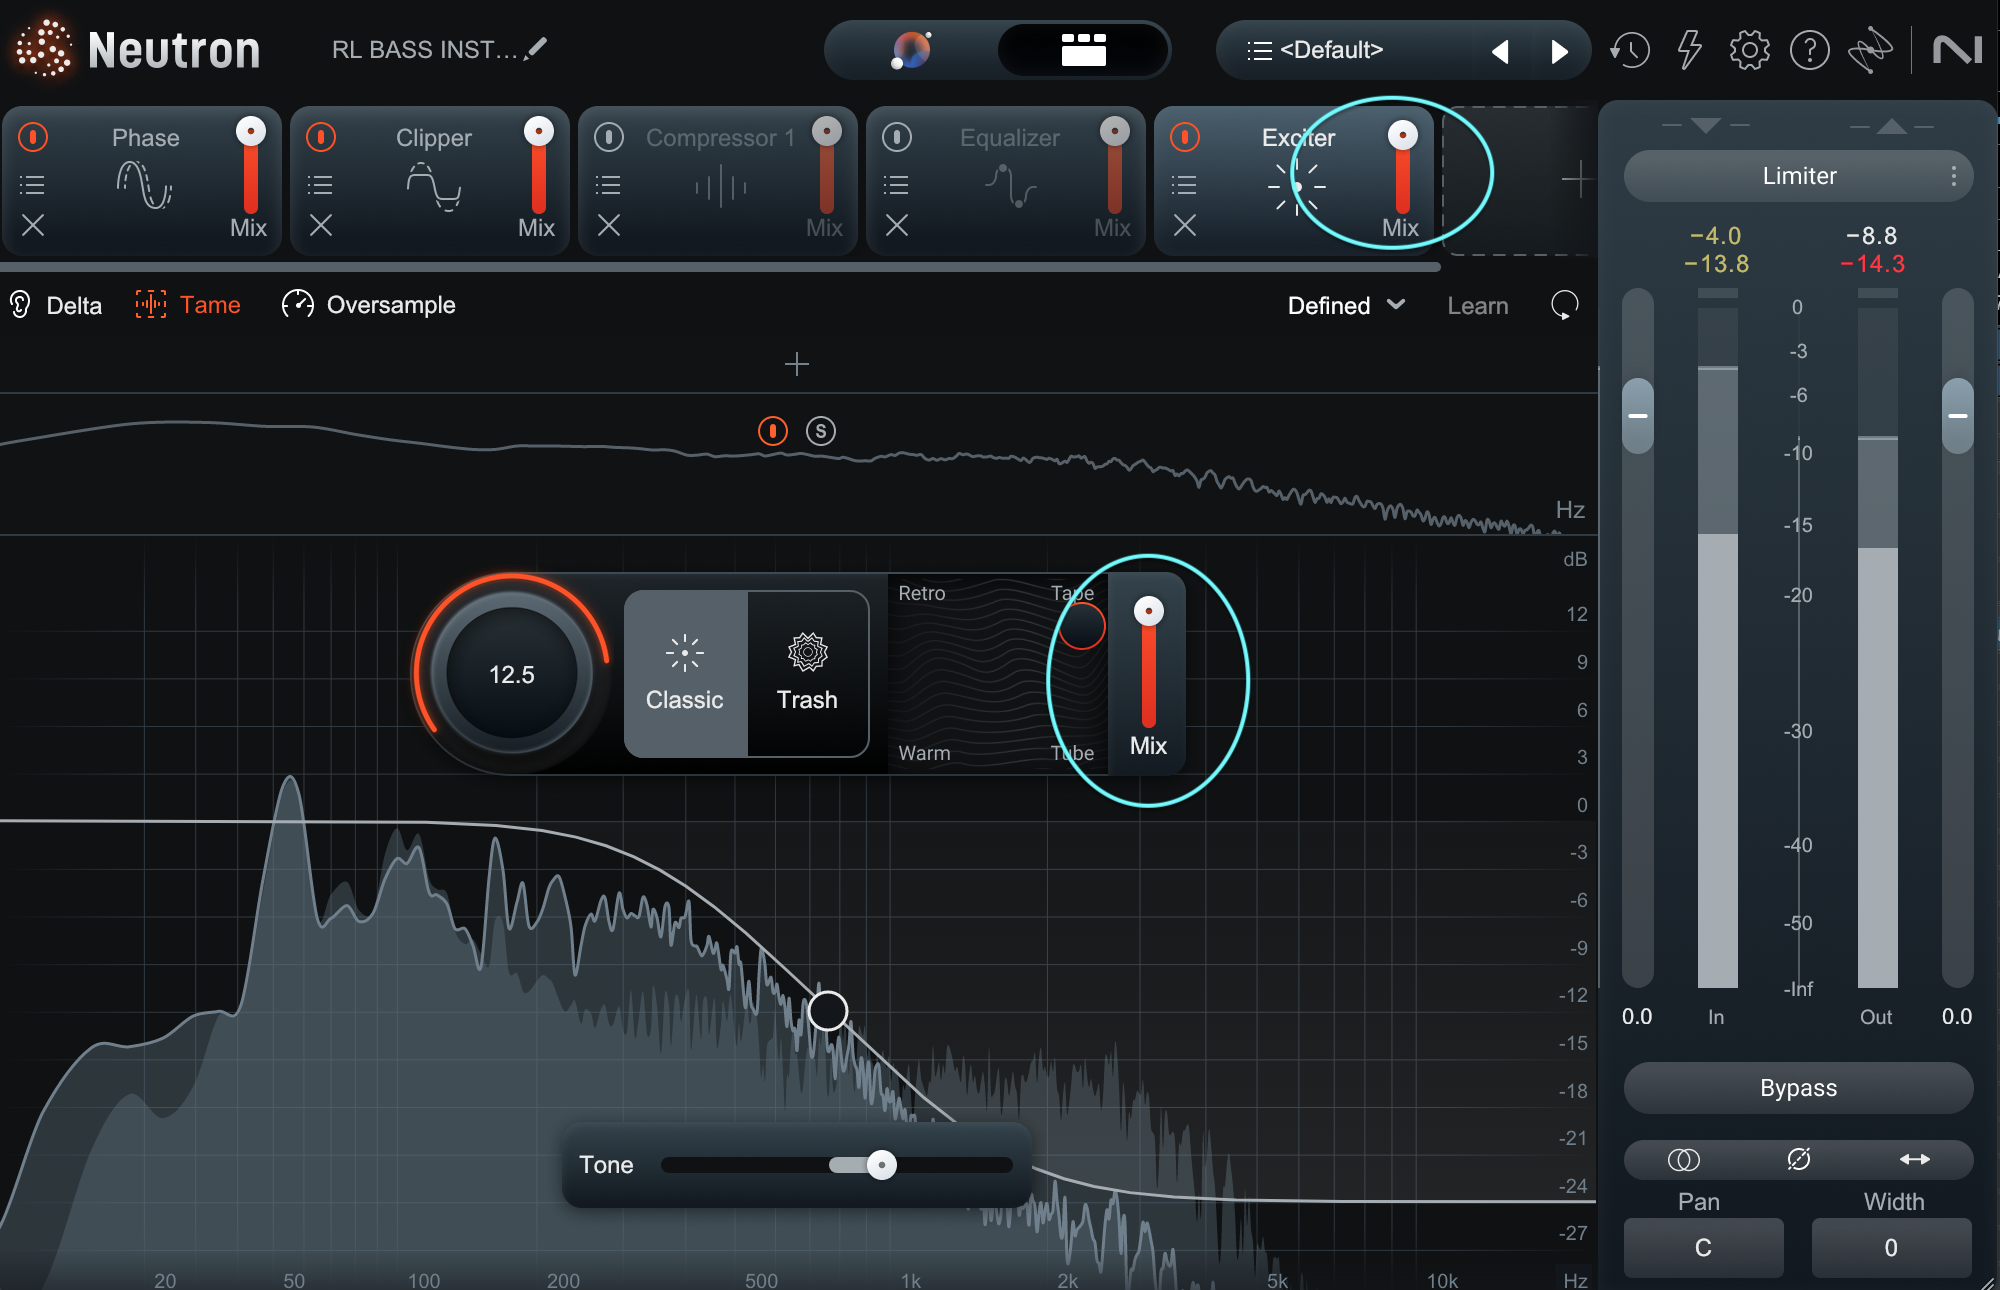
Parallel possibilities in Neutron
Note the circled sliders: these are multiple stages of mix controls. The one in the Exciter itself blends the specific kind of excitation you’re adding. The one up top, by the module windows, is an overall blend – and Neutron gives you one for every processor.
This is a godsend for parallel processing, especially when it comes to bass instruments.
Even in our modern times, some DAWs are notoriously unreliable when it comes to plugin delay compensation, meaning multiple tracks with different processing often leads to phase anomalies. You definitely don’t want that on bass, because that can lead to cancellations of low frequencies.
In the case of plugin-specific parallel compression or parallel saturation, this problem is handled internally: a developer like iZotope or Plugin Alliance is making sure you’re getting a perfectly phase-aligned signal every time.
7. Play around with amp sims
Here are two go-to plugins every engineer should keep in the arsenal when working with the bass, the Ampeg B-15N and Bass Invader inside Guitar Rig 7 Pro:
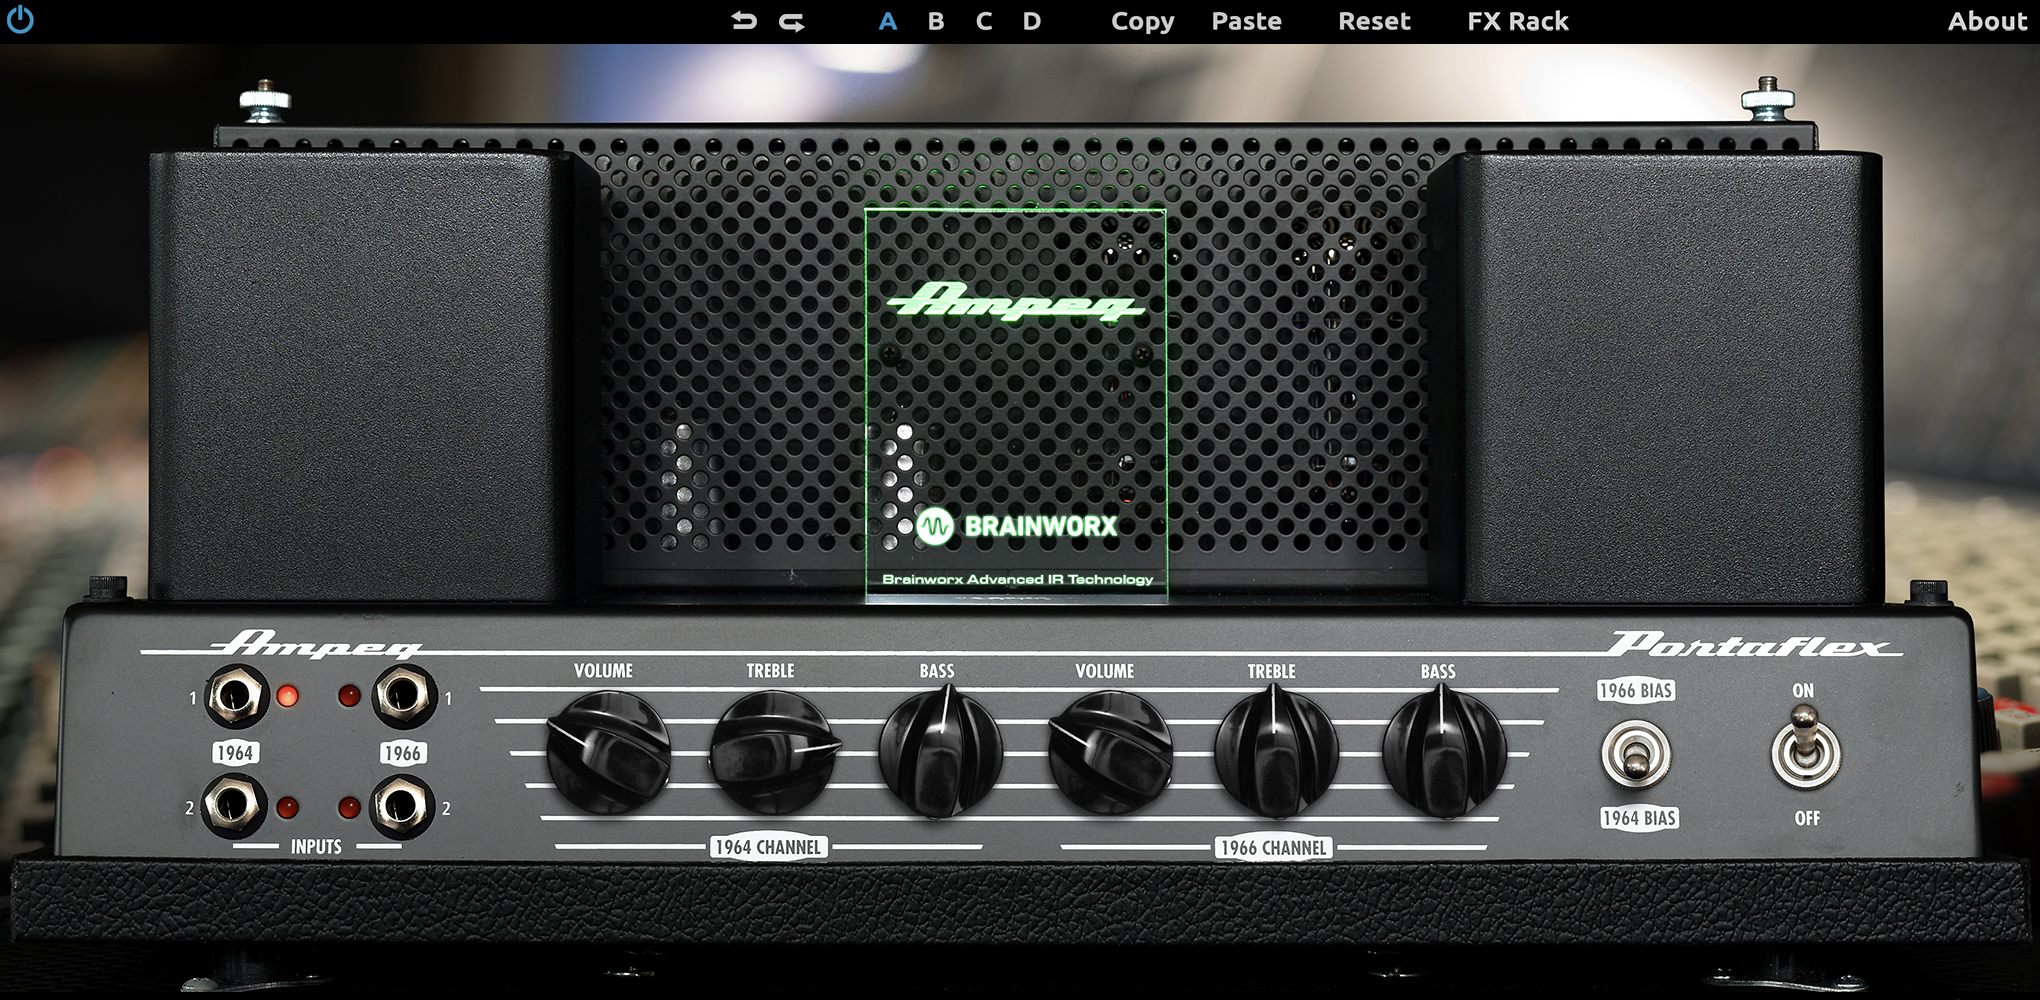
Ampeg B-15N
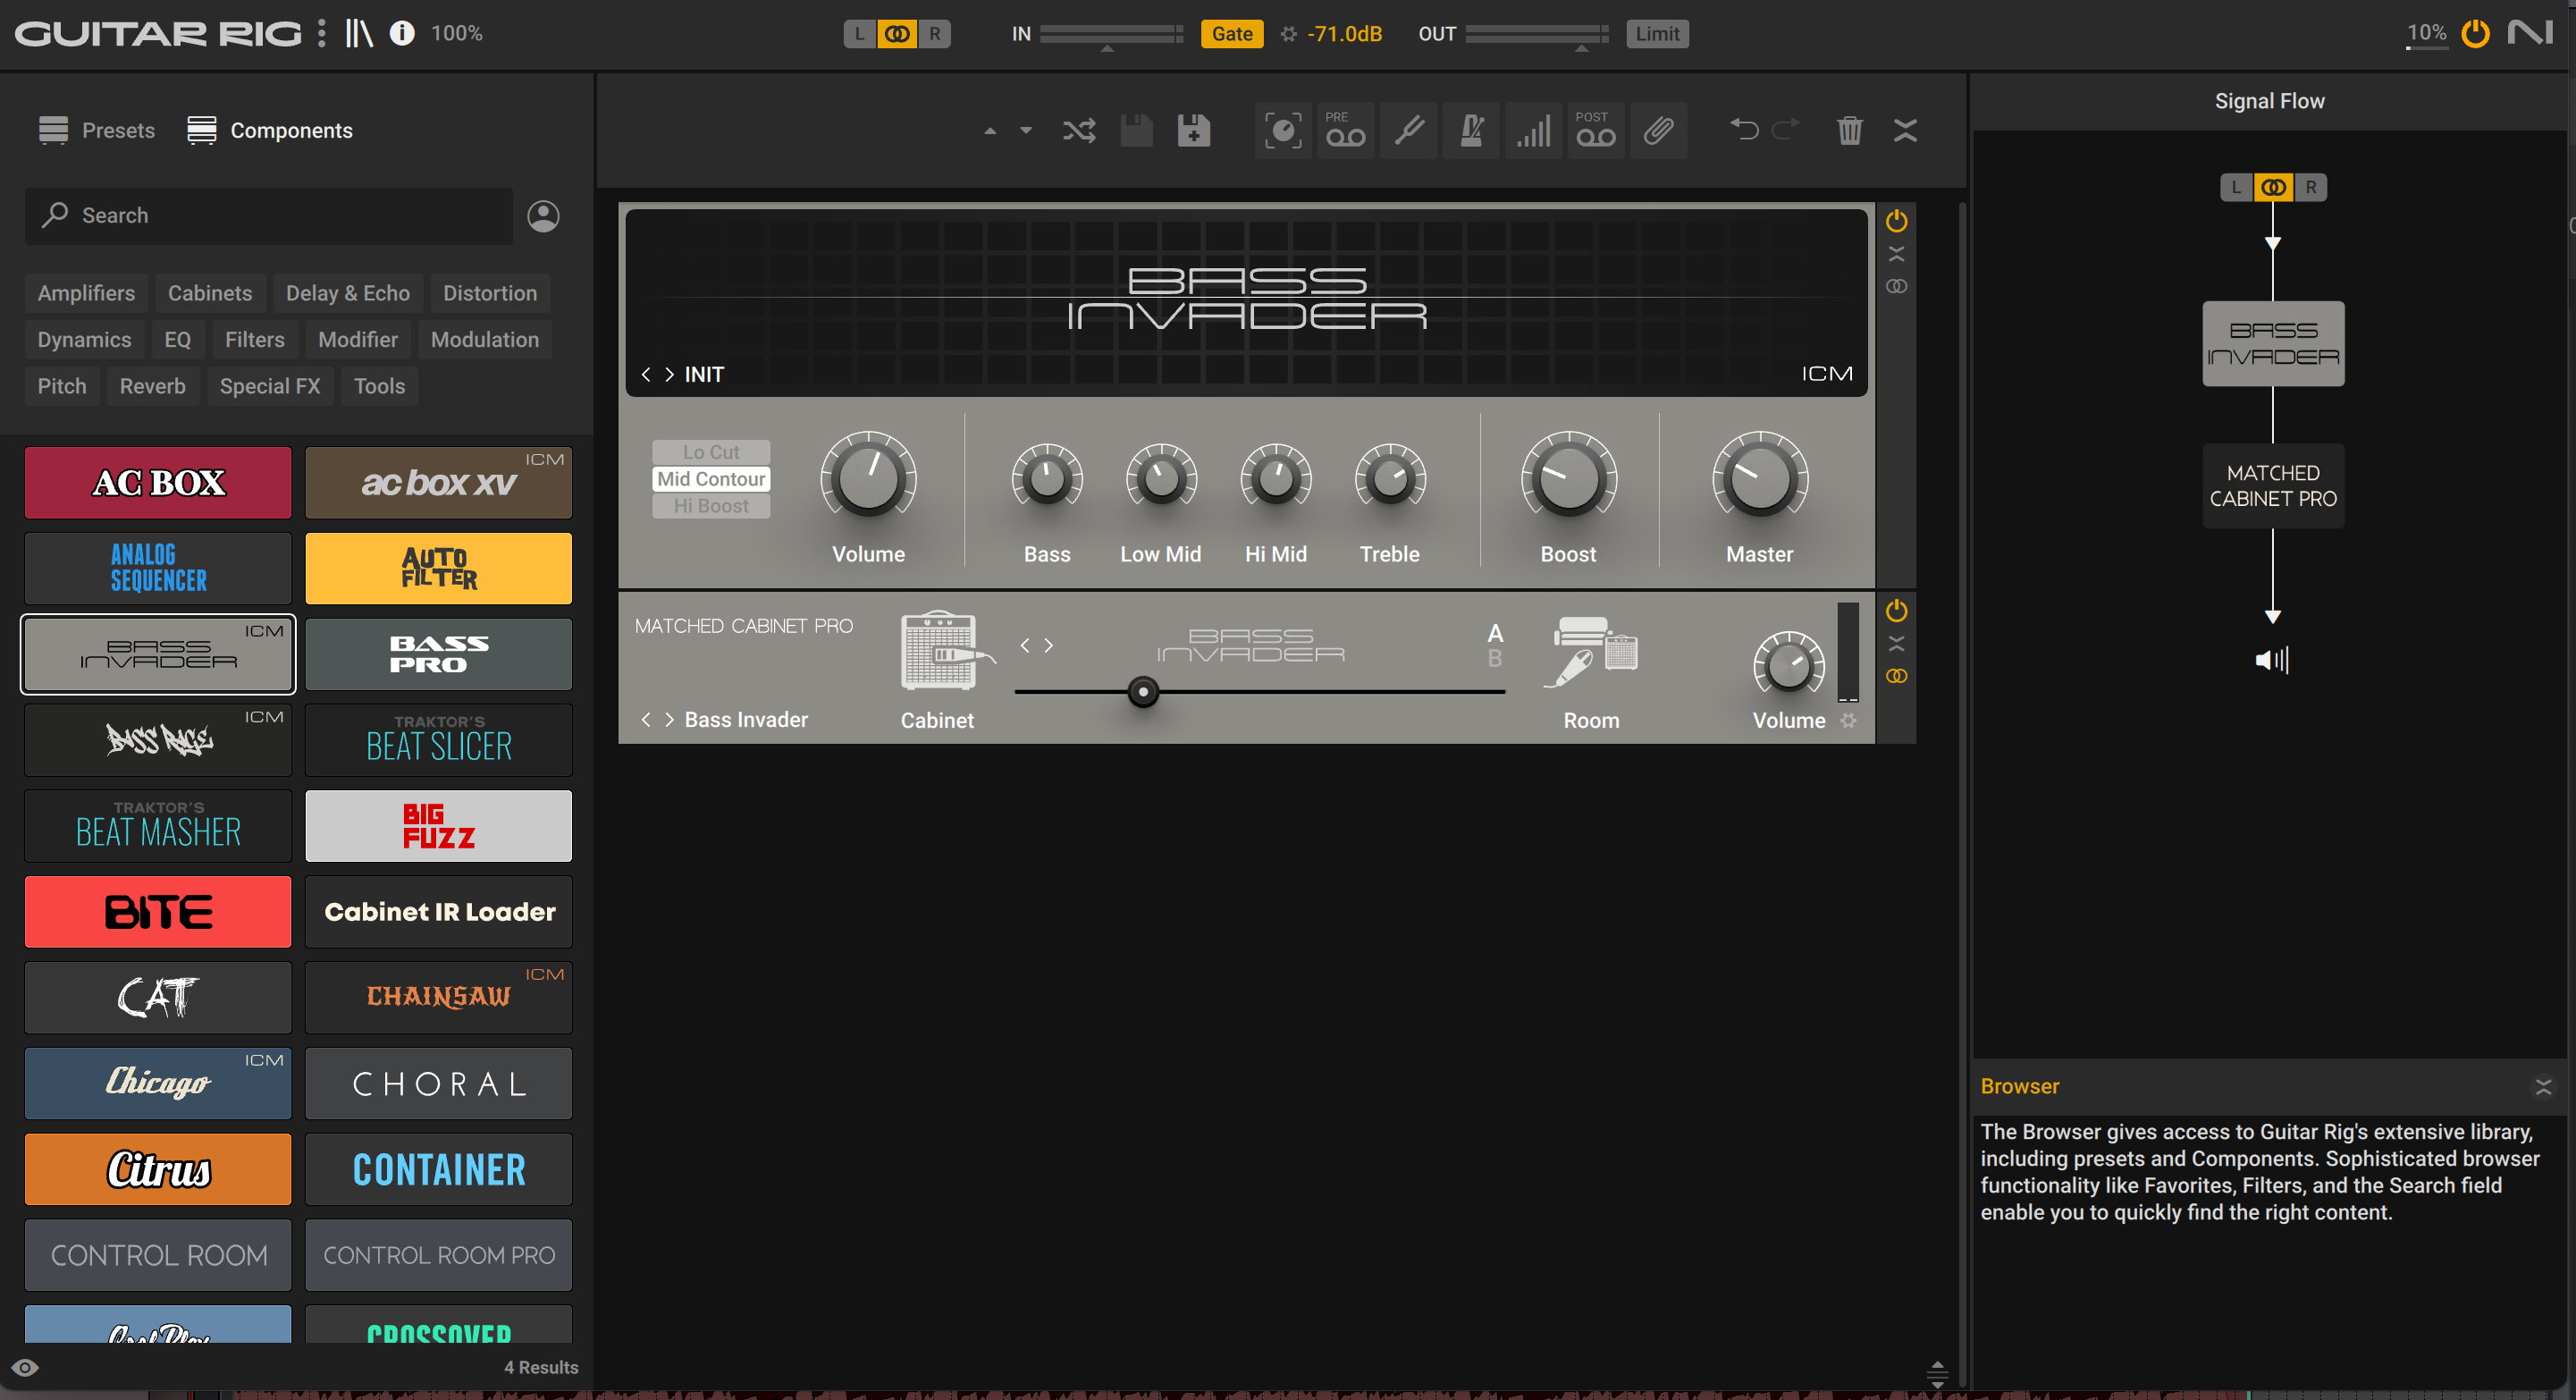
Bass Invader plugin, Guitar Rig 7 Pro
As far as I’m concerned, these are two of the best amp sims for bass—and they work very well together. Observe:
The key is to flip the phase on one of the amp sims. For whatever reason, the B-15N and this Bass Invader patch work better when you flip the polarity on one of them.
You can use these plugins to add a real-world quality to bass instruments, as well distortion or even stereo width.
Most audio engineers will tell you to keep your bass perfectly centered in mono. I say a little width is good, but you have to be careful. If you always insist on leaving your bass tracks in mono, your bass could wind up sounding dull and drab – especially in sparse arrangements.
You have to be careful, though. Too much reverberant, low-end width will muddy up the signal. In fact, I think I’m using too much of it in the above example. This can be corrected with a linear phase EQ, specifically a high-pass filter on the sides of the signal. It has to be a linear EQ to keep the phase smearing to a minimum. The results speak for themselves:
Fit your bass in the mix
To get your bass to sit just right, you need to listen to your ENTIRE MIX. You can’t do it in solo.
Every engineer has a different way of operating. I usually leave the bass in when I’m working on all my instruments. It’s a bridge from one aspect of the mix to the other. But I’m confident that you will find your own path. Checkout a number of the plugins used in this tutorial inside Music Production Suite, and happy mixing!