7 Mixing Challenges to Improve Your Skills
Here are seven different exercises and challenges to improve your mixing skills and push yourself to become a better mixing engineer.
The best way to learn a craft is by doing it. But maybe you don’t have the opportunity to just “do it.” Maybe you’ve got a bit of downtime between mixes. Or maybe you just lost a project to another engineer, and you want to get better as quickly as possible.
Well, these mixing challenges should get you on your way. You might not have thought you could practice mixing as you would an instrument, but you can. All you need is a DAW, a multitrack session (any will do—including multitracks found on many forums), and time.
Read on for some interesting practice routines!
1. The speed run mixing challenge
Take a multitrack at your disposal and start from scratch. Set a timer for faster than it normally takes you to mix. If it takes you days and days to finish a mix, set the timer for two hours. If it takes you one day, shoot for an hour and a half for your first round of speed mixes, and then, as you return to this exercise, bring the timer down to an hour.

Timed exercises are a great way to push your skills to the next level.
Now, do everything you can to achieve a finished mix within the time you’ve allotted for yourself—and by all means, use every trick at your disposal. Do you already have a mixing template in your DAW? Go ahead and load it up. Do you have iZotope’s Assistive Audio Technologies found in Nectar, Neutron, and Ozone? Go ahead and play with those too.
You’ll find you don’t have a lot of time, so the challenge forces you to work as quickly as you can. When the timer beeps, you’re done—you have to walk away from the mix.
The next day, go back to the same multitrack and repeat the challenge. Repeat the challenge with the same multitrack for three to five days. Then, give your ears a week-long break from this mix, which will help you reset your perspective (in this time, you can break out another multitrack for a different challenge if you want to stay busy).
When it comes time to judge the mix, don’t think “which mix is better?” Instead, focus on the pros and cons of each mix. Make a detailed list of each mix’s virtues and drawbacks. If you note any problems common across the mixes, that’s good, for you’ve found your blind-spot—your area that needs improvement. Now you’re closer to hearing whether an area of your room needs further treatment, or if you need to work on ear training exercises to improve frequency identification.
If possible, grab some blind A/B comparison software so you’re not influenced by the mix’s name—maybe your second mix was the best, rather than the last one. It’s important to note whether your skills grew from the beginning to the end of the challenge, but only after you make the fair, accurate, blind assessment of each mix’s strengths and weaknesses. It’s far more useful to note the mixes’ commonalities and differences.
This challenge should help with two things: working faster, and spotting/correcting issues with your mixing practice as a whole.
2. The single plug-in mixing challenge
Anytime I have to demo any new plug-in, be it an equalizer, a dynamics processor, a saturator, a modulator, or a reverb, this is the challenge I use. I’m always surprised by the results: not only do I learn a lot about the processor in question (making it more likely I’ll actually use it), I learn how to mix quickly and effectively.
Pick a plug-in and make it the only one you use for a mix. Almost any plug-in could work here. Neutron would make a great choice for starters, as it’s a whole channel strip—and yes, this counts. But I’ve also done this challenge using Exponential Audio reverbs when I first got my hands on them, and the results were no less fruitful, as even an Exponential reverb can give you tone shaping, dynamics control, and saturation.
During this exercise, all your non-plugin tools are still available to you. Pan, gain-stage, and automate with utter abandon. Even flip the phase of elements—that’s fine too. Crazy ideas you never would’ve considered before are at your disposal. Are you working with a single channel-strip plug-in, devoid of delay? Feel free to mult tracks and reposition the regions for discrete echoes. Flanging and haas-effect delays can also be accomplished through multing/dragging regions around.
When you limit yourself to one tool per track, you make the most out of that tool. Doing so helps develop your ear, your speed, and your ability to solve problems. Not only do you gain mastery of a plug-in for later use, you learn to become more resourceful in your mixing overall, and force your brain to think more creatively in the process.
3. The subtractive mixing challenge
In mixing, we have certain basic tools: equalizers, compressors, delays, reverbs, saturators, etc. So our challenge here is simple: we take one multitrack and mix it multiple times. Each time we mix it, we take away a whole classification of tools.
No compression mix
A mix without compression is the easiest to grasp: you learn to reign in dynamics through automation, saturation, and frequency manipulation (how will a kick be too loud if you kneecap its fundamental?).
No EQ mix
A mix without equalization is harder to conceive, though there are ways around it: at lower levels we hear less bass and less treble, and you can use this to your advantage when mixing without EQ.
Furthermore, we said, “no EQ”—not, “no multiband compression.” Go ahead and blow right past all the “rules” of multiband for this exercise; you’ll learn to hear the breaking point of the process (the moment where a sound is decimated along its crossover points), as well as some unconventional use cases for a very powerful tool.

Breaking the “rules” of multiband compression with Ozone 9
4. The production mixing challenge
The exercise offered here is simple, but not easy: take one of your favorite songs and sample the heck out of it, either with your DAW’s sampler or third-party software. If you’ve never sampled a song before—or don't know what I’m on about—here’s the lowdown:
Import a song into your DAW. If there’s a drum break anywhere, see if you can isolate a region with just a kick, just a snare, just a high-hat hit, or a drum fill. If you like the way a certain chord sounds as it passes by, isolate that progression into its own region. Export these regions as individual .WAV files and load them up in your DAW’s sampler.
Now, program an eight-bar loop out of the samples. Something with drum, bass, chordal, pad, and lead elements. If none of your samples give you something to work with in a certain arena, load them up in a synth like Iris and transform them into the elements you want to hear (this article will show you how). When you’re done, you will have an arrangement that you can now mix, with all the tools at your disposal, to sound as good as possible.
The result
This exercise looks more production-oriented, but it’s geared toward mixing engineers for one simple reason: when you build a track with limited resources, you’re forced to learn the ins and outs of arrangement. More than learning these ins and outs, you have to experience them, which achieves a better, more holistic form of understanding.
This exercise forces you to learn musicality on a mixing level, as it requires no real musical training, but necessitates a good deal of production work on your part. As a plus, you now have more multitracks to practice with!
5. Push against the digital ceiling
There are two rules for this challenge: Mix as close to the digital ceiling as you possibly can without clipping, and do not use compression or limiting on any instrument or stereo bus.
Basically, you’ll find you’re mixing somewhere around -14 to -12 LU (short term), but you’re never, ever hitting 0 dB on the main output fader in your DAW. Furthermore, you have nothing reigning in your transients in a global way, meaning your mix is far more likely to reach past the digital ceiling and clip the output. There is no safety net, and it feels really challenging at first.
It’s also quite rewarding. The challenge teaches you a whole heck of a lot about proper gain-staging, mix balance, and automation—namely for preserving dynamics while protecting your mix against clipping distortion.
The process
As you go back over a section that continuously peaks into the red, trying to identify the offending element, you learn about which sounds creep past acceptability.
Say it’s a chorus, and a certain phrase keeps peaking the meter. You edge that phrase down lower and lower with volume automation, but now it’s lost its impact—and maybe the mix is still clipping!
Presently, you begin to suspect something else: maybe it’s the kick drum at this split second giving us clipping; perhaps it’s an uneven bass note. You identify the offender, bring it down and realize you can actually push your vocal a little bit louder without clipping.
As a result, you start to understand what elements are more likely to clip in various situations. You develop skills for ameliorating these issues that you can put into your mixing routine.
The result
This challenge also allows you to safely push the boundaries of what common sense deems acceptable: nowhere else will you hear me tell you to make a mix as loud as you can; the instinct, which feels natural to the novice, is often counterproductive to a good mix.
Here we flip the instinct on its head and tell you to go for it. You want to make things loud? Let’s see if you can, without any “cheats,” and with a careful eye on the meters.
6. Change up your bussing challenge
This challenge is all about changing things up: if you always mix through a plug-in chain on your stereo bus, go bone-dry instead. If you never put anything on your stereo, try mixing into a character compressor. If you avoid presets like the plague, guess what you should put on the stereo bus? That’s right, an Ozone preset.

Mixing through an Ozone 9 Preset
7. Match a mix challenge
If you scour the web, you’ll find multi-track mixes of some of your favorite songs. Some of these can be obtained legitimately, believe it or not: bands sometimes put out multitracks for public remix competitions or just because it’s fun to see what their fans will come up with.
However you obtain a multitrack doesn’t matter to me in this case (while I am not the arbiter of your morality, I do urge you to operate legally). What matters is how you use it.
In a mix session, use only the original mix as your reference. Your goal in this challenge is not to remix the song to sound better. Instead, you must mix it to sound exactly the same.
But how do you do this? Therein lies the challenge. Use the techniques found in our mixing reference tips article as a start, for they help your ear hone in on the right things to listen for.
Also, start with what you can hear—usually those are the most obvious elements: the overall level/panning balance, and the quality of certain standout instruments (the vocal, for instance). This is a great place to begin, as you don’t need to mess with much in the way of processing to get started, just the normal tools found in any DAW or mixer.
Once the static mix is accomplished, you may find you can hear the reverberation pretty clearly. Go ahead and try to match that as closely as you can with the tools you have in however manner you think the original mixer got there.
You may choose, if you like, to use a match EQ in Ozone, using the reference as a guide, to sit across your mix. Though that might turn into a crutch for this ear-training exercise. If you’re new to matching, experiment with Match EQ, but turn it off as you get more confident in your skills.
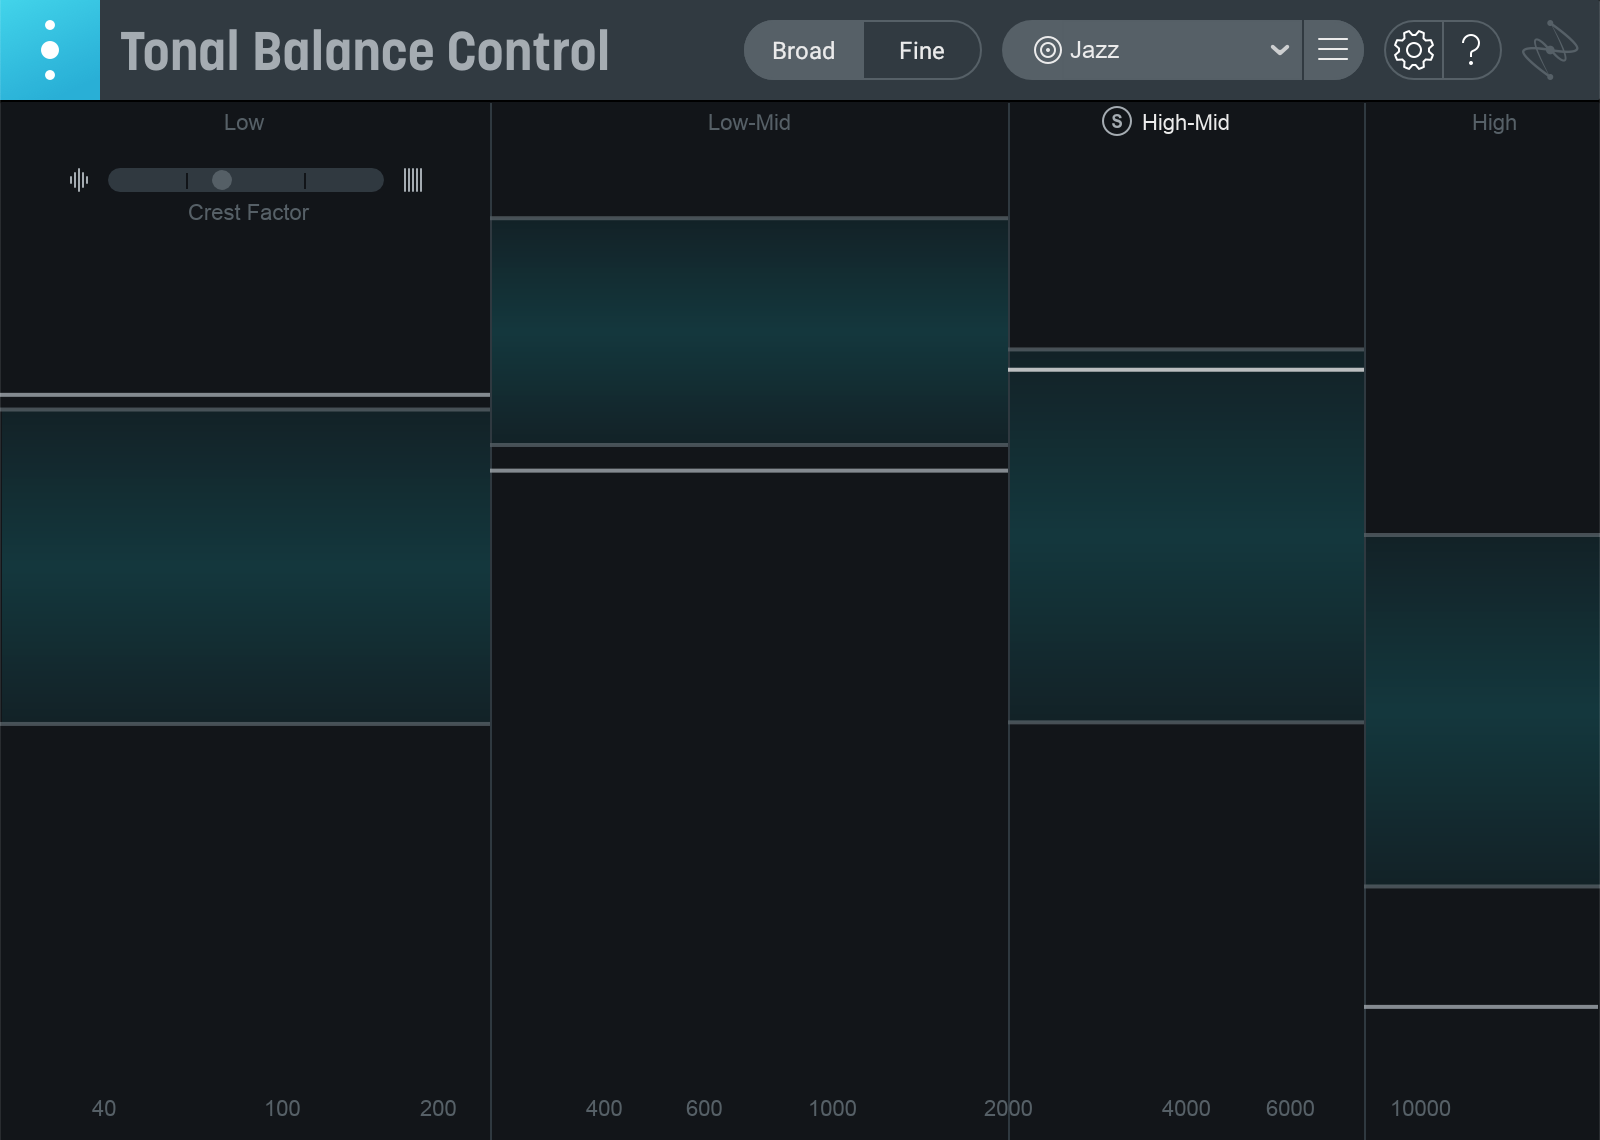
More useful, I’d say, is Tonal Balance Control, with your reference loaded up in its tonal profile. This can help you check if you’re within the correct boundaries without pushing your mix through processing.

Trying to match a custom TBC target—and failing!
At some point, you’re going to need equalization, and this is where things start to get tricky. Here I’ll offer one piece of advice: focus your listening on elements you’re not EQing as much as the ones you are. If you’re trying to get the right midrange out of a synth, focus on how it changes the timbre of the bass, the drums, the vocal, and so on. Use this focus-listening technique while comparing your mix against the reference, and you’ll find your ears will get better and better.
Unless you are exceedingly skilled—and more than a little lucky—you won’t get your mix to null perfectly. This method is about progress, not perfection: there will be a difference between your mix and the original. It’s your job, over time, to bridge this difference as much as possible.
When you think you’re finished with the mix, wait a week, and set up a blind comparison between the original and yours. If you can tell the difference, you’ve got more work to do—and that’s a good thing!
Conclusion
My last bit of advice is to consider creating your own mixing challenges based on your own ideas or points of inspiration. When mixing, I’d stumble across a process or way of thinking and remain open to the idea of turning it into an exercise. I advise you to do the same.
While reading an engineer interview, I’d find myself latching onto something they said—perhaps it was a way of dealing with delays, or some other technique, and I’d brainstorm a little challenge. Again, I advise you to do the same.
The only way forward is to keep working: your craft demands your time and attention. Let nothing get in your way.

