Unmasking your Mix with Music Production Suite 4.1
Learn how the Unmasking capabilities of Music Production Suite 4.1 can help you make smarter mix decisions for overall better productions.
This article references a previous version of Music Production Suite and Neutron. Learn about the new plug-ins included in Music Production Suite 5 Universal Edition, including 

Neutron 5
Inter-plugin Communication is iZotope technology that allows our plug-ins to interact and share valuable information with one another across a session, helping you produce, mix, and master with better results—in less time, with less effort.
Traditional plug-ins are limited by only "hearing" what’s happening on one track at a time. At iZotope, we know that many producers take a "big picture" view when thinking about their mix: such as making instruments like bass and a kick drum gel nicely, unmasking important vocal tracks from groups of instruments, or tackling mixing and mastering jobs in the same session. This is where Inter-plugin Communication can save you time and give you a better understanding of your mix as a whole.
Let's explore five ways Inter-plugin Communication can benefit your next session, using a collection of some of our latest and greatest tools from


Music Production Suite 7
1. EQ two tracks at once (with different settings) using Neutron 3
When two tracks with a similar frequency profile occur at the same time in a mix, we get something called frequency masking. Neither track is heard properly because they are both trying to fit a small space that only has room for one. This is a common occurrence with kick and bass, guitars and vocals, and leads and backgrounds.
Without years of experience, it can be a challenge to locate overlapping frequencies between two tracks and adjust them accordingly. As a result, you fall on guesswork as a process and sweep EQ bands up and down and side to side, hoping an answer will present itself. Compound this with the visual nightmare of going back and forth between two EQs, and inspiration can take a major hit.
With an instance of Neutron on each track, and by selecting the proper track in the Masking drop-down menu on the Equalizer module of one Neutron instance, you can view the frequency spectra of both tracks in a single plug-in window. Increasing the Sensitivity control will reveal any competing frequencies using the Masking Meter.
You can switch between EQs at the bottom of the Equalizer module and adjust each without switching plug-in windows. Clicking Inverse Link makes the separation easier—a cut in one EQ will create a complimentary boost in the other, independent of Q.
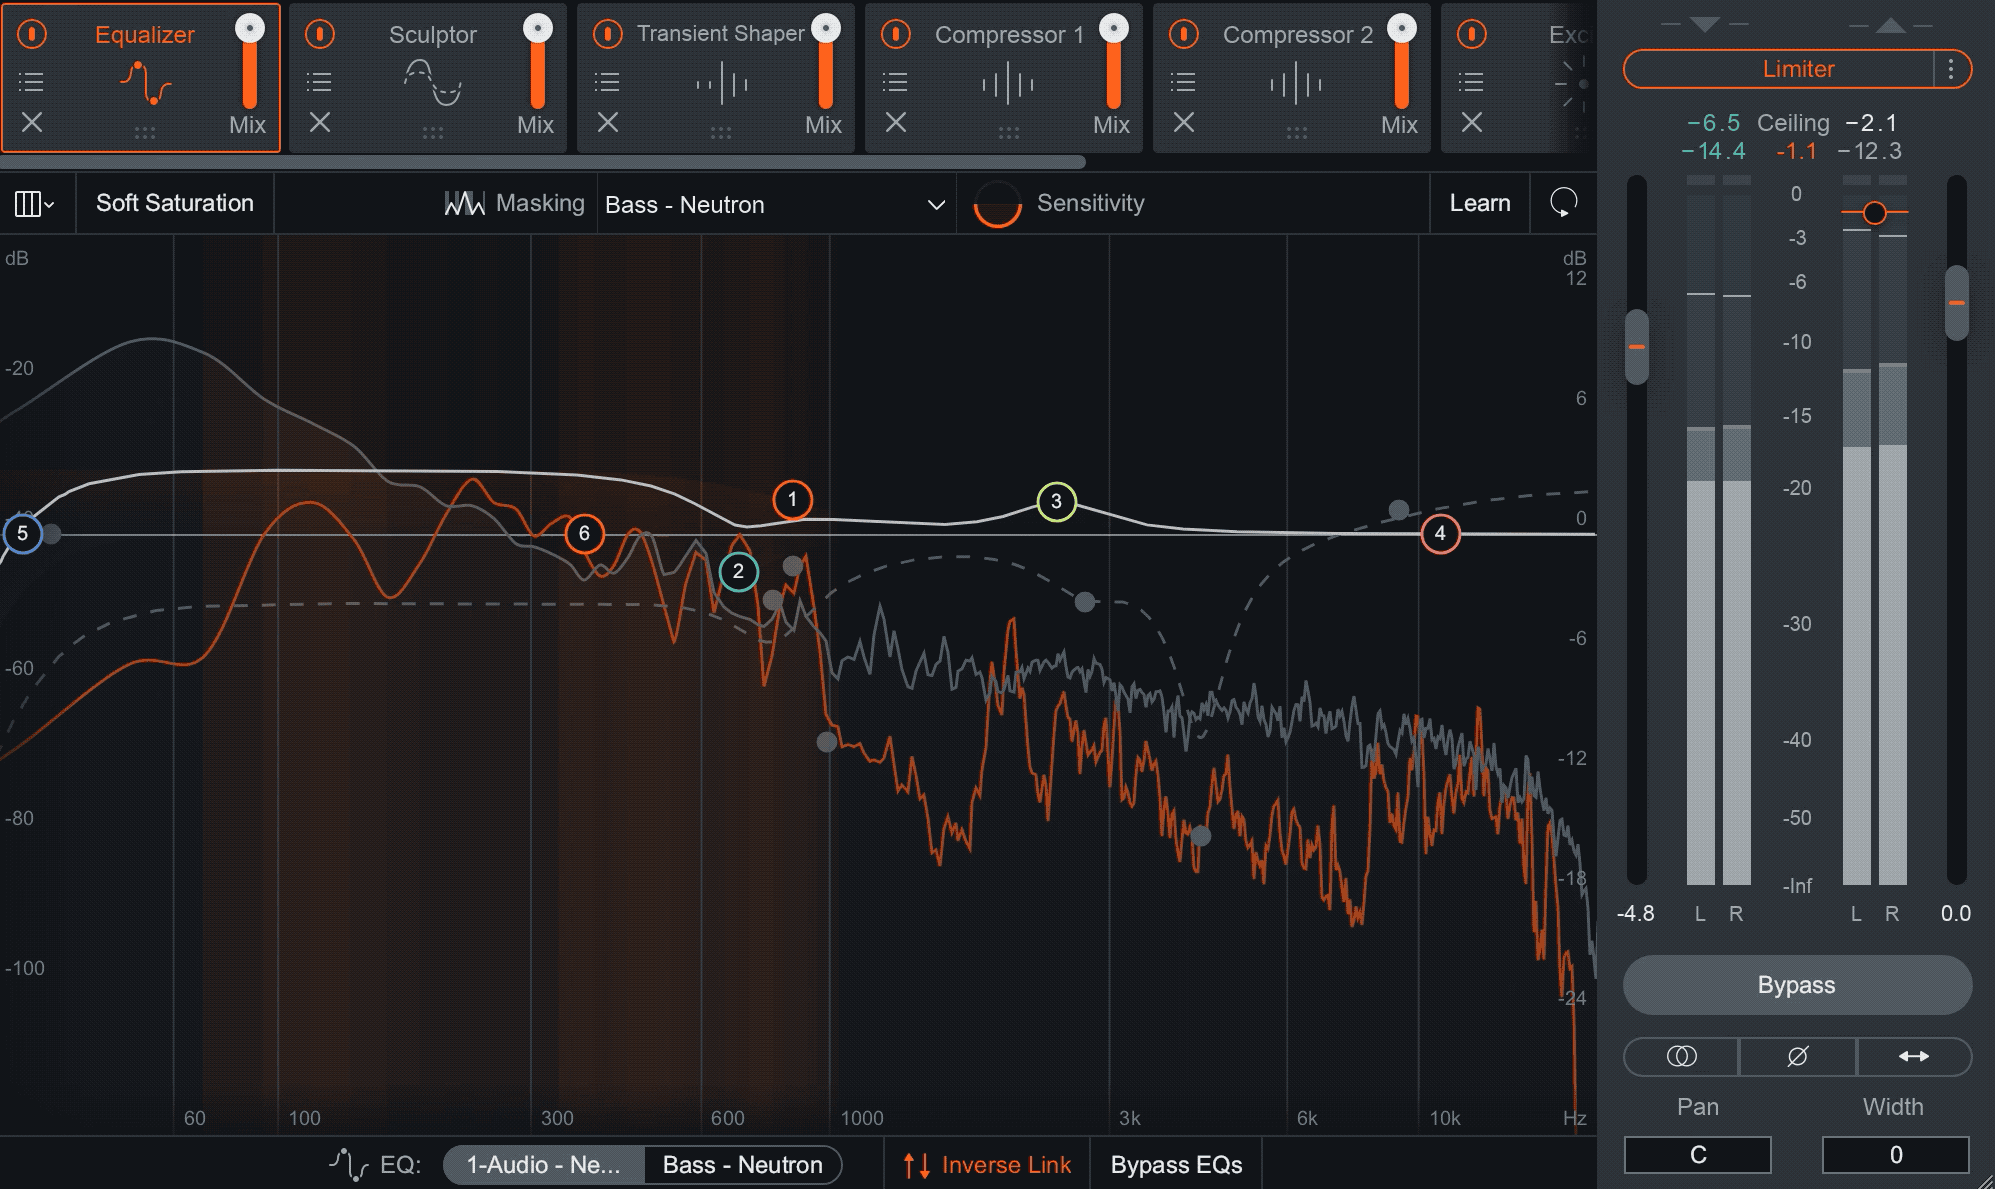
Let’s go with the classic case of kick and bass. In the image above, we're using the kick's instance of Neutron 3 to view and adjust the Neutron 3 EQ on the bass track. The intermittent orange flashes (the Masking Meter) indicate areas where frequencies overlap in the spectra, and the orange histogram lines show how often the masking occurs, so you know exactly where to focus efforts. In this case, the main issue here is between 100 Hz and 1 kHz.
2. Find and fix weak spots in a mix with Tonal Balance Control 2
To achieve a specific kick drum sound, shape vocal timbre, or emulate the sound of a vintage synth, it is common to keep a few reference songs on hand as a guide toward the desired results. While this method of comparison can be helpful to direct focus, there is a fine line before it breeds discontent, which is regularly counterproductive.


Tonal Balance Control 2
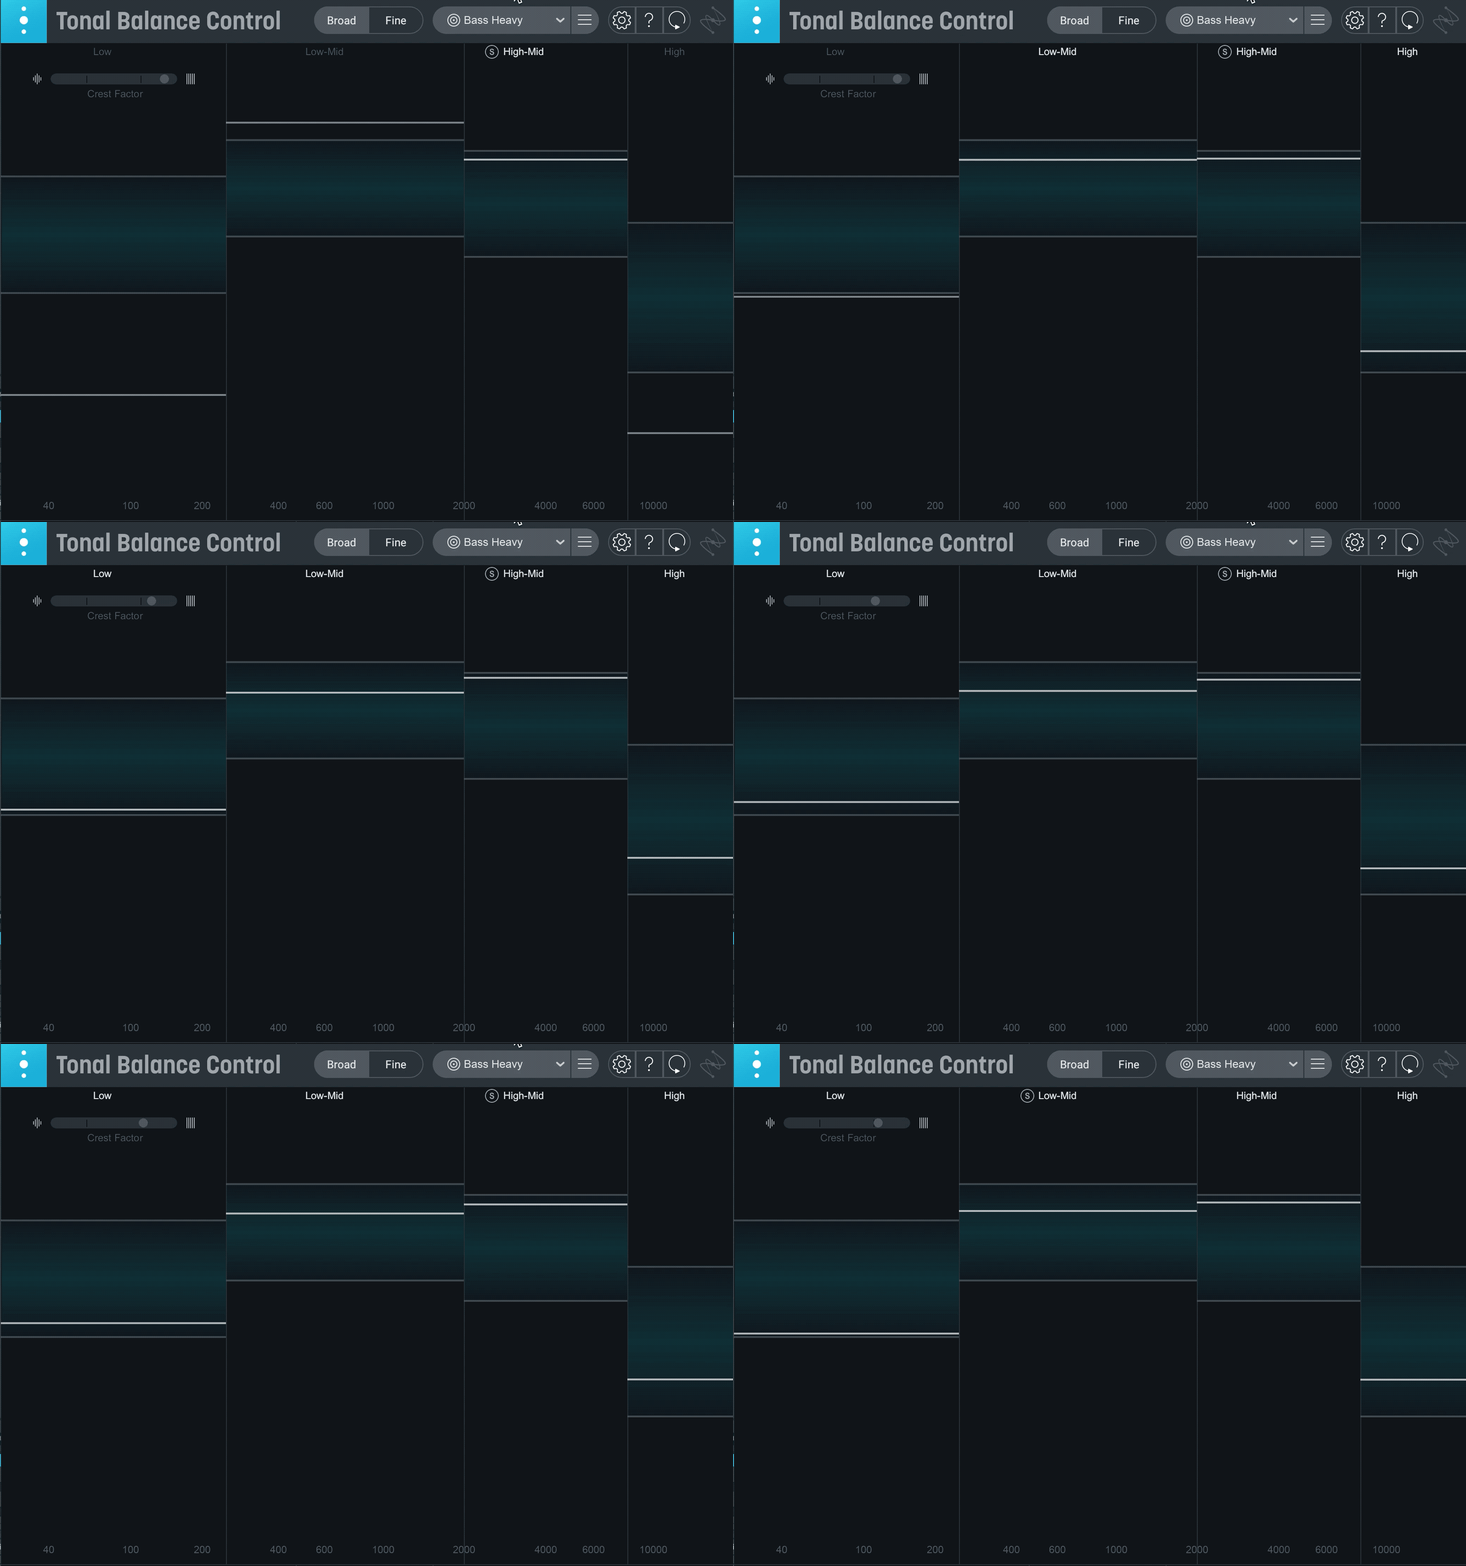
Tonal balance has to do with the way an entire mix works together as a listening experience, as opposed to what one track sounds like on its own. When a song has an even frequency distribution, you never feel the need to turn up monitors to better hear certain aspects, or conversely, turn things don’t due to overpowering elements that distract. Every instrument has a dedicated space in the frequency spectrum and the mix translates well to other playback environments.
The white lines indicate frequency distribution. Over the course of a song, they will move between and even outside of the blue bars, which represent the bounds of typical frequency ranges in a target. The more balanced energy is from low to high, the closer the white lines will be to the center of the blue bars. This visual lets you know where tonal balance issues lie in order to make quicker and more informed EQ decisions. This is particularly helpful for producers who work in rooms with poor acoustics, have hyped monitors, or rely entirely on headphones.
Most tonal balance issues stem from a single wonky track or instrument group. To reflect this, you can pull up the EQ for each Neutron in your session within the Tonal Balance Control window. Instead of going back and forth between individual tracks and the master channel where Tonal Balance is located, you are able to see the big picture of your mix and adjust the details at the same time.
The Inter-plugin Communication between Tonal Balance Control and Neutron allows you to easily get a sense of what’s dragging down your mix and resolve it. If a white line goes beyond a target frequency range or gets close to it, this is a clear sign to dial up the related instruments and change their energy levels accordingly.
3. Organize backgrounds around a lead vocal with Visual Mixer


Visual Mixer
In a given pop or rap session, it's not uncommon to have backgrounds, harmonies, and ad-libs active at the same time to support a lead. Getting these parts to complement one another can be tricky, and going track-by-track inching digital knobs doesn’t exactly make the job any more exciting. Using Visual Mixer to make these judgments feels a lot more engaging, almost like sound design. From a single window, you can visualize each instance of


Neoverb


Neutron


Nectar 3 Plus


VocalSynth 2


Stutter Edit 2


Relay
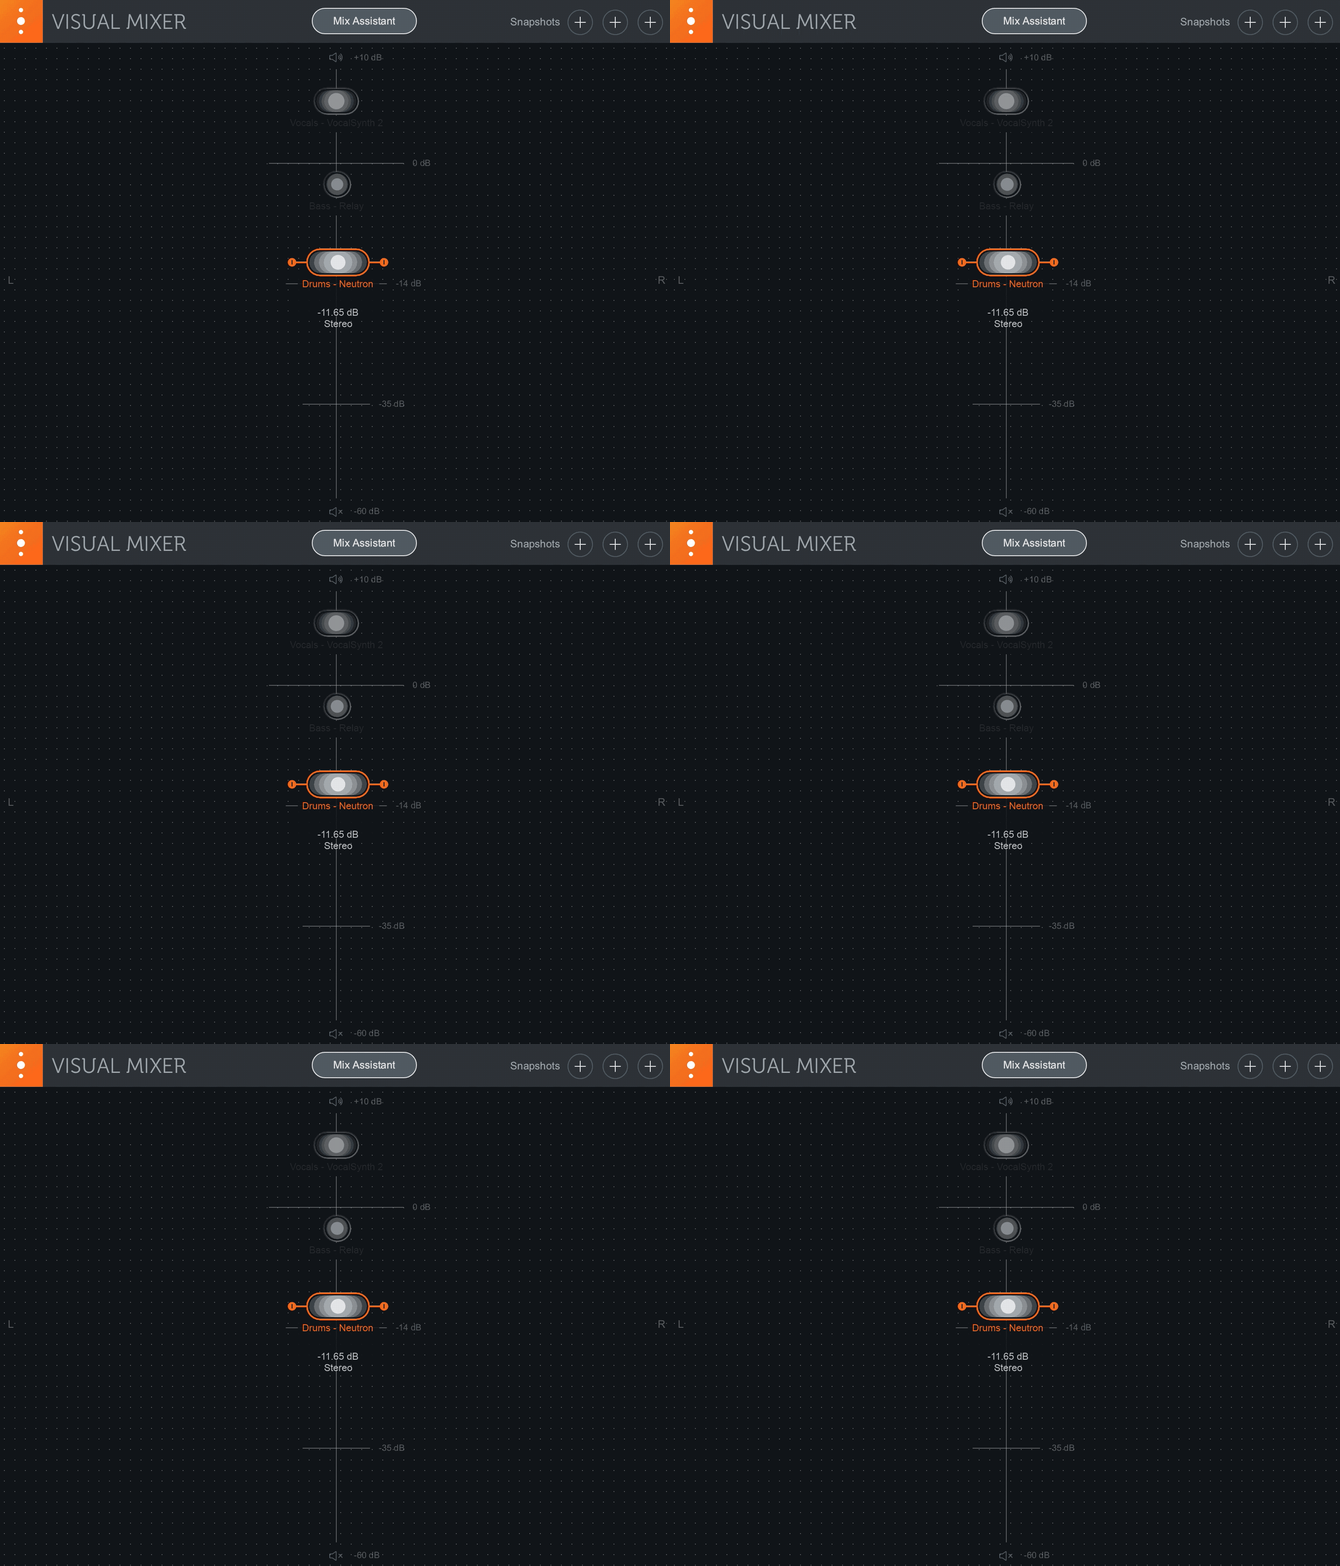
Once you’re confident that each track in your vocal mix sounds good on its own, open up Visual Mixer and start dragging around nodes to find best settings. Vertical moves adjust gain according to the Visual Mixer dB meter, and horizontal moves determine position within the stereo field. The width of each vocal can be increased and decreased from the handles on either side of each corresponding node.
While your ears will ultimately make the final decisions, the controls in Visual Mixer make it fun to order the importance of individual vocal tracks in a mix. Forget faders and knobs and simply follow your audio intuition.
4. Audition multiple mix arrangements with Visual Mixer
When is a song considered done? This question bugs producers and engineers of all experience levels. Without the physical constraints of the analog world, it's surprisingly hard to impose limits on musical exploration and just finish a song. Our tendency to overthink decisions at this final stage is further aggravated the mental and physical strain of long studio hours.
While wrapping up the arrangement of a song, it can be helpful to use the Snapshot function in


Visual Mixer
The same rules apply: all tracks with Inter-plugin Communication can be seen and adjusted within Visual Mixer.
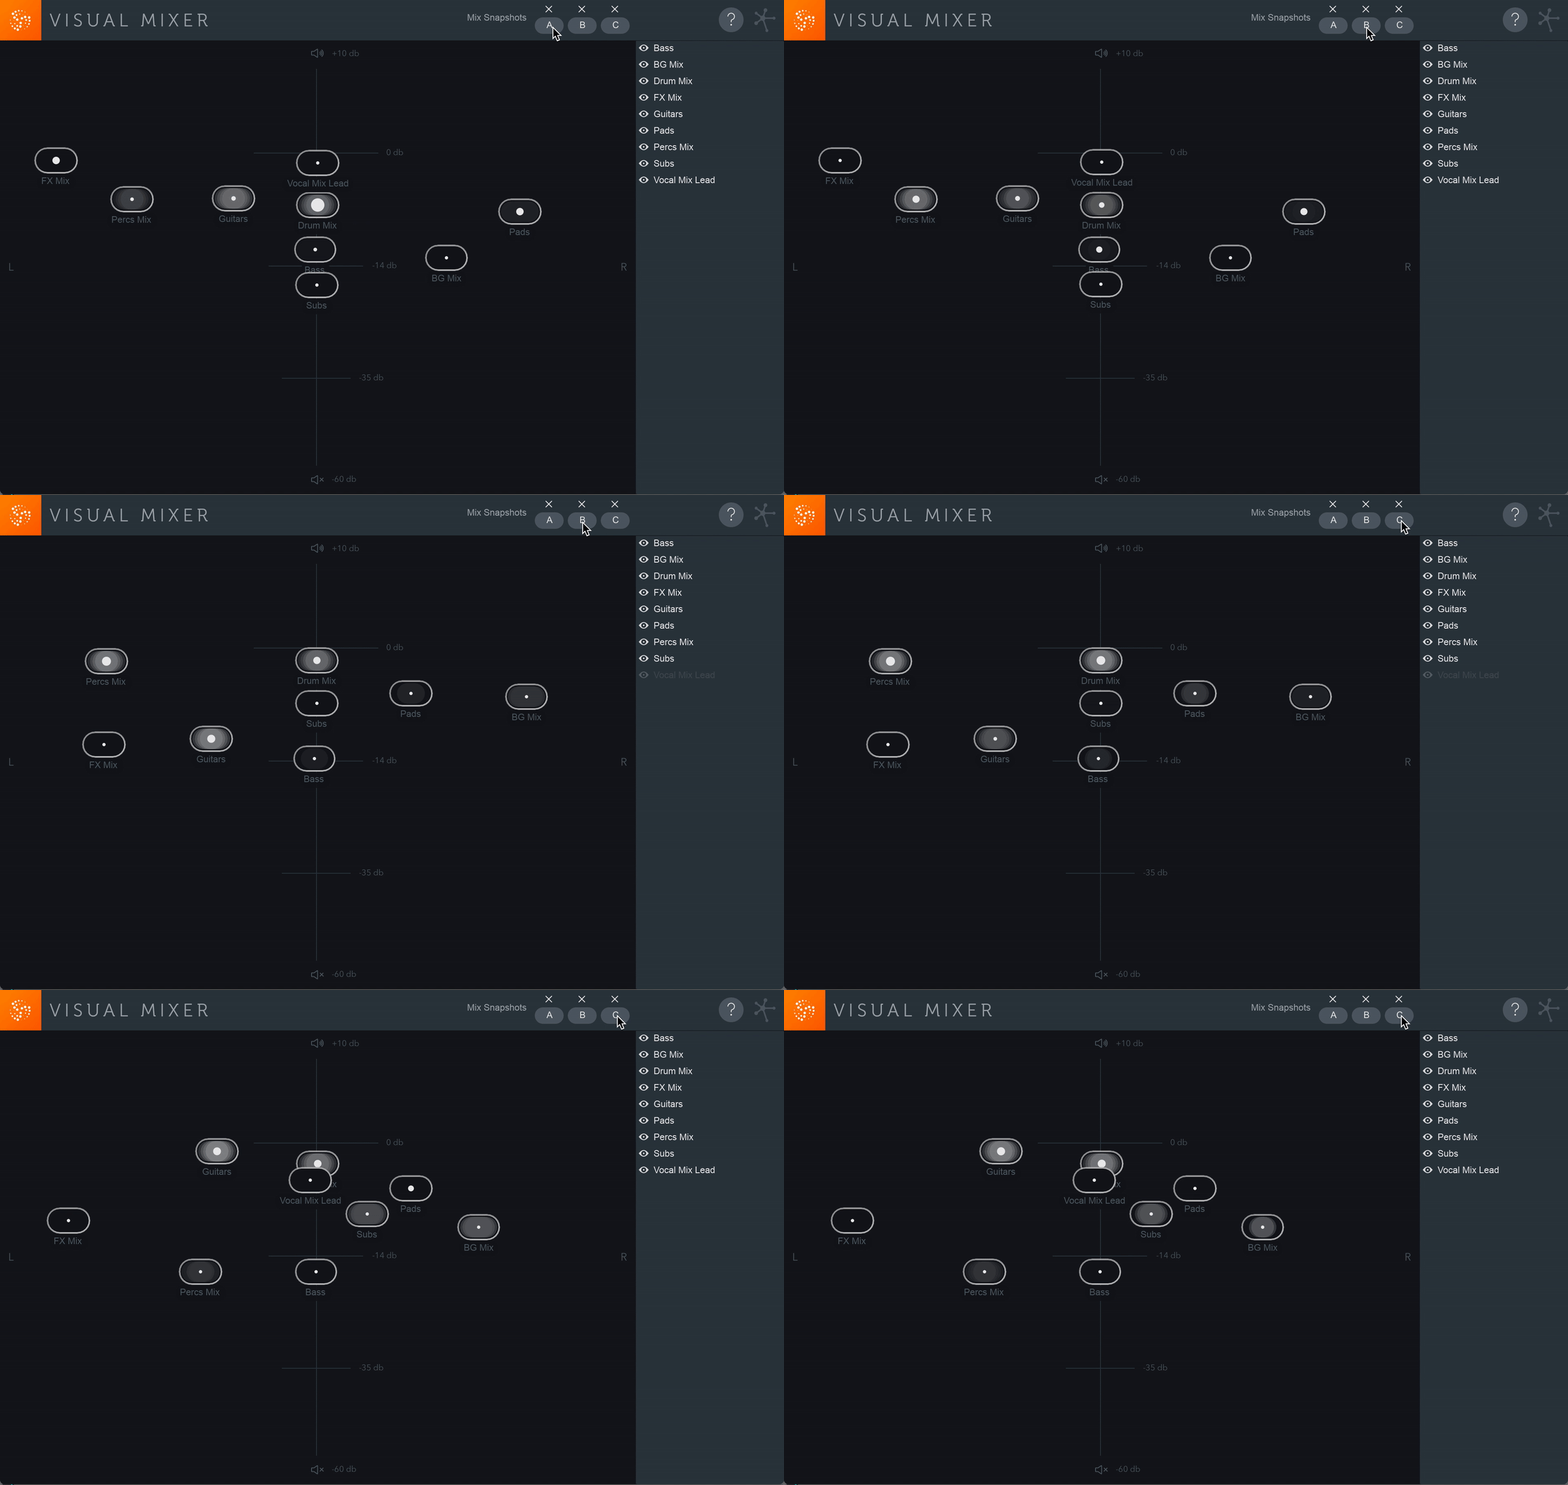
After pouring lots of time into DAW-centric work, working in this visual format is more pleasing is than turning pan dials, moving tracks levels up and down, and sweeping around with EQs. It allows you to zoom out and get a sense of the bigger picture without losing focus on the small stuff.
5. Get a 3D view of your mix with Insight 2


Insight 2
By placing a Relay plug-in on important mix elements in a session, you can beam their frequency profiles into Insight 2’s unique real-time 3D spectrogram to create a detailed topographical map of the session audio. The colourful visual spread is a great way to see if certain mix aspects are over- or underrepresented in your session.
The takeaways
So much about music making relies on good communication. We sit down with bandmates to discuss what direction to take on the next album. We explain to producers what emotions should be felt when the chorus arrives. We use client notes and feedback to guide the mix.
Having one plug-in talk to another allows for more intuitive workflow and precision in a session. I think the four combinations in this article are representative of the benefits of Inter-Plugin Communication for audio production and audio mixing, but there are still more to be discovered. They have sped up my workflow and made tedious tasks like setting audio level and sweeping EQ manage to feel new.
