10 Music Production Tips for Winning the Battle Against CPU Overload
Try these ten techniques on your tracks and plug-ins to manage your system resources and make sure your sessions are frustration free.
DAWs are astounding machines. They provide us with unbelievable power and flexibility for composing, recording, editing, mixing, and mastering, and they serve and spark our creativity. DAW life really is remarkable, until…it happens. Yes, it: the dreaded curse of CPU overload.
You know the pain and frustration the curse brings. Sessions can be sailing right along—you’re adding tracks and plug-ins with not a problem in sight—then out of nowhere, the unforgiving iceberg of reality cracks the hull of your creative vessel and leaves you stranded. Curse you, CPU overload!
When this happens, your ability to be productive is impeded, and your desire to create is destroyed. Plus, it’s a real vibe killer when you have clients in the room. Precious session time is easily burned in the process of trying to find the culprit.
The most likely suspects are plug-ins, other open programs, high track counts, and automation. Since there are many variables even in each of those areas, it isn’t safe to assume that one is always going to tax the CPU more than another. Sometimes, a plug-in or process with a moderate average CPU load will induce random spikes in CPU activity, which although brief, may result in an error message. It sure would be helpful if you could see the CPU load...
How to View CPU Usage
Seeing the CPU load helps you figure out what is taxing the CPU the most and determine if you’re getting close to the “danger zone.” It’s possible to see CPU usage at the operating system level and at the application level (within your DAW). Let's see what the process looks like on a Mac.
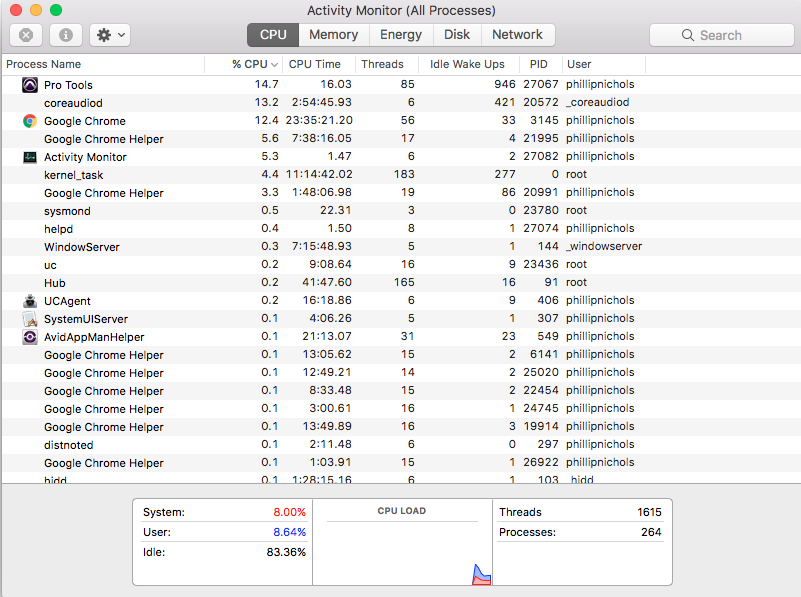
Mac: In Finder, click on the Go menu, then select Utilities. From there, open the Activity Monitor. The CPU tab shows the system and per-process usage.
Now for Windows users:
- Windows: Press Ctrl+Alt+Delete, then select the Task Manager. The overall CPU usage can be seen in the Performance tab and the per-process usage in the Processes tab.
And for specific DAWS:
- Your DAW: There isn’t one universal location for displaying CPU activity in DAWs. For example, in Pro Tools, it is the System Usage window found in the Window menu. In Logic Pro X, you access it via the Customized Toolbar. In Ableton Live, it’s shown in the Control Bar. There are too many to cover, so you may have to refer to a manual or search the Web to find out if your DAW has a CPU meter.
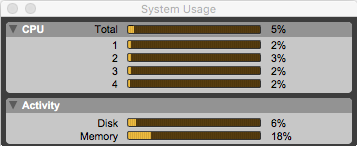
Pro Tools System Usage Menu
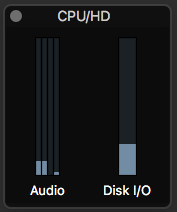
Logic CPU Meters
Of course, seeing the CPU activity is helpful, but it ultimately does you no good unless you can change it.
How to fight CPU overload
Imagine seeing the messages below pop up on your screen during playback. What are you going to do? Install a faster CPU and add more RAM? Go buy a better computer? I think not. That would be both expensive and time-consuming.
Assuming that upgrading your computer is not an option, here are ten methods you can employ to combat draining your system resources.
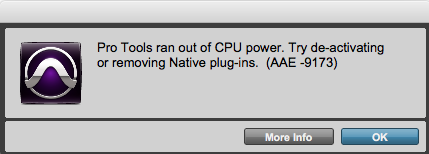
Out of CPU power
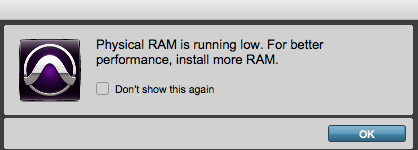
Out of RAM
1. Quit non-vital programs and processes
Other applications, including non-audio programs, can use precious resources and leave less power for your DAW and plug-ins. Trust nothing and suspect everything! A web browser with 15 tabs open can be a serious resource hog. Leaving Logic Pro “chillin” in the background while you work in Ableton Live is a serious party foul.
So, quit programs that you don’t need to use. When I say quit, I mean QUIT; I don’t mean hide or close their windows. An easy way to see if you’re guilty of using apps unnecessarily is to pull up your operating system’s application switcher (Command + Tab on Mac, Alt + Tab on Windows). If yours looks anything like the one below, you better start quitting.
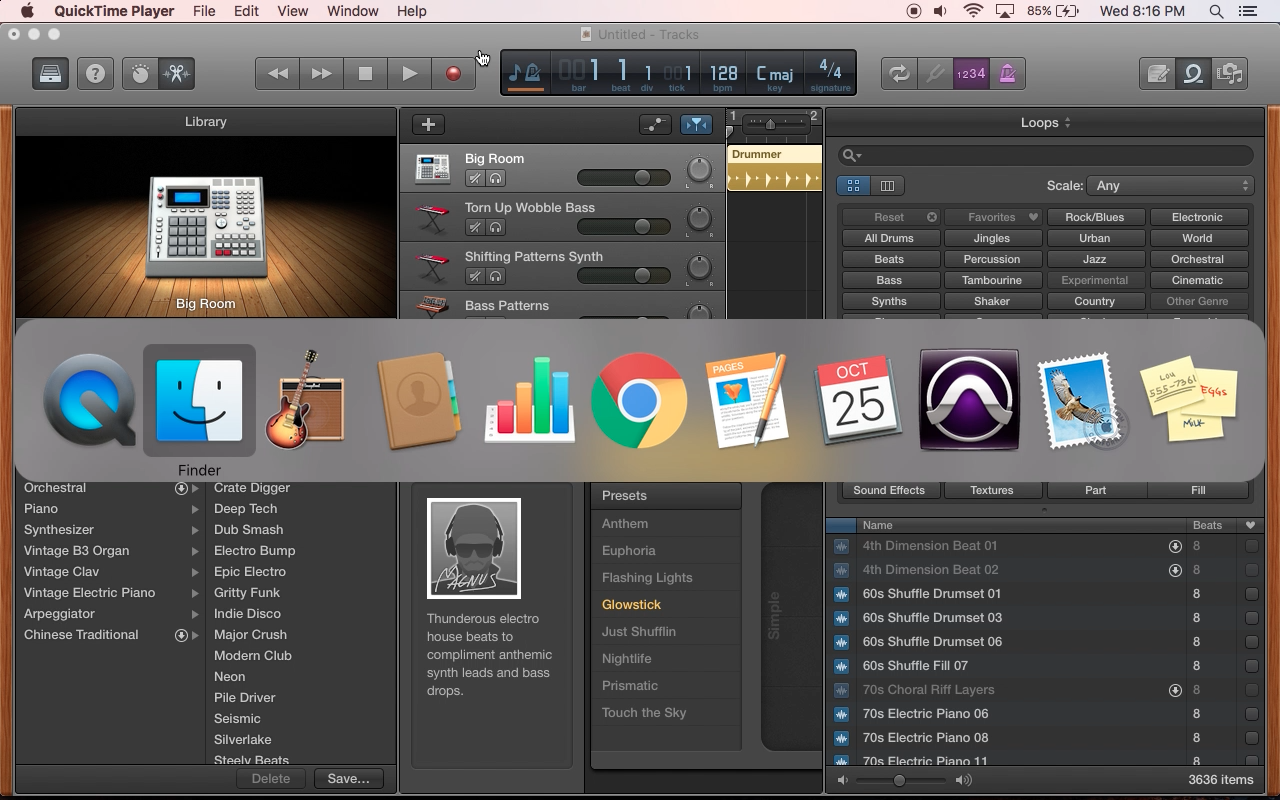
App switcher on MAC
2. Adjust CPU-Related settings inside the DAW
Although it varies from DAW to DAW, most audio programs have a menu in which you can change settings that affect the application’s use of CPU power and RAM. Referring to the images below, notice that the Pro Tools Playback Engine and the Logic Pro Audio Preferences each have a different set of choices. Look for buffer, processor, and cache options in your DAW.
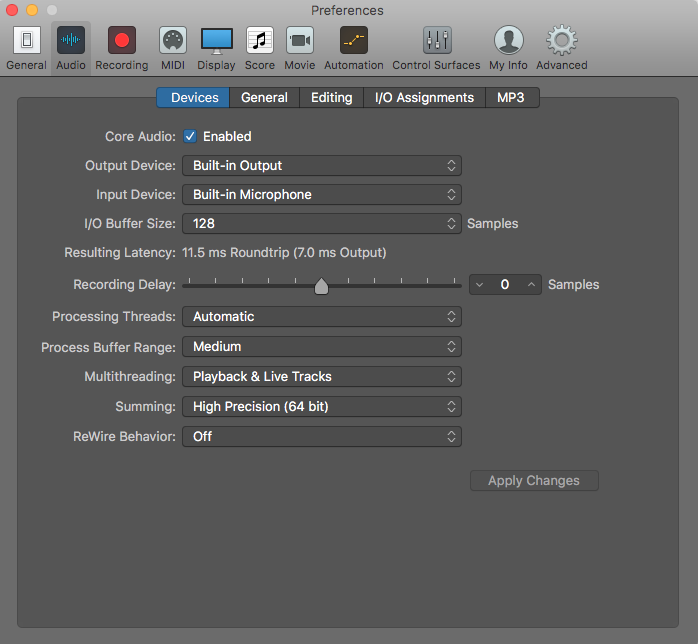
Logic Audio Preferences
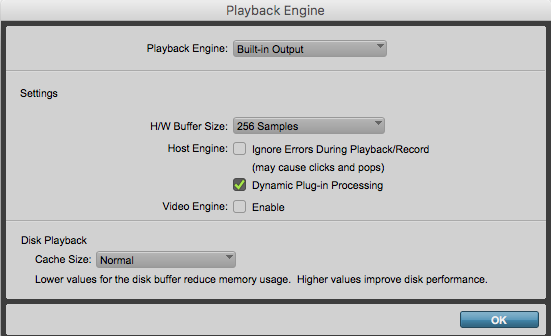
Logic Audio Preferences
Generally, a larger buffer will allow you to run more plug-ins and tracks, but at the expense of higher latency. Should you worry about latency? When you’re tracking and/or using virtual instruments, yes. However, in a typical DAW-based mix, it shouldn’t be a problem as long as your DAW’s delay compensation can handle it and you aren’t syncing to video.
In theory, higher processor allocation settings are good because they allow your DAW to access more CPU power. Yes, there are exceptions, such as when you need to reserve power for another open program.
Cache options often deal with RAM access. Be careful with these! A disk cache would use more RAM for playback of audio files, but leave less RAM for plug-ins. A plug-in streaming cache might reserve more RAM for sample loading in plug-ins, but leave less RAM for video handling.
3. Adjust CPU-related settings inside plug-ins
Some plug-ins have selectable modes that simultaneously impact CPU usage and audio quality. For example, the Equalizer in iZotope’s


Ozone Advanced
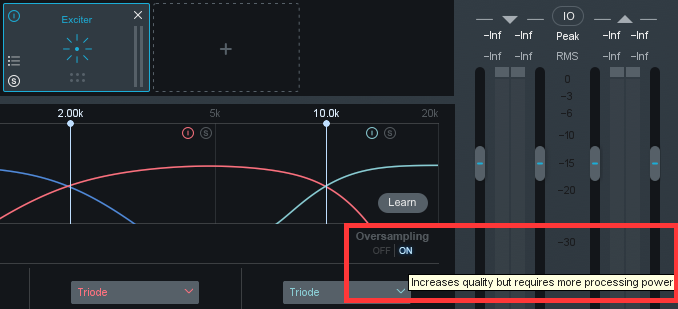
Ozone Settings
The Limiter in iZotope’s


Neutron
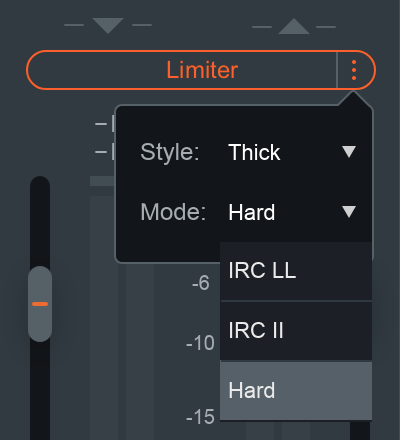
Neutron 3 Limiter settings
4. Deactivate (not bypass) unneeded tracks and plug-ins
If there are tracks that are not being used in your mix, don’t fall prey to the tendency to simply mute and move on. A muted track is still active and will take system resources. If possible, deactivate unneeded tracks. A similar concept applies to plug-ins. Picture putting four plug-ins on one track, then later deciding that you only need two of them. In many cases, bypassing the plug-ins won’t free up CPU power, but making them inactive or removing them will.
5. Choose plug-in elements wisely
Some plug-ins, such as Neutron and Ozone, comprise multiple modules that can be turned on or off within the plug-in. Bypassing the modules that you don’t need will save CPU power. The first image below shows a Neutron module chain with all loaded modules on. The next image shows the same plug-in with unused modules off, resulting in lowered CPU usage.
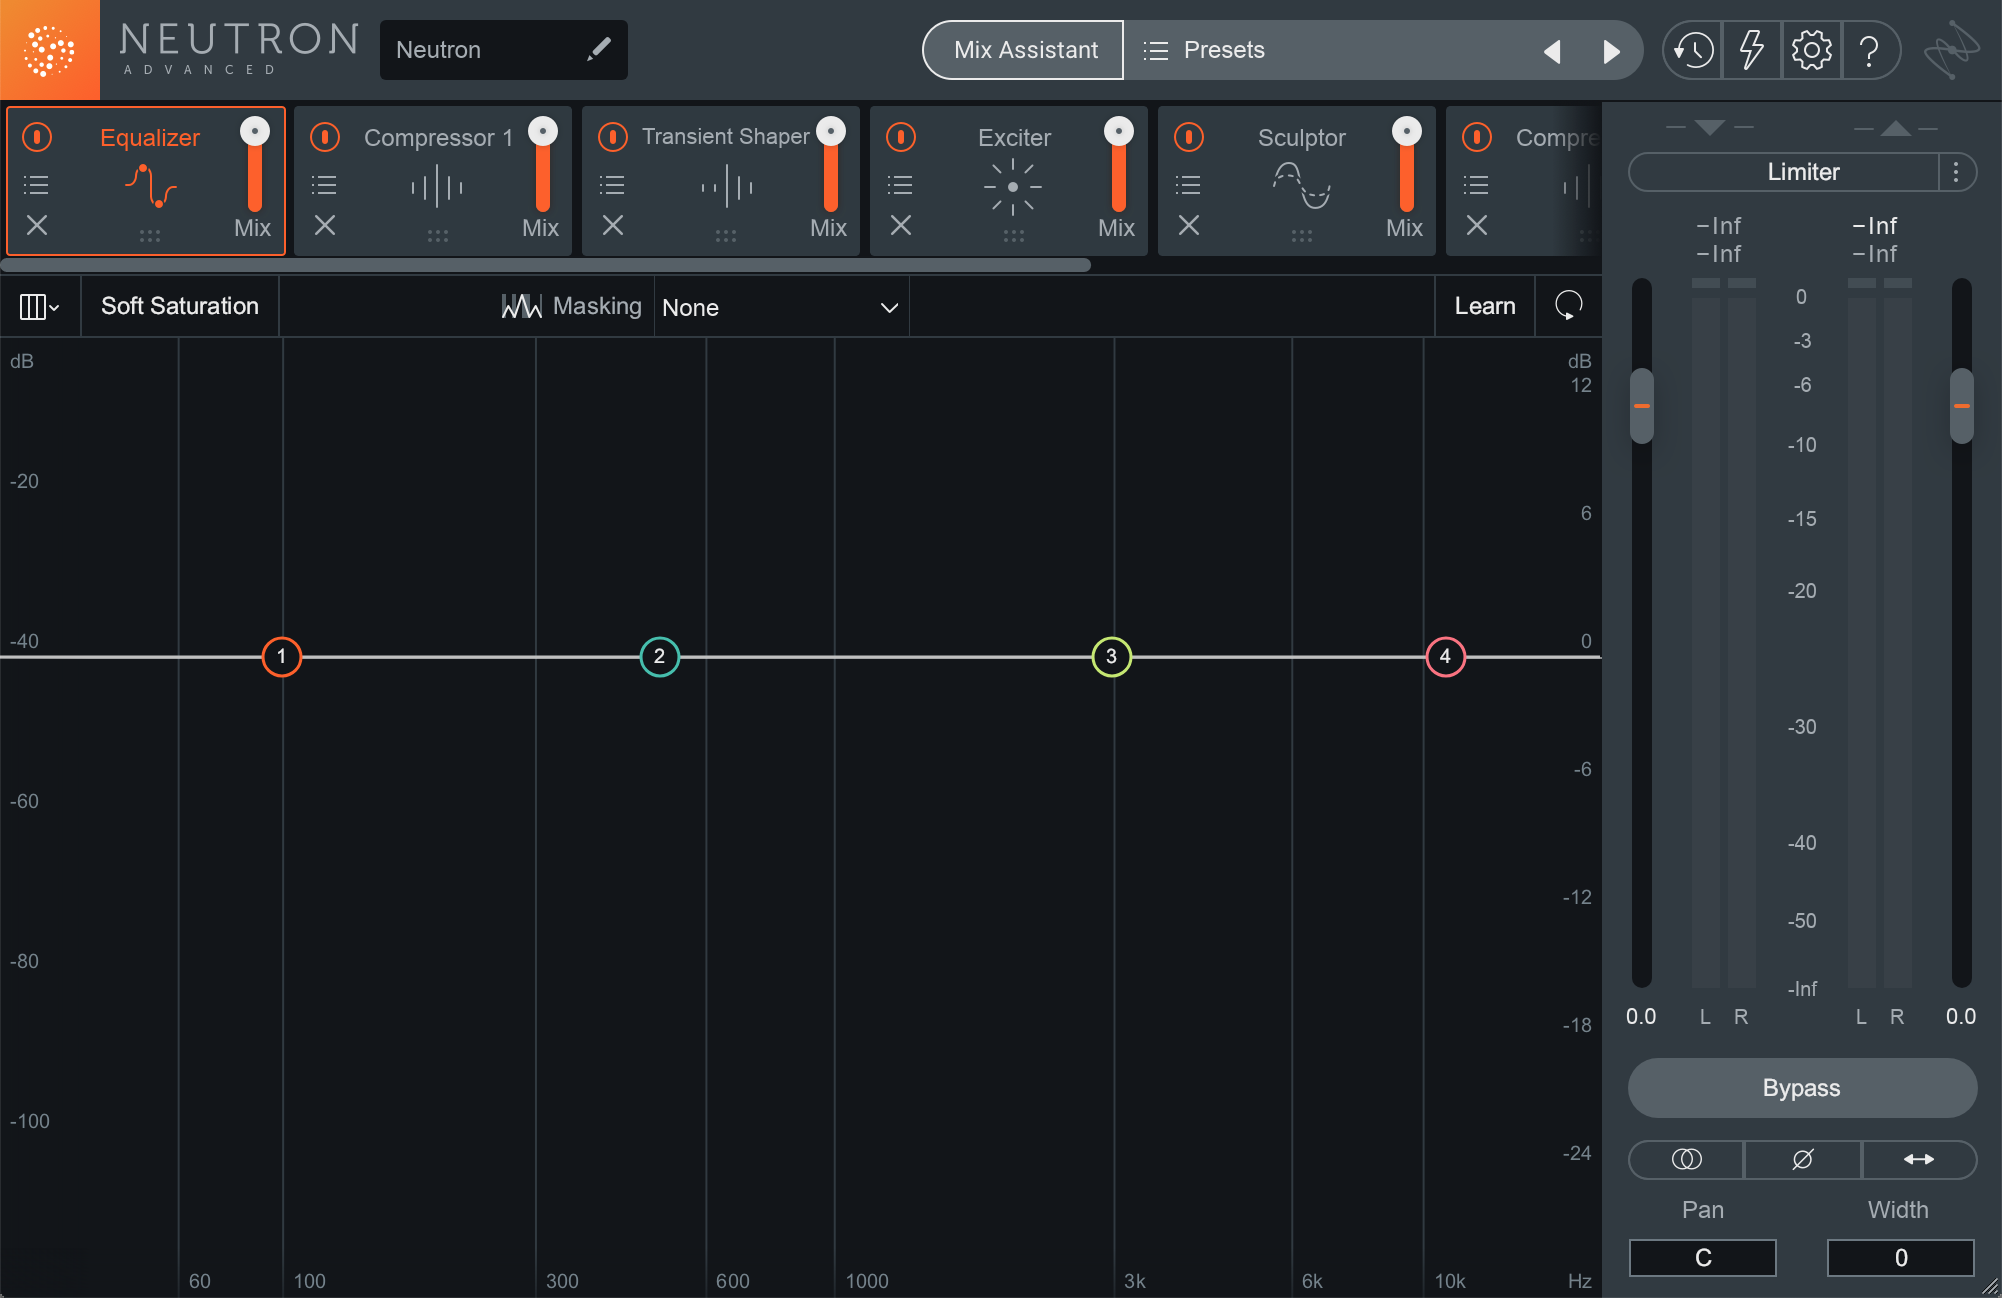
Neutron 3 with all modules
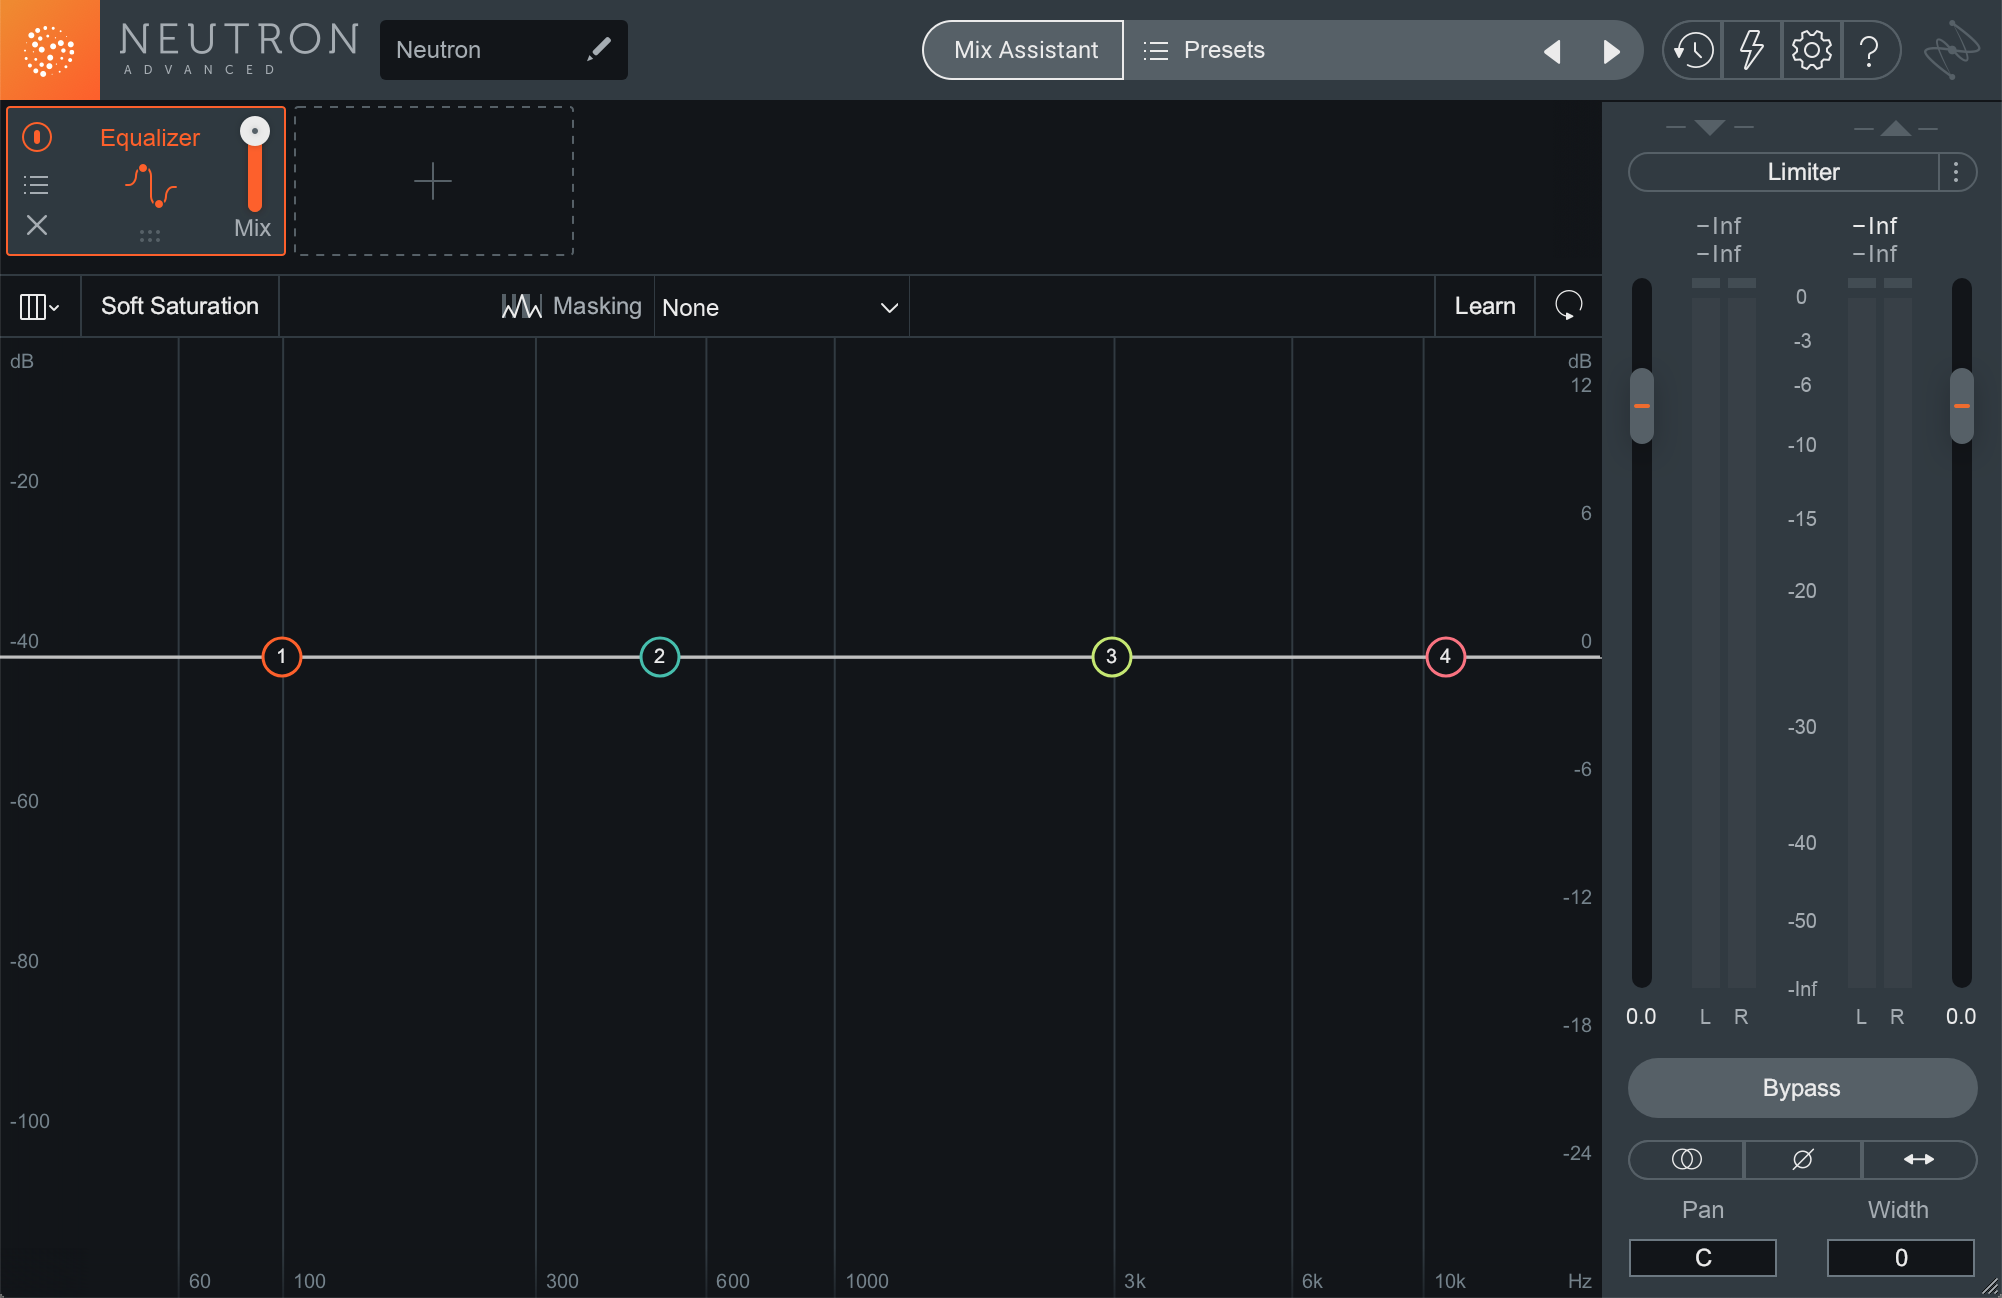
Neutron 3 with one module
Such plug-ins may alternatively be inserted as individual components. Inserting one component of the full plug-in will take less CPU power than a multi-module instance of the full plug-in. For example, if you only intend to use the Ozone Maximizer, insert the Ozone Maximizer plug-in instead of the full Ozone plug-in.
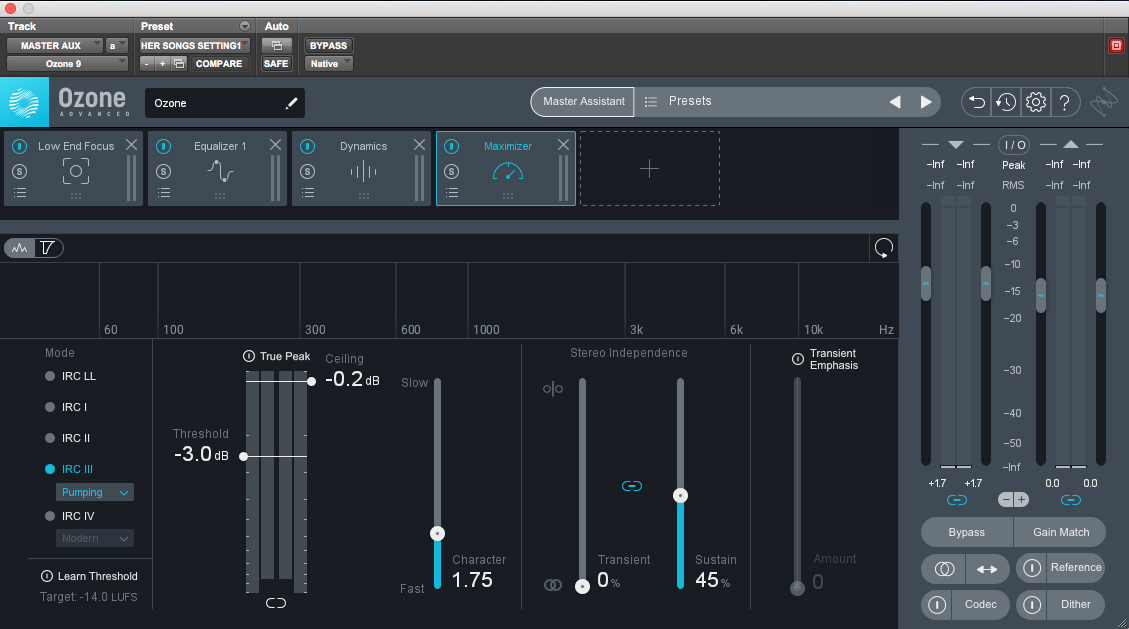
Ozone 9's Maximizer module
6. Use group processing instead of per-track processing
Using identically-configured plug-ins on multiple tracks happens all too often and is a routine waste of CPU power and RAM. Rather than having the same plug-in with the same settings on multiple tracks, consider doing group processing. This involves routing the desired tracks to one track where you insert just one instance of a plug-in. The example and images below show how to use group processing to EQ vocals.
- Change the outputs of the tracks (vocals in this case) to a stereo pair of buses (Bus 5-6 in this example)
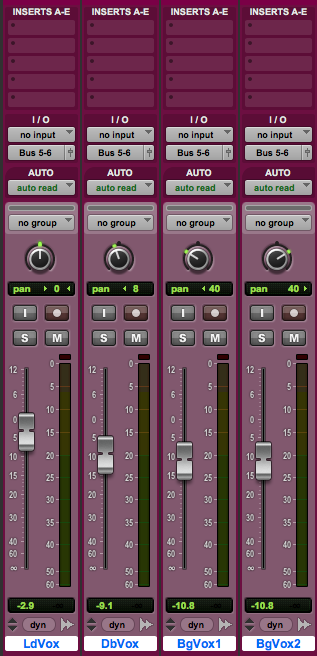
Outputs
- Create a new stereo aux track
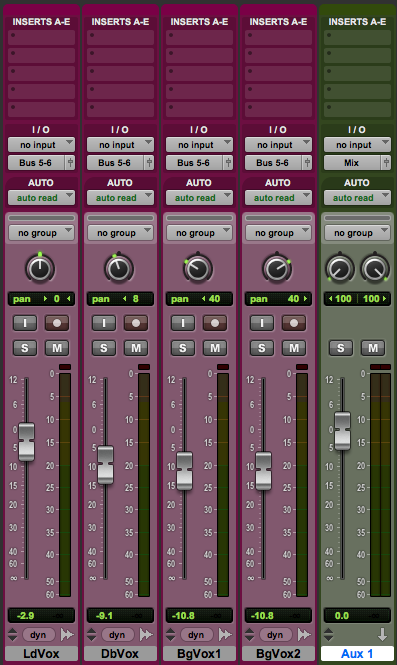
New AUX
- Change the input of the aux track to the corresponding buses from the first step
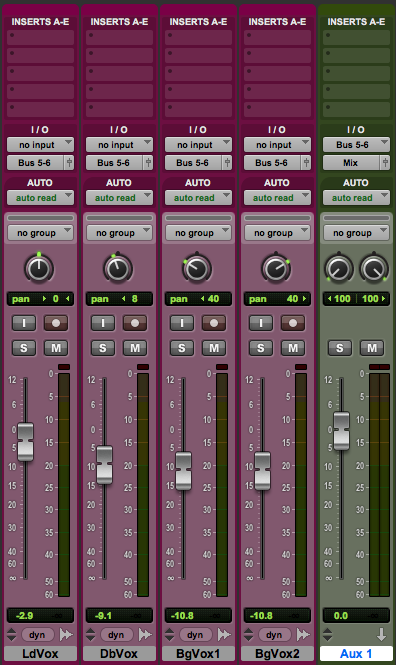
Input Changed
- Insert the plug-in on the aux track
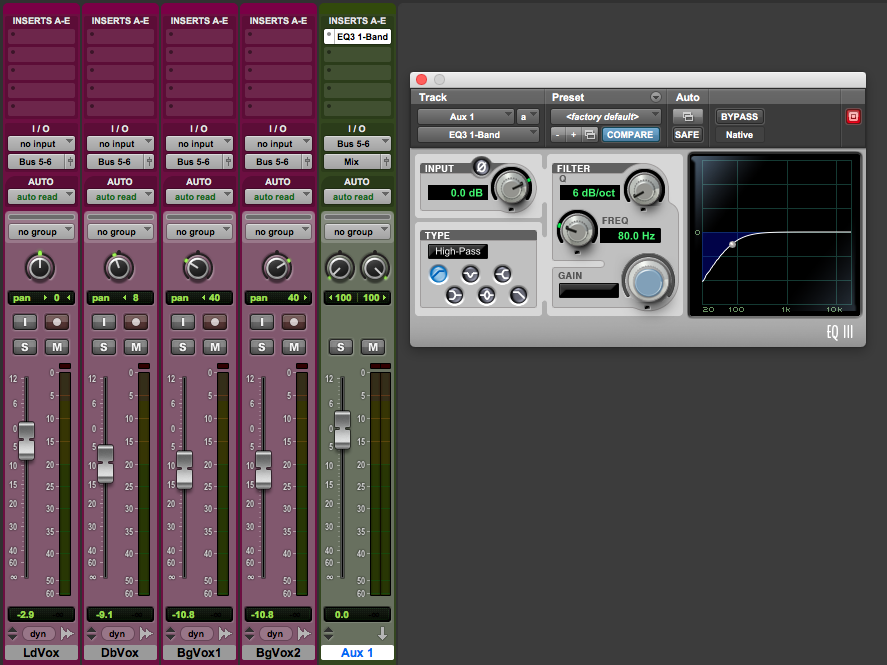
Finished Group Setup
Since all four vocals are going through one aux track, the EQ plug-in on the aux track effects all four vocals. Obviously, one plug-in uses less CPU power than four would. This is more CPU-efficient than inserting the same EQ plug-in on each of the four vocal tracks.
7. Freeze tracks
Some DAWs offer a “freeze” function, which renders a track’s signal—after the plug-ins, but before the fader—as a temporary audio file. For as long as the track remains “frozen,” its plug-ins will be disabled and the temporary audio file will be played, thus saving system resources and still allowing adjustments to the track fader, sends, and pan. If the plug-ins need to be tweaked or changed, just “unfreeze” the track. The plug-ins will be activated and the temporary audio file removed. You can always freeze the track again to save power!
8. Use region-based processing
Some plug-ins in some DAWs can be used offline on specific regions rather than in real time on a track. This region-based processing renders a new audio file with the plug-in effect permanently applied, effectively “recording” the effect to the file. Once the rendering has completed, no CPU resources are used by the plug-in.
That’s a massive advantage, but there are drawbacks. You can’t simply pull up the plug-in later for quick tweaks. If you want a different plug-in setup in place of the rendered one, you’d have to return back to the original unprocessed audio, then go through the region-based rendering process with the newly configured plug-in. Another disadvantage is that this method doesn’t support plug-in automation. So, region-based processing is good for saving CPU power when you’re ready to commit to static plug-in settings.
9. Bounce tracks
This method feels as old as time. Bouncing tracks allows you to lower the CPU and RAM load by reducing the number of tracks used in a session. Many people also refer to this process as “printing stems.” It’s really nothing more than recording a stereo mix of certain tracks such as synths, then using the recorded mix in place of the original source tracks.
I suggest only utilizing this method if no more changes need to be made to the individual tracks. For example, don’t bounce the synths if you still need to edit them. Although the exact process differs from DAW to DAW, here are the basic steps for bouncing tracks or printing stems.
- Solo the desired tracks
- Use your DAW’s “Bounce” function
- Import the bounced file back into the session
- Make the original tracks (the soloed tracks) inactive
With the original tracks inactive, they will not use system resources. If you ever need to change the original tracks, you’ll have to activate them, which will once again use CPU power.
10. Convert the session to a lower sample rate
The higher the sample rate, the more CPU power plug-ins use. A plug-in at 96 kHz takes more CPU power than the same plug-in at 48 kHz. There are endless debates about the merits and faults of high-resolution sample rates; I am NOT going there right now. However, consider this point: If working at a high sample rate prevents you from being able to work effectively, creatively, and efficiently, maybe it’s more important to “sacrifice” your high-resolution fantasy in order to have a functional reality.
If you convert the whole session to a lower sample rate, each plug-in will use less CPU power. That can give you more power to work with. As with most functions, this process is DAW-dependent. The image below shows the function in Pro Tools. It will save a copy of the entire session at the chosen sample rate. Doing this conversion, closing the original high sample rate session, then opening the lower sample rate session would reduce the CPU load and RAM usage.
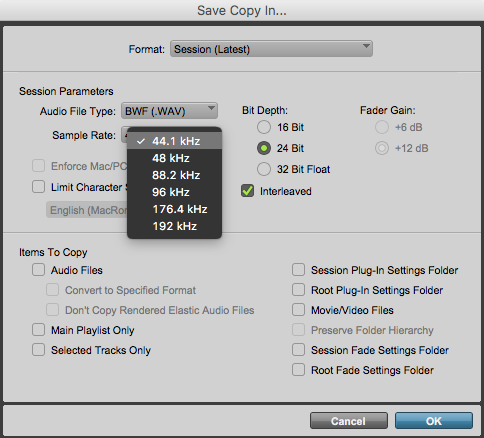
Session Conversion
The takeaways
If you keep the previously-mentioned concepts and tips in mind when working with your tracks and plug-ins, you should be able to successfully manage your system resources and ensure that your mixing sessions will be free of frustration. Explore your DAW and plug-ins, you might find some hidden tricks that will help!
