
10 Times to Take Notes in the Recording Studio
Learn the most important times you should take notes in the recording studio, and print iZotope’s input list to take with you.
Yes, in this rapidly modernizing world, the subject of this article may seem a bit counterintuitive—and definitely more than a little dry: we do everything on phones, tablets, and computers, so why would we ever trust anything to pen and paper?
Two reasons come to mind; the first one obvious, the second subliminal but equally important.
First, files corrupt; systems crash. Where would you be if you lost your bearings in the middle of a malfunction? I bet you’re thinking, “I could just save my notes to the cloud!” True, but sometimes the cloud can rain on your parade. I won’t name names, but certain services have caused some engineers a lot of trouble. Pen and paper, on the other hand, circumvent the corrupted file, the downed computer, and the intermittent storm clouds.
Yet there’s a second benefit to keeping handwritten notes, and this one’s all mental: something about committing notes to paper stores your setting deeper in your brain. At least, that’s the case for me; I find that if I’m keeping handwritten notes while rewiring a patchbay or wandering through an unfamiliar studio, there's a far better chance I’ll recall where everything goes without having to refer back to my notes. Does this make note-taking self defeating? I would say no. It makes the process self-bolstering.
So here are ten situations during which I'd recommend you keep vigorous notes, preferably with pen and paper.
1. Writing an input list
This might be a no-brainer for those who've worked in a recording studio—or even a rehearsal room—but if you've only operated out of your own project studio, it might not cross your mind to keep a real-time, handwritten list of the goings-on when recording. However, this is an essential art, and one that should not be lost in the shuffle of modernization.
Input lists are important because your sessions might stretch over multiple days; indeed, you might find yourself revisiting a song months later with an artist, and as such, it’s vitally important to keep a record of how every source was recorded. If you need to, you can match the sound as closely as possible later down the line with a carefully crafted input list.
A sound's character changes vastly depending on mic choice, mic position, room position—heck, even the channel of your specific preamp (if you're using boutique pres). Trust me, there's little that’s more annoying than trying to recreate a sound with nothing to prime your memory.
Actually, I can think of one thing: failing to do so, and trying to massage the resulting overdub into congruity. While ambience matching technology exists, why not spare yourself the hassle by taking some notes upfront?

Here's what a good input list looks like (feel free to download, print, and take this with you to the studio!)
So I, for one, would recommend you save yourself the trouble down the road and keep a list by hand.
2. Writing down recall
This is another obvious contender, but if you've just procured your first piece of outboard gear, “recall” might be a foreign concept. After all, plugins automatically recall their settings upon instantiation. Hardware, however, exists in the corporeal universe; a compressor will not be restored to your settings simply because you wish it to be.
This is why we keep recall lists, so we can automatically dial in our intended settings when coming back to a track. I’d advise you to keep a recall sheet handy any time you send a sound out of the box for hardware processing.
Lately, I've seen engineers snap pictures of their rackmount gear with their phones, using the resulting snapshots for recall. I would advise against this approach, and here's why.

That's my Neve Portico II Master Bus Processor, lit with the lighting scheme I normally employ. Tell me, is that attack knob on Channel B sitting exactly halfway between 60 and 70, or slightly higher?
Before you answer, here's another angle.
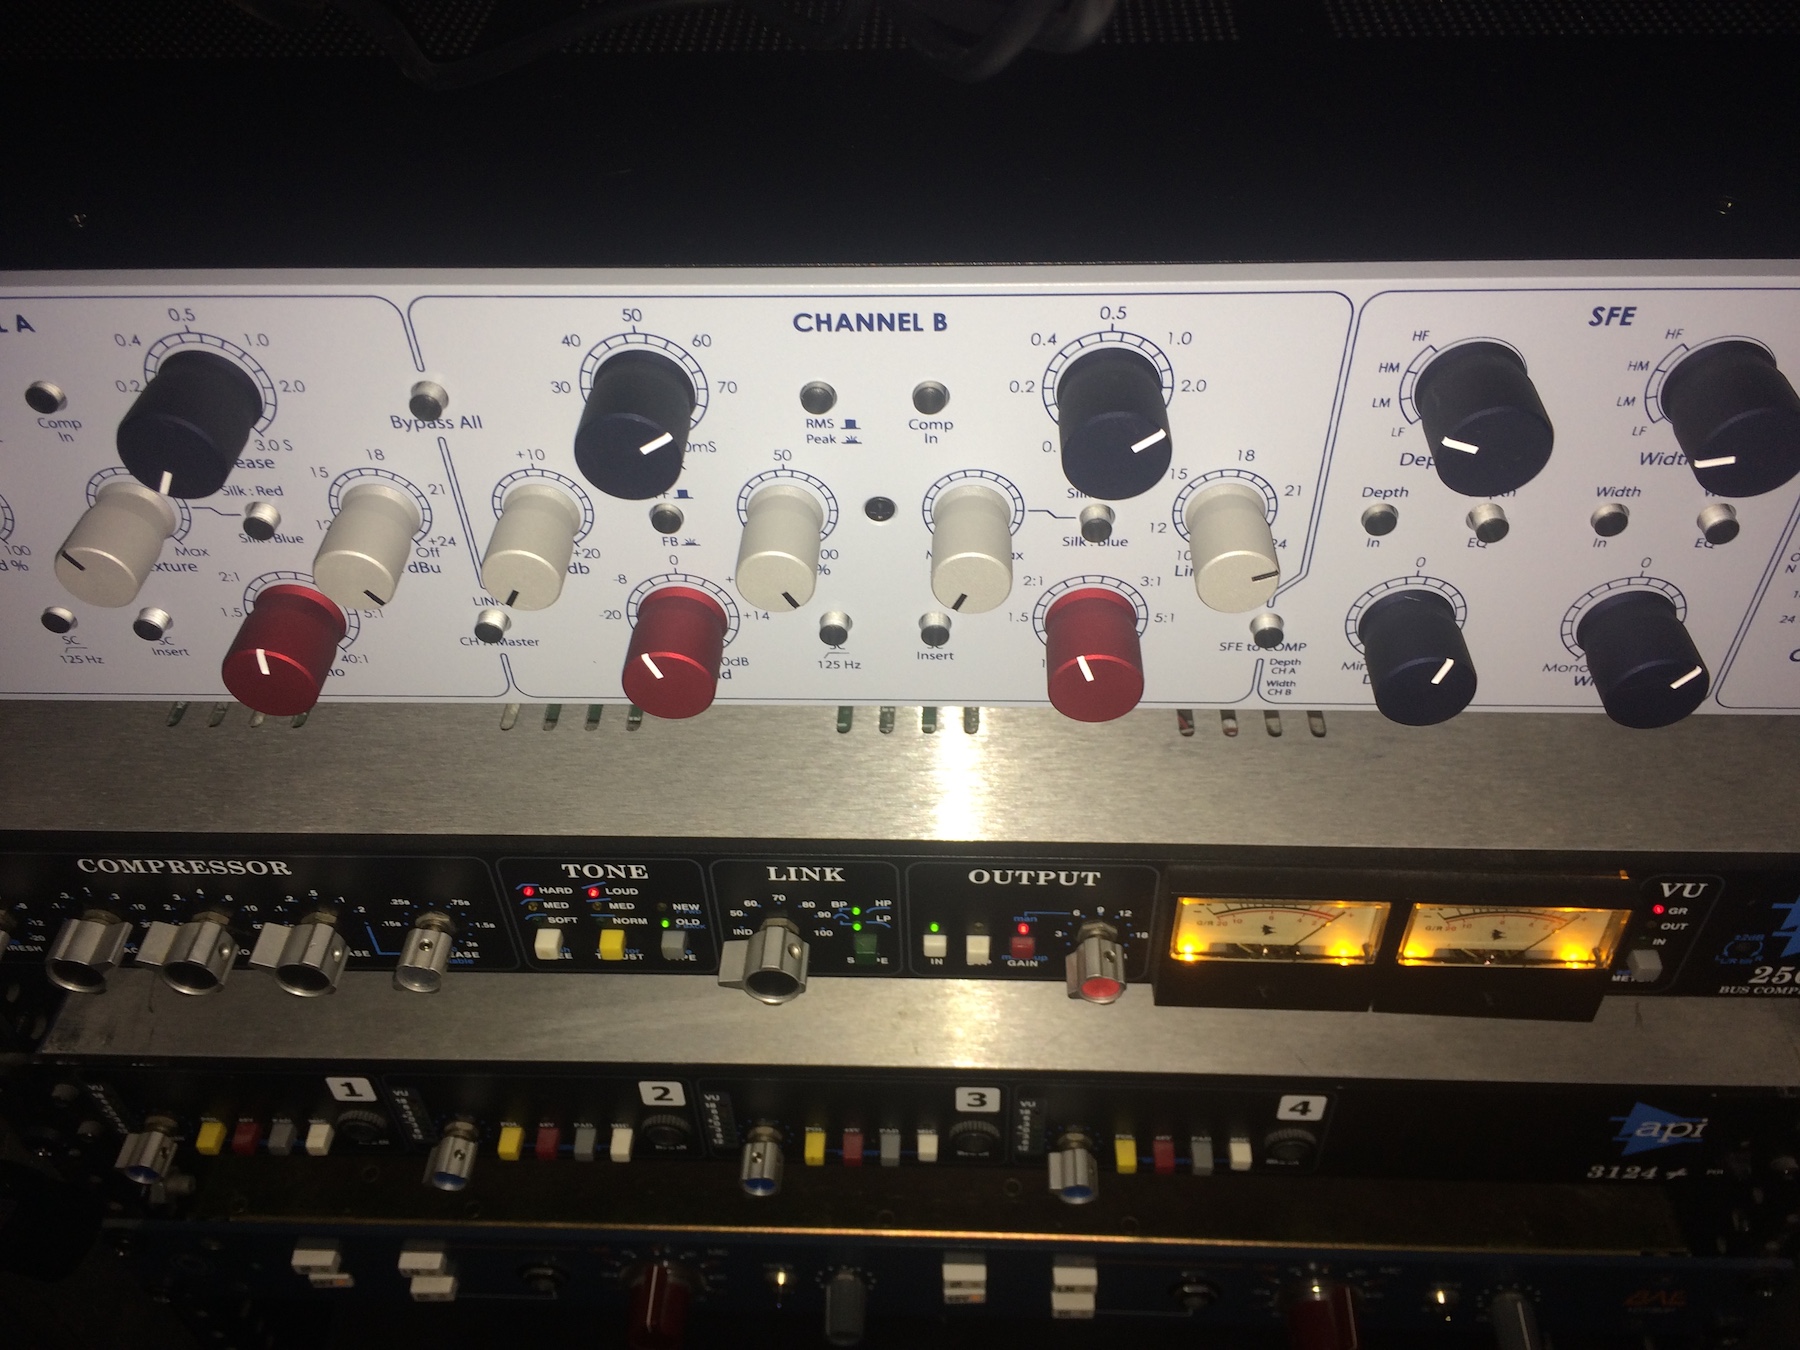
Now I’d wager it’s even more confusing. And yet, it gets worse: this processor is detented, with individual steps occurring quite frequently. That’s why it’s far more elucidating for me to write down the following recall template for the unit:
Attack: 2 clicks above 65
Release: 2 clicks below 2
Gain: 2 clicks from minimum
Blend: 2 clicks back from 100%
Peak/RMS: Peak
Sc: Out
Texture: Out
Ratio: 1 tick and 2 clicks above 2:1…
A picture may be worth a thousand words, sure, but a question like, "Does that look like it’s sitting just above twelve noon or right below twelve noon?" is probably worthless. So do yourself a favor: If you have outboard gear—or free versions of plugins that wipe their settings clean between uses—write out some recall.
3. Learning the routing scheme of an unfamiliar studio
Routing audio through the pipes we use is not easy, not even for people who've done it for years. Just today, I listened as an engineer explained the difference between a normal and a half-normal patchbay to a very seasoned, very accomplished peer. The peer seemed to have a hard time following, so the original engineer eventually said, "Yeah, I didn't get it either until I started teaching at Full Sail."
I bring up these complications for a specific point: even a simple routing scheme will be a relative mystery to you upon first inspection. That’s just the nature of the beast. Do you know the easiest way to demystify this particular conundrum? I’m guessing you might have an idea.
Upon your initial walkthrough, take note of the routing between various wall-panels, snakes, effects racks, consoles, and more. Develop your own shorthand. Personally, I like to use groups of numbers followed by arrows, like this:
Panel, far wall, Room A (9 - 16) —> Inputs 1 - 8 on console
Inserts on console-ins 1 - 8 —> switchcraft ins 9 - 16
That way, I know that in Room A (say it's a drum booth), the signal flows to a specific location on the console, with inserts feeding specific channels of the patchbay. Keeping track with pen and paper will not only give you a quick reference, but, as stated before, will etch the routing scheme into your memory. It carries the added benefit of making you look quite important and professorial to the assistants.

Hyde Street Studios' Neve Console | Source: Wikipedia
4. Listening to a rough mix
Upon your first listen to a rough mix, I hope you have your pen and paper handy, because this is a great time to take notes. Listen to that “end of day” mix—or producer mockup—and write down what you'd like to see changed. Now you have a battle plan, and all it took was one listen!
Upon opening the session itself, repeat the notetaking process; the mix here might very well sound different from the rough (depending on how you received the session—i.e., are you picking up where the rough left off, or importing all tracks into a new file?). Inevitably you'll find more to put into your battle plan. It won’t invalidate your first set of notes, because you’ll have a picture of where you’d like the mix to go, and how it needs to get there from what you’ve been presented thus far.
You may find you need to cut away at the tracks a bit, organizing them into usability before you can play them back. That's fine—you’ve asked for the two-track rough mix already, and you’ve heard it, so your ears won’t be adversely primed in the redistributing of tracks.
The benefit of crafting your battle plan in this way is enormous, as it keeps you from chasing your own tail—always hard to avoid. We often get lost in the mix quite easily, but this roadmap can lead us back to the right path.
I prefer to write my notes down in order, like so:
1) Snare too loud in intro
2) Guitars too boxy in verse
3) Etc.
But you can also use a sheet divvied up by instrument and arrangement.
5. In between your penultimate mix and your final pass
You're almost done with that mix. You can feel it; you are that skeleton at the desk—but only a little while longer. Just a few more tweaks and then...you notice it needs a few more tweaks, and then...it needs few more tweaks…and then...
Does this rabbit hole sound familiar to you? If so, there's an easy way out. And, to paraphrase the great bard Silentó, you already know what it is!
When that deadline is nigh, when the mix is 95 percent there and you sit down for that final pass, listen to your mix beforehand and do exactly what you did on the rough. Take note of everything that needs to happen. These notes should be infinitely specific, looking something like this.
1) Too much echo on first verse vox; take down by 1.5 dB or so
2) More parallel kick in first bridge, take up 1 dB
And so on. Now, your job is simple: you address what's on the list, crossing off the items as you go—and that's it. You've leapt over the rabbit hole.
6. Whenever you address a client’s note
I learned this one the hard way, but when I learned it, I never forgot it. When you get notes from the client—as you invariably will—you'll want to implement them straight away. Maybe they'll be easy. Some might take more trouble time. Whatever you do, keep a detailed log of every change. Every decibel boost and frequency cut should find its way to your legal pad. If you've put on any new plug-ins, write down what they are, and where they sit in the chain.
The reason for this is simple: you'll inevitably get the dreaded note of "split the difference." If you have that difference on a piece of paper, you don't have to guess, nor do you have to open and ferret through earlier sessions, which might take a while. You just refer to the notes, go back to the session, and split the difference in less than half the time.
Want more advice for working with clients in the studio? Check out “18 Tips for Running a Great Recording Session.”
7. Anytime you make a decision in mastering
The first time I walked into a mastering studio, I had the honor of watching Fred Kevorkian work on two tracks I had mixed. I learned a lot that day, but in retrospect, the biggest lesson came at the end of the session, when he pulled out a sheet of paper, read off what he had changed and where, and handed it to me for my notes.
Years later, I now know why taking such stellar notes during the mastering process is necessary: all sorts of things can happen as time accumulates. A client might come to you for a remaster on a “clean version” if the explicit song gained some traction—in this case, recall would be necessary. Likewise, you might begin a project that, for whatever reason, goes on forever, to the point that a colleague has to take over while you're out of town or on another gig. It's not unheard of—it happened on a jazz record I mixed. When something like this occurs, handing your notes over to a colleague will help bolster congruity between practitioners.
If this sounds like recall, well, it is. So why are we mentioning it again? Because mastering is arguably more meticulous than mixing, as it is the last line of defense before the real-world. Thus, we must be even more painstaking with our notes in this context. Add to that a greater likelihood that someone besides yourself might see your notes, and you have a double incentive to be careful here.
8. Conducting interviews
Here's a tip for anyone looking to explore journalism, radio production, podcasting, or any medium where interviews cross paths with audio. Keeping handwritten notes while you record an interview is essential for navigating the editing process down the line. I learned this the hard way when I started out at Forbes and Forbes.com—I'd conduct a two-hour phone interview with someone, and then have to replay the entire audio file just to find a quote I barely remembered. Keeping notes throughout this process helps you move quickly. Just write things down in shorthand as the person speaks, often notating the timestamp of the quote. Here's an example:
13:00 – he says she got into music as child
14:00 – he admits to paying out same rpu royalty for subscription as for ad-based plays; check on legality of this later
The notes don’t need to be pretty—they’re only for you. But if you’re planning on editing audio for a podcast interview, notes like these will come in handy.
9. Re-patching your studio
I just went through this, and boy am I glad I took notes. When you venture behind the patchbay to tend to the rat's nest, the legal pad becomes indispensable. Yes, you should label each connection as you unplug it, maybe with a label-maker or perhaps with gaffers tape. But after each piece of gear has been disconnected, keep a running inventory of each connection you unplugged, how it was routed, and eventually, where it will be routed to next. It could look something like this:
Dangerous Mixer: all connections unplugged; dsub in 1-8 labeled and heading to lynx aurora output 1-8; dsub 9-16 labeled and heading to lynx aurora output 9-16
Lynx Aurora: all connections unplugged; dsub out 1-8 labeled and heading to dangerous in 1-8…
This will save you much head-scratching time as you troubleshoot your way back to studio-health. Simply look down at the page, and you'll have a guide as to what's routed where currently.
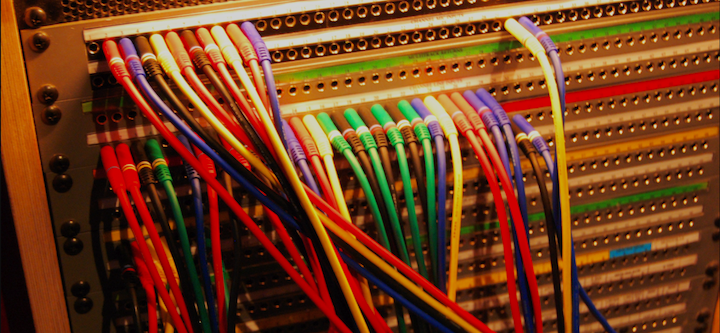
Patchbay at Island Sound Studios
10. Reorganizing files, troubleshooting your system, or upgrading
This is arguably the most important time to take pen and paper notes, because your notes definitely won't crash. Don’t just backup your system before troubleshooting: keep a log of every step you make while doing any major work on your system. That way if something goes wrong, you'll have a record of what you did that prompted the issue. This will help you when dealing with tech-support—or God forbid, with data-recovery specialists.
It'll also help you backtrack your steps if you need to. Here’s an example: say you need to move a sample library back to the second drive you dragged it to, but you're so many operations down the line that you can't remember which of your four hard drives drive was the second one. Notes will come to the rescue!
Conclusion
Now that you know how, when, and why to take notes, you might be wondering, what do you do with them when you’re done? Personally, I date my notes, keep an accordion-style filing folder on hand, organize them into the folder by date, and keep adding notes until the folder is stuffed. Then I take the paper—which is already organized, mind you—to a shop to have it all scanned. The file is named by the range of dates, and from there, I’ll store it all on a hard-drive, back it up to a redundant hard drive, back it up again to a cloud-based account, email myself the file, and save the email. Finding the notes if I need to becomes a relatively painless process, as all my files and projects are named with the dates attached.
Yes, I know this is anal retentive, but if an ounce of prevention is worth a pound of cure, then surely a pound of prevention is worth a ton of distress. Training yourself in being the expert note-taker might seem like an insurmountable effort, but it can be done, even if you’re a slob (full disclosure, I’m no neatnik: after getting carried away unboxing new gear while my wife was out of town, I certainly received a talking-to for leaving packaging material around the house. So I am not above reproach). But if a relatively messy guy like me can keep meticulous notes, so can you.
