5 Tips for Better Audio at Home
Getting better audio at home is a challenge many musicians are facing these days. Here are 5 common-sense ways to improve your studio’s sound and workflow.
In today’s “new normal,” with the need to stay home most (if not all) of the time, we have had to rethink how we work, how we play, how we stay in touch with loved ones, how we learn, and how we record music.
Many of us have been recording at home from the beginning, but with so many pro studios closed, we may have to do more of our own mixing without help. Others of us are new to home recording, and are trying to do more with less in an unfamiliar and uncomfortable setting. That said, I believe this truly is the “new normal”—even after this crisis is over, our home recording rigs will still be used more than ever. So why not help them sound their best?
Here are five tips for better audio at home—and most of them won’t cost you a dime.
1. Before you start, be sure you know what you’re trying to do.
Having the right tools for any job is important, and sometimes spending a bit more money will lead to having better tools in hand. However, that’s not always the case.
It’s amazing how often we go charging into situations without thinking carefully first. We don’t want to be seen as indecisive or behind the curve. We listen to friends and colleagues who talk about the great luck they had doing this or buying that, and we don’t stop to ask whether their situation is so different from ours that their advice is meaningless. We just buy stuff on impulse and wonder why it doesn’t help.
When you look at setting up or improving your home studio, the very first question you need to ask yourself is: “What do I want to accomplish here?” Be honest and practical with yourself; this isn’t the time for grand designs and distant future plans. Unless you were planning on renovating your entire house anyway.
What kind of music are you creating?
A home studio that’s truly well-equipped to do anything is a very rare beast, but studios that excel at one genre or style can be found everywhere. Are you into hip-hop? Then you need gear for producing beats and capturing your voice at its best. Are you an acoustic singer/songwriter? Then you’ll need a good place to record your voice and instrument in the simplest, cleanest way possible. Are you a podcaster? Then you’ll need tools for optimal dialogue recording and editing first and foremost.
What’s your preferred workflow?
Do you like playing many parts one at a time, or figuring out creative ways to capture two or more players at once for a live feel? How far do you want to take your tracks before you go “in the box” and begin processing and mixing with your DAW? Also important: how do you handle material that’s been recorded elsewhere, assuming you need to?
What’s your desired end result?
On the technical side, music goes to so many places now: physical releases, streaming services, download sites… but aside from a few special cases—e.g. vinyl mastering—the same audio files can be used for all of those. Is that what you want to do—go from start to finish on your own? On the other hand, if you do plan to pass your music along for further work by other engineers, are you set up to give them what they need: individual tracks, stems, rough mixes, almost-finished mixes?
At first blush, this seems easy enough. But when you get into it, you realize that nearly everything you do, use, or buy depends on your answers to these questions. You can save a ton of time, anguish, and money by realizing that you can do what you need to do without that latest shiny toy.

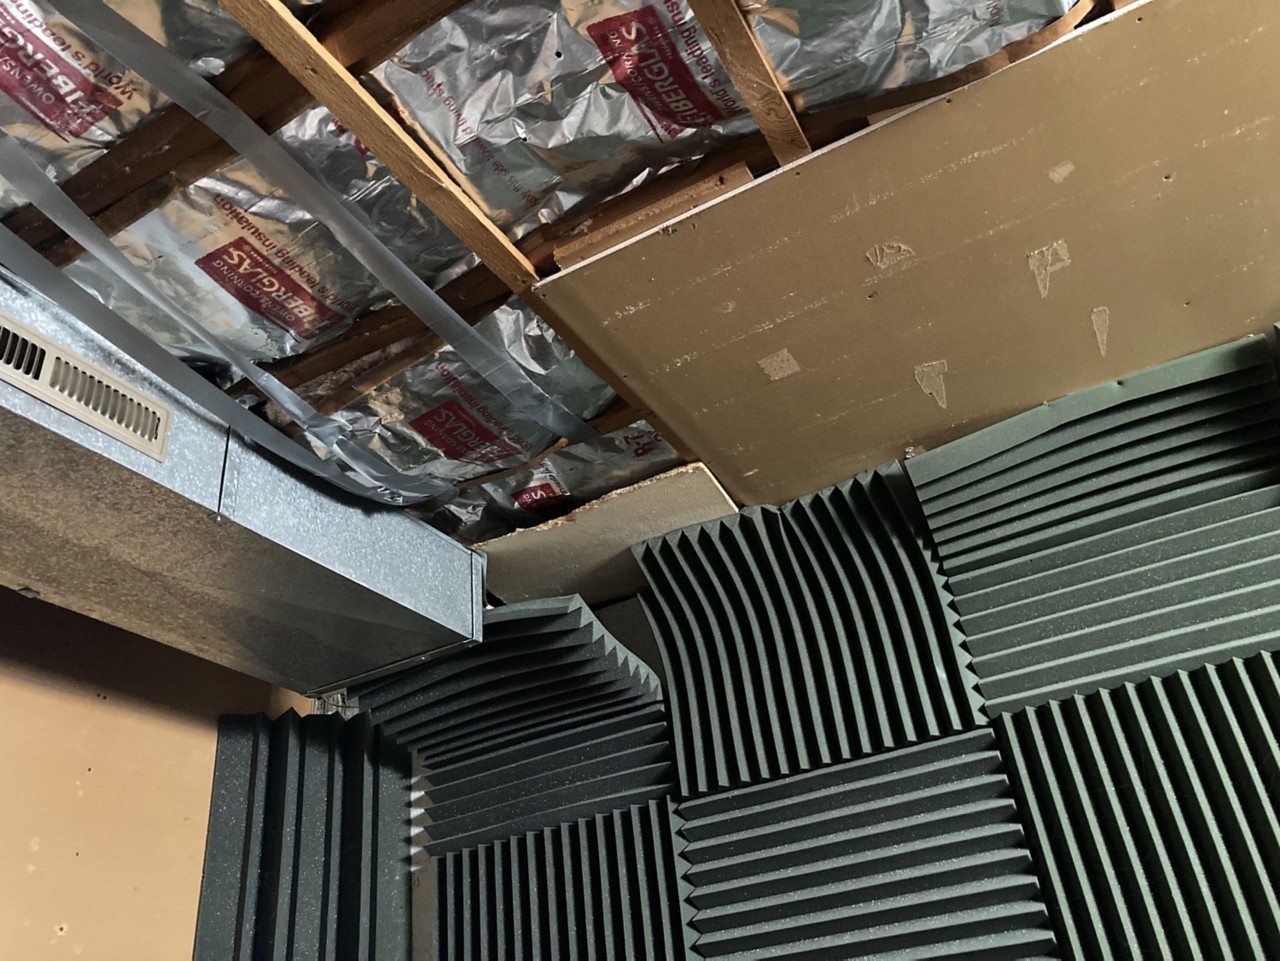
Someday I will write an entire article about everything wrong with this picture. I promise.
2. If you can’t hear, you can’t mix.
I am continually astounded by how many people choose to ignore or undervalue monitoring. It is literally the only thing that affects everything you do, no matter how you work or what kind of music you’re making—so take time to get it right. “Getting it right” means that you hear what you need to, and therefore can create mixes that you can hand off to others with confidence, no matter how they plan to listen to them.
This doesn’t have to completely break the bank anymore: there are several companies making thoroughly professional monitors for only a few hundred dollars per pair, and excellent headphones can cost even less. You can get good results for relatively little money, as long as you follow a few basic principles. Leverage your brainpower to help your ears!
Room treatment
First, remember that sound moves in air and bounces off of surfaces before you hear it. If you’re listening on speakers, you’ll want to treat your room acoustics, even if it’s only a little bit. Your listening area in front of your DAW can be very small, but it should be reasonably free of weird ringing, dead frequencies, phase issues, and the like.
This will take a little studying, but it’s not that hard to learn. Believe it or not, some of the best learning resources out there are acoustic treatment manufacturers’ websites. They know their products will be blamed for bad sound even if they were set up incorrectly, so it’s in their best interest to have their users understand as much as possible. Take advantage of that!
Speaker placement
Second, you can’t just put your speakers anywhere and hope for the best. When a manufacturer recommends a particular setup, do your best to match it, and if your room requires a less-than-optimal speaker position—say, too close to a wall or in a corner—follow their recommendations on how to set your monitors’ EQ accordingly.
Usually you’ll want an equilateral triangle, with the distance from each tweeter to each ear matching the distance between the tweeters. As I just said, your “sweet spot” can be small, but it should be as close to correct as you can get it. Don’t worry about the sound in the rest of the room—you aren’t mixing there!2. If you can’t hear, you can’t mix.

Proper monitor placement
Low frequency treatment
Third, beware the bass. Low frequencies don’t behave like mids and highs; you can’t control them with the usual acoustic treatments, you can’t get them to be perfectly uniform everywhere in any room (certainly not yours), and if you make mistakes with them, everyone will know it. A little care and common sense will help you deal with these issues successfully.
I’ll take some heat for this, but I believe that in small and mostly untreated rooms, critical listening and subwoofers don’t mix. You want to eliminate variables, not add them, so get all your sound from two speakers positioned properly, not from some thumpy thing under a desk somewhere. Subwoofers are for impressing clients; if you create a perfect mix with your sub slamming hard, anyone who listens to it without a sub won’t hear all that beautiful bass—they’ll just hear a mix with less beef than a vegan restaurant. (Life’s not fair. But physics is.)
Smaller speakers will not reach down into the bass as far as we’d wish, but if you learn where and how they roll off the lows, you can learn to work with their sound and compensate for it. To do this, you have some vital allies: check monitors and headphones.
Double-check your work
“Check monitors” are literally any end-user system where you can listen to your mix and make sure it works—your car, your home sound system, earbuds, even the tiny speaker on your smartphone. Carry your mix around to as many of them as you can, and note what works and doesn’t work.
Headphones are vital for all kinds of things. You must own a pair that have a sound you can learn intimately by listening to lots of your favorite music, and that are very comfortable and don’t fatigue you over long hours of use (meaning they have to sound good even when you don’t crank them up).
Headphones are key to picking up subtle details when tracking, mixing, or repairing audio, and because they are moving much less air (and only into your ear canals), they’ll give you all the bass your speakers can’t throw across a room. Learn their sound along with your monitors’, and you’ve practically won the battle for a good mix, no matter what the rest of your gear looks like.
3. Mud flows downstream
When you’re dealing with work in a home studio, one principle will help you more than any other: mud flows downstream. (There’s a more famous and memorable version of this proverb out there, but I can’t write it in a PG-rated article.)
What this means is that when we talk about signal flow from beginning to end, any “mud” that gets picked up along the way will accumulate. What we end up hearing has all that mud it, layer on layer, so it’s vital to minimize the dirt we pick up at each step.
But there’s another wrinkle to consider: we’re not talking about literal mud in a literal stream, we’re talking about distortion added to audio signals… and distortion does not pile up like mud. If an early stage of the audio chain is dirty, that distortion will be amplified, sometimes significantly, as it moves through later stages. It’s not only important to keep things clean all along the way, but to also be extra-careful at the beginning.
This practice of “keep it clean everywhere but especially at the start” will never let you down. The better you get at it, the more improvement you’ll hear. To understand this, let’s follow a typical signal—an amplified electric guitar—through our rig, and watch what happens to it.
From the guitar to the mixer
I know what you’re thinking: guitars are supposed to be distorted, aren’t they? Well, there’s a difference between the kind of distortion we want to hear (pickup warmth, tube overdrive, speaker cone breakup) and the kind we don’t (pickup microphonics, crackly cables, faulty parts). We want to capture all the good stuff and minimize the bad.
So we make sure the guitar is positioned so the pickups behave their best, that there’s nothing in the electronics that needs to be repaired, and that we use a reliable cable and keep the run as short as possible, since a high-impedance guitar signal degrades rapidly over distance. We make sure the amp is serviced, warmed up, and has good tubes, and that the cabinet is in good shape too.
Now we have to capture the sound of the amp and get it to our DAW. We place a microphone next to the cab, aim it properly, and adjust its angle and distance for the best sound. But what if we’re in a noisy environment where unwanted audio can make its way into the mic? We can place the amp in an isolation box so it doesn’t annoy the neighbors, and so the mic doesn’t pick up their dogs barking a critique of our solo.
The mic itself can be a tricky balancing act: some vintage mics add coloration to sound that we find beautiful, while risking electrical problems that can add unwanted artifacts. Newer mics are often very quiet but might not have some of that “magic.” This is where the artist gets to have a say; you use what sounds best. A good-quality mic cable will get the signal to the mixer without appreciable added noise, even over very long distances; a damaged one won’t.
From the mixer to the digital domain
Our guitar signal hits the mixer, and now things get interesting. The preamp takes our mic-level signal (thousandths of a volt) and boosts it up to line level (volts), and whatever crud was in our signal is now a thousand times louder. This louder signal gets run through signal processors, EQ, maybe an aux send/return, a fader, and then a subgroup. Every one of those stages adds or takes away gain, and every one has the potential to add a whole lot of crud.
The secret here is in gain staging: understanding where in your audio chain it’s safest to boost signal levels, and where it should be avoided. Every stage has a sweet spot where the signal gets through with minimal added distortion; the key is to get the signal out of the mixer at a level where the noise floor is as low as it can be. Too loud and things can distort or clip; too soft and the noise floor takes up more of the signal. Learning how to do this takes practice and a knowledge of your particular gear, but again, the better you get at it, the more reliable your results will be.
From the digital domain back to your ears
Now the signal goes to your interface and enters the digital domain. In the bad old days of straight 16-bit recording, this part was a tricky balancing act; you wanted a loud signal for the most dynamic range, but you didn’t want it to clip, because only industrial noise artists like how digital clipping sounds. Nowadays, if you can record at 24 bits, you have more leeway, because the dynamic range is so broad that you can still keep noise low without getting dangerously hot at the peaks. Now that the Loudness Wars are officially over, dynamic range is coming back in style, and you should take advantage of it.
Inside your DAW, things are digital, but the principles of gain staging still apply. You’ll hear when certain processes add noise or not, and you’ll adjust your plug-ins and mixer settings for the clearest result. And finally, you’ll send the signal out to your monitors at a level that’s sufficiently hot to give you a good listening level but not distort or clip.
A lot of beginning engineers think it doesn’t matter where you turn stuff up. The lesson here is that it really, really does—and that you can learn to work it to your advantage.
Learning the give-and-take
One other strategy is worth mentioning: consider whether the sonic benefit of a particular part of the audio chain outweighs its potential for unneeded distortion. In other words, “does this particular gizmo have to be there?” As a fairly drastic example, we could have just run our guitar cable into a Hi-Z input on our audio interface and taken it into the digital domain almost instantly. No pedals, no amp, no mic, no mixer—that’s a whole lot of gain staging we’ve just avoided. The question then becomes, does the guitar amp modeling plug-in sound as good as the SM57 in front of your AC30? That’s your call, and it could go either way, perhaps depending on whether you’re recording a standout solo or just some layered backing parts (more layers = more dirt).

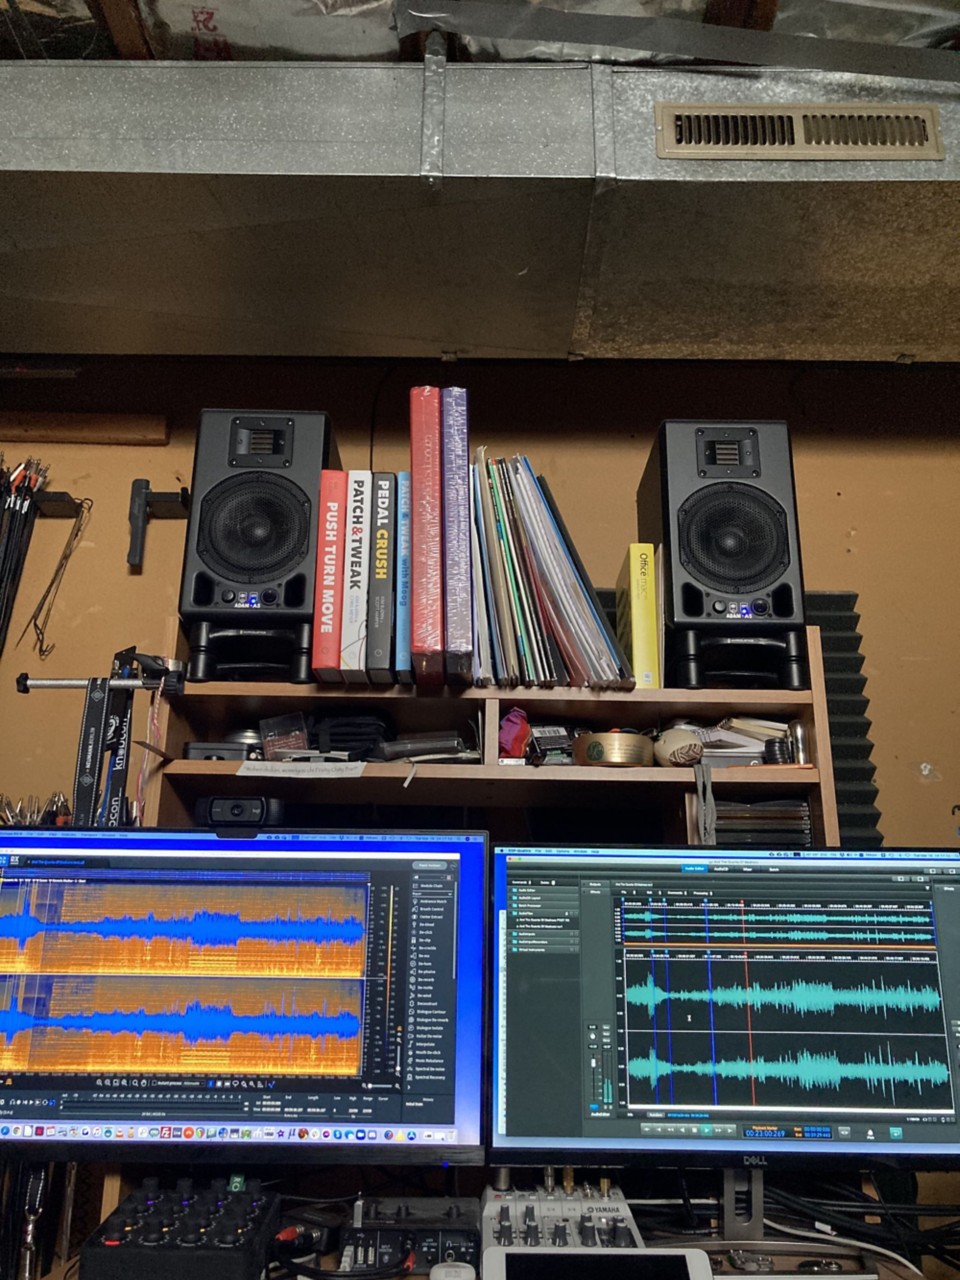
”What? It’s the only place I could put the monitors!”
4. It’s hard to enjoy mixing when you’re in pain.
Capturing good audio and hearing good audio are the parts of the equation we think about first, but there’s another part to consider: ergonomics, the art and science of working at a mix all night without wanting to die when you’re done. Make no doubt about it, mixing is hard, intense work. You can sit for hours, jumping back and forth between tracks and comps and stems, trying to build up a mix to your satisfaction… and that can play hell with your body.
Spending money on ergonomics is a place where you’ll quickly separate the experienced engineers from the beginners. Someone who’s worked in a studio for many years knows how important it is to take care of yourself. A really comfortable chair with good lumbar support and comfortable armrests is not a luxury. Neither is a workstation desk where your monitors can be at eye level, a keyboard at the proper height to avoid fatigue, a specifically chosen mouse or trackball or trackpad to minimize the risk of repetitive-stress injuries, and things like control surfaces that are in easy and comfortable reach.
That takes care of the body. What about the ears? The only things in the studio more valuable than your monitors are your ears. Protect them at all costs! Take frequent breaks to rest, turn your mixes up loud for the “oomph test” and then turn them right back down again, and above all, set and stick to a consistent listening level as much as you possibly can.
This isn’t just for hearing safety, it’s actually good practice for consistent mixes. Your ears’ frequency response isn’t linear with volume; if you turn a signal up or down, you’ll hear the lows and highs change differently than the mids. (Take a look at the Equal-Loudness Contours.) That means you’ll get the most consistent results if you work at the same sound pressure level (SPL) as much as possible. I aim for 80 dB SPL at my mix position, which some folks might find a bit soft; I'm used to it and I can work for hours without fatigue.
And then we get to the more metaphorical pains: pains in the head, pains in the neck, and pains in the tail. We never think about the little things that can improve our studio workflow until we try them, often by accident. Then we wonder how we did without them!
Here’s a short list that I’ve come up with just from looking around my studio:
- At least one really heavy mic stand and boom so I don’t dump my favorite mic on the ground
- Cable racks in easy reach, organized by cable type and length
- A small USB control surface that can be mapped to many different bits of audio software
- Gimbal mounts for my computer monitors so they can easily be repositioned
- A rolling stand for a small synthesizer or controller
- A high-quality digital wireless transmitter for my Schecter so I don’t clothesline myself when I play…
- And a plentiful supply of water
You get the idea. It seems silly to place so much emphasis on pampering yourself while you work in your studio, but trust me—you’ll have enough to concern you without an aching back, dehydration headache, and ringing in your ears.
5. Know when to give up.
This last one is tricky, because it seemingly contradicts all the ones that came before it. The secret here is to actually think about why you follow these rules, so you can intelligently approach the idea of bending them to suit your needs.
Ultimately, you have to get music done. While all the things I’ve laid out in this article will be useful to any home studio owner to some degree or another, trying to follow each and every one of them, while worrying that you’ll be a failure if you can’t, entirely misses the point. These strategies are going to change with your particular situation, and you have to know when and how they’re just going to get in the way rather than help you.
What if your room’s acoustics are so lousy that you can’t get a pristine sound in your mic? Get a mic isolation filter or isolation box—better no room sound than a bad room sound.
What if you can’t get that perfect amp tone no matter how hard you try? Put your amp in the closet until you can play live gigs or track in a real studio again, and record directly to your interface using plug-ins for your tone—just be sure to also save the totally clean guitar input sound so you can re-amp it later.
What if you can’t position your monitors perfectly? Get as close as you can, and learn to use them in that position until you can make things better.
And here’s the really difficult one: what if you’re not in a position to get a decent monitoring setup happening in your room at all? There’s just no place to put monitors even close to the right place, the room’s so cramped that nothing sounds right, or you have people nearby who don’t want you working, even at a safe audio level, if they’re trying to sleep?
Then you use headphones. Invest what you would have spent on speakers in a really good pair of studio headphones with a nice bass response and a lot of comfort, and a high-quality headphone amp or monitor controller to drive them. You’ll always have to check your work on speakers, especially for panning issues and low-end accuracy, but at least you’ll be able to create music rather than convincing yourself that you can’t.
You’ll always find a way to make music. Strive for excellence, but remember that the worst enemy of excellence is perfectionism. You’re never going to get your basement sounding like Abbey Road… so focus on getting your basement to sound its best, and don’t beat yourself up if you can’t do everything by the book. (Whose book? Anybody’s book.)
Conclusion (at last)
These ideas probably weren’t what you were expecting. They’re not as clear-cut or catchy as “5 tips for compressing vocals” or “5 tips for submixing drum stems” or “5 tips for getting beer out of a console.” But there’s something that underlies all of them, the one really critical takeaway from this whole article: the need to think about what you’re doing.
Recording and mixing music is a challenge. You have to balance your artistic side with your technical side—your emotions and impulses with your reasoning and planning—and it’s important to make sure each side is doing what it does best. If you overanalyze and overplan your next guitar solo or lead vocal, will it really be the most heartfelt thing you can give? You know to let your heart take over at that point, right?
Well, it’s the same thing with running your studio workflow. Emotions get in the way of sane and clear thinking. You can’t be paralyzed with worry about what people might think. You can’t poke at a problem for a minute and then slouch off in disgust when you don’t solve it instantly. You shouldn’t be obsessed with things that worked for someone else, rather than thinking about what you really need. And above all, you should never give in to the temptation to spend money on a solution to a problem that you haven’t thought about carefully… if only to make sure it’s a problem you actually have.
Those are emotional reactions to what needs to be a rational thought process. While thinking about this stuff isn’t easy, the benefits will become very clear very quickly, and you’ll pick up steam as you see how much smoother and more musical everything becomes.
At the end of the day, there’s you and the room and the music. What I’ve taught you will be beneficial to you, one way or the other; it’s up to you to kick back and think about it before you put it to work. Remember that better audio at home starts with your needs, your decisions, and your drive.
Oh, and one more thing to remember?
You’ve got this. (Just saying.)


