The Basics of Convolution in Audio Production
Often overlooked, convolution is a powerful process for both standard processing and sound design. In this article, we cover how it works and when to use it.
Convolution is one of the more sophisticated processes regularly used in audio production. Its ability to accurately impart the characteristic timbres of spaces and objects on other signals is useful in both sound design and standard processing applications. With a wide range of realistic and otherworldly sonic possibilities, convolution can be a fantastic addition to any producer’s toolkit.
There are a wide range of convolution plug-ins available, each offering their own additional parameters and impulse responses. Convolution effects can also be found within other plug-ins (there’s likely one in a plug-in you already have!).
In this article, we’ll be covering what convolution is, how it works, example plug-ins that use this process, and what benefits they provide producers.
What exactly is convolution?
Convolution is a type of cross-synthesis, a process through which the sonic characteristics of one signal are used to alter the character of another. Many of you are likely familiar with the concepts used for FM synthesis, in which an oscillator’s signal is used to modulate the signal of another oscillator. To an extent, this would be another form of cross-synthesis.
However, there are no oscillating waveforms involved in the convolution process. Instead, we work with two audio sources, an input signal and an impulse response. The input signal is the sound that will be affected, while the impulse response contains the sonic characteristics of the space or object that we will impart on the input signal.
An impulse response is created by playing a sound, or an impulse, in a space. This impulse can either be a short, percussive sound (a starter pistol, a clapboard / slate, a balloon popping, etc.) or a more sustained sound like a sine sweep (a sine tone that pitches up through the audible frequency spectrum). This impulse produces a snapshot of the space’s characteristic ambience according to the space’s unique acoustics, an ambience which can be captured.
Microphones are used to record the resulting audio. With the initial impulse in mind, we are able to see how the space’s / object’s acoustics affect the resulting sound’s timbre.
Ideally, the initial impulse would be edited out from the recording, leaving just the acoustic response of the space. This would leave a pure signal of the space, rather than including another sound with the space.
Regardless, most convolution plug-ins can use information from any audio file as the impulse response to affect the input signal.
Convolution reverbs
The convolution process is used in some of the most powerful (yet CPU-intensive) reverb units on the market, convolution reverbs. Ever want to hear yourself playing the piano on stage at Radio City Music Hall? With convolution reverb, you can!
Developers travel to famous spaces around the world to record and collect impulse responses, and even do the same in everyday spaces like bedrooms and car trunks. These impulse responses can be used in a convolution setting to recreate the timbre of that space’s ambience.
The leading plug-in developers take great care to record the impulse responses, so these plug-ins are able to almost perfectly recreate the reverb qualities found in different spaces.
Convolution reverb plug-ins will also tend to include all adjustable standard reverb parameters (decay time, adjustable level for early and late reflections, reverb frequency response, etc.). Reverb settings can be customized even after loading an impulse response, allowing for extreme fine-tuning.
As mentioned before, convolution can be used for creative sound design. Instead of using those that capture the acoustics of a large room, we can use impulse responses that capture the sonic characteristics of a metal bowl, a cardboard box, a car trunk, etc.
We can even use contact microphones to record vibrations within each of these items. The vibration recordings can be used as impulse responses to give a new character to any other sound.
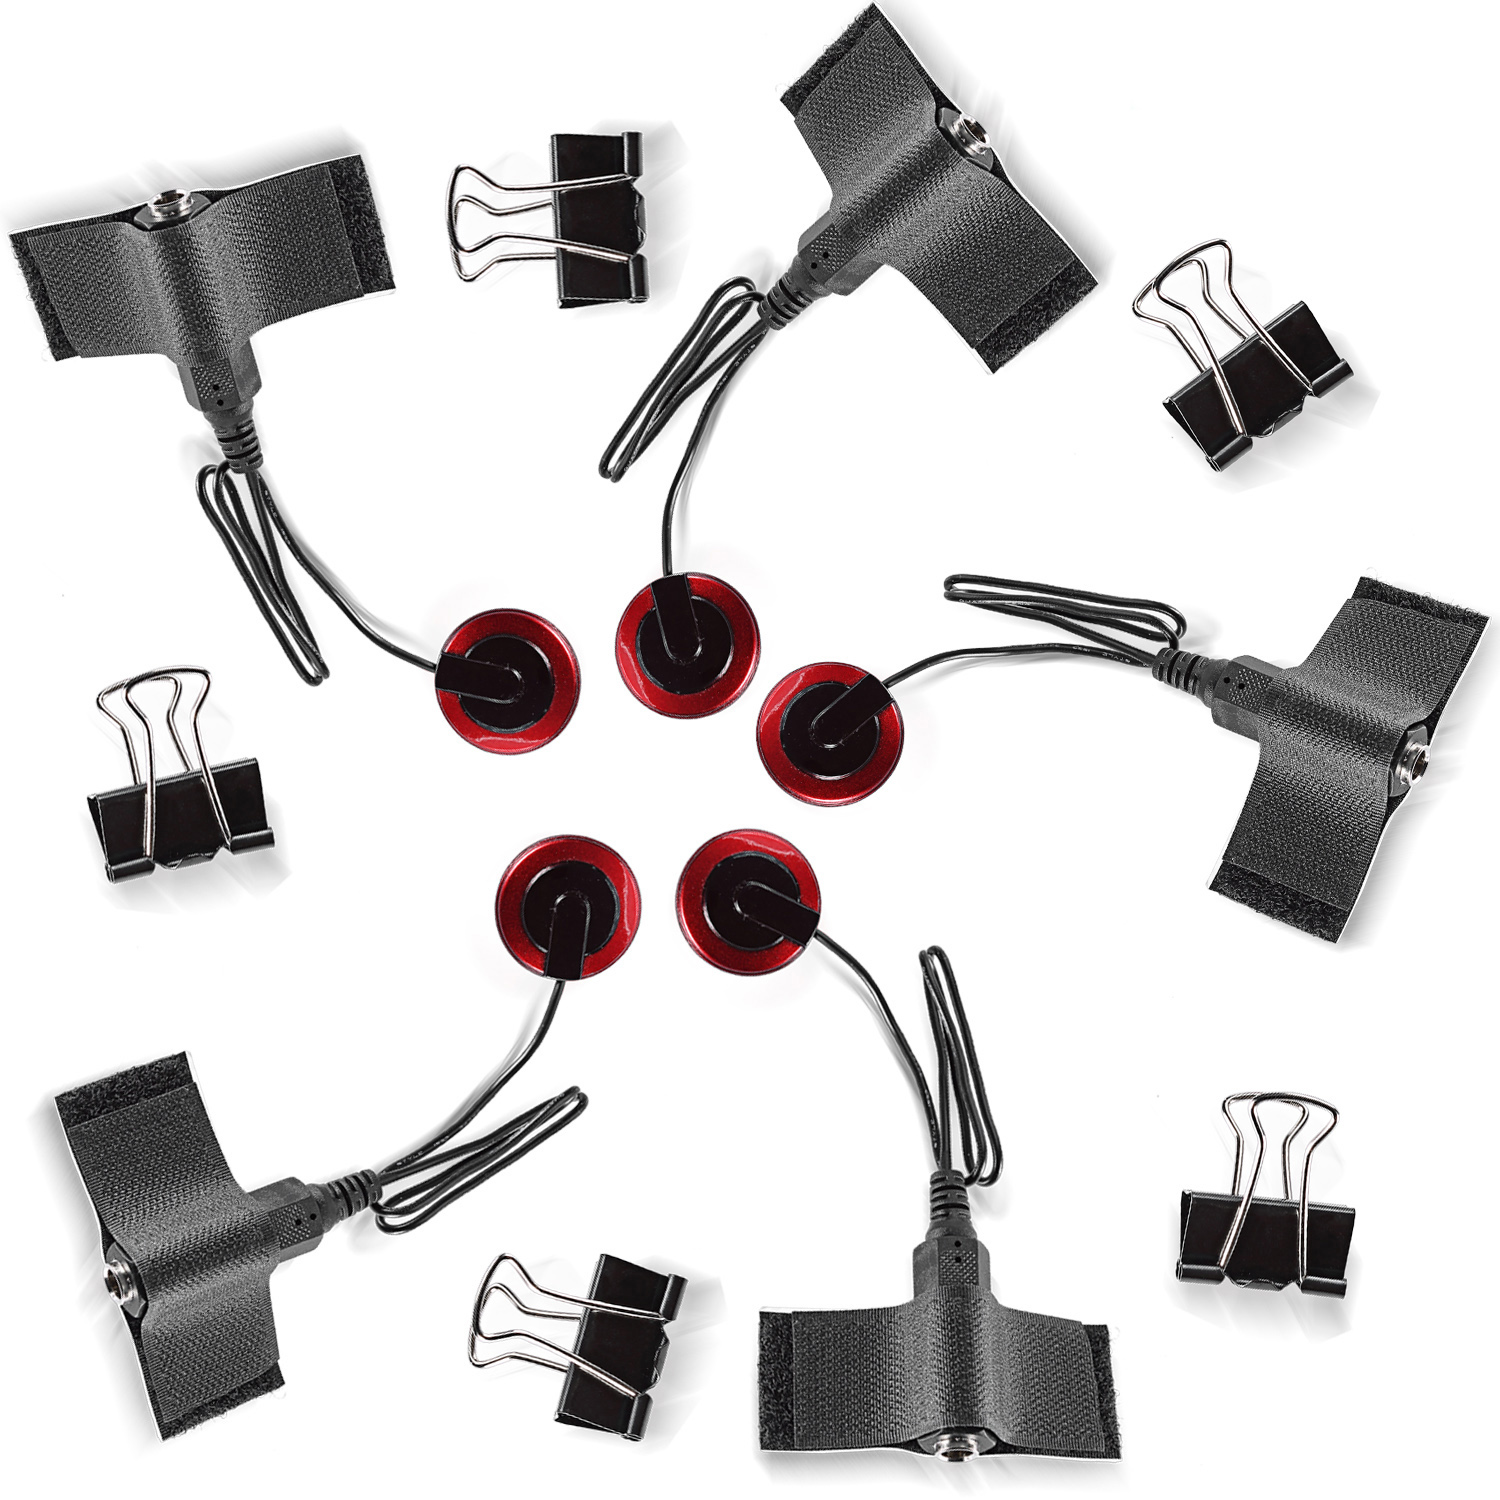
Newer contact microphones
Naturally, this application of convolution generally has more of a textural and timbral effect on the input signal than an ambient effect. Because of this, we can use these interesting spaces and objects to give life to bland instruments and percussion. This can be done subtly to add a light layer of texture to a sound or it can be overdone to create an entirely new sound.
How does convolution actually work?
We won’t dive too deep into the mathematical processes behind convolution, as a more simplified version of convolution theory is used for audio purposes.
Essentially, convolution is the process of multiplying the frequency spectra of our two audio sources—the input signal and the impulse response. By doing this, frequencies that are shared between the two sources will be accentuated, while frequencies that are not shared will be attenuated. This is what causes the input signal to take on the sonic qualities of the impulse response, as characteristic frequencies from the impulse response common in the input signal are boosted.
Example of convolution
Now that we know what’s happening between the two audio sources, let’s find an input signal and an impulse response and check out what convolution sounds like in action. We’ll be using iZotope Trash 2’s Convolve section, a convolution unit that excels in creative sound design applications.
Finding an input signal isn’t challenging, as that can be anything from an audio file to a MIDI instrument to a live input. Feel free to use whatever you’d like as your input signal. And be sure to experiment a bit; much of convolution’s potential is in its ability to create unique, new sounds.
We’ll be using this acoustic guitar loop, as it has frequency content across the spectrum. This will allow us to hear the effects of convolution clearly in all frequencies.
Next, we need to choose an impulse response. Thankfully, Trash 2 has a whole host of impulse responses for us to choose from, as well as the capability to load in your own impulse responses if you wish to do so. For this example, let’s just use one of the impulse responses in Trash’s library. We’ll use “Fishbowl” in the Body category.
In the audio clip below, I’m increasing the dry/wet parameter of our convolution unit in Trash 2 to show the difference between non-convolved and convolved sound. Listen to how the timbre of the acoustic guitar becomes more and more affected—more and more like the glassy, small ambience of a fishbowl:
This is obviously a more experimental use of convolution, more applicable to sound design than anything else, but convolution reverb follows the exact same principle. Instead of a fishbowl, the impulse response would reference the sonic qualities of something like the Sydney Opera House.
Convolution vs. physical modeling
Convolution is sometimes used interchangeably with another term, physical modeling. Both of these processes function on the principle of imparting the sonic characteristics of a physical space or object on those of another, though the differences in how they do this are important to note.
For starters, the term “physical modeling” is generally more commonly used in a synthesis context. Physical modeling synths aim to replicate the sound of an event like a string pluck, drum hit, or air blowing through a wind instrument, by mathematically recreating the physics of how those sounds are made within the instrument.
Convolution, however, is not generative and occurs by processing audio rather than synthesizing it.
The two processes could be used in tandem. While convolution reverbs generally require the impulse to be removed from an impulse response, convolution, in general, can be performed using anything as the impulse response.
Because of this, we can use a physical modeling synthesizer to create an interesting timbre that will eventually be used as an impulse response in convolution. In the example below, I’ve used Tension, a native physical modeling synth in Ableton, to create this interesting timbre.

Impulse response in Tension
I export this as an audio file and load it as my impulse response on Trash 2:
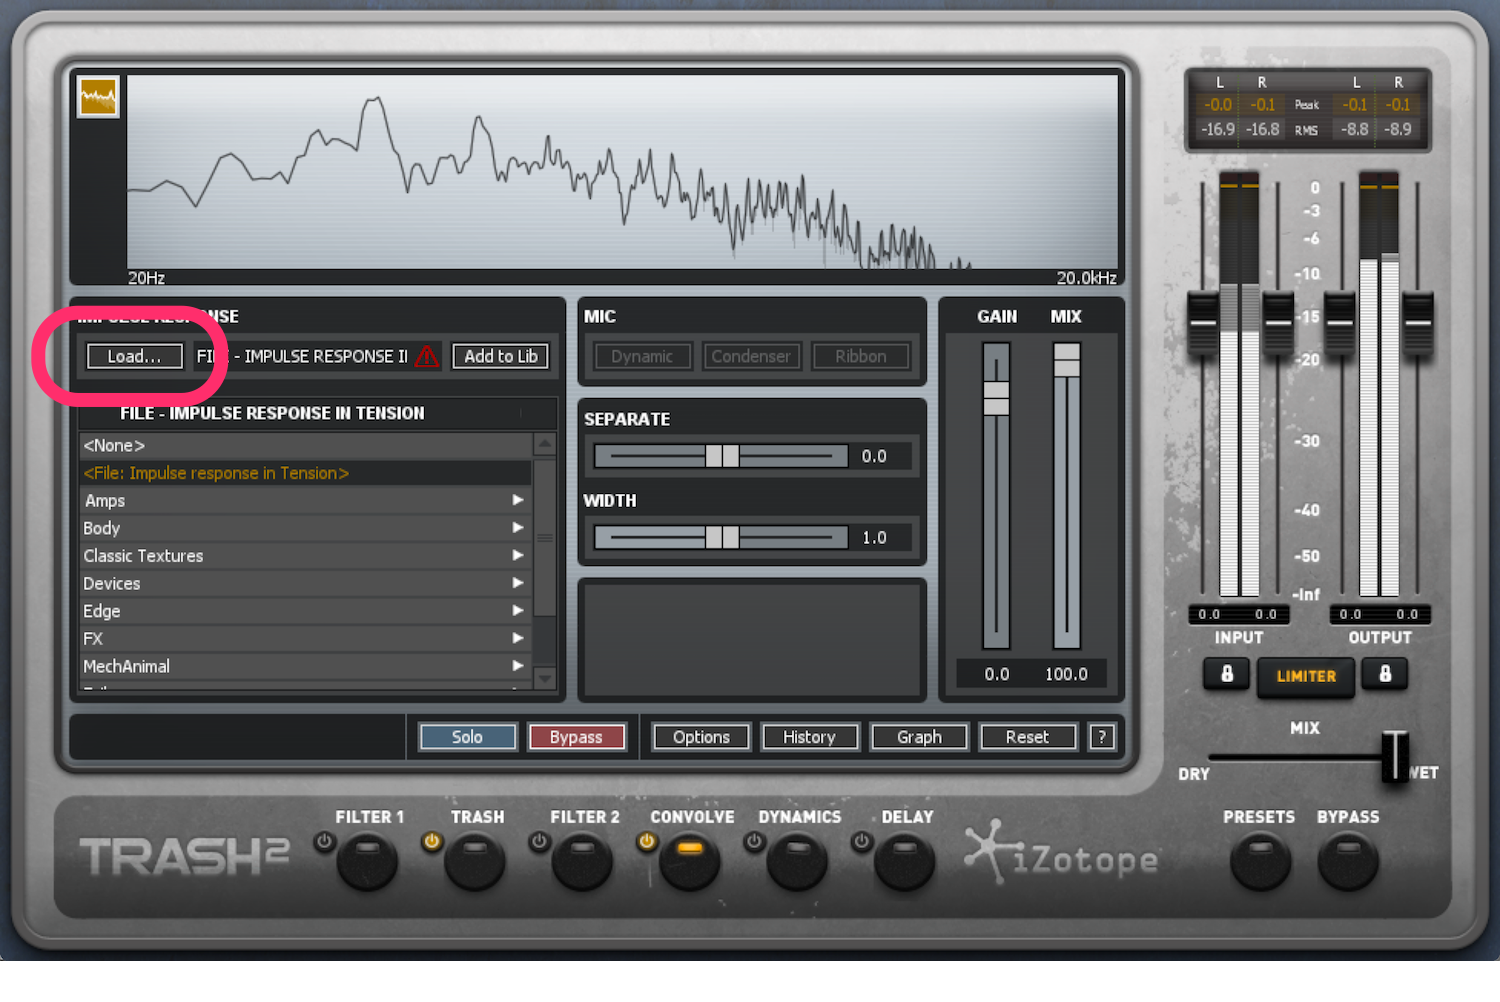
IR Tension to Trash
Listen to the acoustic guitar loop we used in the previous example, now convolved with the sound I created in the physical modelling synth:
Keep in mind that impulse responses can be any audio clip whatsoever, and do not have to necessarily be recorded or created using physical modeling.
Examples of convolution plug-ins
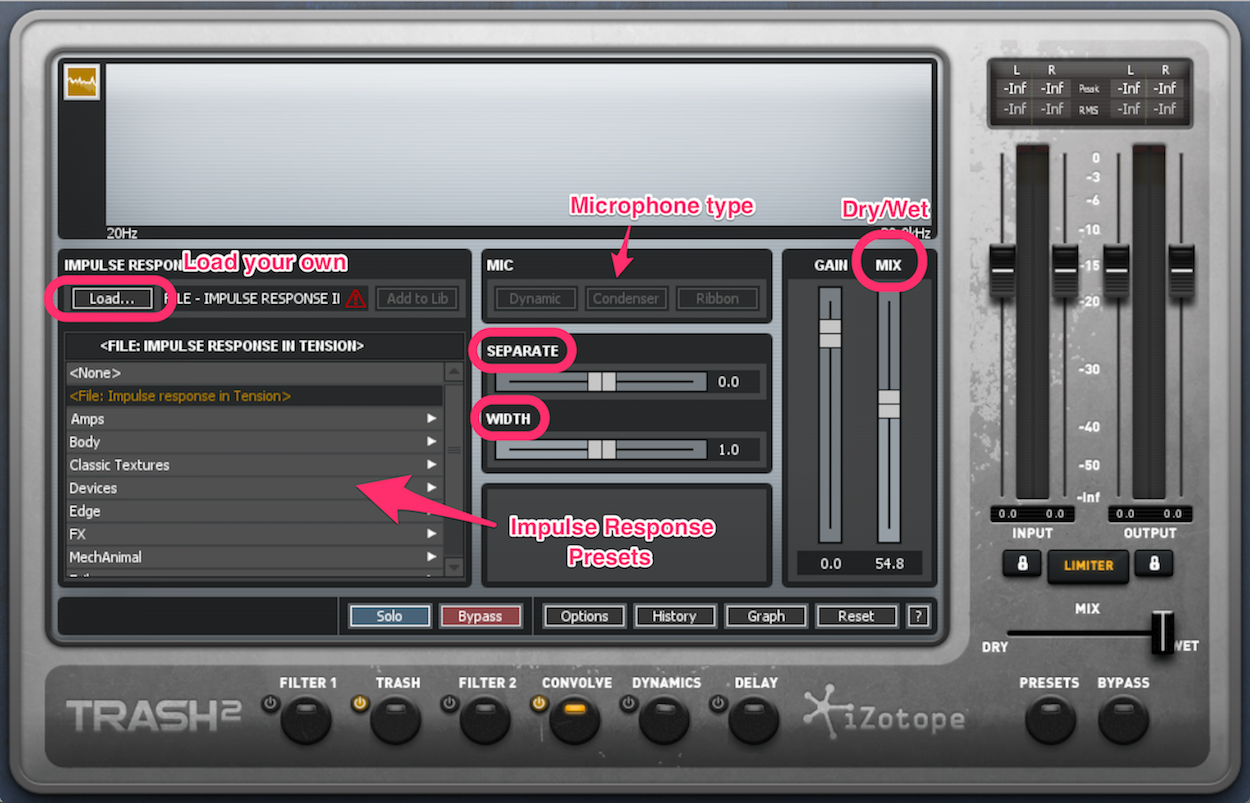
iZotope's Trash 2
We’ve already referenced it in the examples above, but Trash 2 has a powerful convolution unit. It has access to plenty of impulse response presets and the ability to import your own. Trash has adjustable stereo balance (“Width”), Haas effect stereo separation (“Separate”), and the ability to choose different microphone types for processing.
For more info and demonstrations of iZotope Trash 2’s Convolve feature, check out this video.
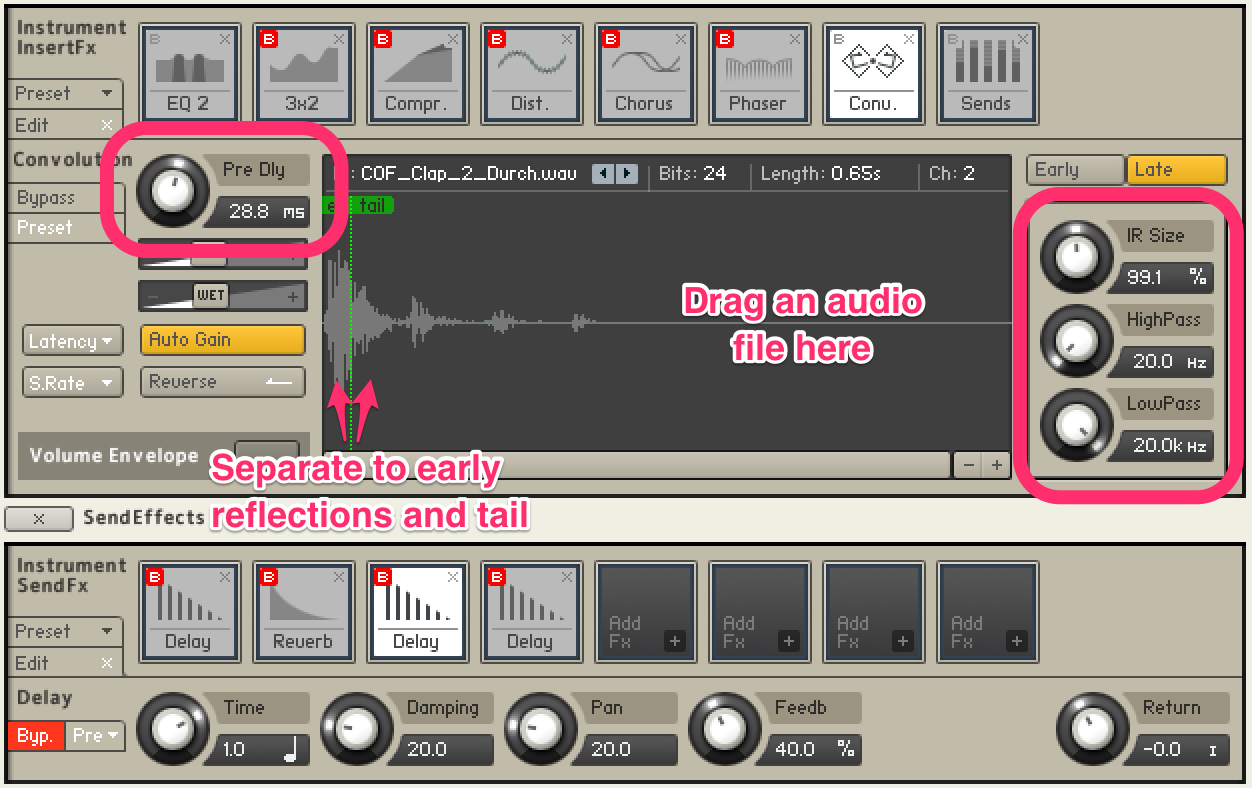
NI Kontakt convolution effect
NI Kontakt actually has a built-in convolve instrument effect. It can be used as an insert or send effect in the instrument’s Edit Mode. Simply drag an audio file into the plug-in window to be used as an impulse response.
The rest of the plug-in functions as a convolution reverb, splitting the impulse response into early and late reflections. These can be separately filtered and sized, and other reverb parameters like predelay are adjustable.
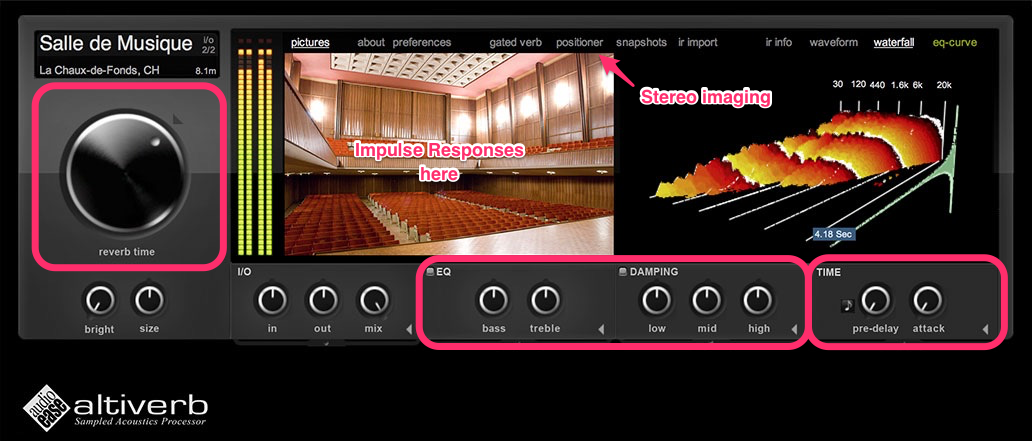
Audio Ease Altiverb
One of the best convolution reverbs out there, Audio Ease’s Altiverb is an easy choice if you’re looking for realistic reverb spaces. It has a TON of preset impulse responses, including those for plenty of famous spaces.
In each impulse response, Altiverb allows customizable reverb settings, including decay time, EQ and dampening for different frequencies, time domain controls like pre-delay, and stereo positioning. Its ergonomic UI displays all of these settings clearly.
Why you should use convolution
The possibilities of convolution are actually endless, as any sound can be used as either an input signal or an impulse response. In sound design, this is an invaluable asset to creating new sounds, as timbres can be intentionally chosen (and recorded) for the purposes you see fit.
Or don’t even think about it and try something on a whim! With the possible combinations, you’re bound to find something interesting.
In a standard processing mindset, convolution reverbs generally sound great. The spaces available in these plug-ins are modeled after some of the most perfectly-designed acoustic spaces in the world.
With the ability to create life-like spacial effects, convolution reverb also has incredible potential for creating believable spaces in music and sound for film and video games. The realistic reverb spaces can help to completely immerse a viewer or player in the experience.
Why you shouldn’t use convolution…?
The only real downside of convolution is that it can be a bit of a CPU-hungry process. High-powered convolution plug-ins can especially hit your computer hard, so are often better used as send effects. This allows you to use fewer instances of the plug-in in the project and keep your reverb spaces consistent in your mix.
Conclusion
Convolution can be a bit of niche process, as it’s not used as regularly as something like an EQ. Additionally, convolution reverbs can be more taxing on your computer than standard reverb plug-ins are.
However, the textural options available through convolution and its hyper-realistic reverb spaces make it a valuable tool in both sound design and standard processing.
And if you get into recording your own impulse responses, this brings a new layer to your convolution process. Different ambient spaces and objects can be chosen depending on what types of timbres you’ll want.
With its availability and potential, convolution is definitely a technique you should familiarize yourself with and put it into action to add depth to your sound.

