How to solve common audio problems with RX Repair Assistant
Learn how Repair Assistant in RX 11 can help you quickly clean dialogue, sung vocals, and instruments, remove background noise, and solve common audio problems.
Recorded vocals and instruments can be full of issues. Background noise and unwanted sounds that can interfere with the clarity of the audio. Poor microphone placement and room acoustics can lead to muddiness or an unbalanced sound. And audio clipping and distortion can occur if levels are not properly managed.
So how can we fix these problems quickly?
RX Repair Assistant leverages iZotope’s advancements in machine learning to help you get quick results when cleaning up audio tracks. It listens to your audio and suggests a great starting point for fixing common noise issues.
In this article, we’re going to walk you through how to use RX Repair Assistant to jump start your mixes.
What’s new in RX Repair Assistant
The latest update to RX Repair Assistant bring significant improvements. The tool now offers more accurate noise and reverb removal for your vocal recordings, able to tackle not only noisy audio, but overly reverberant sound with ease.
The GUI (graphical user interface) has also been redesigned.
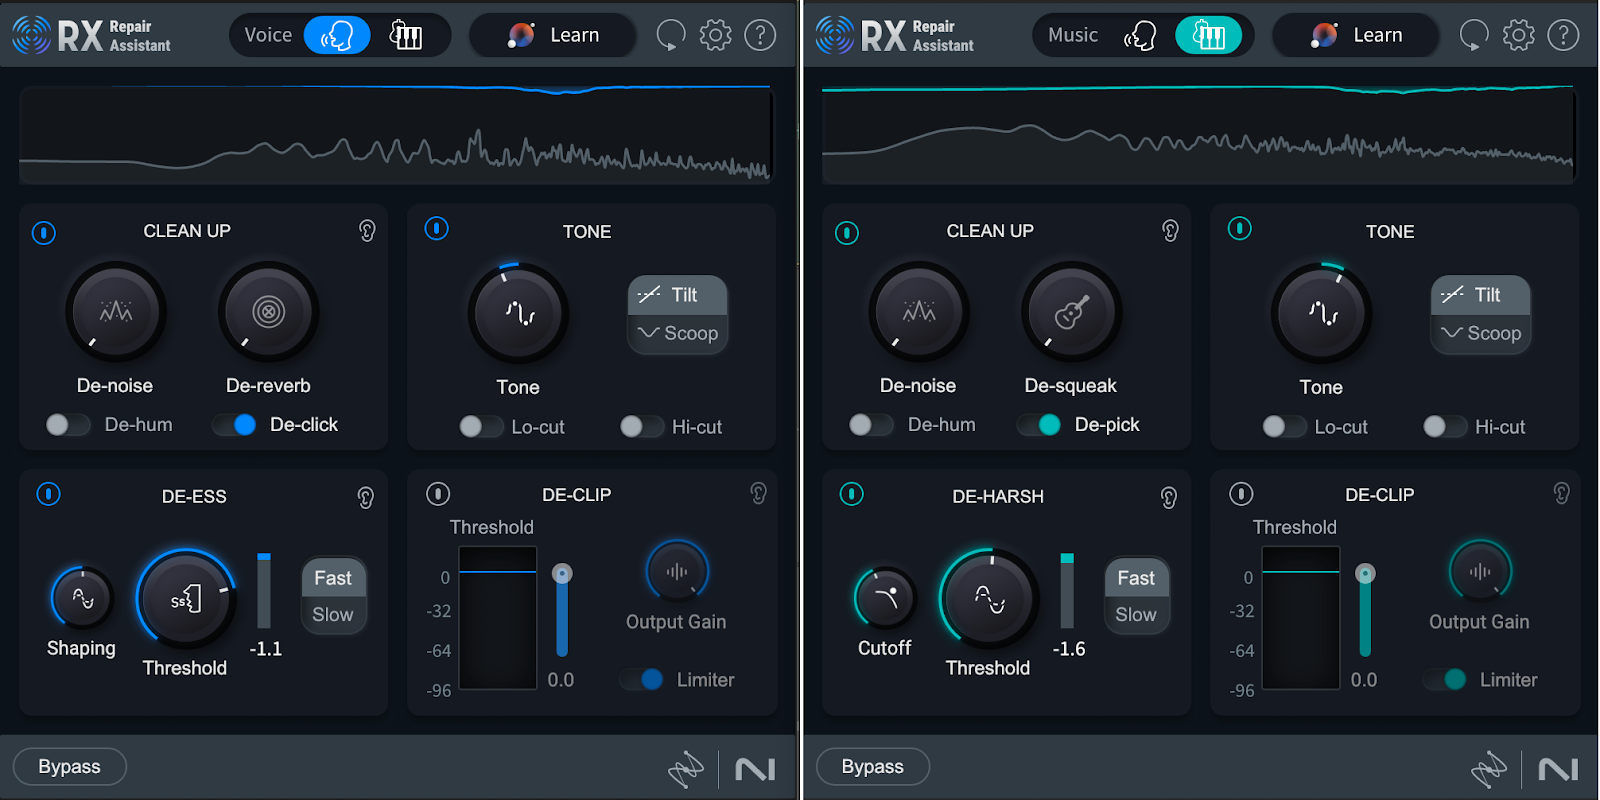
New interface in RX 11 Repair Assistant
On the left of this screenshot is the default tab for Repair Assistant, designed to work with vocals. On the right is what happens if you choose to use this tool on musical instruments, such as guitars, keyboards, and drums.
Switching among Voice and Music settings is as easy as clicking the icon in the top center of the plug-in: the “singing head” gives you access to the voice parameters, and the “keyboard” puts you in music mode.
In either mode, the GUI is separated into four easy-to-understand sections, which make tweaking the assistant’s suggestions very easy to do.
How to clean up common music problems with RX Repair Assistant
What follows are tips for cleaning up dialogue, be they are valid for sung vocals as well as an instrumental context.
Learn the signal
The first thing we do when using the Repair Assistant is select some problematic audio and hit the learn button.
Right off the bat, the assistant will provide settings that sound really good. Tweaking from here is easy, as we’ll show presently.
Background noise reduction
For this example, I will record myself as badly as I possibly can:
When I run this audio through the Repair Assistant, I get these settings:
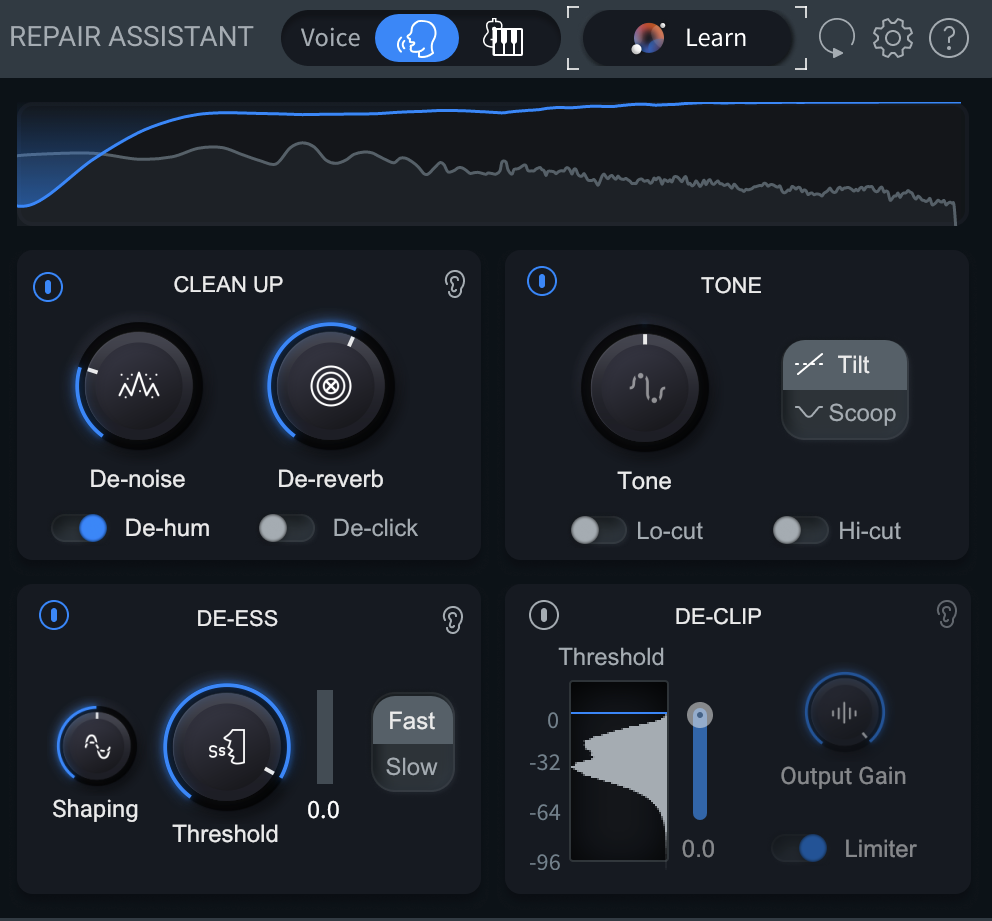
Repair Assistant results
Right off the bat, this is how it sounds now:
A great starting point, but we can tailor things with some tweaking. I’ll shut off everything besides the noise reduction, and I’ll adjust the dial to taste.
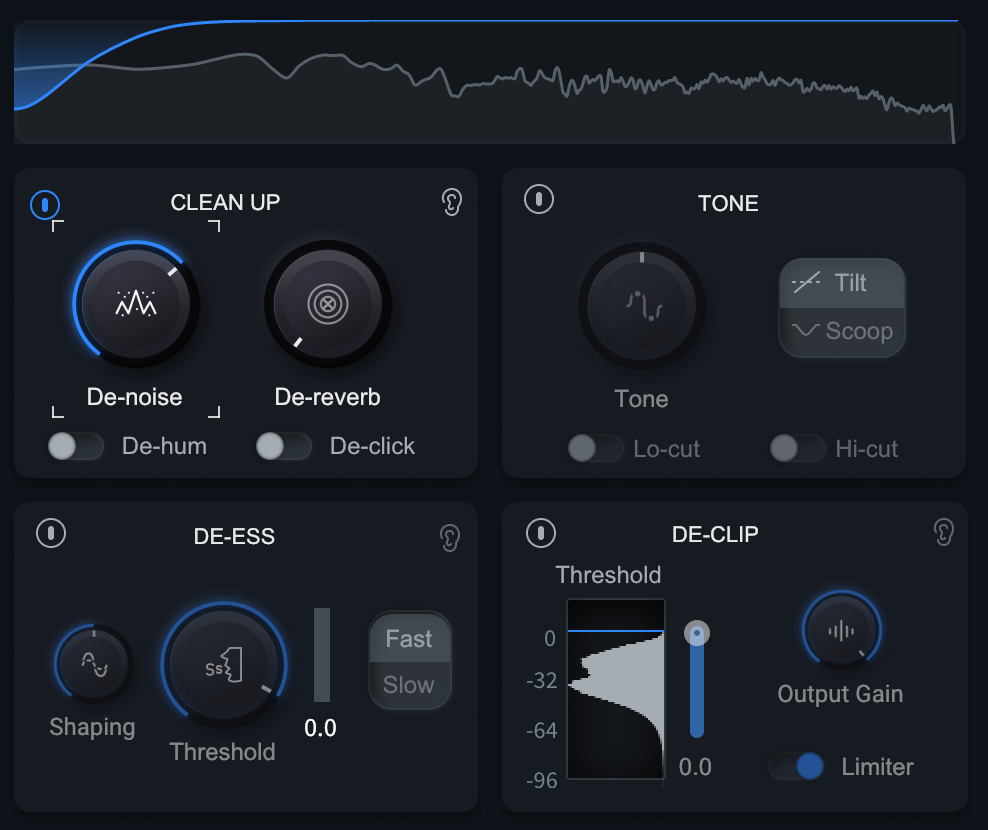
Noise reduction settings in RX Repair Assistant
These are the settings I’ll go with.
Now let’s move on to reverb reduction.
Reverb reduction
I intentionally recorded this as badly as possible, ensuring there would be a ton of room reflections. I did not disappoint!
With the de-noising handled, we can now tweak the De-reverb knob.
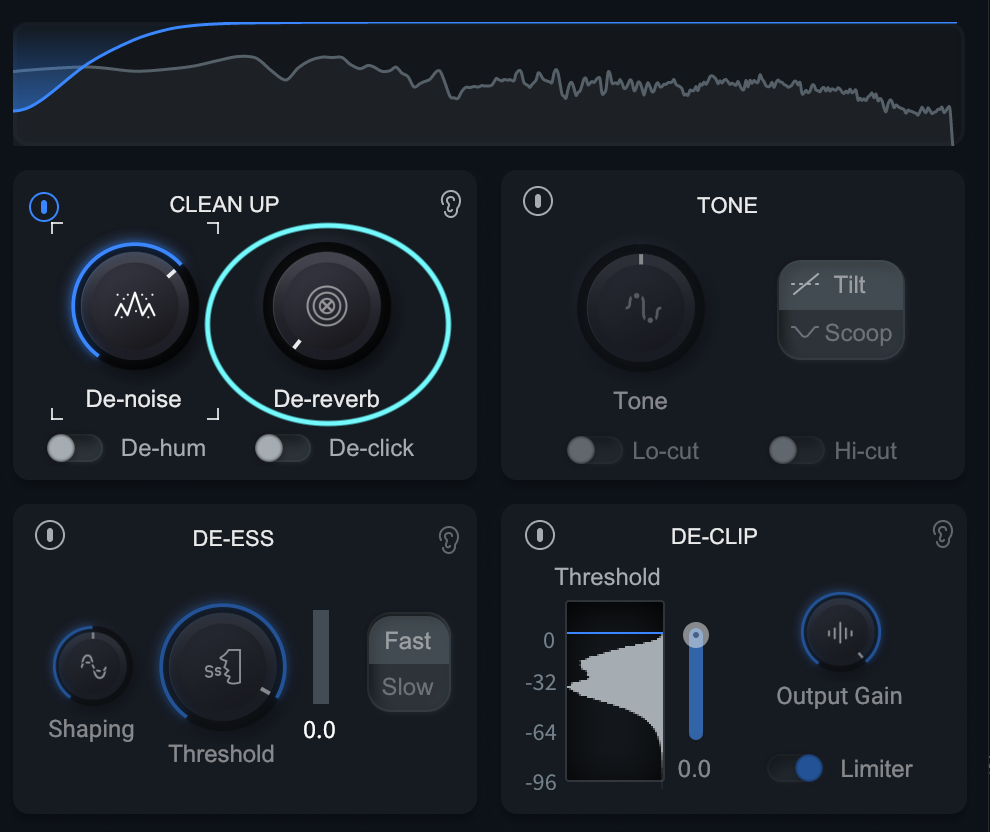
De-reverb settings in RX Repair Assistant
These are the settings I’ll land upon.
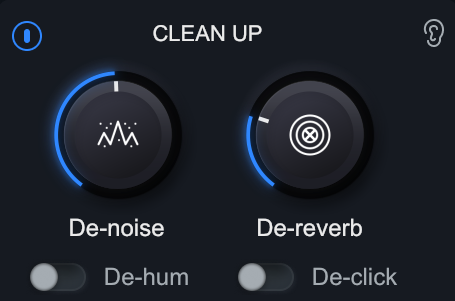
De-reverb de-noising results in RX Repair Assistant
As you can see, I had to adjust the de-noising parameters a bit to get a better sound out of De-reverb. This is not unusual: think of these controls as working together.
De-essing harsh vocals
I think people don’t take advantage of the RX de-esser enough in music productions or in post. It sounds quite good, and the Repair Assistant makes it very easy to use.
In this terrible audio example, we can hear a fair number of sibilance issues. Fixing them with the assistant is as simple as adjusting the controls provided. They are easy enough for the inexperienced user to tweak by ear.
Speaking of ears, don’t be afraid to click on the circled “ear” icon to “solo” the changes you’re making in real time.
We do some basic tweaking, and we can easily land on good results.
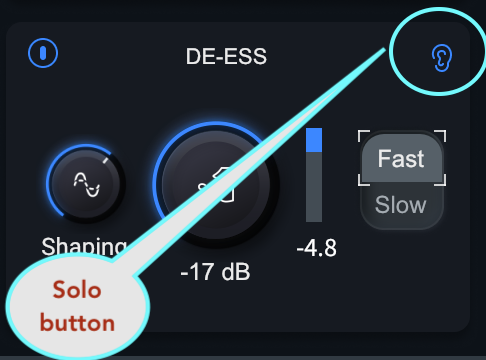
Solo button in the De-ess section of RX Repair Assistant
Tonal adjustments
De-essing is a bit of a tonal problem – the tone of harsh sibilances affects our ears in a negative way. We now have basic tonal controls in RX Repair Assistant as well, and for a piece of audio like this, they are welcome.
I don’t love what’s going on with the low mids here, so let’s see what we can fix with the tone controls.
You see towards the end I’m playing with all the controls we’ve used before. That’s the beauty of the Assistant: you can adjust so many things at once.
Reduce audio clipping
I will now intentionally clip my microphone while singing, causing audio clipping.
Once again, we run it through the Repair Assistant and see what it does – and we do see an improvement.
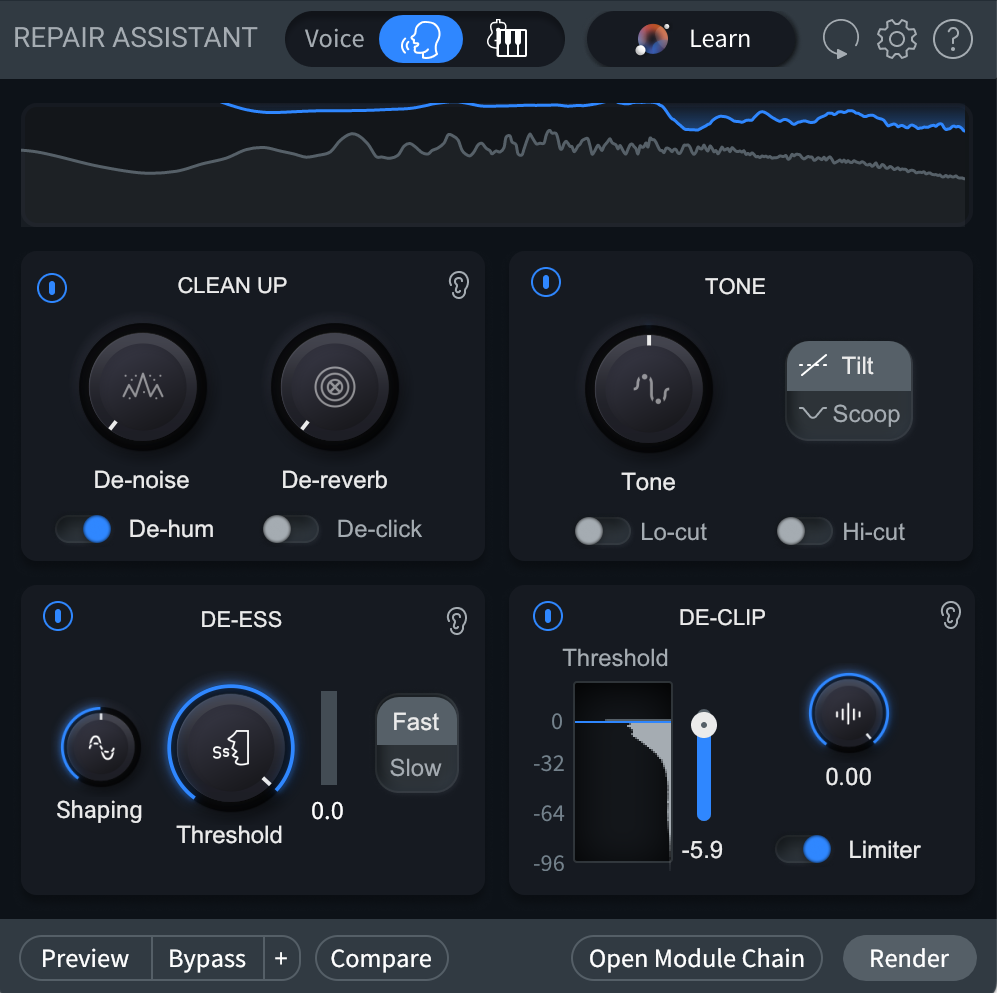
De-clip settings in RX Repair Assistant
But since adjusting is as easy as adjusting three controls, let’s see if we can get something that’s a bit better.
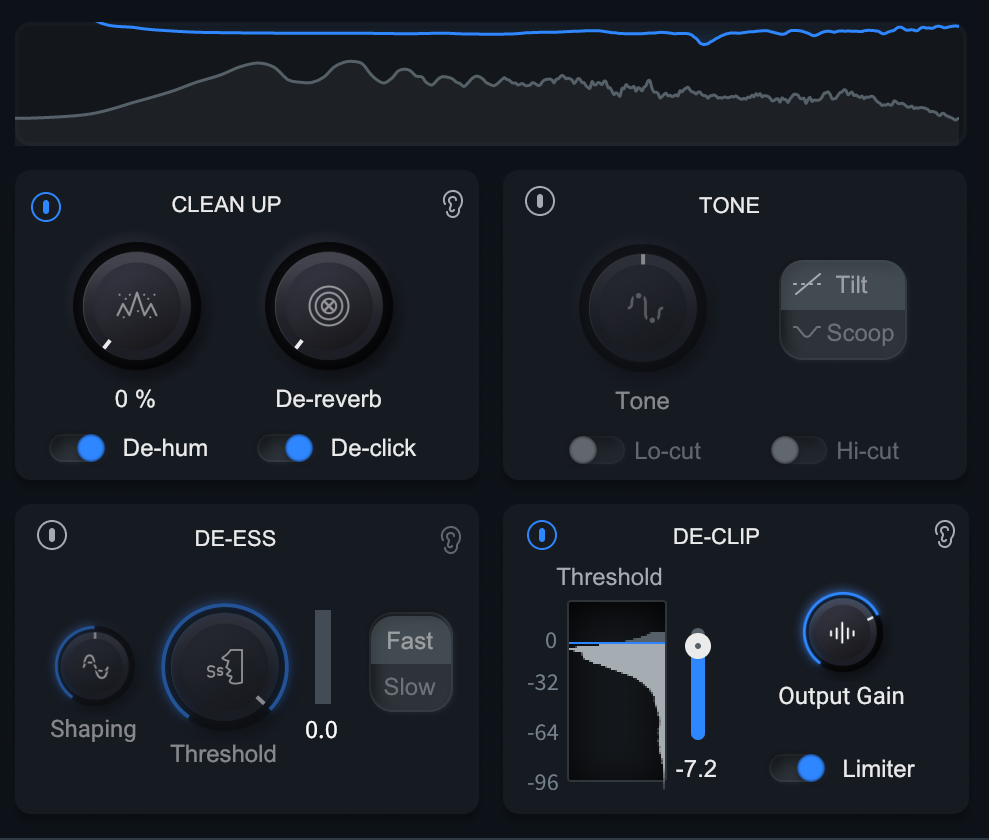
De-clip settings, tweaked
Note how we’ve tweaked the algorithm: we’ve got a higher threshold than before, so we’re actually de-clipping less. The big difference is the output gain is 3 dB down. Sometimes the output gain control of the de-clip section can help us get a more controlled, less overblown sound.
Note that de-clipping can sometimes come at the expense of incurring artifacts. At the end of the word “I” in my tweaked version, you can actually hear more of a pronounced artifact than the assistant’s take on the matter. It’s possible this artifact would be hidden by the music in context – but it’s also possible it wouldn’t. Everything is a trade-off, and everything must be judged in context.
I should note the other thing we’re doing here: we’ve clicked the “de-click” button, which is actually shaving off some of the distortion artifacts incurred by overloading the mic pre. Definitely try using it when de-clipping – it can come in handy. Otherwise, use the De-click button for the usual culprits: mouth noises, digital clicks, and the like.
Instrumental repair
The RX Repair Assistant Music section boasts a lot of powerful features to help you marshall unruly audio. I’ll use a remix project I’m doing for Pete Mancini as an example – a lovely tune called “To Be Alive,” which has great acoustic instruments recorded throughout.
Drums
Let’s start with the drums, played with brushes:
The snare is picking up some resonance from the toms. We can fix this easily with Repair Assistant, using this setting on the snare.
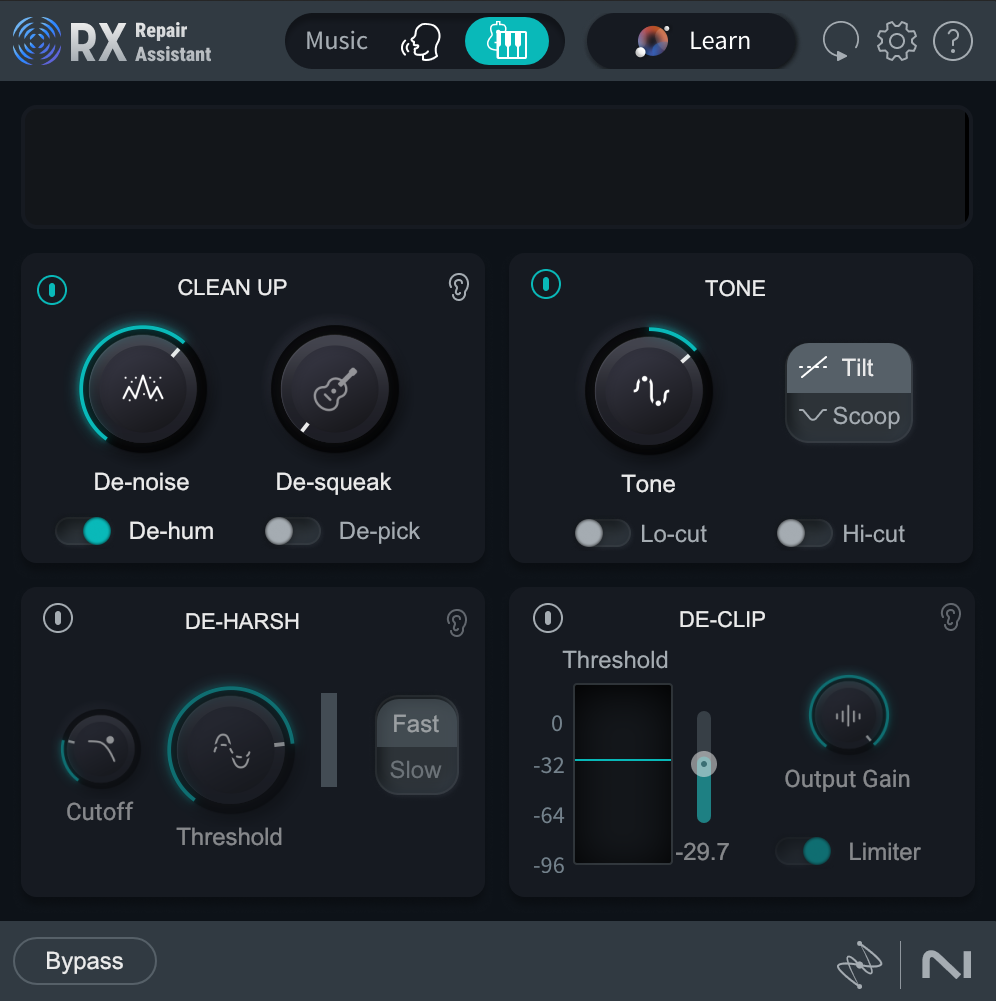
RX Repair Assistant on snare
As we can hear, the tom resonance has been removed from the snare.
Bass
Moving on to the bass, played here in solo.
It sounds like a bass. It’s good. But we’re getting some quick, aggressive noises in the high midrange that I’d like to curtail.
Now here’s a funny thing about bass: for whatever reason, the same processors that work on vocals work well on basses. 2A-style compressors and famous hardware boxes with the word “Vox” in the name are frequently used on basses as well as vocals.
I mention this because we’re using RX Repair Assistant on Voice mode to catch the harshness with the de-esser, and we’re using its tone control to mellow it out a bit too.
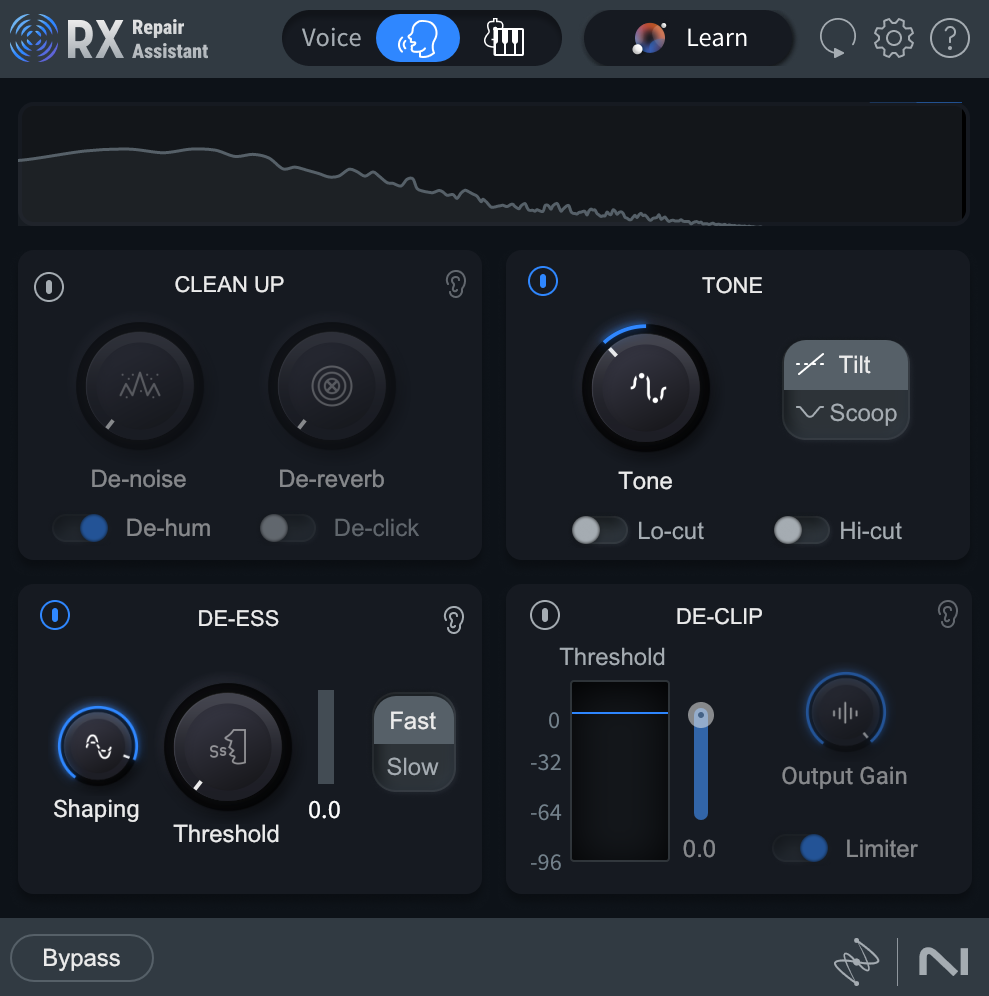
RX Repair Assistant on bass
It’s doing a nice and subtle job of ameliorating that issue without eliminating it entirely, which would sound unnatural.
Guitar
Finally, let’s have a listen to the main acoustic guitar part in solo.
It’s a good-sounding acoustic guitar, but I’d like to tamp down the pick attack if possible, and maybe mellow out the high-mids. Let’s see what the Repair Assistant gets us, after a bit of adjusting.
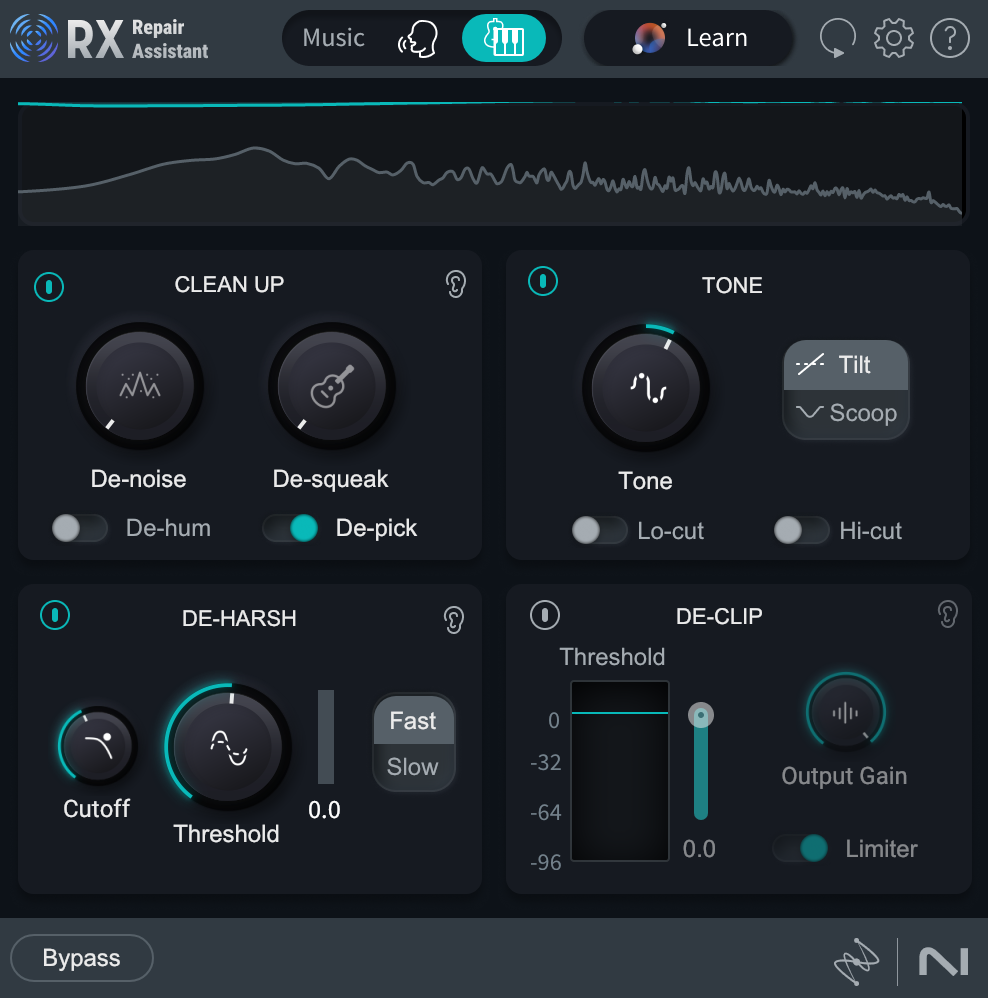
RX Repair Assistant on guitar
I’d argue these instruments are now in a better position for moving forward.
Start getting clean recordings with RX Repair Assistant
Now that we’ve taken you through how to use the tech, feel confident that many of your audio issues are solvable with the click of the learn button and an adjustment of these simple, powerful controls. Go forth and make the cleanest audio you can!

