Removing Dropouts and Gaps Using RX
Learn how to fix common audio problems like gaps, dropouts, and short sections of corrupted audio in this step-by-step tutorial.
Gaps, dropouts, and short sections of corrupted audio are a common audio problem. These can be caused by everything from a loose audio cable to digital errors.
In this blog post, we’ll review these common audio problems and look at ways to address them using RX’s various audio repair options. (To learn more about the subject, read our blog about removing intermittent noises.)
Step 1
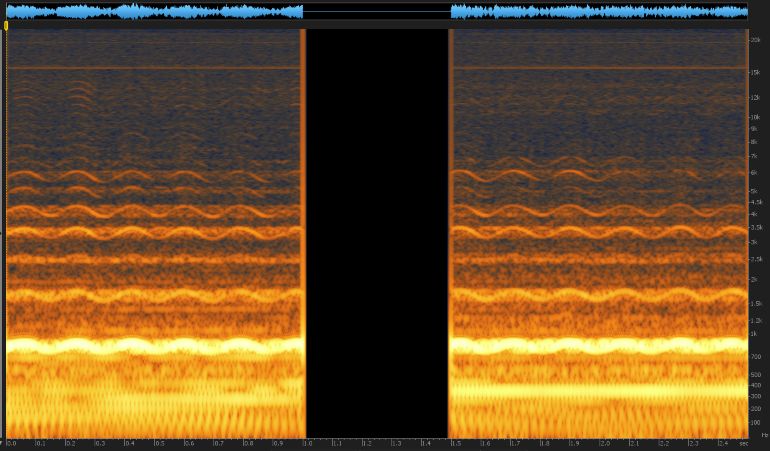
Audio dropouts are easily spotted in either a waveform or a spectrogram view; however, working with a spectrogram makes the repair process easier.
First, make sure you have the gap highlighted. Use a full-bandwidth selection tool to highlight a very small amount of audio to the left and the right of the gap, as clicks will be present (a result of the waveform being interrupted between zero crossings). This technique also helps hone in on material that will later be replaced.
Step 2
Once you have the audio gap highlighted, ask yourself these questions before processing:
- Is the audio fairly steady, with low harmonic content? If so, use Replace to process the gap.
- Does the audio have a repeating pattern, such as a vibrato? If so, use Pattern to process the gap.
- Does the audio seem suited for treatment with Replace, but is much more harmonically intense (like music)? If so, use Partials+Noise to process the gap.
Replace always connects harmonics from two sides of the gap horizontally, while Partials+Noise can connect frequency-varying tones, more common in music.
Step 3
Listening back to your audio is important—particularly when performing repair on full bandwidth audio dropout.
Step 4
Repairing the audio dropout may work the first time, but sometimes you may need to do a couple of passes.
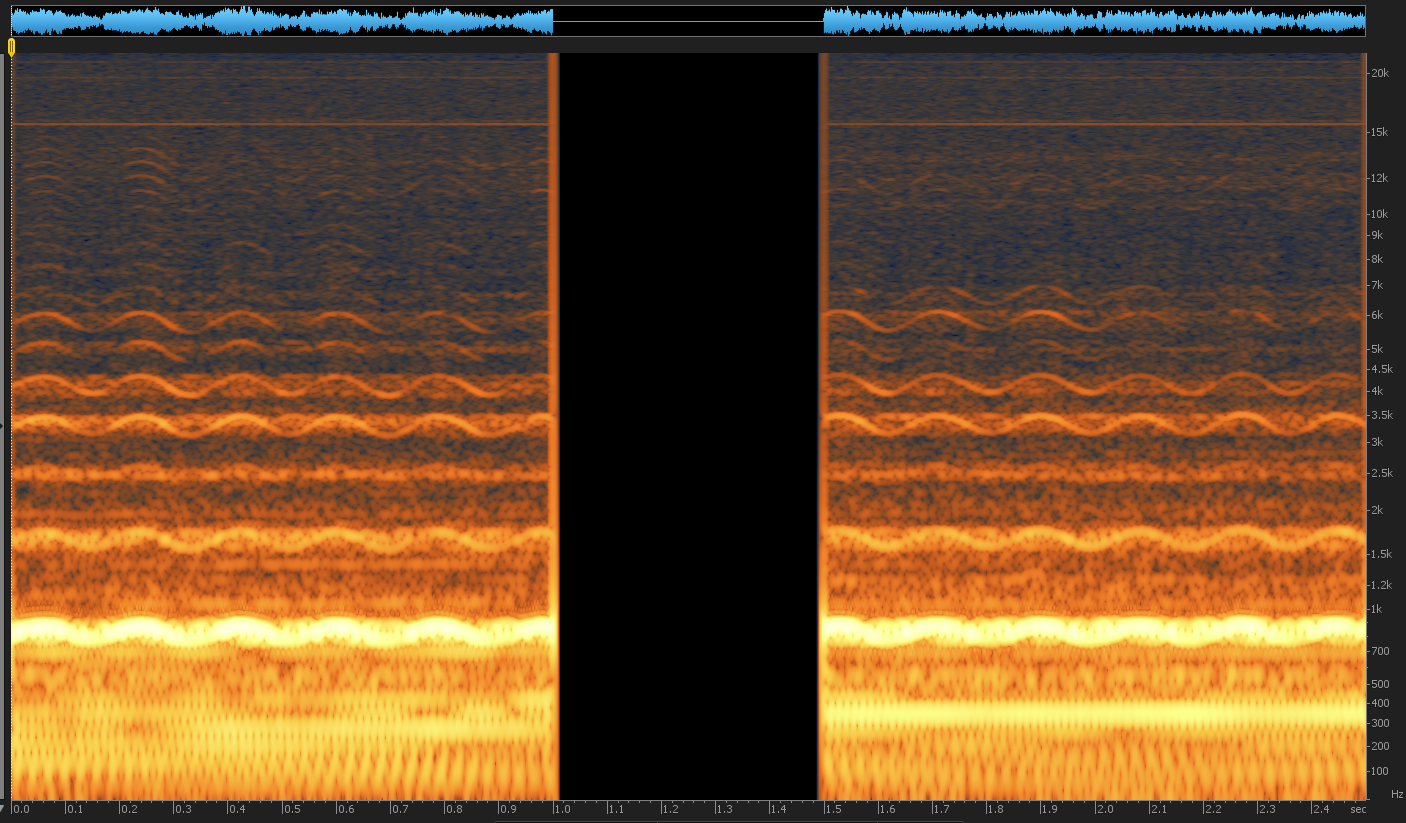
For instance, in the above image, we have an opera singer and an orchestra. Pattern was used to replace the dropout, resulting in this:

Although this may sound good, we can see that the slowly evolving orchestral chord has been repaired abruptly.
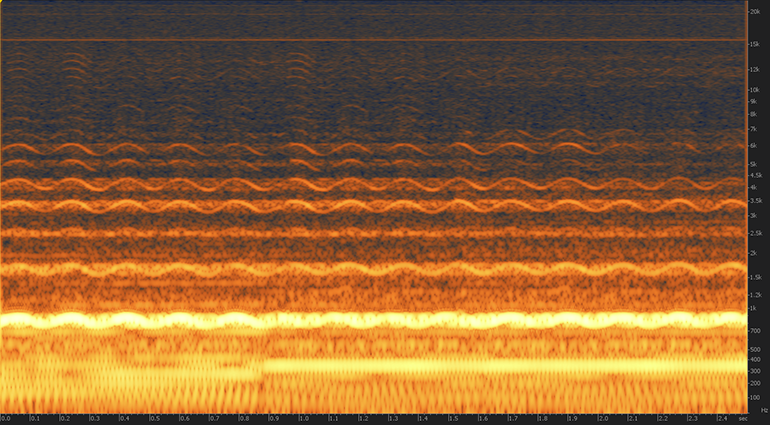
In situations where a whole signal does not transition smoothly, you may need to perform a second pass.
Target the specific frequency area and process it with the appropriate algorithm. In this case, you should use Partials+Noise to replace the harmonic content.
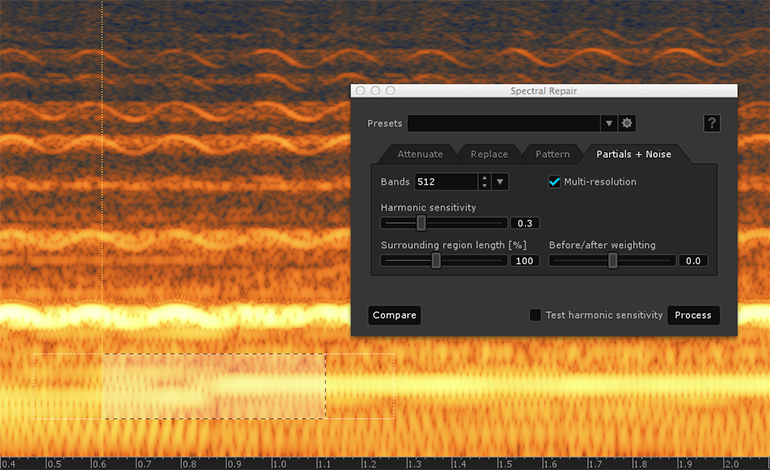

In this image, the audio dropout has been repaired and some additional steps have been taken to ensure a seamless edit.
Using Spectral Repair in RX 4
The Spectral Repair module in RX 4 can be used to fill in unwanted gaps and remove intermittent noises. Spectral Repair offers four different algorithms that you can use for audio repair, each of which works in unique ways:
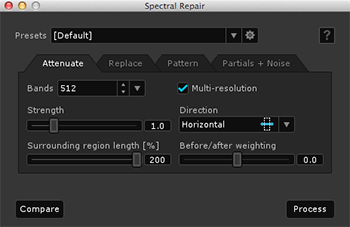
- Attenuate is an intelligent gain adjustment. It can be used to push unwanted audio events into the background—particularly useful if the unwanted audio events don’t completely obscure the desired signal.
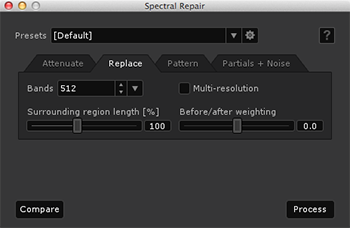
- Replace is used to replace damaged audio, including entire gaps and dropouts. It can resynthesize audio using the audio information surrounding the damaged area.

- Pattern is suited to patching badly damaged audio that contains repeated components, such as instrumental vibrato. It’s an intelligent copy and paste function that incorporates advanced blending techniques.

- Partials+Noise is a more advanced version of Replace. It’s more effective on heavily harmonic content, and focuses on detecting and resynthesizing harmonics.
RX 4 TIP: The Spectral Repair plug-in only works with DAWs that support a technology called offline processing. Pro Tools is one such example.
Spectral Repair requires precise selections using either the basic or advanced tools. If you’re using Spectral Repair as a plug-in inside a DAW, note that it includes a built-in spectral editor window that works in a similar way to RX 4’s interface


