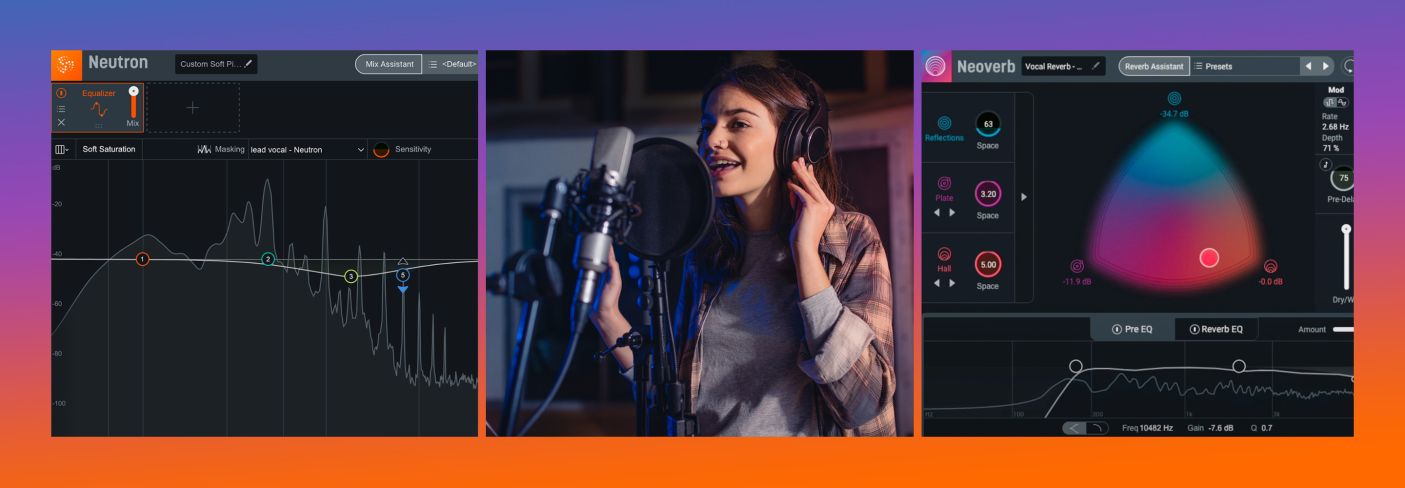
Mixing Vocals: How to Create Space for Vox
A clear vocal is only possible if other elements in the mix leave space for it. In this article, we discuss various ways for mixing vocals to create space and sound like a pro.
If you want to be a mixing engineer, you’re going to have to contend with vocals in the mix. There’s no way around it: vocals are incredibly important to modern-day music.
When beginners start to contend with vocals, they often focus their attention on the vocals alone. “What’s the right vocal EQ?” “How should I compress this vocal?” “How do I process this voice to shine as brightly as possible?”
Here’s the thing: your vocal doesn’t exist in a vacuum! You also need to focus on the rest of the mix to make the vocal shine. In this article, we’ll discuss various ways to mix the instrumental portions of your track to showcase the vocal.
Follow along with these tips by getting a copy of


Music Production Suite 7


Neutron


Nectar 3 Plus


Neoverb
This article references a previous version of Neutron. Learn about

Neutron 5
Jump to these sections:
General guidelines and good practices
The following are some quick, actionable tips to keep in mind—tips you can benefit from right away!
Mix all your tracks with the vocal in
Working on your drum sound? Keep the vocal in. Working on the guitars? Keep the vocal in. Keeping the vocal in makes sure you’re always considering the vocal as you balance the instruments. When you’re focusing on other elements of the mix, it doesn’t matter if you have the vocal -24 dB lower than you normally would. Just have it playing somewhere so your brain is constantly referencing the vocal in some capacity.
Listen to what you’re not EQ’ing
After you start understanding what a 4 kHz boost might do to a guitar, take that ear-training one step further. Try to hear what a 4 kHz boost on the guitar is doing to the vocals. Processing one instrument will always change how the others are perceived. Pay attention to the vocals while EQing the keyboards. You’ll avoid a lot of vocal conflicts that way!
Use submixes for quick balances at any point in your mix
Submixes are helpful for changing the balance of your mix as quickly as possible. If you’ve got twenty-five guitar tracks covering up the vocal, you don’t want to waste time grabbing all of them. Bringing down the guitar submix is much faster.
Listen to balances from far away
Every once in a while, get up, leave your listening position and see how everything sounds from outside your room. Your snare, bass, and vocals should still sound quite prominent, even from this far away. This instant perspective shift can tell you a lot about what needs to change in the mix, especially to accommodate a vocal.
With these guidelines in mind, let’s walk you through some specific Music Production Suite tools that can help you in helping your vocals shine.
Mixing vocals with Unmask in Nectar


Nectar 3 Plus


Relay
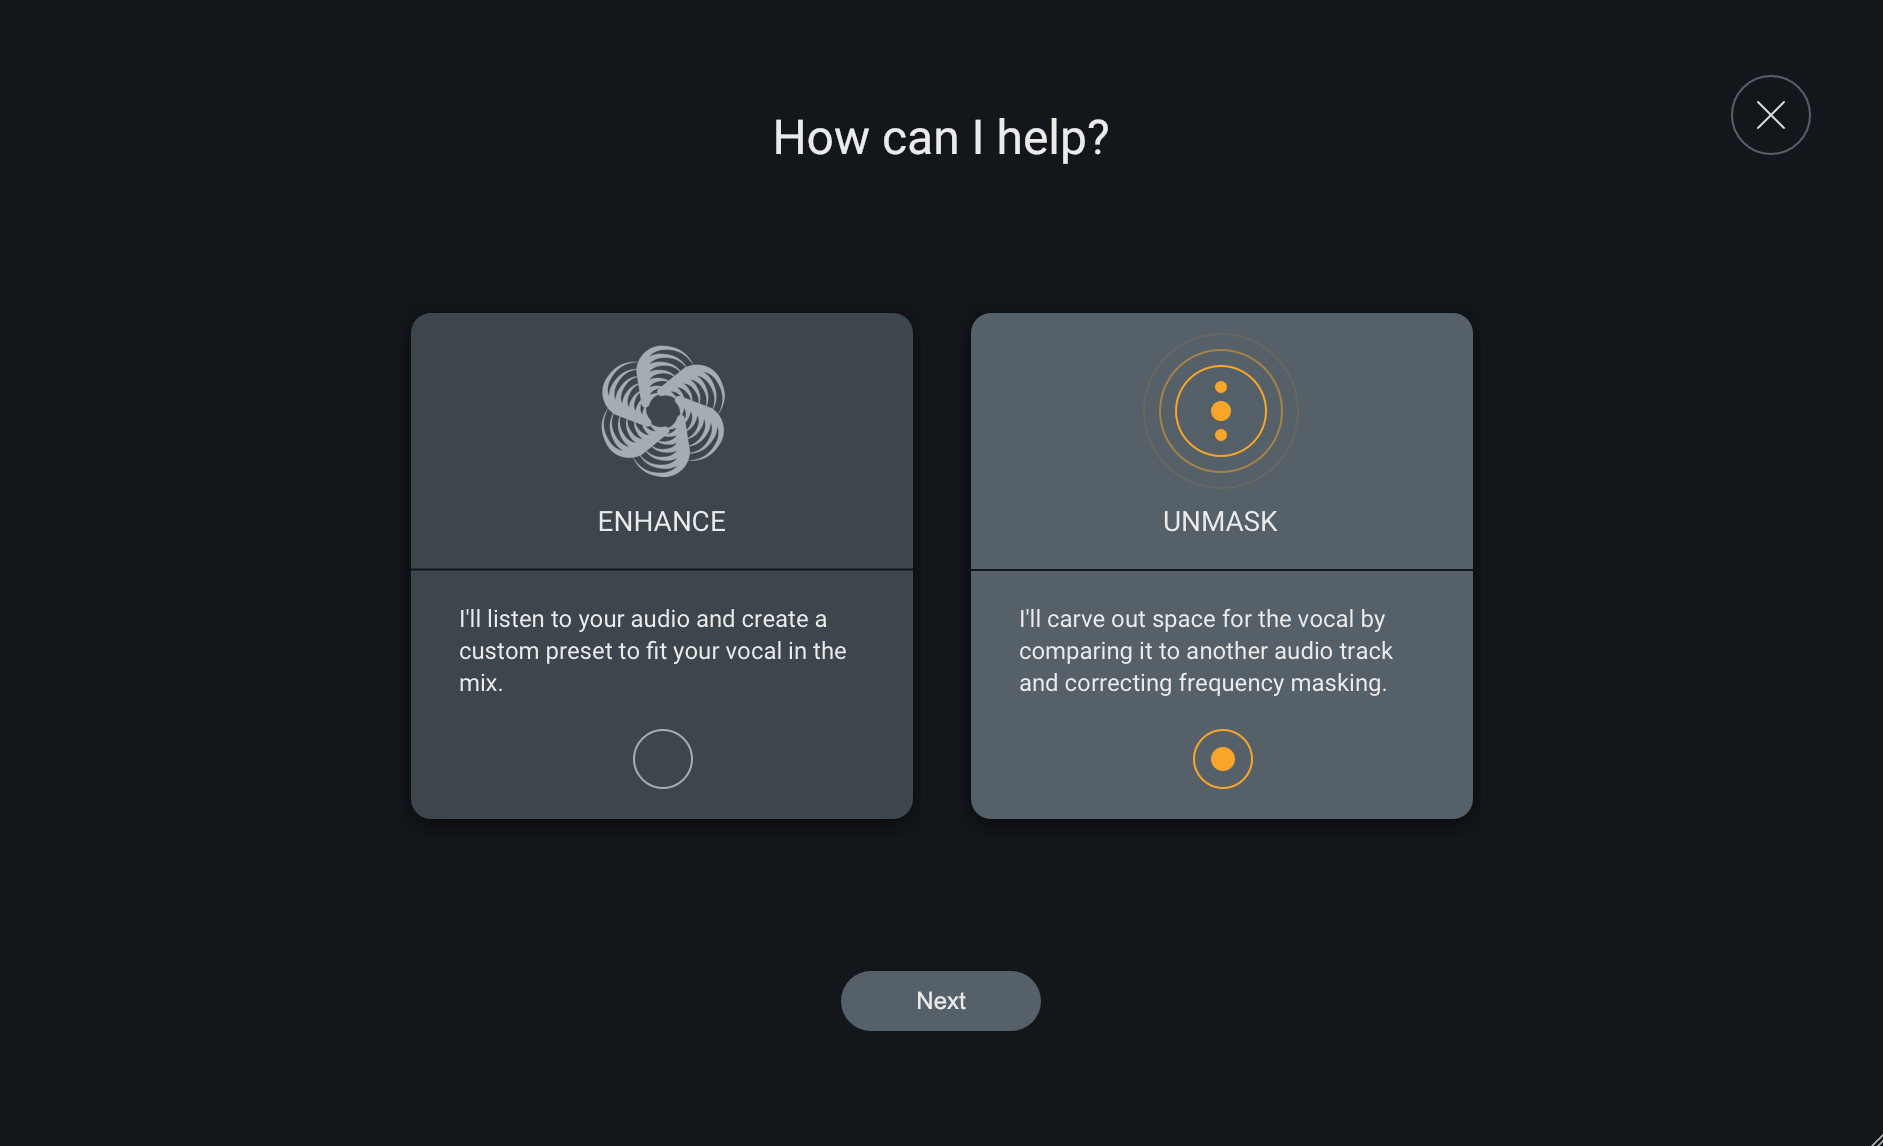
To get started, simply load Nectar on your vocal, and any iZotope plug-in with inter-plugin communication—Nectar, Neutron, or Relay—on a conflicting instrumental track in your mix. Open the instance on the vocal channel and enter the Vocal Assistant. Right off the bat, it’ll give you the prominent option for Unmask:
Vocal Assistant Unmask in Nectar
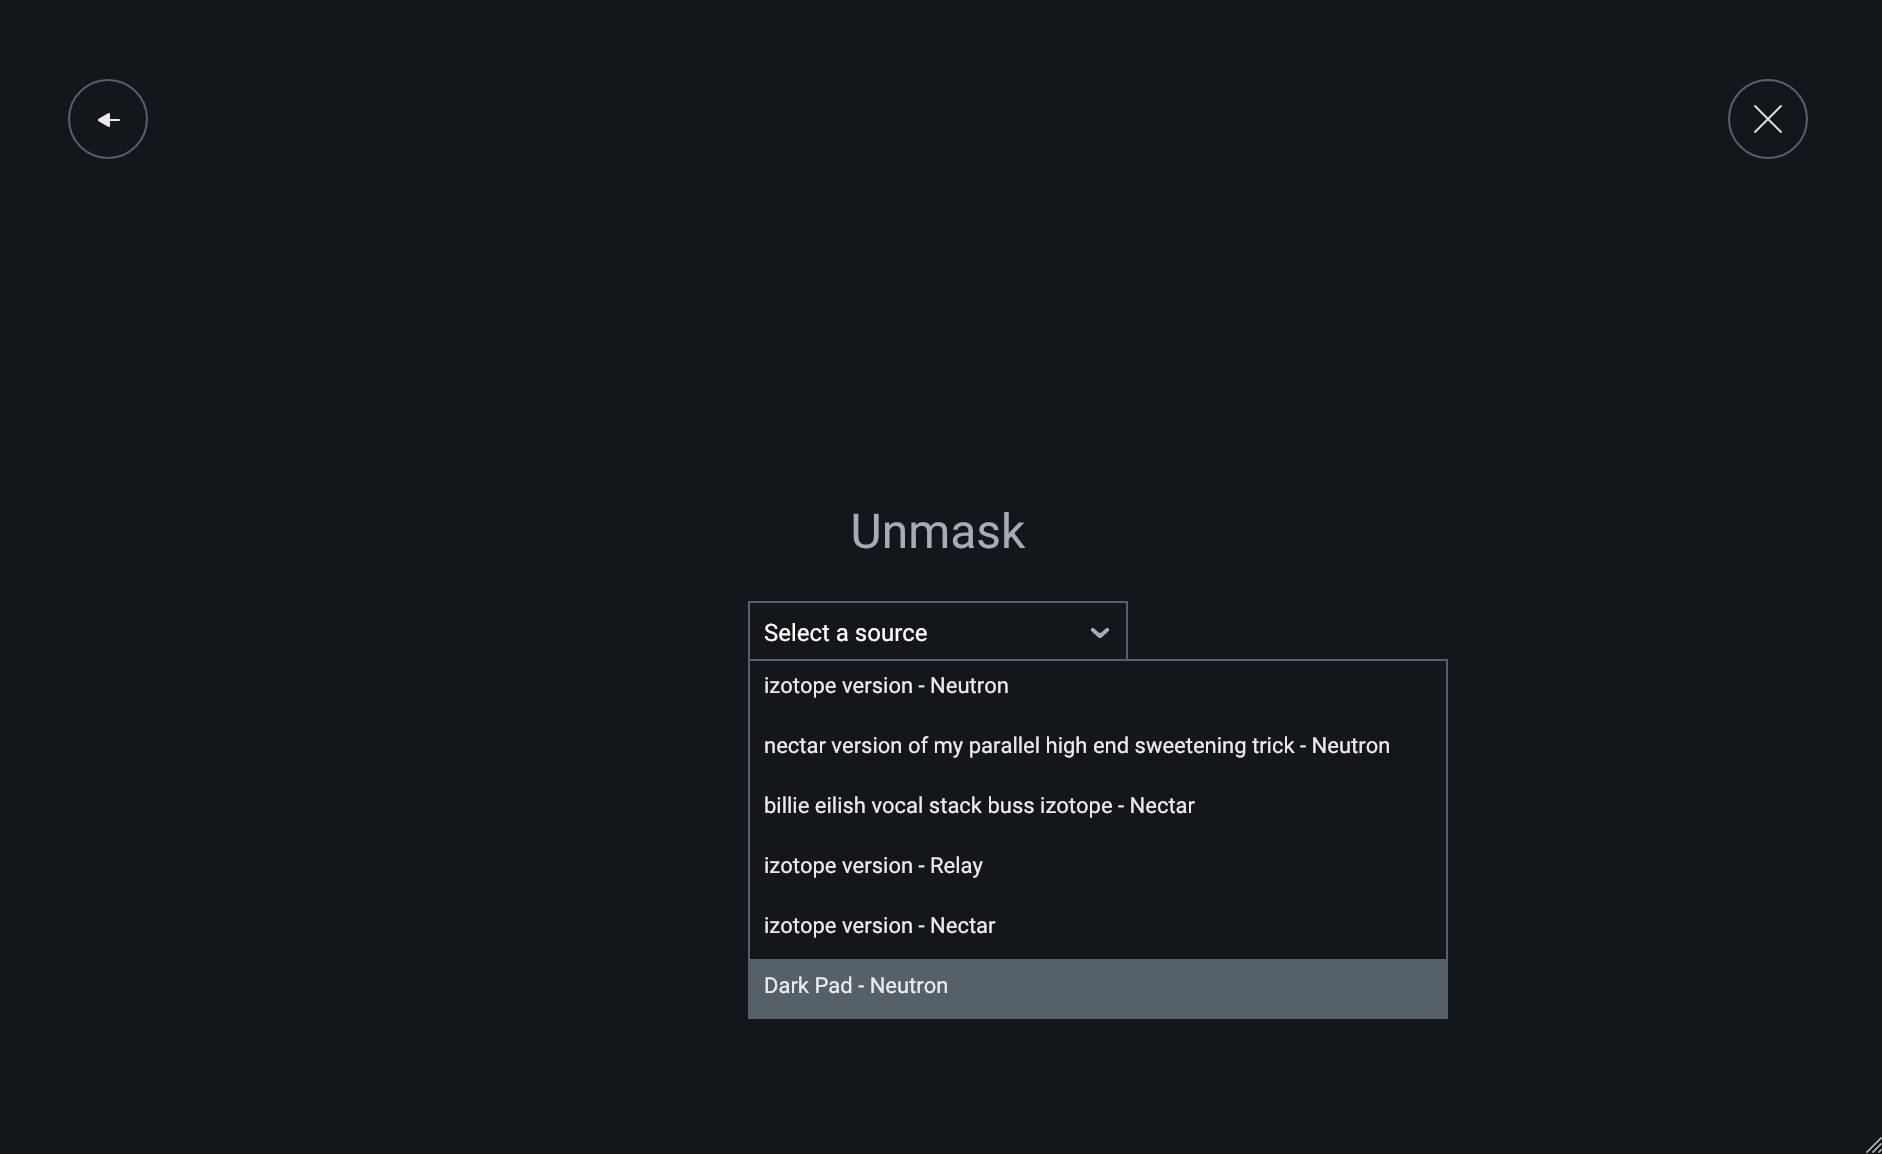
Engage the Unmask feature and choose the element masking your vocal from the drop-down menu.
Select your source in Nectar
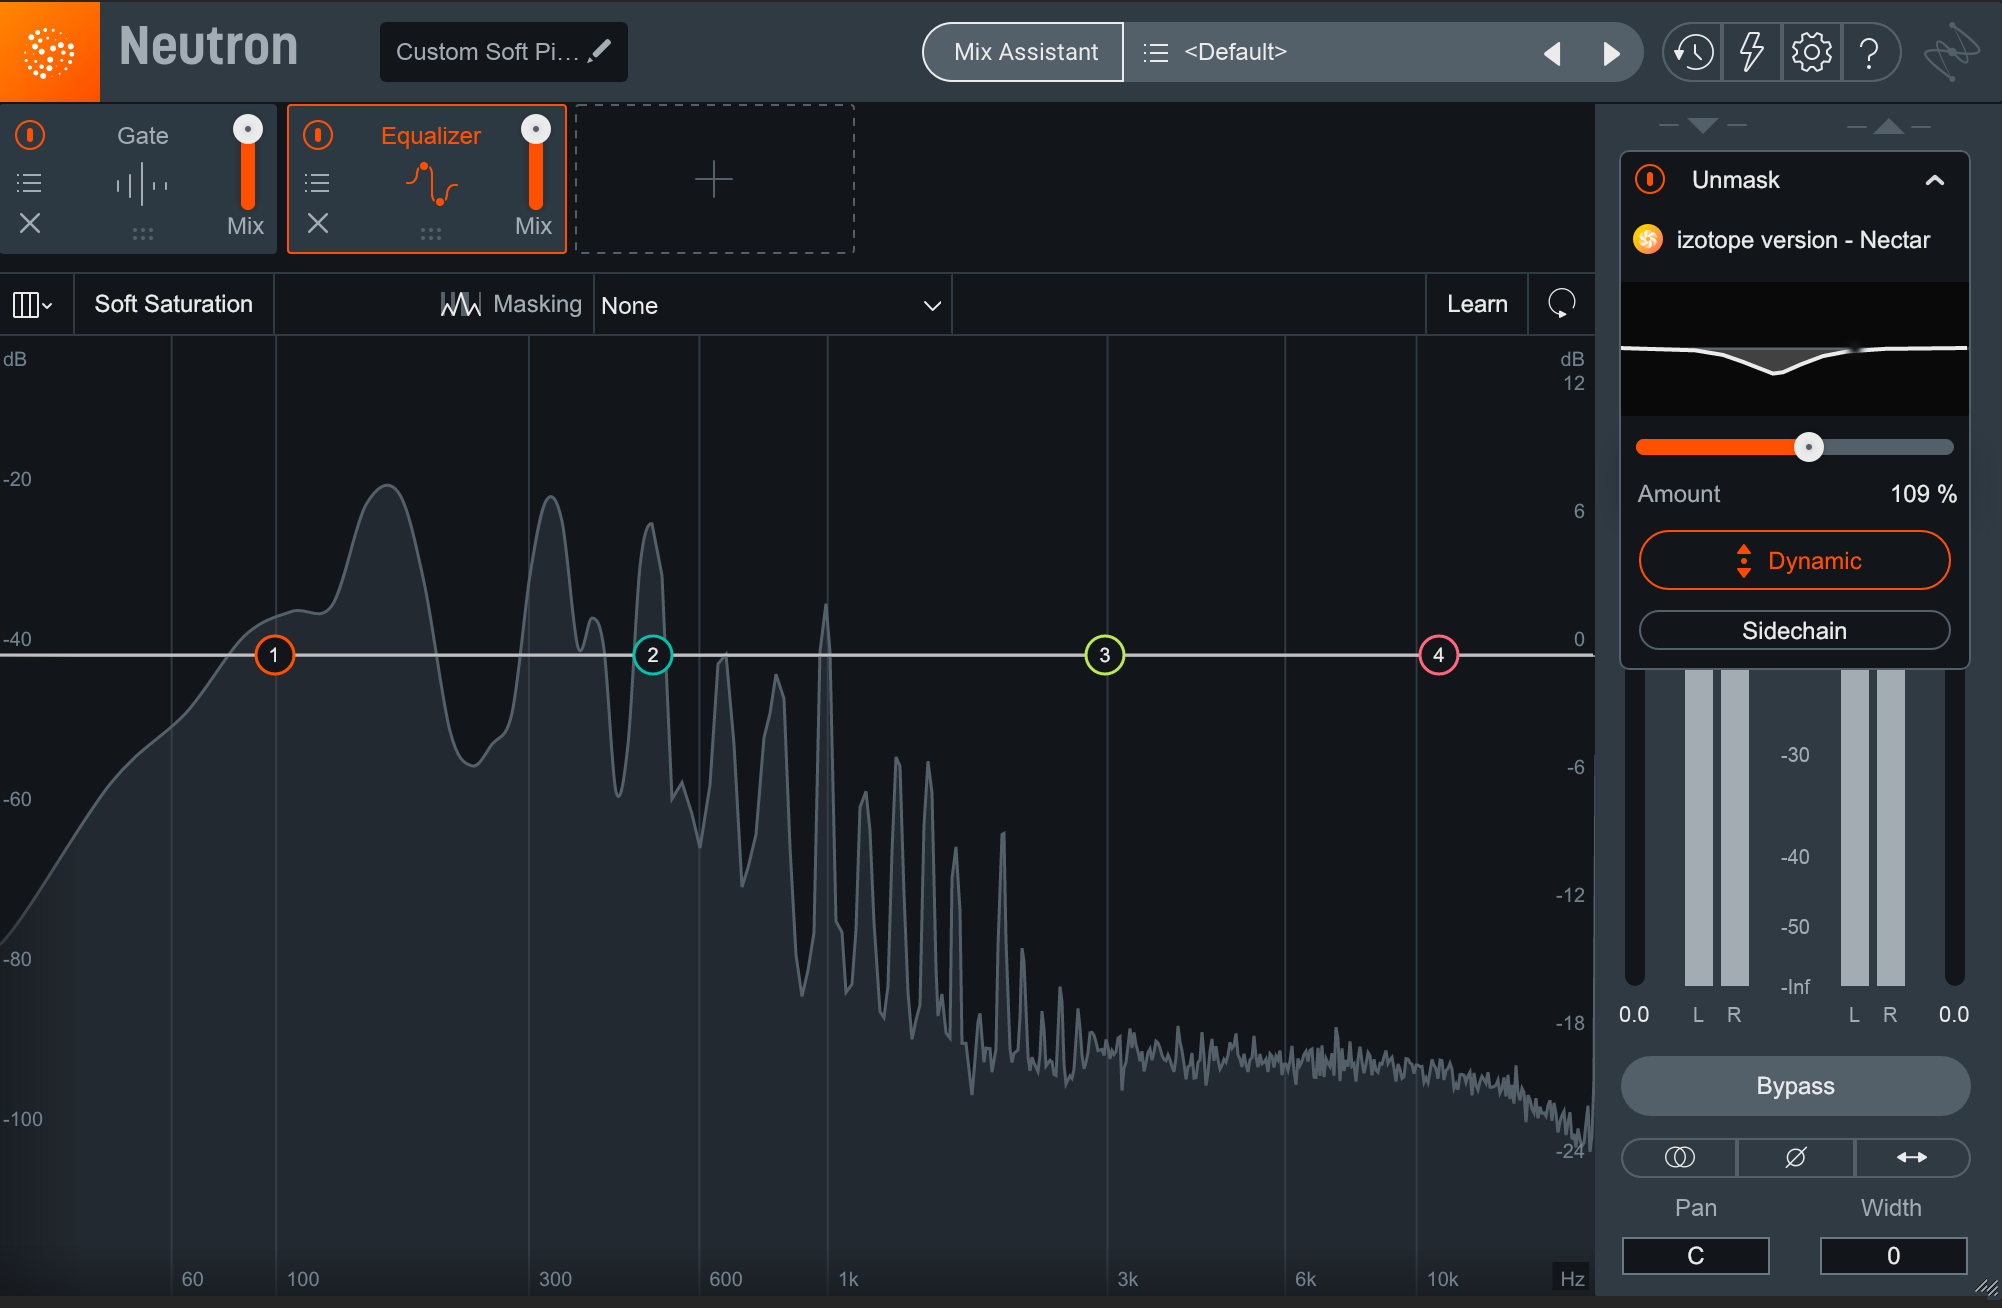
Select the masking element, press play, and Vocal Assistant will automatically analyze incoming audio to clear space for your vocal in the mix.
Neutron unmasked
Note how there’s now a tab that reads “Unmask” in the upper right hand corner. It displays the frequencies that will be attenuated. The percent slider lets you dictate how aggressively Neutron will cut these offending frequencies, and a dynamic mode will duck these frequencies only when the vocal is singing. Pretty easy.
Using the Masking Meter in Neutron
The same process can be done manually using Unmask or the Masking Meter in Neutron. Of course, you’re going to want to learn how to identify frequency masking with your ears if you want to be an audio engineer, but using the Masking Meter in Neutron will teach you about where vocals typically rub against other instruments. Here’s a video showing the basic operation of the Masking Meter.
This is a great teaching tool. I could tell you that the fundamental of a male vocal sits between 100 and 300 Hz—or that the corresponding range for a female vocal is 200 to 400 Hz—but that’s not going to help you hear what these ranges sound like, or hear how other instruments may conflict. The Masking Meter will, however.
Common EQ techniques to resolve vocal conflicts
Let’s go over some common techniques for resolving vocal conflicts with instrument tracks, shall we?
Static EQ cuts
You’ve trained your ears to identify basic frequency ranges, and now you want to know how to wield your knowledge in search of better mixes. Fear not, we’ll give you some tips now.
The first and most basic way to make space for vocal frequencies is with a simple, static EQ cut on an instrumental track. Synth getting in the way of the vocal? Figure out where in the frequency range the conflict is, put in a parametric EQ, and start by cutting 1 or 2 dB from the synth.
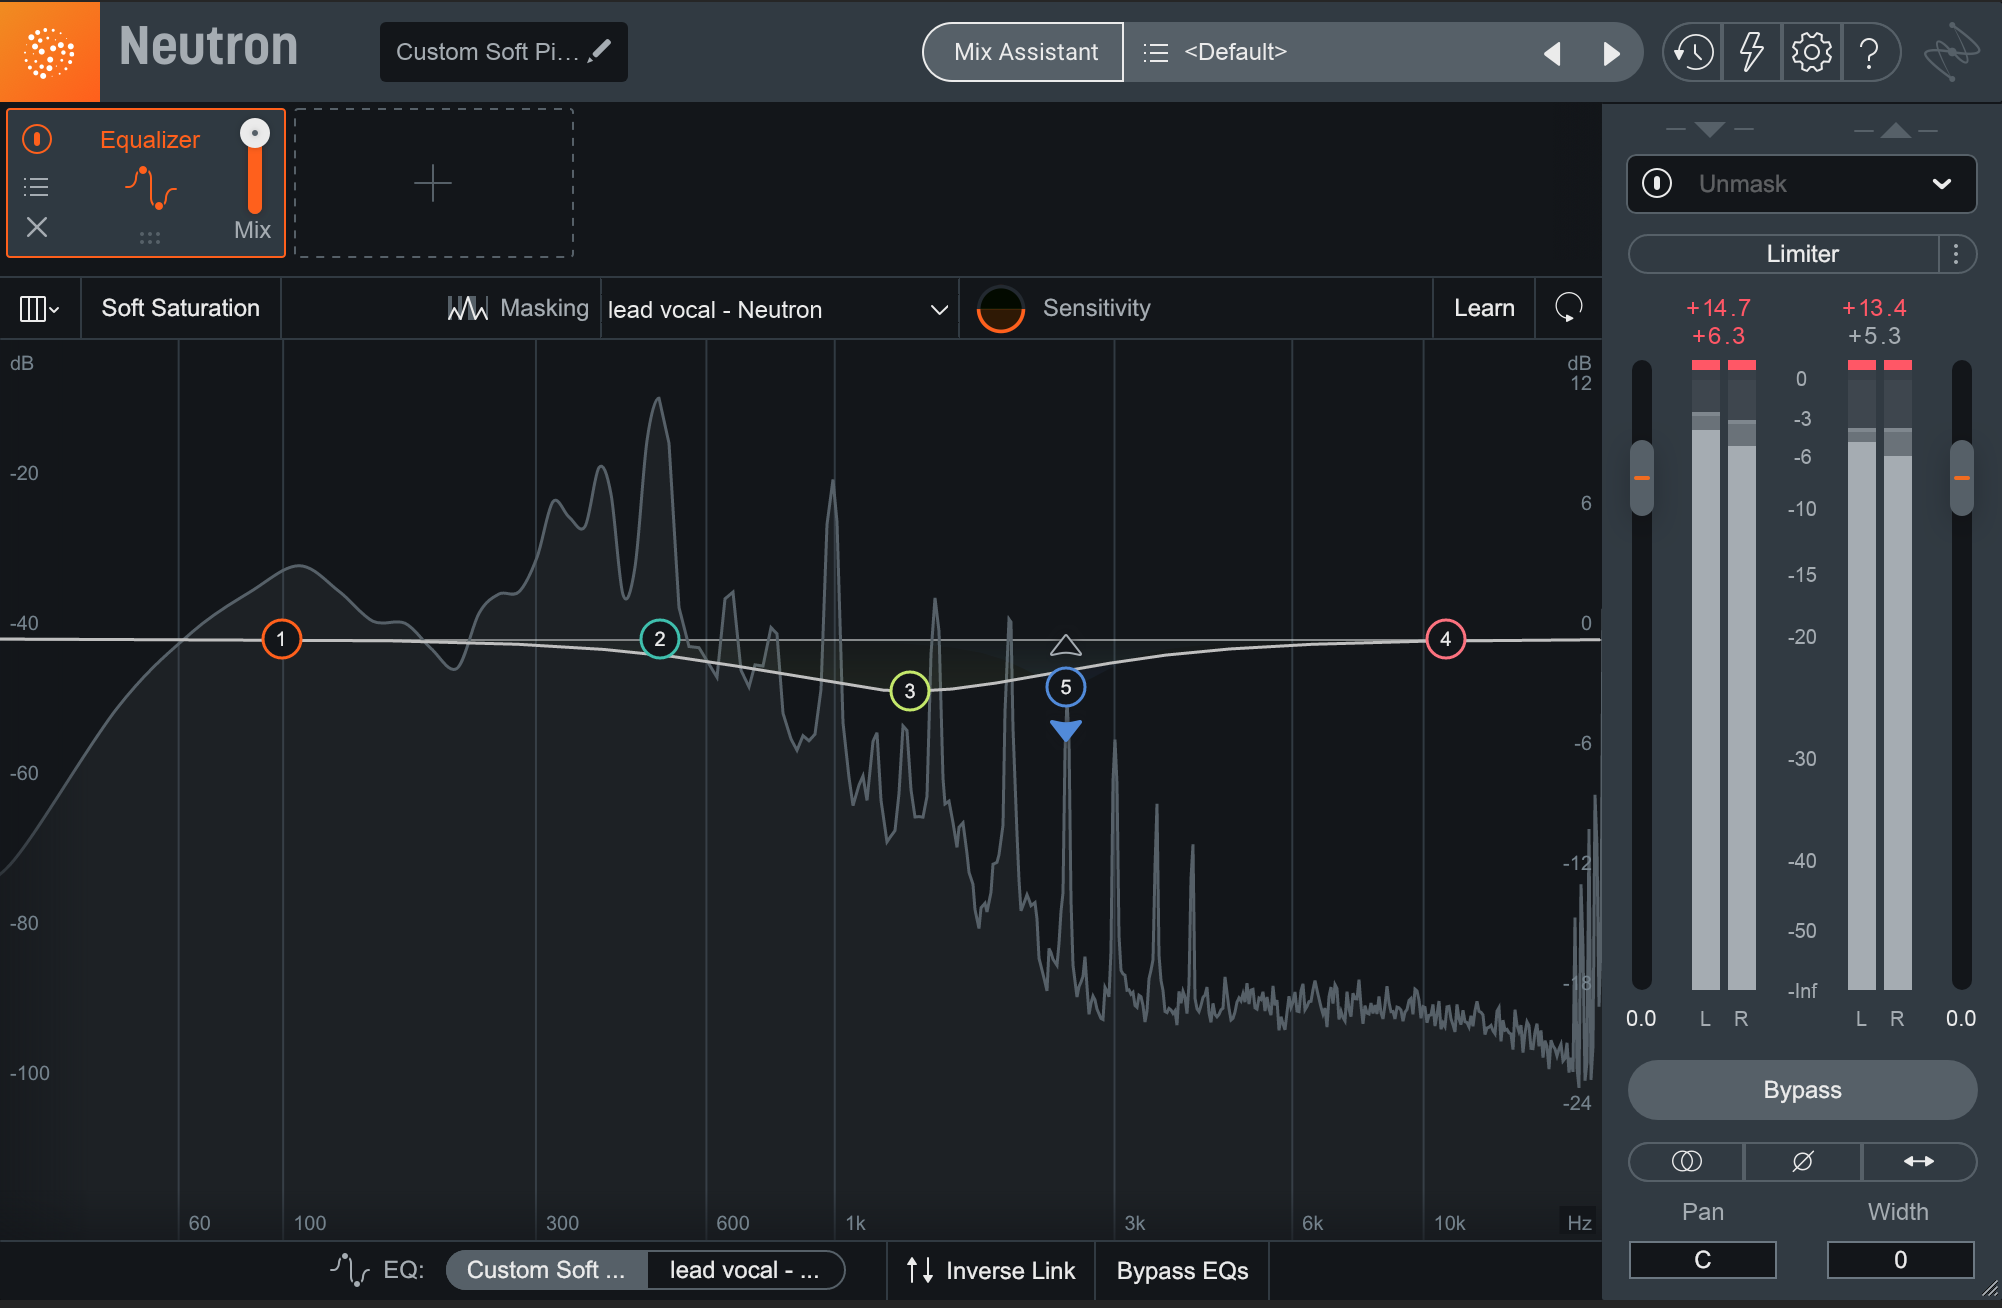
Static EQ cut in Neutron
We can very easily perform the static EQ technique in Neutron. With a masking source selected from the dropdown in the module header, the EQ masking controls appear at the bottom of the plugin. This allows us to EQ either the instrument we’ve got Neutron on, or the masking source we’ve selected. We can also engage Inverse Link mode which will make a cut on the instrumental equate to a proportional boost on the vocal, automatically.
Dynamic EQ
While the above static EQ methods can work to alleviate vocal masking, sometimes a dynamic cut is more ideal.
The main issue with using a static EQ is that these frequencies will always be attenuated, even when the vocal itself isn’t playing. This can sound unnatural. This is why we use dynamic EQ, particularly when triggered by the vocal in question.
By using a dynamic EQ, we can duck down the offending frequency only when the vocal comes in. No vocal? No EQ cut. It’s as simple as that.
In Neutron, any EQ band can instantly become a dynamic EQ band, which can either be set manually or sidechained (i.e., triggered) from your vocal. Just set the sidechain input to your vocal, and you’re good to go. This video on using Dynamic EQ illustrates how to do it at 2:29.
In the case above, the hi-hat was masking the vocal. With dynamic EQ, now the hi-hat EQ will only cut when the vocal is singing!
Stereo placement and panning
We can also make some room for the vocal with good old fashioned panning. The vocal is usually placed in the middle of the stereo field, so we can move other elements away from that space to allow the vocal room to breathe. For example, we could pan mono instruments to the left or right of the vocal. For stereo sources, we could make a cut to just the mid channel with a mid/side EQ, like the one found in Ozone—effectively widening the selected frequency range.
Both these techniques will free up the center so that the vocal can occupy that space. It will also have the added effect of creating a more spacious stereo image for your mix, which will sound more interesting than if everything were centered with the vocal.
Since stereo panning is basically a form of level control, this should usually translate fine to mono—played back in mono, the panned sounds will simply be less loud, and the vocal will reign supreme. Always check in mono, however, to make sure you’re happy!
Handling reverb while mixing vocals
One of the biggest culprits for masking other elements in the mix, especially the vocals, is reverb. It has the potential to smear the mix, covering all your well-designed elements in a haze. On the other hand, reverb is incredibly useful in creating a sense of space, and can make a dull mix sound much more interesting.
Therefore, if you choose to use reverb in your work, you should know how to take advantage of its benefits without ruining your mix in the process. Ideally you should learn how to EQ your reverb correctly—and if need be, compress it, saturate it, or pan it as well. But if your ears aren’t up to the challenge yet, iZotope makes a tool that can help you learn while giving you a great and uncloudy reverb:


Neoverb
Neoverb’s Reverb Assistant automatically helps create a verb that isn’t muddy. It also has a built-in masking meter that can communicate to other tracks using iZotope plug-ins. The video below demonstrates these concepts.
Start creating space for vocals in your mix
Your ability to mix a clear, professional-sounding vocal is directly dependent on the space it has in the mix. The methods outlined above can all be used to create that space, allowing the vocal to breathe and fulfill the prominent role that it’s meant to inhabit. From static and dynamic EQ techniques to sidechain compression and dynamic EQing to panning, mixing around your vocals is the best way to set yourself up for a successful vocal mix. You can explore all of these mixing techniques with iZotope plug-ins included in


Music Production Suite 7


