How to Use an Audio Exciter in Mastering
Audio exciters are specialized tools that add vibe and character to your music. Let’s explore what an audio exciter is and how it’s used effectively in mastering.
Compared to recording and mixing, mastering leans more heavily on technical strategies to ensure that your music best translates in various commercial playback systems. However, there can still be a lot of room for creative decisions to be made.
An exciter is one of those tools in a mastering engineer’s arsenal that takes them to that creative headspace. But being a highly-specialized tool, it’s something that must be wielded with care and purpose, lest you risk compromising the fidelity of your mastering chain. Let’s explore what an audio exciter is, how it’s used in mastering, and how you can effectively apply it to your own mastering sessions.
New to using exciters? Follow along with the Exciter module in


Ozone Advanced
Already an iZotope customer? Log in for loyalty pricing.
Jump to these sections:
What is an audio exciter?
Audio exciters are audio processing tools that manipulate sound through the addition of synthesized harmonics/harmonic distortion, typically in the high-frequency range. But why do these tools exist in the first place? To better understand why exciters exist, we go back in time for a brief history lesson.
Before the advent of digital music production, the entire music creation process went through various stages of analog processing, each with its own signature sound. Every piece of analog gear your audio passes through has an inherent sonic imprint that adds color, mainly due to the various analog components that make up your equipment (e.g., tubes, transformers, inductors, etc).
With digital recording, you can now capture audio through a clean signal path with linear, bit-by-bit accuracy. By its very nature, a digital signal path doesn’t carry with it any added color, unlike its analog counterpart. But a clean audio signal doesn’t mean it’s always the desired sound. Iconic records are defined by the sound of the tools from that era, and many of today’s records aim to recreate those vibes through modern-day techniques. This typically manifests as the “analogue warmth” that a lot of producers and engineers strive to aim for. And one of the most common ways to achieve this is through the use of audio exciters.
Exciters vs. EQ
It’s easy to miscategorize exciters as some form of equalizer because their effects are largely heard in the context of boosted/attenuated frequency ranges, much like with EQs. But unlike equalizers where the results are achieved by simply boosting/attenuating frequencies, exciters are strictly additive.Exciters generate additional harmonics based on the audio signal you’re feeding into it. So always exercise caution when using exciters, especially in mastering, or else you run the risk of overdoing it, therefore compromising the clarity and fidelity of your music.
Excitation vs. saturation
Excitation and saturation are often used interchangeably. They’re technically similar in that the desired effect is the addition of harmonic content into your production to achieve a desired “vibe”. But where they largely differ lies in the function of tape saturation. Besides adding harmonics, tape saturation has other parameters that affect how it processes sound (e.g. tape speed, phase state, bias, etc.)

Exciters and saturators are technically similar in that the desired effect is the addition of harmonic content into your production to achieve a desired “vibe”. But where they largely differ lies in the function of tape saturation.
What an audio exciter sounds like in mastering
Exciters are applicable in both mixing and mastering—but the approaches are vastly different.
In the mixing stage, your goal is to take all these individual elements and combine them together into one cohesive production. So your audio processing tends to be more liberal.
But by the time mastering comes in, the final mix/production has been realized. The intent now is to not “change” the production, but rather carefully “enhance” it without losing/compromising the fidelity of the music based on your mastering decisions. That’s especially true with exciters. A little bit of excitation can go a long way. Exciters are not often part of a mastering engineer’s default signal chain, and for good reasons. It’s a highly-specialized tool that’s only meant to be used for its intended purpose.
Here is a brief before and after listening example of an exciter being used in mastering. Let’s listen to the music BEFORE any excitation is applied:
Listening to the clip, you hear a pop production that pays homage to old school big band vibes particularly with the prominent presence of the brass section. The artist Jenny JAM specifically wants to evoke a more vintage vibe (they recorded on old school microphones in Capitol Studios). So she’s looking to have a bit more saturation in the mid to high frequencies to achieve a “dirtier/distorted” vibe.
Now listen to the same music AFTER a subtle amount of excitation/saturation is applied. Remember that in mastering, exciters are used more sparingly so the difference before and after is more subtle.
You can hear the full version of the song below:
Music: "Prove Who"
Artist: Jenny JAM feat. Reuben Alexander
Recording / mixing engineer: Ikuma Matsuda
Mastering engineer: Jett Galindo
Listen: Apple Music, Spotify, Youtube Music
How to use an audio exciter in mastering
Here's how to apply excitation techniques in your next mastering session using the Exciter module in


Ozone Advanced
Train your ears with blind A/B comparisons between different modes
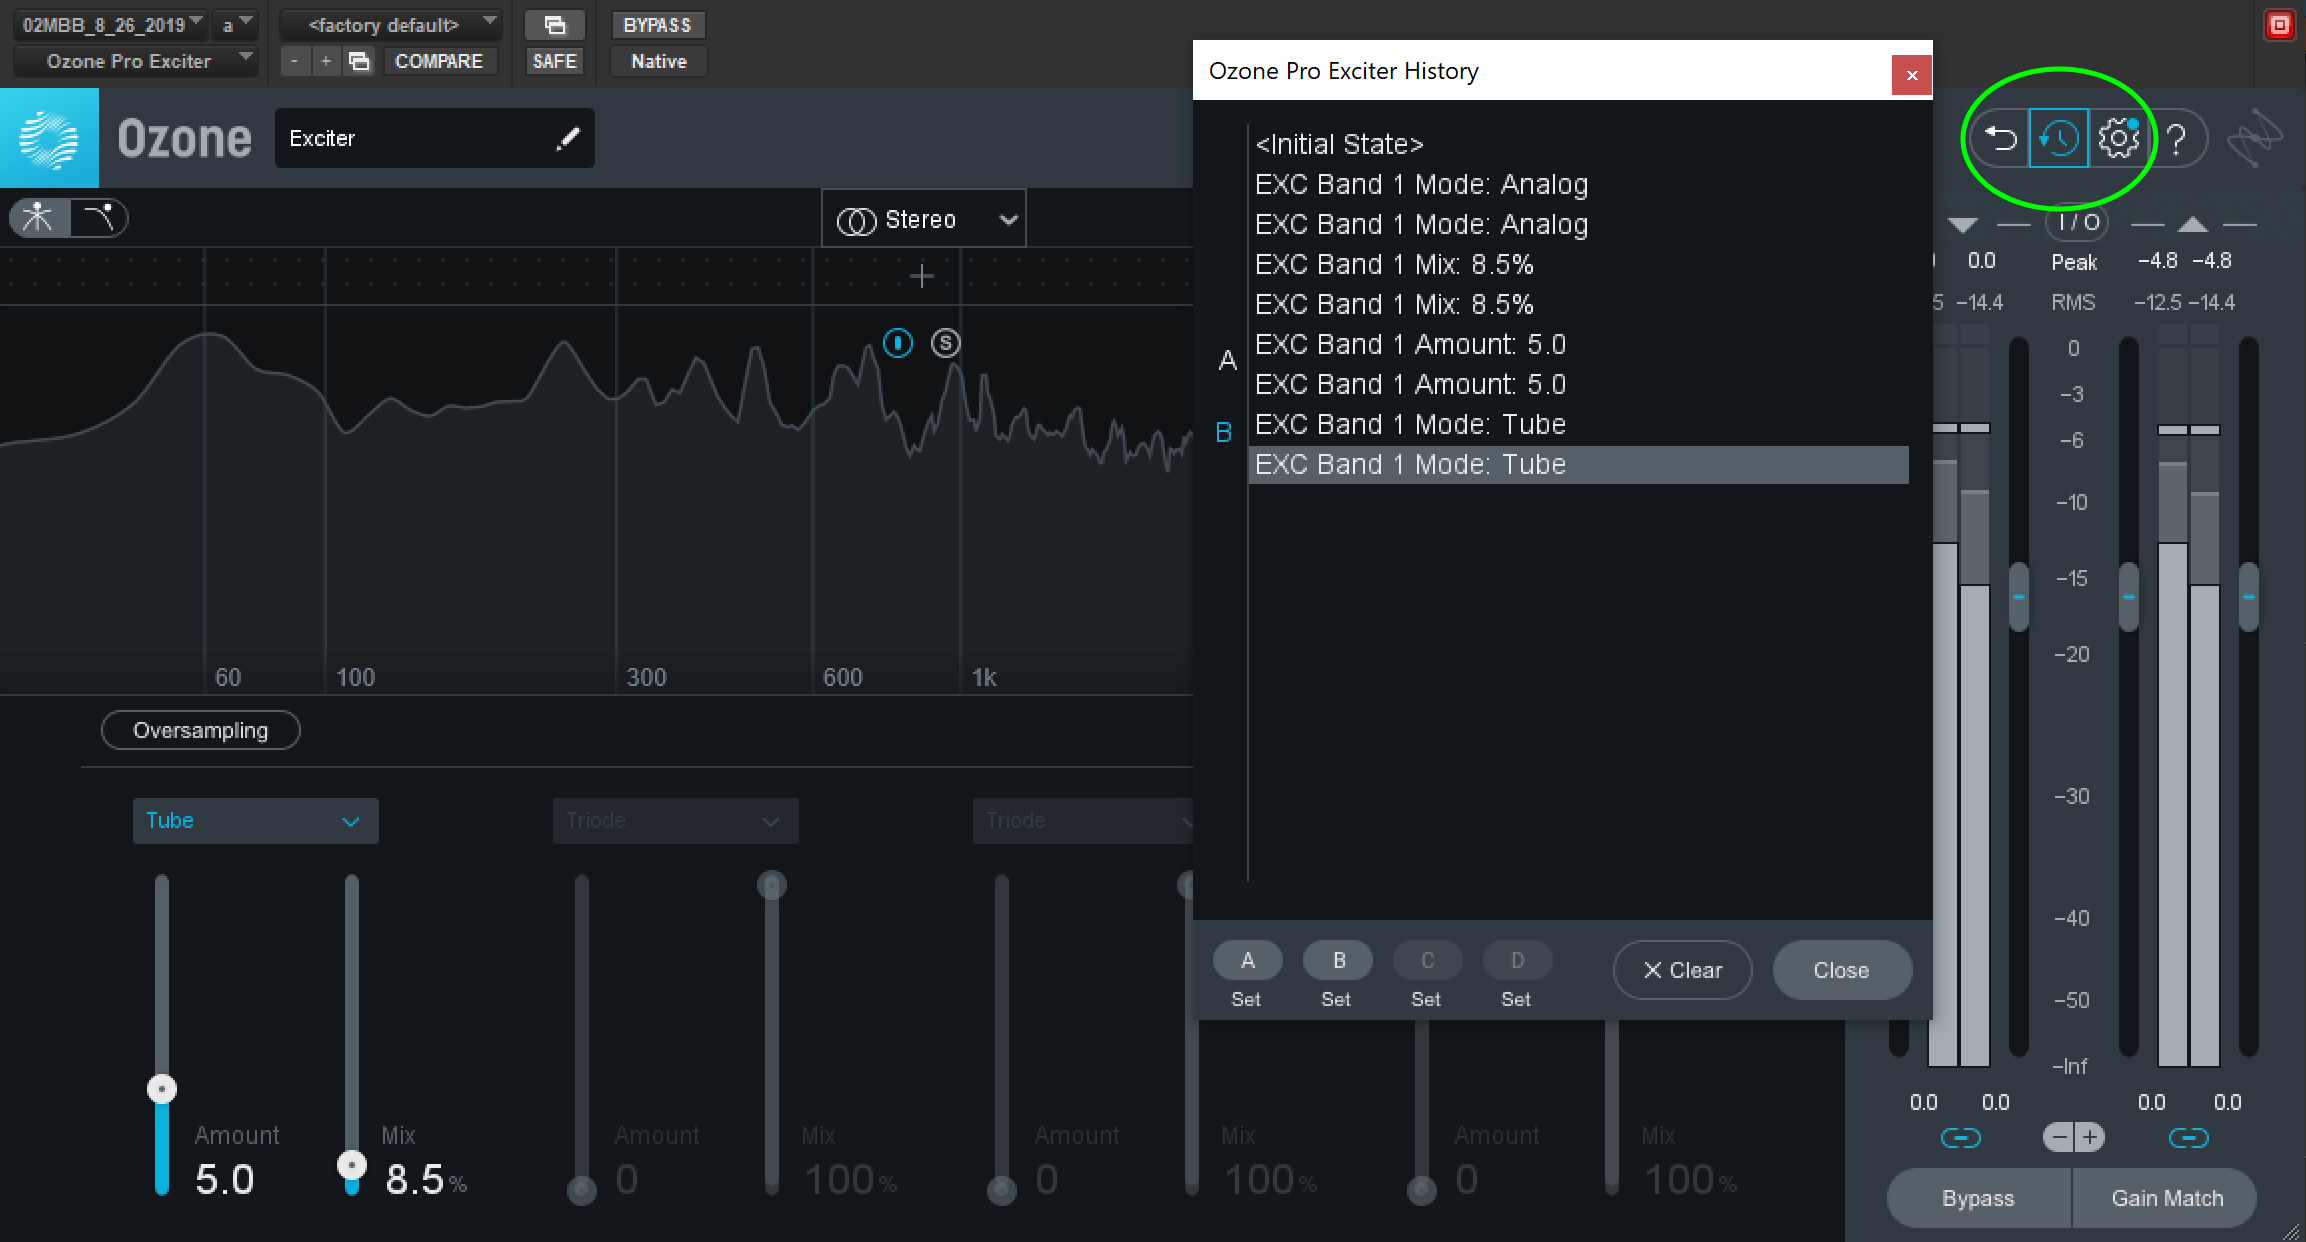
Ozone’s Exciter module comes with several modes, each with varying profiles of saturation and analog gear emulation: Analog, Tape, Retro, Tube, Warm, Triode, and Dual Triode. Each of these modes have their own signature color that imparts a unique character/vibe to your music. The best way to understand the sound of each mode is by critical listening through A/B tests/comparison. You can easily do so using Ozone’s “Undo History and Compare Window” at the top right corner of the interface (see screenshot below).

Train your ears with blind A/B comparisons between different modes using Ozone’s “Undo History and Compare Window
Less is more: The “Amount” and “Mix” controls are your friend
Just a little bit of excitation can already go a long way with mastering. This is where the “amount” and “mix” controls on the Ozone Exciter module become crucial. Once you’ve decided which mode to use after your A/B comparison, proceed by setting your amount control to “0,” then slowly nudging it’s value higher until you reach the harmonic texture you want for your masters. Then, repeat the procedure with the mix control. That way, you lessen the risk of overdoing the amount of excitation.
To start, you may want to keep your control settings to under 10 for the amount, and 10% for the mix. It ultimately depends on the music so listening is crucial. You can hear this in action from Jonathan Wyner’s Exciter demonstration in iZotope's Are You Listening Youtube series.

Less is more: The “Amount” and “Mix” controls are your friend
Oversampling to combat aliasing
One general setback in digital audio that affects the quality of exciters is aliasing. It’s a phenomenon unique to the digital domain where artifacts are generated by your analog-to-digital converter (ADC) in its attempt to recreate audio signals that are above your sampling rate’s Nyquist frequency. Excitation deals with a lot of complex processing in the higher frequency range, so if not addressed thoughtfully, aliasing can result in an edgy sound that may not be desirable for your music.
By enabling Oversampling in your Exciter module, you allot more processing power towards increasing the sampling rate used by Ozone to generate these harmonics. This reduces the effects of aliasing, which in turn leaves you with a smoother, less edgy/hashy sound.

Enabling Oversampling in your Exciter module allots more processing power towards increasing the sampling rate used by Ozone to generate these harmonics, therefore reducing the effects of aliasing
Crossovers to achieve finer control over your use of exciters
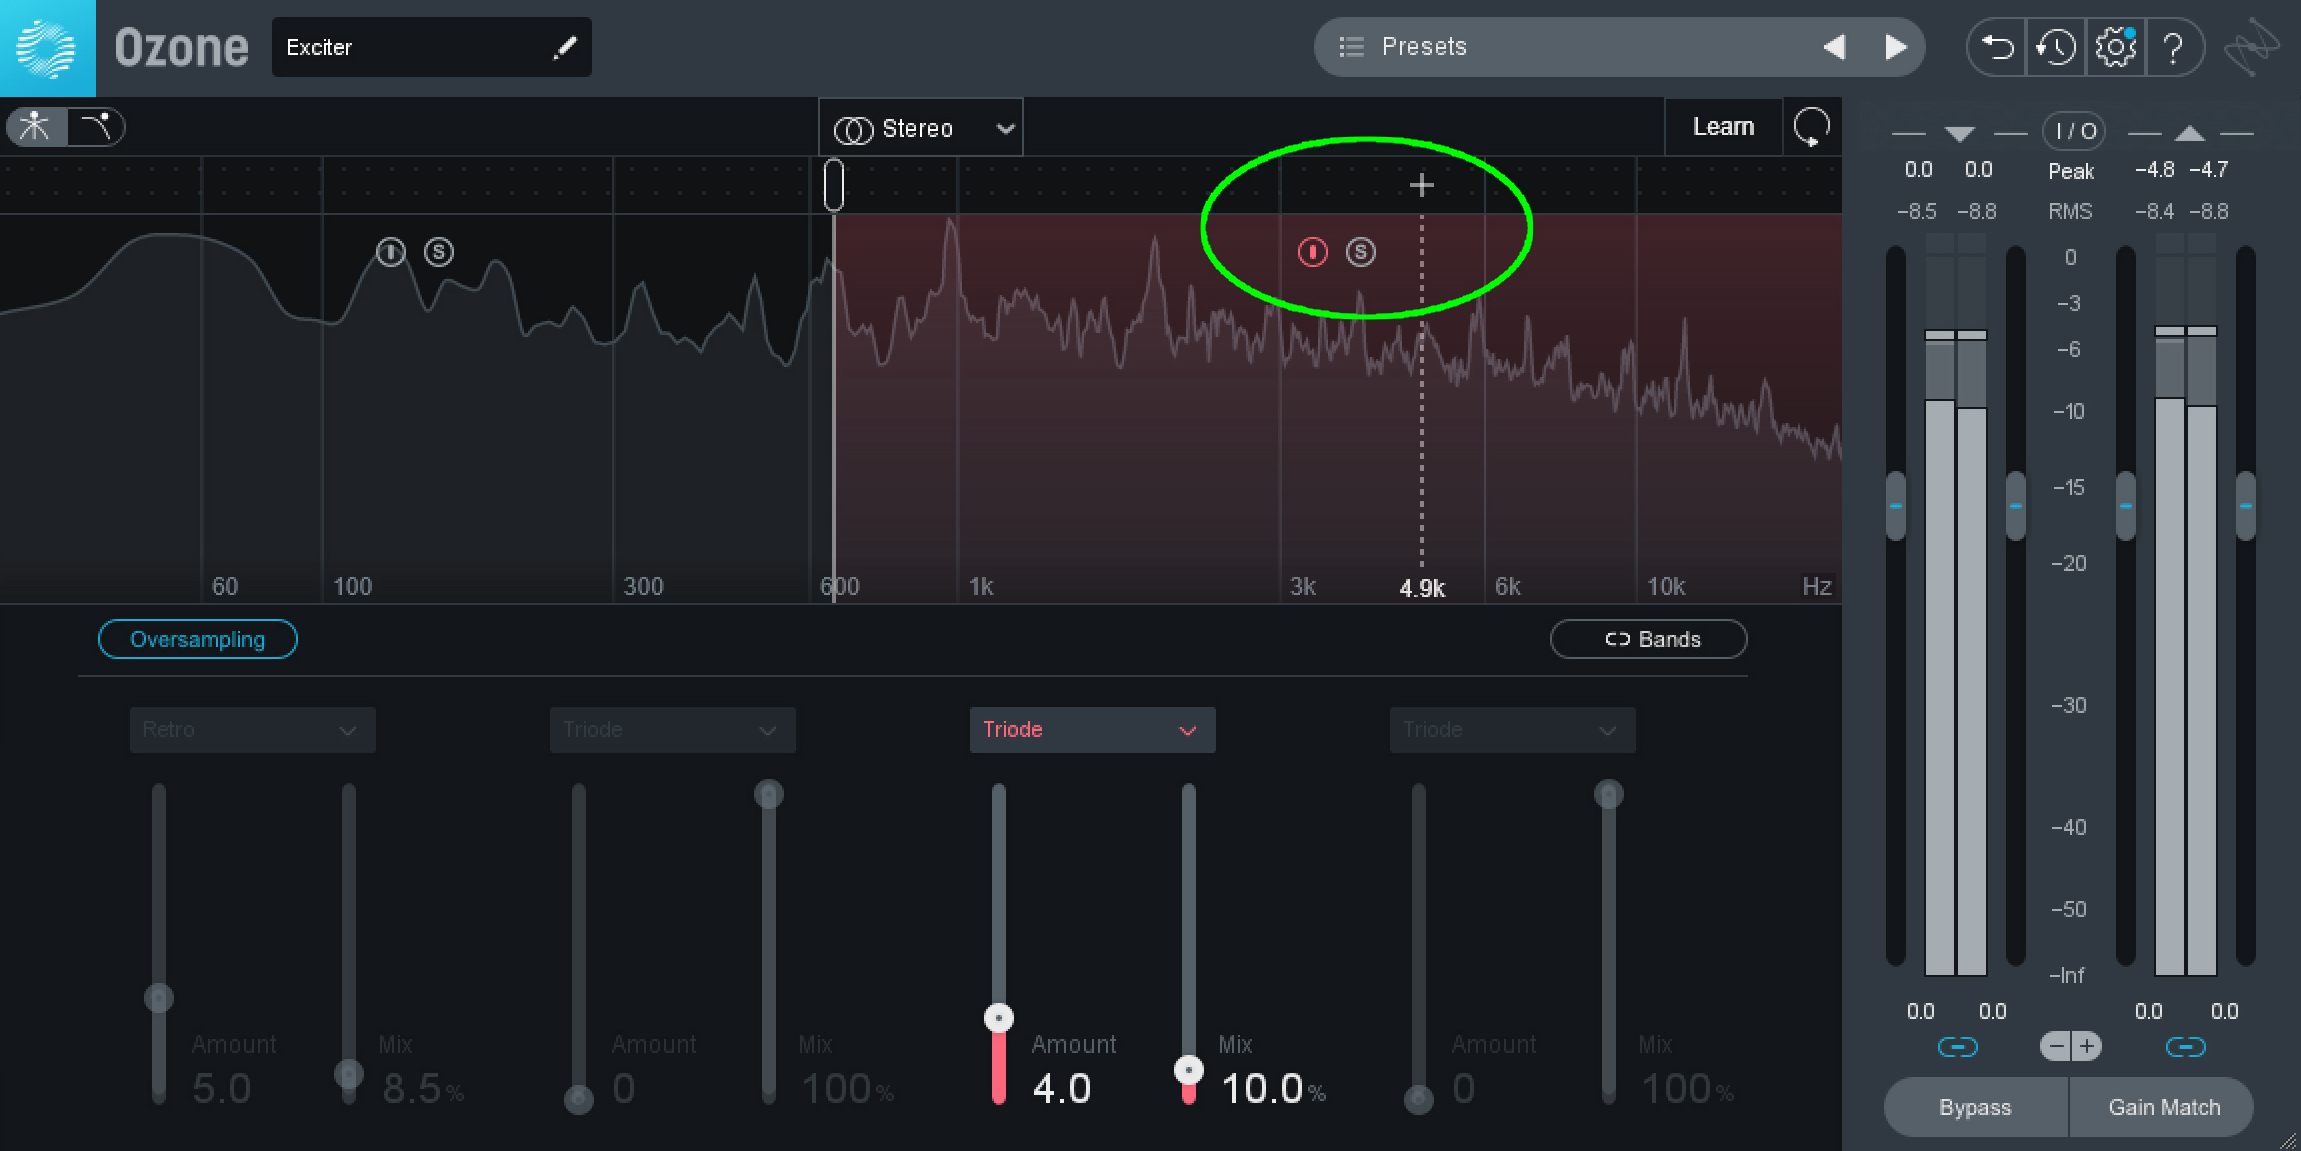
Applying just a little bit of excitation on your master is often all it takes to achieve a desired vibe. But there may be specific-use cases where you want a more targeted approach. For example, you might want a hint of Retro character added to your master without affecting the sound of your bass instruments. Or you might want to add a touch of aggressive drive to the guitars that are panned wide in the music. For these specific-use cases, you can achieve finer control through the use of crossovers.
With Ozone’s Exciter module, you can enable a split-band (or multiband) crossover that lets you isolate your excitation to a specific frequency range. You can also switch your channel processing mode from Stereo to Mid/Side, and use the side channel to emphasize panned elements in the master. With that being said, always exercise caution. If set to “Analog” mode in the options, the crossover filters will introduce phase shifts which, if not set thoughtfully, could lead to problems resulting in audible fidelity loss.

For specific-use cases, you can achieve finer control of your Exciter through the use of crossovers
Audio exciters: intention is key
As with all things mastering, intention is key, but it’s especially crucial when adding an exciter into your mastering chain. Excitation generates added harmonics on top of the music to achieve a desired vibe/effect. But understand that this comes with trade-offs—from added distortion and phase shifts to potential clarity degradation and fidelity loss.
But there’s a reason why exciters remain part of a mastering engineer’s specialized toolkit. It’s all a matter of understanding the behavior of each parameter and being mindful of the purpose behind your application. Through constant practice and critical listening, you empower yourself with the skillset to wield the exciter more effectively in a mastering environment.
And practice makes perfect: try using the Exciter module in


Ozone Advanced

