How to Export Tracks from the Spire App to your DAW
Learn all about the export options in the Spire app, and how to transfer individual tracks to a DAW like Logic Pro or Ableton Live for further editing.
If you’ve been recording music on your own for any length of time, you’ve probably encountered a DAW at some point. For those unfamiliar with the lingo, a DAW (Digital Audio Workstation) is any software program that lets you record, edit, or mix audio files. Popular DAWs such as Pro Tools, Logic, and Ableton Live have become an essential part of music production as digital technology becomes more widely available and accessible.
The Spire app is also a DAW, and has everything you need to create a multitrack music project. But, like any good DAW, there are a number of ways you can get creative with larger, more complex ideas. Many experienced musicians picking up Spire for the first time will probably be wondering how they can make it work in their existing DAW workflow.
The Spire app has a number of useful export options that allow you to continue producing and editing music in your DAW of choice. In this article, we’ll cover the basics of exporting audio from the app and into your DAW.
Why use Spire studio along with another DAW?
If you can record, produce, and mix an entire project using only the Spire Studio and the Spire app, why use any other DAW? Here are two main reasons why you might want to do this:
You want to record tracks remotely in Spire for use in your DAW project later
One big advantage of Spire Studio is its portability—you can record a song right when the idea strikes you. But what if you have a song recorded in a DAW on your computer and you have an idea for a new part while you’re out and about? With Spire, you can throw down tracks anywhere and open them in your DAW when you’re back in your regular work environment (as long as they’re in the same tempo).
You can make a project in Spire and mix the tracks in your DAW
If you’ve been doing this for a while, you probably already have an ingrained workflow for mixing your tracks in your DAW. Luckily, whatever you record in the Spire app can be exported out as individual tracks that can be opened on your machine. Record your song ideas anywhere, then send ‘em to your computer to add software instruments, reduce background noise, and mix with your favorite plug-ins.
Export options in the Spire app
Just like in your favorite DAW, Spire has different export options, depending on your needs.
Text or email export:
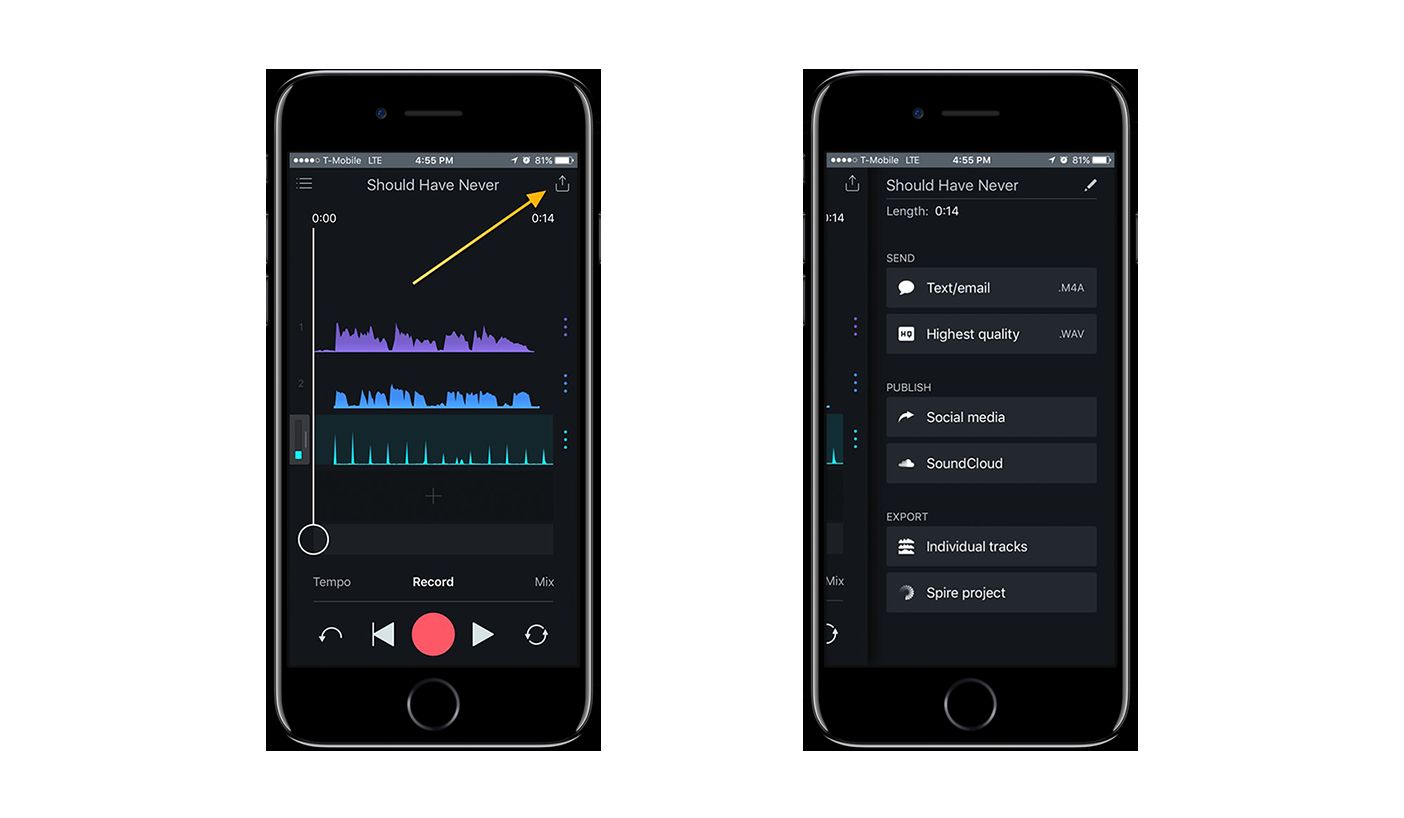
You have the option of sending your audio as a .M4A or.WAV (best quality) file via text or email. This is the quickest way of sharing a project, but you can only export the entire project in this way (not individual tracks). This export method is best for quickly sharing your finished project or rough ideas and isn’t ideal for exporting to a DAW for mixing, but it can do in a pinch if you or aren’t worried about mixing individual tracks.
Publish to social media:
This option will simply bounce out your project and share it on your social media or Soundcloud. This is more useful than you might guess (how many of you have band members who don’t know what a .wav file is?), but impractical for exporting multitrack projects for later remixing.
Export individual tracks:
This is the bread and butter option for exporting to a DAW. This bounces each individual track in your project, which you can send to various locations using your iPhone’s share sheet. You can also export the whole project as a Spire file, which contains all the panning, mixing, and editing info in your Spire project. The .Spire file can only be opened by the Spire app, but it’s still a handy option if you’re sending the project for someone else to open on their own Spire app, or to an external hard drive for long term storage.
Before you begin
There are a couple of things to keep in mind if you’re planning on exporting or importing audio to or from a DAW with Spire:
Session Tempo:
In recording, it’s best practice to use a metronome whenever possible. It helps you record multiple layered tracks more accurately, and also makes it easier to work with the individual audio files after exporting them. If your Spire project tracks are intended to be used in a larger arrangement in your DAW, it is critical that they are recorded at the same BPM as the rest of your project!
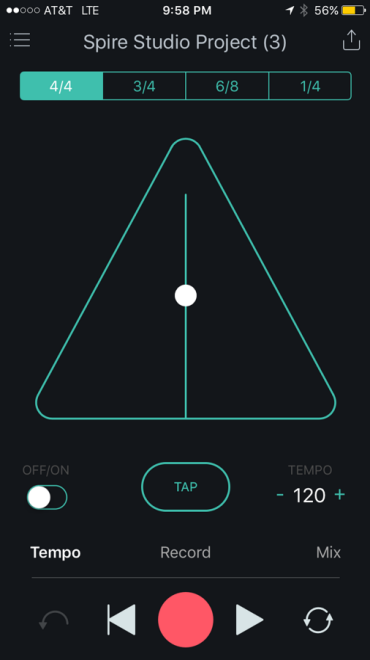
Spire app metronome
Mix Moves in Spire
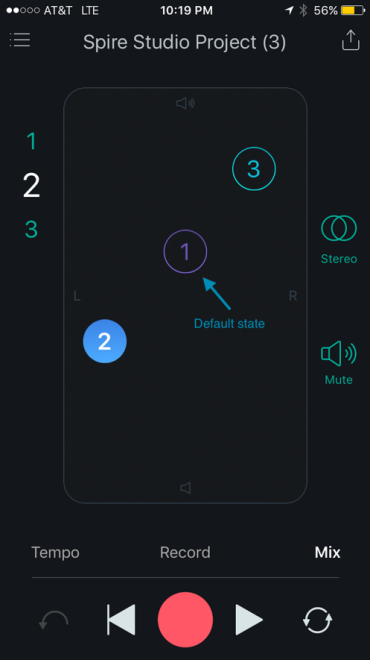
Note that the Spire app will export audio according to how you’ve mixed it in the mix panel. If you have multiple tracks panned left and right, or have added effects in Spire Studio, then that’s how the track will export. Any effects on the track will be printed to the file, and any panning you’ve performed will be written in as well. You won’t be able to pan these files later (at least not without specialized processing).
How to send tracks to a DAW
For the purposes of this blog post, we’ll use Logic as our example DAW.
Step 1: Before recording, remember to click the “Tempo” tab in the Spire app and set your key signature and BPM (beats per minute) on the metronome. If you’re not sure of the BPM, you can Tap the tempo out using the TAP button. Turn the metronome on with the switch on the bottom left.
Step 2: After you’re done recording, prepare for export by resetting all pan and gain nodes in the Mix window. Remember, any panning you make before exporting will be permanent, so it’s best to simply reset everything. To reset a mix node to default, simply double-tap on the node in the mix window, and it will snap back to its default position.
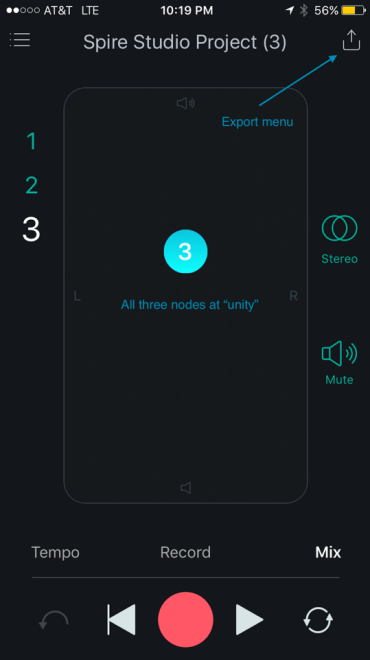
Step 3: Once you’re done, hit the Export icon in the top right corner of the Spire app and choose “Individual Tracks”. After preparing your tracks for export, you can choose whether to send the tracks via Airdrop, or another sharing service.
If you’re on the same wifi network as your destination device, and you are transferring to a Mac running OSX, using Airdrop is the fastest method of getting your audio onto your computer. You will see your machine appear in the Apple share sheet after selecting your export option.
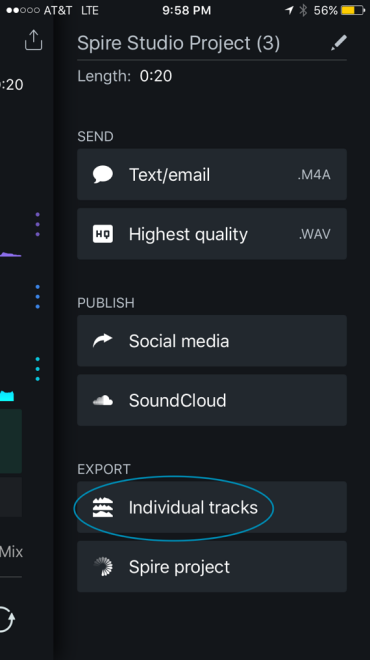
Spire app export menu
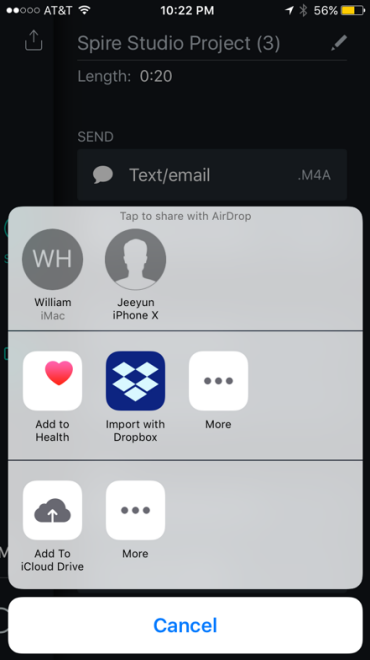
Share sheet menu on iPhone
Note: If you use a PC or are away from your wifi network, you’ll want to upload to a service such as Dropbox or iCloud drive. These are also available in the iPhone’s Share Sheet. After uploading, simply log into your Dropbox or iCloud account to get your files.
Step 4: Now for the fun part—go to your machine and open your exported tracks! If you emailed them to yourself, just access email on your machine and download the attached .zip file. If you used Airdrop, the file will be waiting for you in your downloads folder.
Once you have the tracks, you’ll want to import them into your DAW. Different DAWs have different methods of importing, but in most of the major ones you can simply drag your audio files into the application window. Here we see an example of this in Logic, which makes it extra easy by asking whether you want to place all audio on separate tracks or use a single track.
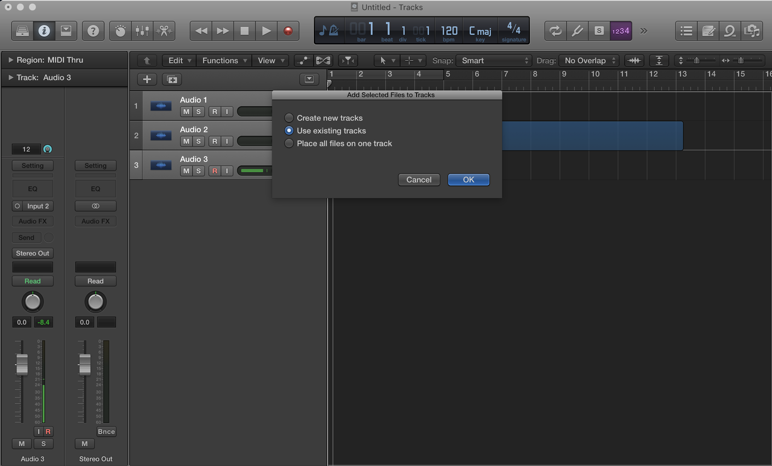
Now you’re ready to edit and mix your tracks in a DAW!


