How to Create Sample-Accurate Loop Points in RX 7
Learn how to create sample-accurate loop points in RX 7 to avoid pops while you’re looping audio—all in only a few clicks.
This is Part 1 of a four-part series written by Toby Pitman, sound designer for Netflix's Dracula. Read Part 2 here, Part 3 here, and Part 4 here.
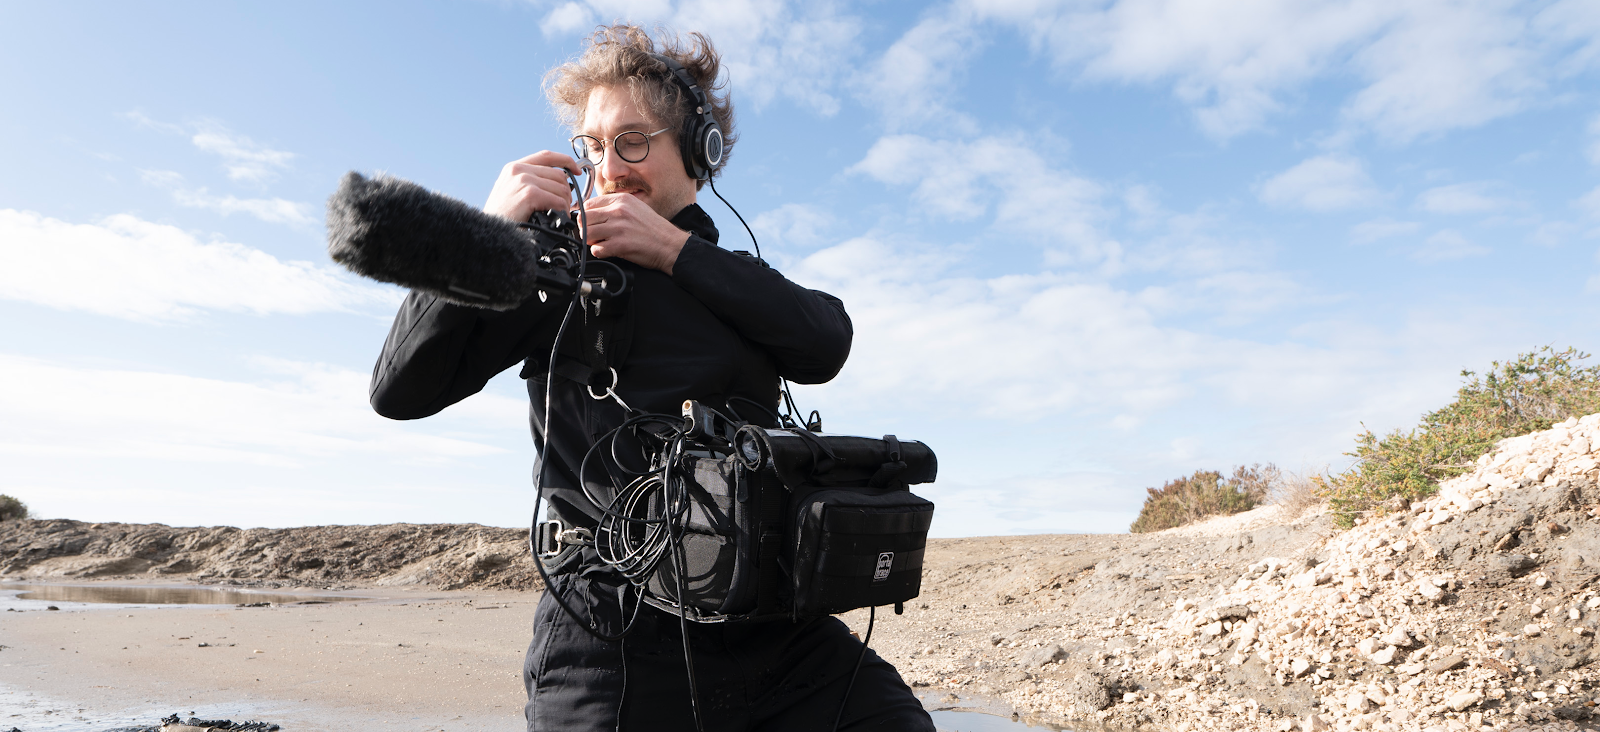
I recently had to transform some orchestral performances into playable patches for the BBC’s latest adaptation of Dracula. I wanted to build some custom Kontakt instruments with the audio, so I split the recordings into over 100 usable chunks.
As long as your audio has embedded loop data, it’s possible to loop “user audio” in the synth plug-in Omnisphere. This is when I hit a wall—Omnisphere has no crossfade option, so the In and Out points of your loop have to match perfectly at the sample level. Otherwise, you’ll hear a massive click or pop when it loops on a non-zero crossing!
To find perfectly matched crossing points in a stereo file with a lot of random material sounded impossible. Enter


RX 11 Advanced
In this article, we'll show you how to create sample-accurate loop points in RX to avoid pops while you’re looping audio—all in only a few clicks.
This article references a previous version of RX. Learn about 

RX 10 Advanced
The solution? RX Audio Editor
The solution to this problem in RX is simple. All I had to do was make two zones in the sample identical so I can select anywhere inside these identical zones for a perfectly sample-accurate loop!
To do this, use the trusty Command+C shortcut to copy the desired audio material in the Spectrogram. Then use a really clever feature in RX called Paste Special, followed by Mix. You’ll find this by right-clicking in the Spectrogram or using Shift + V. This function allows you to layer the copied audio over other existing audio within the Spectrogram. Paste Special has a number of paste variations and many useful sound design applications.
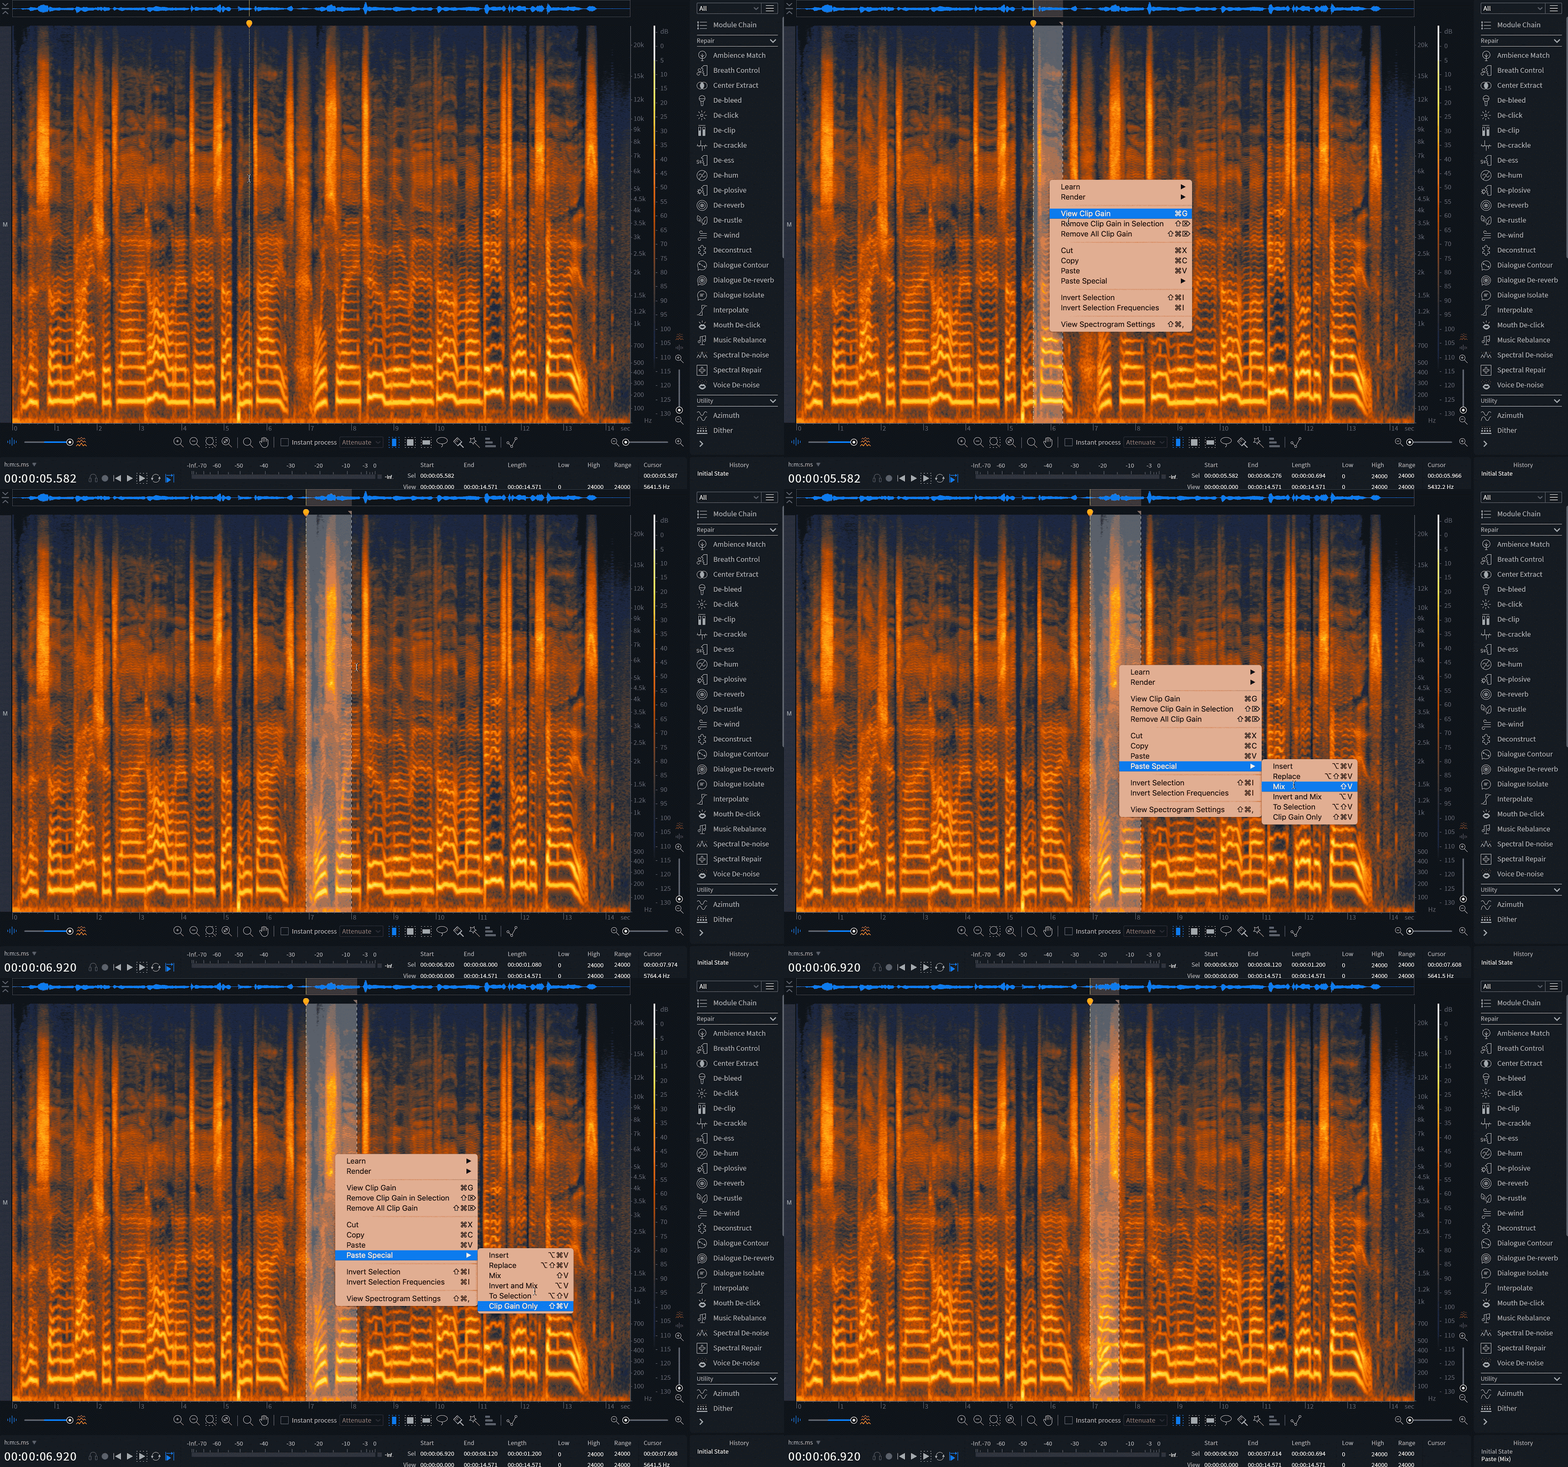
Start by creating a selection about 2.5 seconds in length in the general area of your first loop point. Next, create a Region by pressing M for Add Marker Or Region.
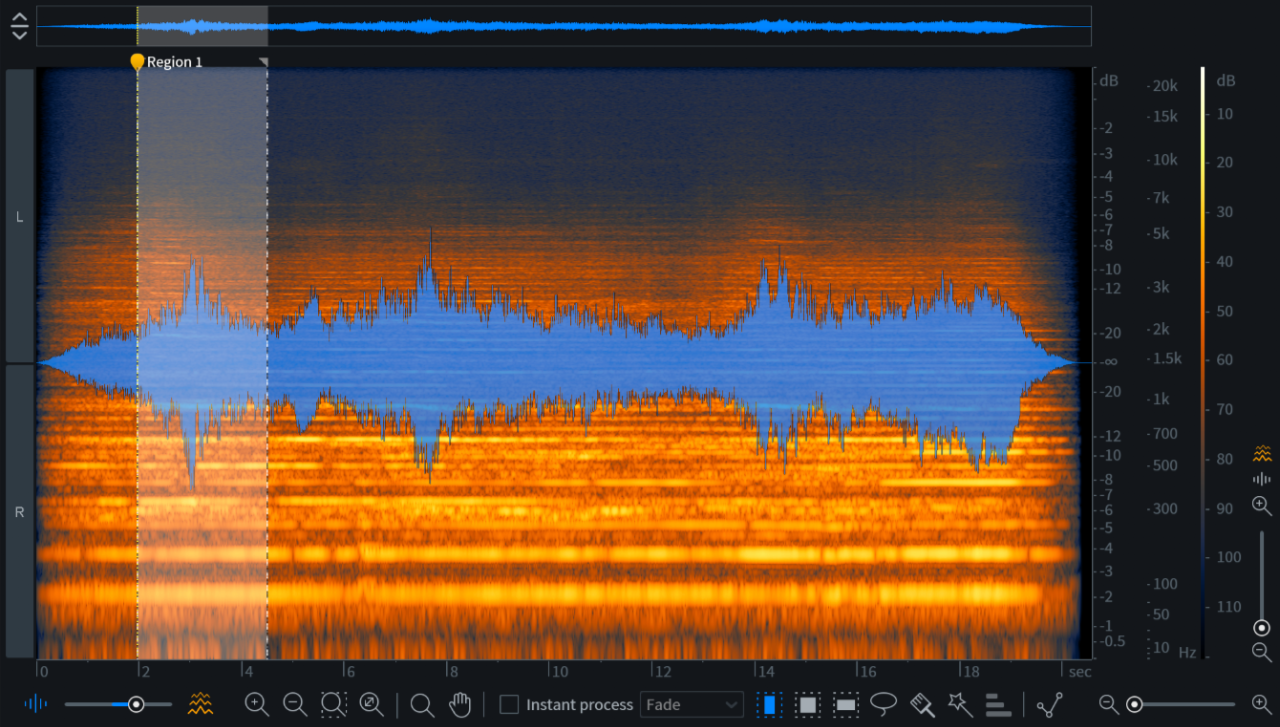
Creating a region from a selection
Drag the selection to the desired end of your loop and hit M to make another identical Region. These are now my two copy and paste “zones." I name these Start and End in the Region and Marker window (Window > Region And Marker). This window is useful for managing and selecting your regions, so I tend to keep it open as I work.
Note: If selecting regions later down the line, use the Region and Marker window. You can recall a selection by clicking its small, yellow pin at any time.
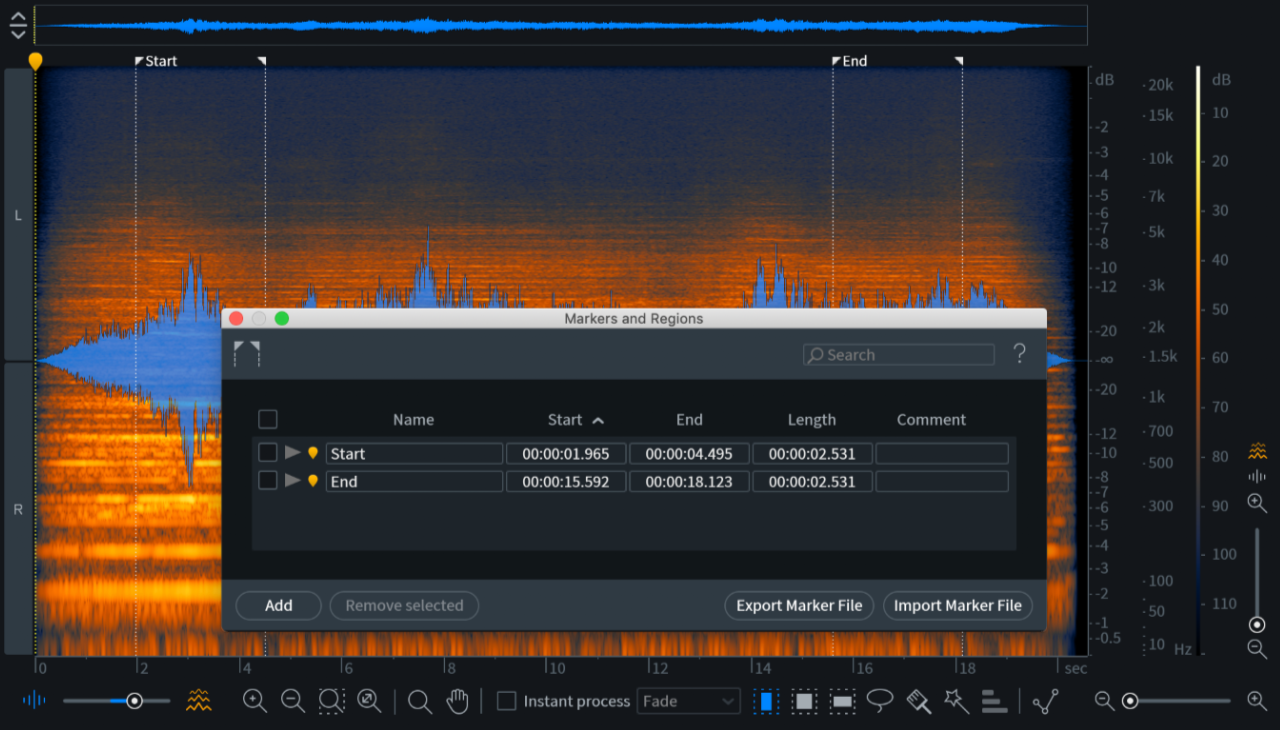
Two identical regions ready for cloning
The next step is to duplicate the loop so you have a copy of the original, should you need to refer to it down the line. To do this, copy your Start Region and use File > New From Clipboard so you have a clean version stored for later in a separate document.
Feathering selections
Once my loop Regions are configured to my liking, I then go to Preferences > Misc and turn Selection Feathering up to 1000 ms. This will give me a smooth, one-second fade in and fade out for anything I copy to the clipboard—a very useful feature.
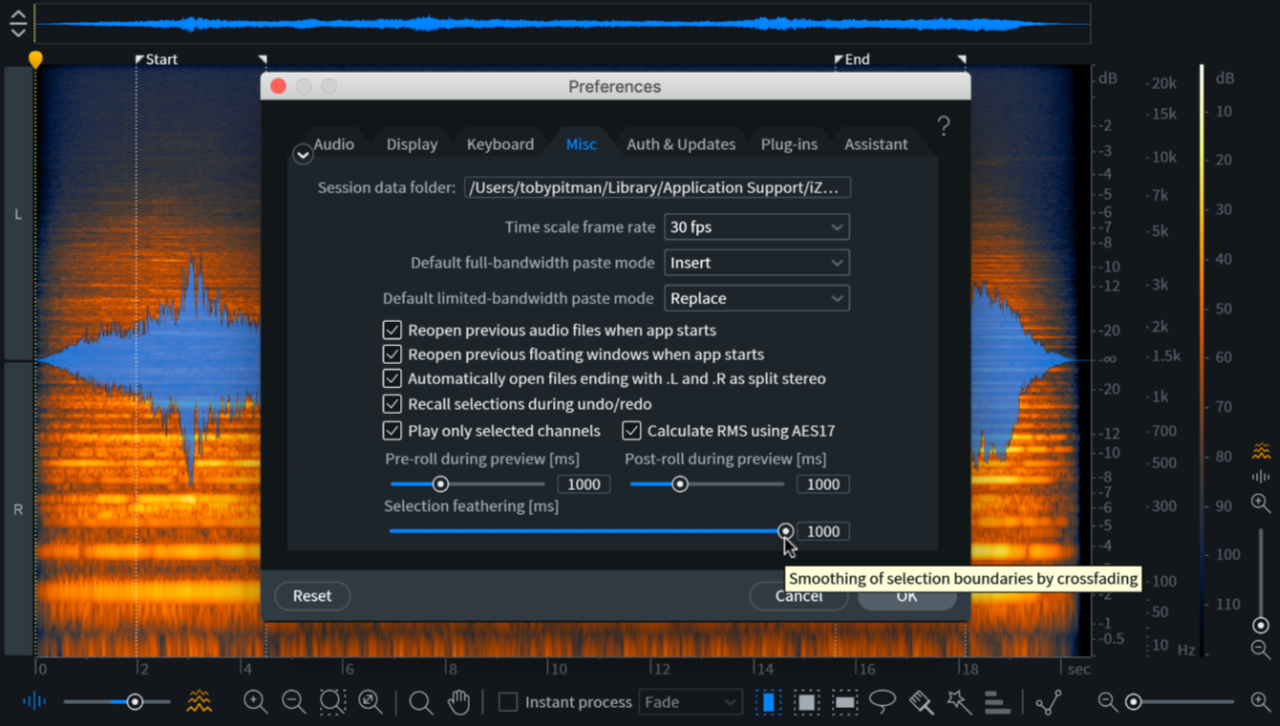
Selection feathering creates a smooth transition when copy/pasting audio
Cloning the regions
To start the process, select your End Region and copy it to the clipboard. Then select the Start Region and press Shift + V to access Paste Special, and select Mix to paste the End Region audio into it.
To go the other way, copy the clean Start Region audio from the file you created earlier, then select the End Region and repeat the same Paste Special procedure. As you can see in the screenshot below, we now have two regions whose midpoints are identical.
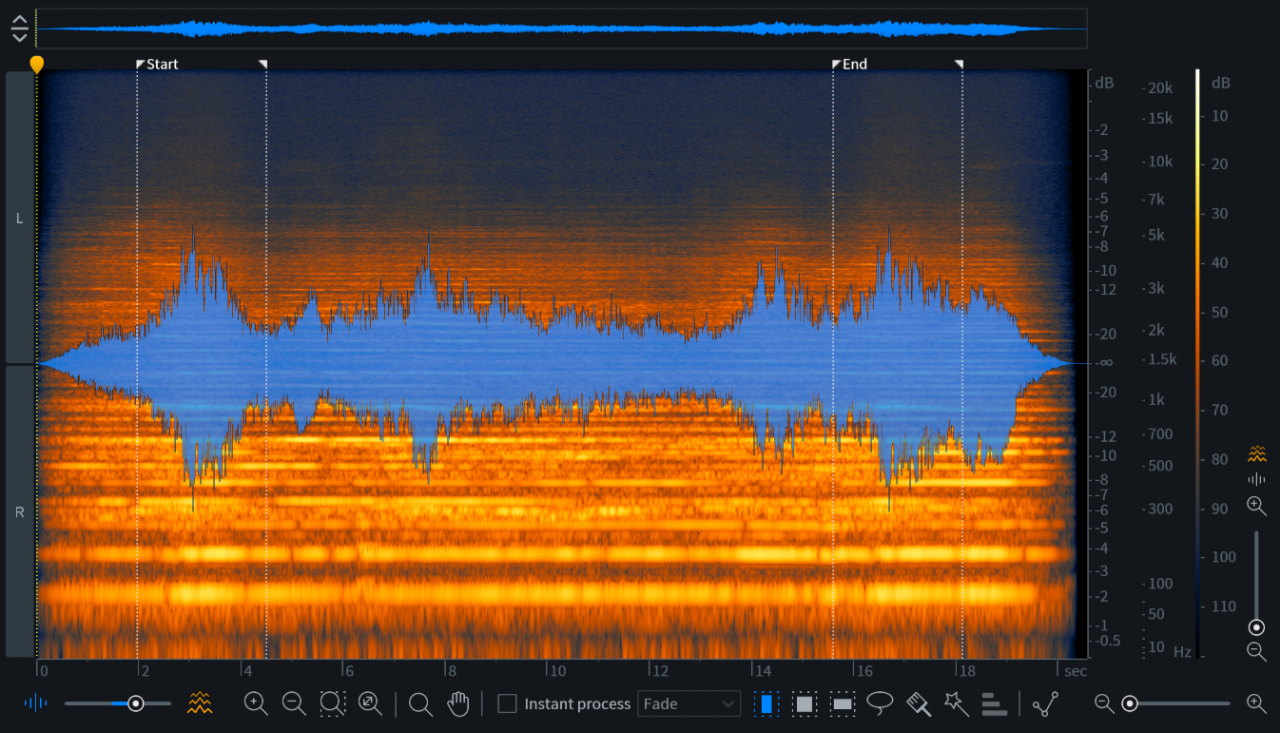
The mid-points of these two regions are identical.
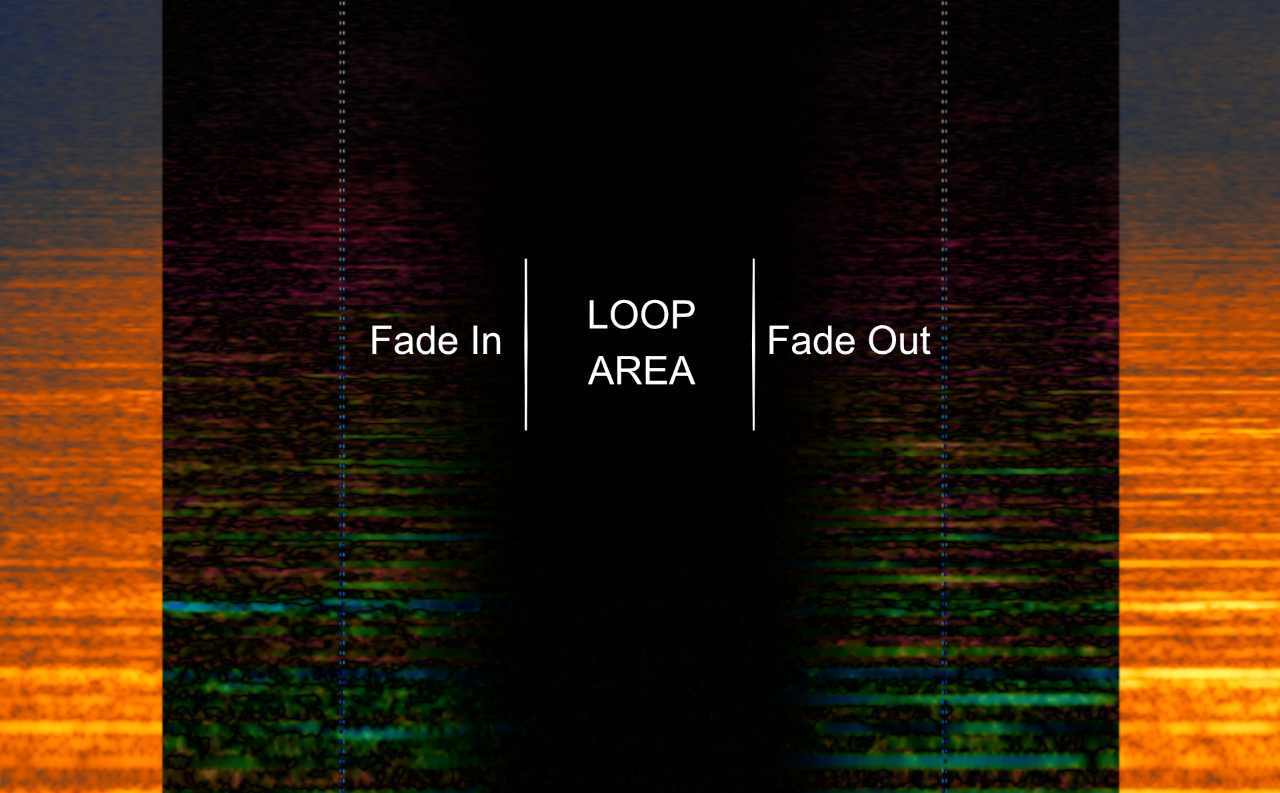
The dark area depicts where I can get a sample-accurate loop point.
Setting your loop
To set the loop points, make an arbitrary selection and create a new Region called Selection. The next bit is important: you want to make this new Region the same length as the distance between the front edge of your Start and End Regions. To do this, paste the Start values of both Regions into the Start and End points of the new Region.
Note: To change the Time Format in RX 7 to samples, click View > Time Format > Samples.
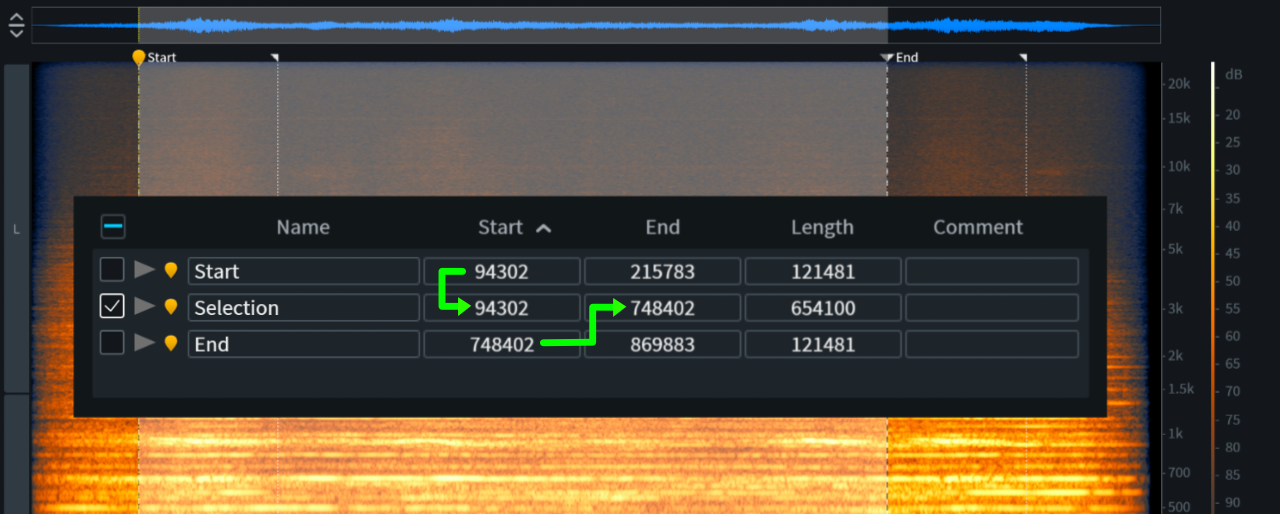
Setting the correct loop length
Once the length of this selection is set, I can drag it into the center of the two other Regions where the audio is identical.
It’s time to set some Markers for this final loop placement. Press M and name it Loop. Now you can discard the other Markers by selecting them in the Region and Marker window and choosing Remove Selected.
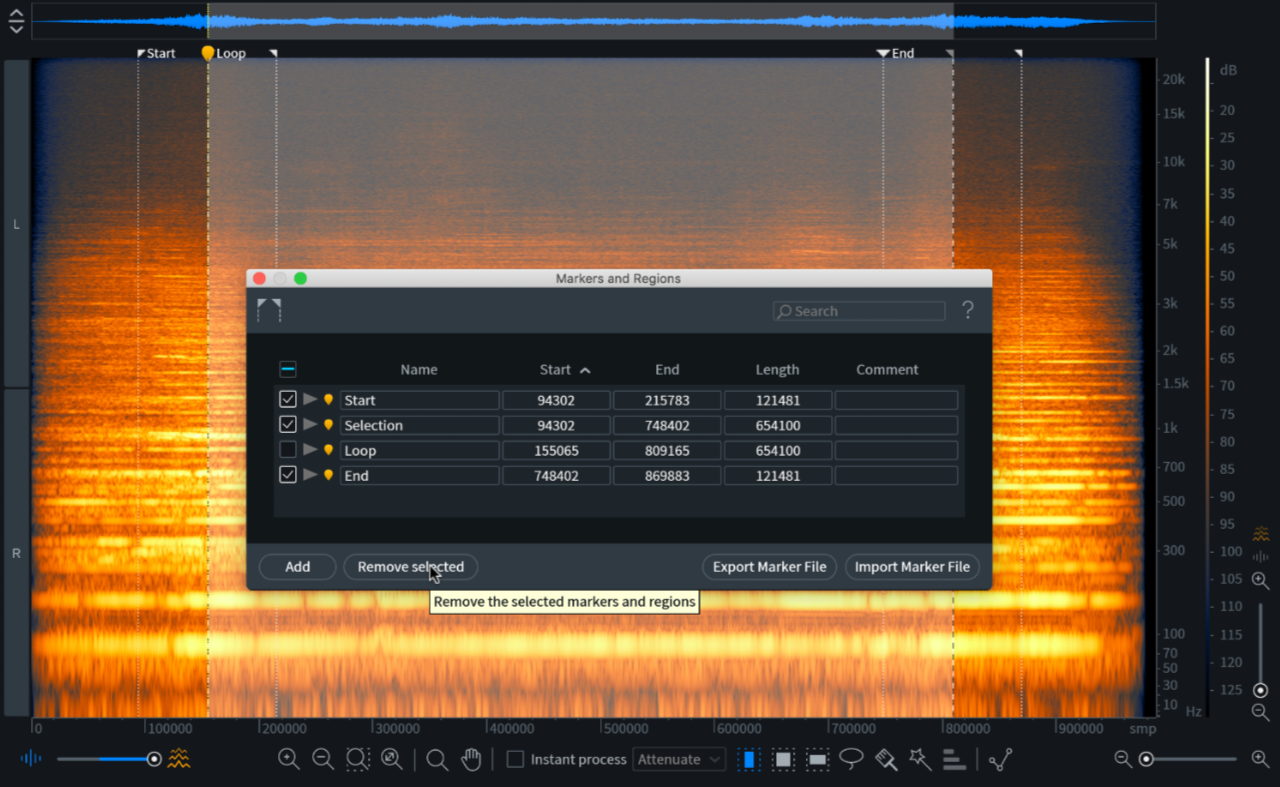
With the loop set, I can now delete the old markers.
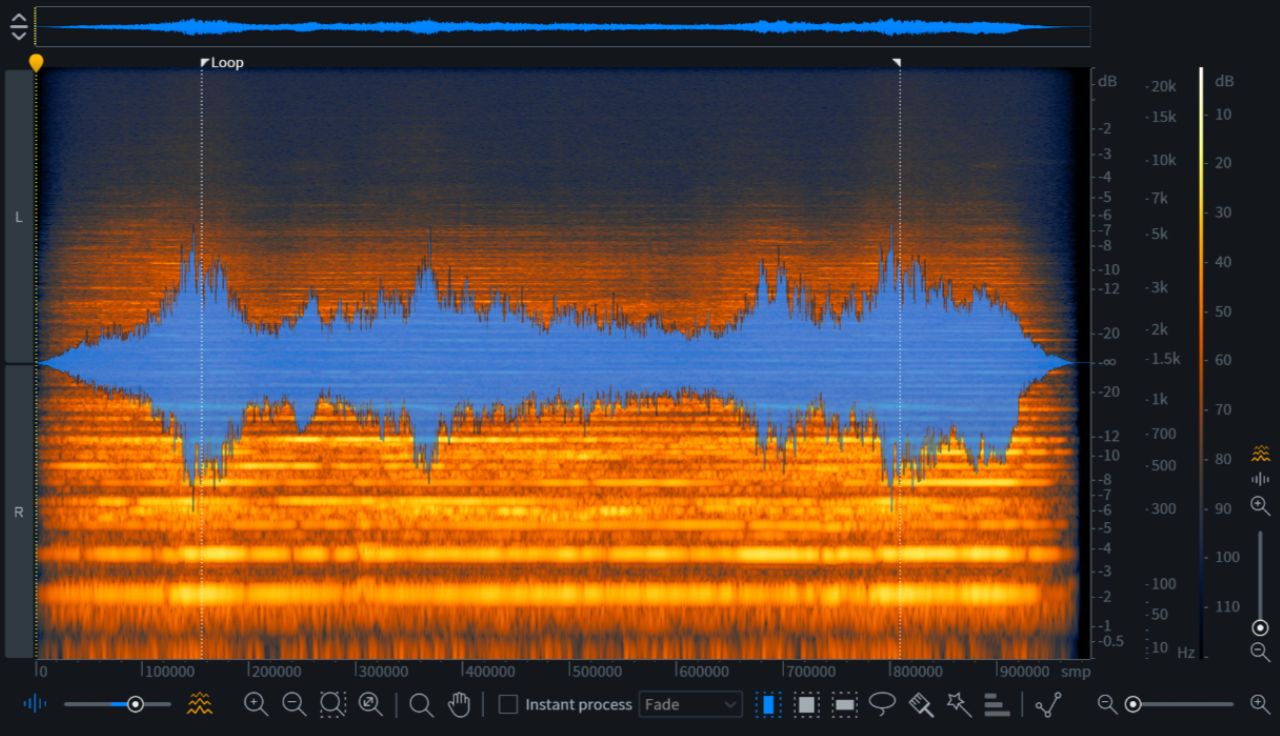
Here’s the final loop we’ve created:
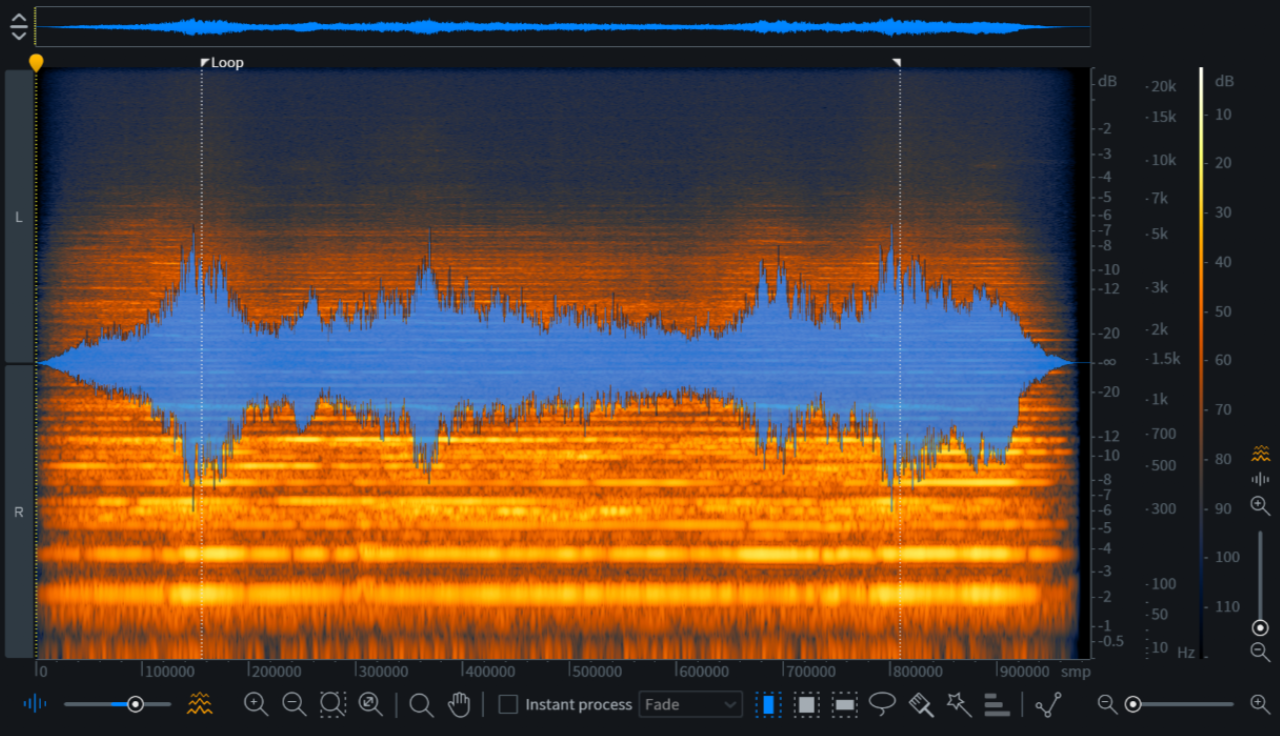
The final loop points are set.
Here’s the raw loop playing in RX. You can still hear where it loops, but that’s not the point. The point is it’s seamlessly looping without any kind of crossfade at all.
Saving your files, and beyond!
You can now overwrite the file—File > Overwrite Original File—which embeds this ‘Loop’ Region as a set of Markers. It’s important to add that these are NOT embedded loop points, but Marker information, which many audio applications can convert these markers to embedded loop points. I do mine in Logic Pro X by importing all the files into an instance of the EXS24 sampler, then enabling Loop for all the samples. This picks up the Markers from RX and creates loop Start and End points. You can then write this loop data into the files in the Sample Editor in Logic Pro.
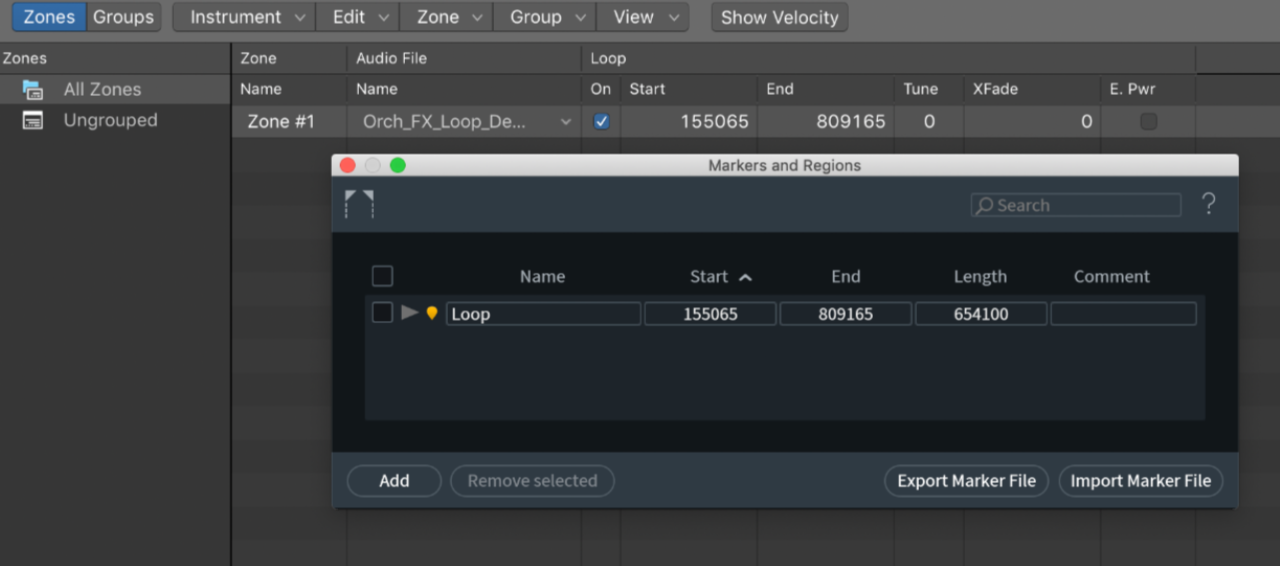
Logic Pro X can read this marker information to set loop points.
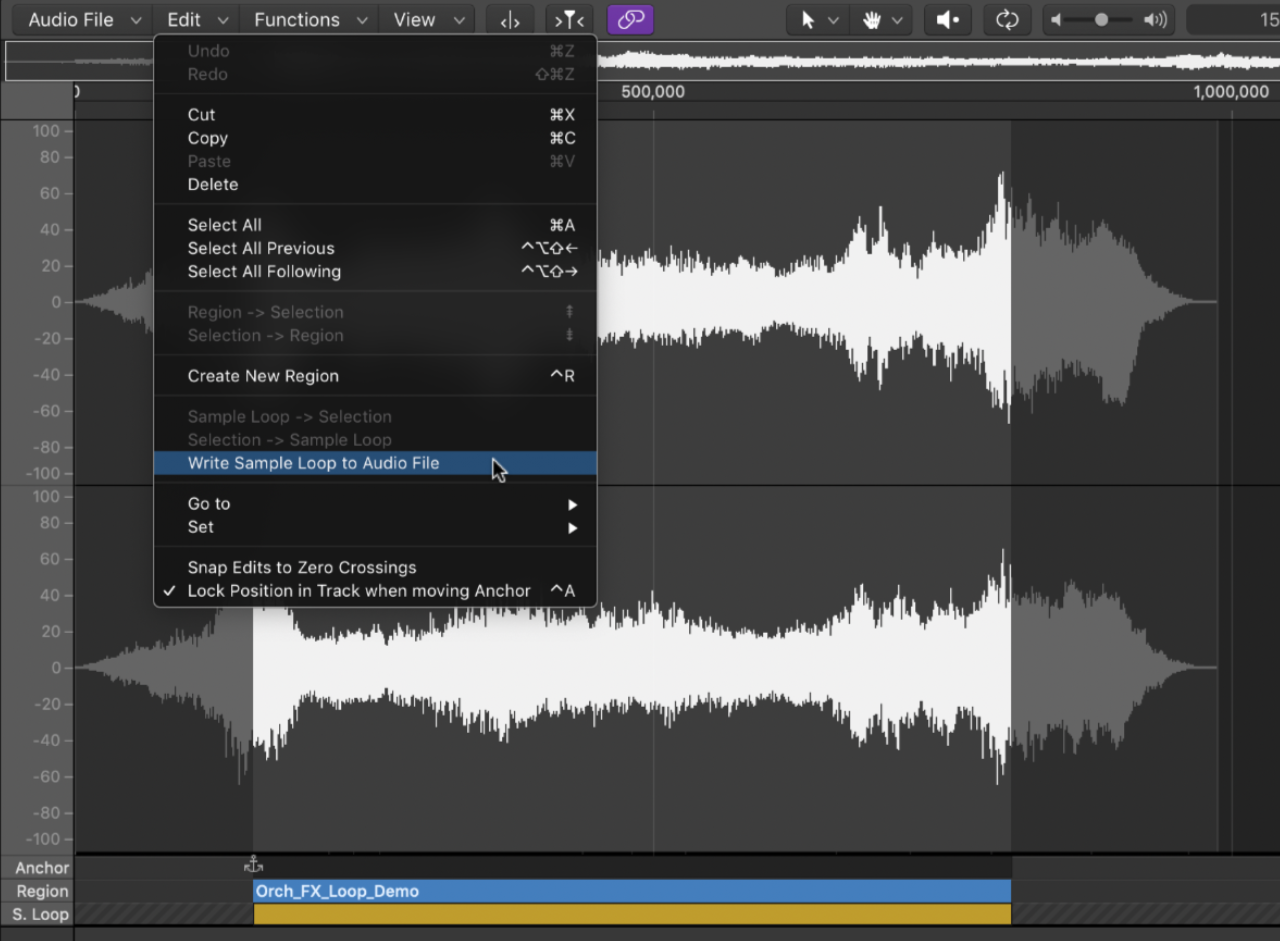
Writing the loop data to the audio file
You’ll notice if I drag the sample into, say, Kontakt, the loop automatically shows up in the Wave Editor. If I use the Loop Edit window for closer inspection, the loop is perfectly matched.

Kontakt automatically picks up the loop points of my audio files.
The same thing happens in Omnisphere when I drag the sample into the User Audio section—a perfect loop achieved, no crossfading required! I’m now free to have a bit of fun with this sample in Omnisphere and make a patch from it. What we get is a nice atmospheric drone patch.
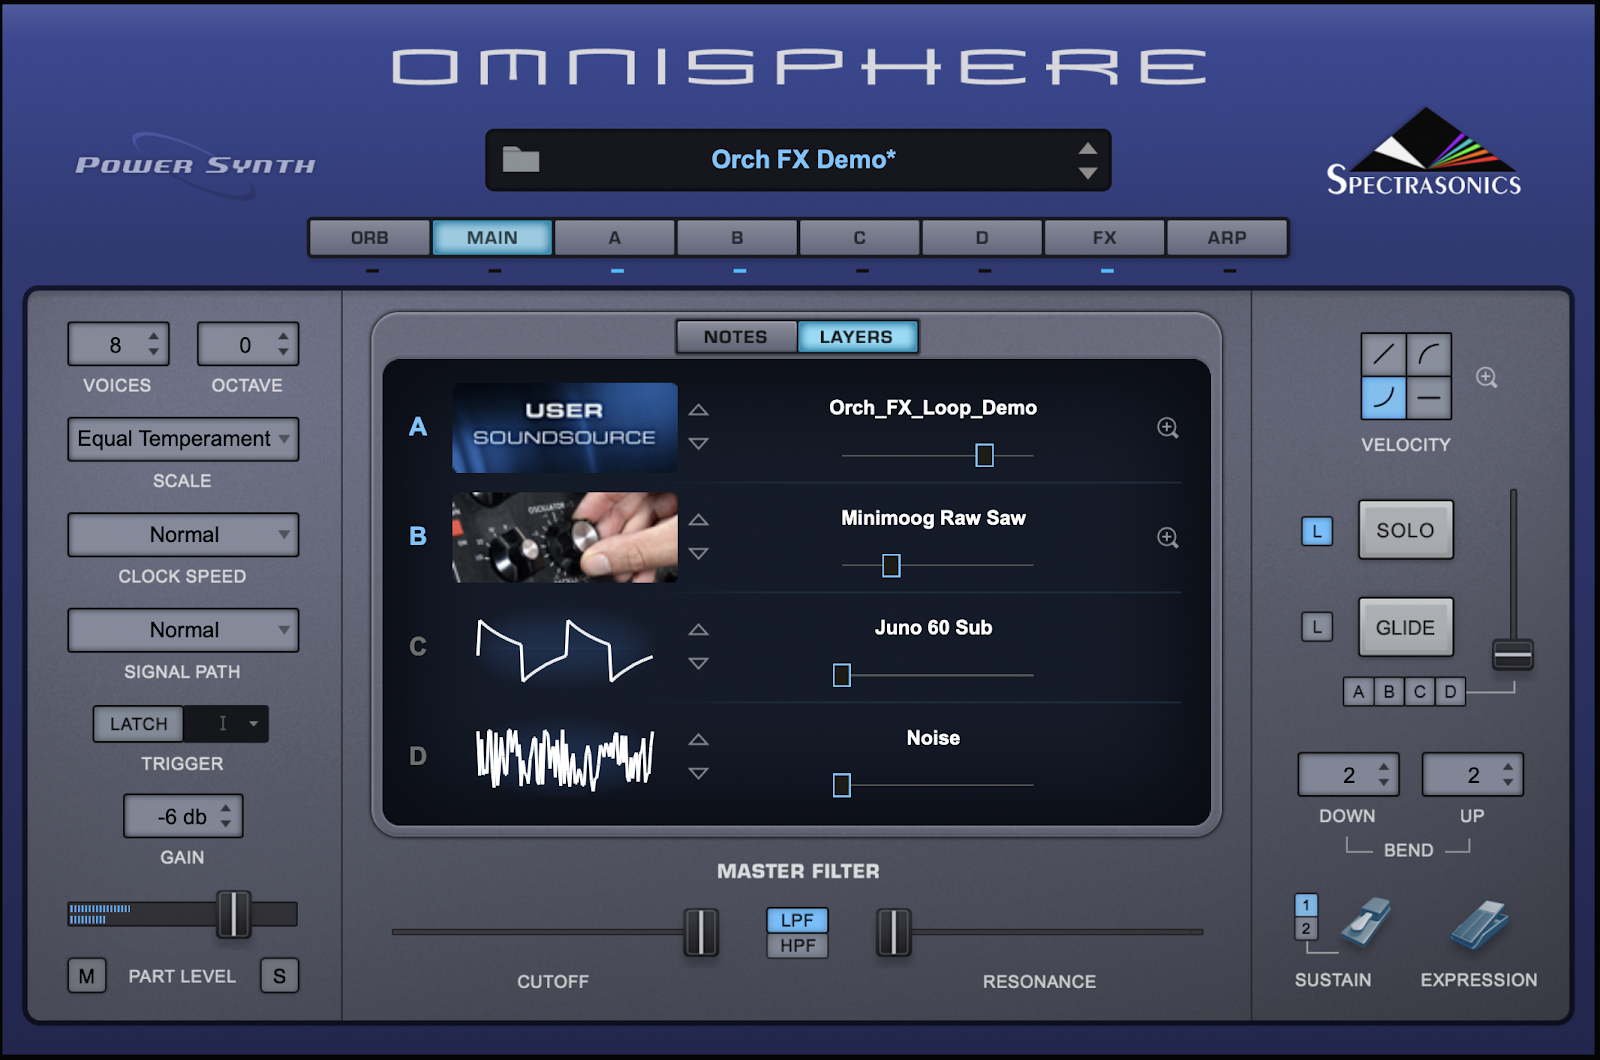
Test patch in Omnisphere
Conclusion
This may seem like a fairly complex scenario, but it’s pretty simple in practice. Each file takes about 60–90 seconds to process once you get in the flow of it which is nothing.
This is a great technique for looping complex material where the source material is very different at the Start and End points—such as ambient and textural pads—which was largely the case in this project. This is just one example of the many unique and powerful tools in RX that can be used in sound design. Copy/paste has never been so inspiring!
Check out Part 2 of this series, coming soon.
