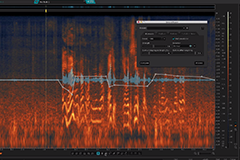
How to avoid a muddy sound in your mix
We’ve all found ourselves with a muddy mix on our hands. What should you do in these situations? Read on to find out.
A muddy mix is something every audio engineer deals with from time to time.
Worry not dear reader—we’ve all found ourselves sitting at the DAW in the morning, a cup of coffee in one hand, our head in the other, tearing out what’s left of our hair out while wondering “how the bloody hell did I let this mix get so muddy?”
What do you do in these situations? Read on to find out.
What causes muddy audio?
First, you need to understand the culprit behind muddy audio, which can be summed up by one hyphenated word:
“Build-up.”
When too many frequencies build up—particularly in the subs, lows, and low midrange—you get a muddy mix.
You can think of this as too many similar sounds fighting for the same space: a kick drum, a bass, and a piano part are playing in the same register. Maybe it’s four guitar parts and two synths all chugging along.
Too much of a similar sound at the same time will cause frequency build-up, which will result in “mud” if these frequencies are under, say, 400 Hz.
But it’s not just multiple instruments fighting for the same space that causes a muddy mix. A single instrument can cause mud all by itself if it lingers too long!
That’s right: mud exists in time as well as space.
Think of a resonant kick drum, a roomy piano, or a wooly bass sound: left sustaining out into the abyss, these can muddy up your mix, especially if another instrument is trying to muscle its way in. This is why one must also be careful with reverb and time-based effects: they can pile on the mud.
Let’s cover what you can do to wash the mud out of your mix now.
How to avoid muddy sound
Here are the basic things we can do to fight the good fight against mud.
1. EQ Management
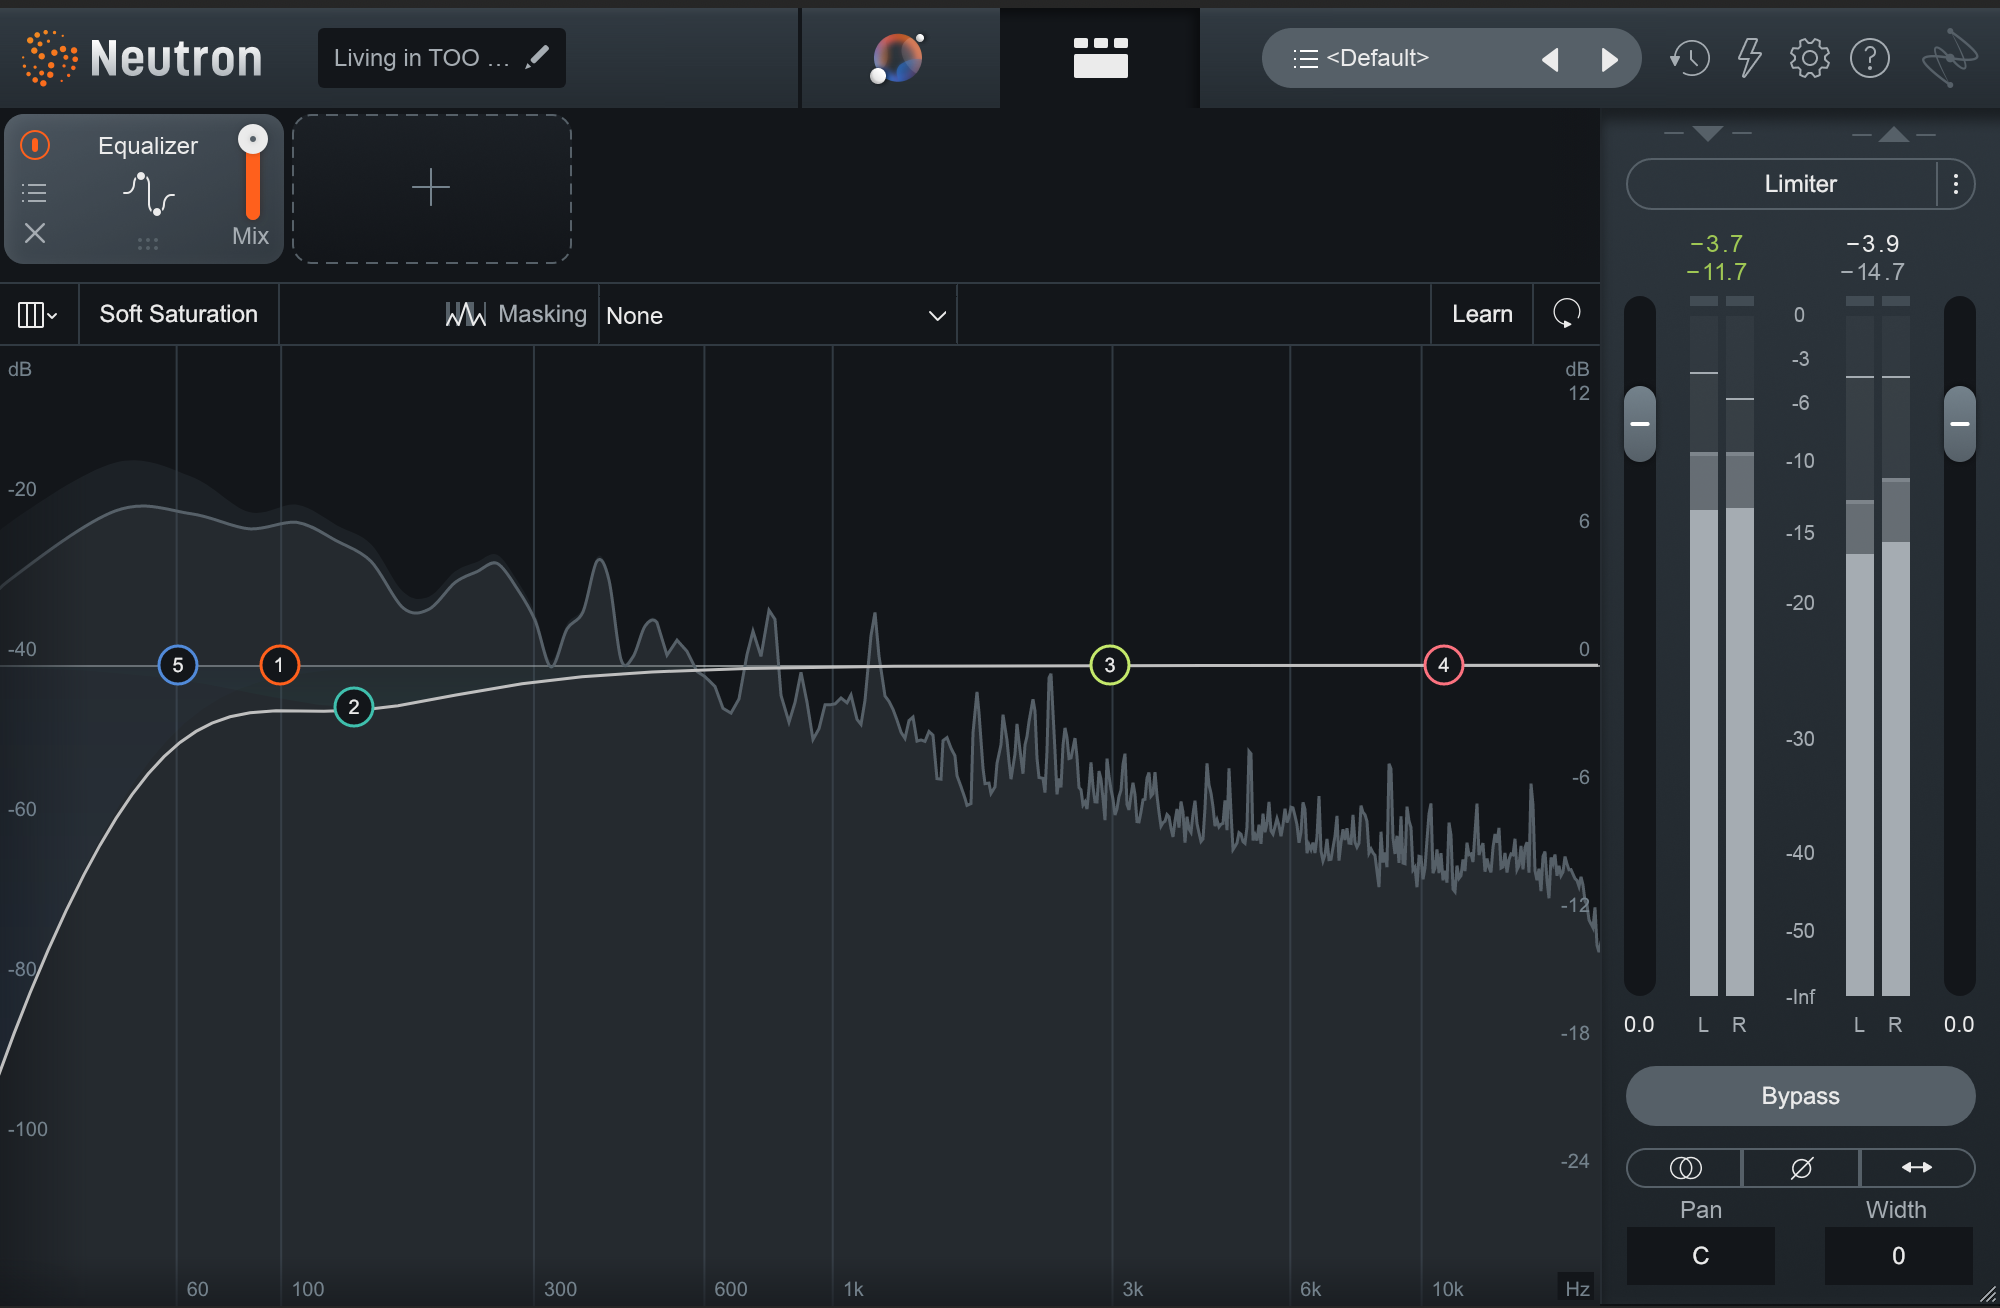
Your first tool in the fight against mud is the humble EQ. Two curves are going to come in handy, often used together.
The first is a high-pass filter, shown below:

The second is a low midrange cut, usually on the wider side.
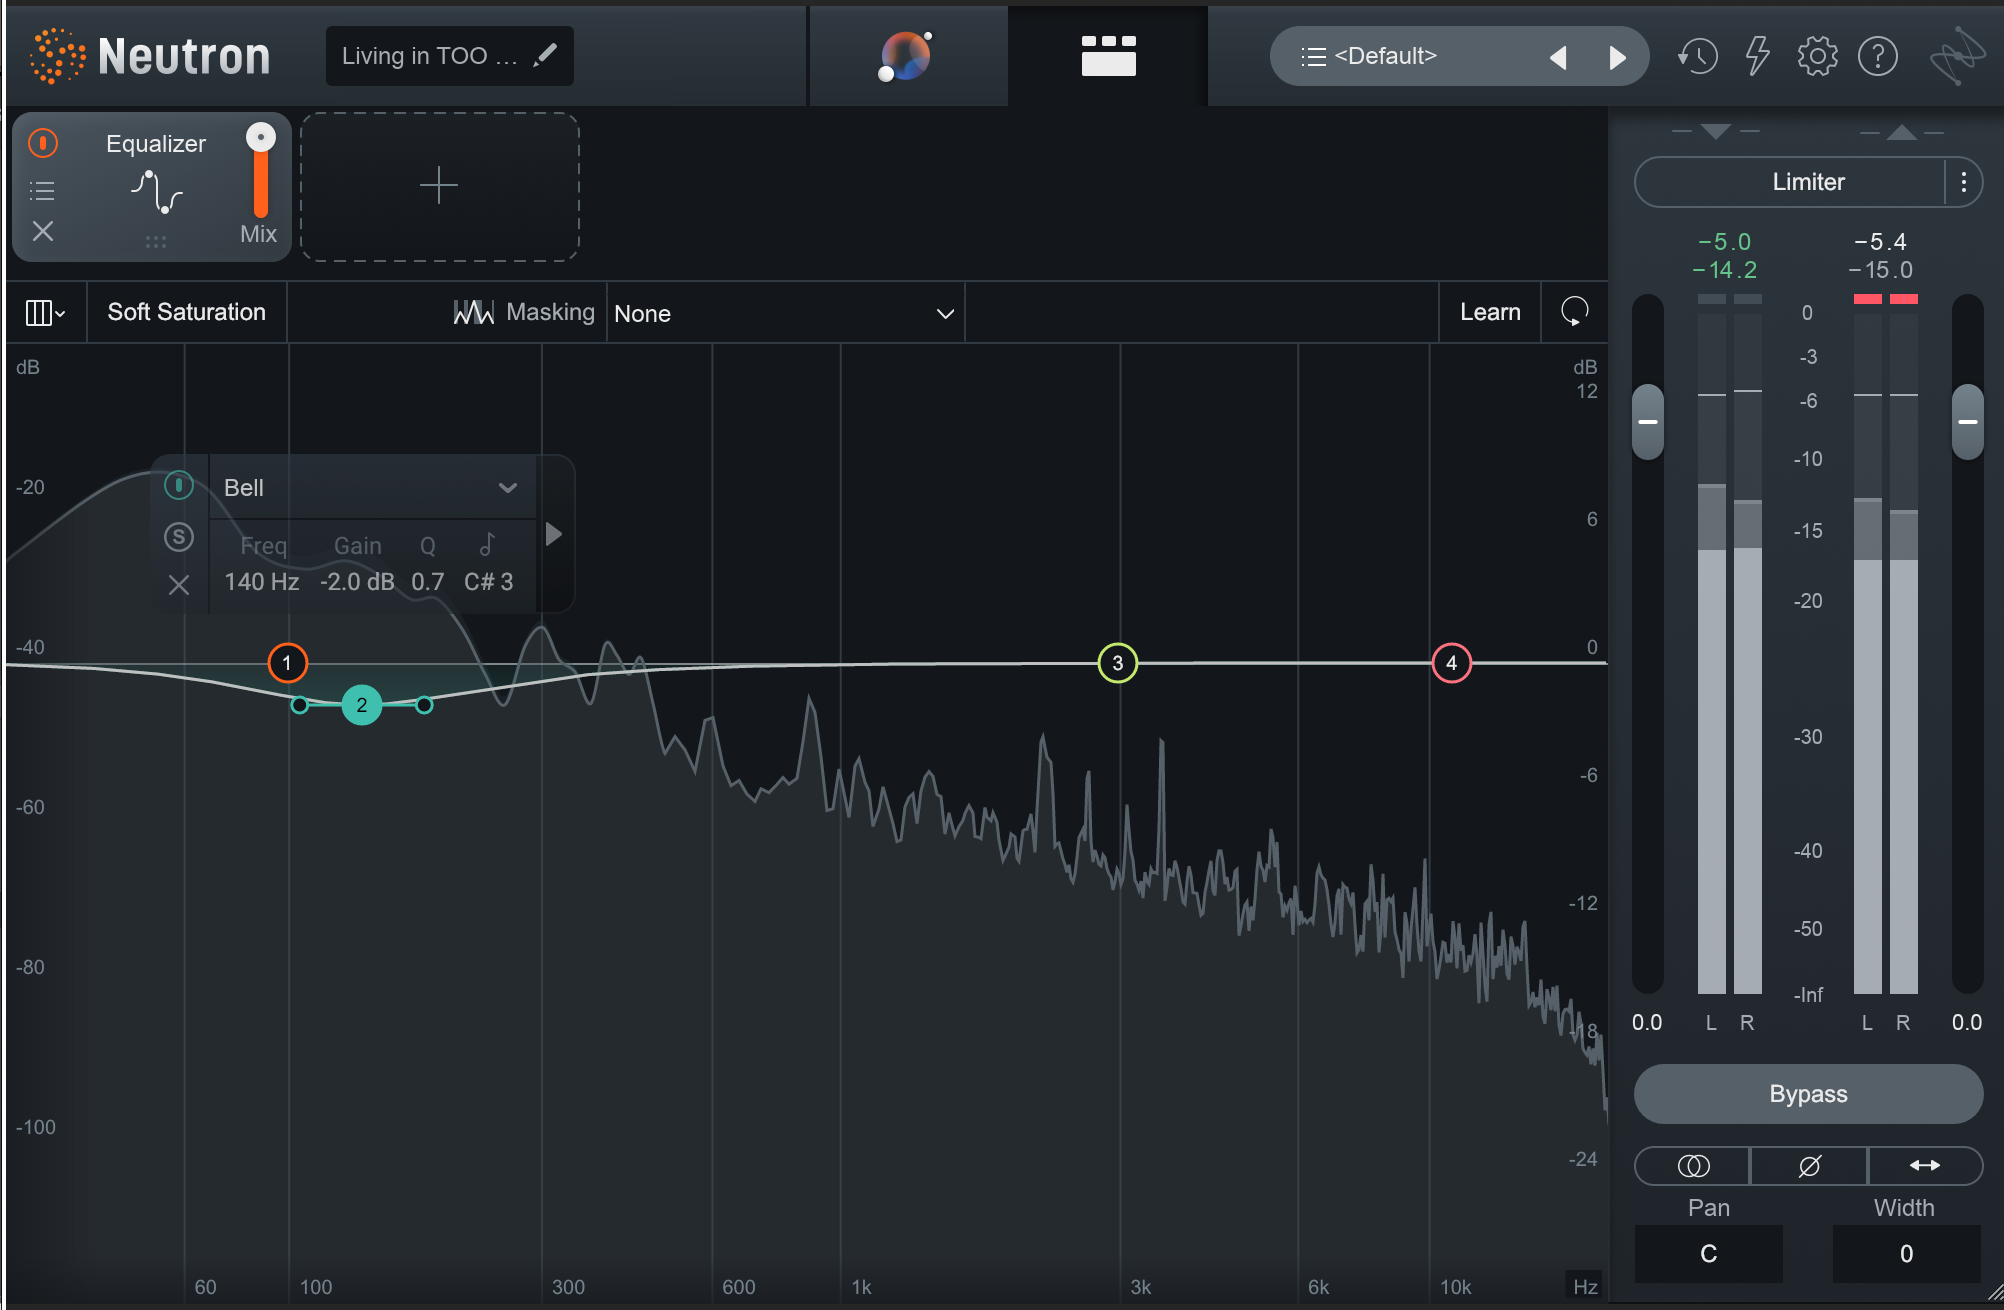
Sometimes you’ll find yourself using both together, like so:
Let’s listen to a mix and see what’s causing it to sound muddy. From there, we’ll fix the issue using simple EQ.
As we said above, sometimes one instrument will mask another. Here, Neutron’s unmasking tools can be used to great effect:
2. Panning and stereo imaging
Panning is the act of moving instruments around the stereo field, and this too can help with mud.
Observe this mix with a drum kit, a bass, and a guitar:
This is a mono mix right now, and as such, it’s quite muddy. Now, I can use the EQ tricks above to make it less muddy, like so:
But that’s not really going to serve us here. Instead, let’s use panning to our advantage. I’ll take these tracks, forego all EQ, and let simple panning help us clear away the mud:
The difference is quite apparent—but we’re not done yet.
There’s still something muddy about this, can you tell what it is?
It’s the drums, specifically the room mics, the tom mics, the overheads, and the hi hat mic:
These tracks have quite a lot of resonant, stereo information pertaining to the kick and snare. Because of these roomy resonances, we’re getting mud when everything plays together.
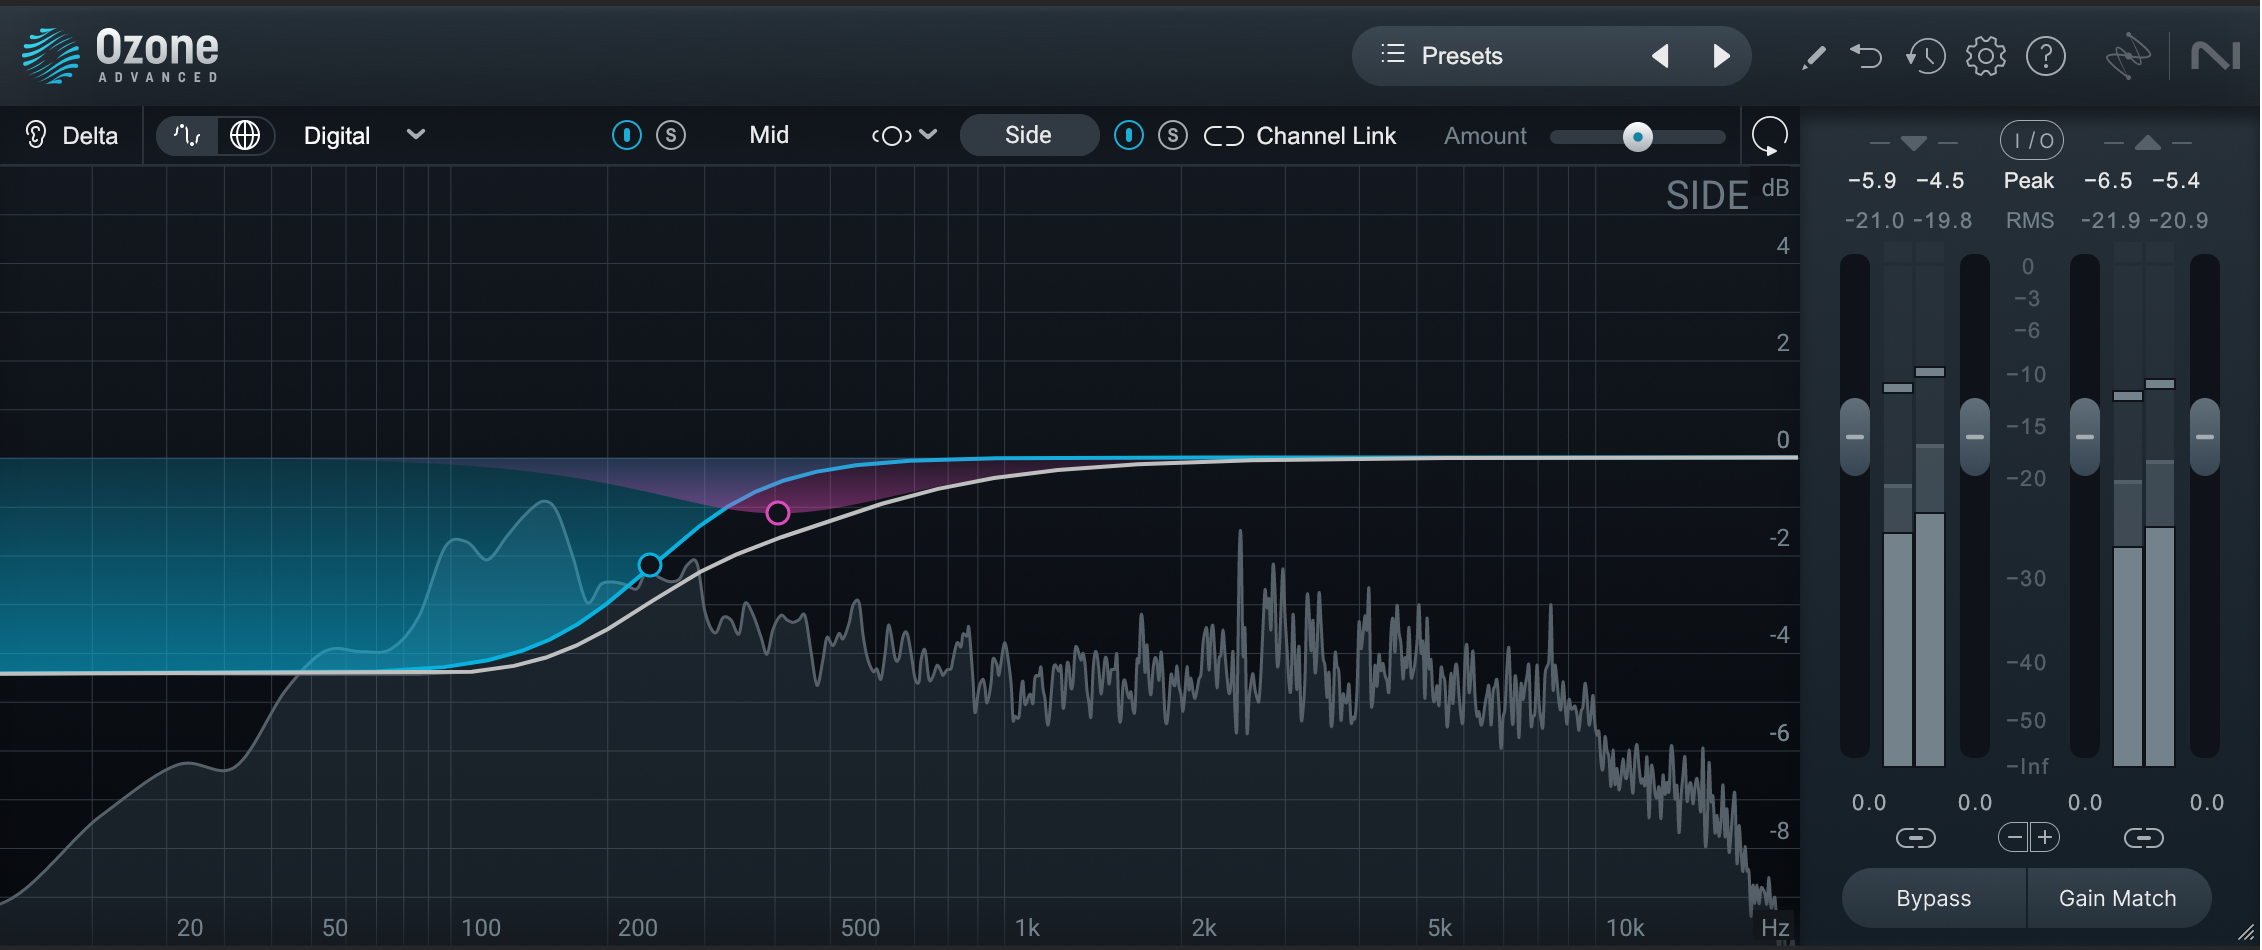
Here I will fix those kick and snare troubles with a linear phase EQ, often using it in M/S mode.
Do not forget to use linear phase mode—it’s quite important with drums. I’ll do the following cuts to the room mics on the side information, where we don’t necessarily need to hear kick and snare in the lower and midrange registers.
In the tom bus, I’ll also cut some information that we don’t actually need:
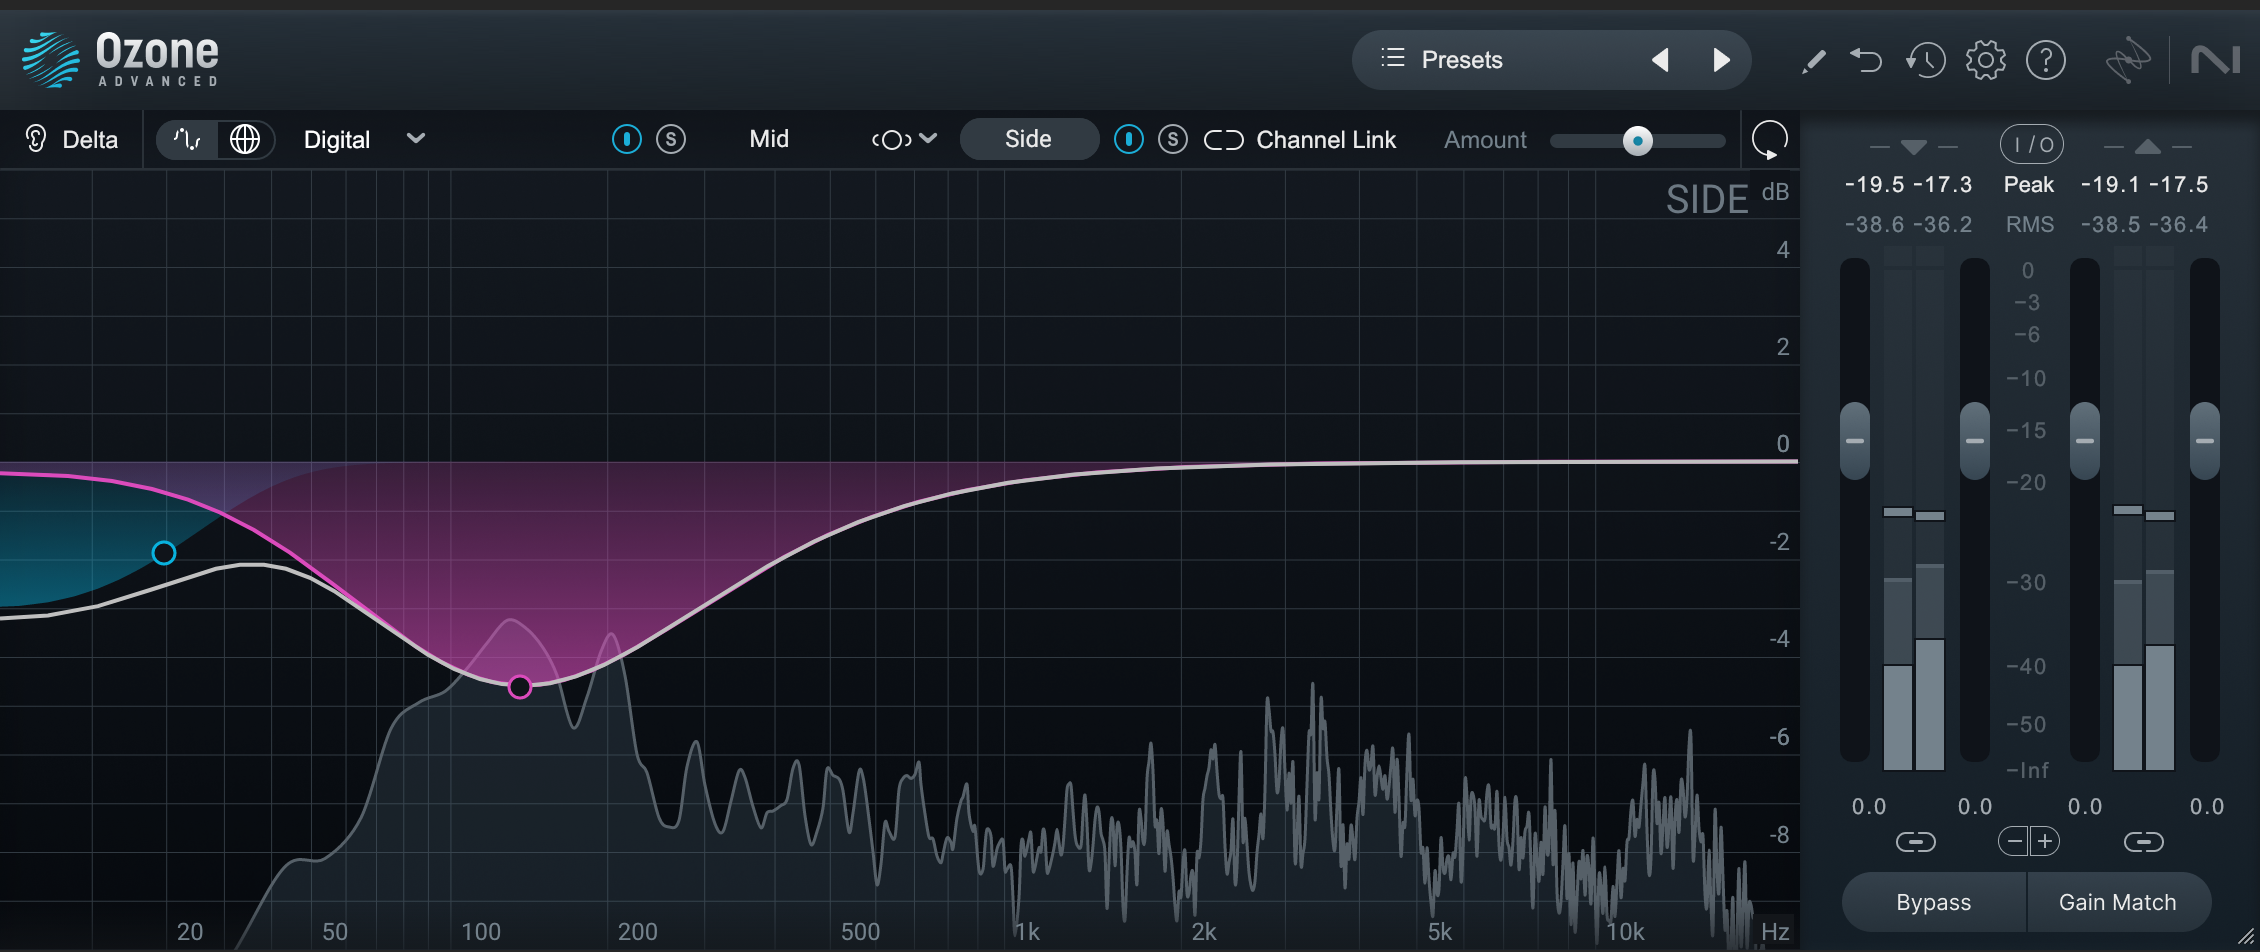
Alternatively, I can gate the toms and EQ them independently, but for our purposes here, I want to show you just how fast and efficient EQ can be for this job.
Onto the overheads:
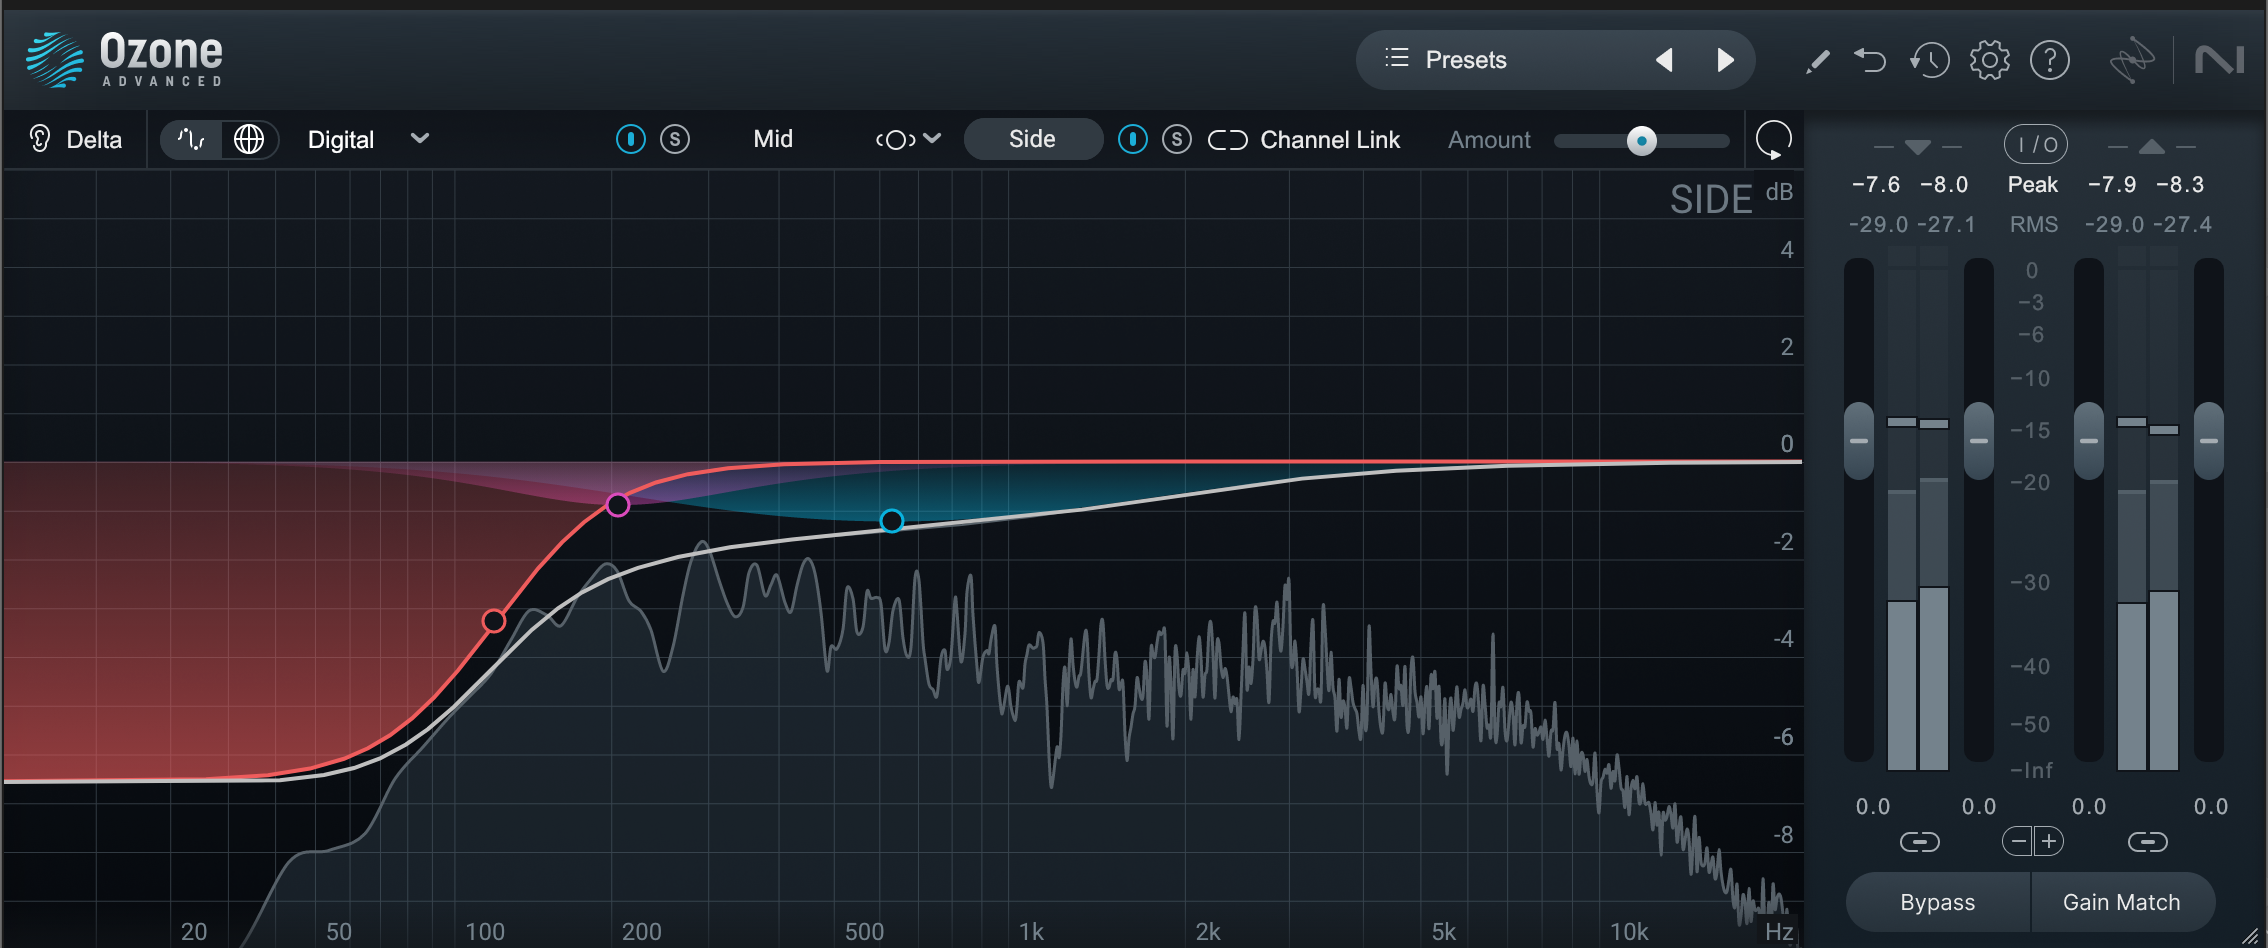
And finally, the most satanic of all instruments according to Steve Albini—the hi-hat:
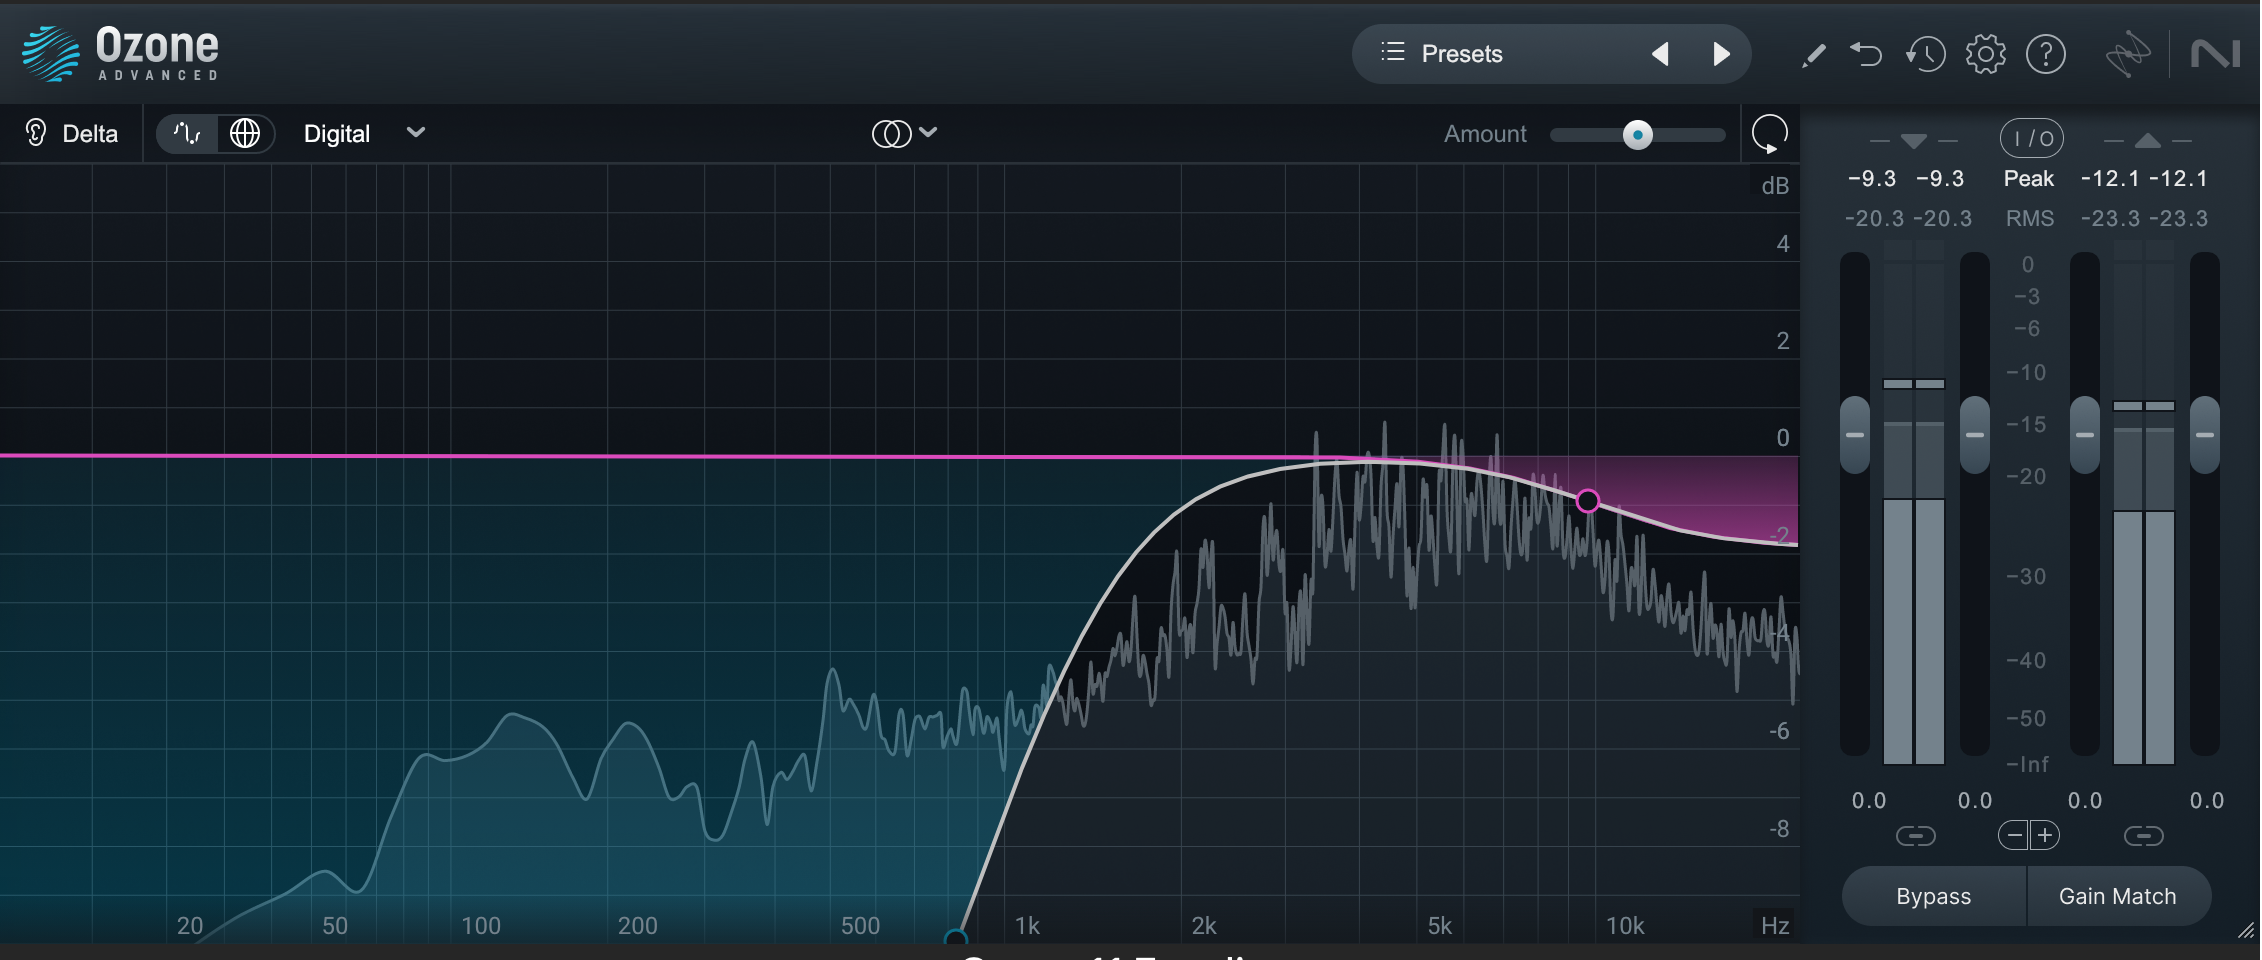
Observe the before and after:
3. Dynamic range control
Compression can also be our friend in clearing out the mud. Let’s cover some common methods below.
Multiband compression
Sometimes, a static cut in an instrument will do more harm than good. You’ll cut the life out of the track along with the mud. Here, multiband compression—and its cousin, dynamic EQ—can help preserve life.
Think of a guitar part: much of the life of a guitar is in that 100 to 400 range, but this is also a frequency range rife with mud. You may find cutting this area with a static EQ will drain its vital essence.
If that’s the case, try a multiband compressor in this range with a medium attack, and a release that fits the material. Sustained guitar chords might do better with a medium to long release, whereas a fast picked part might benefit from a short attack time.
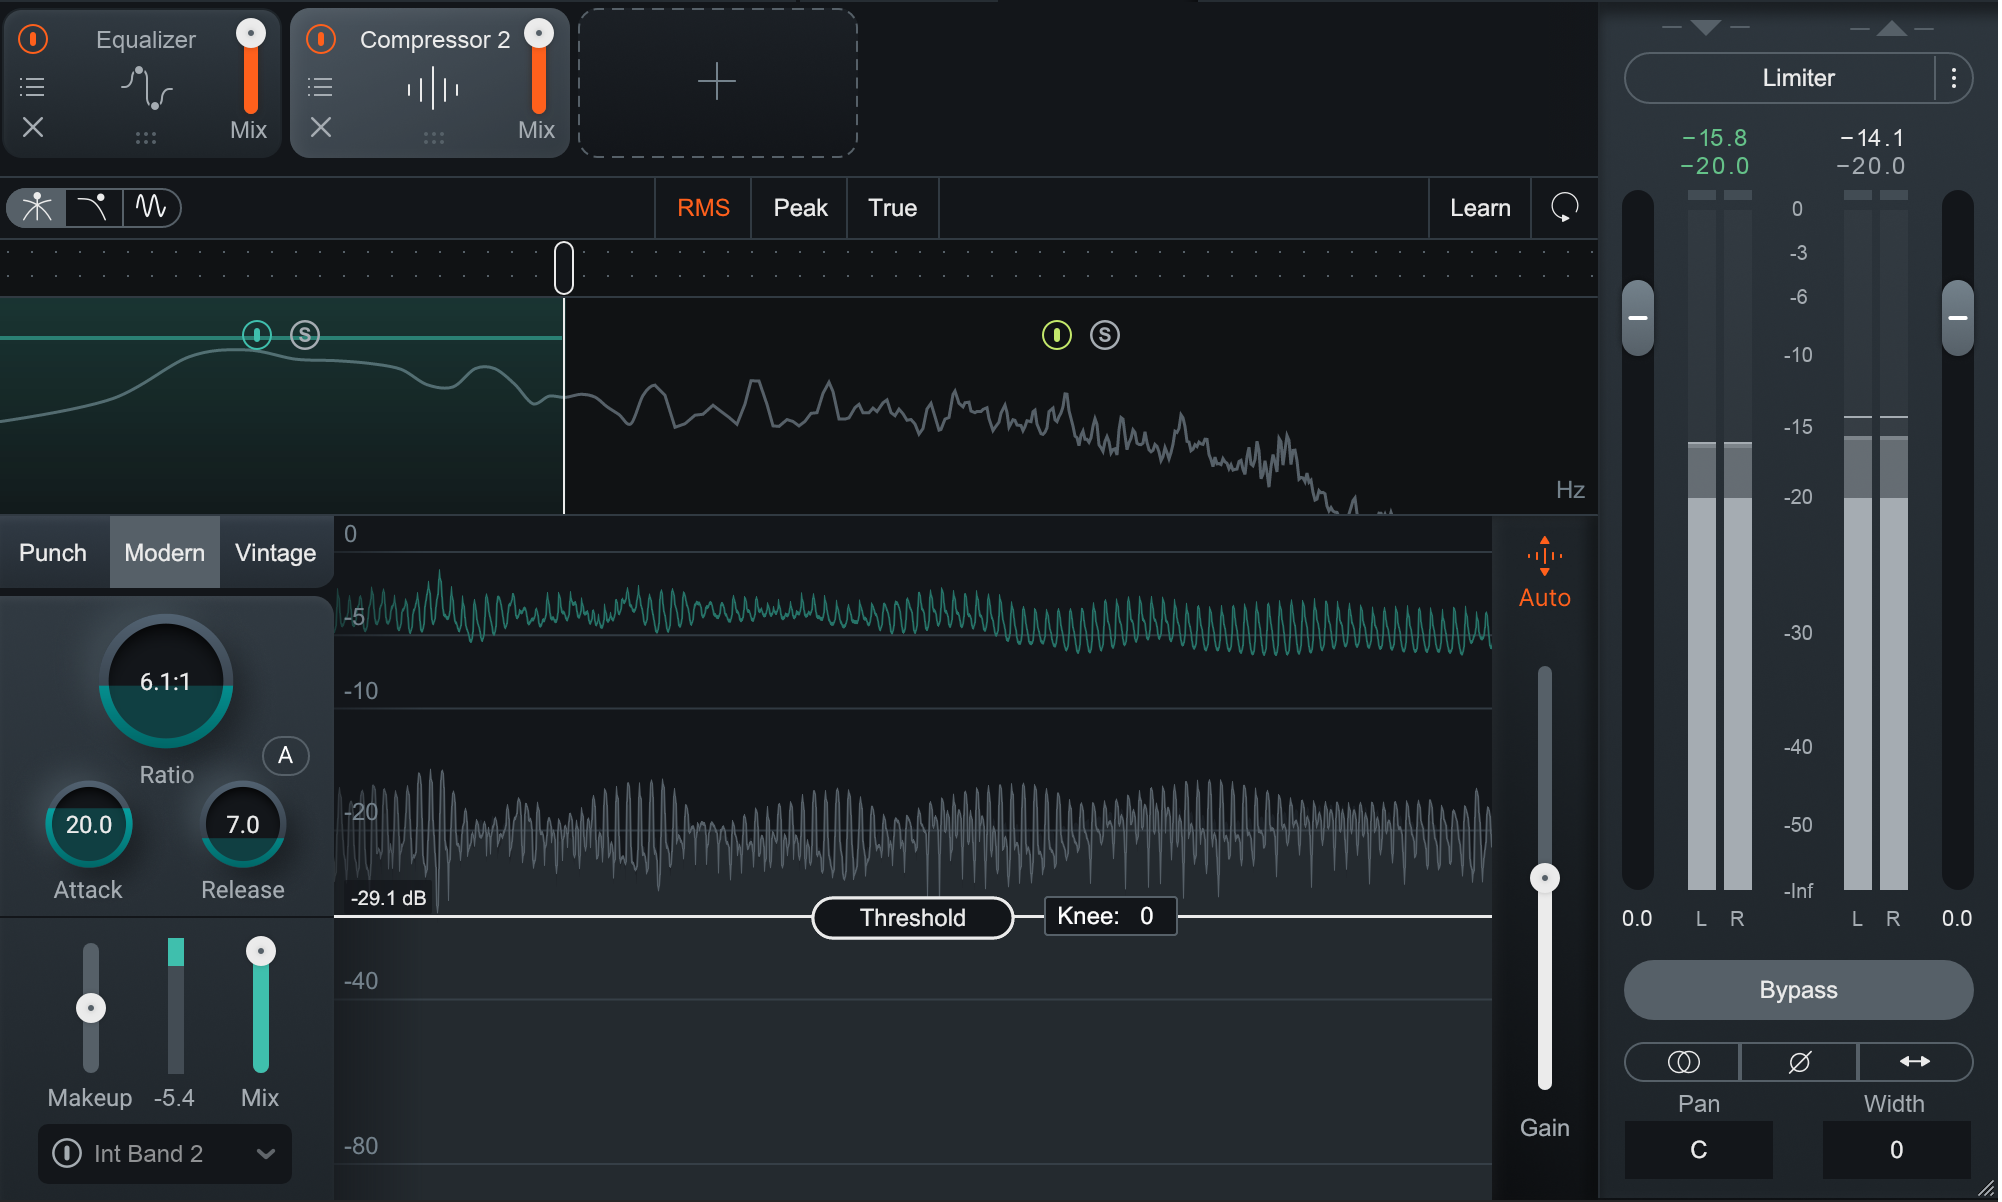
Broadband compression with an emphasized sidechain signal
In this technique, we don’t affect the tone of the guitar itself. We force it, instead, to quiet down when its most muddy frequencies are prevalent.
We do this by slapping a compressor on the instrument in question, and applying an EQ on its sidechain detection circuit—one that is tuned to favor the muddy frequencies, like so:

This is an instrument with a Neutron compressor on it. You’re seeing the sidechain compressor circuit pictured here, with a band-pass eq set to favor the mud. That means the compressor is no longer responding to the instrument—it’s now responding to a heavily filtered, very muddy version of the instrument.
Observe this crazy techno song that nevertheless has guitar. Here it is without compression:
If we use the settings above, here’s what we get:
Note how the bass synth is more audible in the latter example. That’s because of the compression on the guitar.
Sidechain compression to keep sounds from fighting each other
Here we’re feeding the compressor with an internal sidechain to keep one instrument out of the way of the other. A classic example would be bass and kick drum: you set up a sidechain compressor so that whenever the kick hits, the bass ducks in the low and low-mid frequencies, like so.
Here’s an example without sidechain compression on the bass.
And in this example, we’ll route the kick into the the sidechain input of the multiband compressor on the bass:
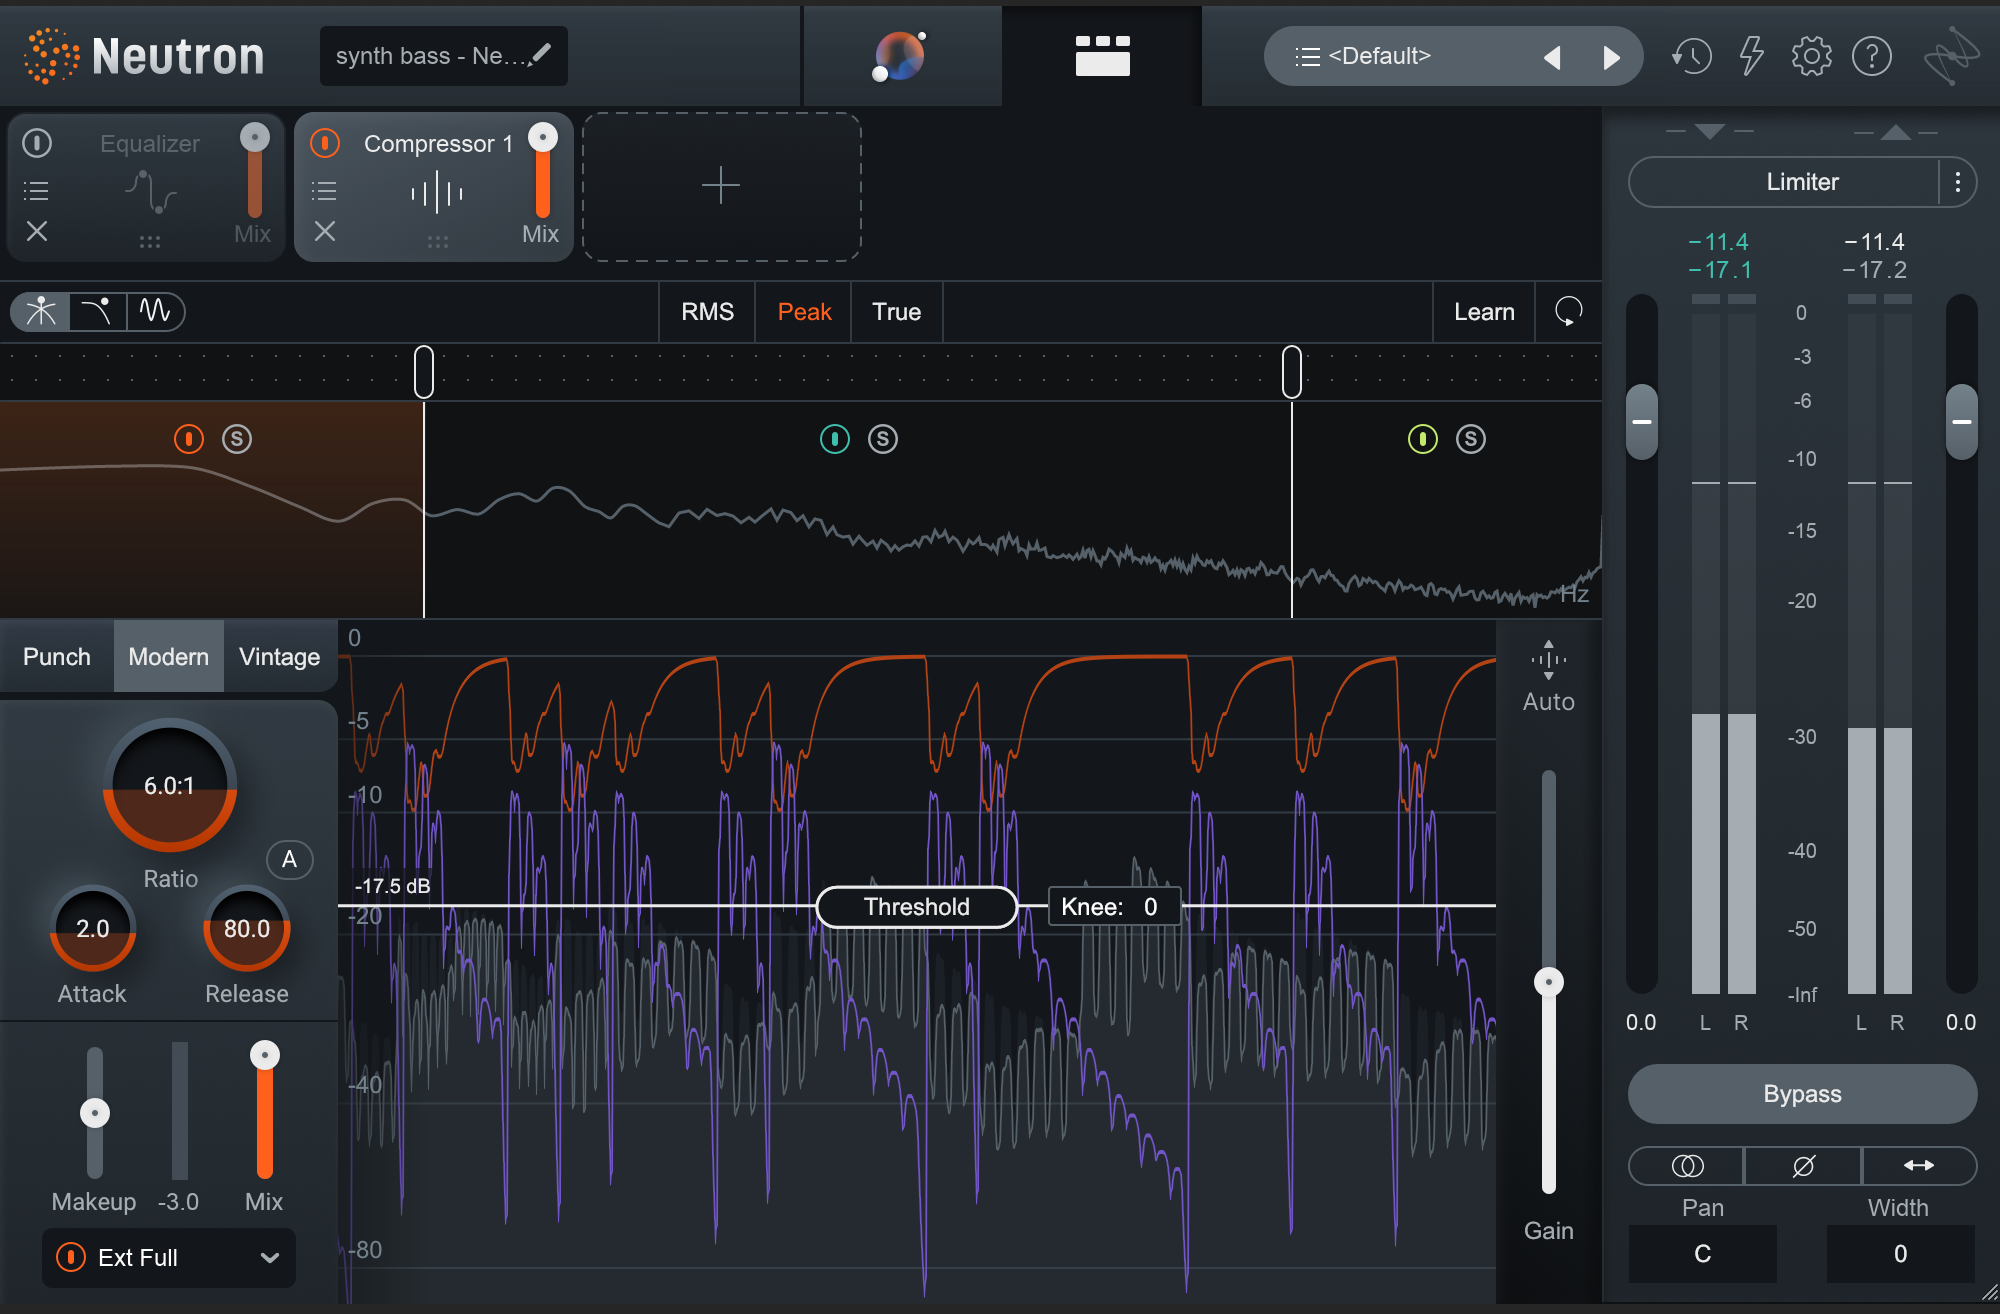
We can hear the kick more, but we don’t really notice obvious ducking in the bass part. That’s the benefit of this technique.
Transient/sustain processing
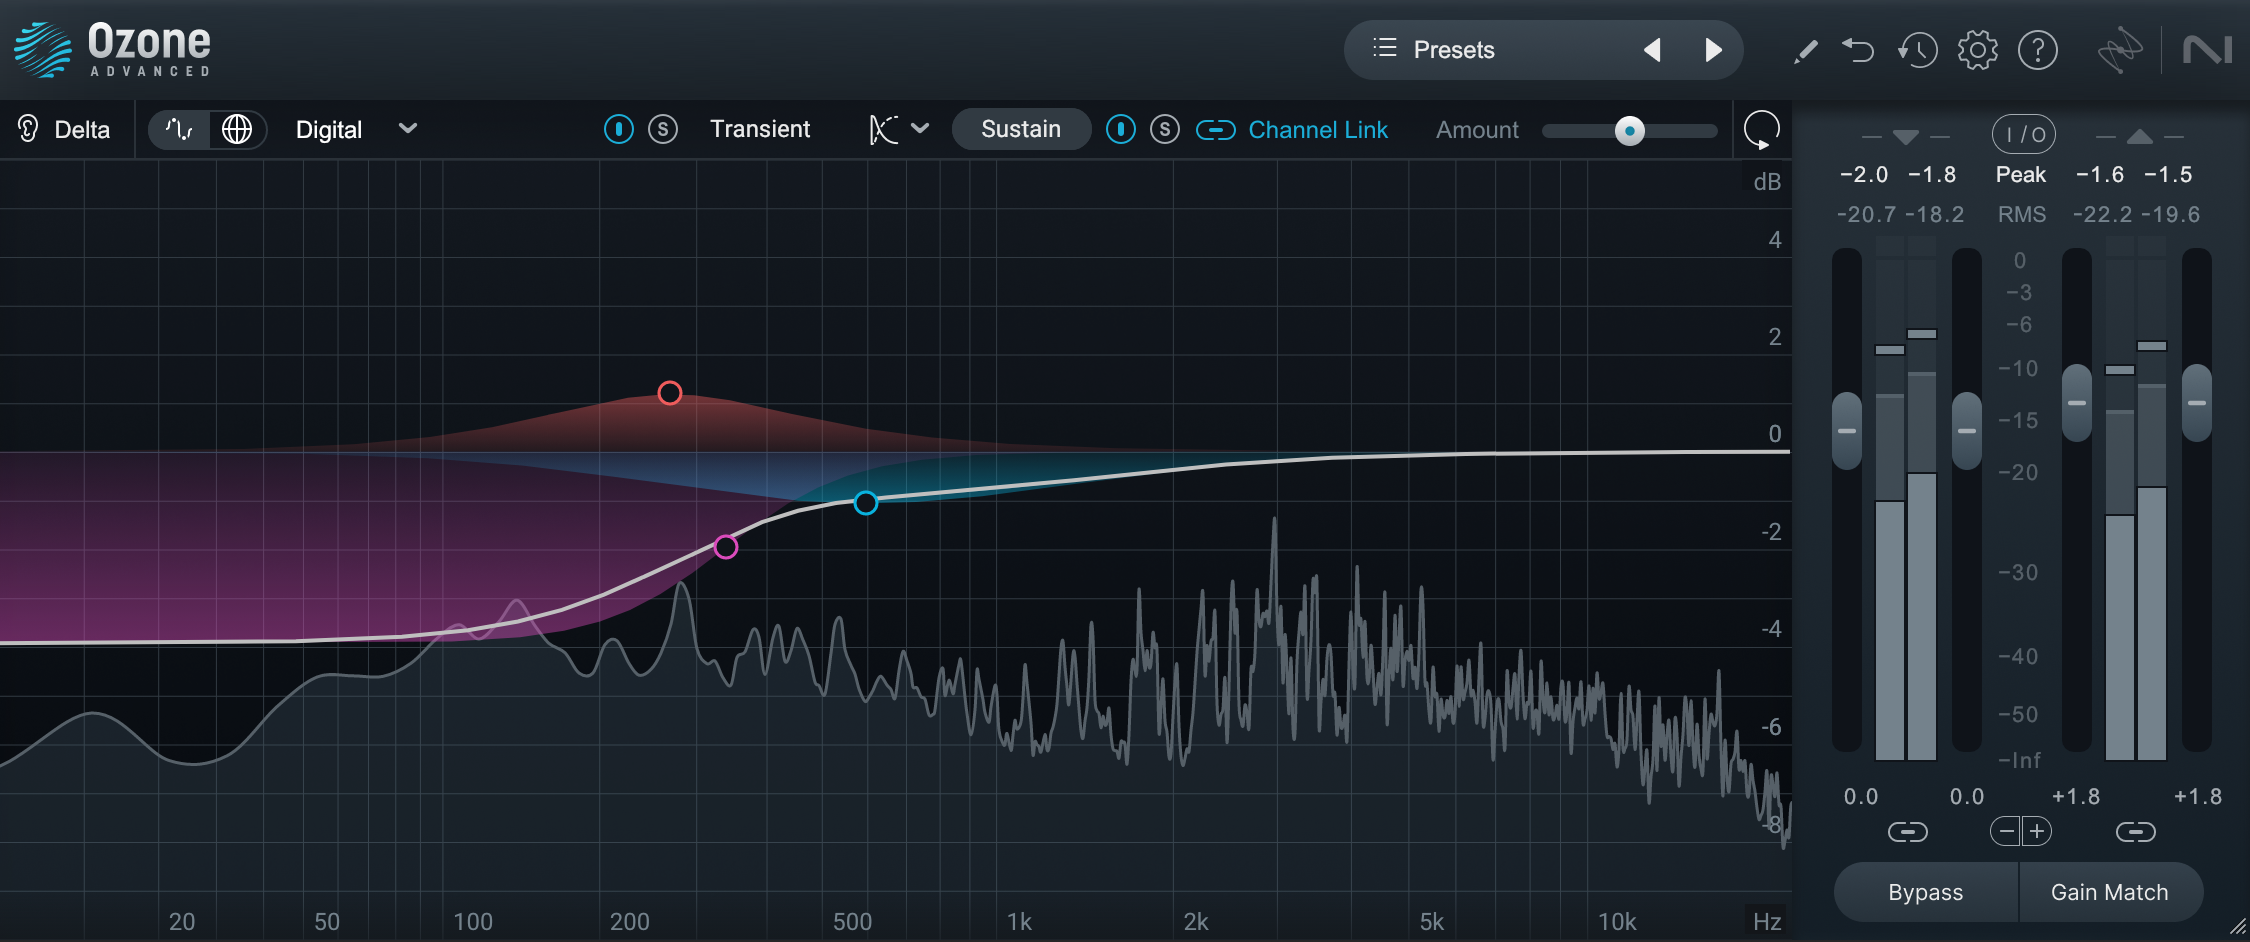
In the last few years, digital processing has made great strides in transient/sustain processing. We now have plug-ins that separate the transient portions of a signal from the sustaining material quite well.
This helps with issues pertaining to duration, like boomy bass drums or wooly basses. We can allow the transients to come through unharmed, but tame the sustaining material.
Observe this drum loop:
In the mix, it might be quite muddy. Observe how we can reduce the sustaining kick and tom material with a transient sustain eq, such as the one in Ozone:
4. Effects management
When it comes to reverb and delay, the principles of avoiding mud apply twice as hard. If your mix feels too cluttered or lacks clarity, your effects might be to blame.
First off, you must time your delay and reverberation effects quite intentionally; too long, and mud will ensue. Err on the shorter side and eke your times longer only if you need to.
Secondly, keep the “25% less” rule in the forefront of your mind when mixing reverb and delay: if you think that the level of a vocal reverb is perfect, scale it back by 25%—or more, if you’re working on headphones. Headphones will lie to you about how loud your reverbs should be; they’re tricky little devils in that way.
Finally, keep in mind that all of the tips I’ve mentioned above apply to your effects. You can EQ them, compress them, sidechain them, and manipulate their stereo weighting in the service of avoiding puddles of mud.
5. Use reference mixes to your advantage
Reference mixes are a fantastic way to watch out for mud. I have a bank of reference tunes that I use to snap my attention into focus, and they each serve a purpose. I pull up Everybody Here Wants You for its gorgeous, pristine drum sound—it can really help me stay out of the mud. As I said in the video up top, I even keep a v1 muddy mix of my own in my reference folder. It’s my metric for “seductively too far in the mud department.”
Here’s how I use my references: at the end of a session, I bounce the mix, wherever it is. I take a break. Then, when my ears are fresher, I walk around and listen to my references the way a consumer would—on headphones, or on a home speaker system. After a couple minutes with my refs, I load up my mix and see how it does. This is a fantastic way to uncover mud.
6. Keep arrangement in mind
This is the biggest factor in eliminating mud—though it applies more to production and composing than it does to mixing. One time a jazz bassist handed me a tune with regular bass, synth bass, overdubbed bass melody, and a groove played on the toms. Dear reader, I’ve never been so close to murder. It’s like he handed me a puddle of mud and said, “go ahead and put your face right there.”
If you’re arranging, composing, or producing material, take note: craft your songs so that instrumental parts naturally stay out of each other’s way, both in space and in time.
Create clean and clear mixes
Download iZotope's Neutron to start creating crystal clear mixes, free of mud. Leverage features like the Unmask Module, Exciter Module, and Equalizer Module to create songs that sound balanced, rich, and full.
