5 Ear Training Exercises to Listen Like a Mastering Engineer
Explore five ear training exercises to help you sharpen your listening skills and listen like a mastering engineer.
When you think of the most important tool in a mastering engineer’s arsenal, what comes to mind? An equalizer? A compressor? Top-notch conversion, monitoring, or room acoustics? These are all certainly very important, but without a great set of ears behind them, they’re virtually worthless.
But in truth, your ears are only really one part of the story. They turn sound vibrations in the air into neurological signals, but it’s your brain that does the real hearing. Luckily, our brains are great at learning and adapting, so here are five ear (and brain) training tips to help you listen like a mastering engineer.
1. Train your ears to identify specific frequency ranges to EQ more effectively
A fundamental listening skill for a mastering engineer, and one which closely relates to level matching, is being able to judge tonal balance. More specifically, the ability to quickly identify which frequencies or frequency ranges are either deficient or poking out too much will allow you to make corrective EQ moves more efficiently.

Typical frequency ranges of common instruments and vocal ranges
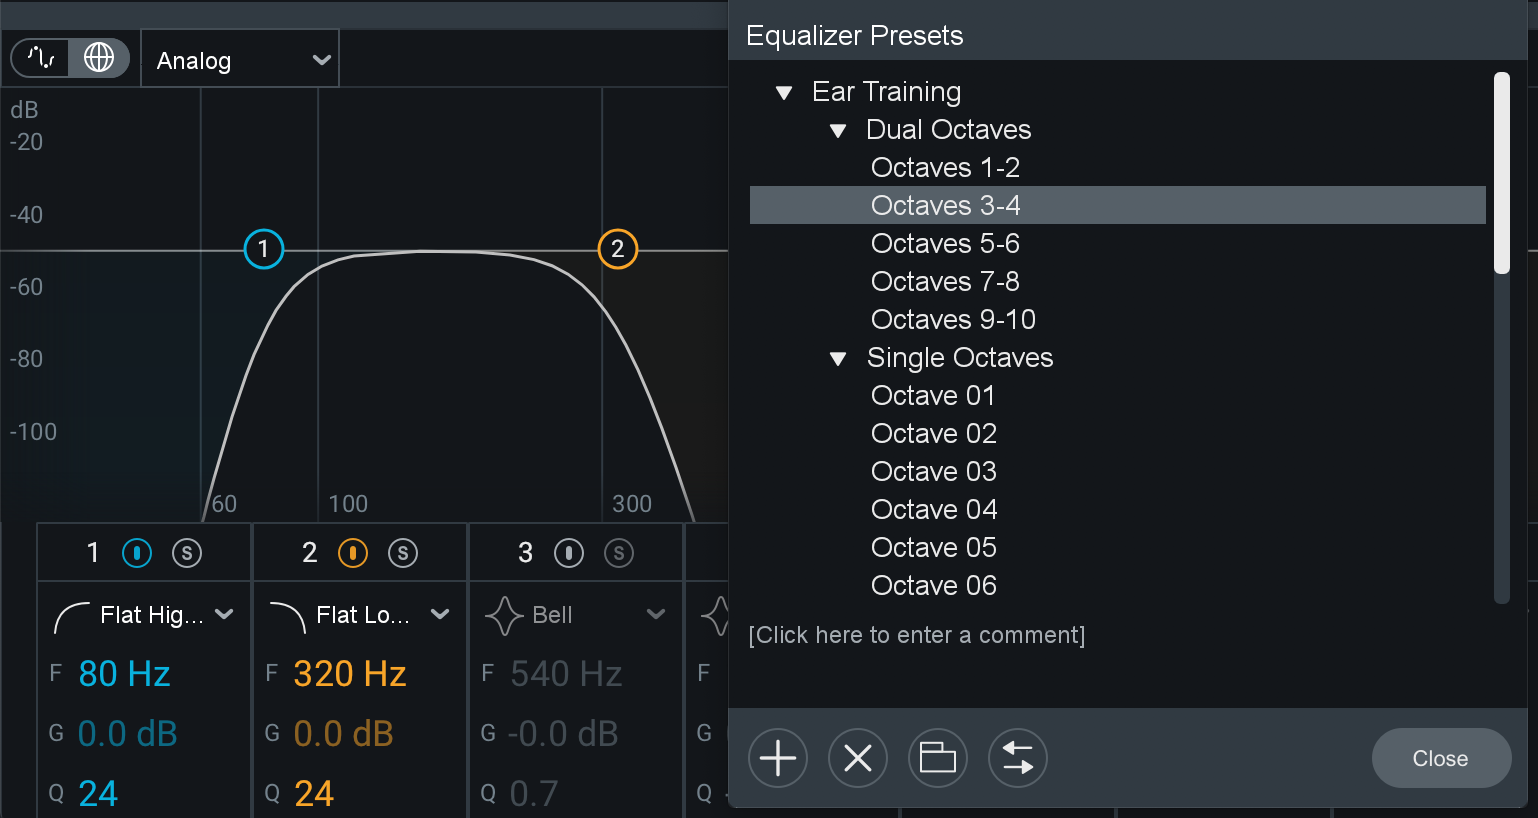
Broadly speaking, the range of human hearing can be split into ten octaves. If you’ve never done much frequency-based ear training, these are a great place to start. These 15 Ozone equalizer presets will allow you to step through the individual octaves, or if you’d prefer to start with broader frequency ranges, dual-octave groups.
The training exercise
Load some of your favorite music into your audio editing software and listen to it while slowly stepping through the presets (you can also do this manually in an EQ of your choice). Try bypassing the plug-in periodically, paying special attention to the relationship of the energy in the octave or dual-octave band you’ve been auditioning to the energy of the whole song. As you step through different presets, also pay attention to the level relationships between adjacent octaves.
When you feel like you’re getting a good grip on the different frequency ranges, you can try some ear training apps like iZotope’s own Pro Audio Essentials, or other products like those from PureMix, SoundGym, or Quiztones. This is a skill that can take a long time to hone, but the rewards are worth the effort!

Ear training EQ presets
2. Train your ears to level match two songs
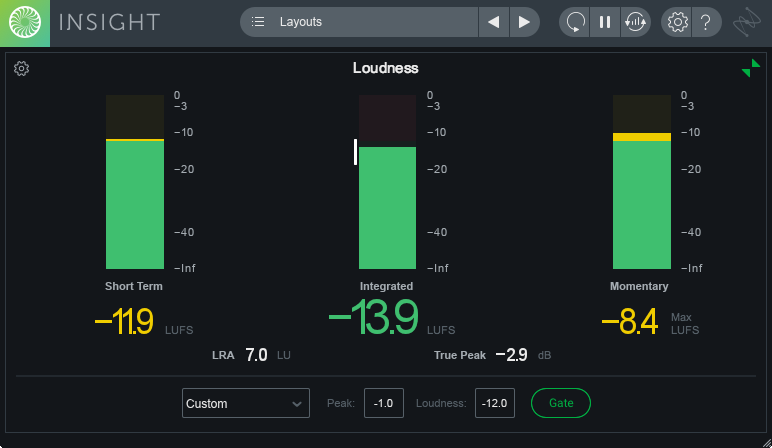
Simple as it may sound, level matching two songs is one of the most fundamental listening skills a mastering engineer must develop. A momentary or short-term LUFS meter, such as those found in


Insight 2
Any level matching difficulties will center on tonal balance and the overall dynamics of the song. Dynamics are a bit easier to dispense with, so let’s discuss those first.
The training exercise
Adjusting overall dynamics
It can be difficult to find the average loudness for a song with wide dynamic variation, so it often makes sense to focus on the loudest section. Perhaps this is the final chorus, or the main drop after a big build. Whatever the case, find the loudest sections of two songs and compare them to easily adjust gain and put them on equal footing.
Adjusting tonal balance
Tonal balance and perceived loudness are inextricably intertwined, making it more difficult to get to grips with the impact of a track’s tonal balance on its loudness. Increase a song’s level and you will perceive it as having more bass and treble; decrease its level and it will become more midrange focused. To combat this, pick a focal element in each song and compare the levels of those elements. Lead vocals are often a good candidate, but lead synths, horns, or other main melody instruments can also be suitable. However, keep in mind that imbalances in monitoring such as monitoring chain deficiencies can also add to the challenges when comparing two recordings with different spectral emphasis.

Loudness module in Insight 2
3. Train your ears to hear subtle compression while mastering
There are no two ways about it: learning to hear compression—or more specifically, learning to hear the effect of compression on your music, and especially the subtler variety typically used in mastering—is one of the most difficult audio engineering skills there is.
This comes down to several factors. First, compression can be used in many different ways. While it can certainly be used in the traditional sense for dynamic control, it can simultaneously be used to enhance punch, alter tonality, add movement, and more. Second, when properly used in a mastering environment, compression is usually understated, bordering on imperceptible.
The training exercise
The easiest way to start learning to hear these effects, as is so often the case, is to greatly exaggerate them. Try setting up a compressor with a high ratio, 4:1 or 6:1, and a fast release time, around 25 ms.
Start with the threshold all the way up and the attack set to its slowest setting, play a full mix through it, and then bring down the threshold until you see 6 to 8 dB of gain reduction. Next, slowly decrease the attack time and listen to the effect this has on the main transients (likely kicks and snares), both in terms of punch and tonality.
Once you’ve found an attack time that suits the song, try increasing the release time. Listen to the effect this has on perceived level, apparent density, tonality of sustained elements, and movement (particularly of lead elements). From here, you can begin to experiment with ratio, knee, and sidechain filtering, keeping in mind that reverting to more extreme attack, release, and ratio settings may make other adjustments easier to hear.
As you internalize what these changes sound like over time, you’ll be able to hear subtler and subtler compression, like the 1–2 dB of gain reduction that is more typical for mastering.
4. Train your ears to hear subtle limiting
While limiting is a close cousin to compression, it has its own set of sonic characteristics to focus on, most of which are heavily tied to transients. These characteristics aren’t actually so hard to hear, but because limiters typically raise the overall audio level, these changes in sound are often masked by our psychoacoustic preference for loudness.
Luckily, there’s an easy way around this. Most limiters allow you to link the input and output controls, allowing you to hear the effect of limiting without any change in level. In the


Ozone 11 Advanced
The training exercise
As an exercise, try linking these parameters, pulling down the threshold, and listening to the change in the characteristics of transients. Many modern limiters can be hard to hear when they’re doing a small amount of limiting. As you begin to pass 4, 5, or 6 dB of limiting, listen as the drums start to pull back in the mix, losing impact and changing slightly in tonality. Adjust your threshold this way to easily hear when you’re over-limiting.
This method of increasing the amount of limiting without increasing the gain will also allow you to compare other settings on the limiter more easily, such as linking, transient emphasis, release modes, or lookahead. As with compression, overdoing things at first can help your ear more easily recognize those characteristics as you bring them into subtler, more reasonable territory.
5. Train yourself to hear clicks, pops, and other artifacts
While this isn’t necessarily exclusive to mastering, listening for clicks, pops, distortions, and other artifacts is essential in the final quality-check stage of any mastering job. This exercise is often best suited for high-quality headphones, as they’ll help highlight the subtle sounds you’ll be listening for. It’s also an exercise that requires a slightly different mindset than the others we’ve discussed so far.
In mastering, it’s always important to listen to a song as a whole, but the first four exercises allowed us to focus on specific characteristics: level, tonality, dynamics, and transients. Your final quality check requires you to zoom out and listen to everything at once, maintaining a high level of focus without letting your mind drift for the entirety of the song or album. This requires as much, if not more practice, than identifying the errors you’re listening for in the first place.
It’s also important to understand that these flaws can sneak in at any stage of the production or post-production process. While clicks, pops, and dropouts can certainly result from indelicate edits during production and mixing, they can just as easily be the result of the render step of a final master file, buffer under-runs and other dsp errors, hard disk buffering issues, driver handoff errors and more.
It’s also important to develop an instinct for flaws which are related to the production process vs. ones which are technical in nature. Comparing your final master against the original source file is one good way to hone this skill. At the end of the day though, it’s crucial to raise awareness of—and fix—any of these errors. As our own Jonathan Wyner likes to say, “You can fix it in the mix, but you can’t fix it in the distribution!”
The training exercise
Listen to the following song (downloading and listening to the original .wav on high-quality headphones is highly recommended). How many errors or anomalies can you find? As you find them, start making a list with a time-stamp and brief description for each event. Remember to check the mastered version against the source file to verify whether the error was in the source, or something introduced in mastering.
The types of sounds you’ll be listening for likely fall into the following categories:
Thumps, pops, tics, and clicks:
These can be in any frequency or volume range and are very short in duration. Their varied nature can make them hard to spot, and sometimes they may even be intentional. Try listening for these by not focusing on any particular musical element, but rather by listening for events which are disassociated from musical elements.
Dropouts:
These can happen in one or multiple channels and, if they’ve avoided detection up to this point, are also probably short in duration. They’re particularly hard to spot on loudspeakers, but will often jump out in headphones. Pay special attention during fade-ins, fade-outs, and reverb tails.
Clipping, and other distortions:
These can also take many forms, but are often likely to show up on transients with lots of low frequency energy first (e.g. kicks or the very front of bass notes). Listen for extra brightness that shows up dynamically with transients. Other distortion and saturation that was present in the recording and mix can also creep forward during mastering. Keep a special ear out for this distortion creep on vocals and other lead instruments.
When you’re done, compare your list to this one, or, if you’re an


RX 11 Advanced
Tying it all together
Whether or you’ve realized it or not, we’ve just walked through the five major disciplines in mastering: leveling, EQ, compression, limiting, and QC. As with any skill you want to develop, there’s no shortcut to any of these, but you can absolutely practice and improve in these areas.
Before we go, I want to leave you with one final bonus tip. It’s very easy to only use our studios for music that we’re working on, but it’s absolutely crucial to develop an intuition for what high-quality music should sound like in your room. So often, we only listen to finishedmusic casually, and in other environments—our cars, in earbuds, or maybe in the background while making dinner. Try making it a goal to set aside one hour, four to five days a week, to simply sit and attentively listen to well-engineered music in your studio. If you can do this before you begin to work on your own projects, so much the better.
Hopefully, with an enhanced intuition of what music should sound like in your room, and by practicing these five listening exercises, you’ll find your aural acuity keeps improving. Good luck, and happy mastering!
