5-Step Tutorial for Getting Rich Vocal Harmonies on Your Tracks
Getting wide, lush vocal harmonies in your tracks is easier than you might think. Learn how to get a rich vocal harmony in this five step tutorial.
Do you ever feel like your harmonies sound washed out or hollow when you’re recording vocals, or are you just getting started on experimenting with vocal harmonies? Getting a wide, lush vocal harmony in your next track (or three) can be easy by following this five step tutorial, leading to results like this:
Before we jump in, let’s explore what vocal harmonies are and identify them in popular recordings.
What is vocal harmony?
A vocal harmony is the sound of two or more voices or vocal tracks being heard simultaneously that use notes that fit the underlying chord structure. You can have multiple harmonies stacked on top of each other. Popular ways to sing vocal harmonies include singing in thirds, fourths, fifths, or octaves above or below the main melodic line.
A great example of vocal harmony intertwining with the main melody can be heard in Simon and Garfunkel’s “The Sound of Silence.”
Another use of powerful vocal harmonies in modern music is to make a chorus sound larger than life, as seen in Ariana Grande’s "Break Free" ft. Zedd at 1:15.
In this tutorial on adding rich vocal harmonies on your tracks, we’re going to be focusing on recording vocal doubles as well as vocal harmonies to give recordings a full-bodied sound. I’ll be using the free Spire app for iOS to record and mix my vocals, so if you haven’t already, make sure to download the app so you can follow along. I’ll also be using my Spire Studio, but you can easily achieve this effect with traditional recording equipment.
Step 1: Record your main melody
First, open the Spire app and import your backing track. Then, plug in some headphones and run the Soundcheck feature—this will automatically set your levels and sculpt the tone of your vocal. If you’re a Spire Pro member, you’ll also get access to additional vocal processing like automatic noise removal, a virtual pop filter, and personalized EQ to make sure your vocal comes through crisp and clean.
Now, go ahead and record your main vocal melody. You’re going to want to make sure it’s exactly how you want it since we’ll be lining up your vocal harmony tracks to this melody. Take care to make sure you time your vocal perfectly. This will ensure your harmonies don’t “muddy up” your main vocal later.
The main melody I’ll be working with for this tutorial is from a track I’ve been writing with LOVD and VisionV called “So I Melt.”
Step 2: Record multiple vocal harmonies
For this tutorial, I’ll assume you already know what harmonies you want to sing. But if you’re looking for inspiration, check out this article on tips and tricks for adding vocal harmonies to a song.
In order to get that rich, luscious vocal sound, I’ve found it helps to have at least two distinct harmonies. Typically, I’ll write and record a high harmony (one that goes above my melody) and a low harmony (one that goes below my melody). Make sure you get the timing of these harmonies just right so they overlap perfectly with your main melody.
Tip: The Spire app has a built-in metronome to help. Just set the tempo to match your instrumental so you can time your vocals properly.
For this effect, you don’t want words or phrases ending at different times, so do your best to line up each take as closely as possible to the melody.
Step 3: Record vocal harmony doubles
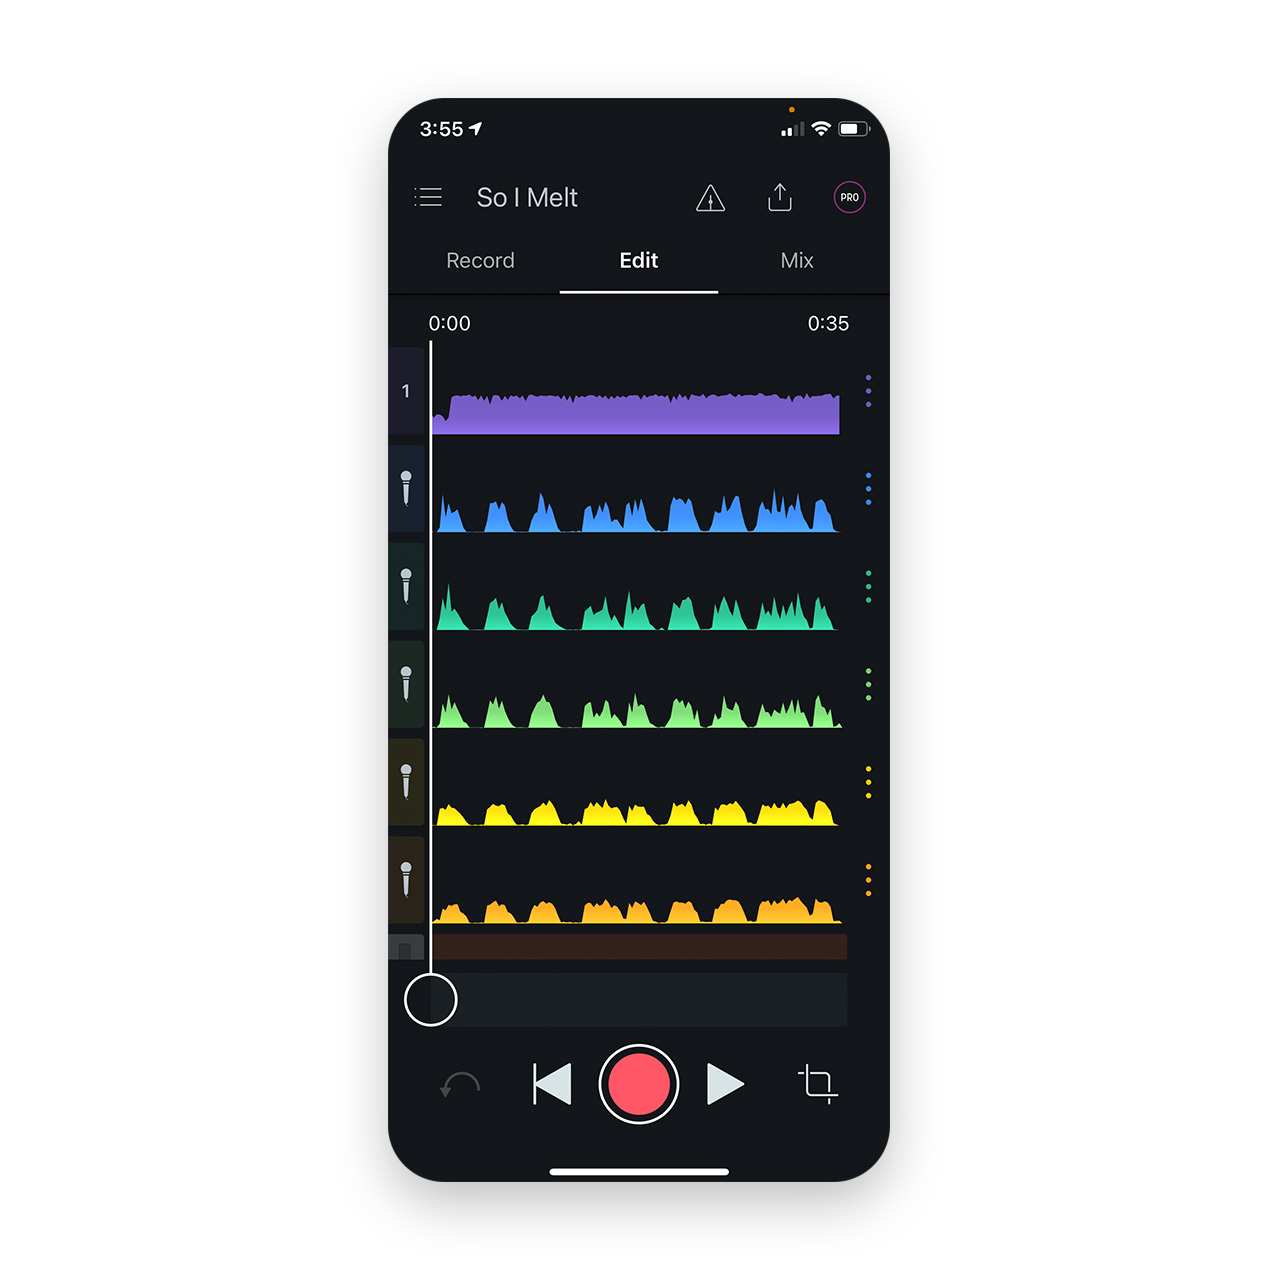
Now, you’re going to record vocal doubles for each of your harmonies. Sing each vocal harmony exactly the same as in step two, making sure to keep them aligned with the other takes. There are naturally going to be some slight variations in your tone, inflection, and timing, so don’t sweat it too much if it starts to sound a bit cluttered at this point. Those subtle differences are actually what makes this effect work!

Record doubles for each vocal harmony in the Spire app
Step 4: Widen and pan your vocal harmonies
After you’ve got each vocal harmony recorded twice, it’s time to play with their positions. Navigate to the Mix tab and start messing around with the panning of each harmony track by dragging them around in the mixer window (making sure you keep your main melody front and center). I typically like to take my low harmony and pan one take hard left and the other hard right. Then I’ll pan my high harmony takes slightly less to the left and right, like in the image below.

Pan your vocal harmonies in the Mix tab
As I’m sure you’ll soon hear, panning your various harmonies will really start to bring your vocal to life and give it a sense of space. But, if you’re needing a bit more width, play with the Wide/Narrow feature to add even more widening to each vocal.
Notice in the audio example below how rich my vocal got, just from some simple widening and panning.
Step 5: Add Spire Pro vocal effects
For this step, you’ll need to have a Spire Pro membership. Your Spire Pro membership comes with a ton of extra vocal effects you can add to your tracks, right from within the Spire app. They are continuously updating the library of effects you can apply to your vocals, but some of my favorite so far have been:
- Tune adds pitch correction ranging from natural to slightly robotic.
- Lo-Shift and Hi-Shift adjust the formants of your voice without adjusting the pitch.
- Chill applies phaser and reverb effects to add depth and dimension to your vocal.
Play with applying different vocal effects to each harmony track to dial in your own unique sound. Try applying the same effect to all of your harmonies, or switch up the effect on each harmony track. This is where you get to flex your creativity to craft the vibe that best fits your track. Check out the harmonies below to hear how the added vocal effects from Spire Pro give my vocals a distinct sound and accentuate the harmonies.
Give it a go!
Try these steps out on one of your own tracks and notice the difference they make. For more on improving the sound of your harmonies, make sure to check out our article on 8 Tips for Mixing Vocal Harmonies.


