What is a Transient in Audio Production?
Learn about what a transient is, what it sounds like, and how to optimize transients in your mix to get a professional sound.
You may have heard engineers toss around the phrase “transients” when they need to get their snare drum to cut through the mix or when they want to reduce the harshness of the guitar's pick attack. But what is a transient, and why does it matter to your mix?
In this guide, we’ll explore what a transient is, what it sounds like, and how different processing can help you shape the sound of your transients to make your mix sound more professional.
Jump to these sections:
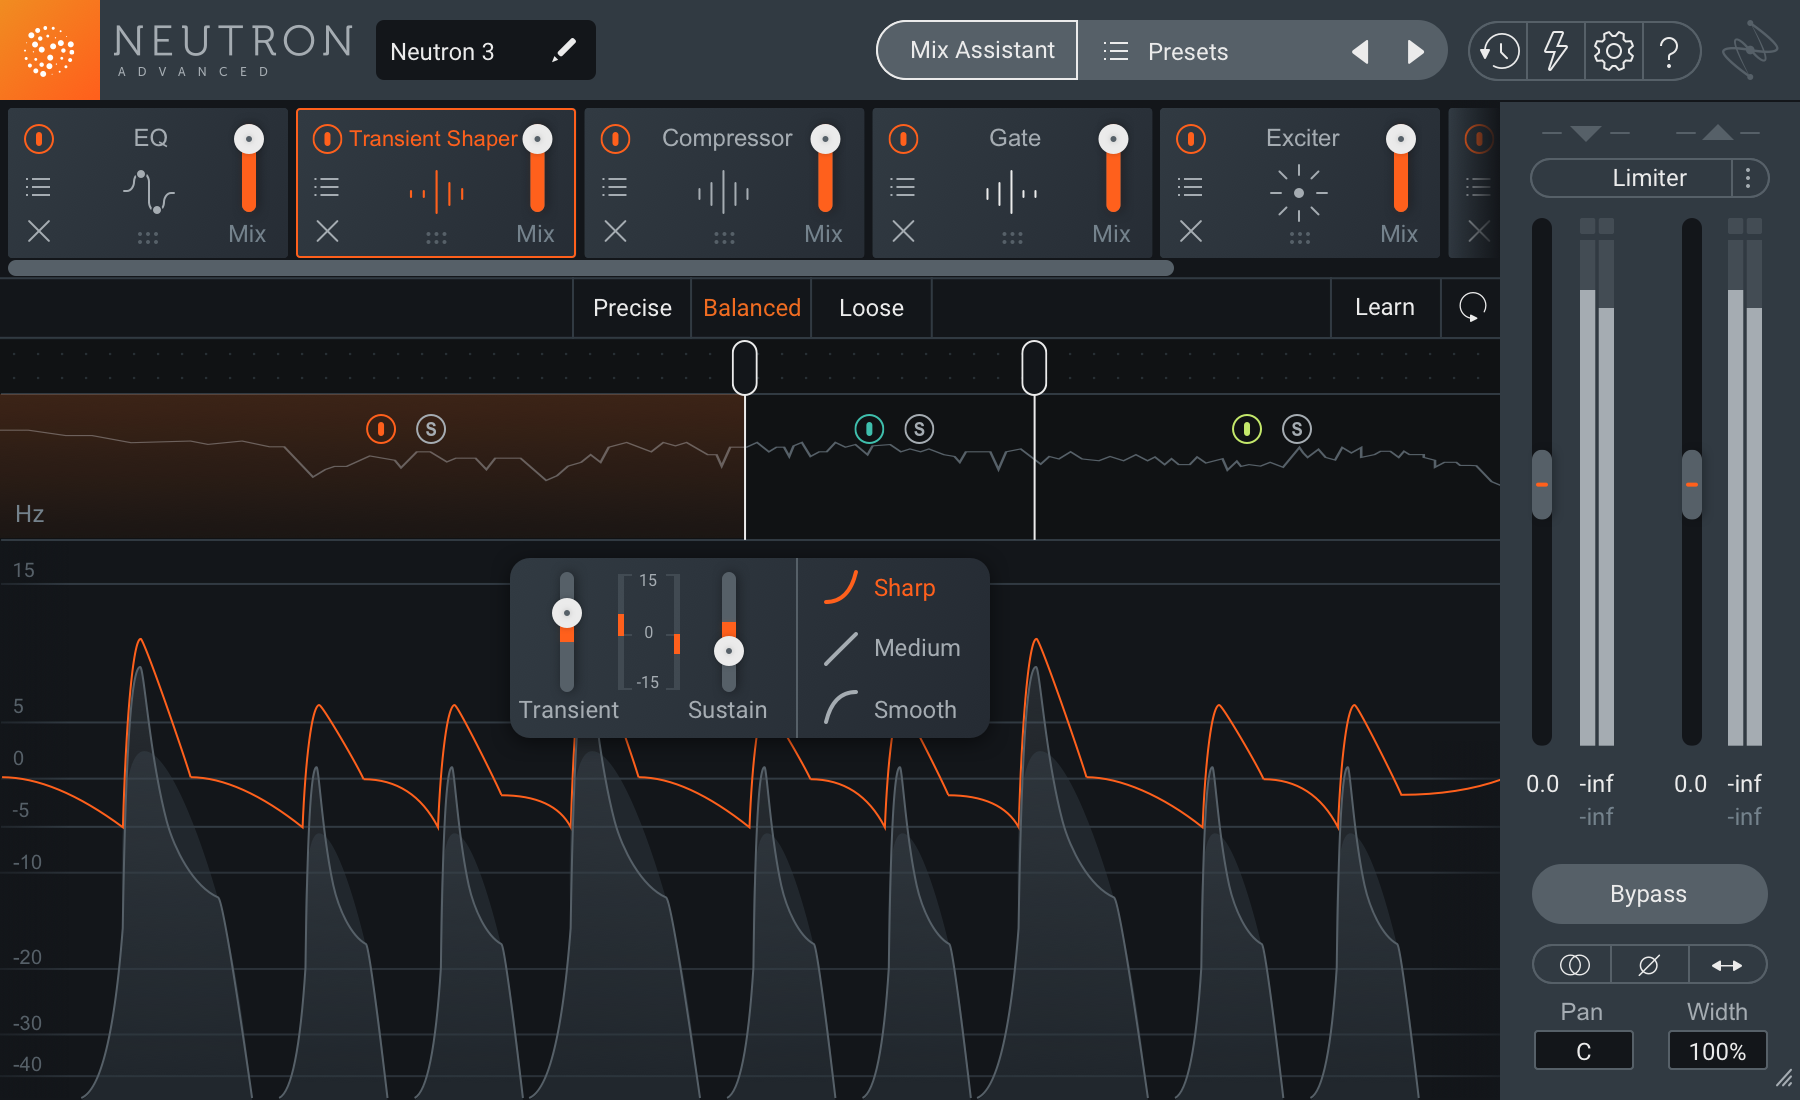
Tame transients in your productions with the Transient Shaper in


Neutron
What is a transient in audio?
A transient in audio is defined as “a temporary oscillation that occurs in a circuit because of a sudden change of voltage or of load.”
Now, I’ve always wanted to type that cliched statement with a straight face—but in our case it’s not so far off the mark, especially when describing the behavior of an audio signal in an analog circuit.
In terms of our digital recordings, we can sum up the phenomenon of transients this way:
A transient is the initial peak of a sound—the first spikes in the waveform, as it were.

Visual of transients in a waveform
We can think of transients as innately rhythmic, even in a sound we don’t closely associate with rhythm, like a long sustained note. If the note begins with any sort of attack—if it doesn’t fade in from silence and fade out to silence—it has a transient.
Think of the transient as the absolute first part of the sound: that first thwack of the snare, that first slap of the bass, that first pick of the guitar, even vocal consonants, or the attack of well articulated flute or horn parts. It typically happens before we hear the actual melodic content of the note.
What do transients sound like?
You may ask yourself what a transient sounds like. Well, I can show you—and also teach you how to isolate them for yourself.
Take a sound filled with transients, like this drum part. Duplicate it and put it on it’s own track:

Two duplicated tracks
Put Neutron on both tracks, set up Transient Shaper with Precise and Sharp settings, and flip the polarity on one of them.
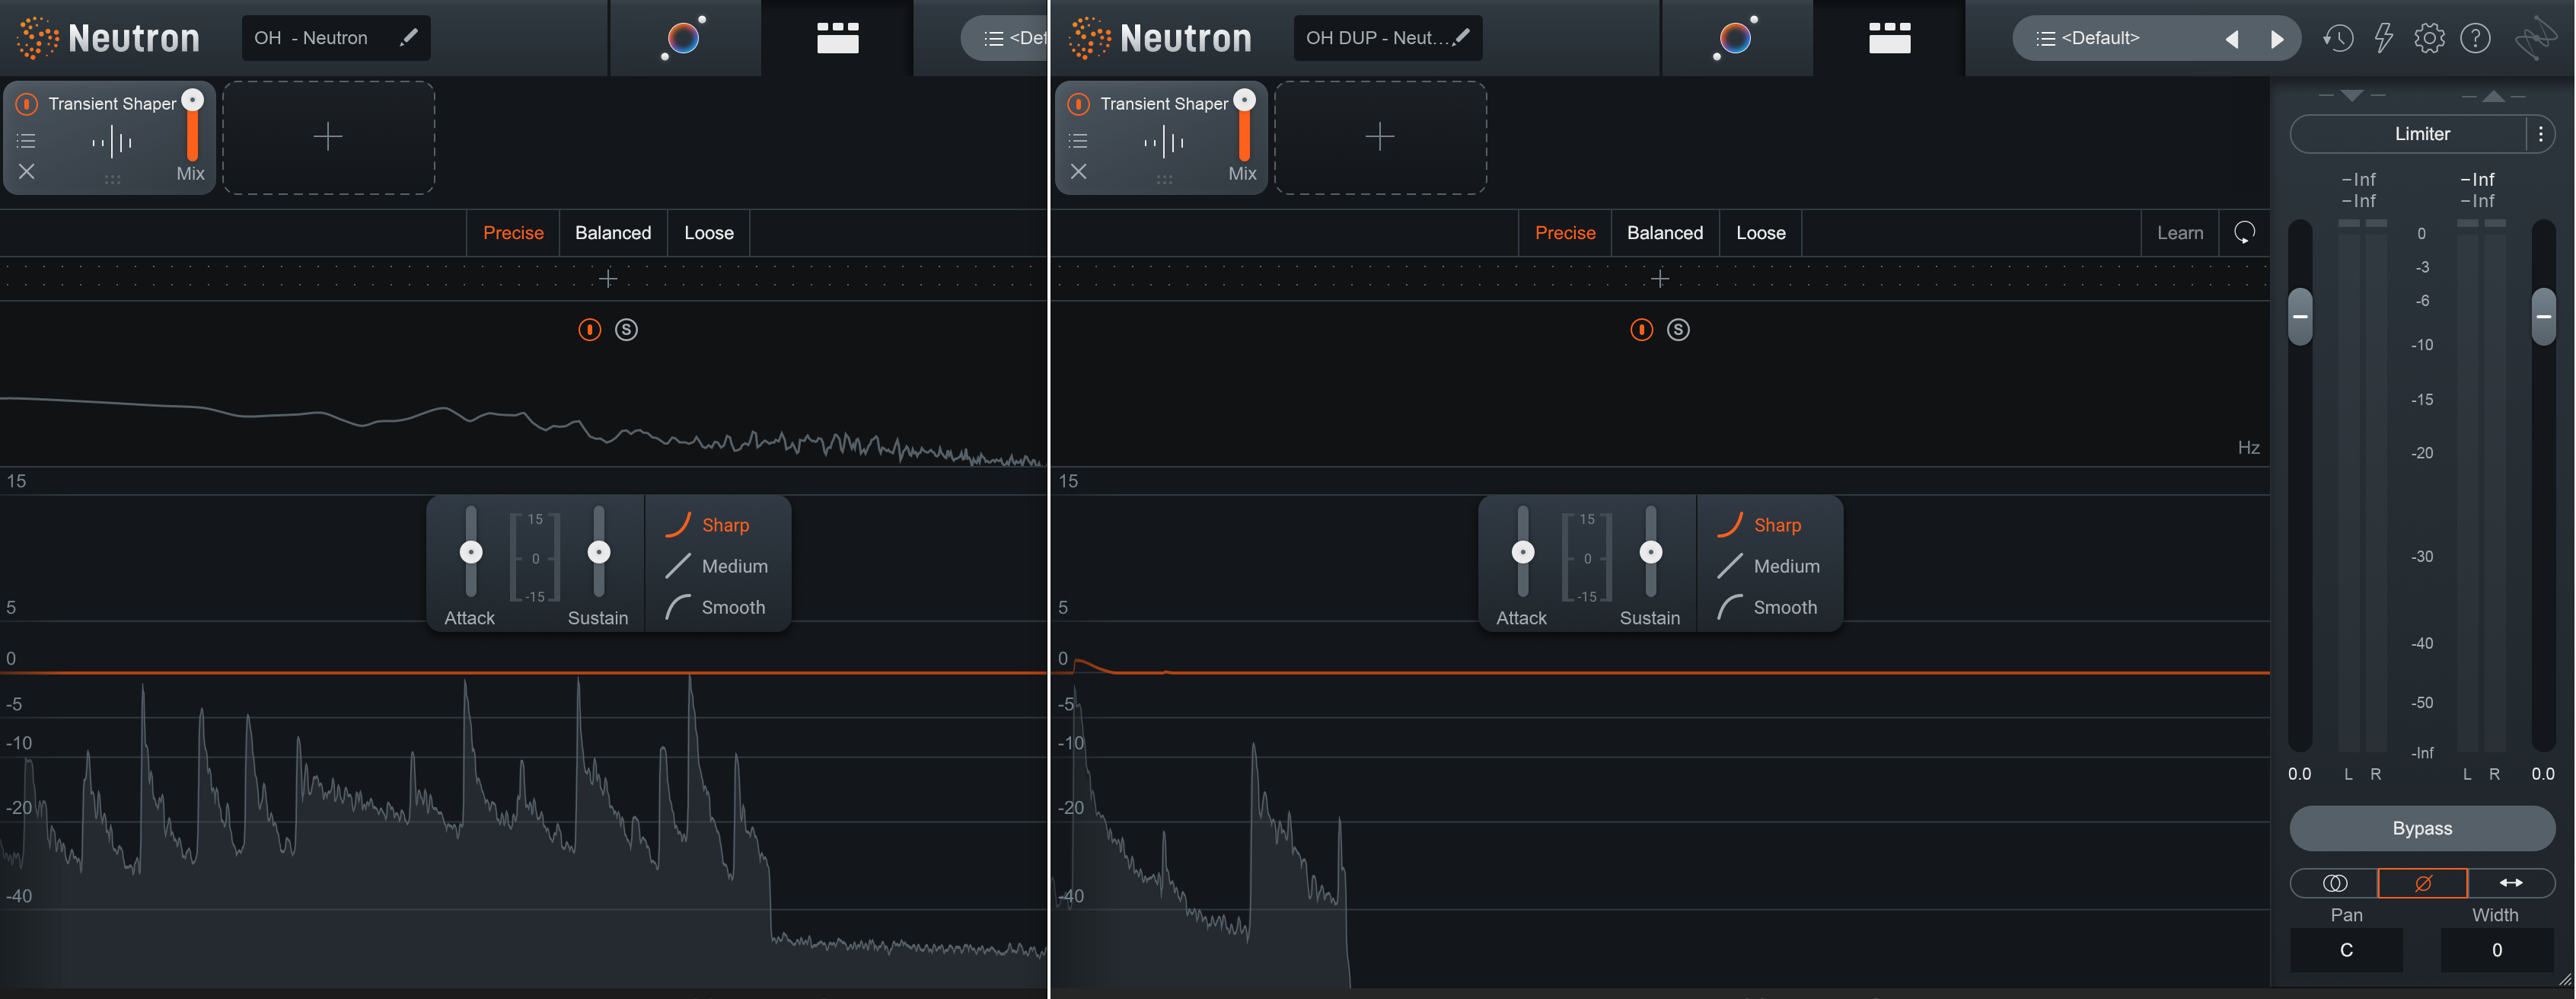
Two instances of Neutron's Transient Shaper
Now watch what happens when I move the transient slider slightly on one of the Neutron instances:
What we are left with is, roughly speaking, the transient portion of the material—or at least, what Neutron’s Transient Shaper defines as the transients of each drum hit. This gives you an idea of how the transient is different from the rest of the signal, which can be illustrated in this video:
Now you can clearly hear the difference between transient material and the rest of the signal.
Are transients bad?
No! Transients are good. They are deeply important to the way we localize or spatialize music.
For instance, if I take three acoustic guitars and pan them left, center, and right, one way I can make them seem wider is by emphasizing their transients. Observe these guitars:
Here are the guitars presented without effect.
And here they are with Neutron’s Transient Shaper emphasizing their pick attack.
Doesn’t the second example feel wider? And all that changed was how we emphasized transients!
However, too much of a good thing can quickly become a bad thing. An overabundance of transients can lead to a whole host of issues, including two especially prominent ones:
A sloppy sounding track. Overly transient material can sound haphazard and unprofessional, as though the player couldn’t control how they attacked each note. Emphasizing transients willy-nilly can make a production seem amateurish.
A wimpy final product, especially if you’re mastering your own material. Transients are the first things to go when pushed up against the limiter. If they’re overly exaggerated, the limiter will work hard to tamp them down. A good mastering engineer will use all sorts of tricks for optimizing the relationship between peak material and average signal before using a limiter. However, if you’re mastering your own music, you might not be hip to these tricks, and you could do harm to the final product. You could create an overly distorted final product, or a song not as impactful as the competition.
How to tame transients
Regular old-fashioned compression can have a fantastic effect on taming transients. 76-style compressors can downright obliterate transients if you need them to, and musical compressors, such as those based on opto circuits—can do the trick in subtle ways; that’s why you often see the 76/optical combination on material such as vocals, bass, and guitars. Just remember, fine-tuning attack and release times is key here.
Take a look at an optical compressor in


Nectar 3 Plus
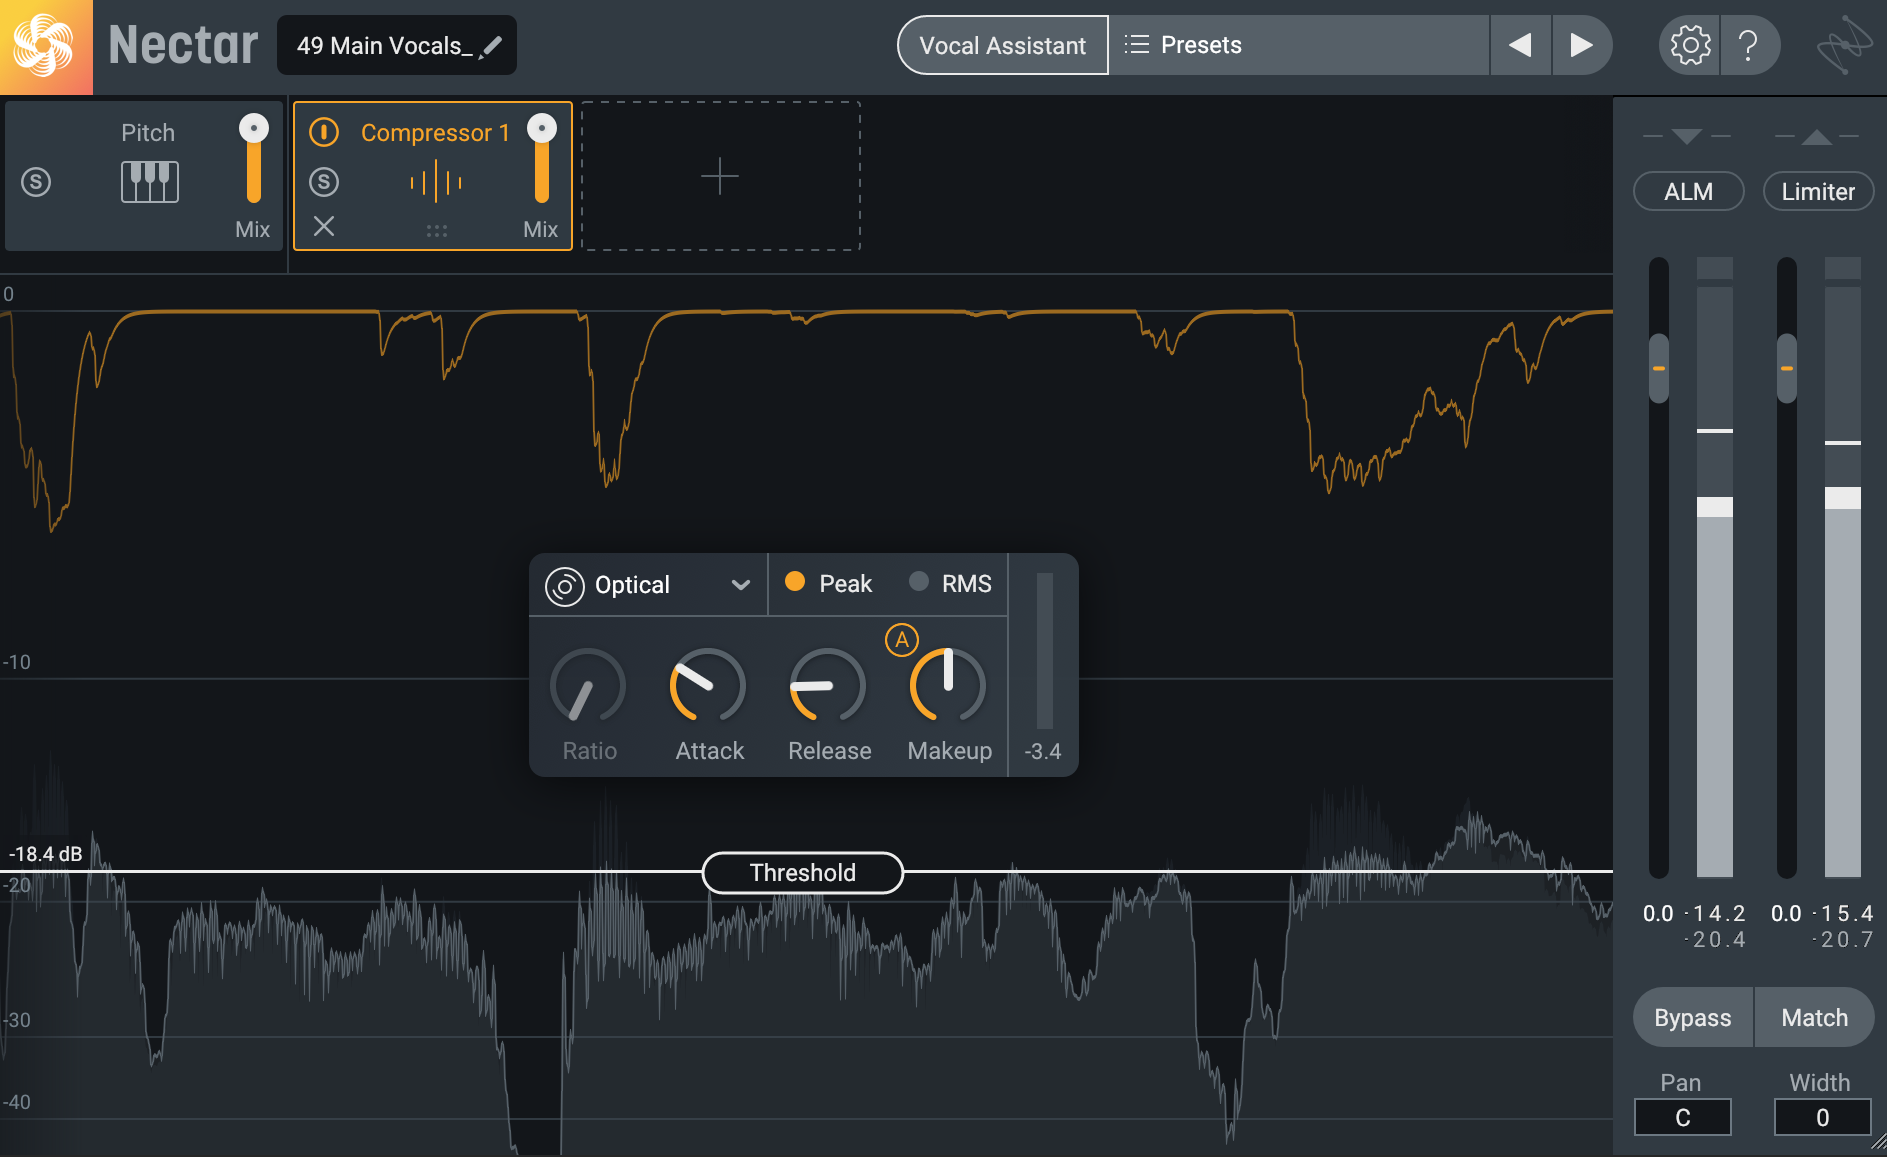
Nectar Optical Compressor on vocals
Band-specifc compression or dynamic EQ can also come in handy when used correctly. Center the compression band around a particularly aggrieving frequency range—such as harsh pick-attack in an acoustic guitar—and you’ll lessen the issue to some degree.
You can see it in action below with


Neutron
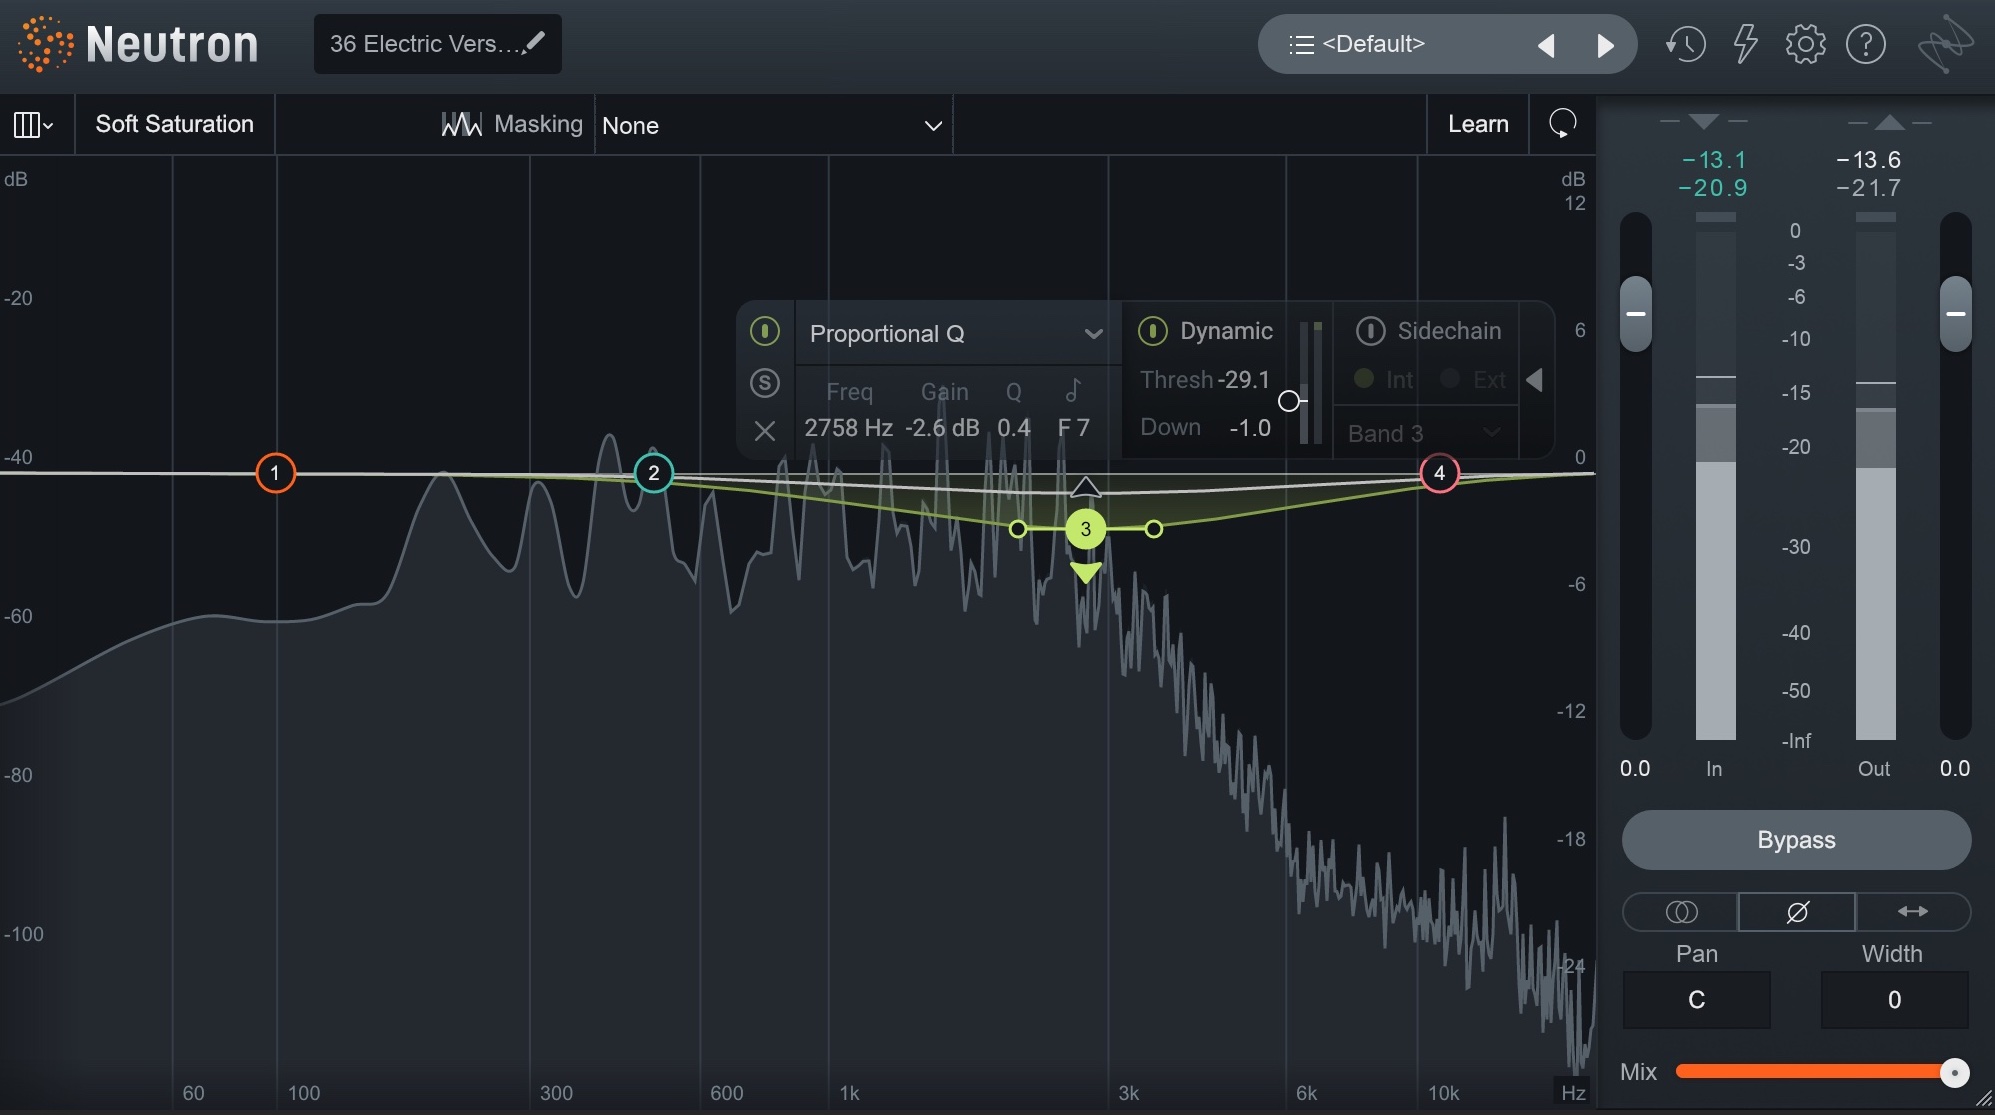
Neutron Dynamic EQ on guitar's pick attack
While we often use Transient Shapers to enhance material, they also excel at taming transients if you bring the attack parameter down. Try experimenting with multiband transient shaping as well—though do be subtle with it, or you will destroy the integrity of the sound.
Here you can see multiband transient shaping used to great effect on a keyboard.
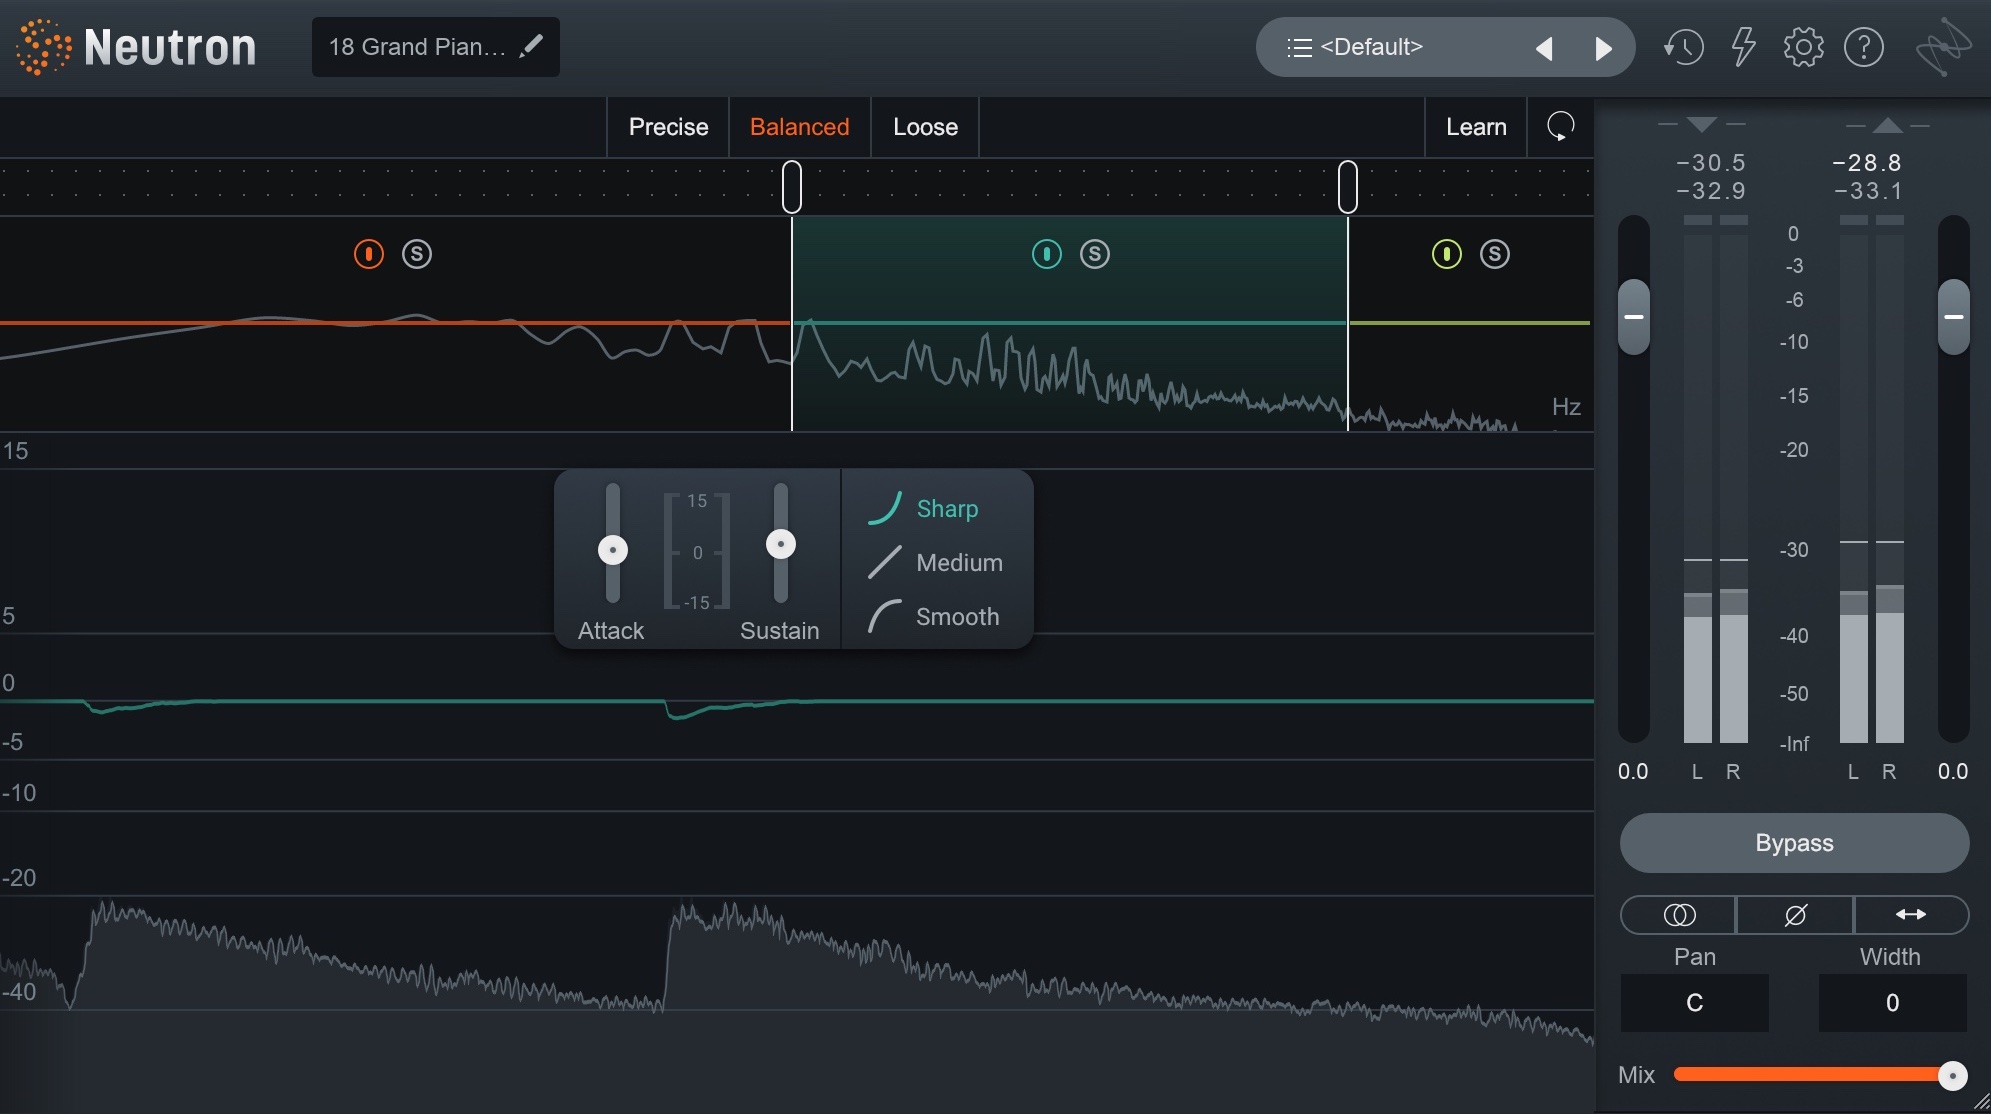
Neutron Transient Shaper on sampled piano
Parallel compression is a great way of curbing transients, though in a somewhat counter-intuitive way: you can use parallel compression to bring quieter signals up in level without destroying the impact of the original sound. This is why you often see parallel compression on vocals, drums, or even whole mixes.
Parallel compression can frequently add a feeling of heft without overtly throwing off the EQ balance, because the effect is in and of itself dynamic.
Once you’ve introduced parallel compression to a track, you’ll find you can bring the volume of the track down on the fader, and it won’t lose much impact. You’ve turned the sound down, and with it, its initial transient. Yet it doesn’t sound any less energetic.
Remember those tips and tricks I talked about for mastering to level without undue distortions? This is one one of them that engineers use from time to time.
Finally, saturation, used smartly, can help blunt transients without blunting impact. I’ll show you how on some drums.
I’ll use


Ozone Advanced
Note that when I added the exciter, the loudness in the meters didn’t change all that much. In fact, it read lower in terms of short-term LUFS.
Then, we went over to a meter from Plugin Alliance called Metric AB. This meter showed us the PLR measurement, which is similar to crest factor (the ratio between the peak level and the average level). Even though the processed drums measured marginally lower in loudness—but sounded pretty good and equally loud with the saturator in—the PLR was actually lower, meaning it had less dynamic range—or crest factor.
With this meter, the lower—i.e. closer to 0—the reading, the more “squashed” your sound is. Saturation here allowed us to get a more squashed, less transient sound that still felt impactful. This is part of what saturation can get you.
Do be sure to check oversampling on the Exciter, however, so you don’t introduce as much aliasing.
Start shaping transients in your mix
We’ve now defined a transient, shown you what it sounds like, and given you several useful ways to keep them in check without sacrificing impact. Now, it’s up to you to bring these techniques into your workflow. Start using


Neutron
I’ll end with some choice words from my favorite captain—Captain Planet: the power is yours.

