Simple FM Synthesis: Sine Waves and Processors
It’s easy to overcomplicate sound design. In today’s article, we create an FM bass patch using only sine waves and common processors.
We often overestimate what we need in sound design. Sure we can use complex waveshapes and crazy processors, but we can reduce the process drastically and still achieve interesting results.
In this article, we’ll show how FM synthesis and some simple processors and can be used to take a few sine waves to an expressive and grungy bass patch. We’ll cover the steps we take, why we’re performing them, and create a sample patch along the way.
We’ll be showcasing the creation of this patch on Ableton Live’s Operator synth, a basic FM synth that has controls found on most (if not all) FM synthesisers. In the end, we’ll turn this basic low sine wave into an articulating neuro bass sound.
Basics of FM synthesis
FM synthesis stands for “Frequency Modulation” synthesis. In FM synthesis, we modulate the pitch of an oscillating wave with another signal. This modulation in pitch creates interesting timbral changes.
The signal used to modulate pitch is at “audio rate,” meaning that it is within the 20 Hz – 20 kHz range of human hearing. Essentially, it acts as a super fast LFO, with the high modulation rate being the cause of these timbral changes.
FM synthesis functions on the concept of “operators.” An operator contains an oscillator with amplitude controlled by an envelope.

An operator in Operator
The output of one operator can be fed into the input of another, modulating the second operator’s pitch with the first’s. In this scenario, the first operator is called the “modulator,” with the second being called the “carrier.”
Increasing and decreasing the volume of a modulator will increase and decrease the intensity of frequency modulation on the carrier.
We can arrange operators in different ways called “algorithms,” each of which will have different sonic effects. By rearranging operators, carrier signals change, which in turn, changes the final sound.

Ableton Operator’s algorithms
Synthesis
Today, we’ll be using Ableton Live’s Operator, a relatively simple FM synth. Any FM synthesizer that you use will likely have these parameters. We’ll be using four operators, each of which is only a sine wave with normal phase position.
For the sake of this article, we’ll shorten “Operator A” to “OpA,” “Operator B” to “OpB,” and so on.
I want to use a cascading algorithm, where OpD modulates OpC, which modulates OpB, which modulates OpA, which is fed to the overall output for Operator. This is the simplest algorithm for FM synthesis.

Cascading FM algorithm
First, I insert a short MIDI clip in my DAW on a MIDI channel. This will allow me to keep the bass playing while I make adjustments, rather than trying to play and design the bass at the same time. I want a grungy bass sound that glides around and articulates, so I have these notes at a low register and overlap MIDI notes.

MIDI clip
I insert an instance of Ableton Live’s Operator instrument onto the MIDI channel. The default patch only has OpA activated, which is a simple sine wave. To get the gliding bass that I’m going for, I set Operator to play monophonically (with one voice) and increase the glide time to about 200 ms. This is the foundation of our patch.

OpA only
Most operators in an FM synthesizer will have some sort of pitch-based parameter. This is usually measured in whole numbers. This number determines the operator’s pitch relative to the MIDI note played. In Operator, this is done with the Coarse parameter, which moves an operator’s pitch through the harmonic series based off of the played MIDI note.
I start with OpA. Its Coarse parameter is set at 1, so it will play the pitch of the low MIDI notes that I’ve already written in.
FM synthesis creates a ton of new harmonic content, so modulating a high-pitched signal can sound pretty harsh. This is why I begin building my bass off of a low sound with minimal harmonics.
OpA’s Level parameter is set to 0.0 dB, so it will be playing at its full volume according to its volume envelope. I set this envelope to have a slightly longer attack time, as I want the bass to quickly swell in during its attack phase. I drop the sustain level a bit as well, as I want the end of this short swell to jump out a bit.

OpA volume envelope
With OpA set, the remaining synthesis is a bit of trial-and-error. I engage all the other operators and map their Coarse and Level parameters to a MIDI controller. With the MIDI clip playing, I adjust these parameters and listen for sonic effects that I like.
Higher Coarse settings than 1 will help cause the harsh sound that I’m looking for. I found that the sound I liked had Coarse values of 3, 6, and 3 for OpB, OpC, and OpD respectively. This places these oscillators at 1 octave + a perfect fifth, 2 octaves + a perfect fifth, and 1 octave + a perfect fifth above the MIDI note respectively.
I like using modulator operators built on a combination of octaves and fifths above the MIDI note. FM synthesis will still create interesting timbral effects, but these intervals will maintain tonality. Otherwise, the bass will sound more like a sound than a note.

Operator coarse settings
Increasing each operator’s level will increase FM intensity. Moving the Level parameters causes changes in timbre that make the bass articulate.
Here’s the same MIDI clip, now with all operators activated. Note that there is no movement yet, as the Level parameters are static.
Synthesis automation
With some simple automation, we can add a ton of character to this bass sound. I move the Level parameters as the MIDI clip plays, finding the timbral changes that I like.
I notice that the Level parameter for OpB has the greatest impact on the final articulation. I make sure that I don’t push this too hard, but use it as the main parameter to shape the articulation that I want.
I use OpC, with its higher pitch, to add modulate OpB. This adds some of the high-frequency crispiness that I want.
I notice that increasing OpD’s level has a very harsh sound, so I decide to use this sparingly. I elect to use it to give a bit more grit at the beginning of notes to accentuate note changes in the bassline.
With all of this figured out, I record a few passes of automation to find a good foundation. I then edit the automation lines to create the exact articulation that I want.

All operators with automation
Processing
Now that the bass itself is sounding decent, we can move on to processing. When designing heavy basses like this, it can help to use some crazy effects. However, we’ll show that you can still get to a nasty sound with standard processors.
I start with an EQ to shape the sound a bit. I attenuate signal between about 800 Hz and 3000 Hz by a considerable amount. This eliminates some of the boxy nature of the bass, while also dulling a bit of the mid and high-mid harshness that we have.
This isn’t much of an issue, as I know that I'm going to be distorting the bass after this EQ. This will replace some of the nice harshness that we’re losing.
To take advantage of the coming distortion, I also create some extreme EQ curves so that the distortion is hit harder by different frequency ranges. This will create some interesting timbres after distortion.
I insert two notch filters and one boosted bell filter. I place the two notches at ~ 150 Hz and 500 Hz, two areas that can become a bit too overpowered in a bass like this. The bell filter is used to add an interesting resonance before distortion.

Bass with EQ
Next, I want to distort the sound. This will introduce some more of the grit that I want and tie the sound together. I use Trash 2 as my distortion plug-in, but any distortion or saturation could be used.
I elect to use two distortion stages at moderate distortion rather than one with high distortion. This helps to add grit without making the bass too harsh.

Bass with distortion stage 1

Bass with distortion stage 2
However, there is still a bit too much high-mid grit for my liking. I control this with Ozone’s Dynamic EQ. With two EQ bands, I perform some dynamic attenuation of the high-mids and highs. Now, in the previously harsh parts of the bass phrase, the grit is controlled.

Bass with dynamic EQ
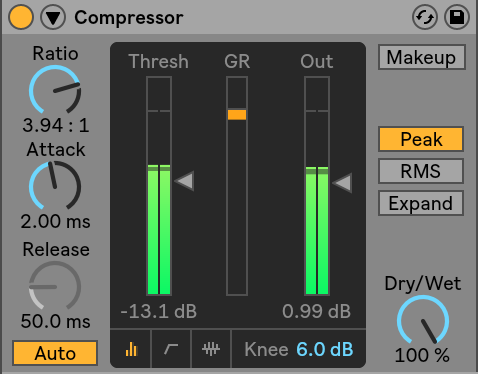
To round out the overall sound, I perform some light compression at the end of the insert FX chain. This helps to smooth out any parts of the phrase that jump out and makes the bass sound more like one coherent element.

Bass with compression
Lastly, to give the bass a bit of stereo presence, I use chorus. I send the bass to a return track, where I have a Chorus plug-in. This will preserve the main bass sound while adding sound in the sides of the stereo field. I put a Flanger after the Chorus plug-in for a bit of extra character.

Bass with chorus send
Processing automation
As before, we can add even more articulation to the bass sound with automation on our processors.
I choose to automate the bell filter on our EQ that we used to create a resonance before distortion. I automate its cutoff frequency to move with the notes of the bass, rather than staying static. As the resonance now moves with the notes, the “sound” of this resonance becomes more a part of the bass than a random resonance.
I also automate the gain of this bell filter to rise and fall, causing the resonance to swell and decay. This creates more movement, which accentuates the articulation that I already have.

Bass with EQ automation
I also automate the send level that sends our bass to the chorus return track. This causes the spacial effect of the chorus to only happen at certain parts in the phrase, again accentuating them.

Bass with chorus send automation
Lastly, I automate the rate parameter on the Chorus plug-in. As I mentioned in another article about Chorus, Flanger, and Phasers, the rate adjusts the delay modulation speed for the chorus effect. By increasing the rate, a quick wobbling sound will occur in the chorus. I think this gives the spatial effect that we get from the chorus a more interesting character.

Chorus rate automation
Conclusion
With FM synthesis, we were able to use four sine waves and only six processors to create a gnarly articulating bass patch. Check out the final result:
Sound design is quite personal, and the choices that you make may not be the same as mine. But with these general processes, you should have some guidelines towards creating interesting sounds like this.