8 tips for using reverbs and delays on guitars
Learn how to use reverb and delay to enhance your guitar tracks in mixing. Discover tips and techniques to create depth, texture, and space.
Barring distortion, few audio effects are as essential to mixing guitars as the time-based ones: reverb and delay. From classic spring tanks to the arena sounds of stadium rock, time-based effects are a bedrock of all mainstream music production.
Yet overuse is a real possibility when you’re first starting out. I feel I have a good handle now, but being largely self-taught and too antisocial for internships, I do wish I had had someone looking over my shoulder to get me started with tips and tricks.
This article aims to be that over-the-shoulder view for any budding engineer looking to get their feet – or rather their guitars – wet. We’ll provide eight tips. The first two will be conceptual, and the remaining six will offer suggestions for how to practice specific things.
Let’s roll
Try out these reverb and delay tips with Aurora and Cascadia, two Catalyst Series plugins from iZotope with intelligent features.
1. Learn the natural colors of the reverbs you have
Practicing your instrument is essential to improving your skills. We audio engineers cannot run scales or practice rudiments and hope our mixes will get better, but we can engage in thoughtful exercises to learn our tools, and to better deploy them.
With this in mind, you ought to engage in the practice of learning how different reverbs in your arsenal work with different kinds of guitar parts.
Practice routines of this variety require some creative operations. And, what works for me might not work for you. We all have different brains, after all.
Having said that, this is what I would do, if I were going to practice how to make better associations with reverb and guitar:
- Pick various types of guitar parts – clean parts, acoustic parts, heavy parts, solos, rhythmic figures, chords, etc – and import them into your DAW
- Set up all the reverbs you wanted to play with on different channels
- Pick one of your guitars and start listening to them through all the different reverbs
- On paper, write down what you notice about each reverb
- Repeat the process with different guitars
In this exercise, you’re not fiddling with settings yet. You’re simply learning the stock color of the processor in question and creating your own emotional attachments to them.
If you do this with a new guitar part every day for a week, you will start to quickly know what you want in various scenarios. You’ll begin to understand your desires and understand what processors get you to your results quickly.
You’ll hear a guitar in the mix, think “This will work with a spring reverb panned into the opposite channel of the original instrument” and know which reverb to select immediately.
2. Know why you’re using time-based effects on your guitars
Work without intention is doomed to failure. It helps to define your intentions so that you can always strive forwards with purpose.
To that end, I think of time-based effects as tools that achieve specific goals.
Here’s a general list of why I might use various time-based effects on guitars:
- To evoke a real world space
- To make a sound feel three-dimensional within a defined space
- To create the feeling – rather than the sound – of depth
- To evoke a particular genre or particular aspect of an established tone
- To enhance the natural groove of the part
- To create the illusion of multiple guitar parts
- To counterbalance different mono elements within a stereo field
- To achieve creative stereo effects
- To allow one part in particular to stand out against the rest
- To allow multiple parts to blend in, freeing others to be more prominent
Feel free to come up with your own goals and intentions as you progress. But if you don’t have your own goals for reverb and delay, I encourage you to begin your journey by borrowing mine.
We’re now going to take these ten goals and cover them in the rest of the blog.
3. Use delay and reverb to create a sense of space
This seems like an obvious tip, but consider how important it actually is: reverb and delay have the power to transport the listener from their boring, humdrum life to any number of interesting locations, both real and surreal.
Using time to create space is not as easy as it may seem, even for something as colloquial as the guitar. You might know what a real-world space sounds like, but that doesn’t mean you know how to create it from scratch. The gulf between your ears and your creative intuition takes years to bridge.
Let me give you some general tips to help bridge the gulf.
First, listen to real world spaces and note how they sound. Sounds like a silly exercise, but it’s job number one, because it’ll teach you how space really works – and it’ll lead you to some actionable tips, such as the following:
If you want to recreate the reverberant feel of an outdoor location, a simple stereo delay is your best tool for the job
Sit down in a park sometime and listen to what’s happening around you. Do you hear anything resembling reverb? Or, to the extent that a floating sound carries any ambiance, is it more of a slap delay? Unless there’s a big curved surface to diffuse and refract sound, what you’ll hear is more commensurate with a delay than a reverb.
I’ll illustrate by playing two sounds: an acoustic guitar and some city park ambiance. The guitar comes from a record I did many years ago for Micah E. Wood. The city park ambiance is only there to show you how ridiculous a reverb will sound in context.
I will now slap a convolution reverb that samples a real live park. You tell me how good it sounds.
It sounds like bad makeup: a painted-on effect that is hardly natural.
Let’s try a very simple stereo delay now: Cascadia, in ping pong.
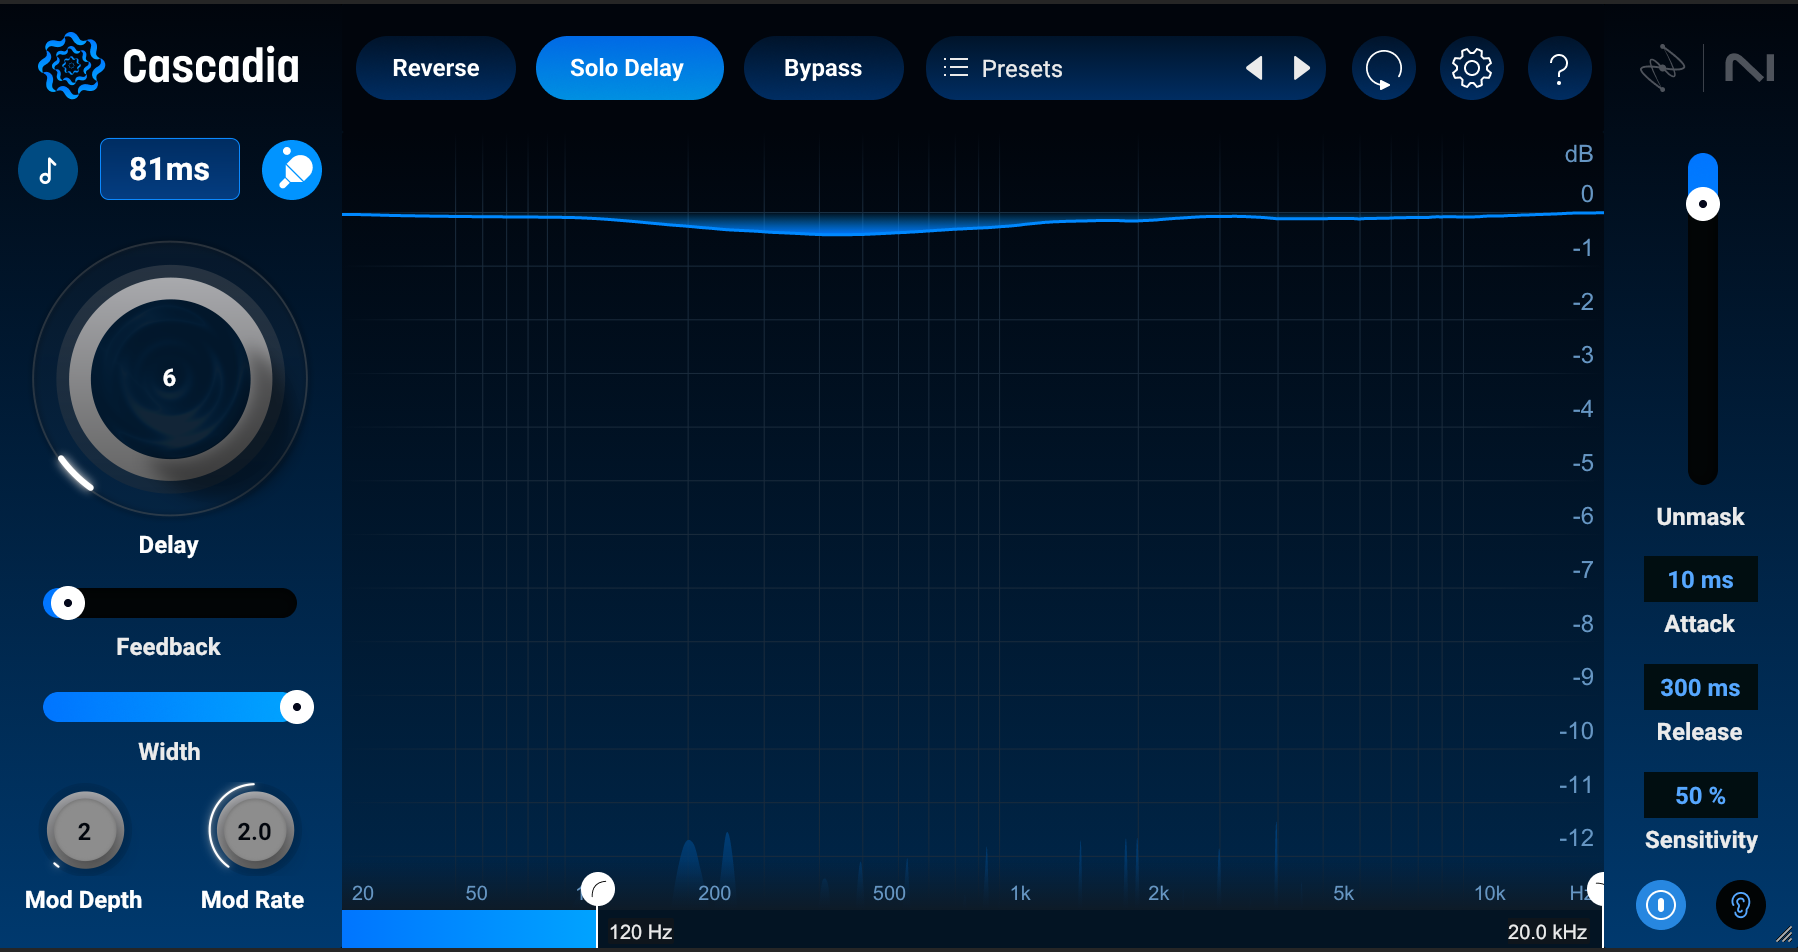
Using Cascadia delay to recreate the sound of an outdoor space
Note how more natural this feels to the situation. The reverb did not sound real at all in context. The delay did.
If you want to create a real sense of indoor space, refer back to tip number one
Our first tip in this article was to learn the color palettes of the time-based effects you already have, doing so by practicing various reverbs on various guitar parts.
I propose you apply this exercise to learn a real-world indoor space in the following manner:
- Identify the space you want to learn (i.e., “concert hall).
- Identify the plugins you have that emulate concert halls, both in convolution and in algorithmic ways.
- Run guitars through all the plugins.
- Take notes!
So, if I were a Native Instrument aficionado, and I wanted to hear what our acoustic guitar recording sounded like through a concert hall, I’d take my guitar part and run them through the following plugins separately and listen to each result.
I’d first run in through Aurora and use a hall reverb.
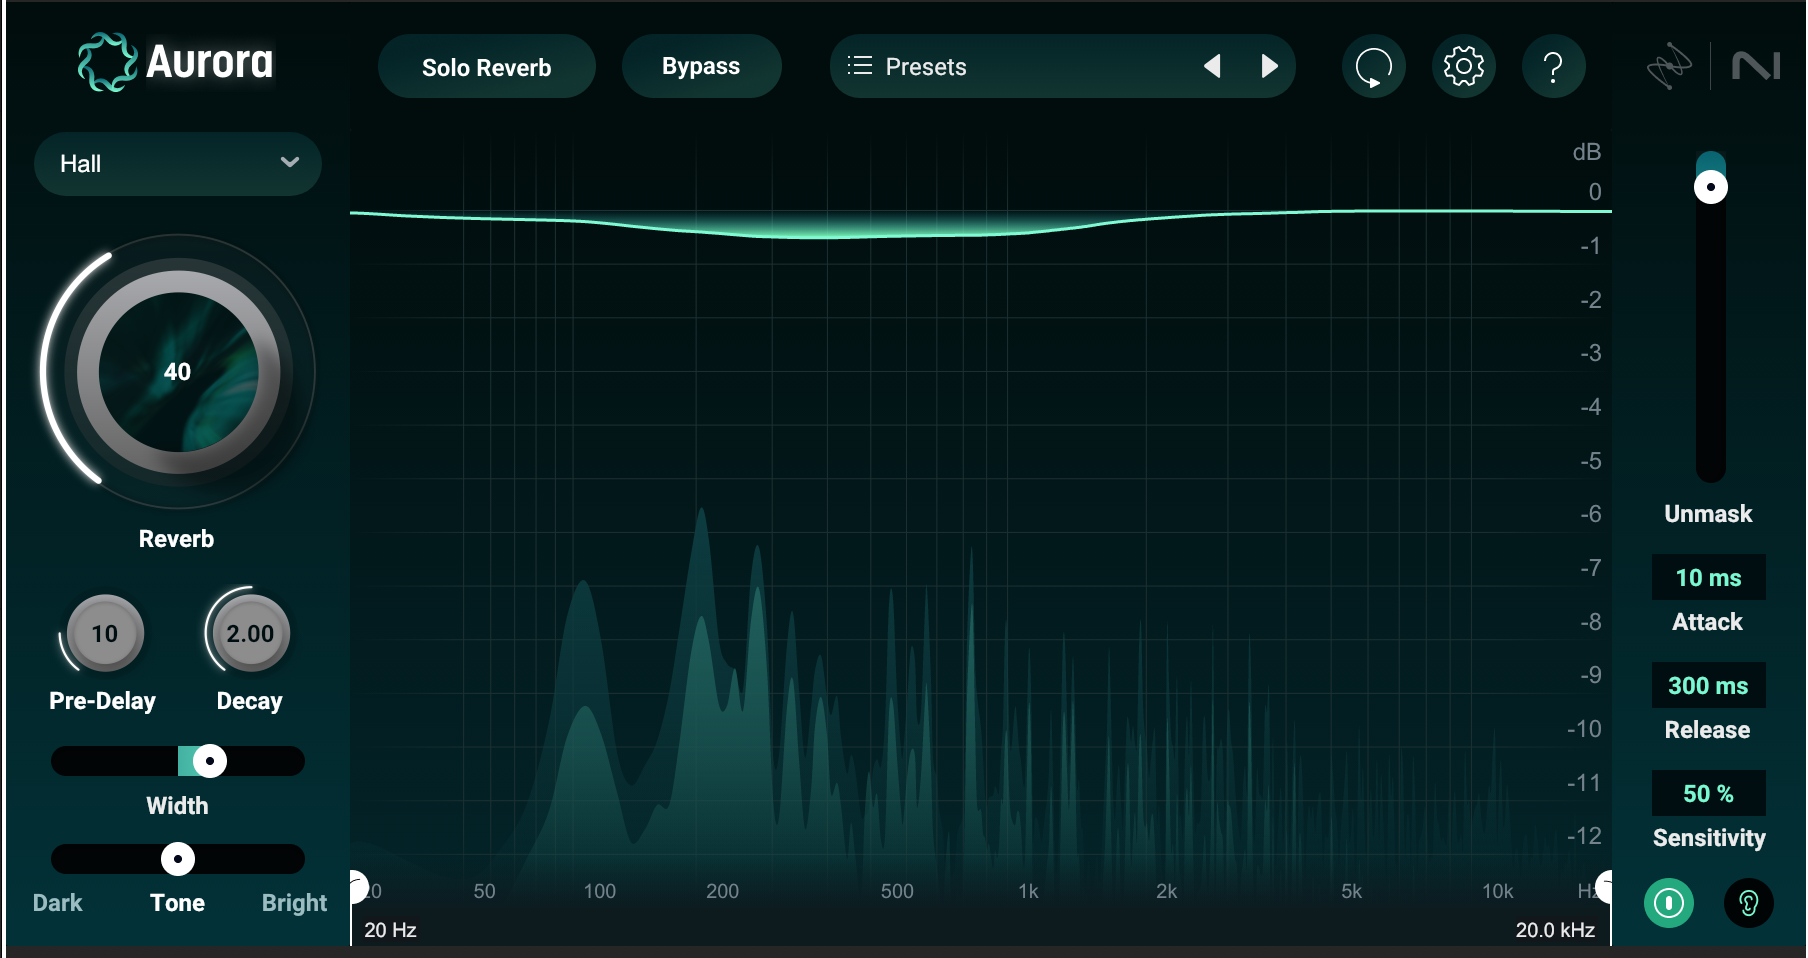
Using Aurora’s Hall reverb to create a sense of space
I’d then use Guitar Rig 7 Pro’s Reflektor Hall processing.
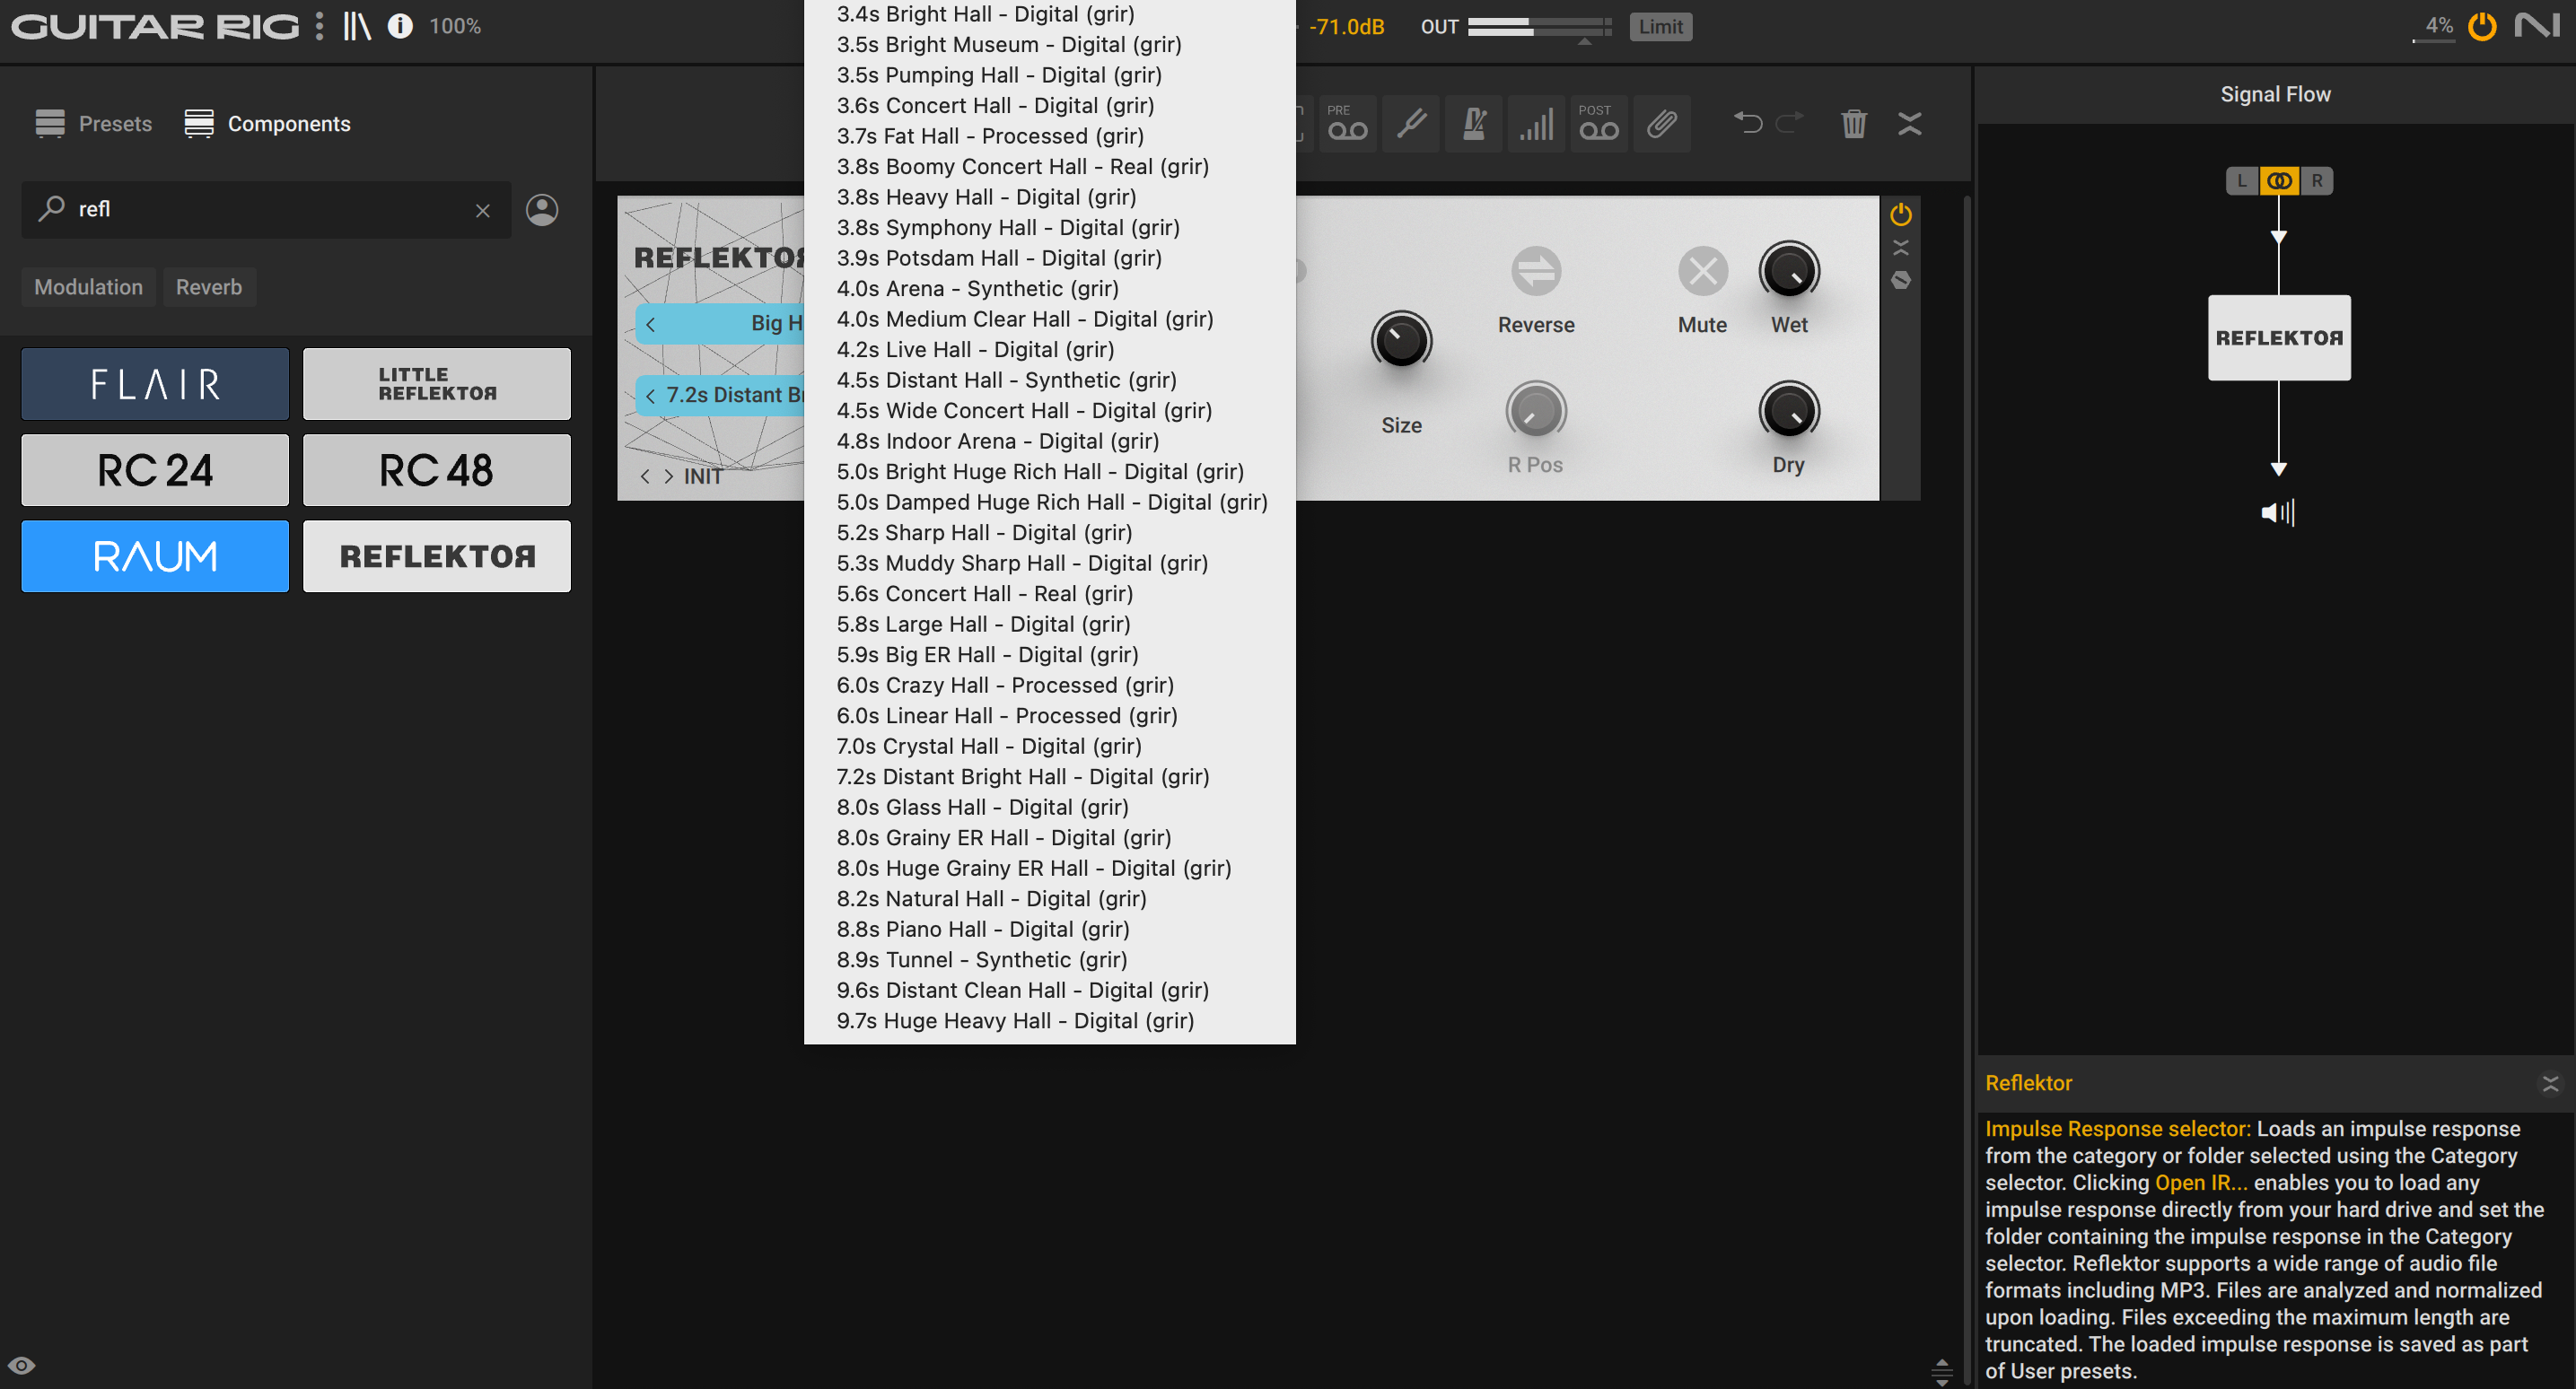
Using Reflektor Hall in Guitar Rig to create a sense of space
And then I would run it through Trash from iZotope and use another Hall preset.
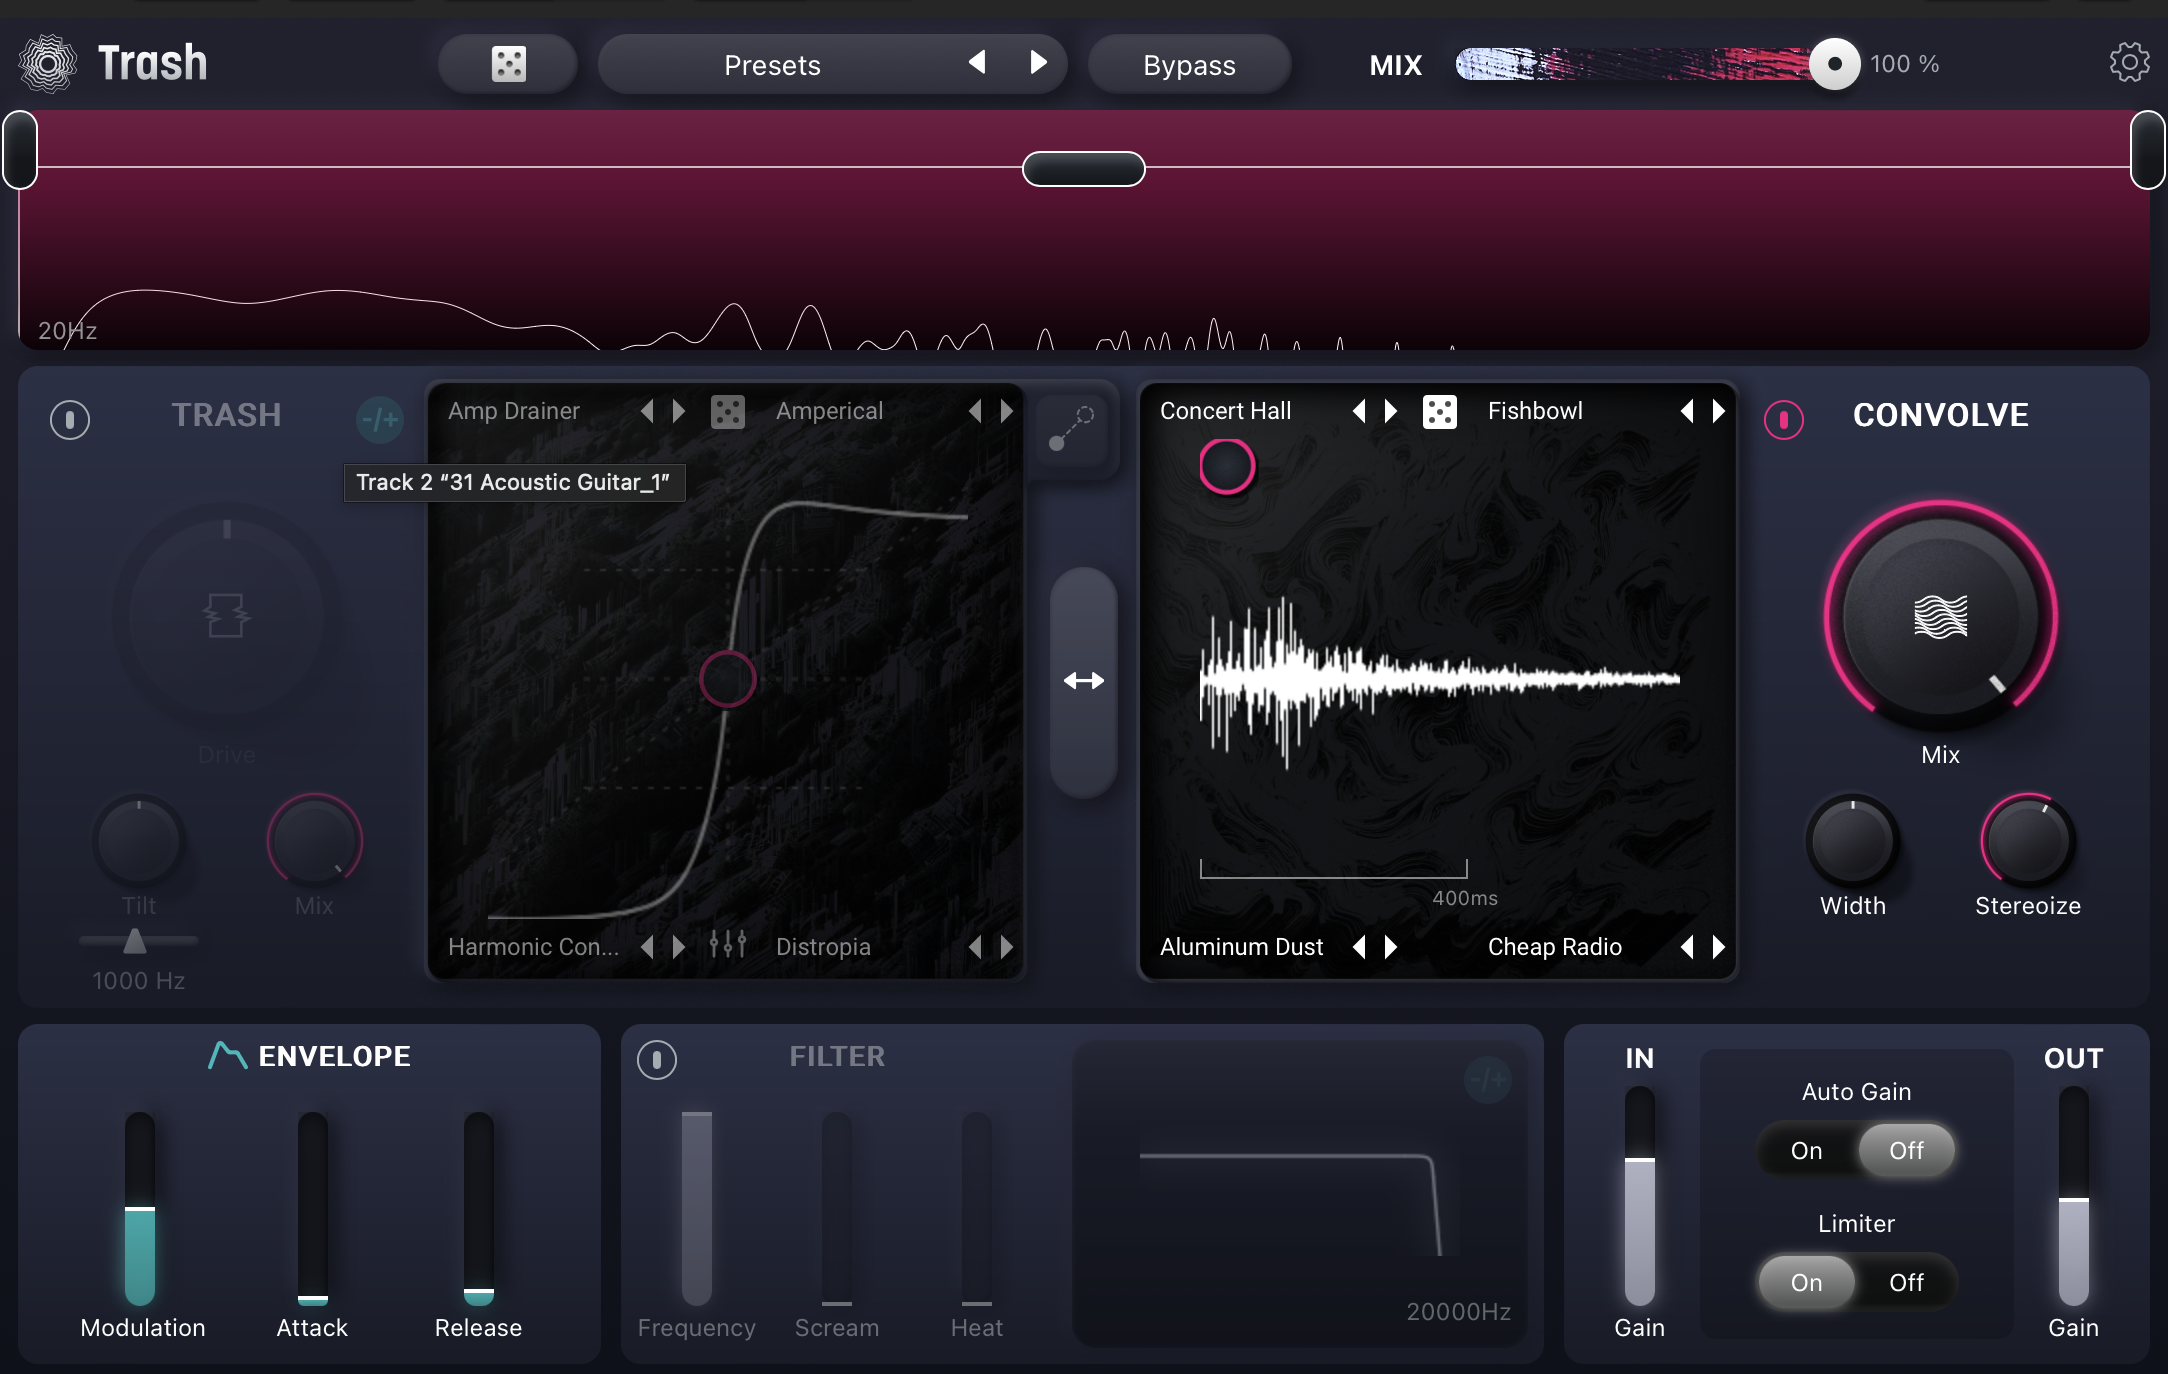
Using iZotope Trash Concert Hall preset to convey a sense of space
Of course, I’d spend some time tweaking their various parameters, but I’d always take notes. What did each one sound like to you? What did they evoke? Which one feels the most like sitting in an actual concert hall and listening to an acoustic guitar?
4. Use delay and reverb evoke a particular genre – or a particular aspect of an established tone
This is another study-based tip, yes. But you must study the greats to either become great or avoid imitating your predecessors (both goals are worthy).
Certain delay units and reverberation methods have become classic over time – so classic that they evoke specific genres or specific feelings. There are specific plate reverbs that can evoke the sound of holiday classics, while specific spring tanks can evoke dub music. Likewise, specific digital units – such as things modeling Lexicons and Rolands – can evoke whole decades of pop music.
If you’re a Guitar Rig 7 Pro owner, you’ll find you have access to plenty of tools that emulate classic plates, springs, and digital delays. plugin Alliance also makes emulations that evoke the classic gear.
So here’s the practical tip I’m advising:
- Take a song you like, with a guitar reverb or delay you wish to emulate
- Research the tools that were used in attaining that reverb
- Open the corresponding tool in the Native Instruments universe
- Pick a guitar part that sounds vaguely like the one you’re trying to emulate (i.e., clean for clean, chuggy for chuggy, etc)
- Tweak to see if you’re getting close
5. Use delay and reverb to enhance groove, presence, and depth
When used subtly, time-based effects can have drastic effects on the groove, presence, and depth of a guitar. I’ll illustrate just how this works in the following examples.
A delay can help reinforce the groove of a guitar part
Let me show you some guitars against drums, clean.
There’s a short slap that came with the part, but we can help with the groove by adding our own stereo delay to the proceedings. I’ll use Cascadia, but any delay can work.
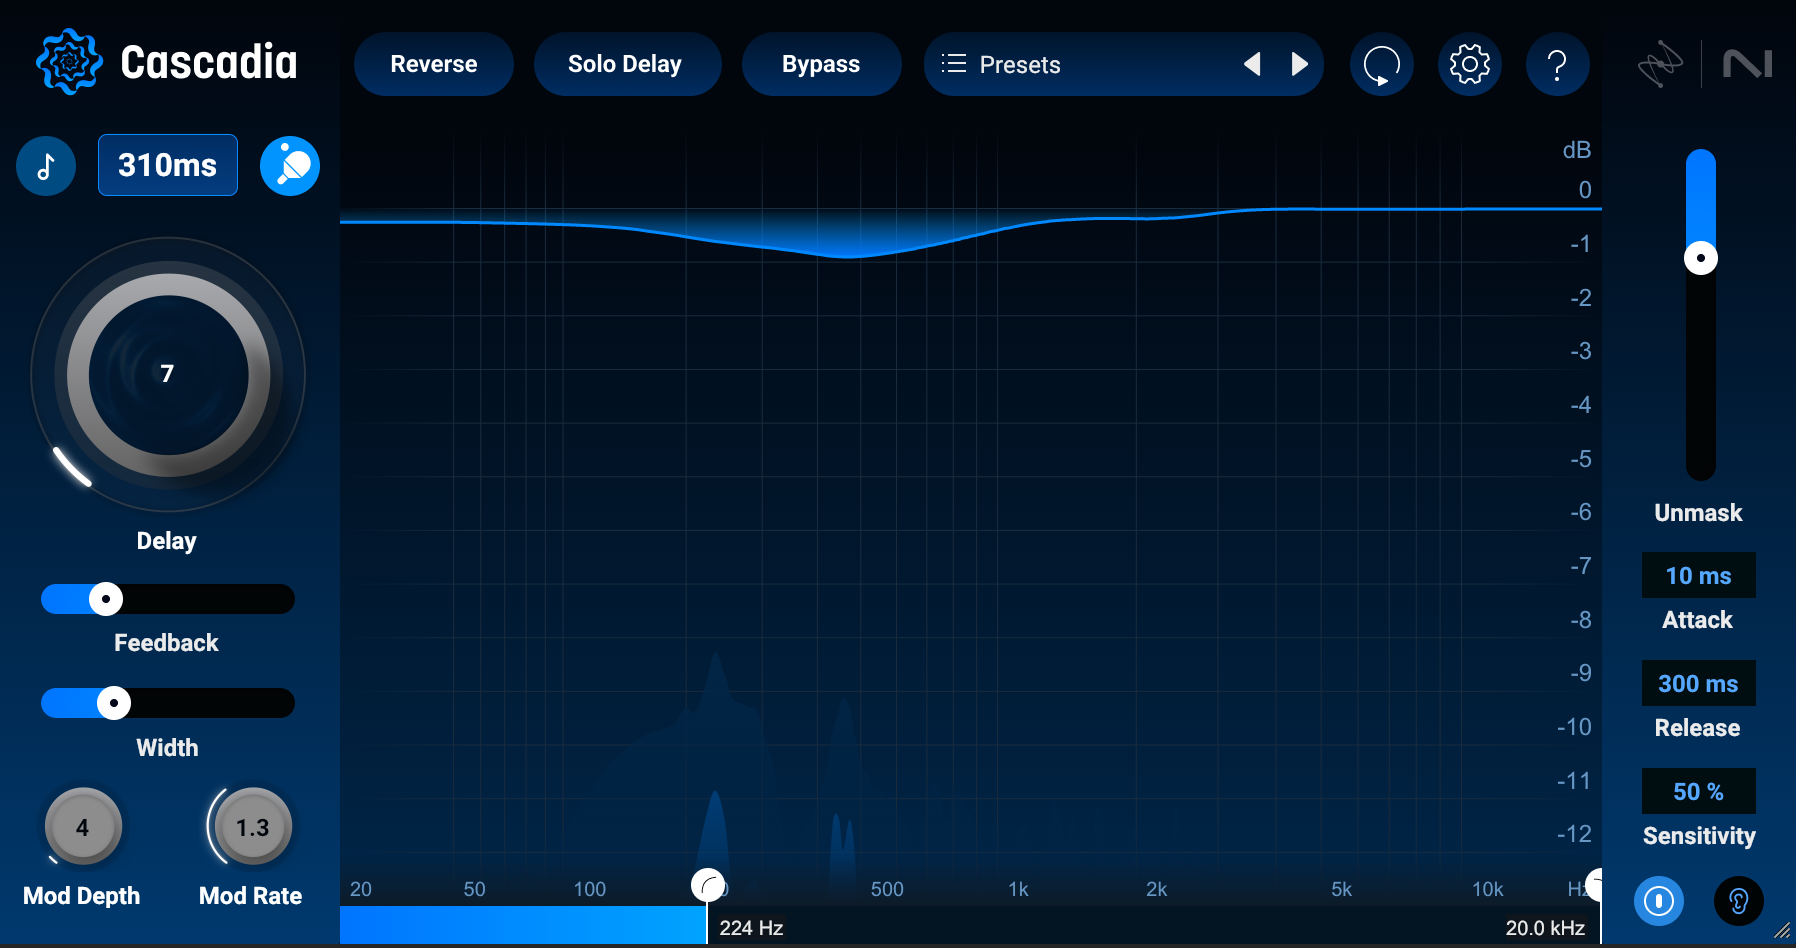
Using iZotope Cascadia to reinforce the groove
There’s just a little more pocket now, thanks to the delay.
A subtle delay can create depth
Similarly, I can use a delay to create a feeling of depth in the instrument. I’ll use the same delay with a straight-eighth note subdivision, and make the delay super quiet so you can barely hear it.
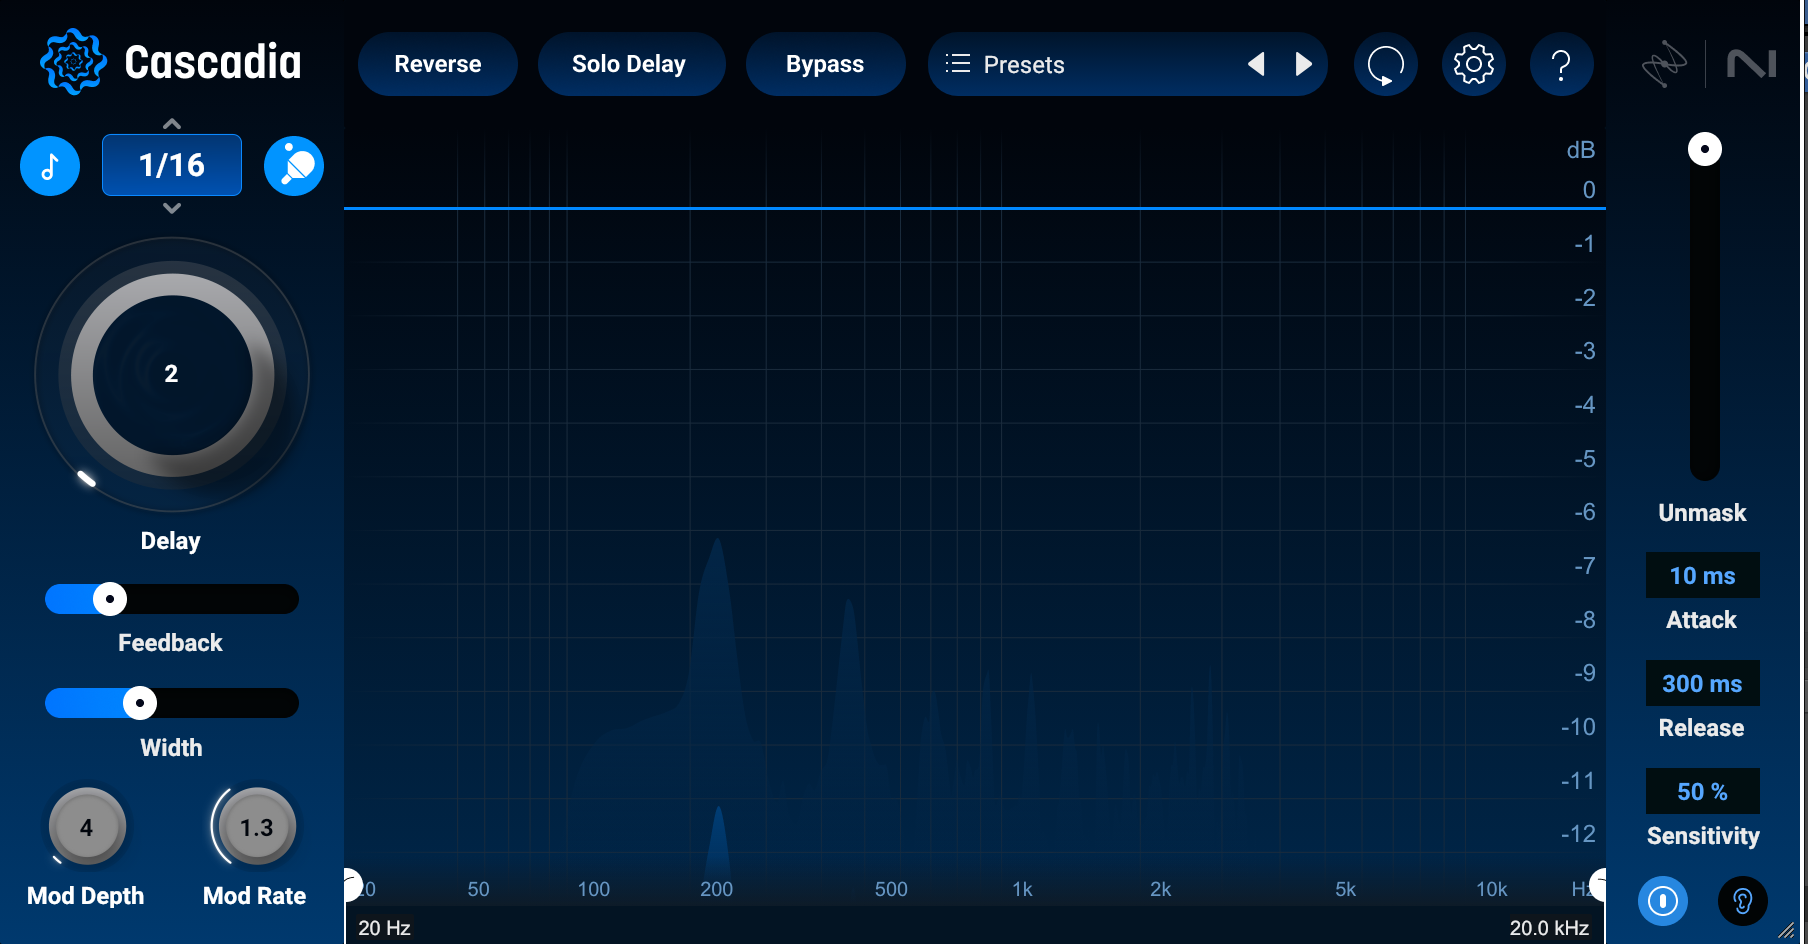
Using iZotope Cascadia with a 16th note delay to create depth
Yet, you’ll feel the guitar has more weight and presence with the guitar than without.
A subtle, short reverb can also lend a sense of depth
Instead of using delay, I’ll achieve a similar extension of the guitar’s depth using a short reverb, such as the ambience setting in Neoverb.
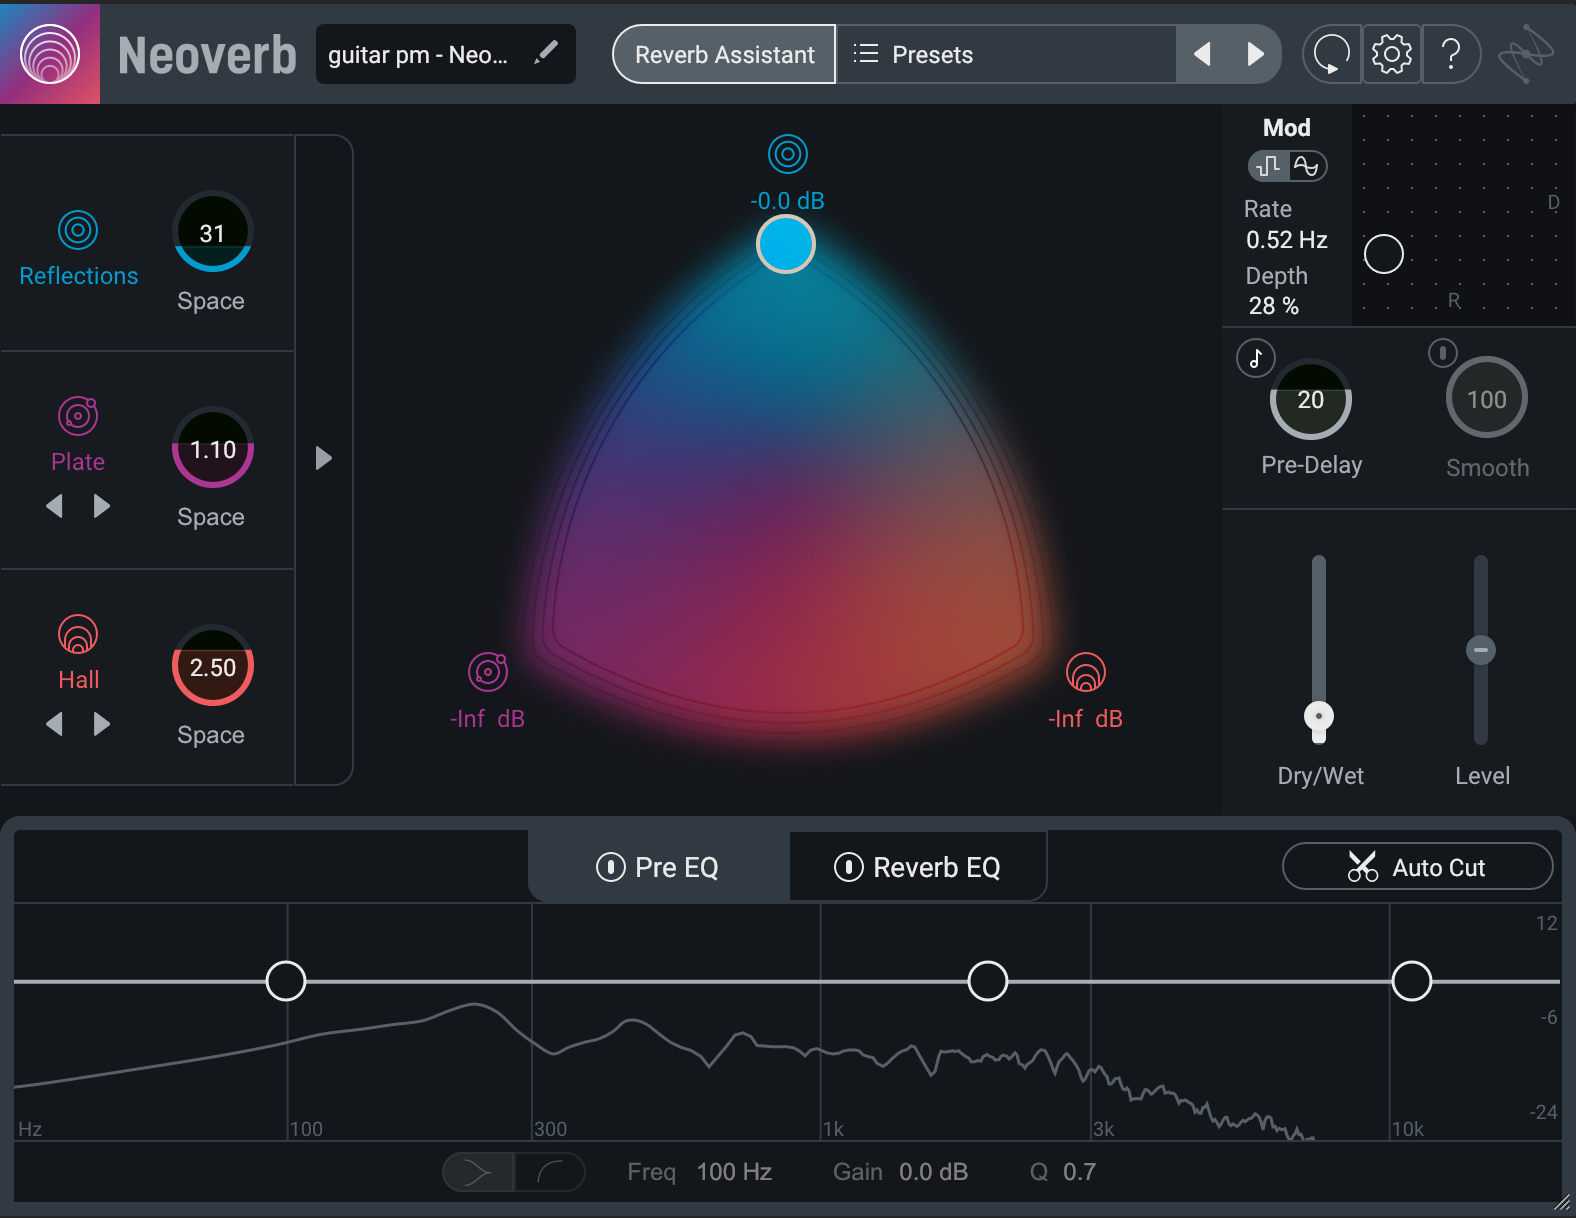
Using iZotope Neoverb as a subtle, short reverb to create depth
It has a different weight to it from before – but a weight all the same.
Adding presence to guitars with delay
Delays can also help one guitar stand out in front of the others.
Observe this guitar solo, over a bed of rhythm guitars:
I’ll use Cascadia again, this time I’ll use a 1/8 delay to sit with the tempo, and aggressive high-pass filtering to really bolster the high mids., No how the solo will stand out against its background guitars.
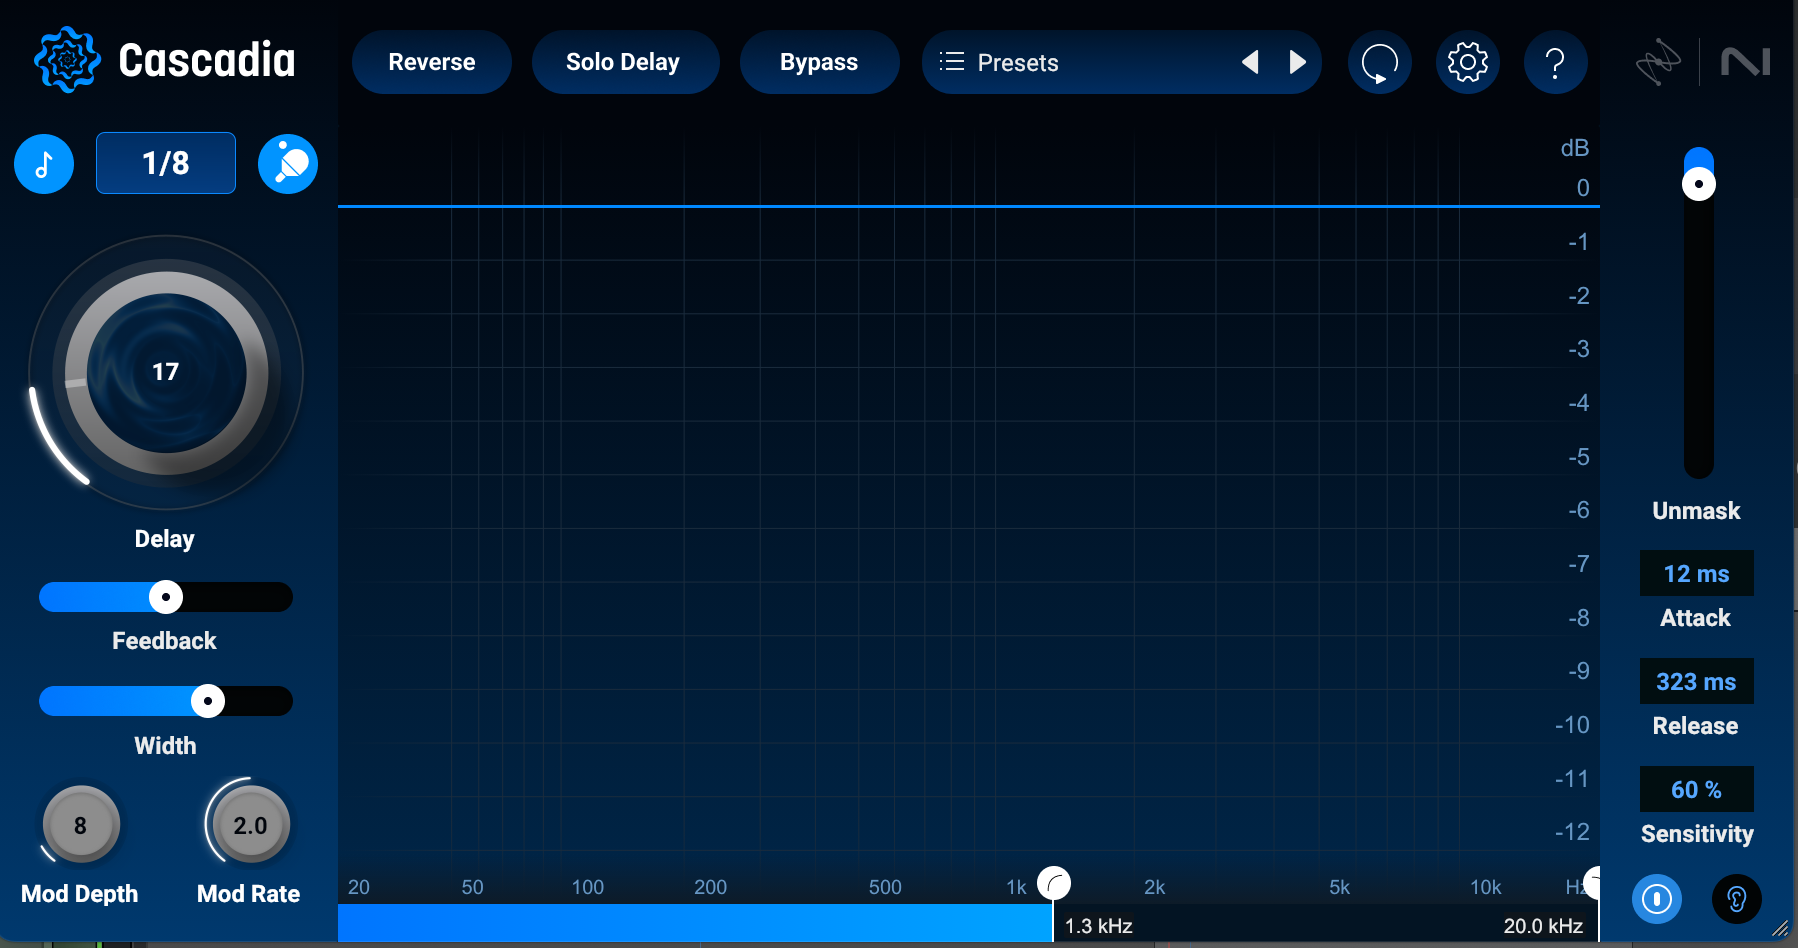
Using iZotope Cascadia for presence in the guitar
Sinking rhythm guitars guitars further into the mix with reverb
Here, instead of using delay to bring the lead guitar in front of the mix, I can use reverb to sink the rhythm guitars further back into the mix.
I’ll illustrate this effect with Aurora, but it’ll work with nearly any kind of reverb.
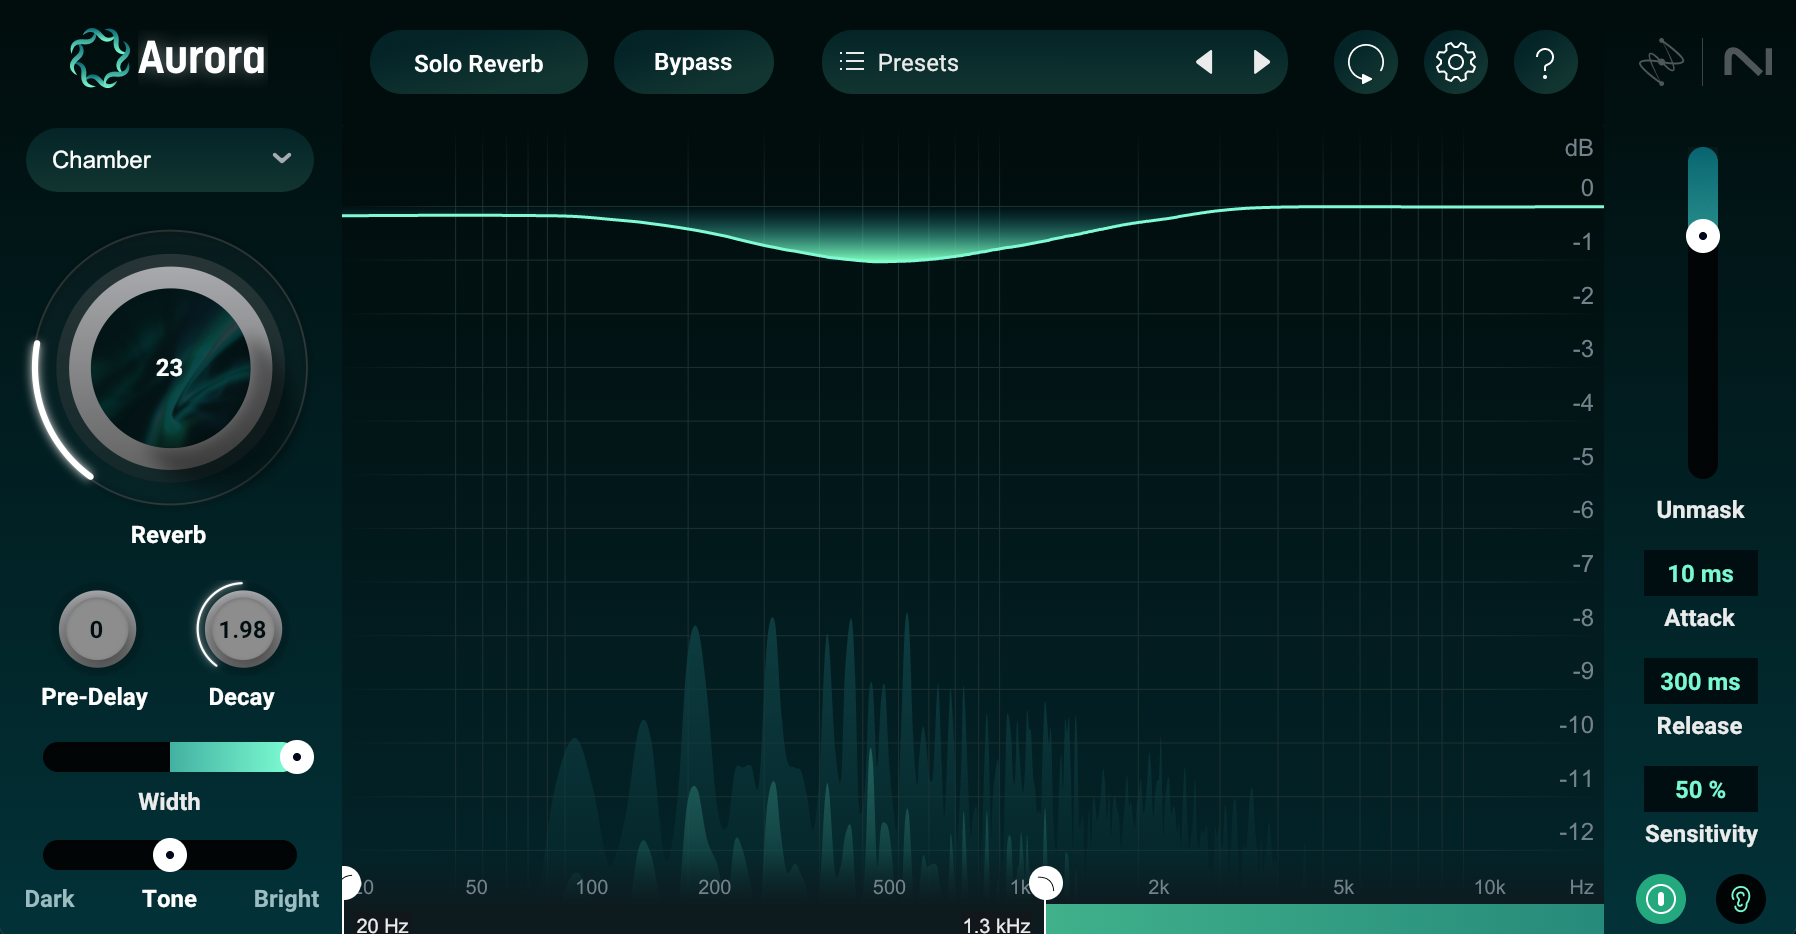
Using iZotope Aurora to sink the guitars back into the mix with reverb
Note the low-pass filtering, which is helping to reinforce the low-mids. Also check out the width: cranked like this, we’re really blurring the specificity of the transients, which has a blunting, background effect. Finally, note the pre-delay: it’s at zero. When you use reverb pre-delay, you put a sound source in front of the reverb. No pre-delay means the sound is blending more with the reverb.
You’ll hear in this before/after comparison how the guitar solo pops out more, even though we’re not touching it at all – we’re only putting reverb on the rhythm instruments.
6. Use delay and reverb to create a feeling of multiple guitar parts
Often you receive one guitar in a mix, and are given the directive to make them many. Delay and reverb can come in handy for this purpose. Let me show you two of my favorite tricks.
Delay and pitch-manipulation for double tracking
Start by putting your guitar on one track and panning it hard left. Next, take the same guitar, duplicate it to a second track, and pan it hard right.
On the hard right guitar, use any plugin that introduces a very short delay. It can be your DAW’s stock delay plugin, or something more complicated, such as the bx_delay 2500 from Plugin Alliance.
A delay like the bx_delay 2500 has built in modulation effects, which may come in handy for further differentiating the signal we’re delaying.
With settings like this:
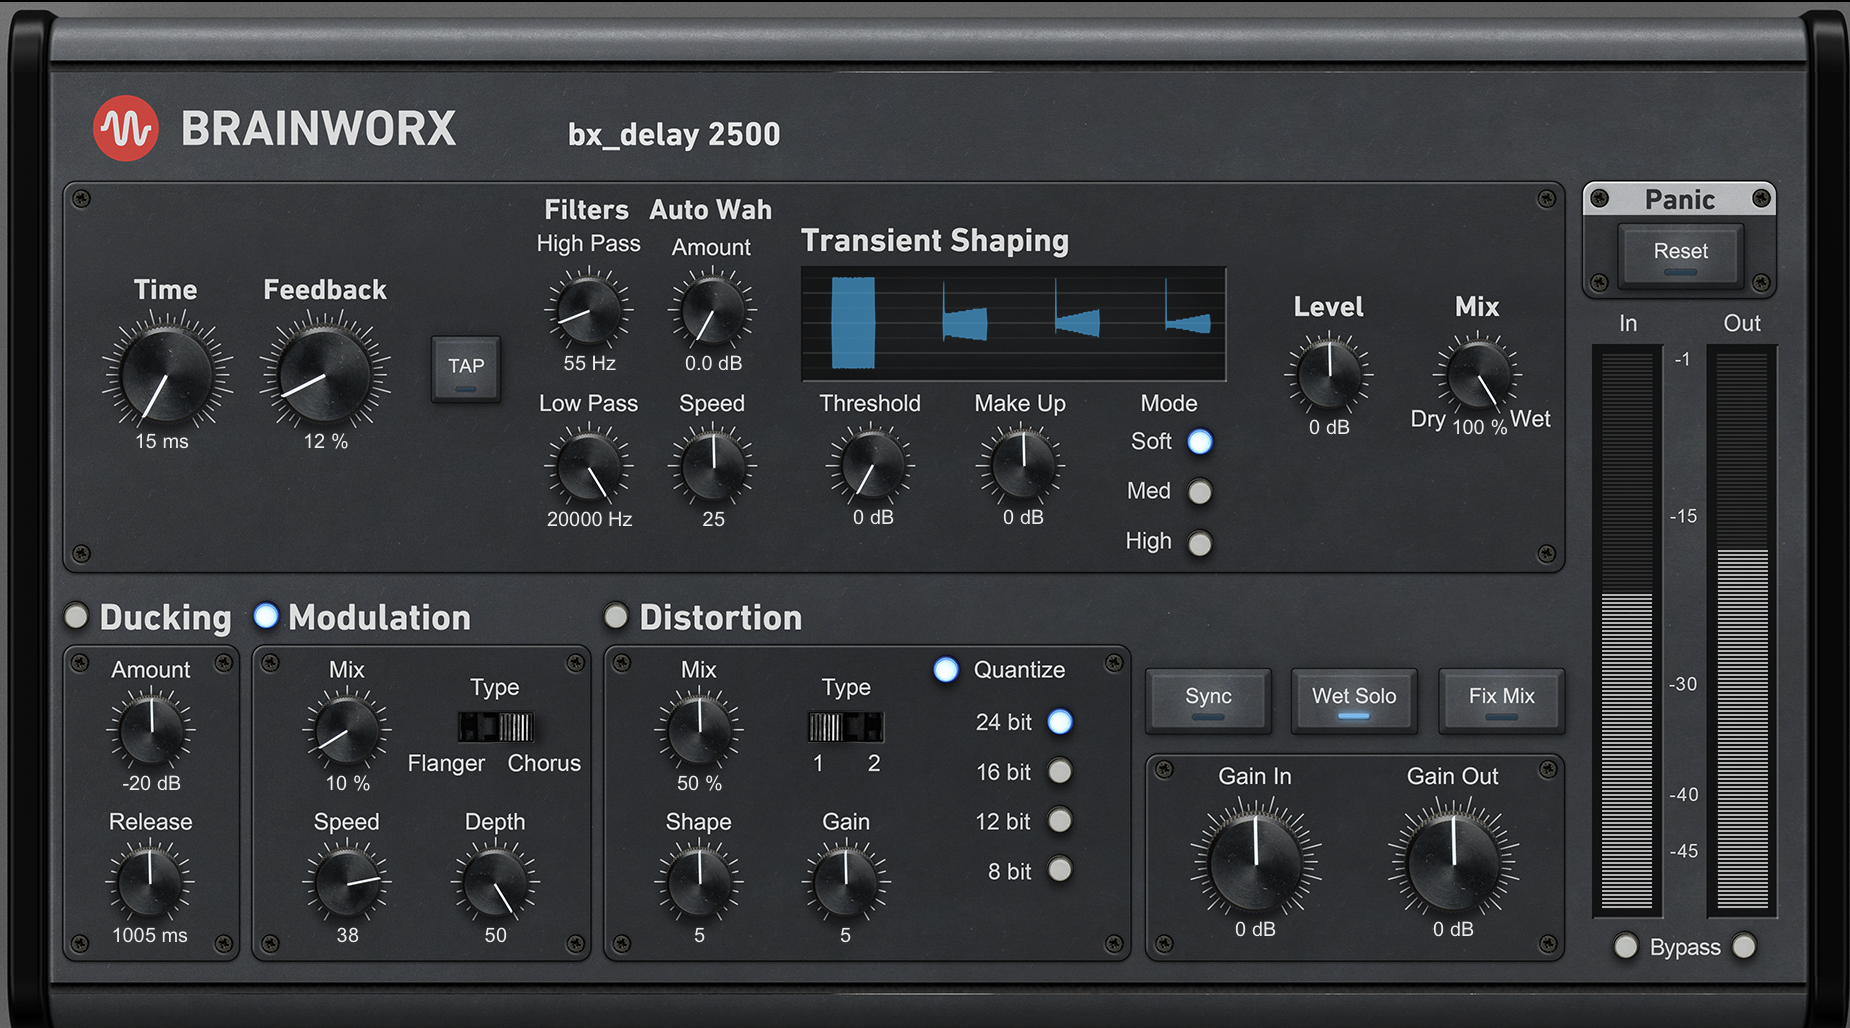
Using bx_delay 2500 to differentiate the guitar signal delay
You can now easily make one guitar part feel similar to a double-tracked instrument.
7. Use time-based effects counterbalance different mono elements within a stereo field
Often you’re presented with multiple guitar parts in one song, and for whatever reason, the best move is to pan them hard left and hard right.
Hard-panning is frequently the cleanest choice for making big expansive mixes. Nevertheless, LCR techniques can make the mix feel vaguely naked or isolated.
Take out your left headphone and one guitar completely disappears – it’s not mixed with the track, as much as placed somewhere next to it.
Such drastic panning can feel unnatural in both headphones and speakers without a little, subtle counterbalancing. Delay and reverb are a great way to accomplish such counterbalancing:
You can place a guitar hard left, and place a short, mono reverb of the instrument hard right. Similarly, you can do this with a colorful and short slap delay.
Let’s take our mix from before and add a second guitar part. We’ll pan them hard left and right right.
You can see how that’s a bit off-kilter, even though it’s ostensibly “balanced.” It feels unnatural.
So, let’s try using a short room sound on one side of the guitars with the Bettermaker BM60, like so:

Using Bettermaker BM60 for one side of the sound
And for the other, right-bound guitar, let’s use a colorful slap delay and pan it hard left.
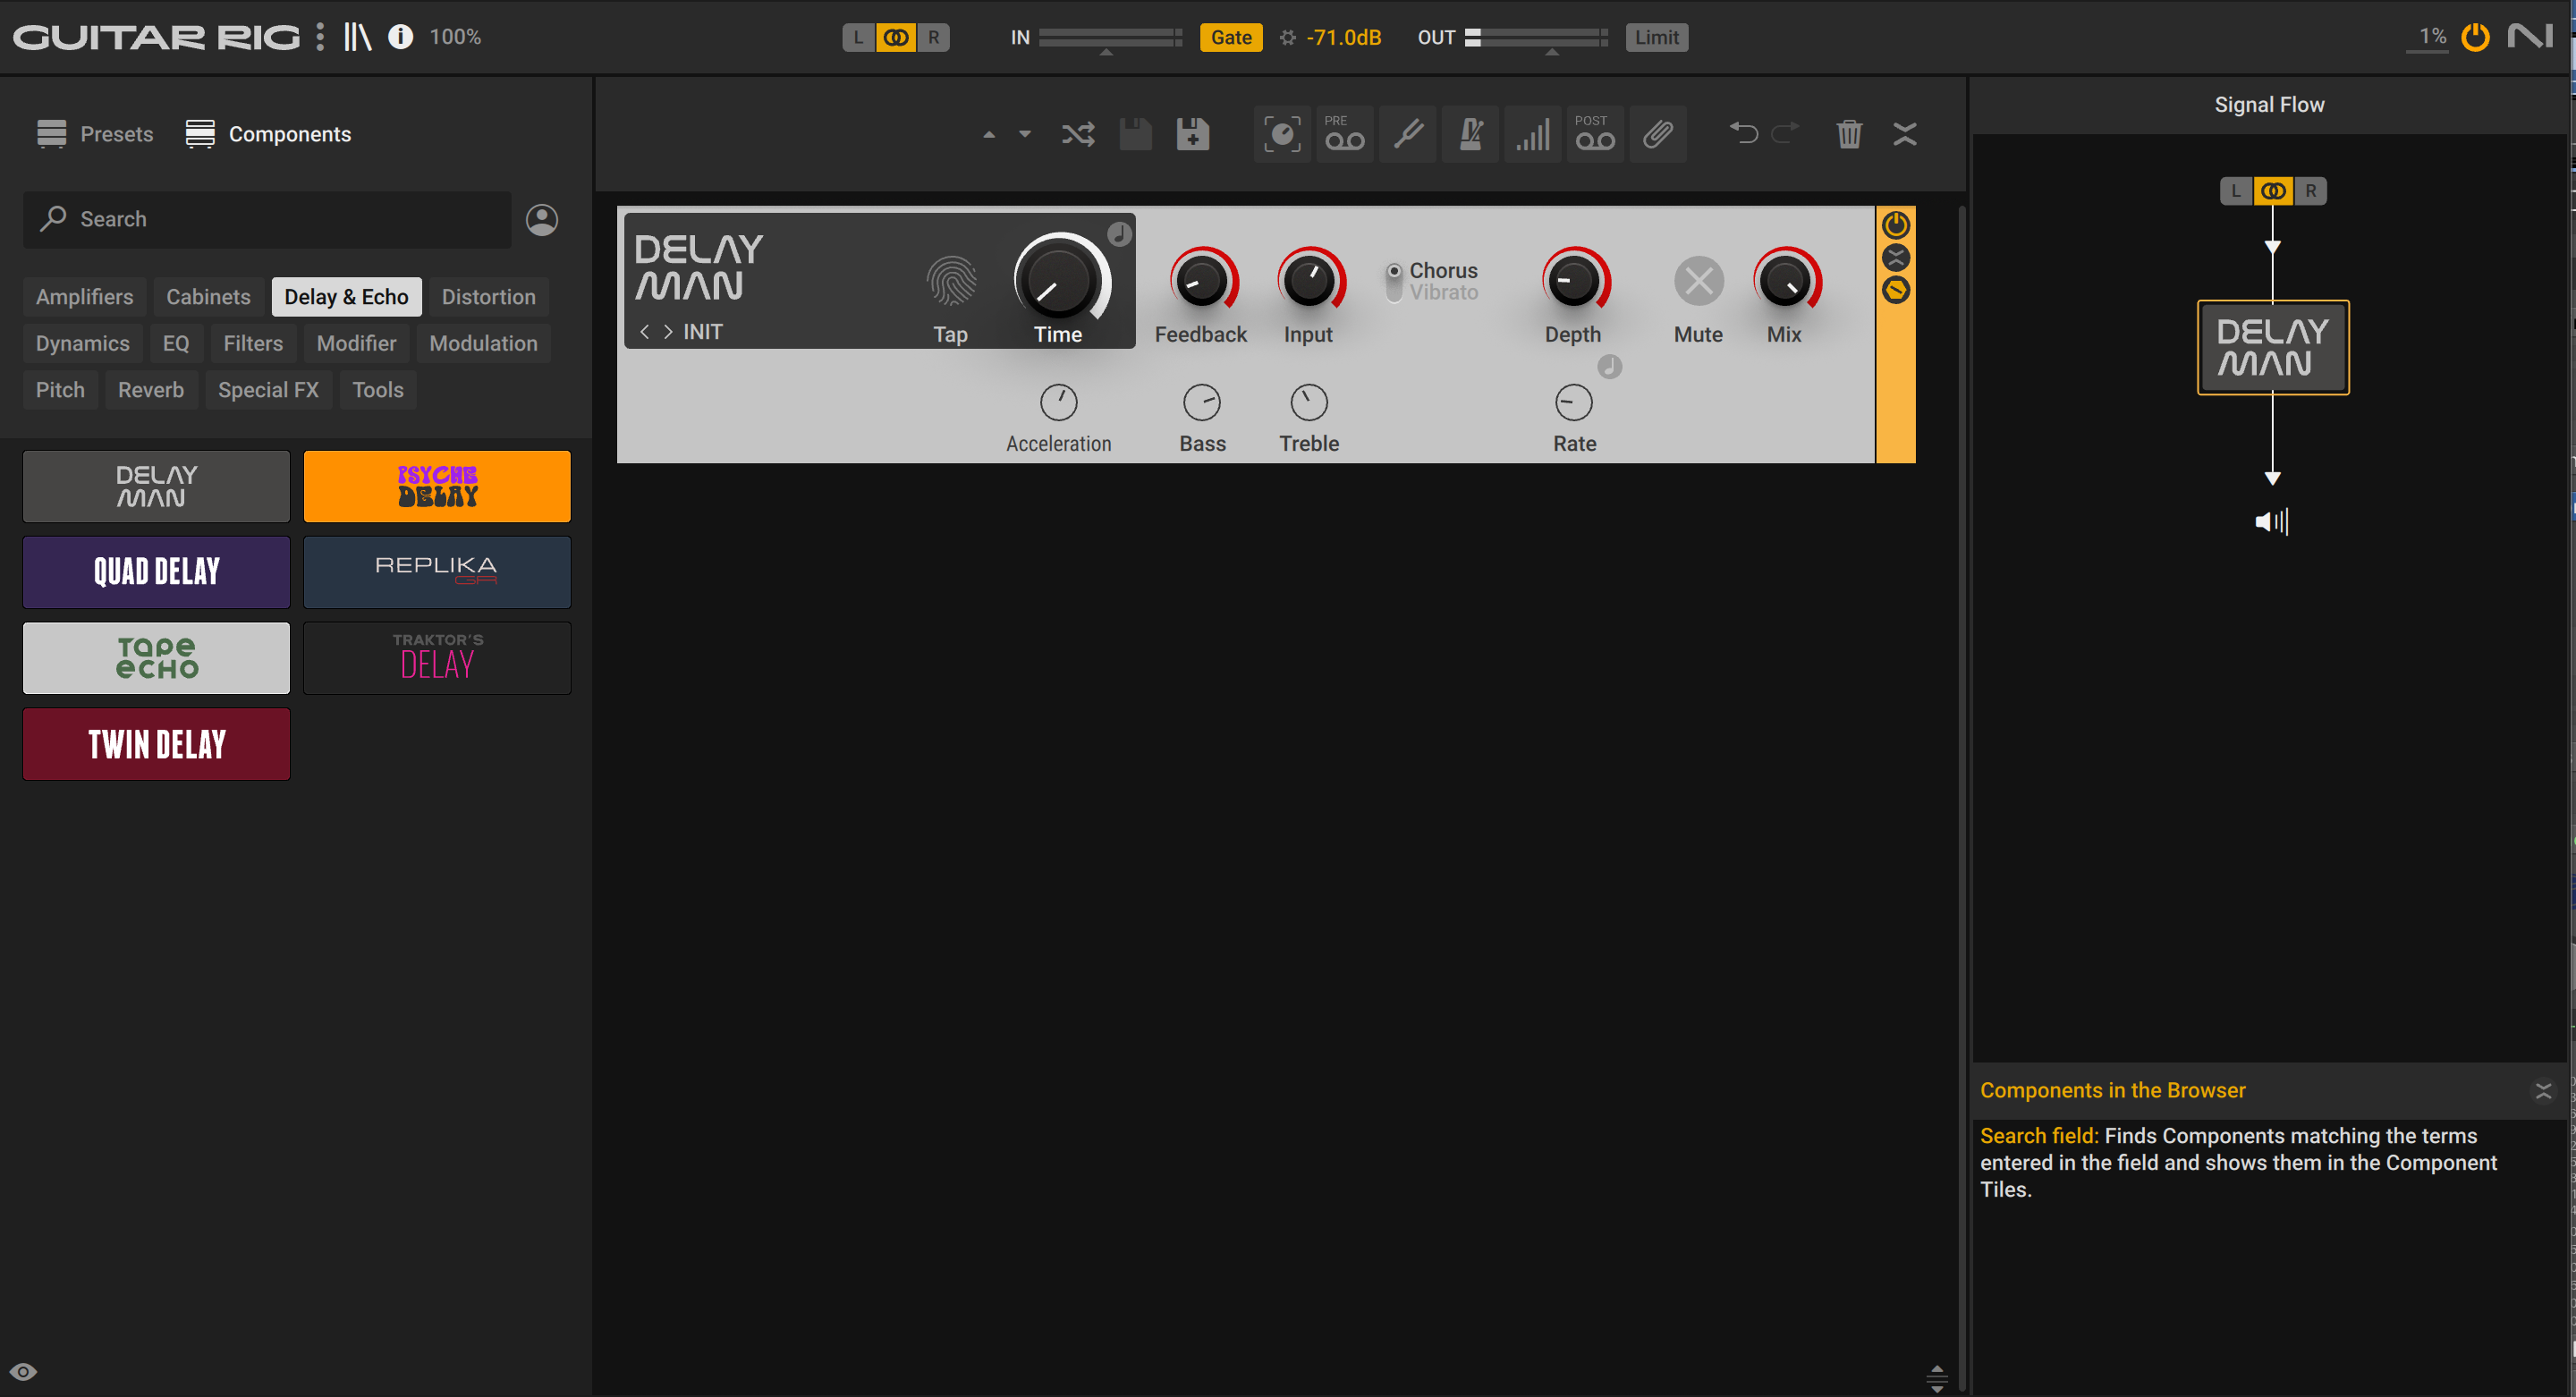
Using Delay Man for the right-bound guitar
Here are the results, which you can judge for yourself in a before/after comparison:
It’s not distracting – but take them away, and things feel a little too stark.
8. Use delay and echo to achieve creative stereo effects
In a song where only one guitar is present, we can do interesting things to its stereo image with clever use of reverb and delays.
Let’s take this guitar part again as an example:
Remember our trick for doubling a guitar part with delay? We can do a similar thing with a short, mono reverb panned in the opposite direction. I like to instantiate Guitar Rig in a dual-mono configuration, keep the left dry, and put a very short reverb in the right. It won’t feel like a double. Instead, it’ll feel like a strangely hollow stereo effect.
Yet, it won’t be disappear as much as you’d think in mono:
We can make the effect even more interesting in a subtle way by adding an evolving, auto panned delay to it:
Here’s a short, wordless video illustrating the effect:
Do keep in mind that these tricks are not necessarily mono compatible. Always check the mono mix to make sure you’re not losing too much guitar in the fold down. If you are, you can use a recovery tool like the free Ozone Imager to ameliorate some of the problems;
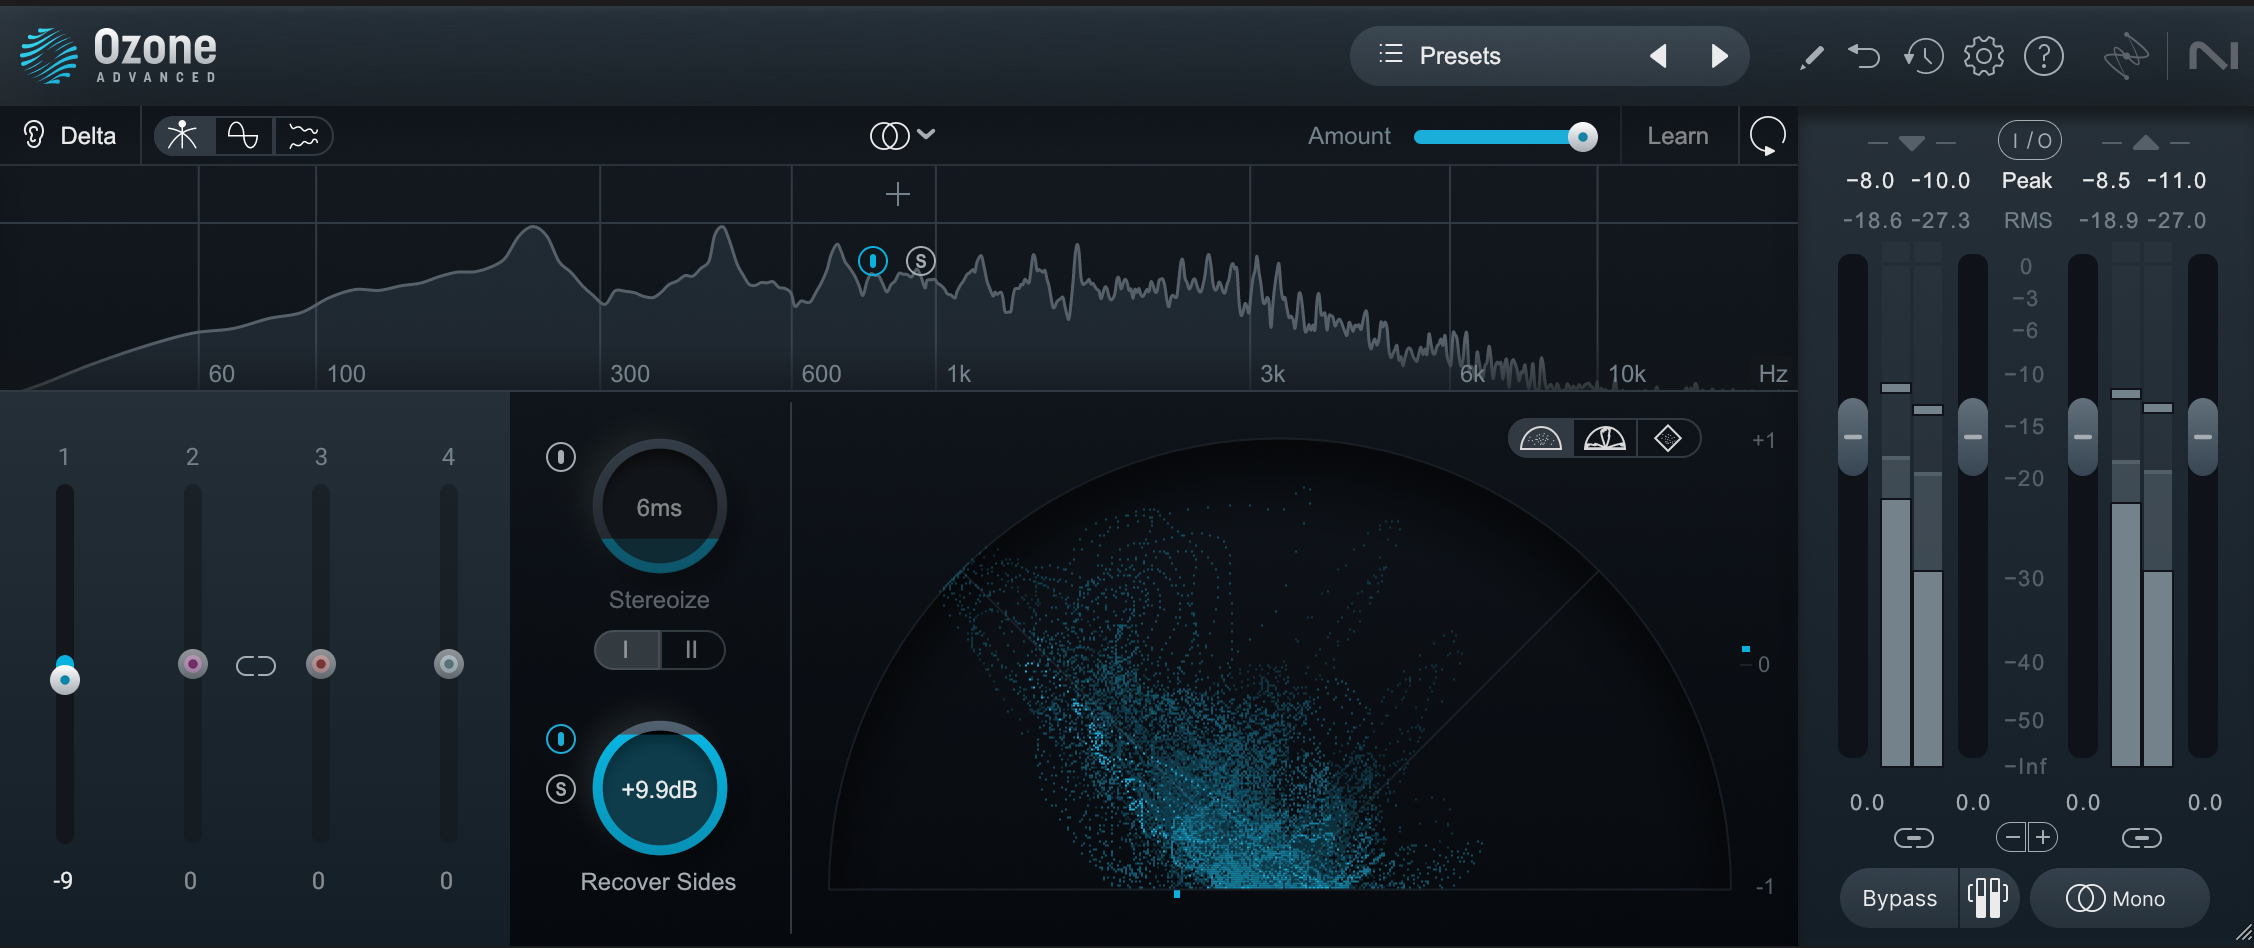
Using iZotope Ozone Imager to not lose too much guitar when in mono
When it comes to reverb and delay on guitars: remember the 10-25% rule
These tips are all fun, but please remember, much of what I’m showing you has been exaggerated for the purposes of demonstration – particularly the more creative effects.
So let me conclude this piece with one final tip: whatever level you’ve set your time-based effect, pull it back by about 10-25%. In the heat of the moment, we are too subjective about our choices, and often exaggerate things. Pulling back by default is a good habit to get into.
Other than that, we hope these tips provide you with some inspiration. As you dive into delay and reverb, be sure to check out the articles below, which cover common reverb and delay mistakes and how to sidestep them.
