How to mix vocals with Nectar Vocal Assistant
Learn expert techniques for mixing vocals effortlessly with the new Nectar Vocal Assistant and get a professional sound.
Vocal mixing is an art that can make or break a song. It's the magic that transforms a raw vocal recording into a polished, professional sound that captivates audiences. And many people ask online, “How do you start mixing vocals?” or “Is it easy to mix vocals?” People deluge the Internet with lots of other questions pertaining to life, the universe, and more—but when it comes to mixing, vocal mixing questions are in the top ten.
Well, good news for you: the new Nectar 4 has redefined how to mix vocals in a modern production context, providing answers to all questions pertaining to the craft of vocal production and vocal mixing.
In this tutorial, we’re going to walk you through the Nectar 4 Vocal Assistant, so you can get started mixing vocals with ease.
Follow along with Nectar, a complete set of tools for mixing, producing, and designing vocals.
Nectar 4 comes with several tools that make mixing vocals easier, including Audiolens integration, harmony and doubling effects with Voices and Backer, as well as a redesigned Auto-Level module.
But the Vocal Assistant is where easy vocal mixing shines.
The Assistant, which develops a sensible starting place for your particular vocal—has been given a powerful makeover in Nectar 4.
Indeed, the Assistant is now so different, and so much more helpful than it previously was, that the rest of the article pertains to using it. Using Nectar's Vocal Assistant and learning from its choices will enable you to start mixing vocals easily.
How to use the Nectar Vocal Assistant
Assistive learning tech is nothing new to iZotope plugins, but just in case you’re unfamiliar, I’ll walk you through the process:
1. Load Nectar 4 on your vocal track.
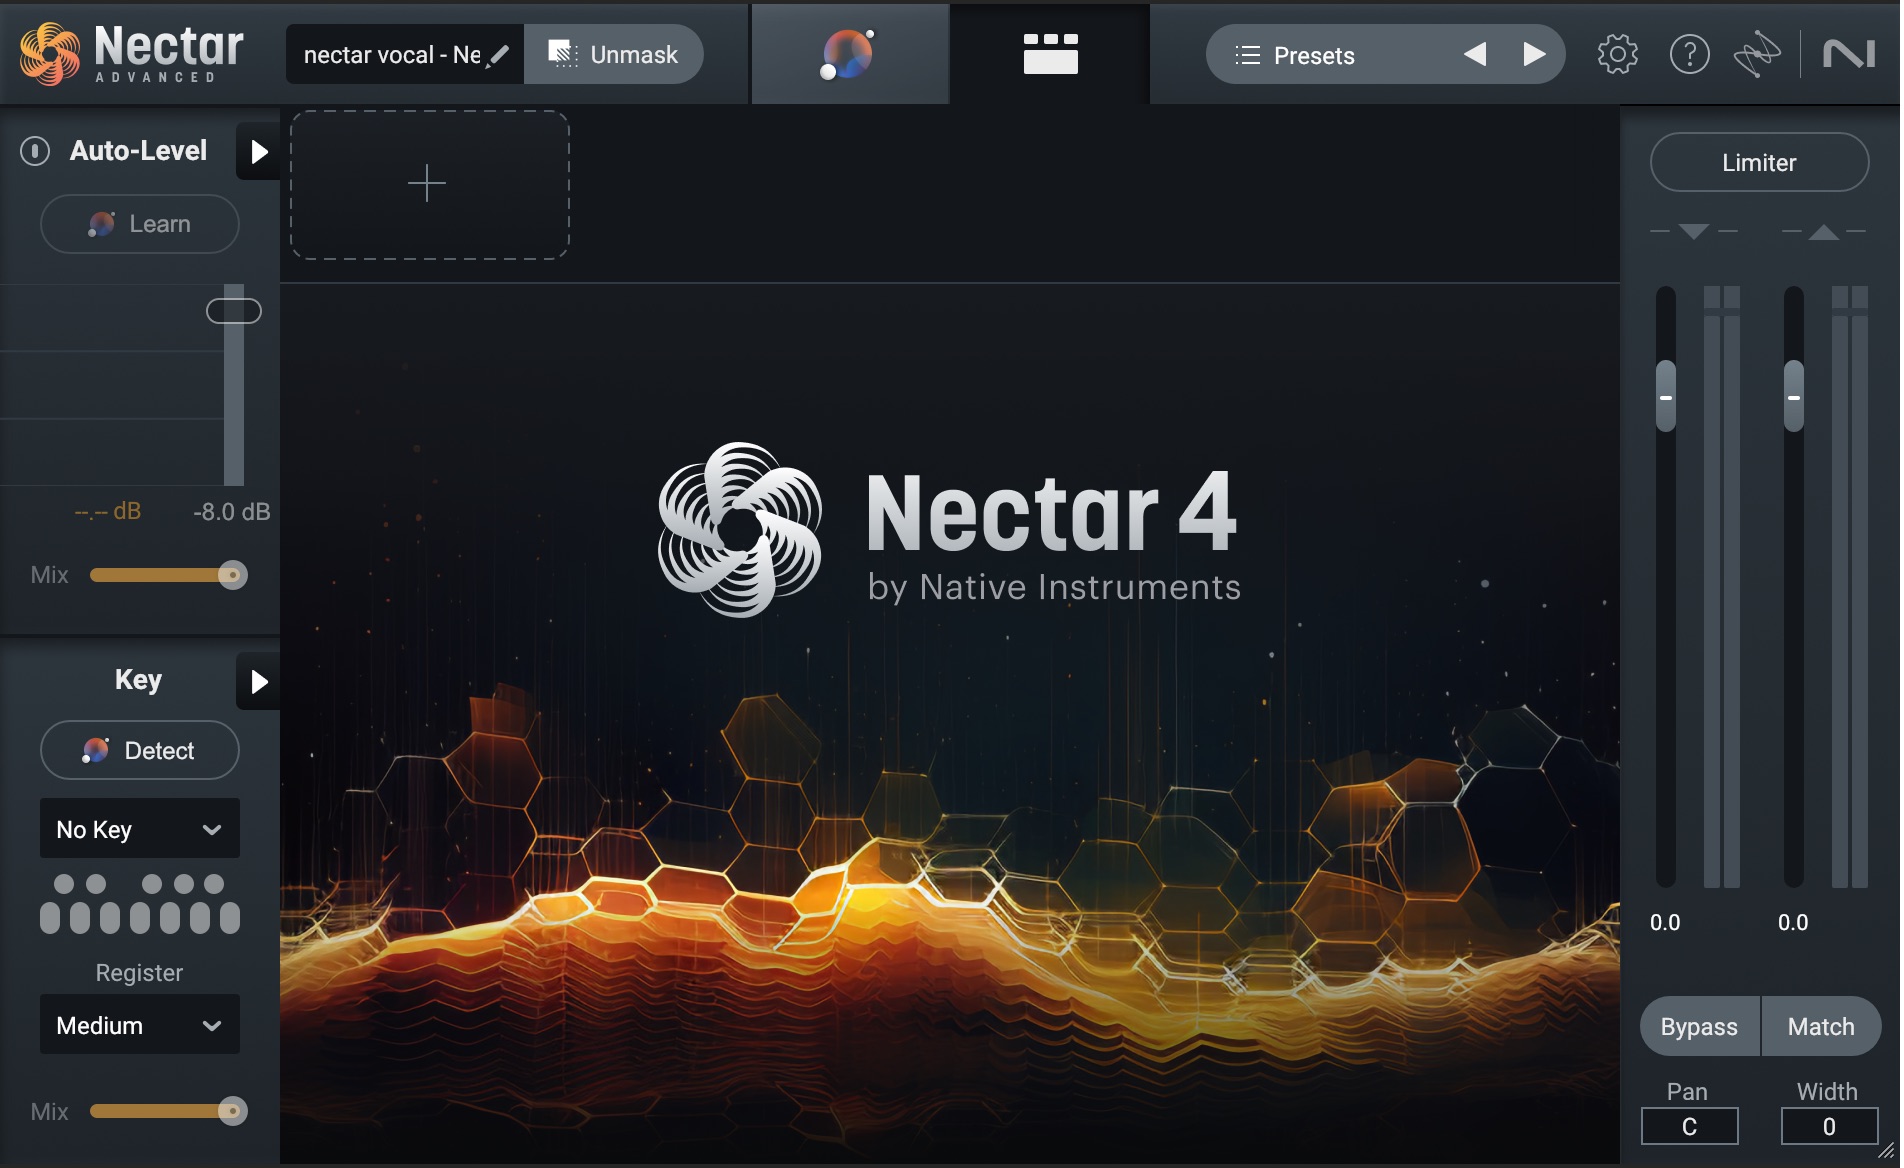
Nectar vocal mixing plugin
2. Click the Assistant view, circled below.
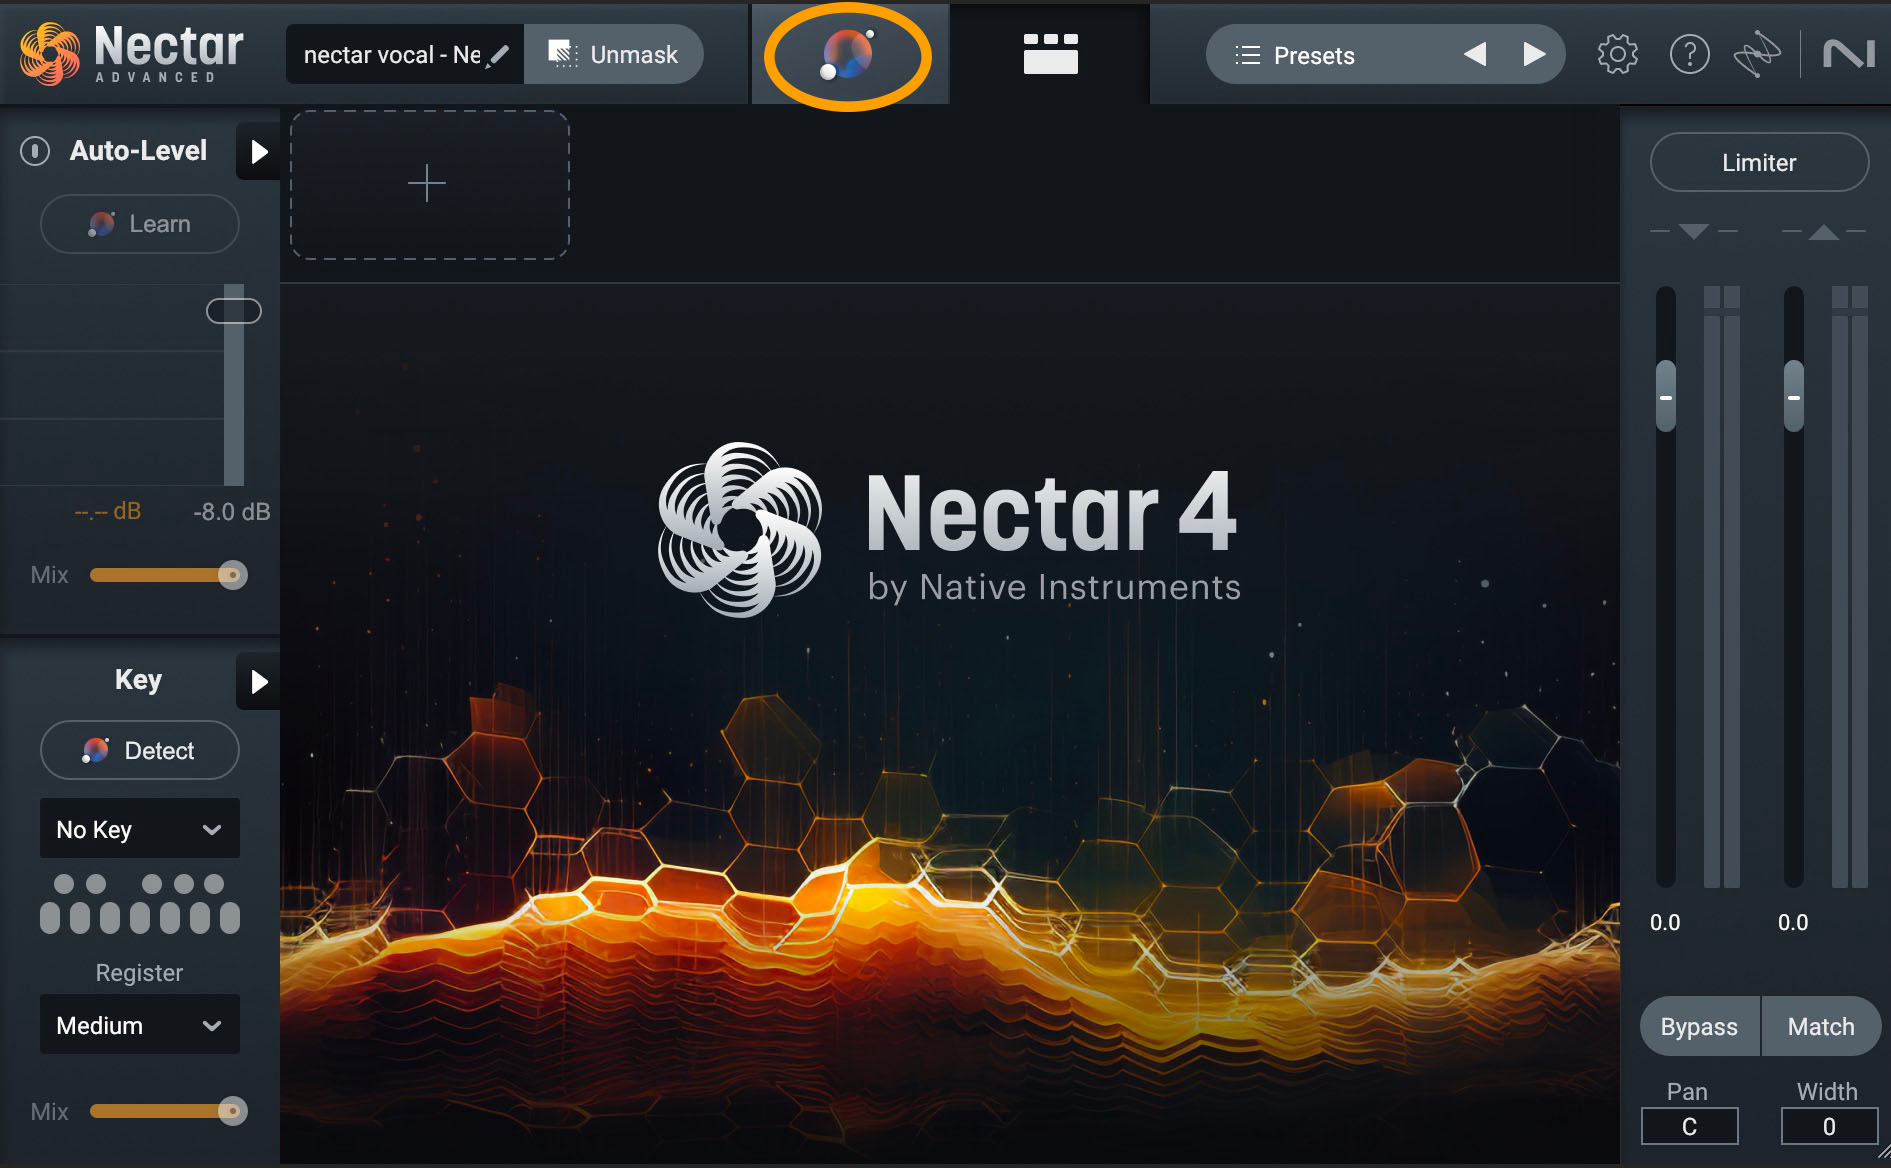
Select the Vocal Assistant at the top center of the Nectar plugin
3. Hit play, and Nectar will automatically analyze your track. Keep in mind that the Vocal Assistant needs time to analyze your vocal. If you are trying to run Vocal Assistant on a clip shorter than 20 seconds, you should enable loop playback before starting Vocal Assistant.
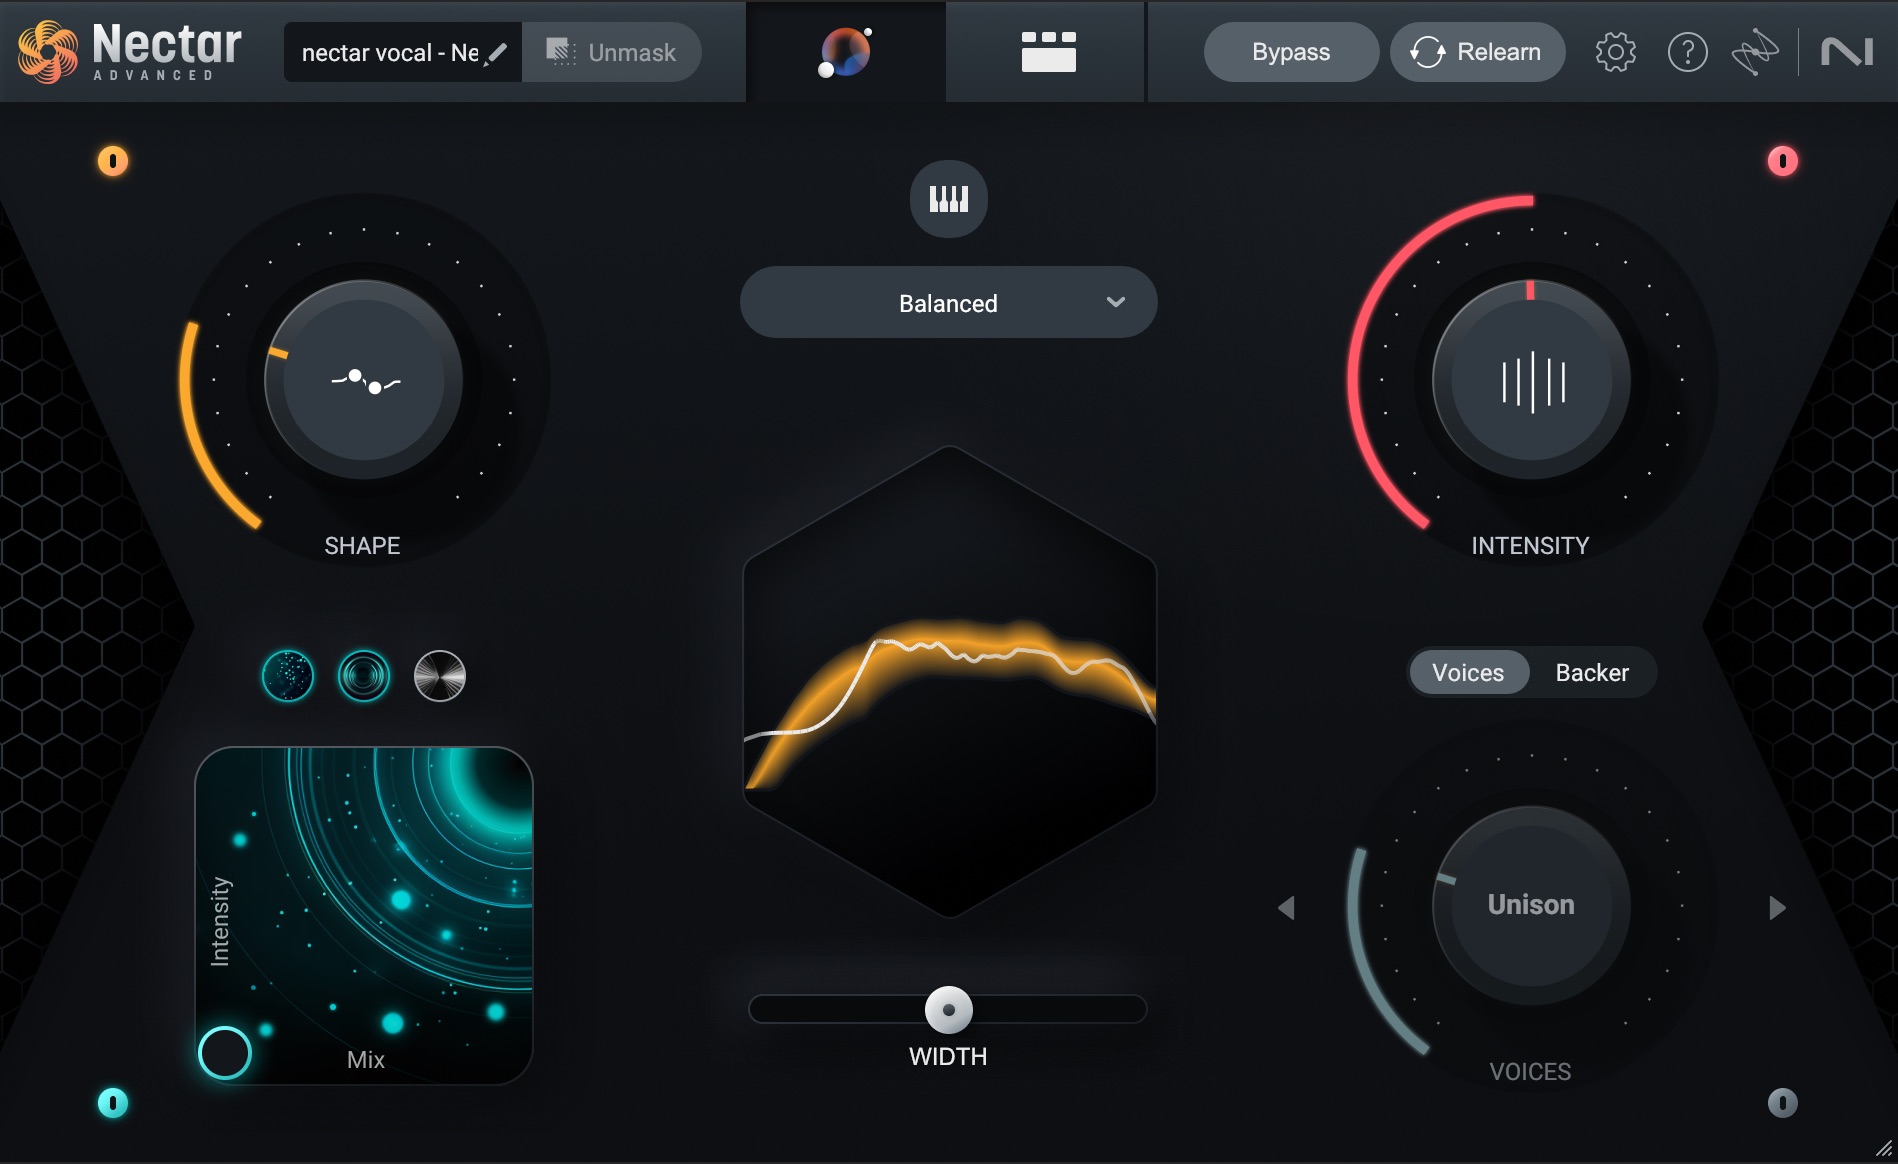
Nectar Vocal Assistant View
Really, the quickness of the whole thing is best captured in a video, so here’s Nectar 4 in action.
I’m using the stems for a track by the artist Rileyann called "Meteor."
And even though the process is quick and easy, here's what the Vocal Assistant runs through when analyzing your vocals:
- Analyzing input level to determine optimal RMS: Enables Auto-Level module (Advanced only) and adjusts the input gain to ensure an optimal input level.
- Analyzing vocal signal to determine optimal settings: Analyzes your vocal to identify characteristics that will inform the processing applied in the subsequent steps.
- Applying settings based on vocal content: Applies an initial “character” EQ curve and Dynamics settings.
- Detecting vocal register: Analyzes pitch information in your vocal track and uses that information to set the Vocal Register for optimal Voices and Backer settings.
- Learning subtractive EQ parameters to improve clarity: Learns the frequency content of your vocal and sets subtractive EQ bands to frequency values that will help to improve clarity.
- Detecting vocal sibilance to set de-esser: Analyzes the frequency content of your vocal for harsh, sibilant frequency content. If sibilance is detected, Vocal Assistant will set the optimal cutoff frequencies and threshold value for De-esser.
- Applying dynamics for a controlled output level: Configures Compressor settings to control the output level of your vocal.
- Setting reverb mix level depending on selected assistant mode: Applies a subtle Reverb to your vocal to add a sense of space.
The Vocal Assistant view in detail
The Assistant view controls all the modules in Nectar in a streamlined way. It’s akin to having a keyboard shortcut on hand for executing complicated computer commands with one click of a mouse.
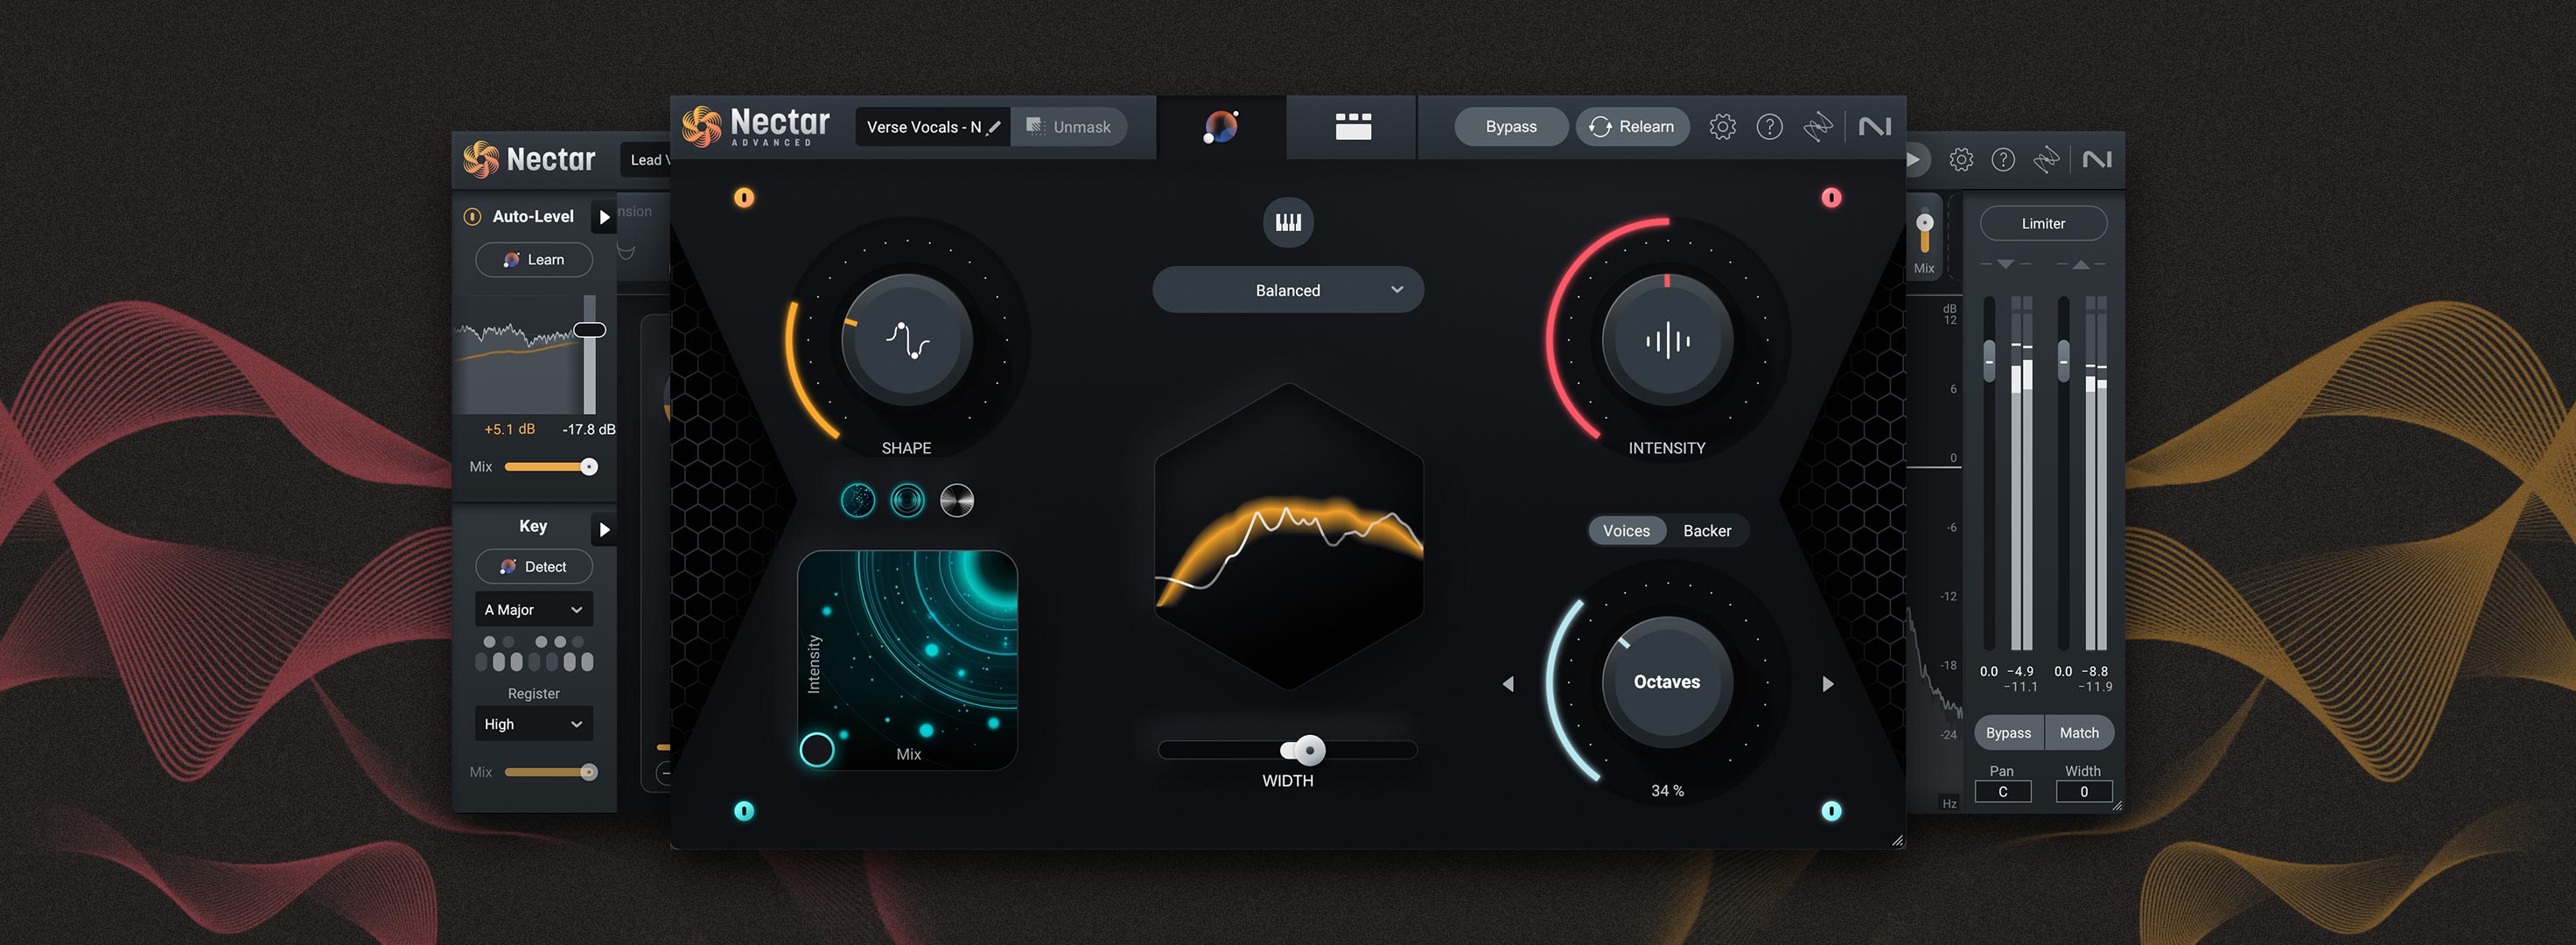
Open the Assistant tab, and you’ll find four colorful sections flanking the corners, including Shape, Intensity, Voices/Backer, Width, and FX.
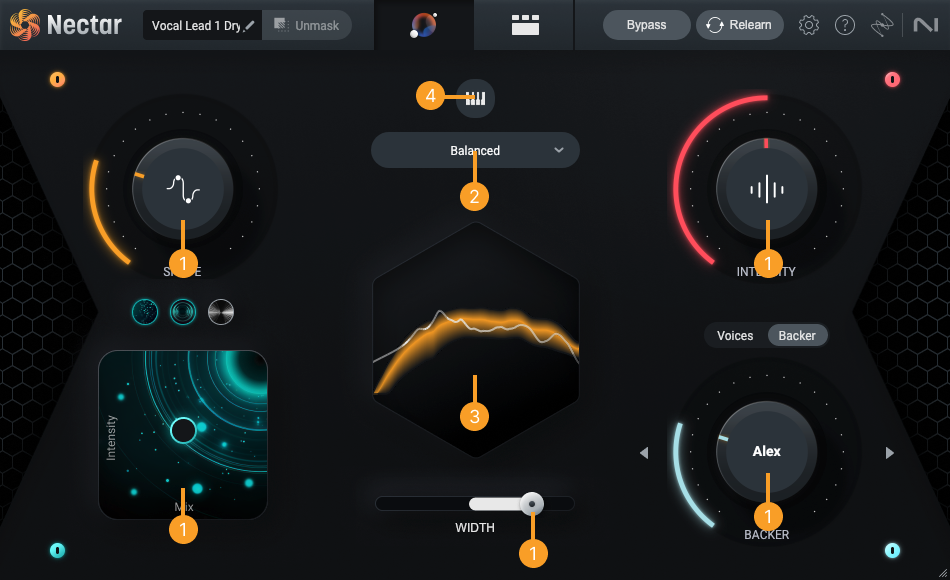
Vocal Assistant View overview
1. Intent Controls
2. Target Library
3. Meters and Display
4. Key and Range
The intent controls are parameters that allow for broad control over early decisions in your vocal production and mixing workflow. They work together with Vocal Assistant’s intelligent analysis, Targets and the signal chain to give you a simple workflow for tonal, dynamics, effects, width, and voice decisions in your mix.
Shape and Intensity take up the top half of the screen, giving you control over your overall tone and dynamics (i.e., volume control).
The bottom half of the screen houses the creative side of things, with a section for making creative harmonies and backing tracks out of your lead, and a panel for instantly adding texture through the use of delays, reverbs, and modulating effects.
In the center are three other useful controls.
Starting at the bottom, you have a width slider to control the overall stereo spread of the vocal.
In the center of the screen is tonal balance curve with a clickable list of target profiles that help shape the tone.
The whole thing is topped by a vocal range and key section that can automatically detect the key of the song, and adjust harmony parts automatically. It's important to note that only Octaves and Unison settings will be available in Voices until a Key is set with this part of the interface.
The Target Library is one of the most powerful parts of the Vocal Assistant view.
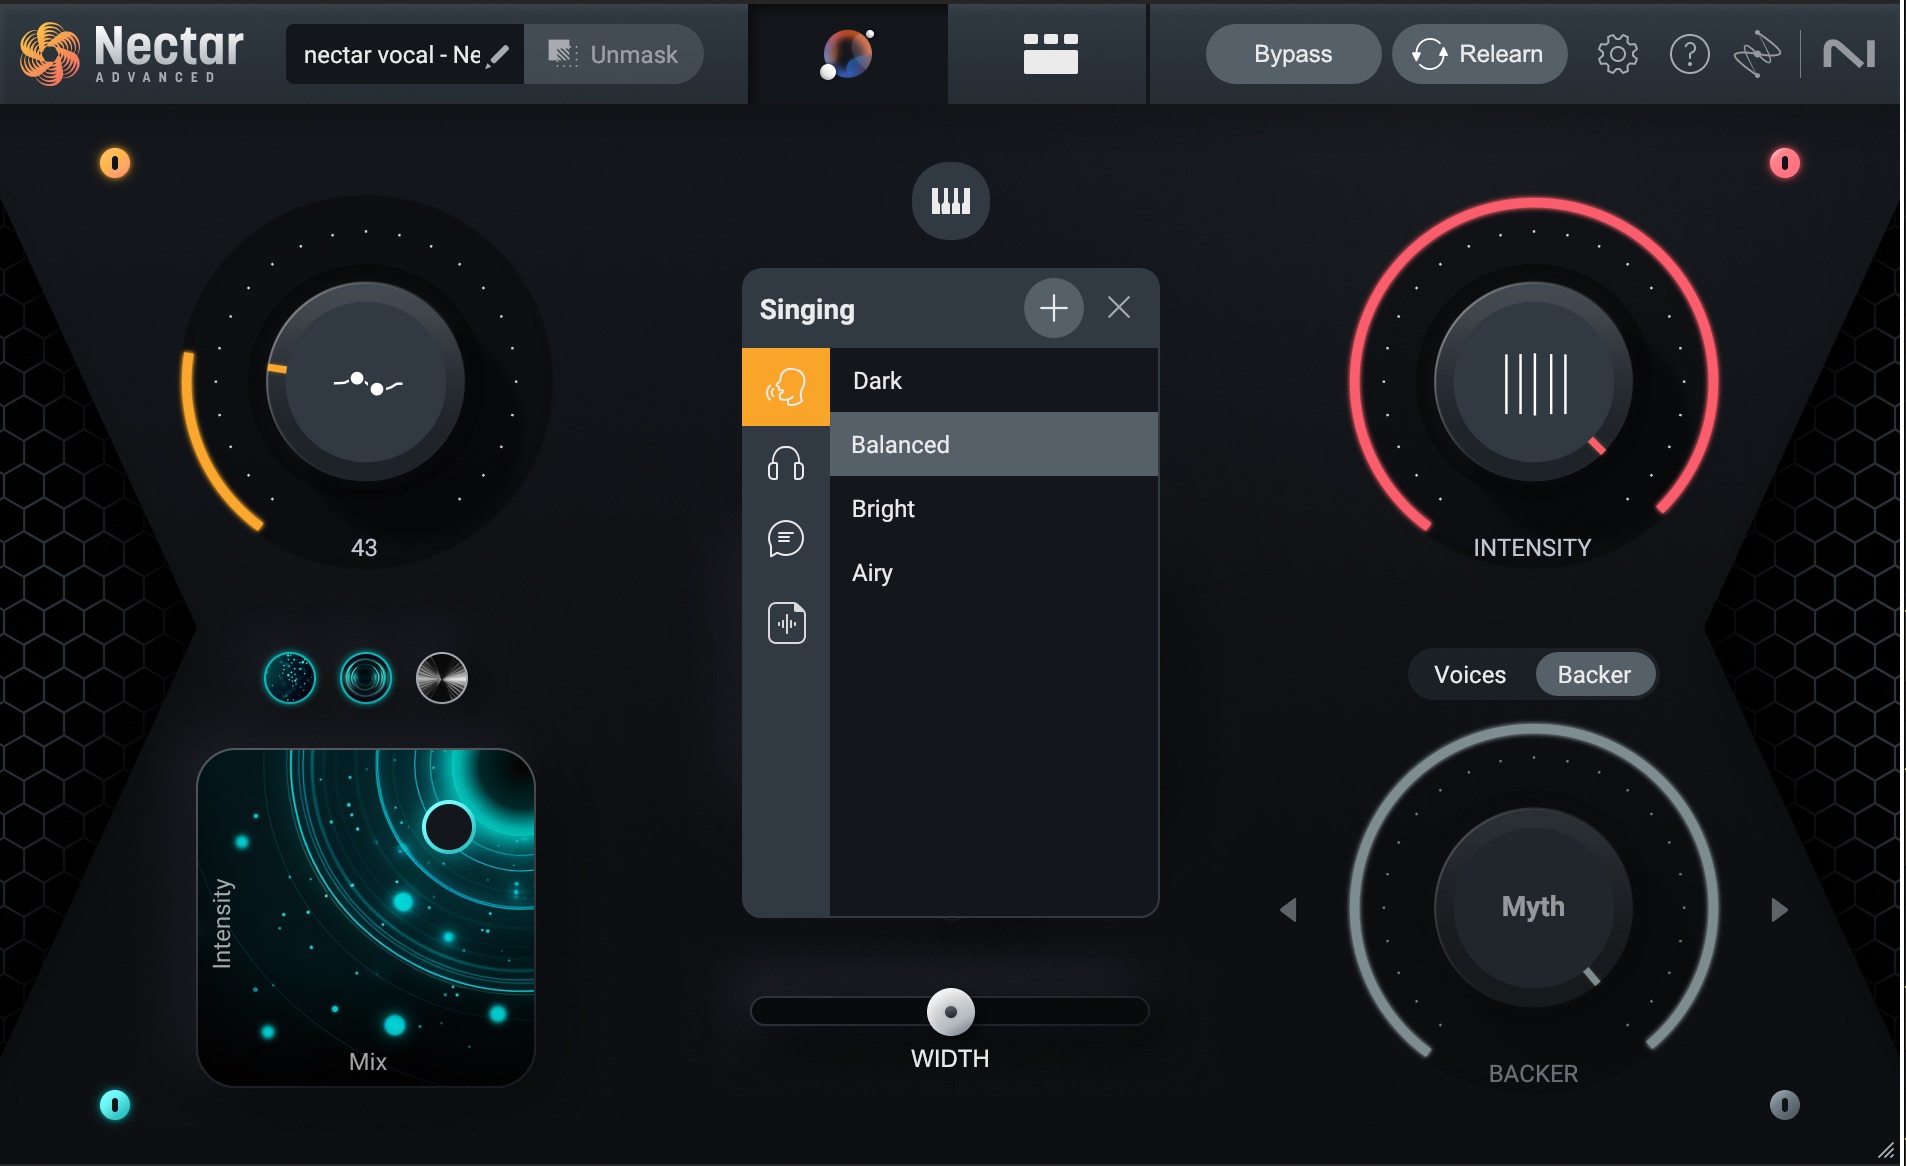
Vocal targets in Target Library
The Target Library contains vocal targets and user generated reference targets.
See the little icons to the left of the tonal descriptions—the singing head, the pair of headphones, etc.? Those are overall classifications for your vocals. The first is singing, the second is rap, the third is dialogue (for post), and the fourth is references that you can upload to Nectar.
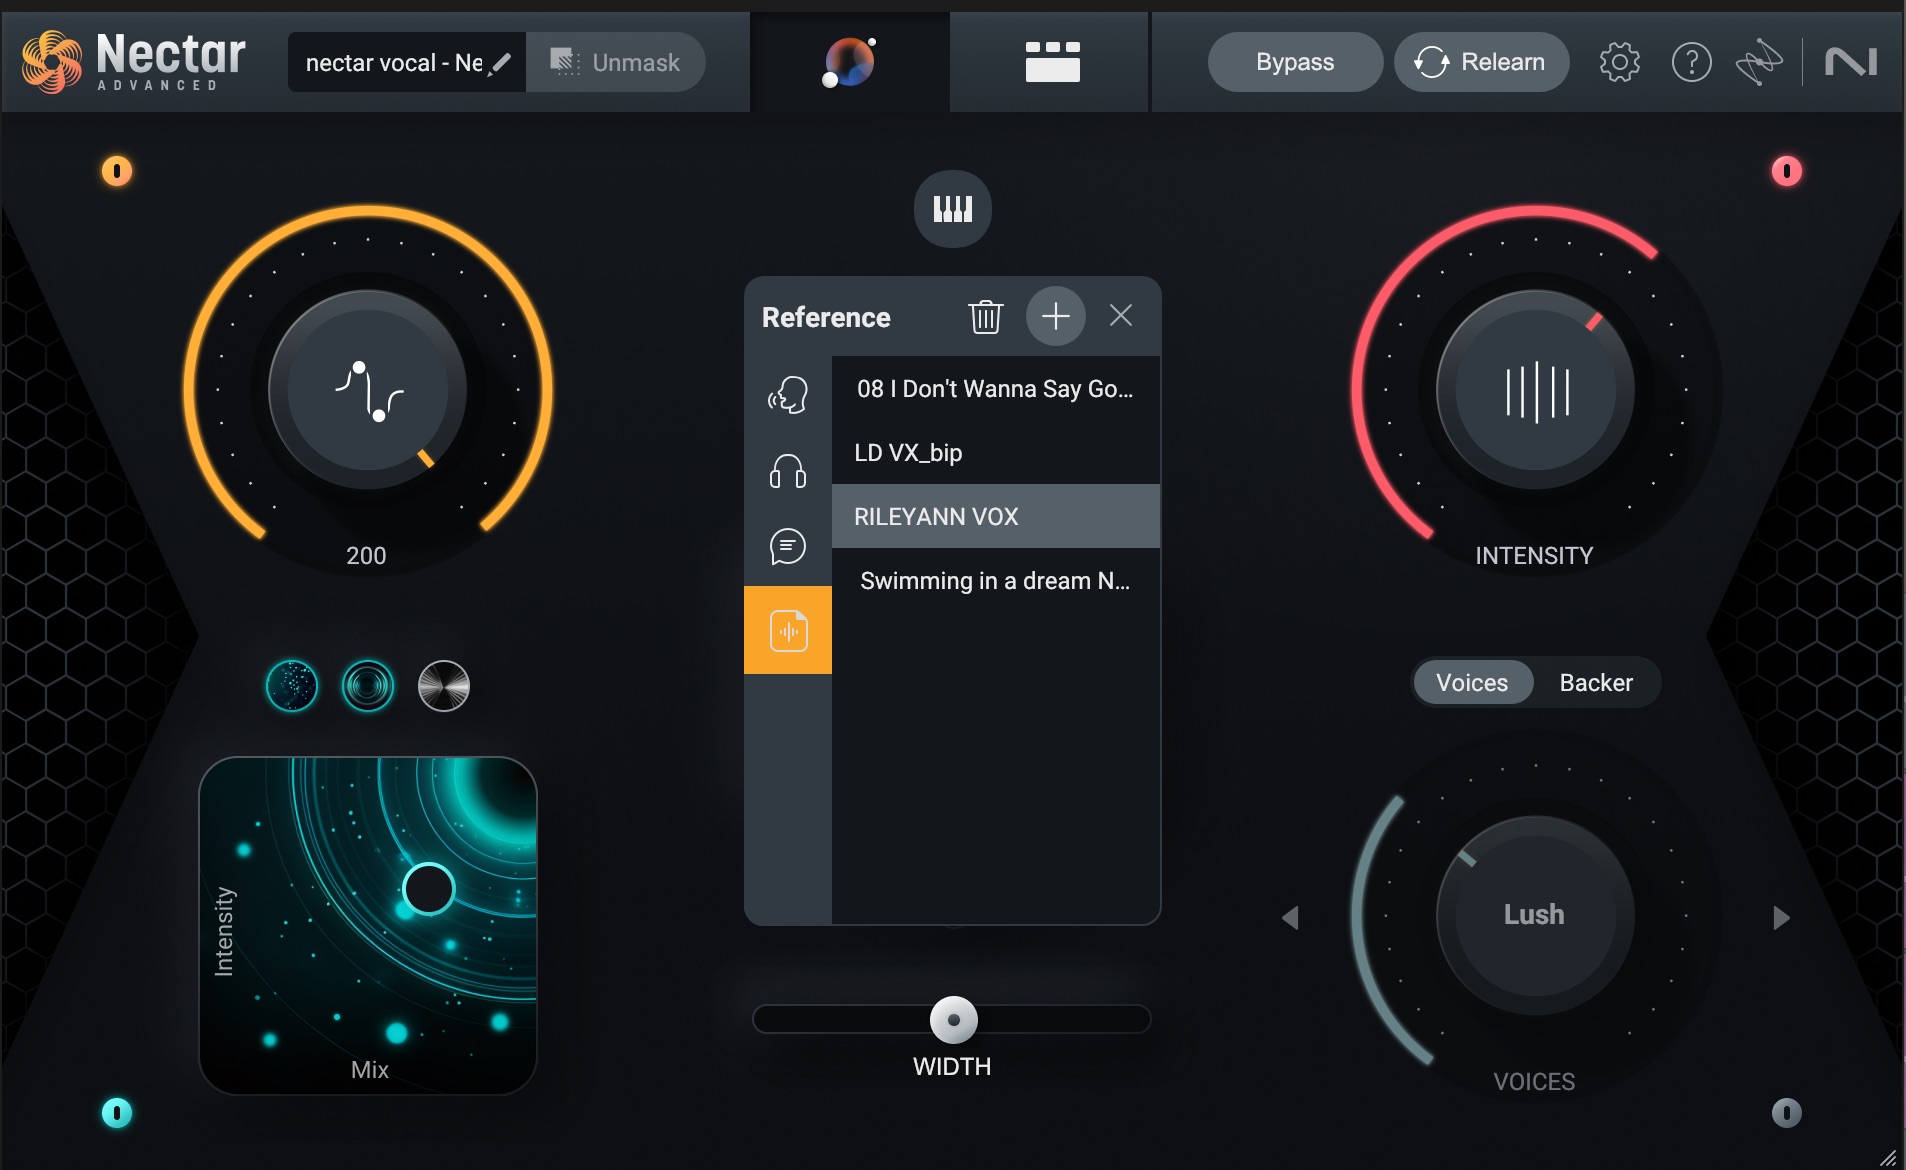
By clicking the “+” button you can upload your own reference target to the Target Library
Say you really like the way Taylor Swift’s voice sounds on her latest hit; you can upload the song into the plug-in, and it will analyze the tonal characteristics of the vocal. Then, a curve will be generated, and Nectar will automatically shape your vocals to fit that curve.
Setting a target provides helpful starting points for the Intent controls in the Vocal Assistant View and the modules in signal chain in the Detailed View.
How good does this curve sound? Well, you’ll notice I have a target called “RILEYANN VOX” uploaded here. This curve was taken from the original processing chain applied to Rileyann’s vocals and is what you'll hear in the "before" audio example.
I’ve applied this target curve to the vocals, and run it through the same reverbs and delays. Instead of a stack of third-party plug-ins processing her sound, we now just have Nectar doing all the EQ, de-essing, and compression in the "after" audio example.
Nectar Vocal Assistant, Target Matching
It's very similar, no?
Interactivity—the special ingredient
In the Vocal Assistant, nearly all of the controls interact with the profile you select—so if you choose a sung vocal in the dark style, you’ll get a completely different EQ and compression setting than if you had chosen a rap vocal in a balanced style. But that’s not all: the delay, reverb, and modulation effects will also change to match the style.
Likewise, the Voices section is influenced by another parameter: the selectable key of the song. By default, the only two harmony options available to you in the Voices section are Unison (aka, doubling), and Octaves. However, the key of the song gives you access to other harmonic colorations.
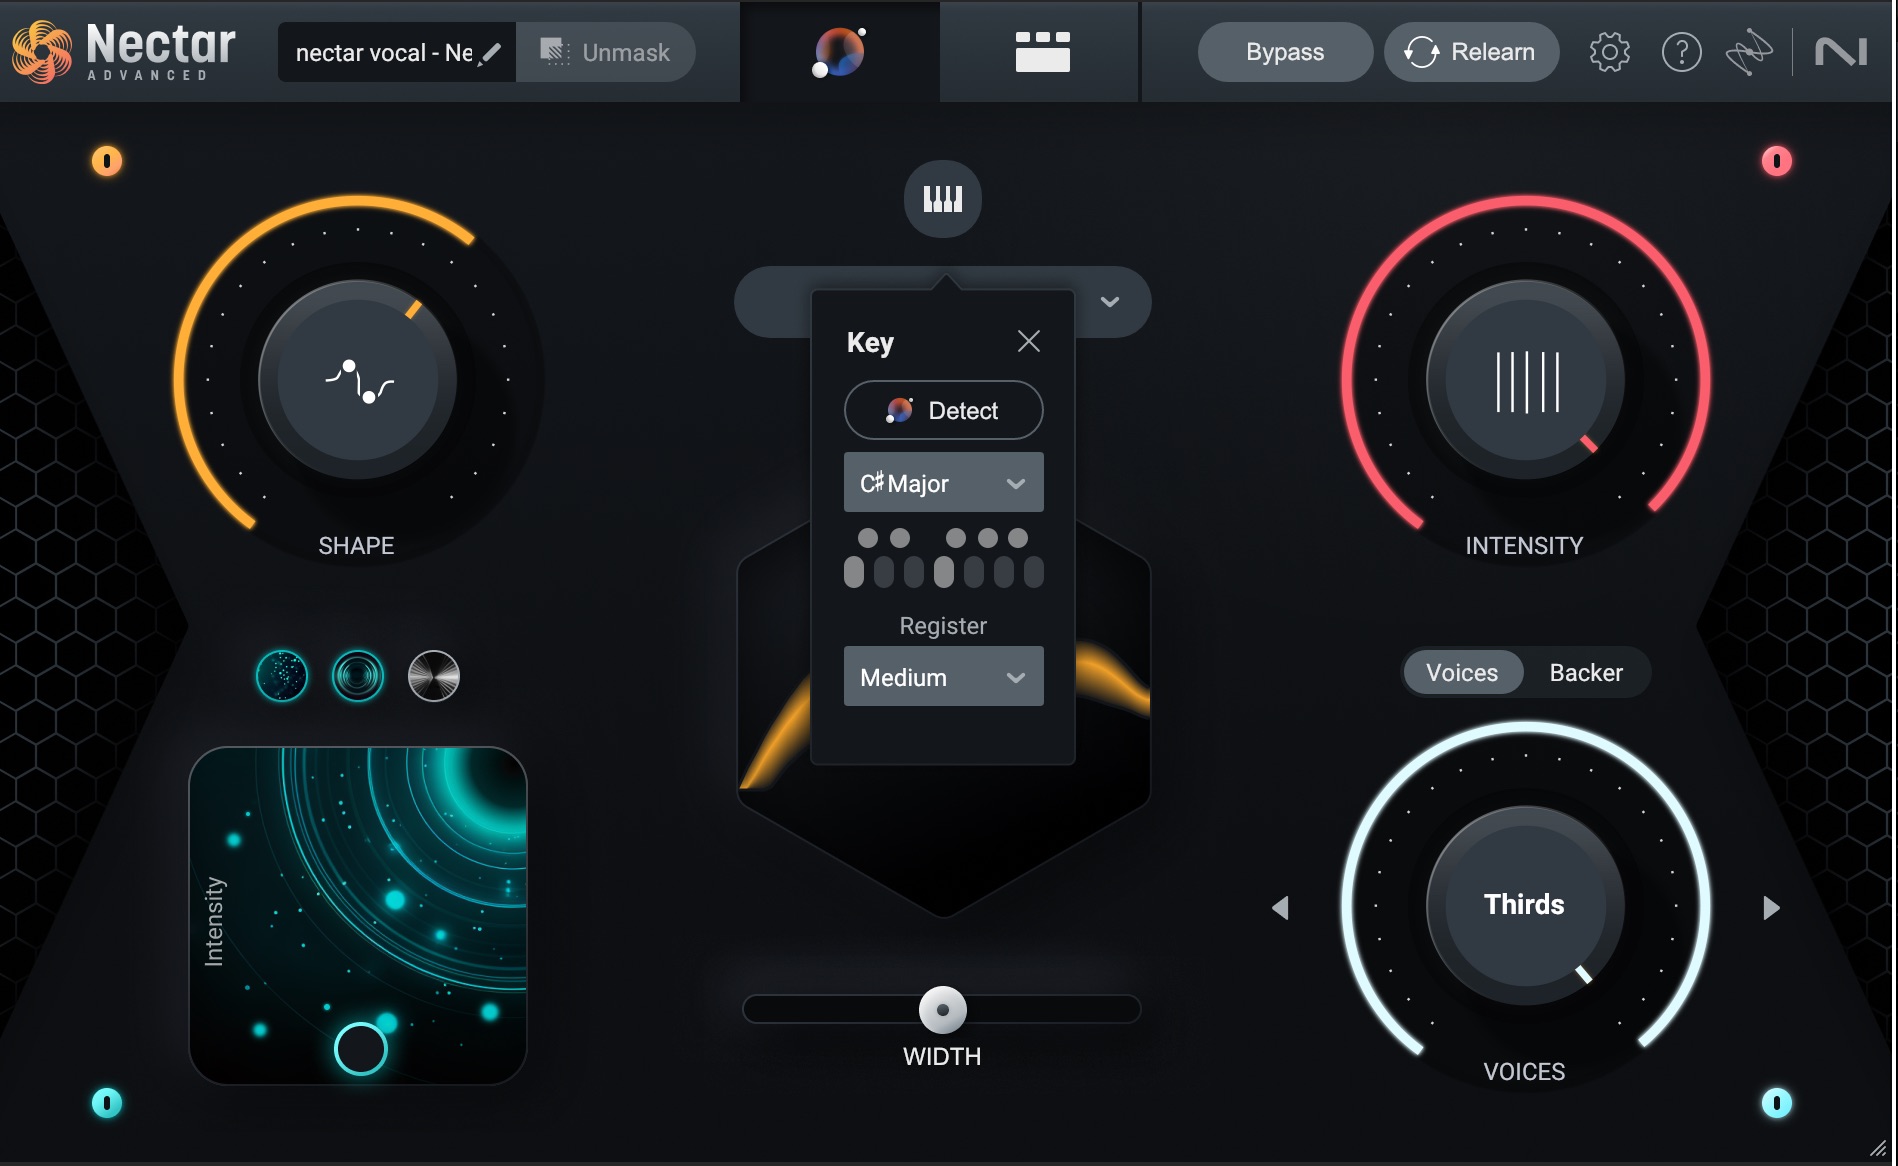
Choosing the key and vocal range in Nectar
Once you choose your key, you get access to other intervals and coloration. These are labelled in musical terms (Thirds, Parallel), or in more subjective terminology (Happy, Sad, Moody).
So, as you see, everything is interdependent—and yet quite easy to use.
Seeing the Nectar Vocal Assistant in action
Now that we’ve covered the various parameters and machinations of the Vocal Assistant, let’s show you how to use it when mixing a song.
The best way for you to see this is in video form. What follows is me opening and using the Vocal Assistant to quickly mix a vocal against stems.
Get started mixing vocals with Nectar Vocal Assistant
Harnessing the power of the Nectar Vocal Assistant has the potential to be a game-changer for anyone looking to elevate their vocal mixing game. With its intuitive interface, intelligent processing, and an array of customizable options, Nectar empowers both beginners and seasoned producers alike to achieve professional-grade vocal mixes.
