How to mix and master a song from start-to-finish
Learn how to take a rough mix to a finished track using mixing and mastering techniques in this complete guide.
Mixing and mastering a song involves balancing the levels of different instruments and vocals, which can be a challenging process to jump into. And if you’re new to all of this, a good ear, attention to detail, and intuitive plugins can help you ensure clarity and cohesion while maintaining the artistic intent of the track you’re mixing and mastering.
In this tutorial, we will be exploring how to achieve a professional-sounding track that translates well across various playback systems using the plugins in the Mix and Master Bundle Advanced.
How do you mix and master a song?
Mixing a song involves adjusting levels, EQ, panning, and adding effects to individual tracks to create a balanced and cohesive sound, while mastering polishes the final mix by optimizing loudness, EQ, and compression to ensure it translates well across all playback systems.
But it’s important to stress this now: no one can give you an exact prescription for how to do this work.
Even if I were Bruce Willis, and I went back in time to tell my younger self things like “this is how you mix a song from start to finish,” and “wow, you really look like Joseph Gordon Levitt,” it wouldn’t work. Why?
Four reasons:
- There is no ONE way to mix or master a song
- You’re always honing and changing your workflow
- This is a craft you can only really learn by doing
- Because learning this craft involves learning how to listen – which is so much harder than you think!
Learning this craft is a lengthy, experiential, and connective process: I can tell you to watch for muddiness in the low mids of a guitar track, but you’re not going to understand how to do that until you make your own mistakes.
All I can do is walk you through how I mix a song today. In doing so, I can provide helpful tips – lessons that you can hopefully metabolize as you set upon your own journey.
What do I need to mix and master music?
In a most streamlined sense, these are the things you need to mix and master music:
- A neutral listening environment that you know and trust, one that is as neutral as possible (i.e., a treated room, a pair of mastering-grade headphones, etc.)
- A playback/listening system that you know and trust – one that is as neutral as you can afford
- A pair of ears sensitive to the situation
- A willingness to learn, and to start over from scratch if necessary
- A medium to playback and edit music (in this case, a DAW such as Logic, Pro Tools, Reaper, etc)
- Tools to EQ, compress, and otherwise process the music – in this case, the iZotope Mix & Master Bundle Advanced
The difference between mixing and mastering
Even in the 21st century there’s a lot of confusion about the differences between mixing and mastering.
Mixing is the act of taking a whole bunch of instruments and massaging them into a single stereo file. Depending on the number of instruments in your song, you’re typically mixing 10 to 100 tracks down to a solitary stereo track.
Mastering is the act of finalizing this stereo track for mass distribution. Mastering entails ensuring the song plays well everywhere from car stereos to headphones. It also entails making the song competitively loud in contrast to other songs in the genre. If the song is part of an album or EP, the tune needs to work in that context. The whole record needs to flow correctly.
Mastering also involves fixing technical errors that might have gotten through the mix stage, as well adding metadata so the song can be tracked, and generating files appropriate for various distribution platforms (a DDP for CD, vinyl packages for vinyl releases, 48 kHz files for music videos, etc).
Mastering is not EQing a giant smile curve on your mix and slapping a limiter on the bus. It’s not submitting a file to some AI service that can’t tag your song, top it, tail it, or fix glitches. It is something that must be done by a human, especially if you, as a human, want to get paid for your work.
With that covered, let’s give some tips for how to mix and master a song from start to finish.
How to mix a song
You’ve gotten some tracks from a producer – or you’ve recorded everything yourself. What happens first?
1. The static mix
In the static mix, you set up a preliminary balance of all the tracks in a session – a balance achieved with level, panning, and nothing more.
The idea is to set yourself up for a smooth experience later down the line. You use this part of your time to cover the basics. Frequently, time spent in the static mix involves turning the volume of a track up or down, and placing it somewhere in the stereo field (i.e., left to right).
When working with multi-mic’d instruments, engineers also use polarity to their advantage. Say there are two mics on a kick drum. In a static mix, I would ascertain the best phase relationship between the two mics, always listening for the fullest, most robust sound when playing both tracks.
Sometimes the static mix is provided by the client. They just send you their session and you work on top of it. This happens a lot, and it’s the case with the mix we’ll be using below – a boisterous bedroom pop tune called "Gimme Power" by Glorian.
2. Make each instrument group sound good in the context of the others
Here’s an old meme repurposed for this article:
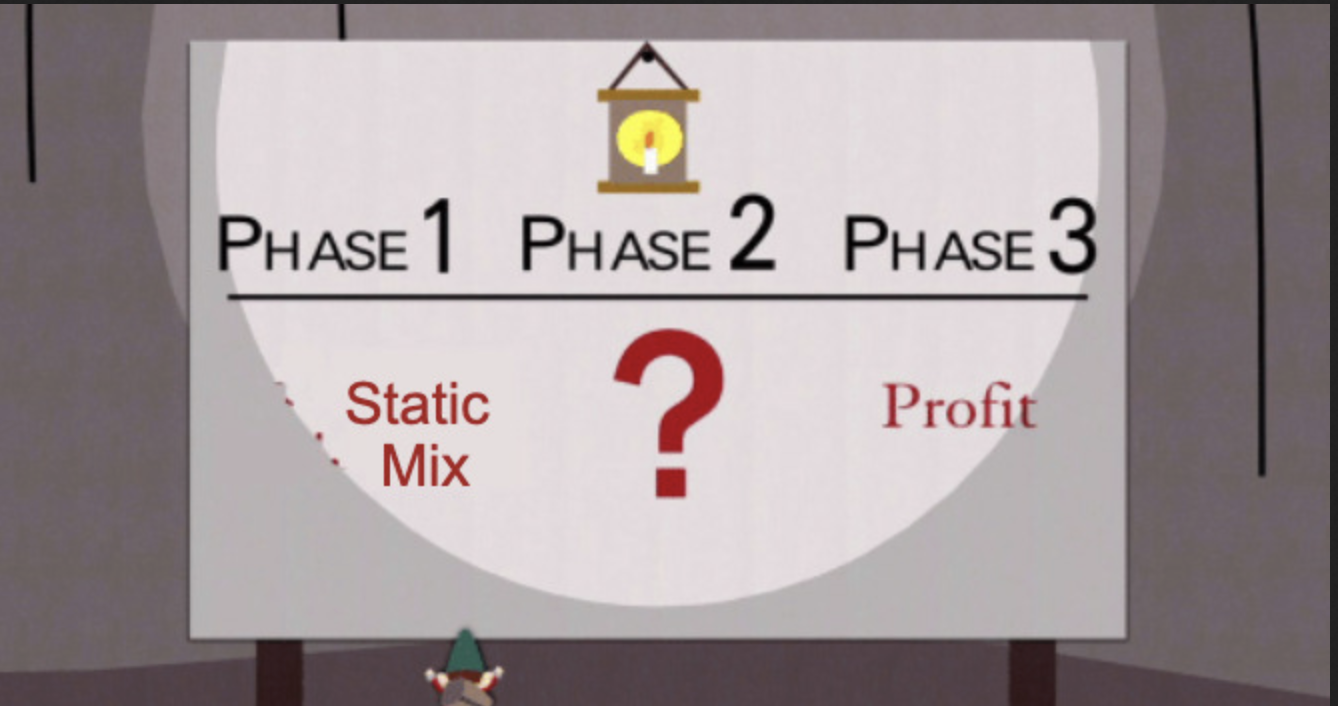
Yes, phase 2 is very much a question mark, because everyone does it differently, and people refine their process as they progress.
The objective is clear, however: you spend time with each instrument group to make it sound as good as it can in context, and then you tweak the mix as a whole as necessary.
Here’s a rundown of how it might go.
Drums and bass
I often start with the drums and the bass at the same time and work from there. Let’s take this static mix, for example:
Let’s spotlight the drums and bass by bringing down the volume on the instruments.
I don’t mute the instruments and vocals. I want them to be playing in the back of my subconscious. By lowering the faders, I can focus mostly on the drums without losing perspective.
Here I’m noticing I want more crack on my snare and kick elements. I can use the Transient Shaper from


Neutron 5
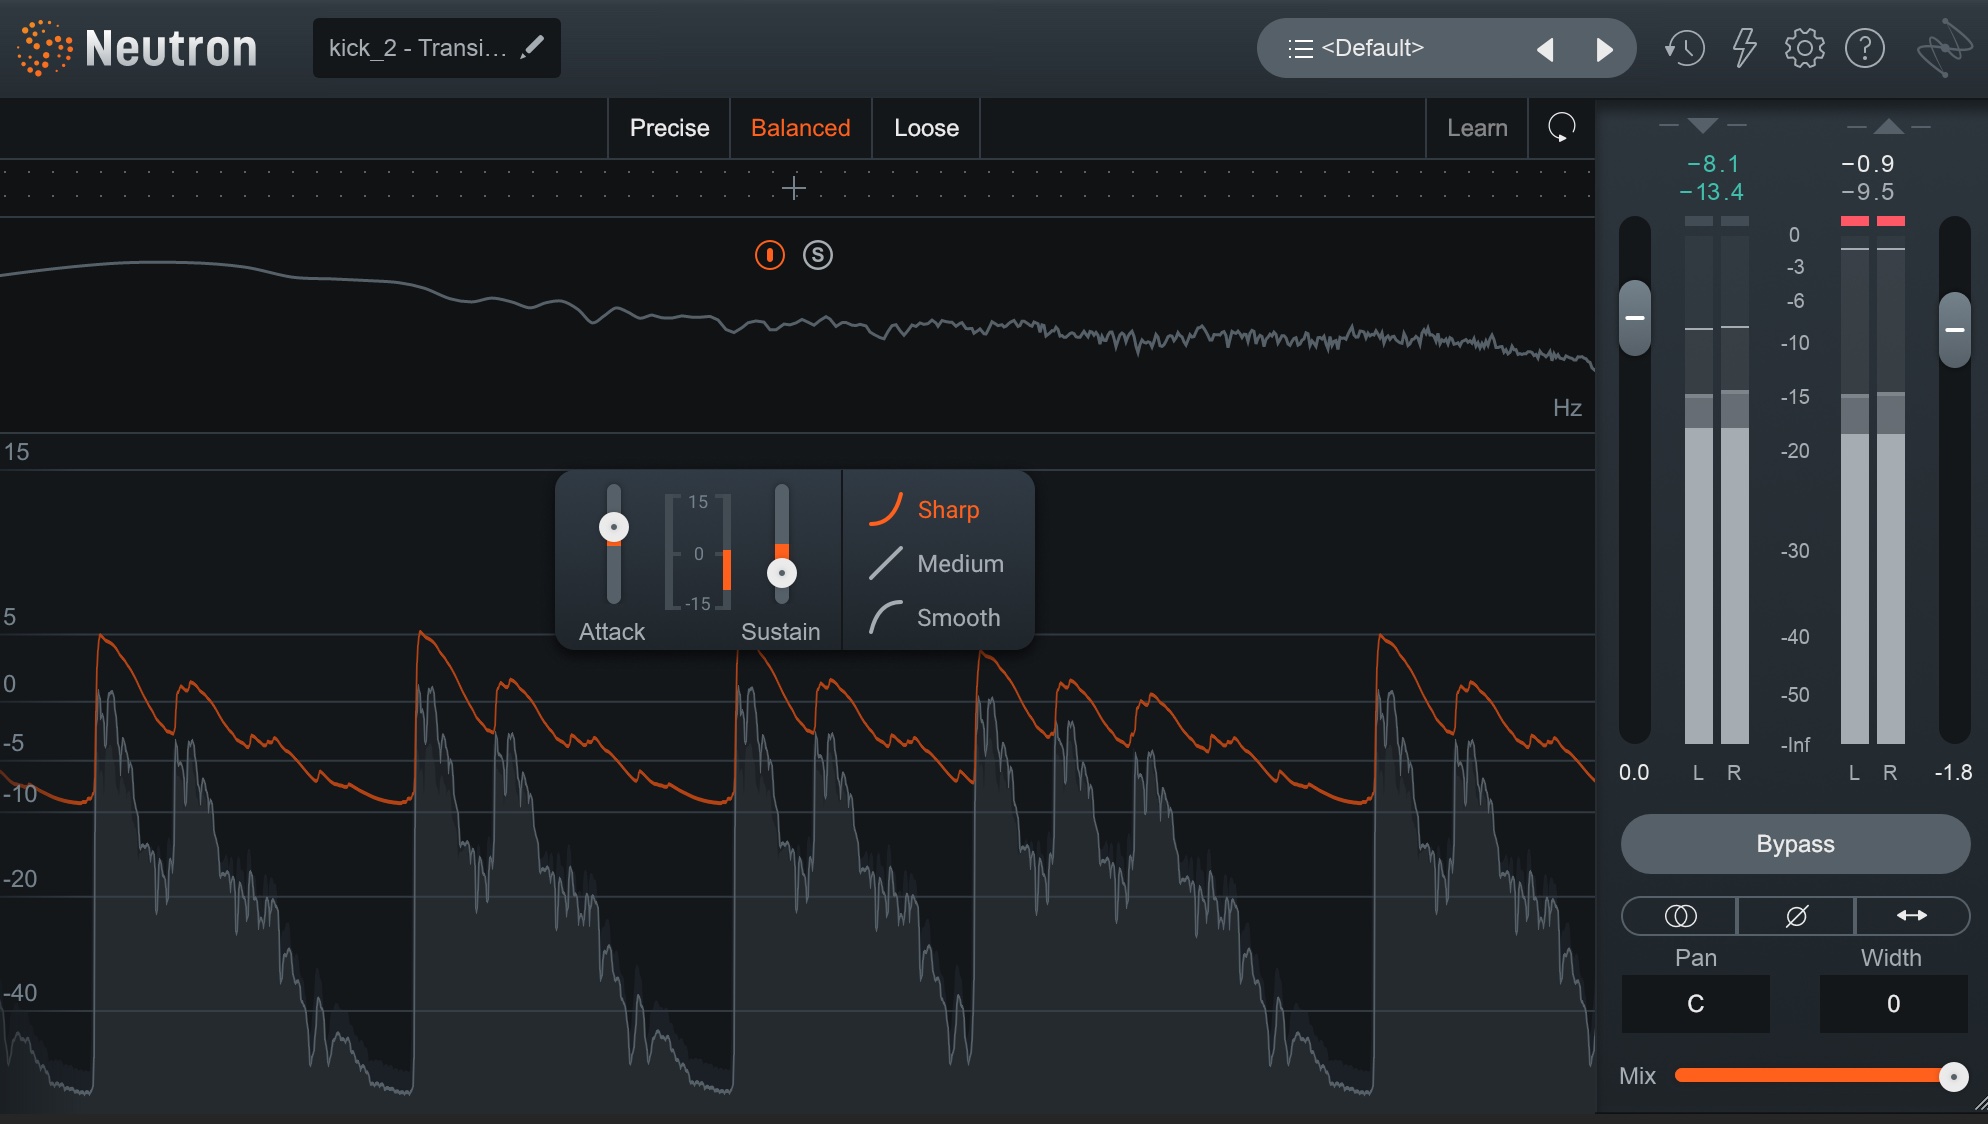
Neutron Transient Shaper module

Transient Shaper on snare
I also want to bring down the high sizzle on the drum loop that occurs halfway through – though I don’t want to mess with the transients. I just want to curb the brittleness on the sustaining ride parts. I’ll use the


Ozone Advanced
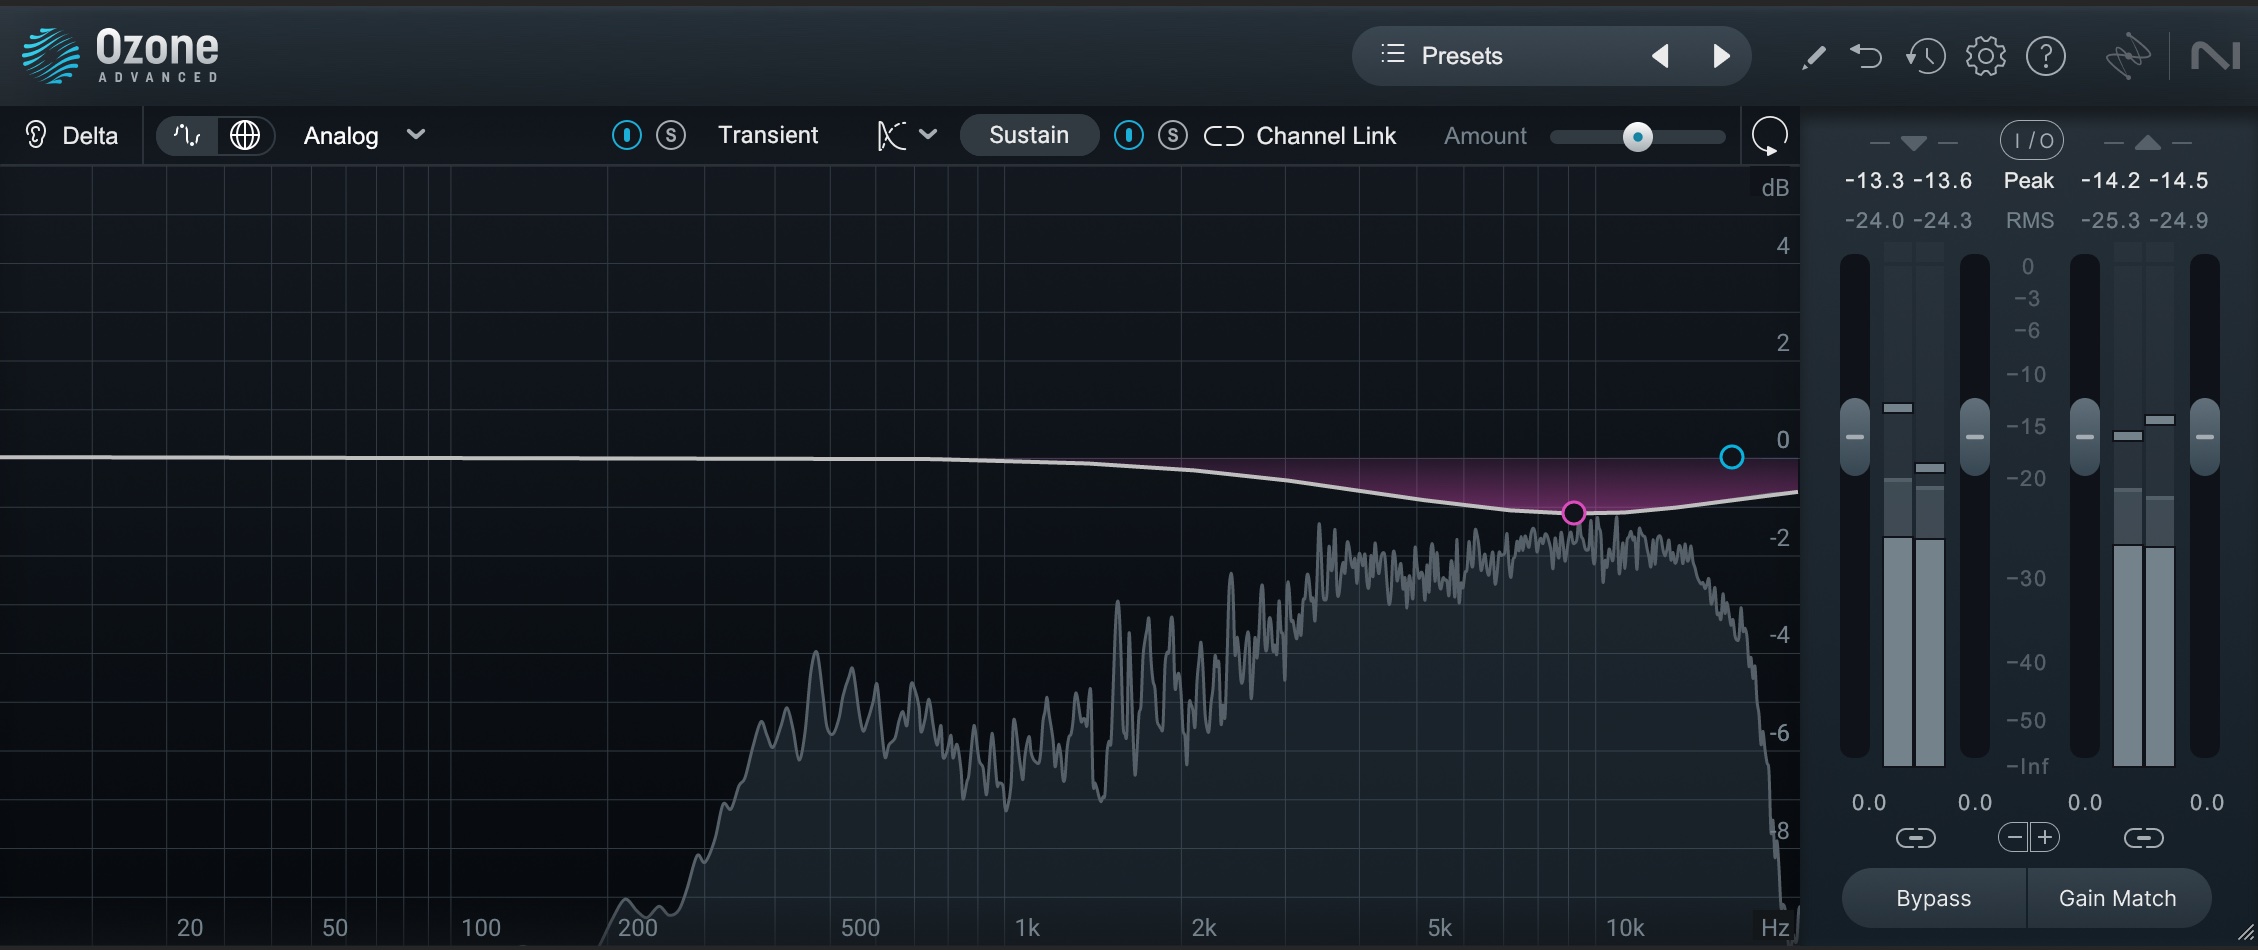
Ozone Transient/Sustain EQ on cymbals
I’ve achieved what I want on drums for now, so I move onto the bass – which, in this track, is an electric piano.
Here’s where things start to get fun. First I’m going to copy the electric piano to a new track, and then I’m going to shift it down an octave with a stock DAW plugin (all DAWs have a pitch shifter.) Next, I’m going to use Ozone’s linear phase-EQ to low pass everything below 100, doing so with a steep slope.
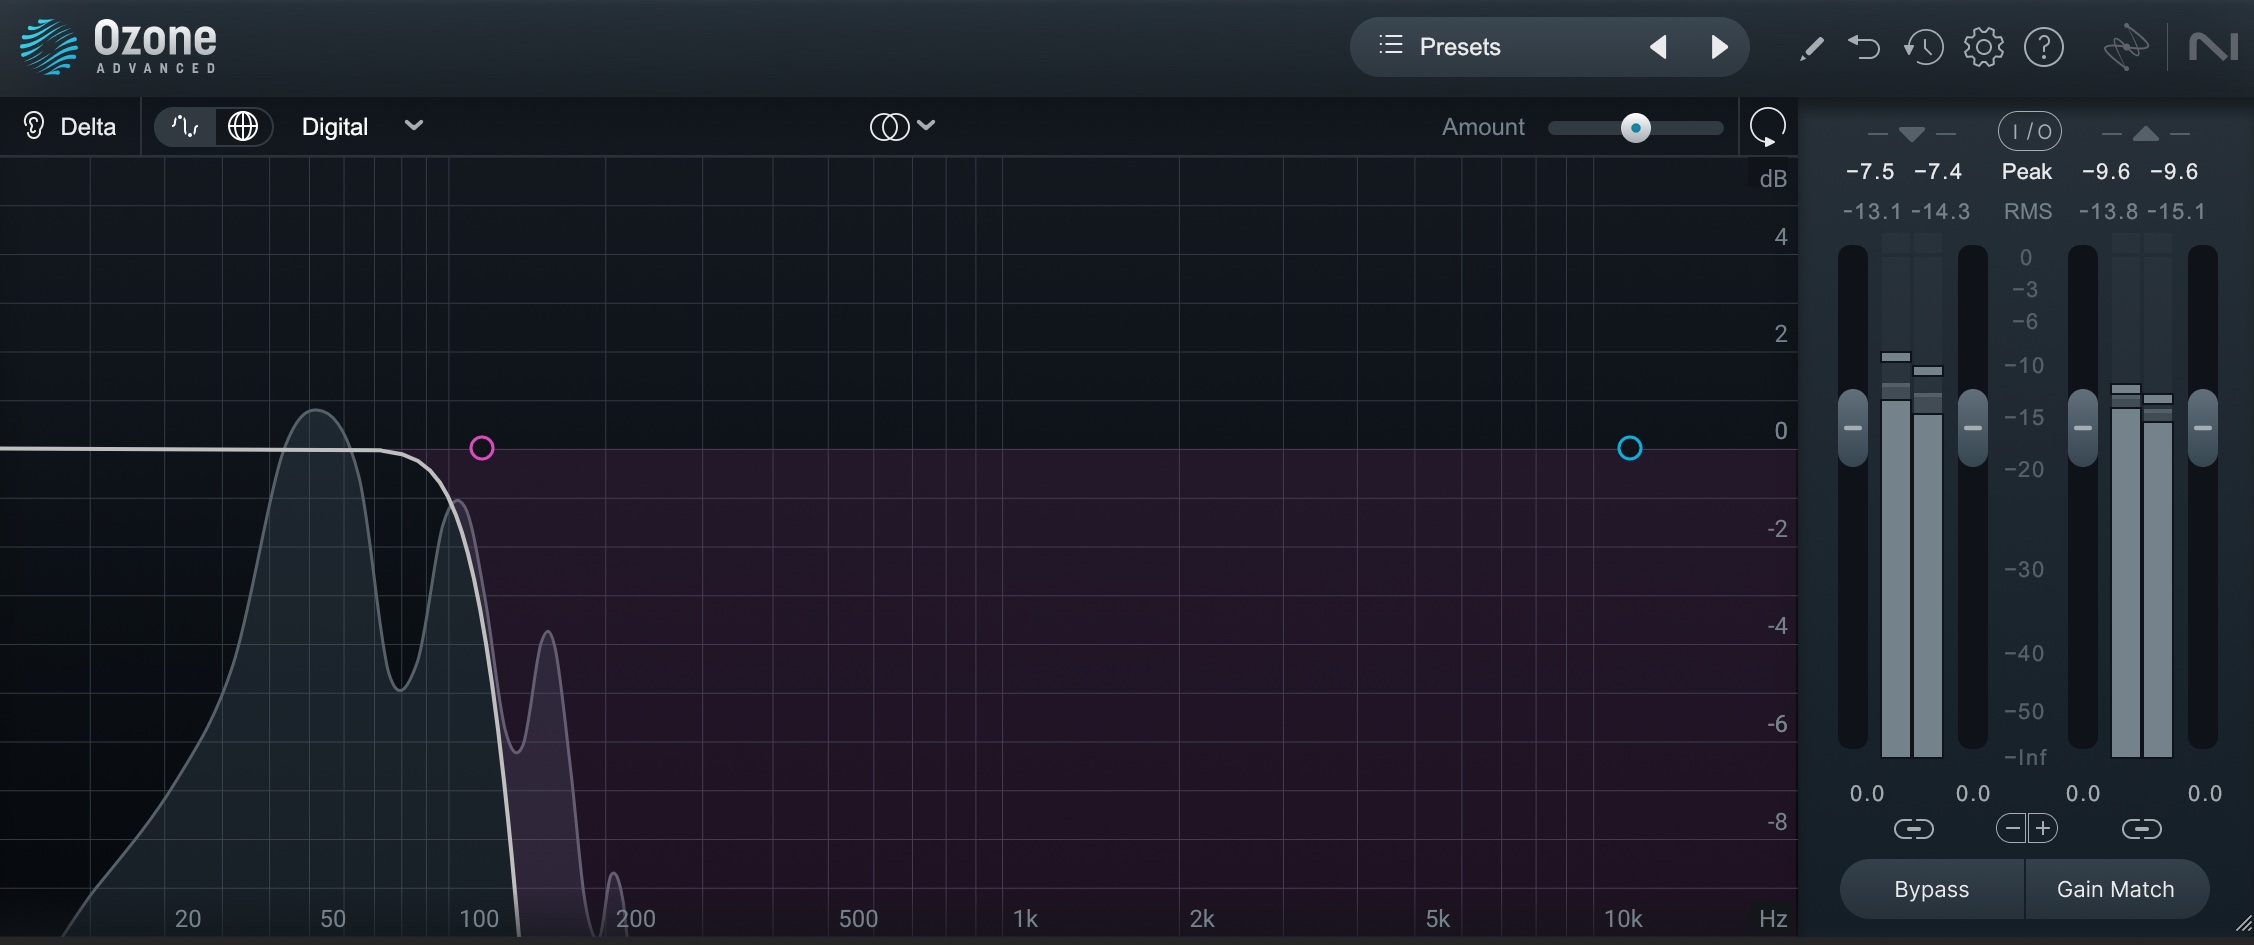
Fake sine bass
This will get me more bass out of the part. I’ll blend it in with the original signal alongside the drums.
Listening to the drums and bass at the same time, I can tell it needs shaping. I’ll add some Vintage EQ to the bass bus to make it fit with the drums more.

Ozone Vintage EQ on bass
Next, I’ll add Neutron’s compressor to the bass part, sidechaining the bass to the kick so it ducks a little.

Sidechain compression on bass
Harmonic Instruments
Now I’ll mute my drums (just something I like to do) and raise the level of the harmonic instruments back to where they were. I’ll keep the vocals -18 dB down so I don’t lose track of them. Still, I want to pay closer attention to the instruments right.
I’ve got a distorted electric piano and a distorted electric guitar going. On the electric piano, I want to get some of that clickiness out of the high register, which I’ll do with an EQ and a multiband compressor.
I’ll also use a broadband compressor with a bandpass on its sidechain to help bring down those loud jumpy bits that come in halfway through.
For the guitar, I’ll add some ozone exciter for thickness, and some vintage EQ for subtle sonic sculpting. I’ll follow this with transient/sustain EQ, scooping out some low-mids in the sustain material to help tighten the guitars, and adding a bit towards the top on the transients side to emphasize pick attack:
Now let’s bring in the drums again:
I now tweak things a little, since I have all the instruments going. I add a little 2 kHz to the guitars to help them cut through more. I also take out that broadband compressor on the keys – I find I neither want it or need it. I compare what I’ve done to the static mix, and, satisfied with what I have, I move on to vocals.
Vocals
I’m going to start with the backgrounds first, because they feel a bit alone out there on the left.
The artist wants them out there on the left – and I need to honor that – but I can still ground them a little with subtle symmetry. I decide to send the background vocal to a buss, and put


Nectar 3 Plus
We’re still leaning to the left, but it feels a bit more grounded.
Taking a listen to the lead vocal, I notice it’s a bit full in the upper mids, and a bit heavy on the sibilance. Building on top of this is going to be hard – and thankfully, not necessary, because the client handed me a Logic session to work from. The vocals already have some plugin processing.
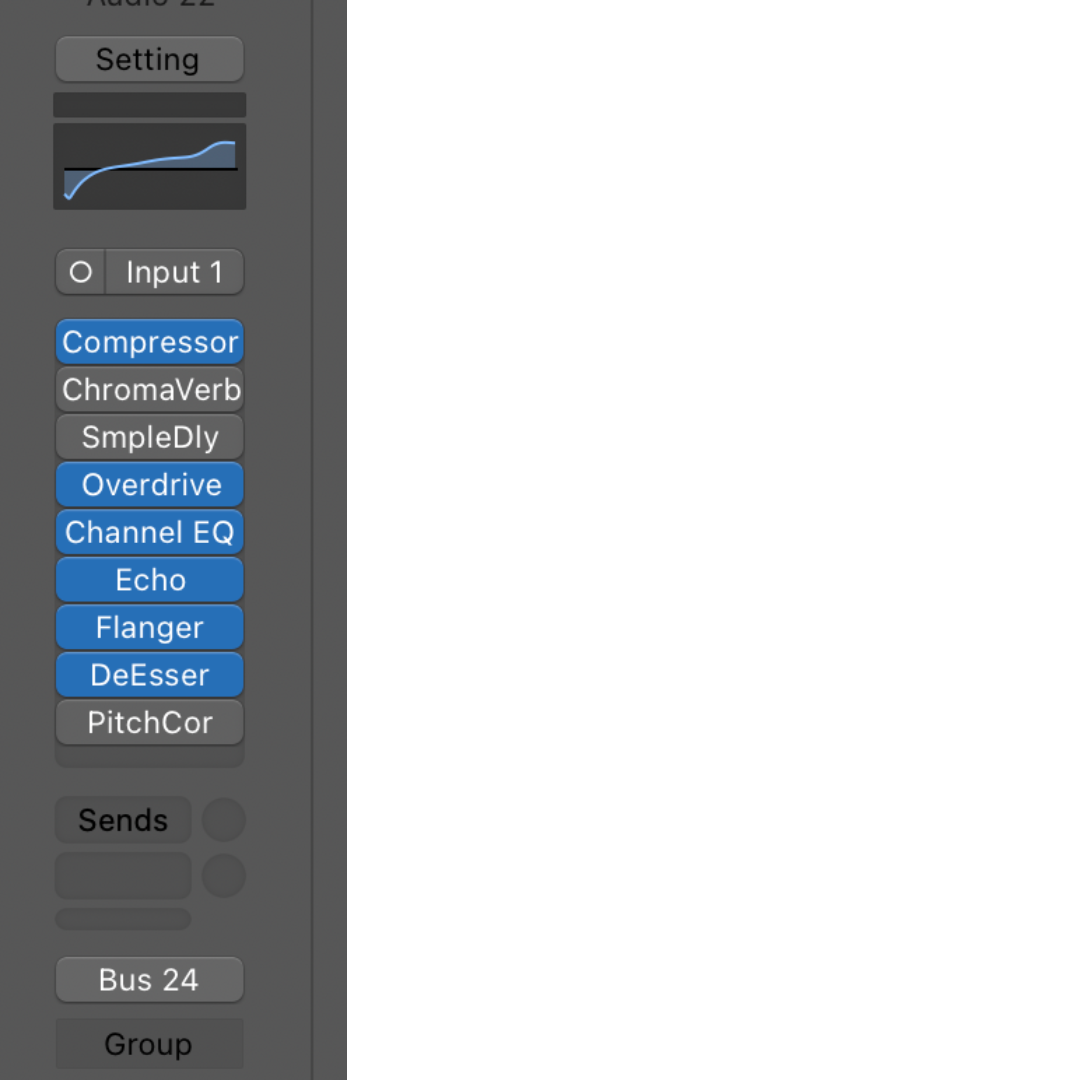
Vocal processing
The compressor hitting before the EQ is what’s causing the harshness in the highs, so off it goes. I also don’t want to use the saturator before I apply my own compression. We’ll keep the EQ, because it was integral to how the producer came up with his flanging and echo effects, which I don’t want to lose.
Here’s a quick video demonstrating what we end up with:
As you noticed towards the end, I did a level-matched comparison between the rough mix and the mix as it is now. It sounds like an improvement. Here, I stop and give my ears a break.
3. Take a break and enact notes
A break is crucial at this point. Then we can come back and tweak the whole thing with fresh ears. This is also the time to bring in reference tracks, and use plugins like


Tonal Balance Control 2

Tonal Balance Control
To keep myself from going insane, I limit myself to two tweaking passes before I send off to the client. Here’s two videos showing off two different times I came back to the mix.
How to master a song
If you’re mastering your own song, the first thing you should do is take a very long break from hearing it so you can come back with fresh ears. A week is good. Ten years is better. Truly, it’s better to be exceedingly seasoned at mixing before you attempt mastering your own mix in any professional context.
I’m not saying don’t do it – you definitely should, keeping the results to yourself until you can honestly say you prefer your own masters to whomever the client hired.
If you’re not mastering your own material, and you’re just starting out, we’ve got plenty of material on this website to help you learn about the process. Here’s basically how it works:
- Get the loudness first
- Make sure you’re not making the song worse by making it louder
- Make it sound better than it did before
- Make sure you know it will translate across different playback systems
- Take care of all the boring, unsexy stuff no one covers online (metadata tagging, fixing glitches, sequencing, etc)
- QC the files to make sure they’re free of errors
Sounds simple, doesn’t it? Well no, it’s not. It’s unbelievably hard. Luckily, tools like


Ozone Advanced
All I can do is show you how I mastered this mix today. Here goes.
And if you’re looking for more tutorials on mastering, check out our mastering from start-to-finish guide, as well as our quick tips on mastering with Ozone.
Start mixing and mastering your music
Mixing and mastering your own music is no easy task, but it is rewarding – and with tools from iZotope, it’s easier to do it yourself than it ever has been before. Remember, there’s no panacea here. Each song is a unique puzzle that demands its own solutions.

