How to Mix in Logic Pro X: Quick Start Tutorial
Learn how get your mix session up and running with our quick start tutorial on using Logic Pro X for mixing. From setting up your session to learning important key commands, we'll guide you through every step of the process.
Logic Pro X is a powerful DAW that offers a wide range of features for mixing and audio editing. In this Logic Pro tutorial for beginners, we will guide you through the process of configuring the DAW to optimize your workflow and ensure that you have all the necessary tools and settings in place for a successful mixing session. We will cover topics such as setting up your Logic Pro session, configuring your track layout, and adjusting the software's preferences to suit your needs.
By the end of this guide, you will have a solid understanding of how to set up Logic Pro for mixing music and be ready to dive into the creative process of mixing your tracks.
Bring your Logic Pro X sessions to the next level with powerful iZotope mixing and mastering plug-ins including


Neutron


RX 11 Advanced


Ozone Advanced
1. Adjust Logic Pro X settings on startup
The first step in Logic Pro X mixing happens when you first open the DAW. It will take some time to complete its initial load and it will ask you if you want to download additional content, such as Apple loops and instrument banks. Whether you do so or not is up to you. I do advise, however, that you address the following menu item straightaway:
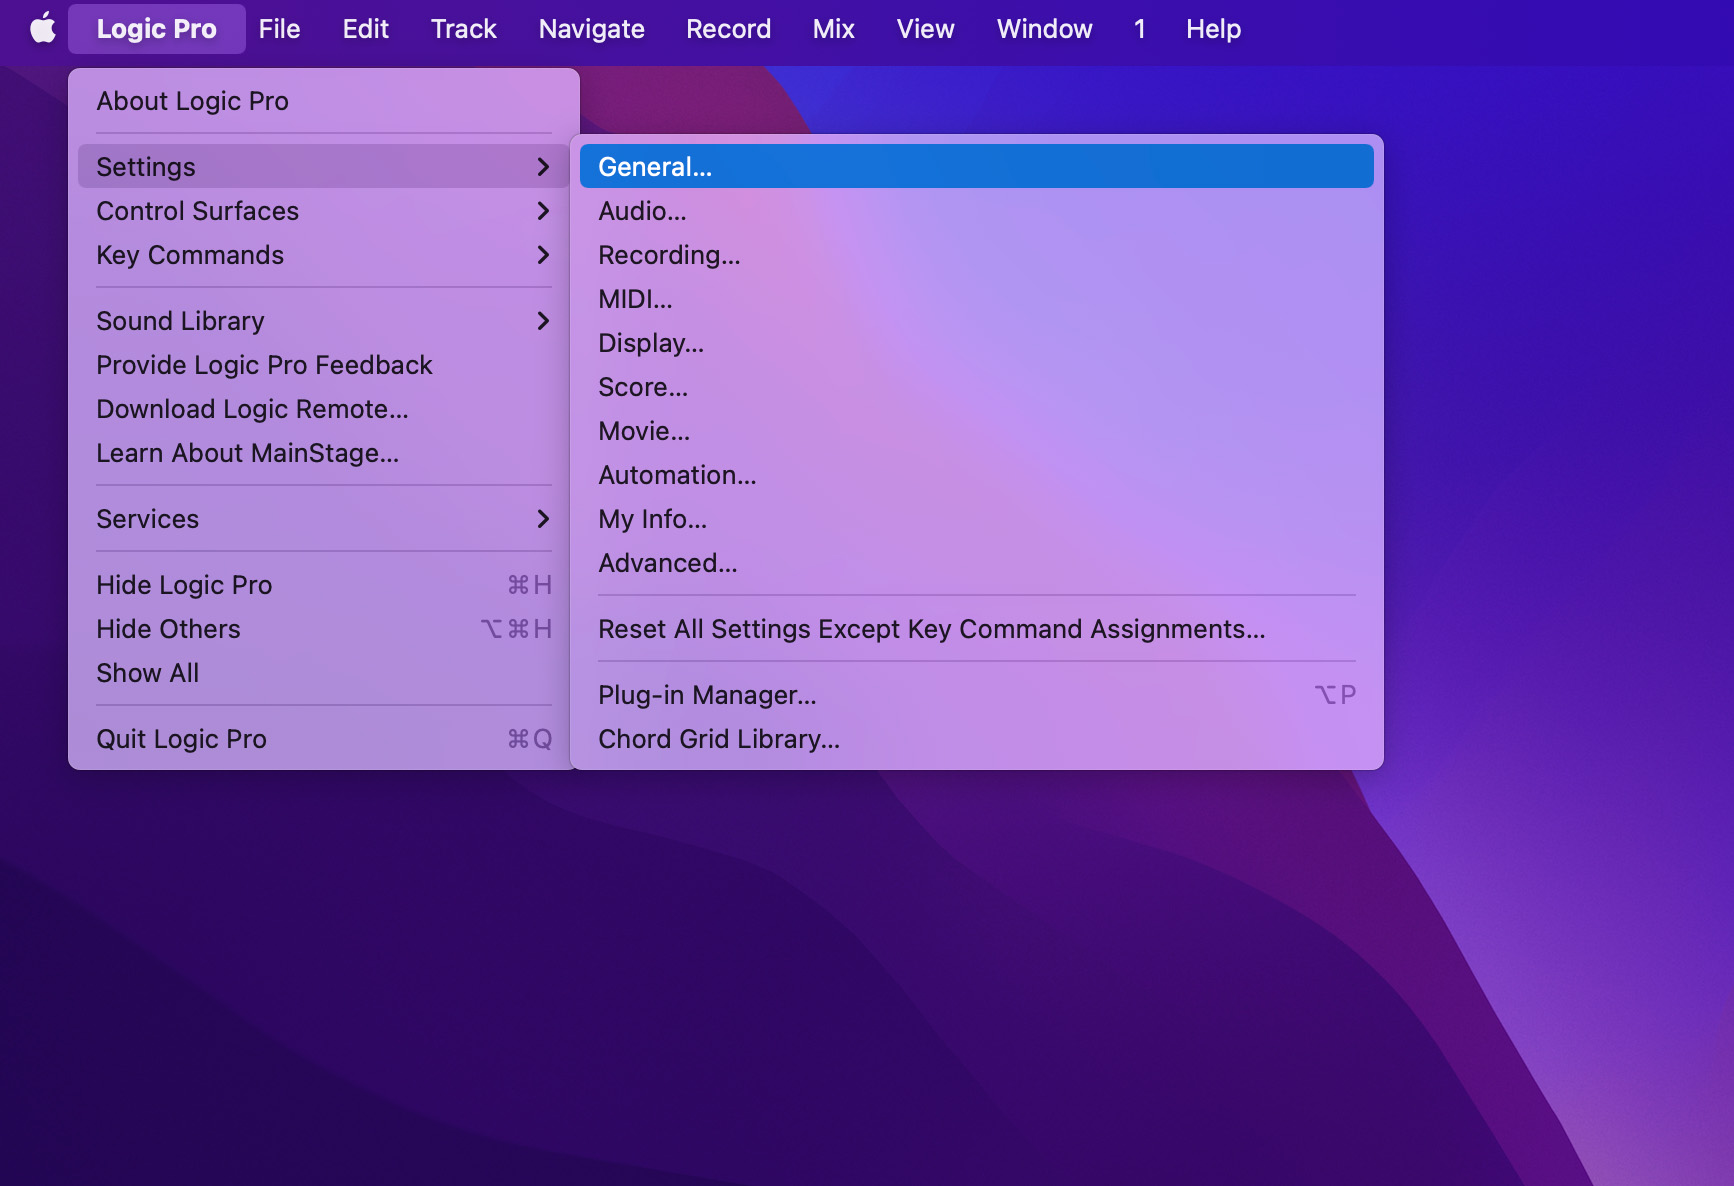
Logic pro X general settings
Once having clicked into the settings menu, tab over to the advanced window, pictured here.
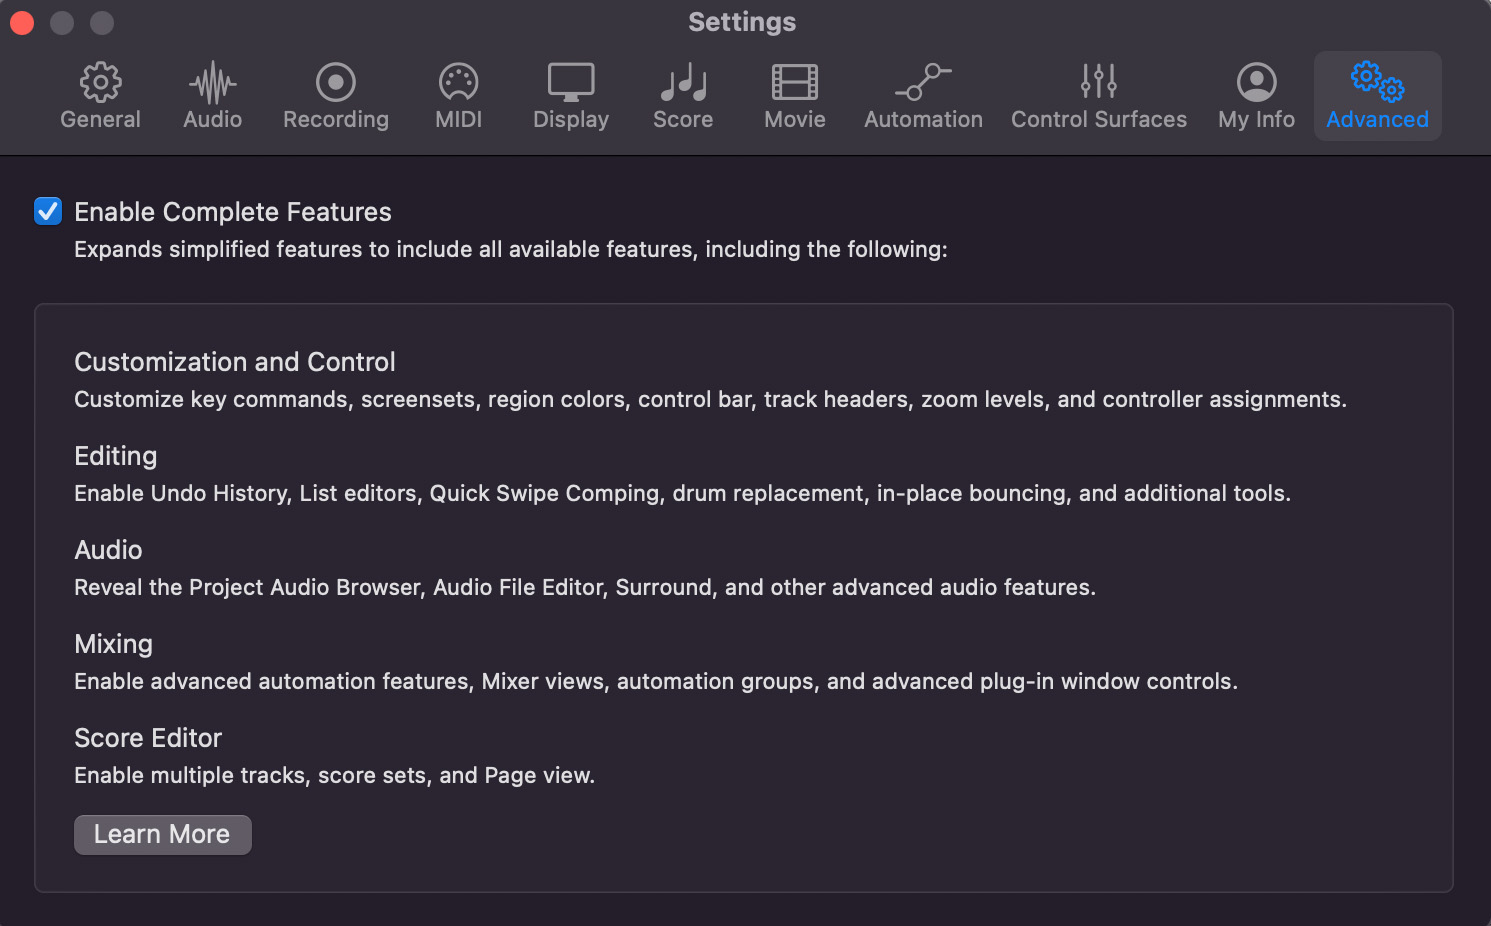
Logic settings advanced tab
By default, complete features are set to “off.” Turn them on so you can take full advantage of Logic Pro. You can think of it this way; this option puts the “pro” in Logic Pro.
2. Open a new session
Logic gives you several possibilities for opening new sessions, accessible again in the settings tab.
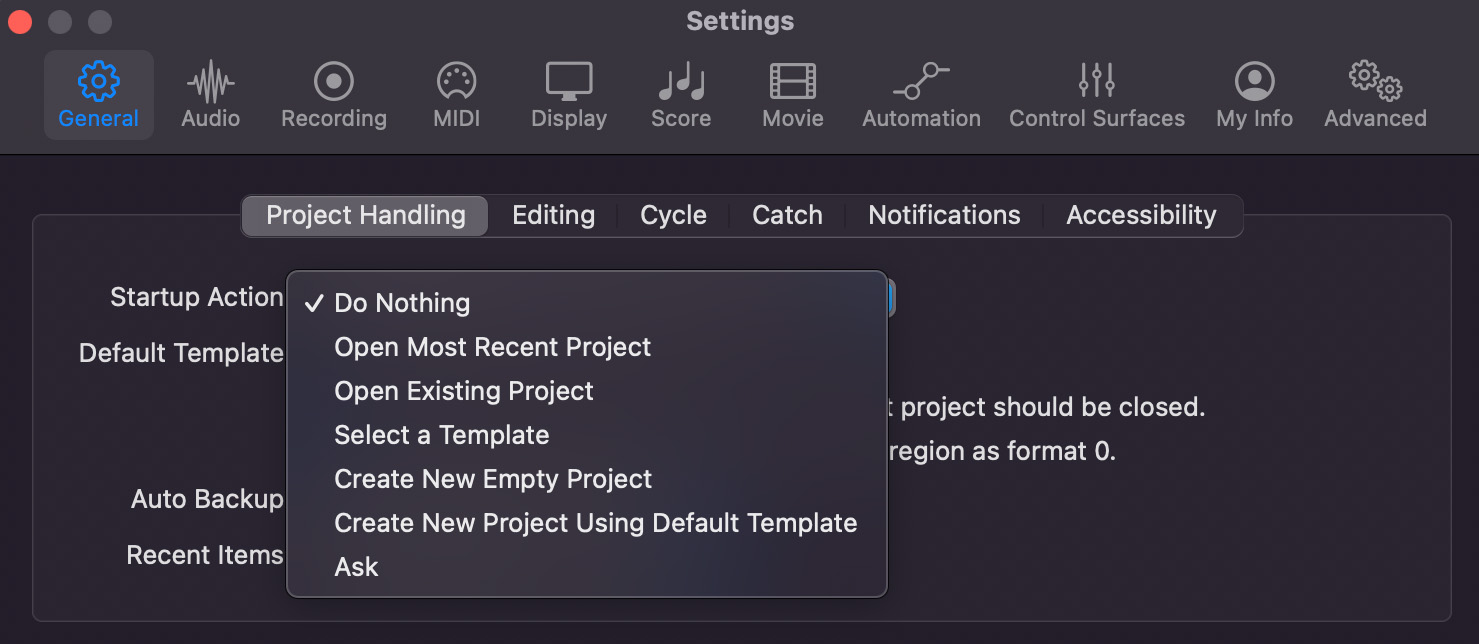
Options for opening a new session in Logic
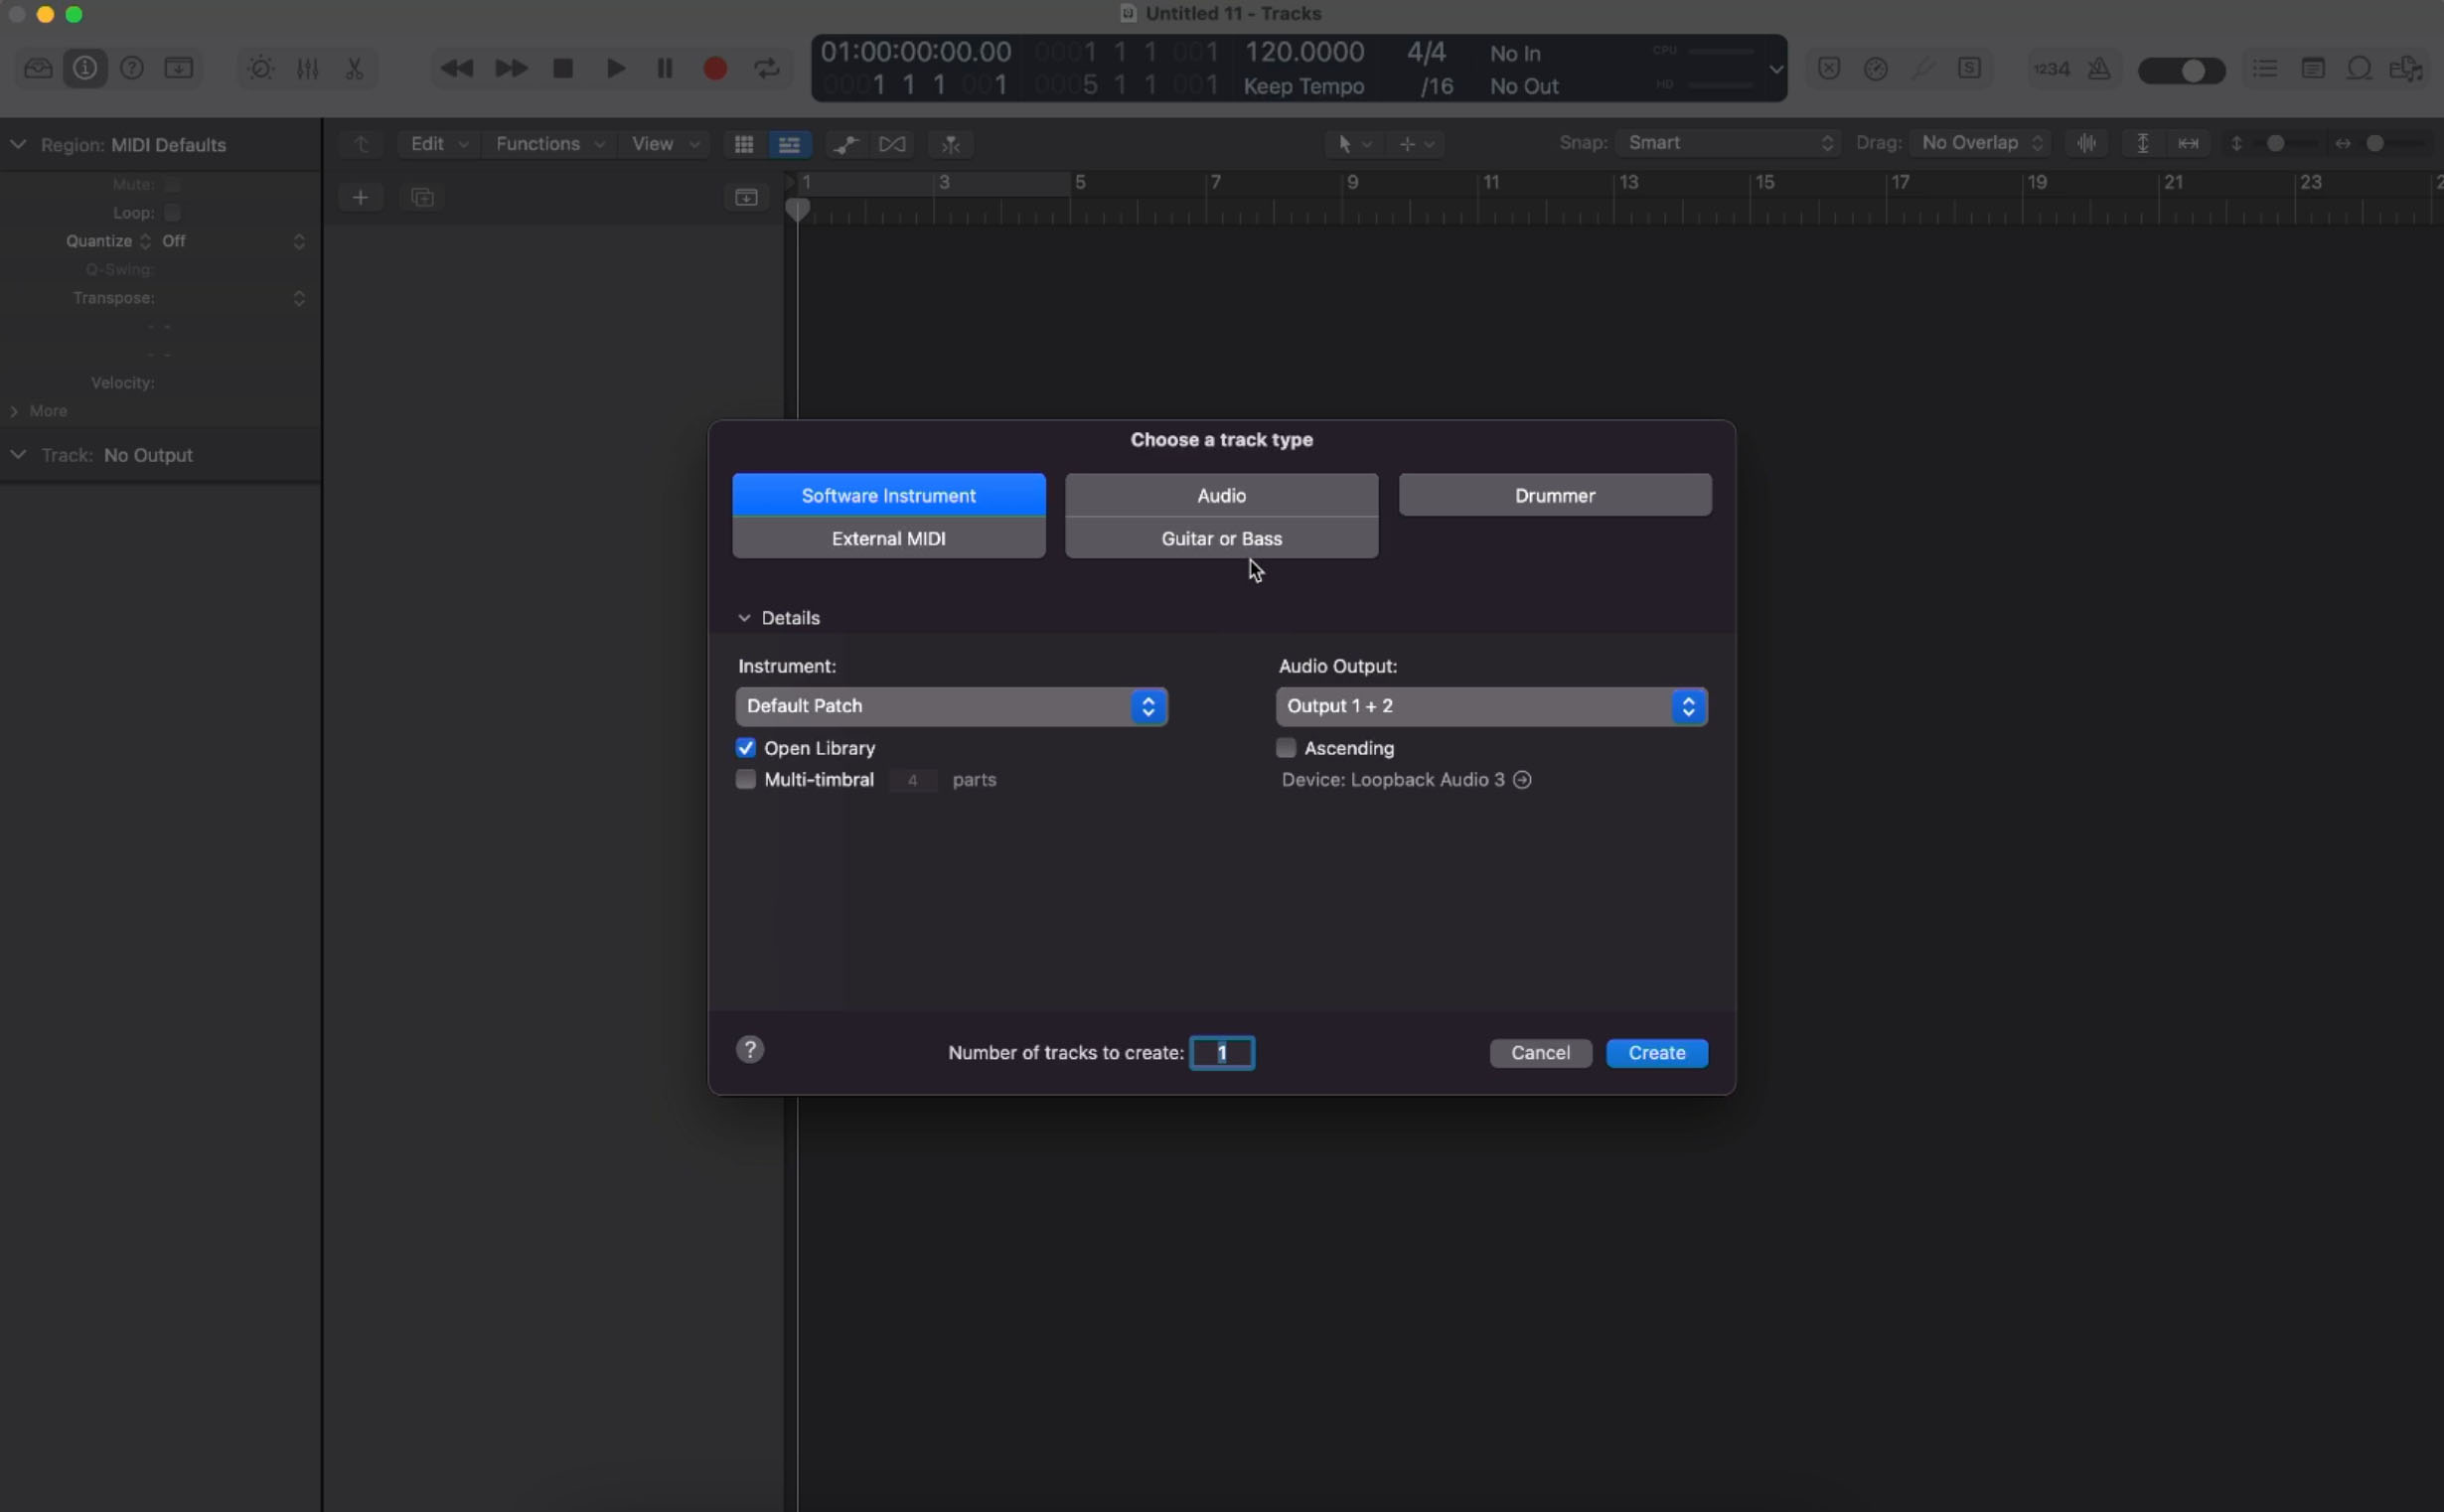
I have mine set to “do nothing,” as shown. So when I open a new Logic project, this allows me to choose a track type, the input details, and the audio output as shown in the video below.
There are a few ways to go about starting a project in Logic Pro. You can pull up empty project options that include the tempo, key signature, time signature, input and output device, sample rate and frame rate, and spatial audio settings.
Logic also has a set of templates available to you when you select “Project Templates” that can be a great place for getting started. These include templates called “hip hop,” “electronic,” “songwriter,” and more.
3. Understand the Arrange window
This is the default window you will see in Logic Pro after opening a new project.
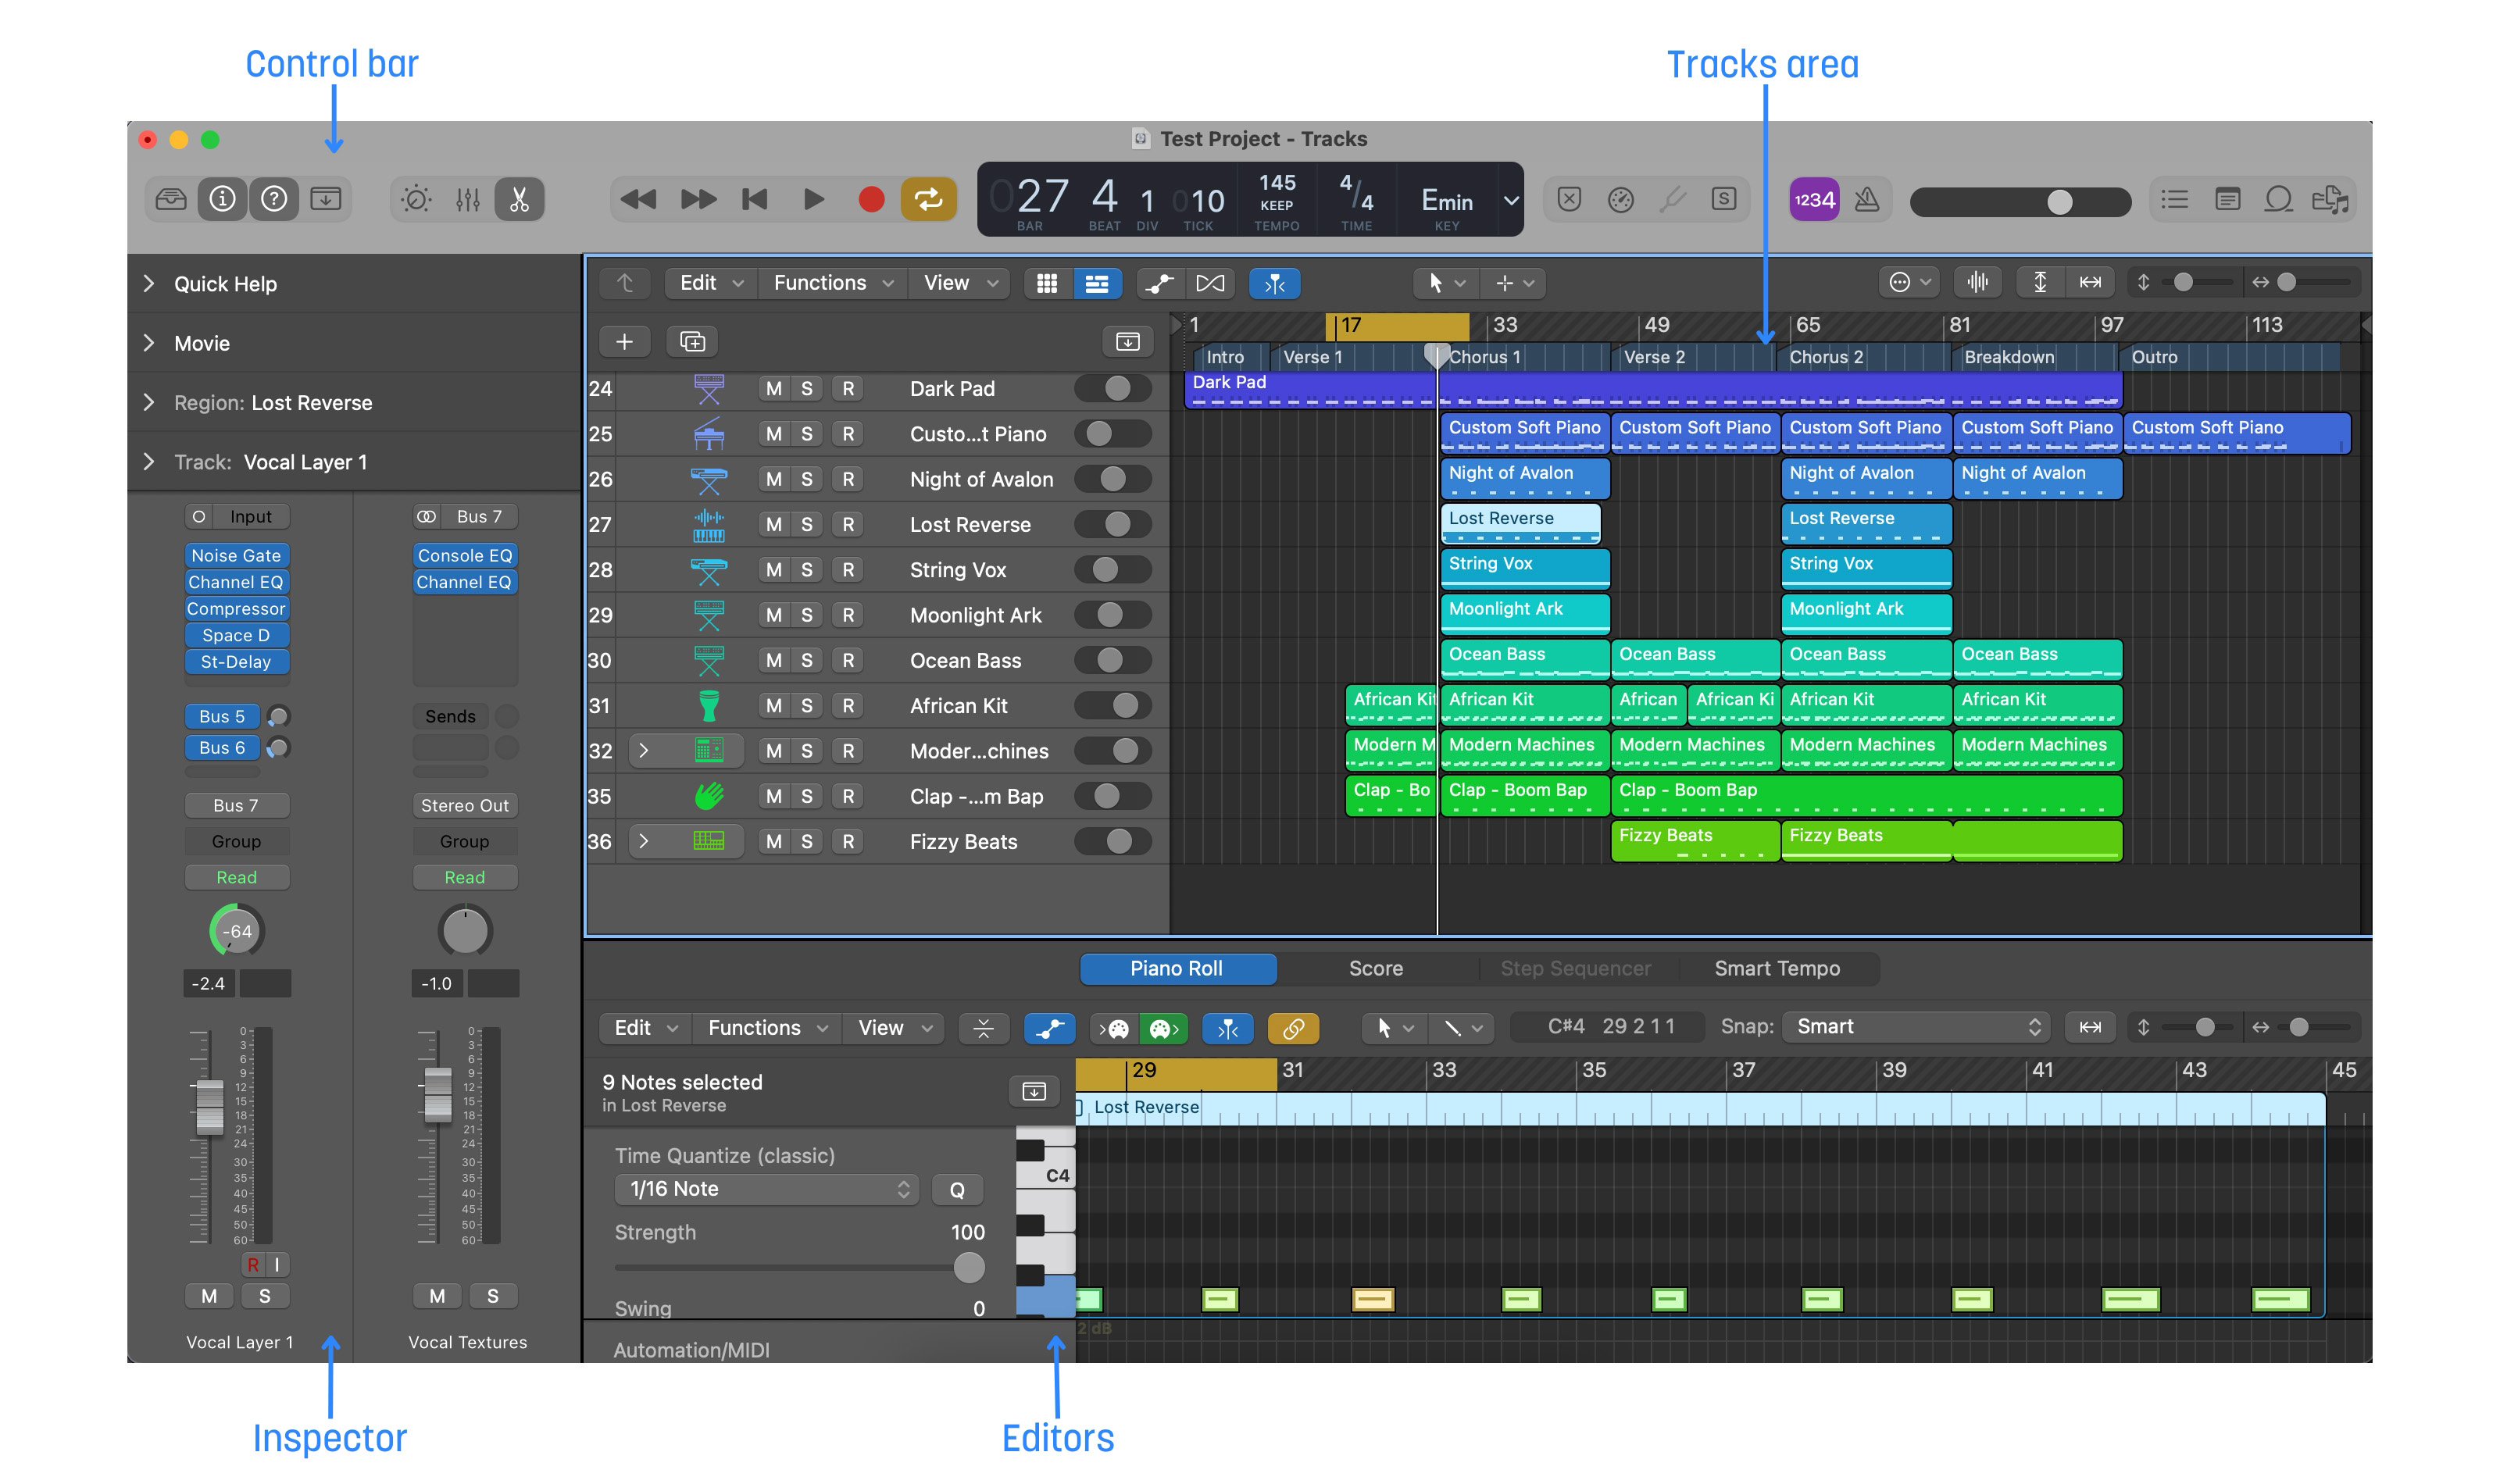
Logic Pro X Arrange window
It’s called alternately the “Arrange window” or the “Main window,” and it’s where you do the majority of your conventional editing. From here, getting around is pretty easy, as demonstrated in this video.
Learn more about the interface below:
Tracks area: This is where audio and MIDI tracks are displayed and can be edited. It is located in the main window of the software and is where you can add, delete, and arrange tracks, as well as edit the audio and MIDI data within them. The Tracks area also includes the Track Inspector, which provides access to various track settings and parameters.
Control bar: The control bar is the horizontal bar located at the top of the main window that provides various controls and options for the software. It includes buttons for common tasks such as saving, opening, and creating new projects, as well as buttons for transport controls, like play, stop, record, and loop. Additionally, the Control Bar includes a display for the current time and tempo, and buttons for accessing the mixer and other windows.
Toolbar: Toolbar is a horizontal bar located at the top of the main window, below the Control Bar. It contains icons for various tools and functions that are used for editing audio and MIDI data within tracks.
Inspector: The Inspector is a window that provides access to various settings and parameters for the selected track or object. When a track is selected in the Tracks area, the Inspector displays information and controls for that track, such as volume, panning, and effects.
Smart Controls: Smart Controls allow you to quickly and easily control various parameters of a plug-in or software instrument on a track. Smart Controls provide a set of knobs, sliders, and other controls that can be customized to control specific parameters of a plug-in or instrument.
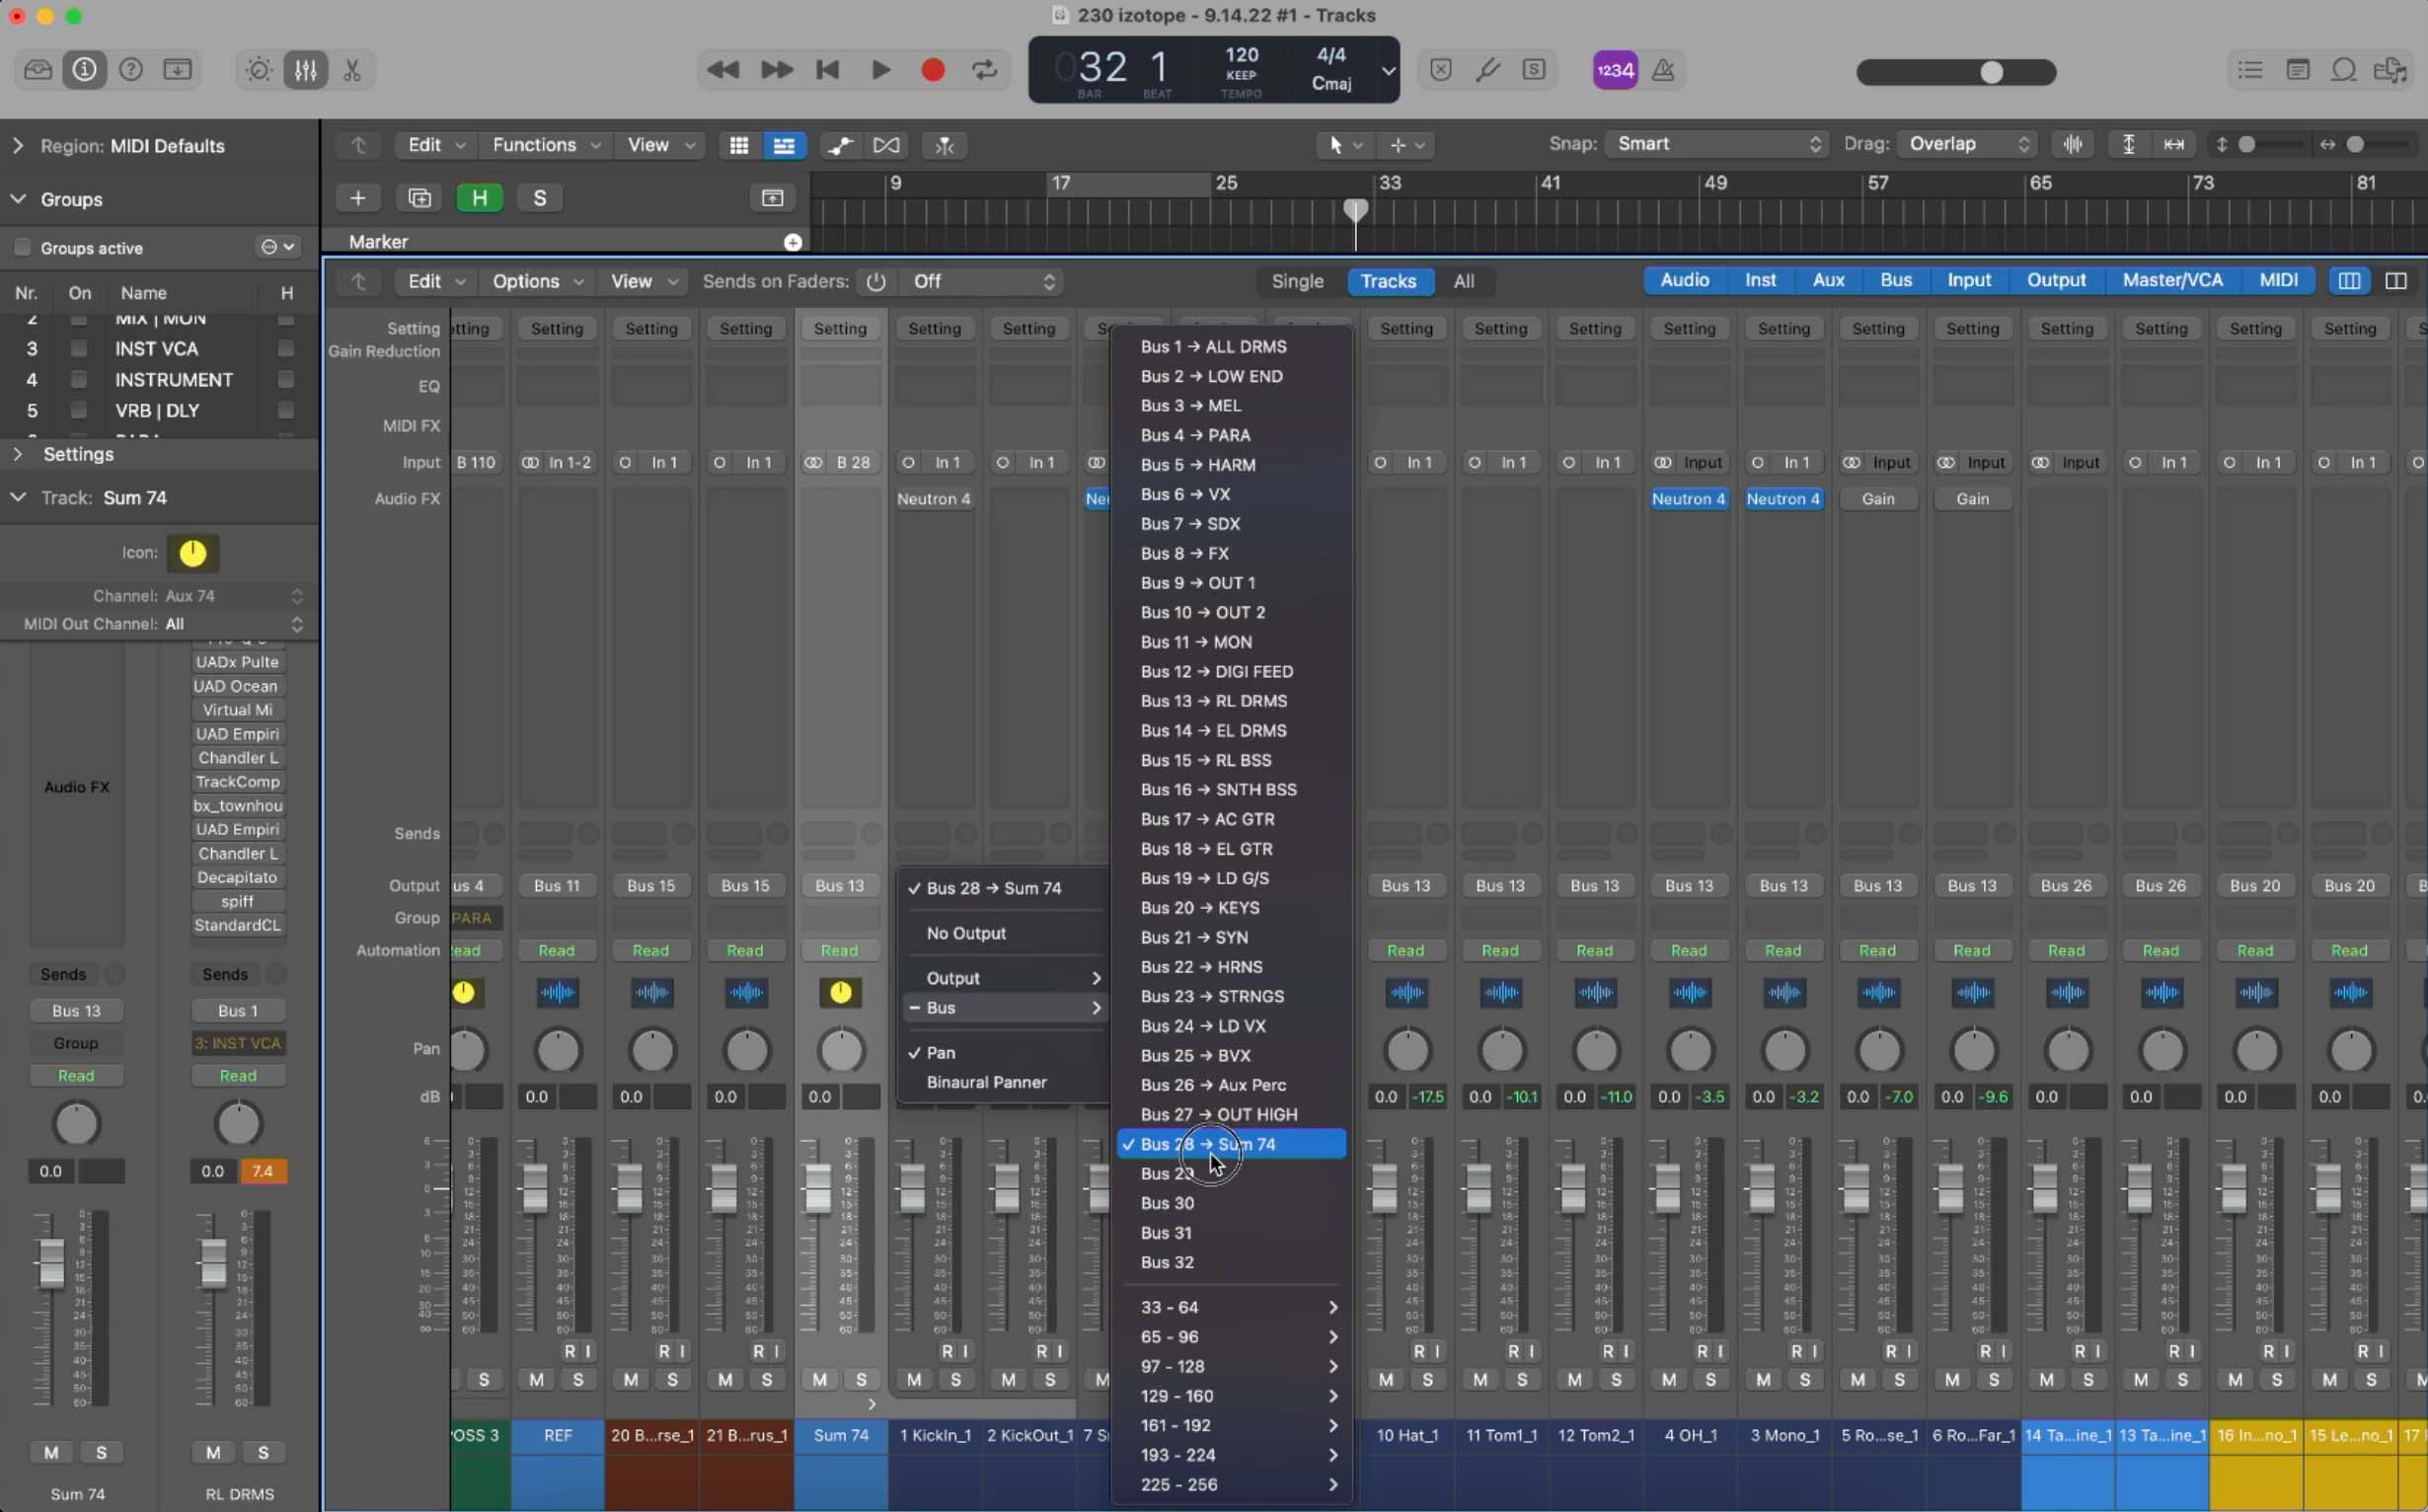
Mixer: The Mixer is a window that allows you to adjust the levels, panning, and other audio settings for each track in a project. It provides a visual representation of each track as a channel strip, with controls for adjusting the volume, panning, and sends to effects or busses. The Mixer can be accessed by clicking on the Mixer button in the Control Bar or by using the keyboard shortcut Command+2.
Editors: Editors are windows that provide different views and ways of editing audio and MIDI data within tracks. There are several different editors available in Logic Pro, each with its own unique set of tools and functions, including the Piano Roll Editor, the Score Editor, the Event List Editor, the Sample Editor, the Hyper Editor, and the Step Editor.
Browsers: The various browsers let you select Apple loops from the library as well as view audio files in your project, add audio and movie files from the Media Browser, and access media from connected storage devices.
Notepad: There's also a notepad that allows you to create project and track notes.
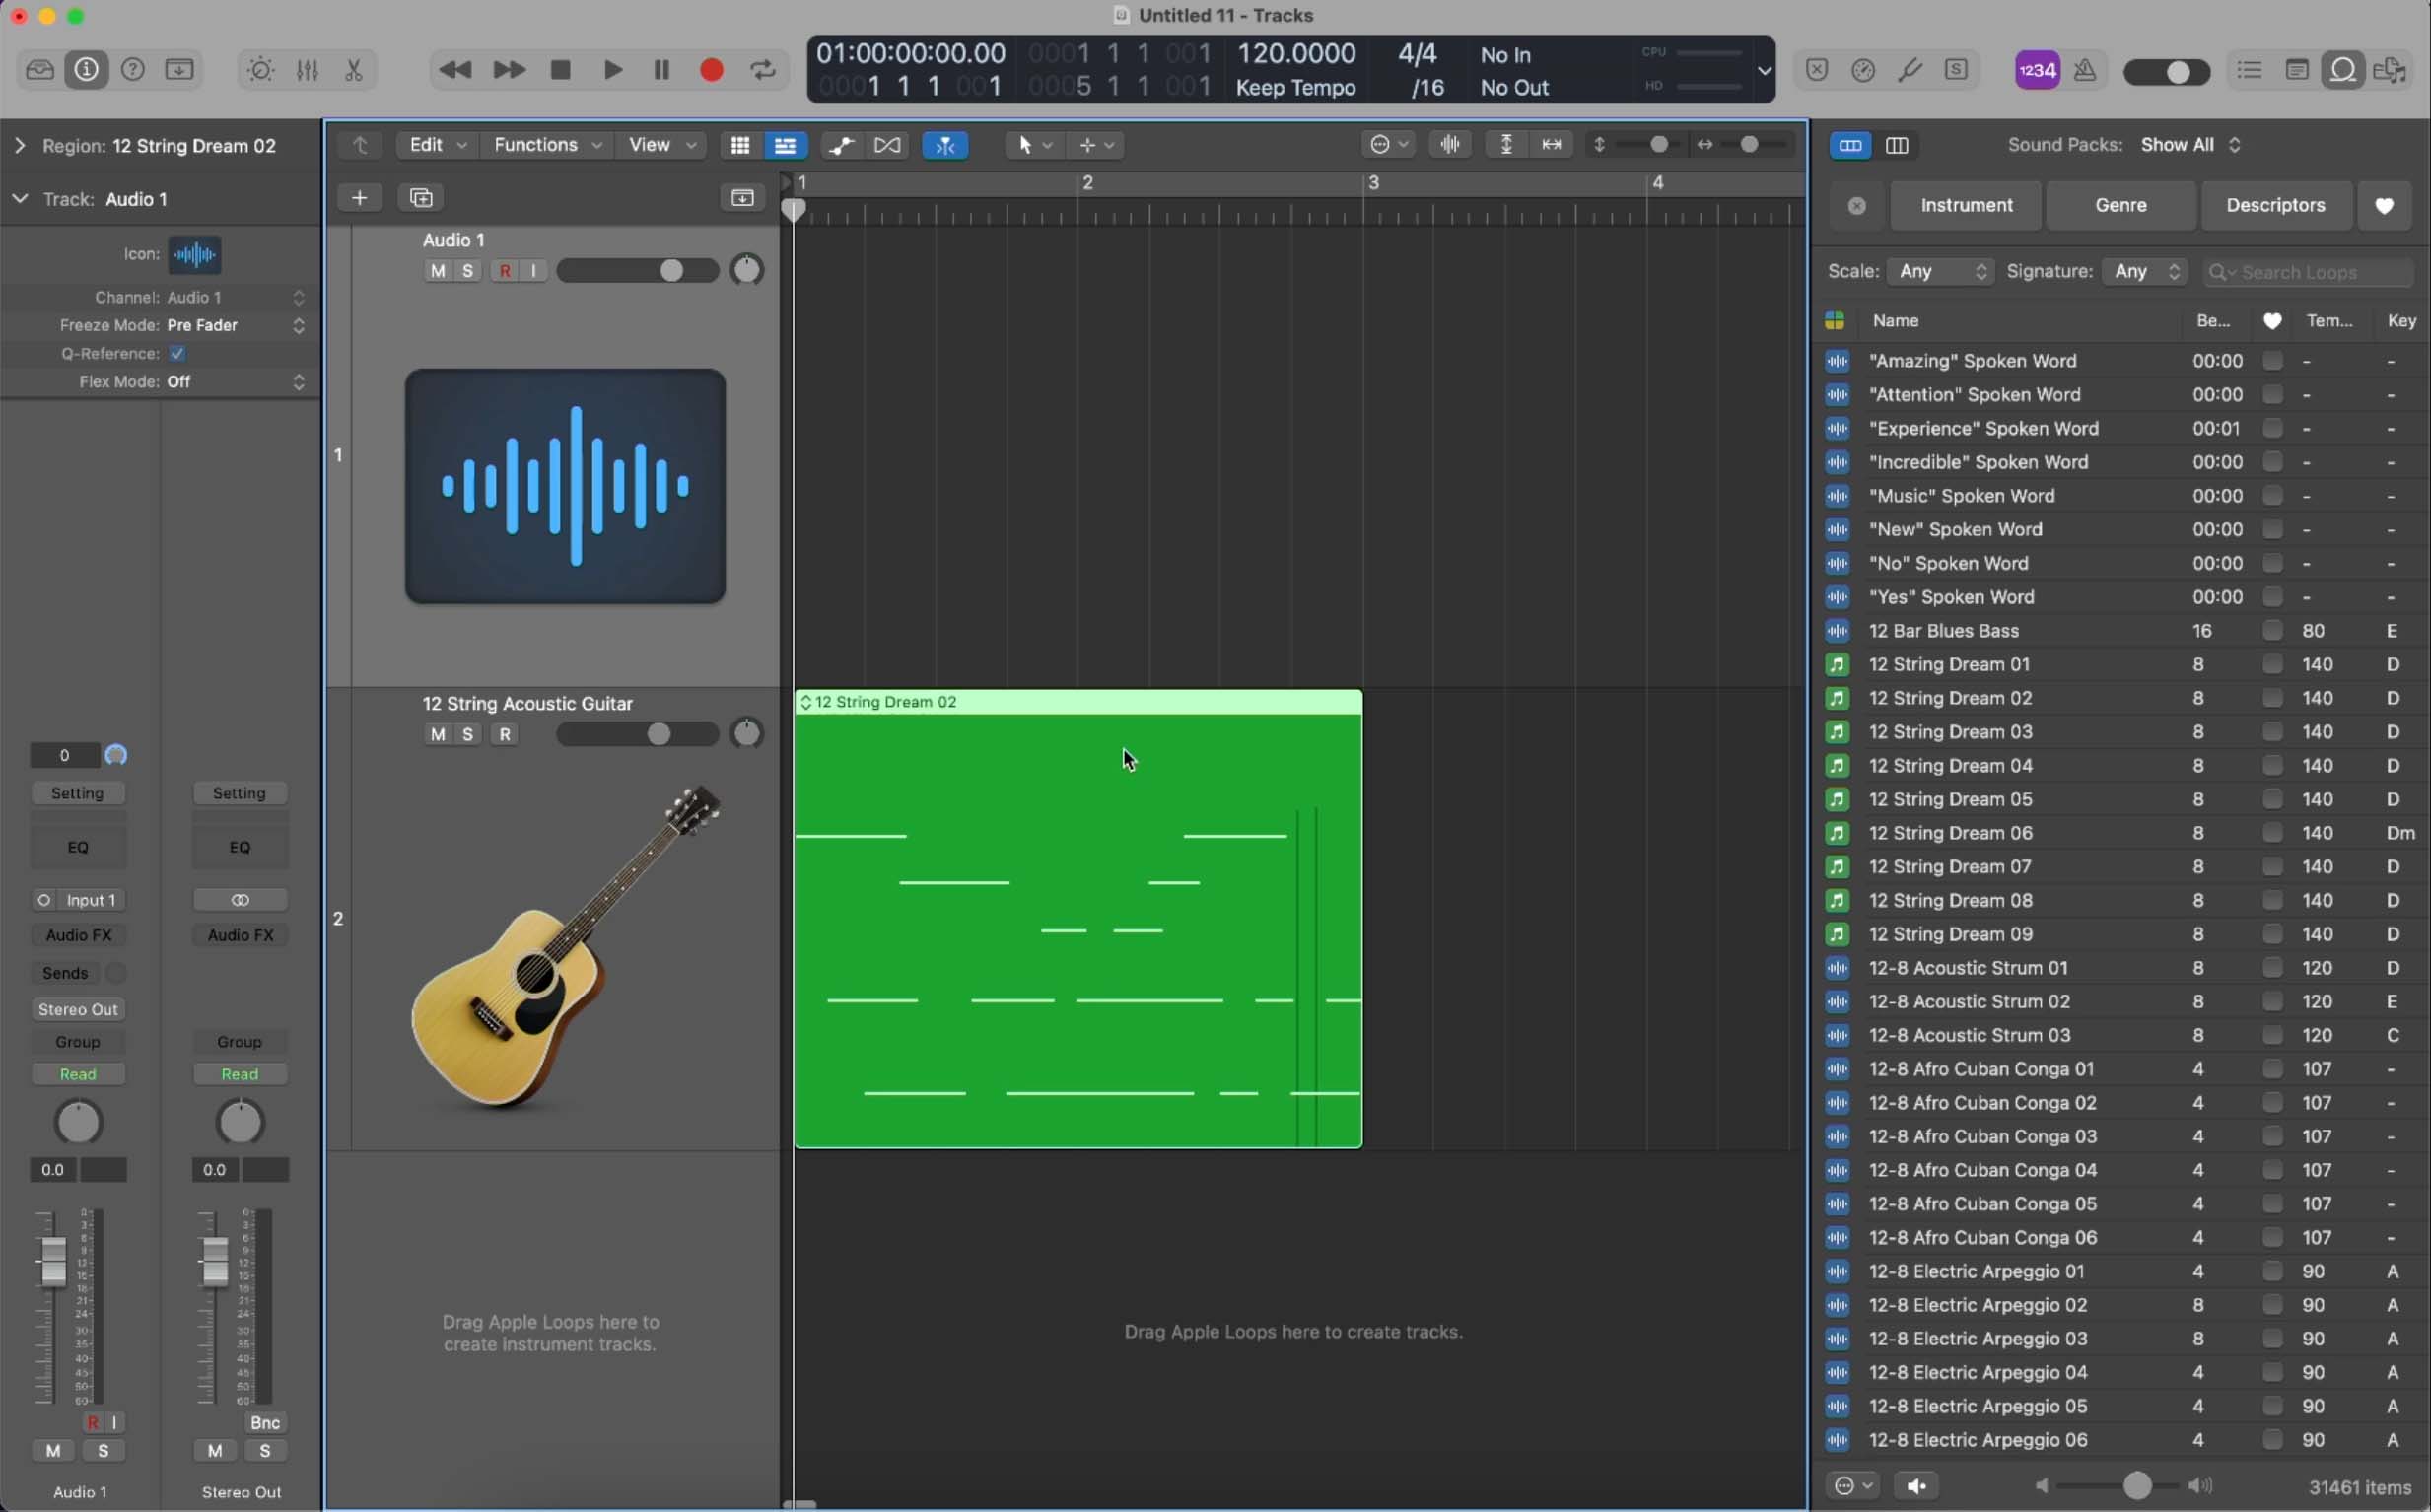
You can also duplicate tracks with the same settings as your previous tracks using the icon to the right of the plus button.
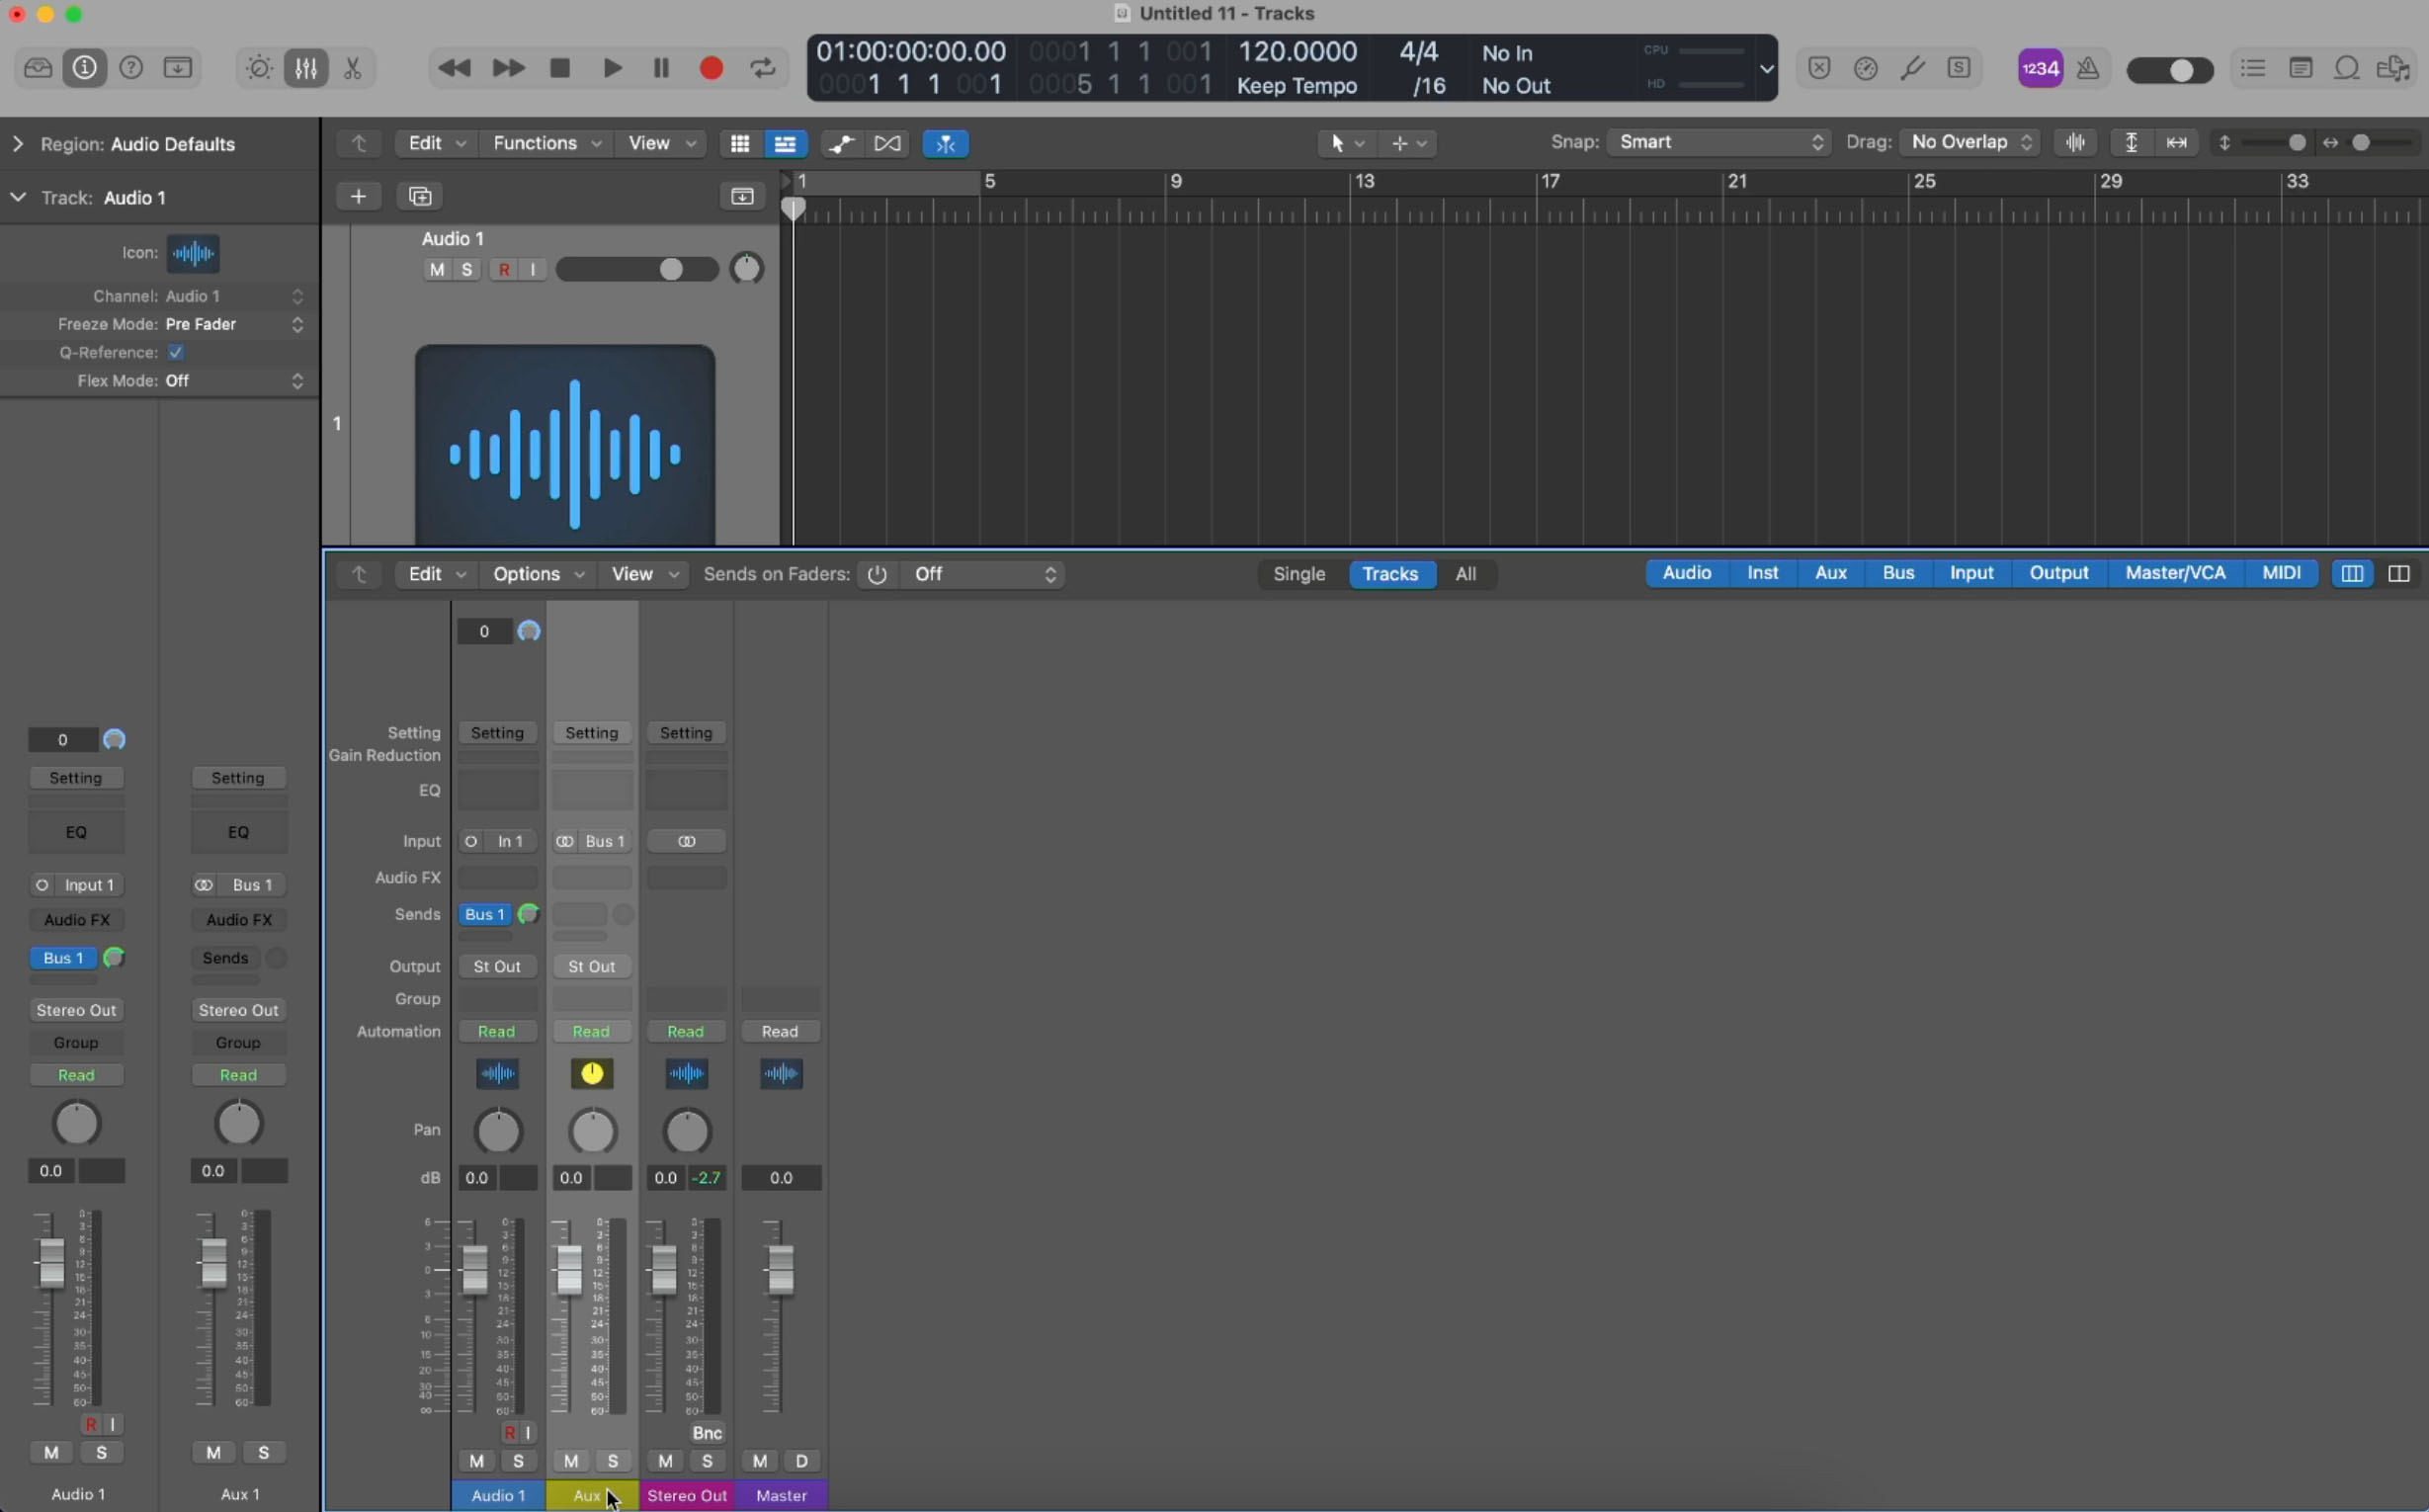
You cannot, however, create auxiliary tracks in this manner—things like buses or submixes. They have to be generated in a different manner.
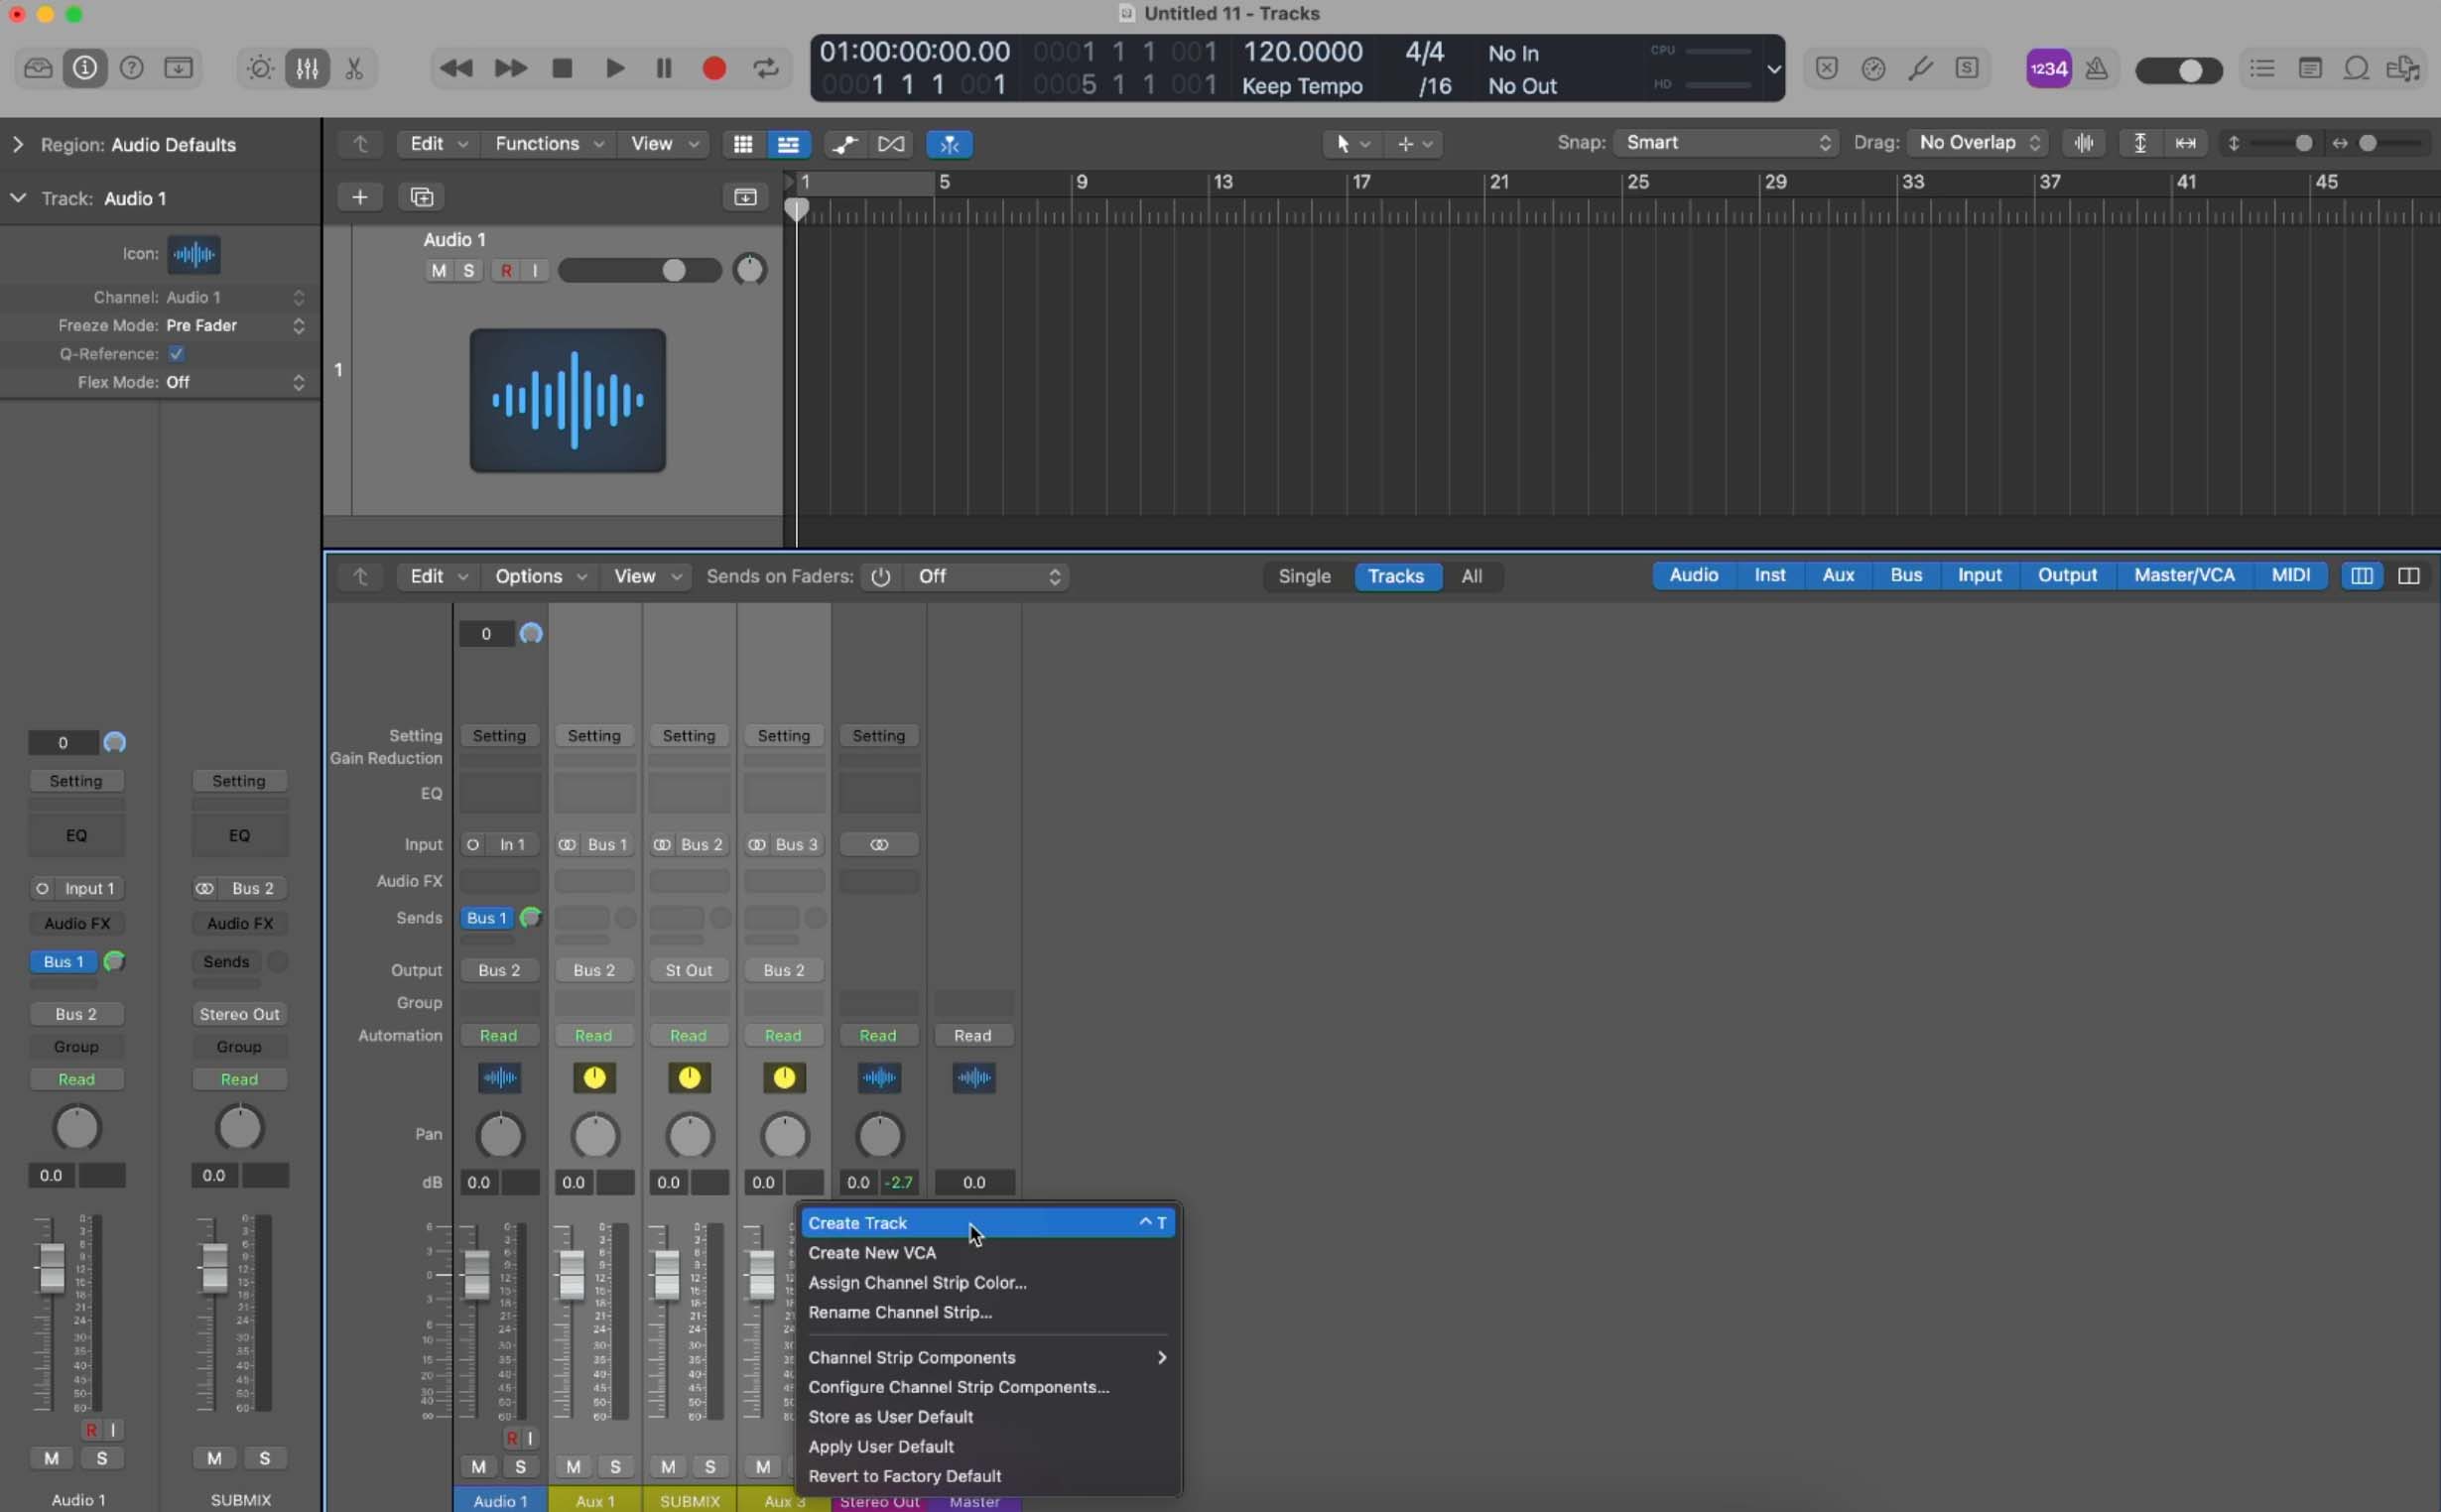
To do so, you can go to the Sends button in the Mixer window and choose a bus, then choose a destination bus from the submenu.
By default, auxiliary tracks, VCA tracks, and your stereo master output are not available in your main window. However, you can create them in the arrange window.
Doing so is quite helpful: once an auxiliary track is available in the main window, you can export it as a stem by simply clicking on the track and pressing “command+E”. As any working engineer will tell you, the ability to export stems quickly is quite handy for all sorts of reasons.
4. Import tracks into Logic Pro X
Logic Pro offers several ways to import tracks:
- Drag and drop: You can drag audio and MIDI files from your computer's Finder or Explorer directly into the Tracks area or the Arrange window in Logic Pro.
- File > Import: You can go to the File menu and select Import and then navigate to the file you want to import.
- Media Browser: You can use the Media Browser to navigate to the file you want to import and then drag it from the Media Browser into the Tracks area or Arrange window.
- Audio Unit: If you have Audio Unit effects or instruments, you can use them in Logic Pro by going to the Audio Unit Manager and adding them to the library.
- Plug-ins: You can also use third-party plug-ins by installing them in the appropriate folder and then adding them to the plug-ins list in Logic Pro.
All these methods allow you to import audio and MIDI files into Logic Pro and create new tracks with them. Once imported, you can then edit, process, and arrange the audio or MIDI data as needed.
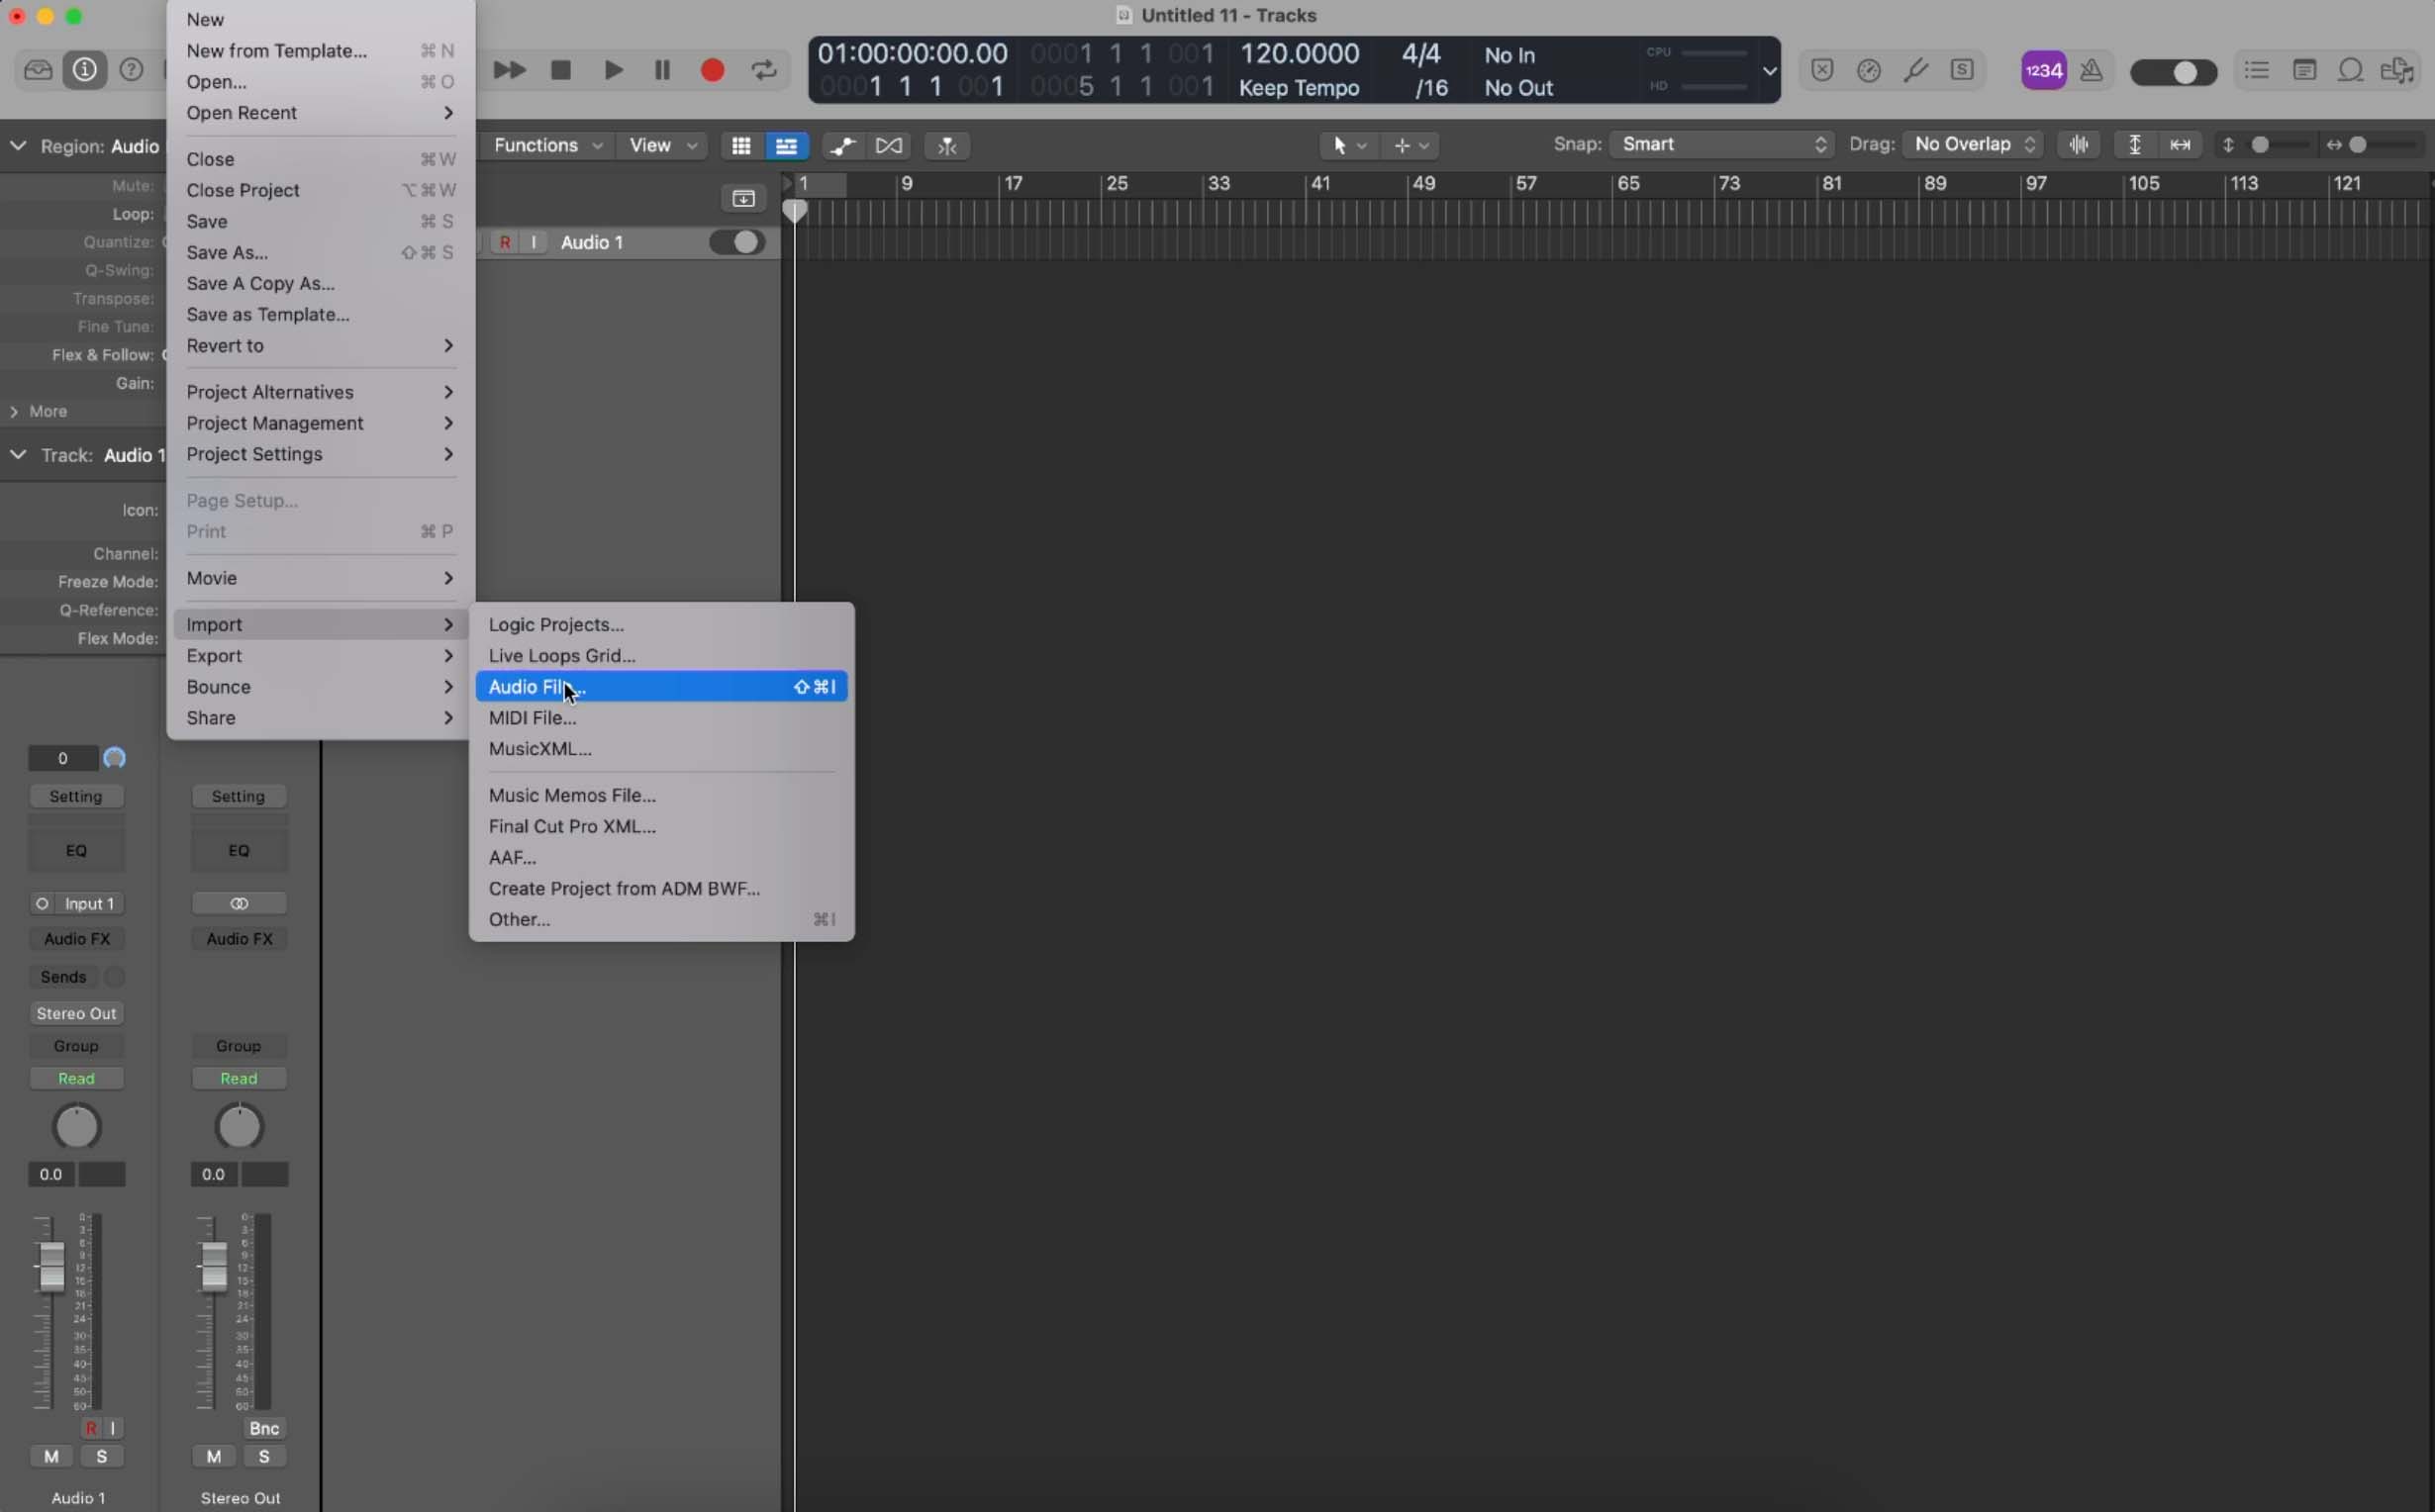
Import audio files from the File menu into Logic Pro X
5. Navigate the controls in Logic Pro X
Now that you have these basic items under your thumb, you should rest assured that getting around Logic Pro X in a basic manner is pretty easy:
- “Play” and “stop” are actuated by pressing the spacebar.
- The return key automatically takes you to the beginning of your session.
- Moving around your session from left to right is accomplished by carrot keys (period and comma), or with your mouse—clicking along the timeline at the top of the arrange window, pictured here:

Logic Pro Timeline
Apple has a list of keyboard commands that you can experiment with to navigate the controls within Logic Pro. We'll explore how to customize them in the next step.
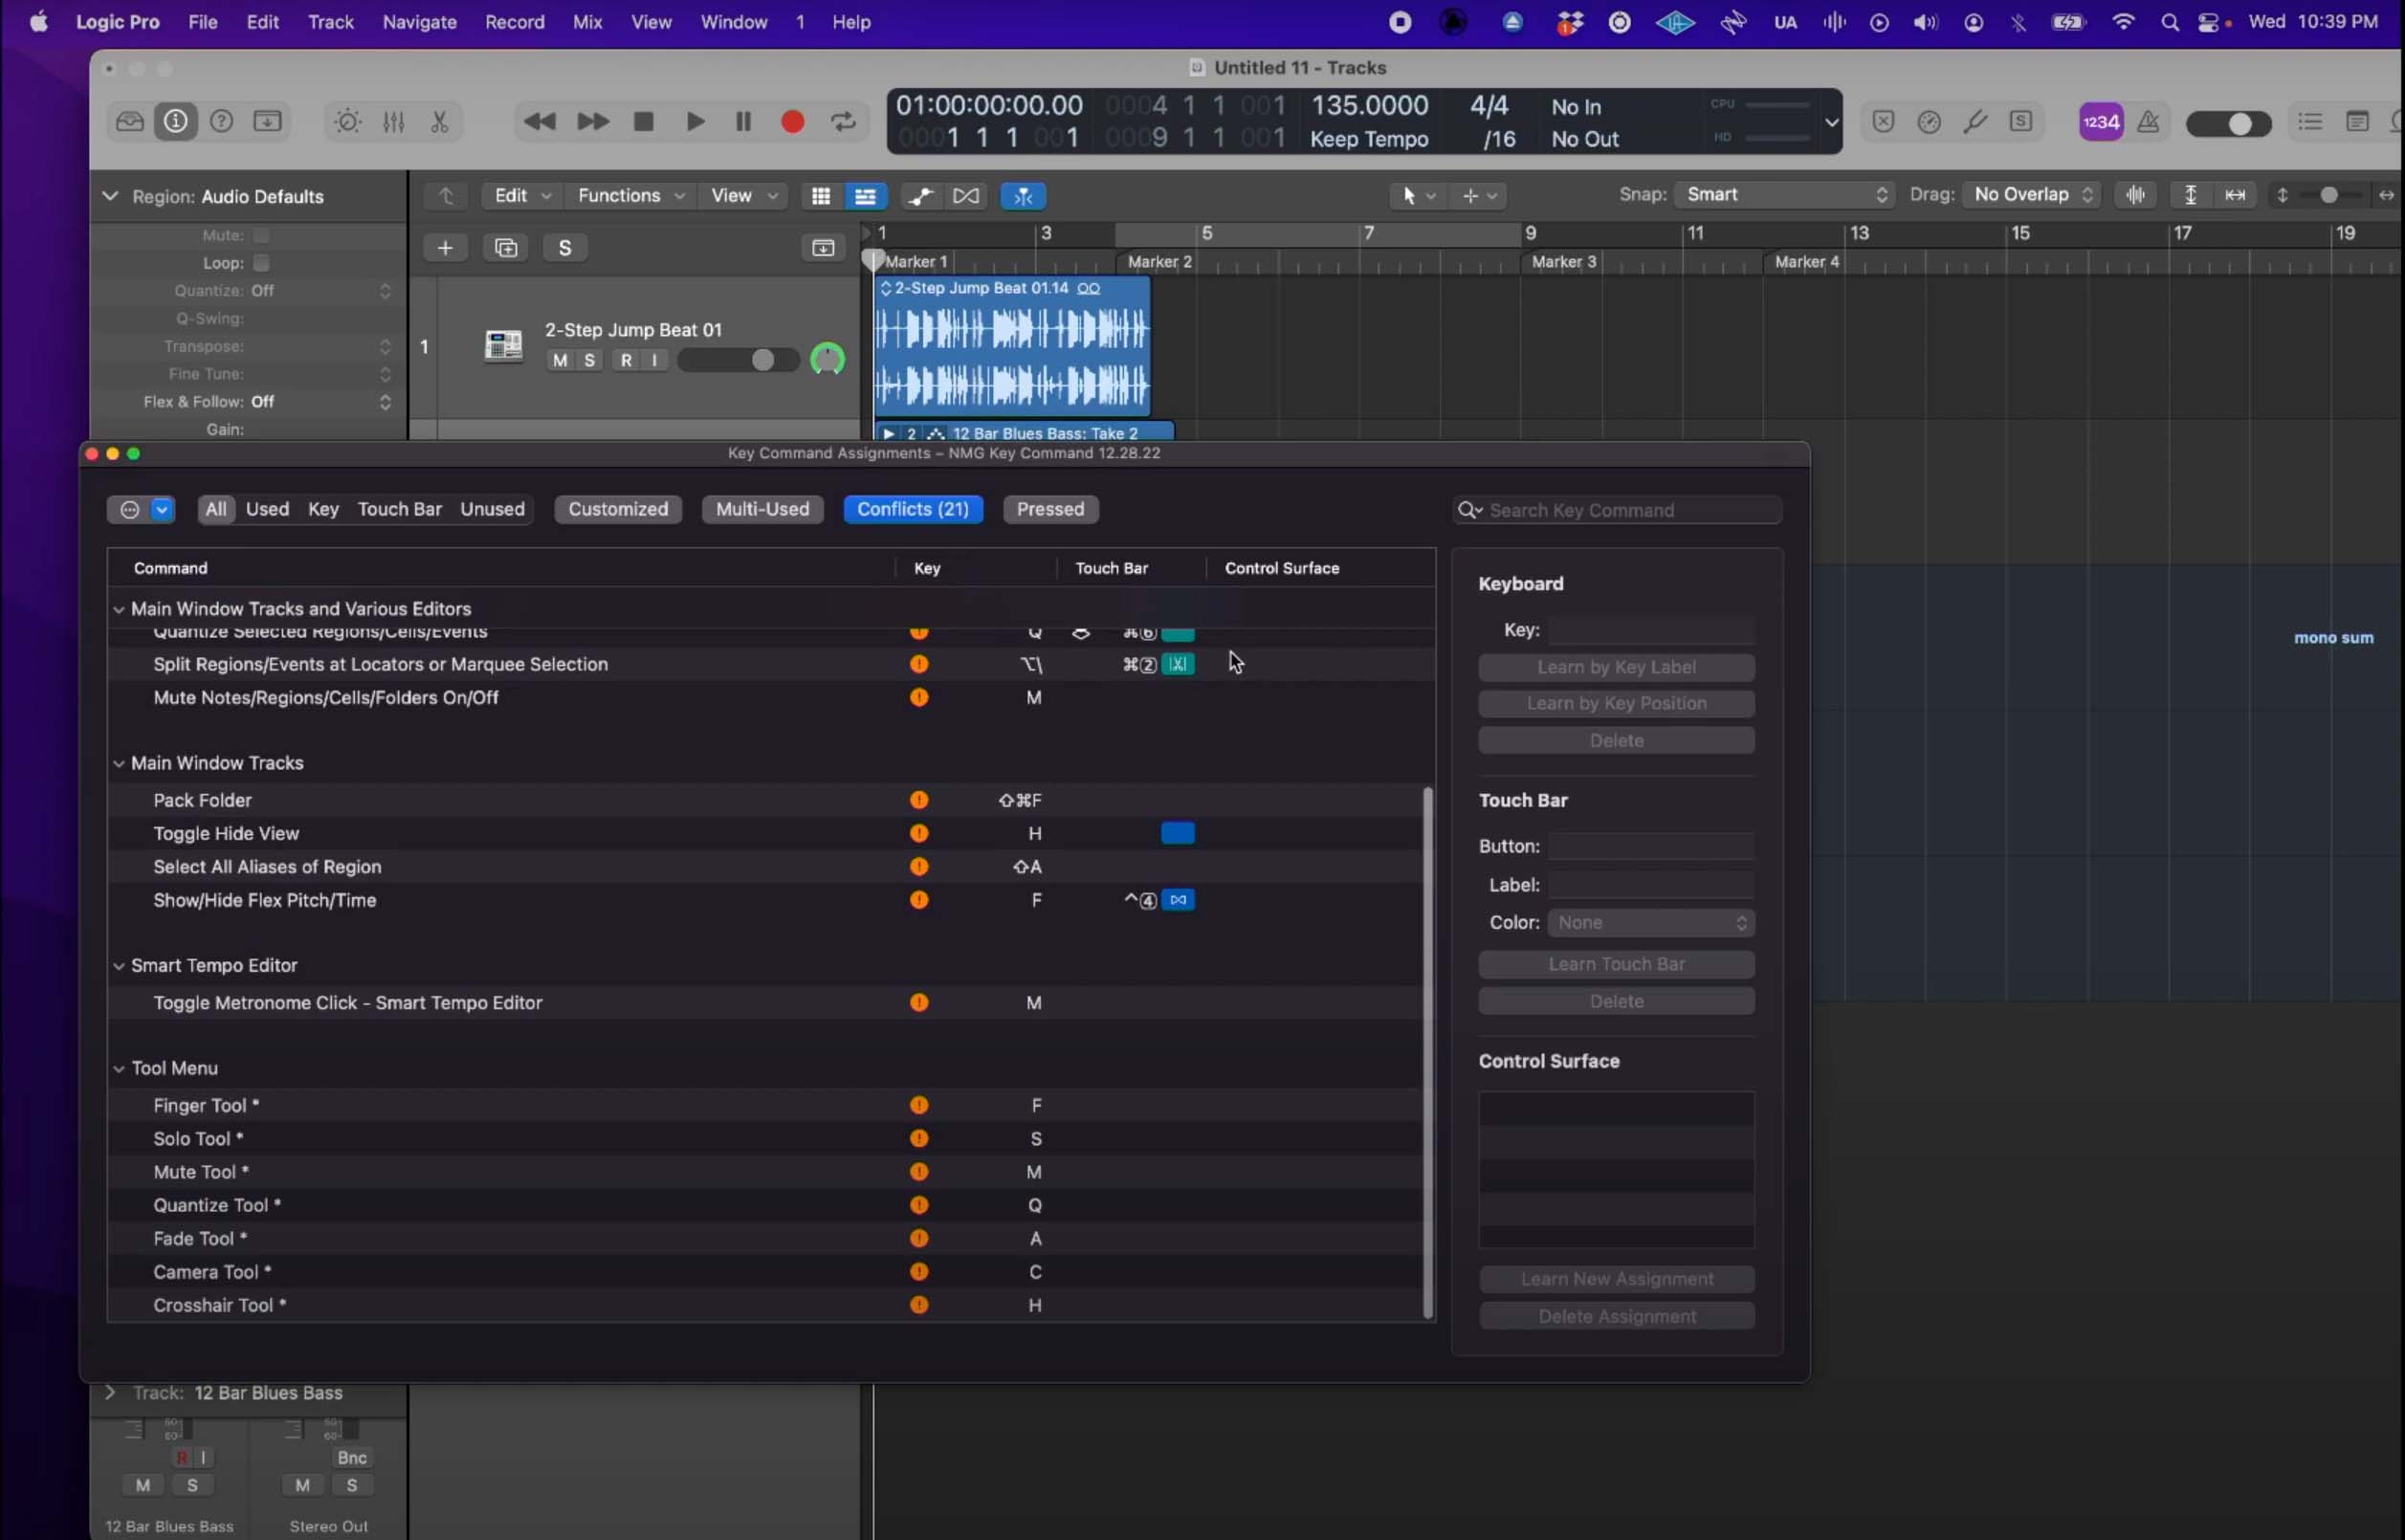
6. Customize key commands
In Logic Pro X, you can customize keyboard commands to suit your workflow and preferences. Here are the steps to customize keyboard commands:
- Go to the Logic Pro menu, and select Preferences.
- In the Preferences window, click on the Key Commands tab.
- In the Key Commands tab, you can browse through the different categories of commands, and select a command to reassign.
- To reassign a command, click on the current keyboard shortcut, and then press the new keyboard shortcut you want to use.
- You can also create new commands and assign them to a keyboard shortcut by clicking on the "+" button in the lower left corner of the Key Commands tab.
- Once you are done, click on the "Done" button to save your changes.
You can also export and import your custom keyboard commands to share with other users or to use on different computers.
Here’s a video that demonstrates how to customize your key commands:
7. Explore advanced editing tools
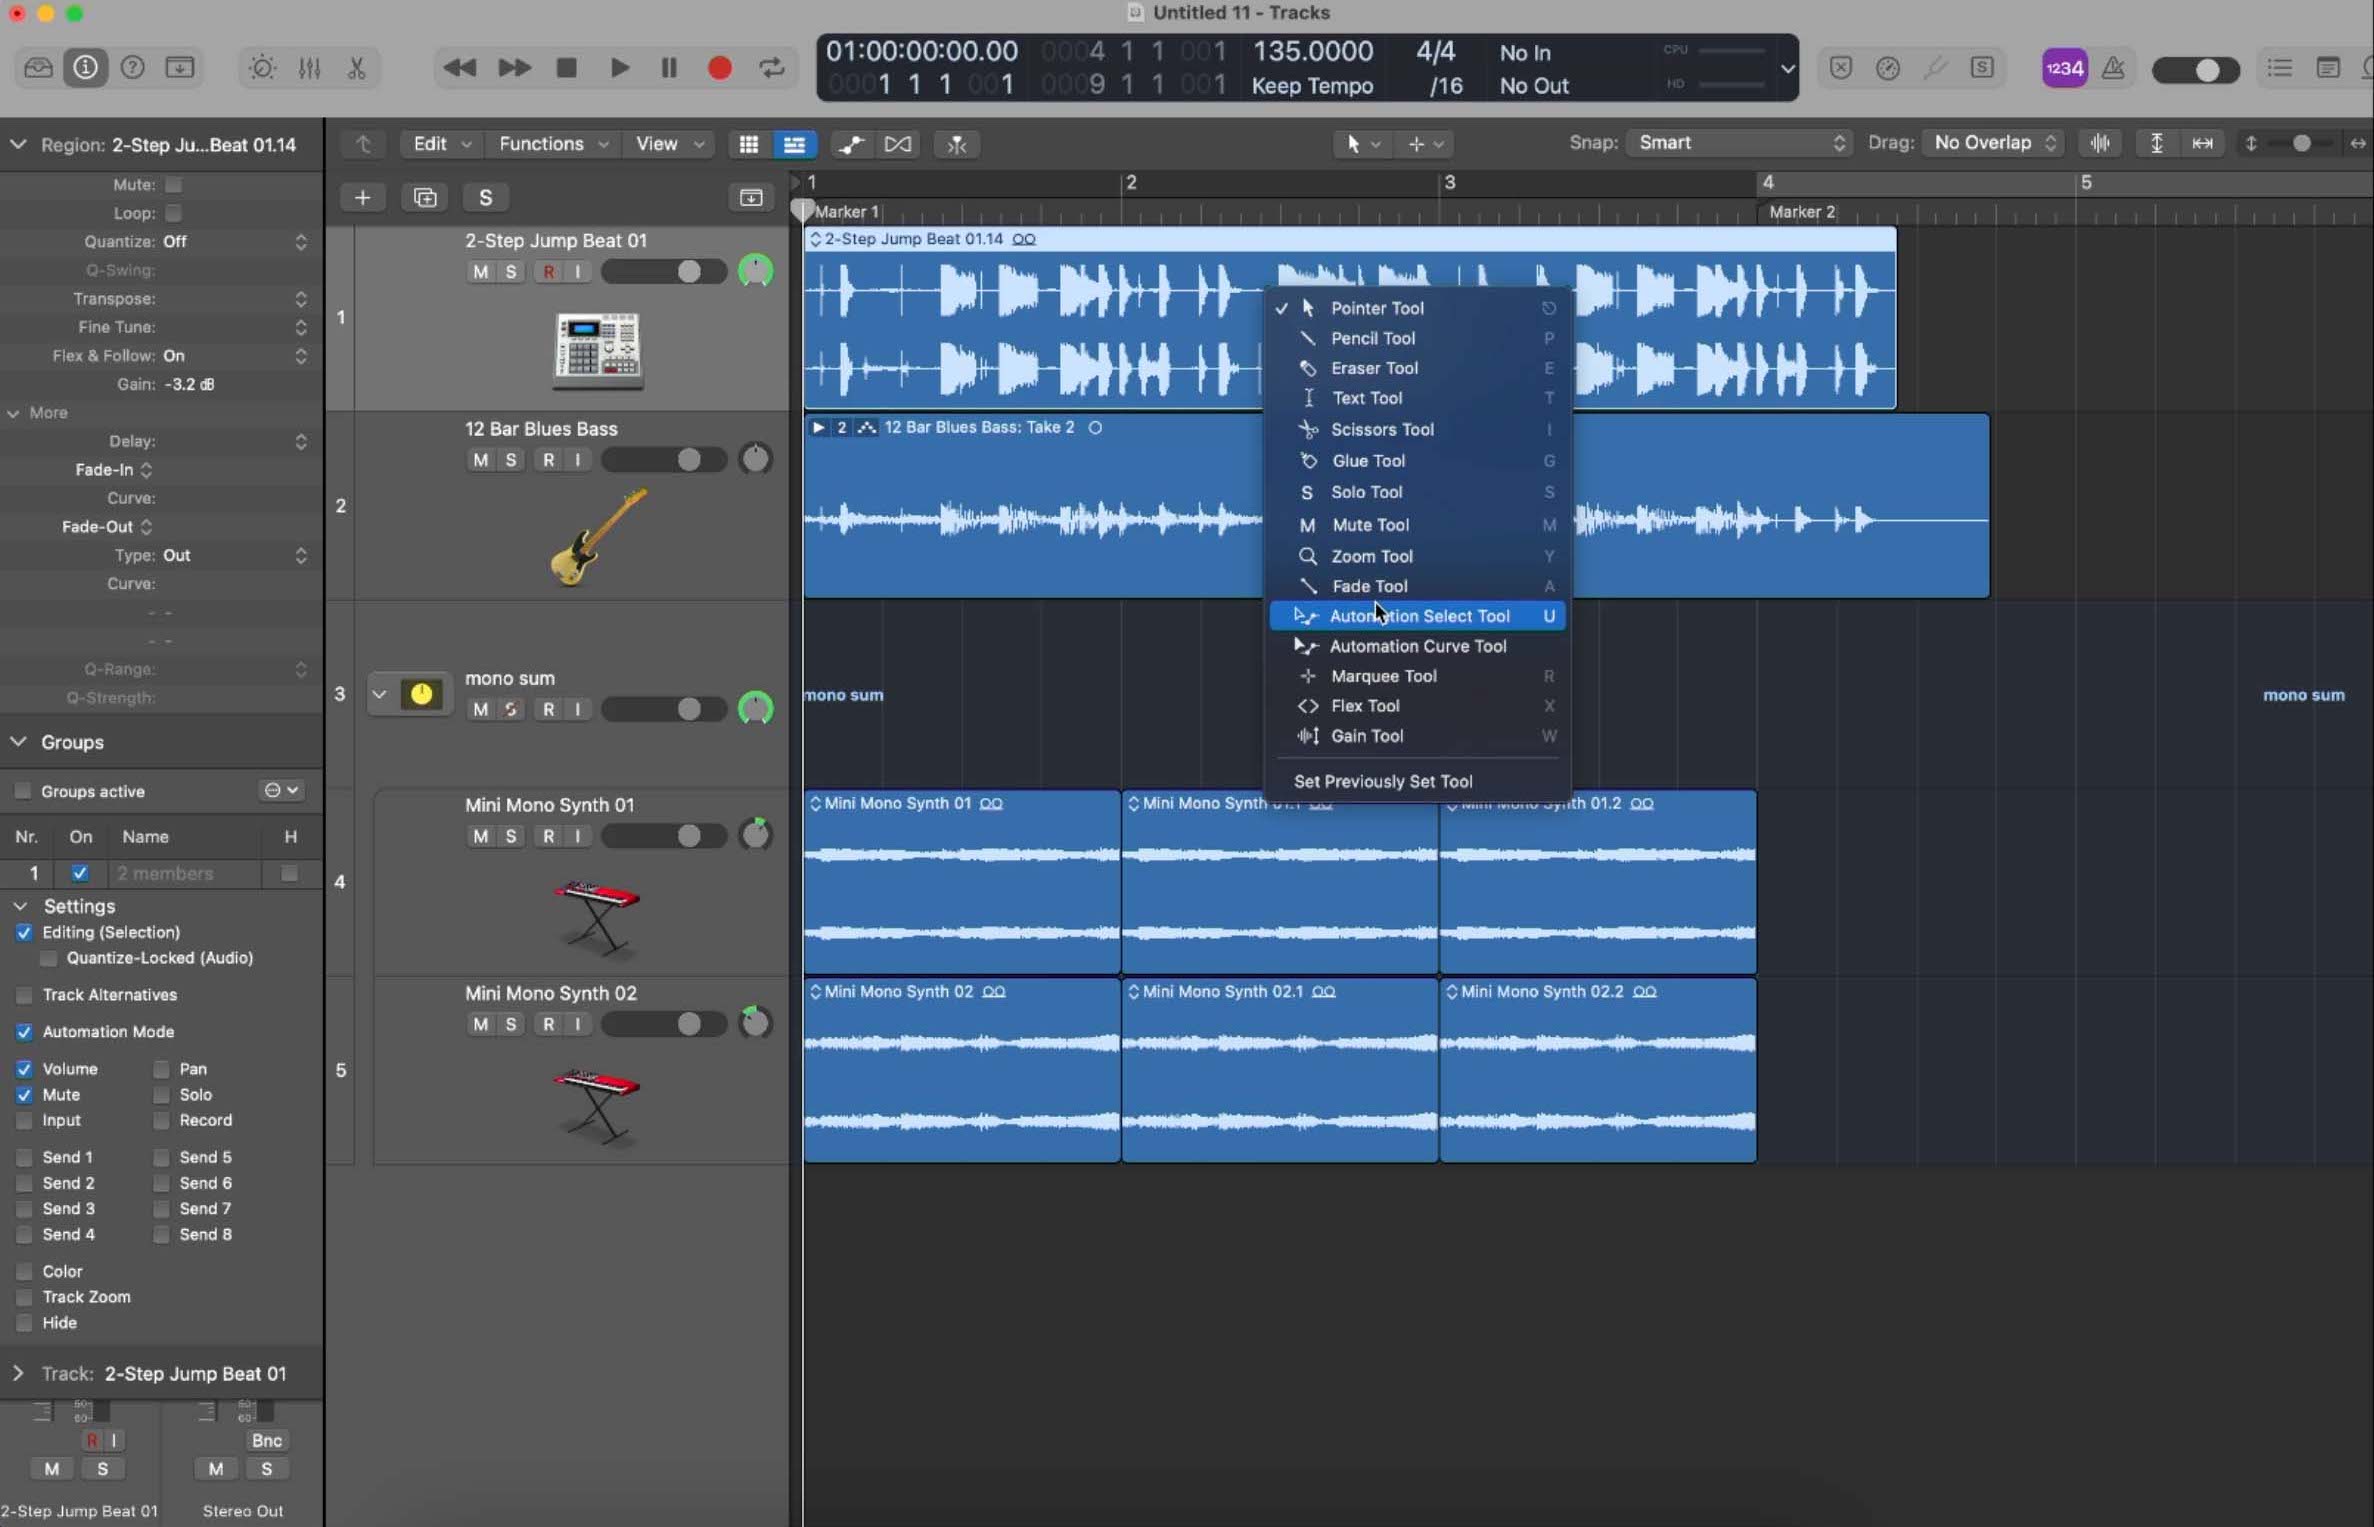
Logic Pro has its own array of editing tools that are quite powerful, once you understand how to use them. They are accessible by pressing the ESC key at any time:
- Pencil tool: Draws and edits data in a track. You can draw MIDI notes, draw MIDI controller data like pitch bend or modulation, editing existing MIDI data, or draw in a step sequencer style interface.
- Eraser tool: Deletes notes, controller data, automation, or multiple events from your project.
- Text tool: Adds text annotations to a project.
- Scissors tool: Splits audio and MIDI regions at specific points and cut unwanted sections.
- Glue tool: Merges audio and MIDI regions together or create loops.
- Solo tool: Temporarily solos an audio or MIDI track, allowing you to focus on it while you work on your project.
- Mute tool: Temporarily mutes an audio or MIDI track
- Zoom tool: Zooms in and out of the project in the arrange window, allowing you to see more or less detail of the audio and MIDI regions.
- Fade tool: Create and edit fades on audio regions in your project.
- Automation Select tool: Selects, edits, and creates automation for various parameters on a track, such as volume, panning, and effects.
- Automation Curve tool: Creates and edits smooth automation curves for various parameters on a track like volume, panning, and effects.
- Marquee tool: Selects multiple regions and events. You can click and drag the marquee tool over the regions you would like to select. You can then copy, paste, or edit multiple regions in your project.
- Flex tool: Allows you to adjust the pitch and timing of audio regions in a flexible and sophisticated way.
- Gain tool: Adjusts the overall volume level of audio regions in a track. You can adjust volume levels, normalize audio, match volume levels, and more.
Here's a video that reviews the marquee tool in more detail:
Really, I can’t sell the marquee tool enough. It allows instantaneous splitting of tracks, muting, automation creation, and more.
8. Learn snap and drag options
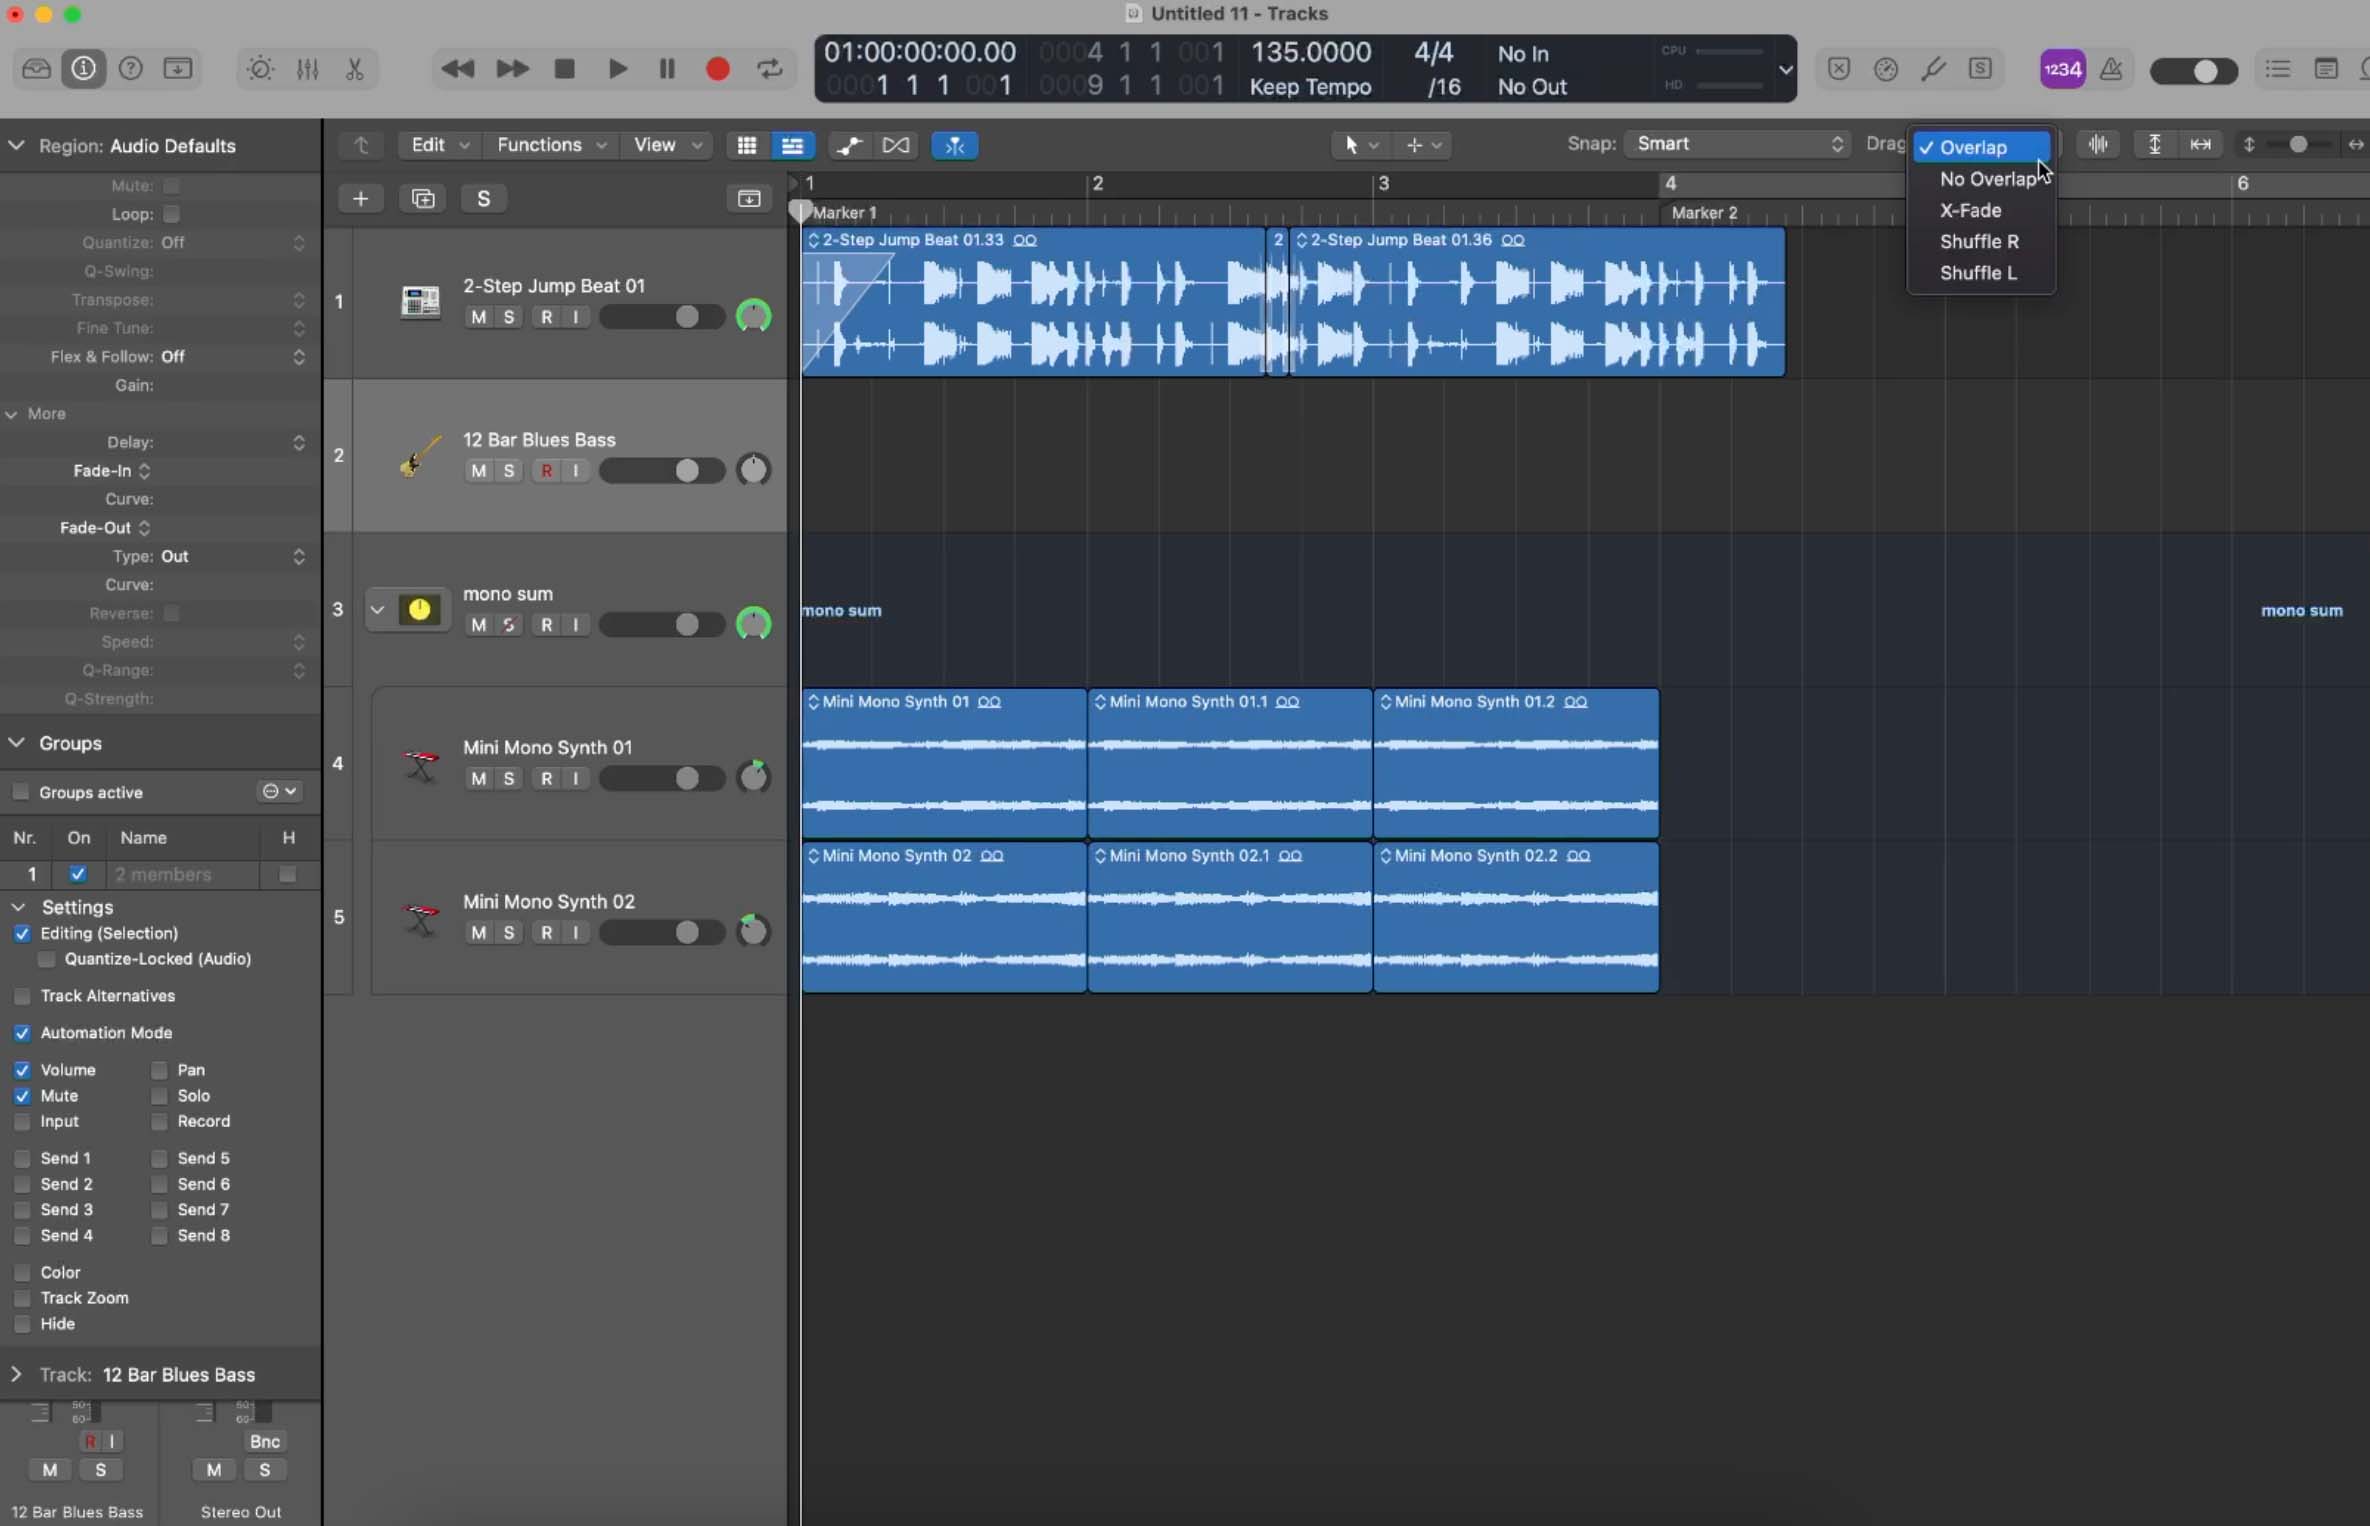
Logic has several snap and drag options that can help you speed up your workflow and edit your audio, switchable by mouse in this window.
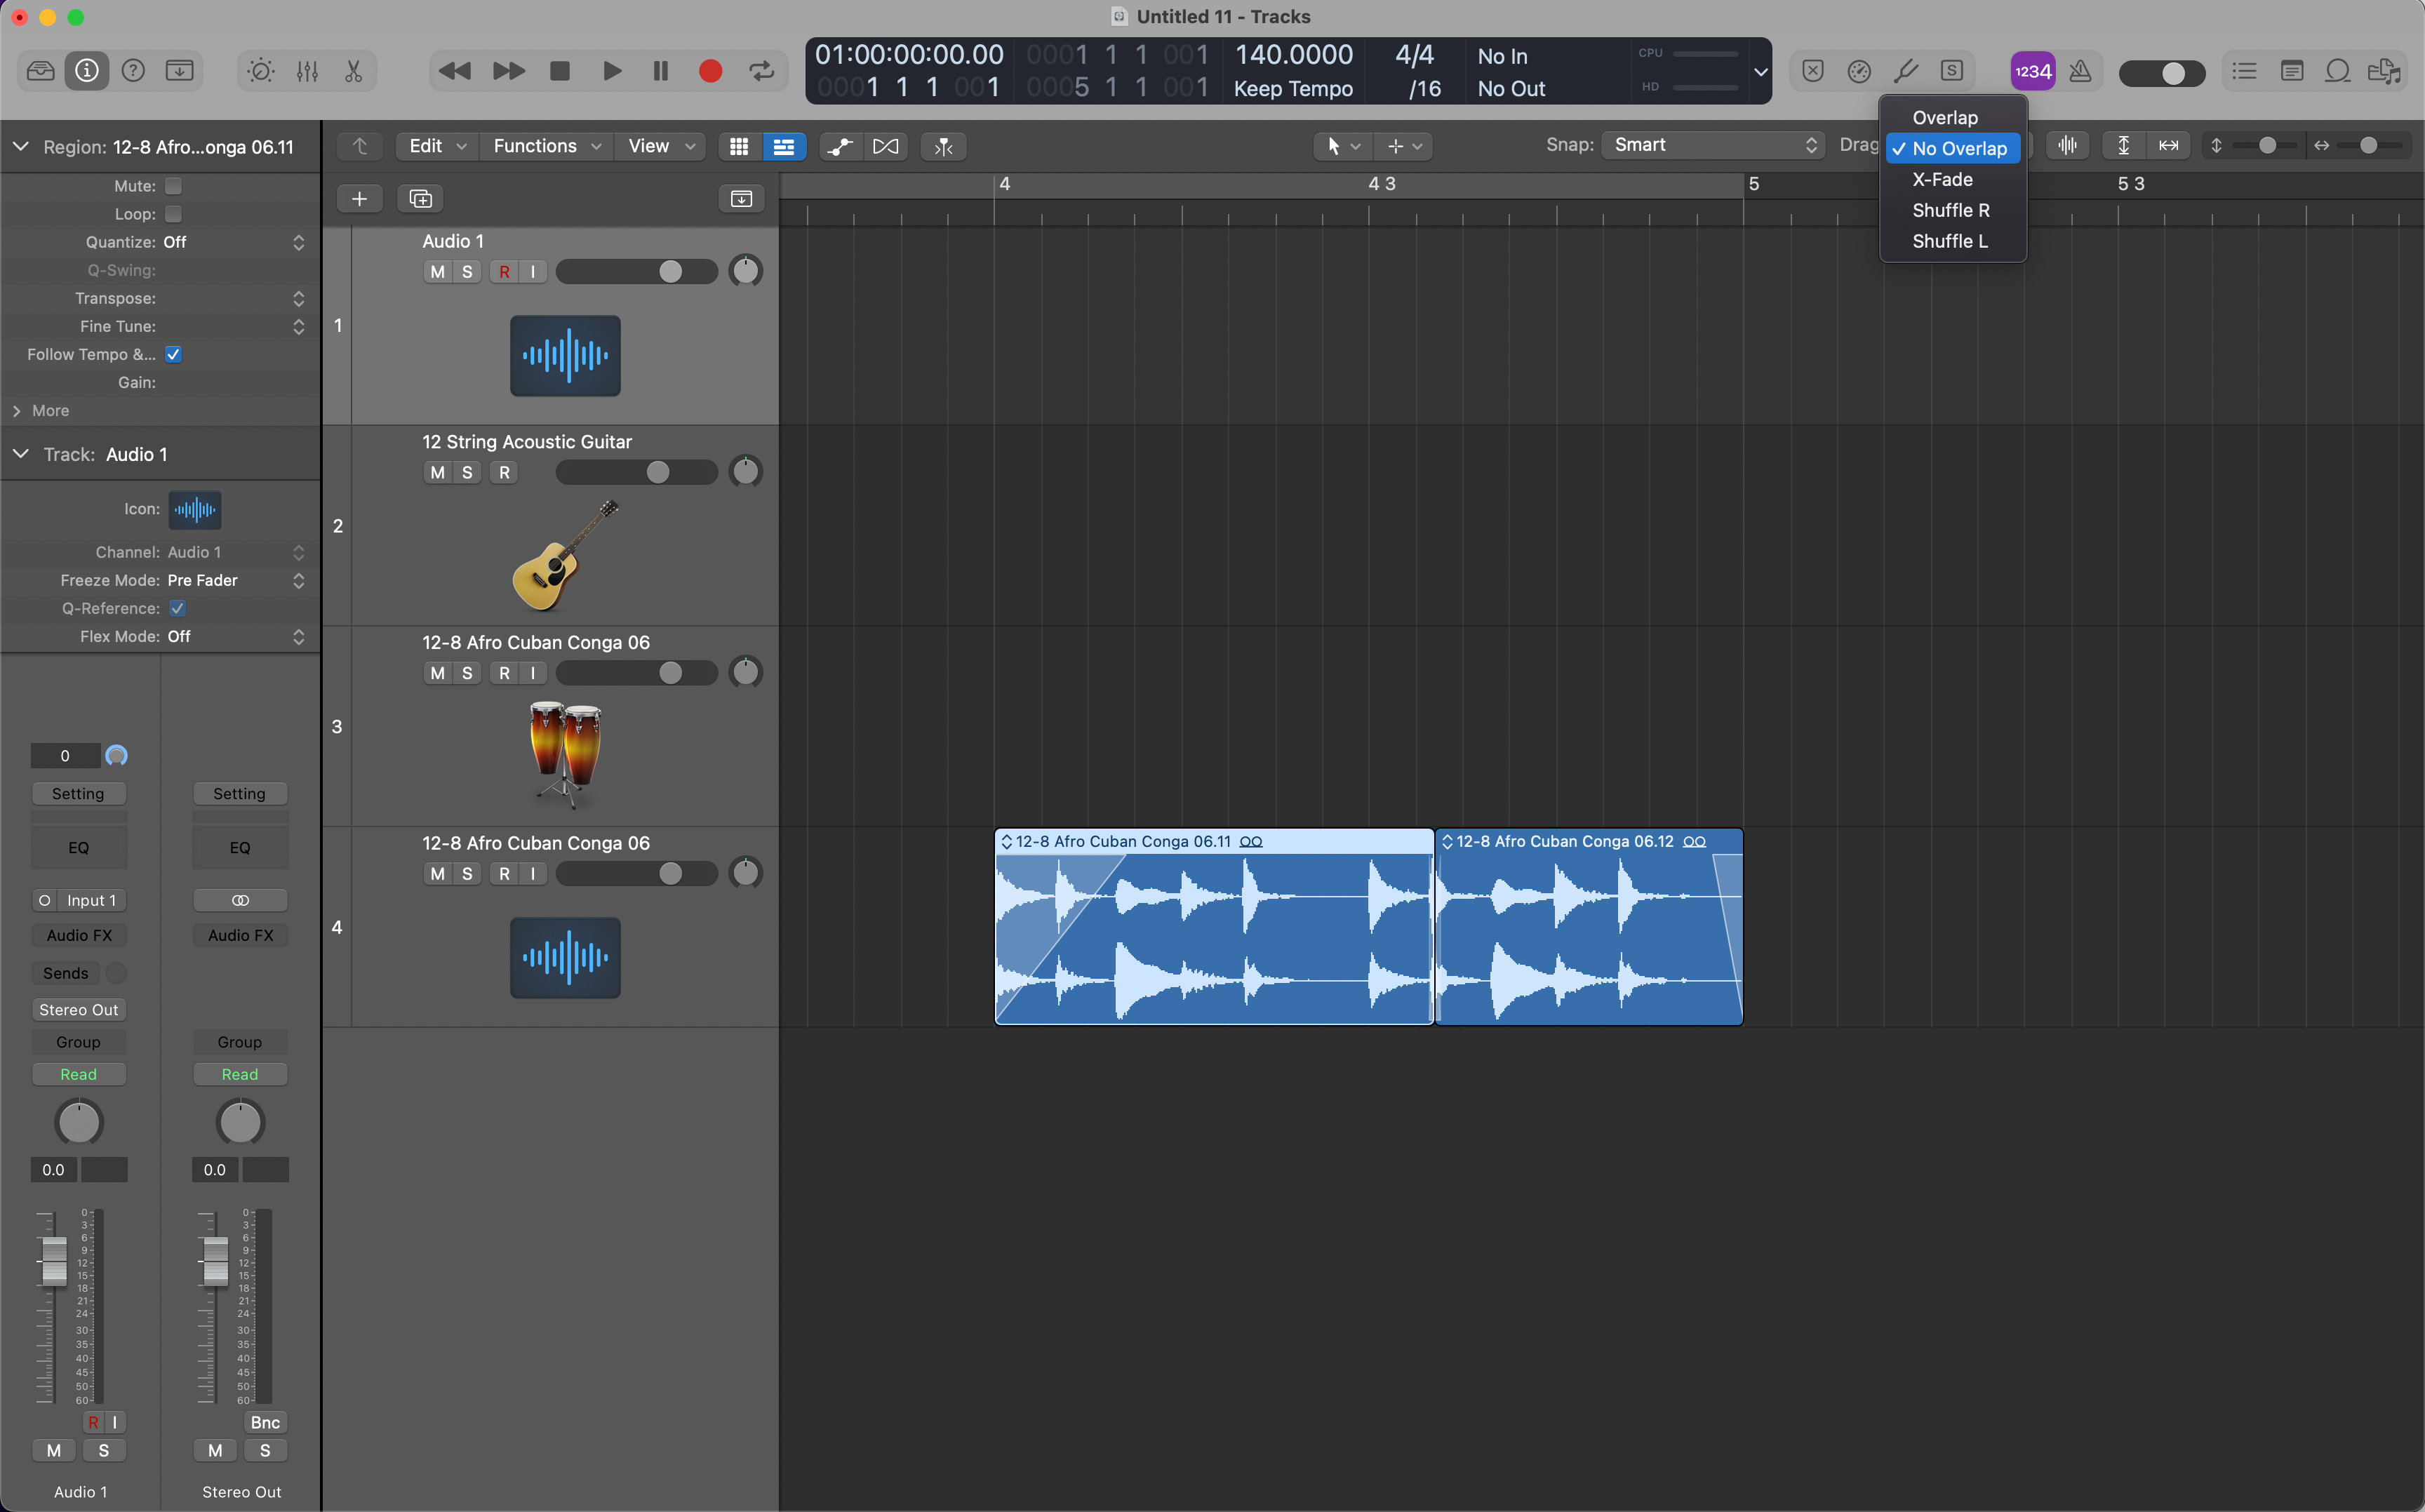
Drag options in Logic Pro
The drag options control how audio and MIDI regions are moved and manipulated when you drag them in the arrange window. These options allow you to control how regions behave when you move them, which can be useful when you're working on a project and need to make precise adjustments.
Overlap and No Overlap: The "Overlap" function is used to adjust the overlap between audio and MIDI regions in the arrange window. When enabled, the "Overlap" function allows regions to overlap each other and play simultaneously. When disabled, the regions will not overlap and will stop playing when the next region starts.
X-Fade: The "X-Fade" (Crossfade) function is used to create smooth transitions between overlapping audio regions. When enabled, a crossfade is automatically created between the overlapping regions, allowing the audio from one region to fade out while the audio from the other region fades in.
Shuffle-R and Shuffle L: The "Shuffle R" and "Shuffle L" functions are used to adjust the timing of audio and MIDI regions in the arrange window while maintaining their relative positions to each other. When you activate the Shuffle R function, the regions are shifted to the right. This means that if you want to make some space on the left, you can select the regions and shift them to the right and the regions to the right will move accordingly to make space. The opposite can be done with Shuffle L.
The snap options allow you to control how the audio and MIDI regions in the arrange window snap to a grid. The snap options allow you to control how closely the regions align to the grid, which can be useful when you want to create tight, quantized rhythms or make sure that regions start and stop at specific points.
The main snap options in Logic Pro include:
- Grid: Audio and MIDI regions will snap to the nearest grid line.
- Bar: Audio and MIDI regions will snap to the beginning of the nearest bar.
- Beat: Audio and MIDI regions will snap to the beginning of the nearest beat.
- None: Audio and MIDI regions will not snap to any grid lines.
Check out this video to learn how to switch between some of these snap and drag options in Logic Pro.
9. Organize and route your sessions
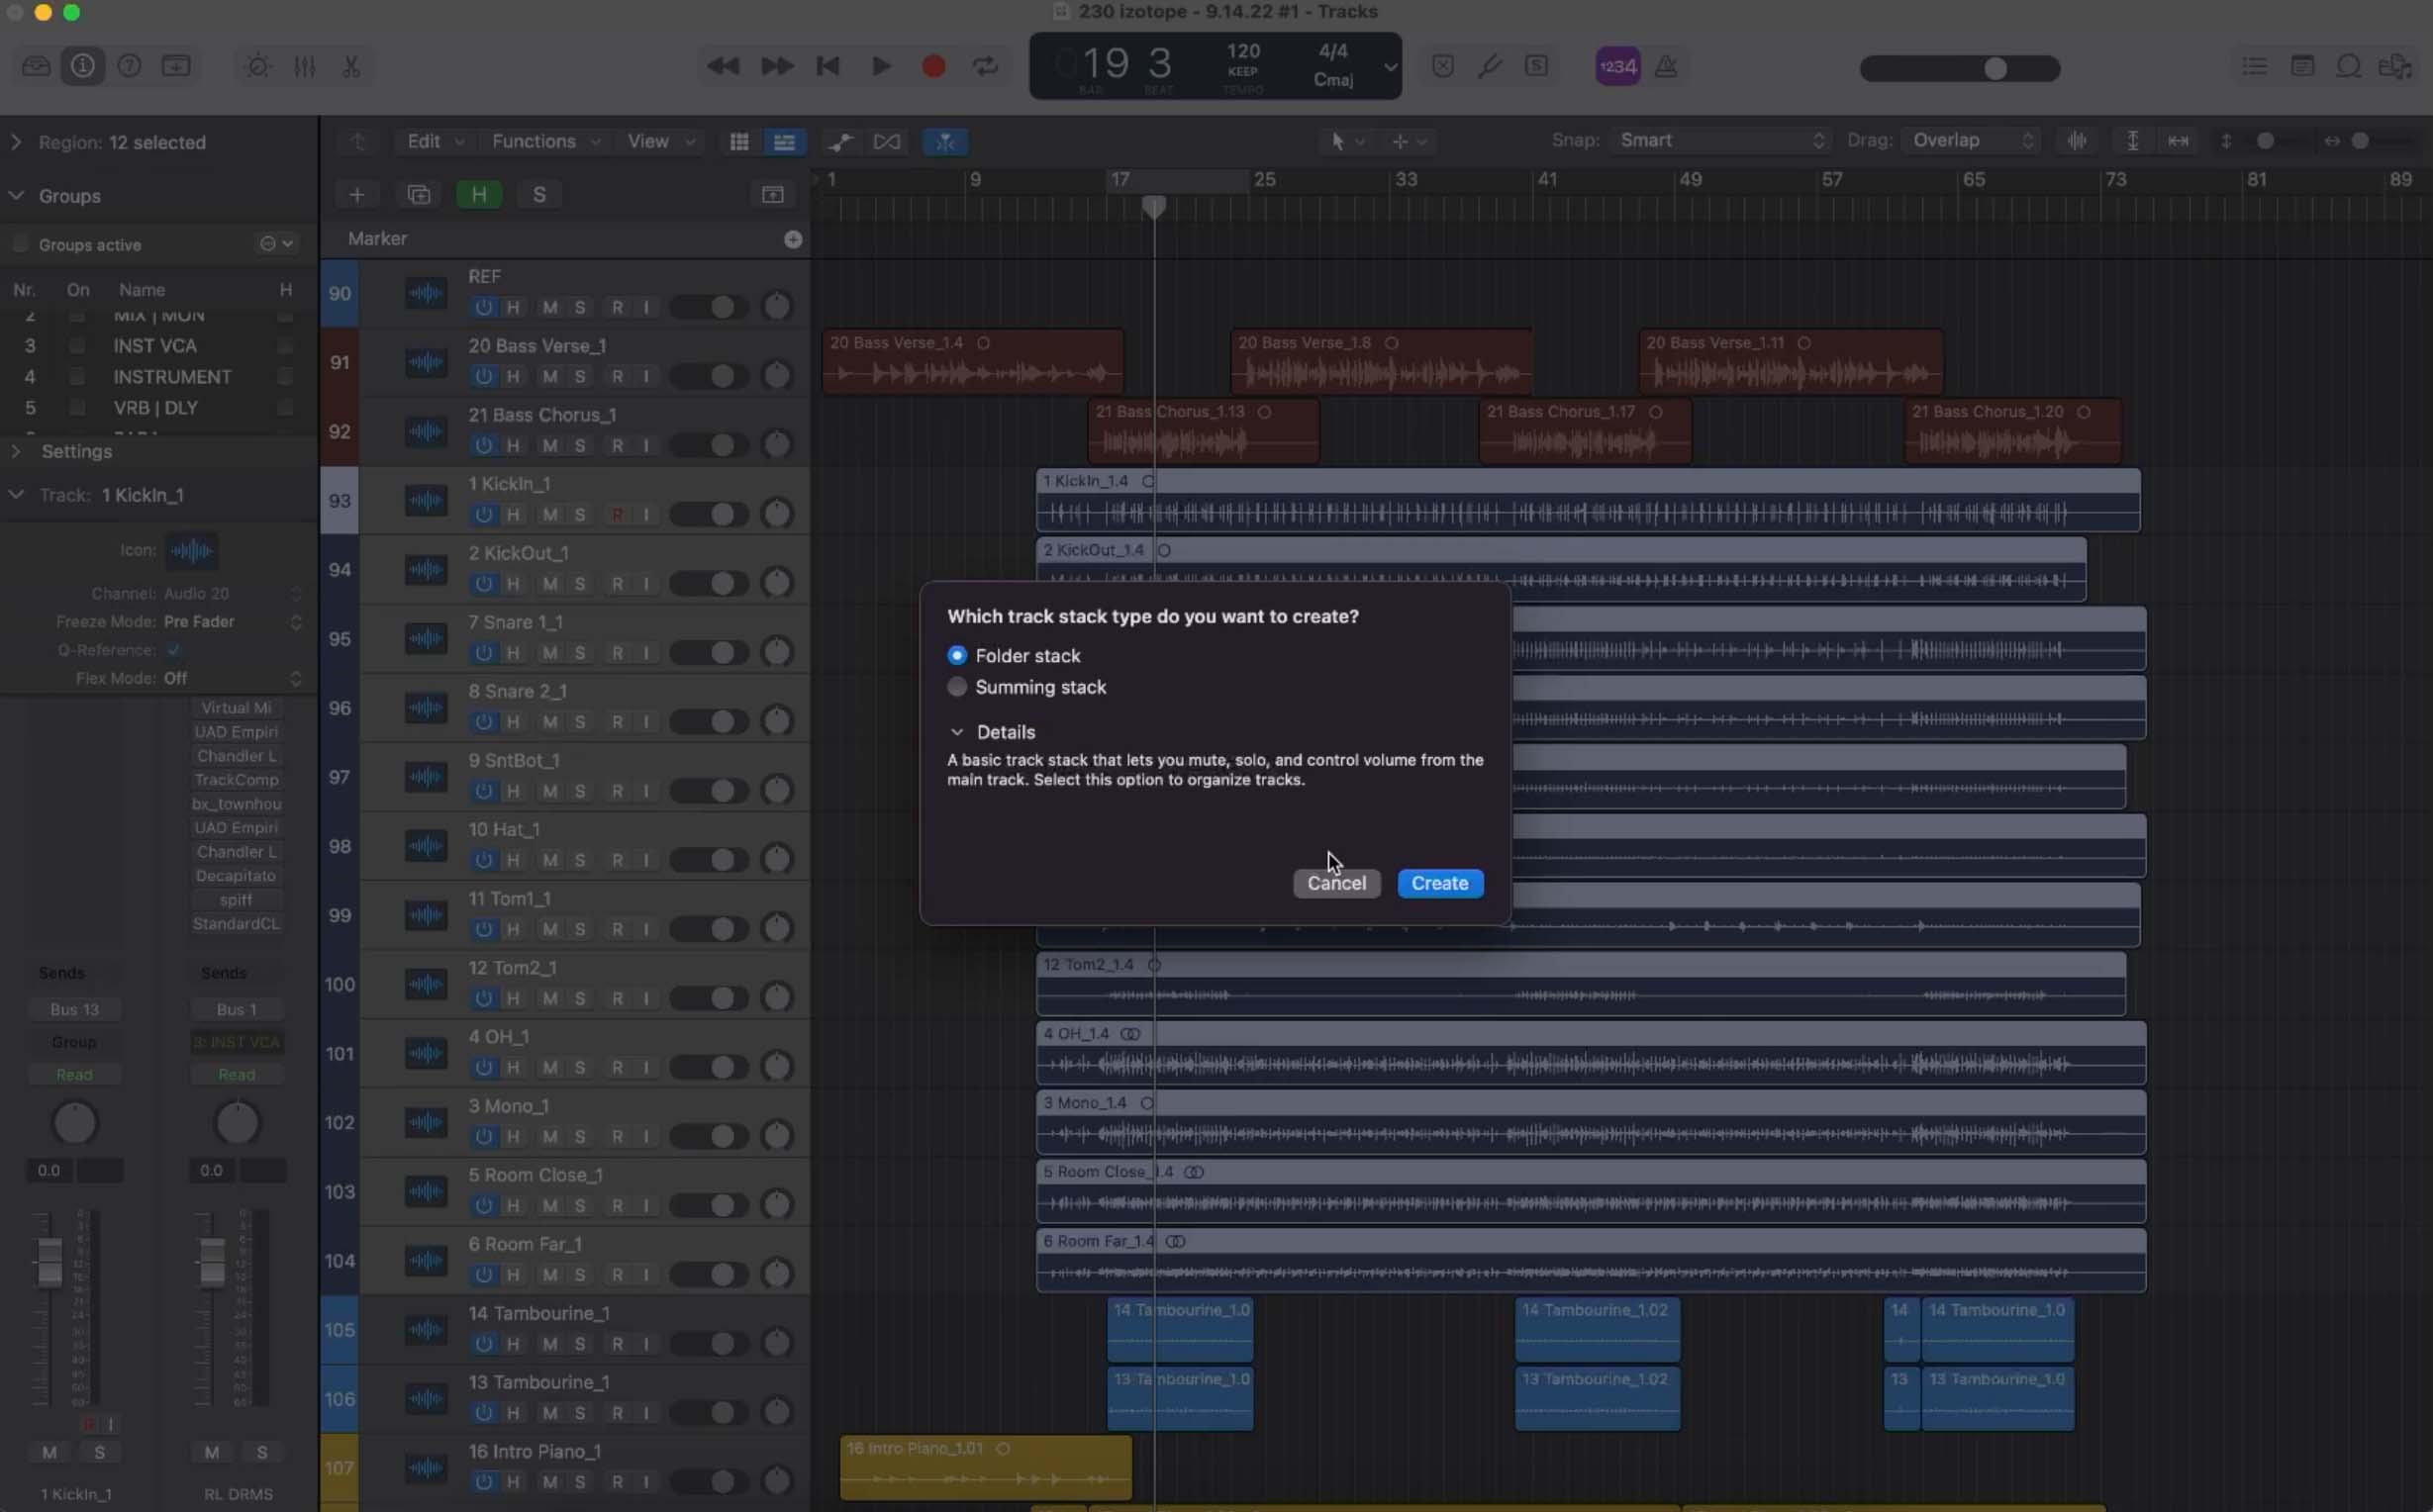
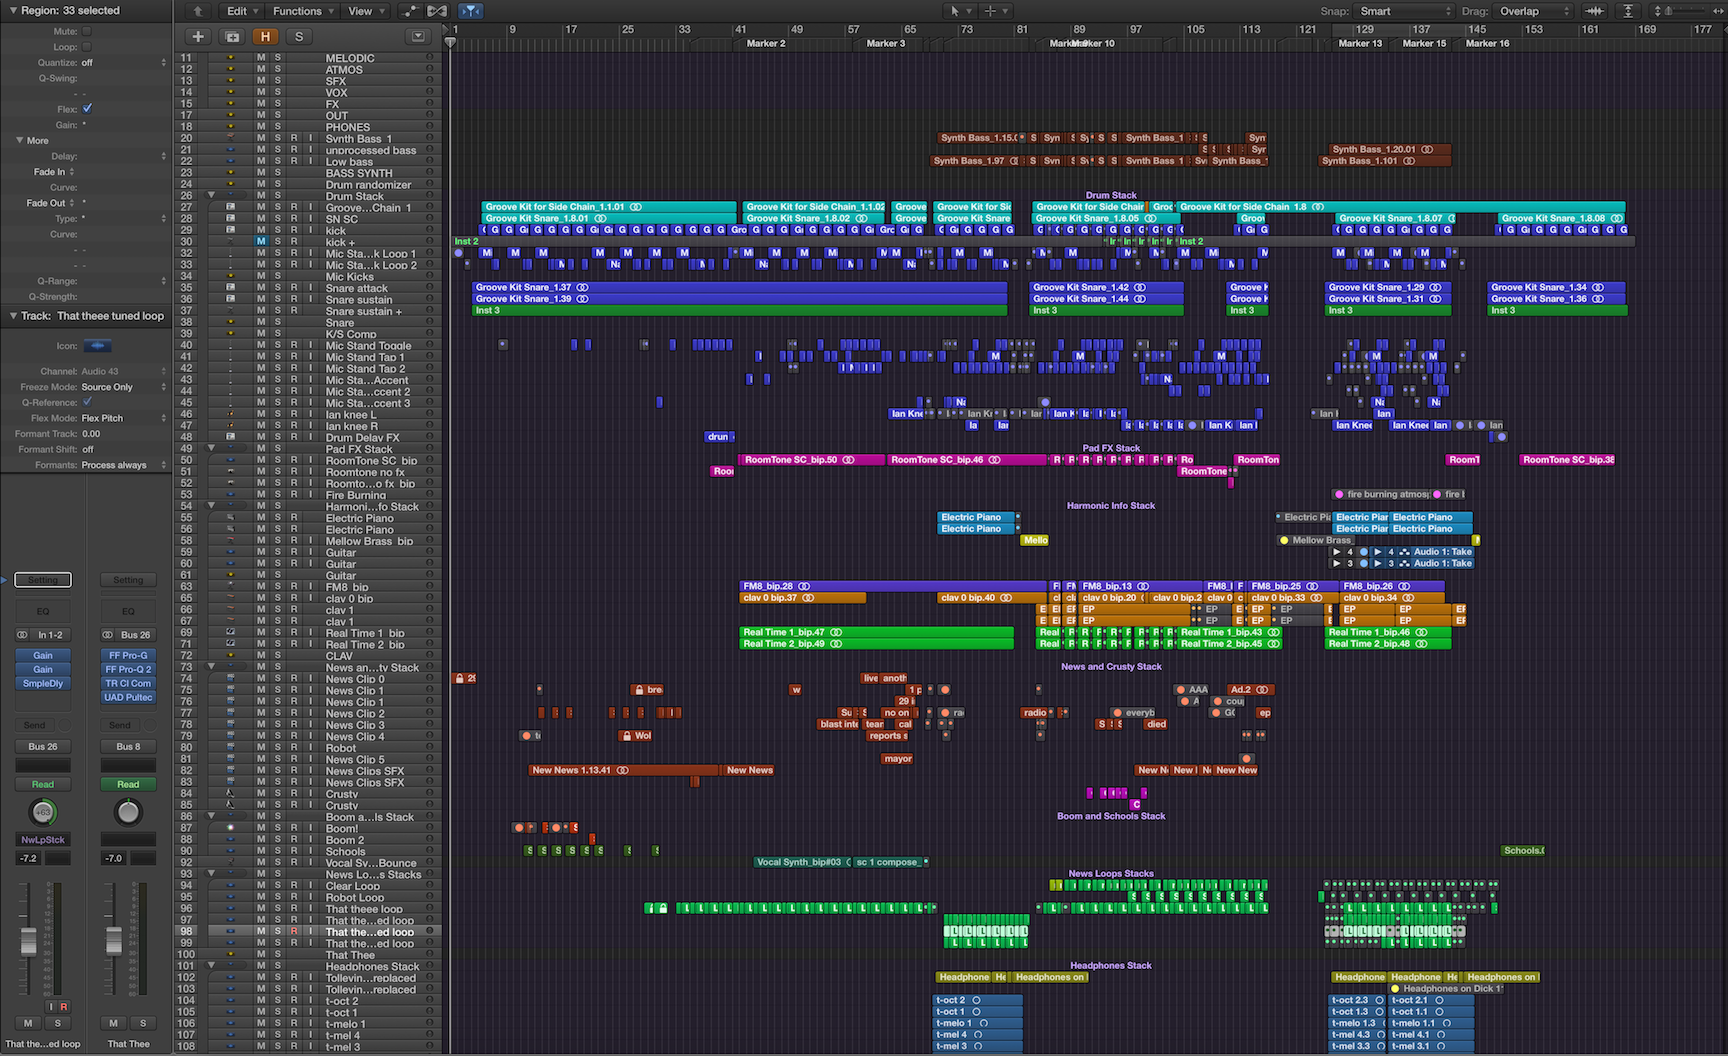
Logic Pro offers two kinds of track stacks that help you organize and route your sessions. The first is a folder stack, which sends all associated tracks to a VCA (Voltage Controlled Amplifier).
The second is a summing stack, which lets you combine multiple tracks and route their output to an audio subgroup.
These two tools make things quite a bit more manageable for large sessions. You can instantly collapse your track stacks by option-clicking them, making navigation a breeze.
10. Use iZotope plug-ins in Logic Pro
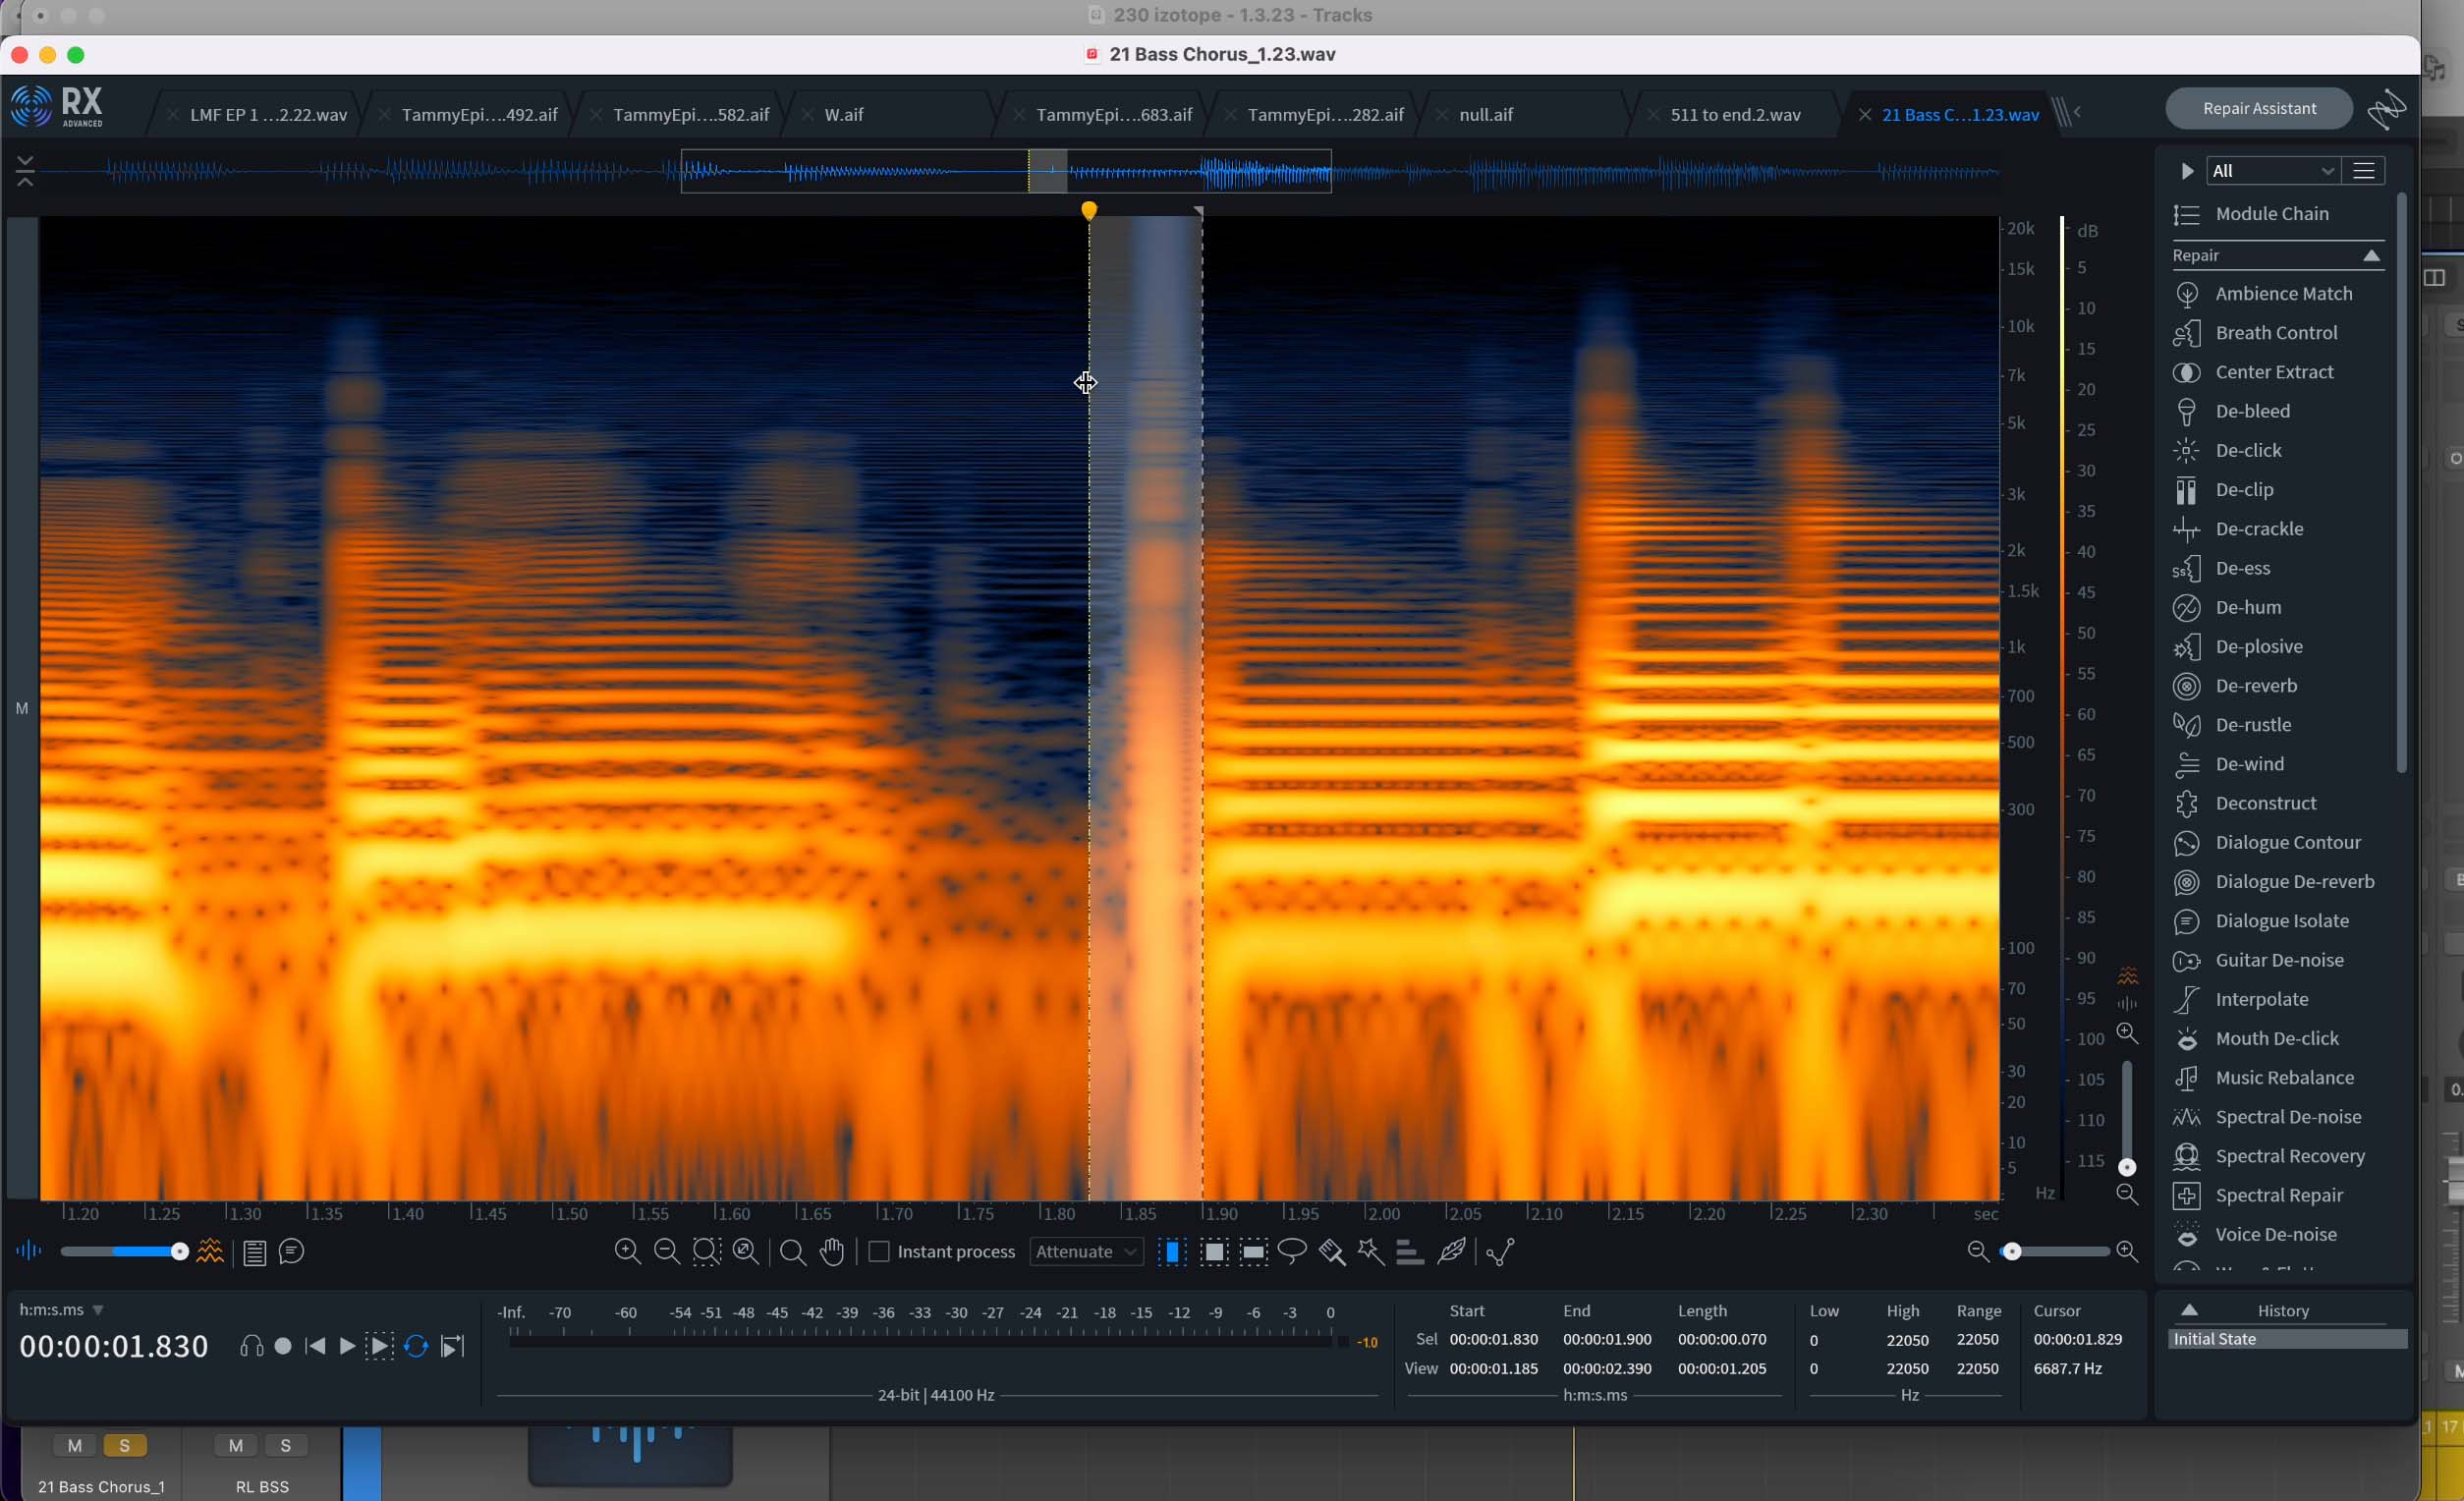
Logic Pro X and iZotope play awfully nice with each other. If you set Logic’s external audio editor to iZotope RX, getting back and forth between RX and Logic is a breeze.
Simply tab over to this window in the settings menu:
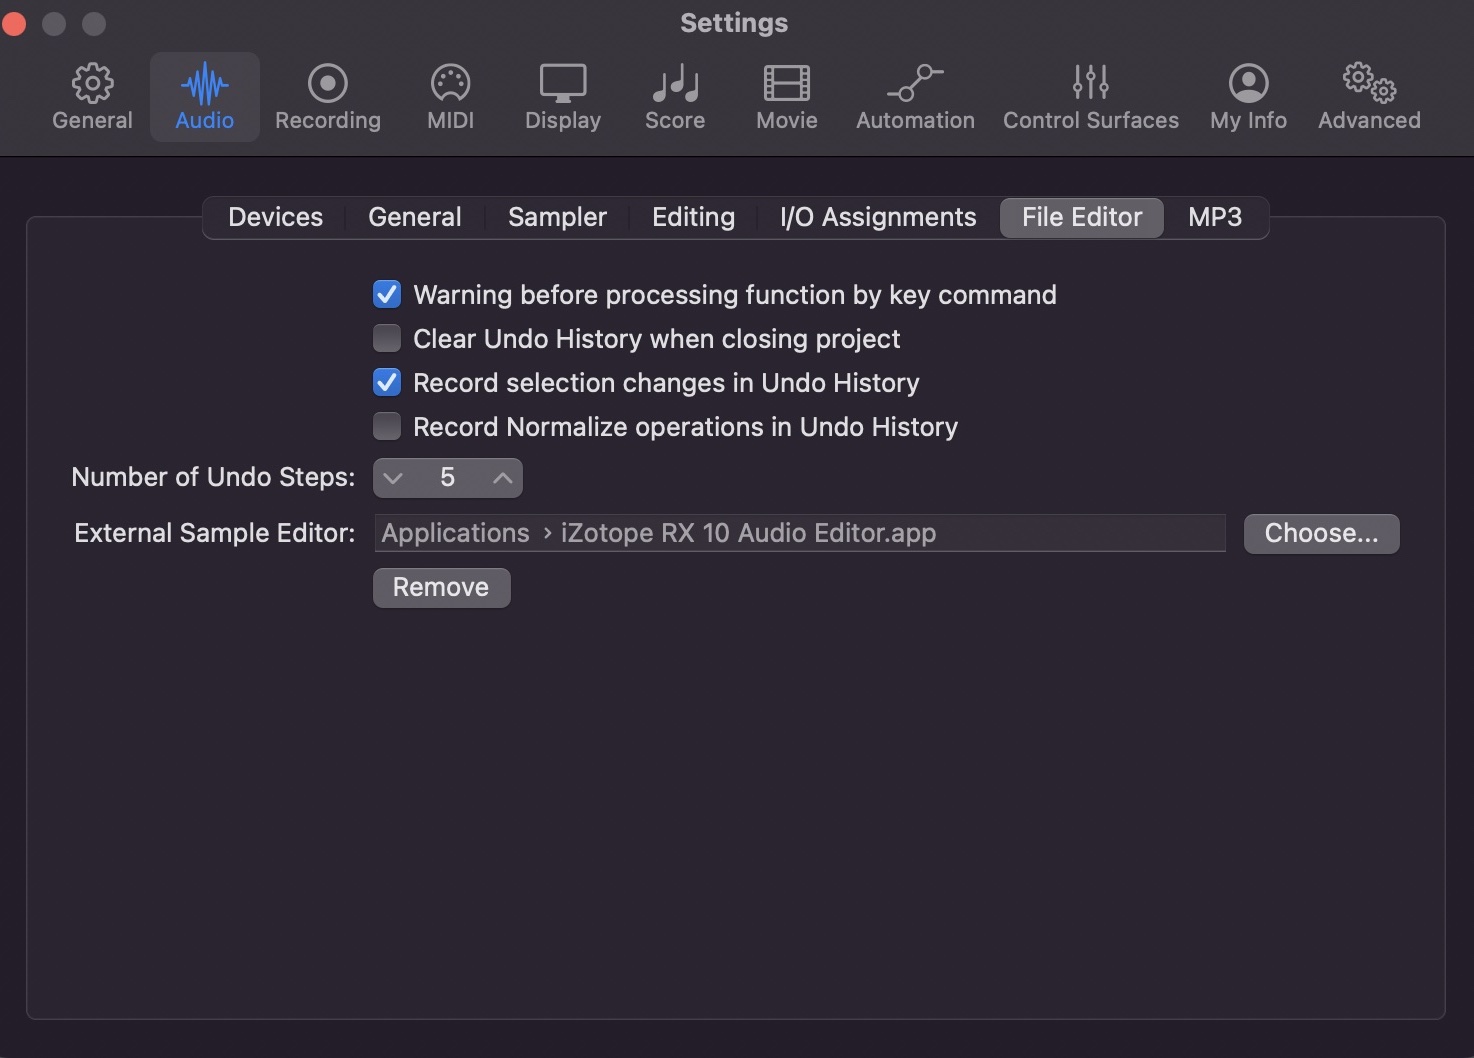
External file editor
You can see I have RX 10 selected as my external sample editor.
In the following video, I will make use of RX as an external sample editor. I will:
- Notice a click in a bass part that shouldn’t be there.
- Isolate the region around the click with the marquee tool
- Save the region as a new file with my key command (option command f)
- Open the file in RX 10’s standalone app (key command: shift w)
- Use RX De-click the offending region (key command: command+2)
- Overwrite the original file
And the click is magically gone!
It’s also worth noting that iZotope’s AI-powered tools, such as the intuitive iZotope Neutron mixing plug-in, work wonderfully in Logic Pro X, both natively on the silicon chip, and in Rosetta.
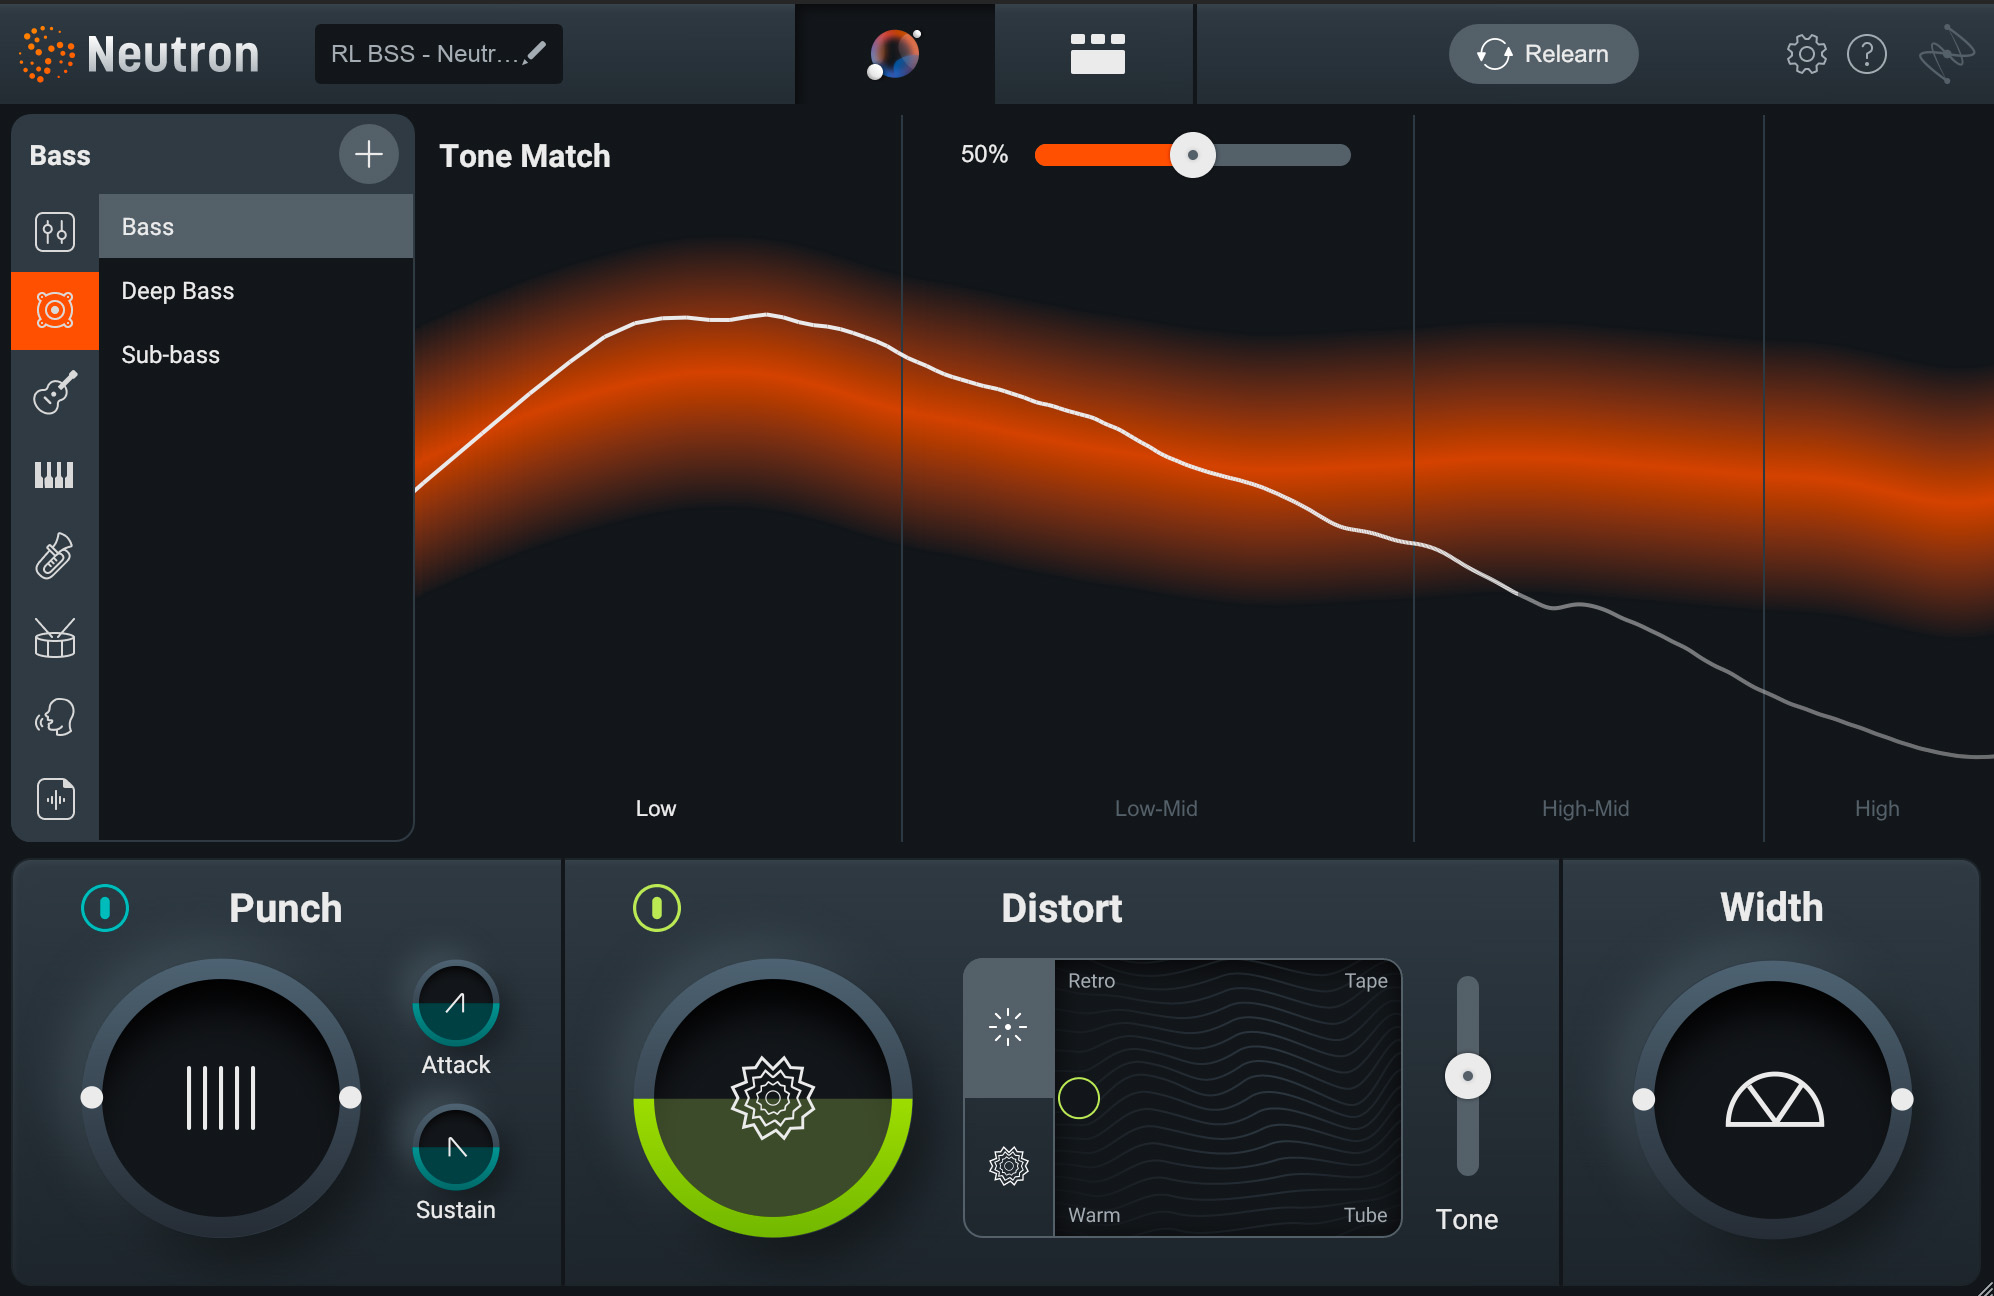
iZotope Neutron works well in Logic Pro natively on the Silicon chip and in Rosetta
Starting mixing your sessions in Logic Pro
Logic Pro X is a powerful and comprehensive digital audio workstation that offers a wide range of features for music production and editing. By learning how to navigate the interface, manipulate audio and MIDI tracks, and utilize the various tools and effects available, users can quickly and easily edit their mixes.
If you haven't already, try using powerful iZotope plug-ins inside Logic Pro X to get pro-sounding tracks, including Neutron, RX, Ozone, and more.
