Gain Staging: What It Is and How to Do It
Gain staging is tough to understand—so let us explain it! In this article, we’ll give you a modern approach to gain staging, as well as a brief history of the term in analog and digital contexts.
Gain staging is a term that baffles many beginners. It’s the kind of phrase people throw around at producer parties as though they know what it means. Often they don’t.
Even if I threw down the most prosaic definition of gain staging (“adjusting the level at each point of amplification to ensure an optimal signal-to-noise ratio, without unwanted distortion”) it might only confuse you, especially if you didn’t understand the building blocks of that definition.
In this article, we’re going to try to keep it as simple as possible.
In this piece you’ll learn:
These gain staging concepts can be applied with the plug-ins included in iZotope's


Music Production Suite 7
What is gain staging?
Gain staging is the process of making sure the audio is set to an optimal level for the next processor in the chain in order to minimize noise and distortion. By gain staging through your analog and digital systems, you can achieve the best possible sound for your recording.
It’s important to note that “optimal” here means loud enough to drown out the inherent noise floor of a recording, but not so loud as to cause immediate distortion upon hitting the next processor in a chain. Think like goldilocks: you want it to be just right.
“Loud” is also too fuzzy for our purposes. It’s too subjective—certainly when it comes to meters or signal processors. An audio signal might appear “quiet” while causing analog or digital distortion regardless. In my experience, this is particularly true of electronic hi-hats: they can sound quiet, read loud, and cause digital distortion if left unchecked. So, the better term here might be “strong.”
Gain staging has traditionally been set up differently in analog and digital environments. Let’s examine how they work.
Gain staging in analog vs. digital
Analog and digital gain staging are two practices that have similar beginnings, but differ quite a bit under examination.
Analog gear has physical limits above which a signal will incur audible distortion. The distortion can sometimes sound round, even pleasant in small doses. We keep this distortion in mind when setting the levels of analog processors, making sure we preserve enough room before the point of distortion. We call this room “headroom.”
Digital can have a limit all its own—a ceiling we call 0 dBFS. Above this level, we can get hard digital clipping, characterized by squaring off a waveform:

Example of digital clipping in an audio interface
We often try to avoid this distortion, though some engineers like to court just a little of it from time to time to get a certain kind of aggression. This choice should be made with the utmost care—but more than that, this choice is made by how we choose to gain stage in the digital domain.
This is a very simplified definition of digital conditions, designed to prepare you for what’s to come. Remember this for now: gain staging isn’t so cut and dry in the digital world. We’ll circle back to that later. First, let’s go deeper into analog gain staging, as it’s still important if you record music, or if you use any analog gear in your mixing setup.
Gain staging with analog gear
Before the advent of digital, records were made with analog equipment. Microphones, outboard EQs, compressors, console desks, tape machines—every piece of gear had to be leveled properly for the next piece of the chain, in order to achieve a good result. A “good result” could mean something pristinely clean, or something pleasantly saturated; this depended on the material in question.
There were issues in getting good results: Record too quietly, and you’d approach the noise floor—a blanket of constant, audible hiss that can be distracting. Push the gear too hard, and you’d incur unusable distortion. This was usually the result of driving a unit beyond the capability of its power supply’s voltage.
Now we can put a finer pin on the term gain staging as it applies to analog processing:
In the analog world, gain staging refers to adjusting the level at each point of amplification to ensure an optimal signal-to-noise ratio, without unusable distortion.
With analog gear, you have to think globally—you have to consider everything from the source to the mix bus. Overdrive one piece and sure, it might sound good in a vacuum. But the combination of a bunch of processes all driven too hard could overwhelm the final result of a track, or negatively impact the whole mix.
You have to think about the level of a track, all its channel-based processors (compressors, EQ, etc.), all its submix processors (likewise), and all the stereo bus processors. Furthemore, you have to think about all the tracks going through each path as it pours into the final pipeline of the stereo bus.
Here we can begin to consider the import of terms like “headroom” and “noise floor.”
You don’t want to be hovering too close to the noise floor—you want to drown it out, so you don’t hear the hiss. But you also want to leave enough headroom, so you don’t incur distortion.
You need a buffer or safety zone that can accommodate transient spikes or loud moments without causing horrible distortion. This is headroom.
With this basic analog lesson concluded, let’s move onto digital.
Gain staging with fixed point digital interfaces
In the old digital days, digital systems had an “analogue” to analog—a similar, though not identical point of no return: that 0 dBFS we referenced before. dBFS means “decibels full scale,” and it describes the highest possible level in the digital world you can achieve without harsh digital clipping, which again, looks like this:

Example of digital clipping in an audio interface
Respecting and fearing 0 dBFS was the norm back in the day. Reverence for the digital ceiling looked relatively simple—at least, for the common engineer who didn’t want to get too deep into mathematical concepts: just treat the process as you did in the analog world. General guidelines included:
- Positioning the faders of a static mix below unity gain
- Aiming to avoid going higher than 0 on the faders whenever possible (assuming the tracks were recorded at a good level).
- Making sure no individual channel-fader was positioned above its corresponding submix’s fader position (to avoid even the possibility of driving anything too hard)
- Making sure no individual channel ever set off your DAW’s red meter—the one that signifies clipping
- Making sure no analog-modeled plug-in was driven past the point of pleasant, harmonic distortion
- Making sure no digital, non-analog equivalent plug-in clipped within the module, as that could cause unwanted distortion
Those were the days of primarily using fixed-point audio interfaces—when crossing the digital ceiling marked a fixed point of no return; the audio would always be degraded in some way, which I will illustrate in a moment with audio examples.
One by one, however, DAW and plug-in developers alike turned to floating-point processing, and now we find ourselves in a new reality.
Gain staging with modern floating-point digital processing
Most DAWs currently operate with floating-point processing, often 32-bit or 64-bit. This allows for handling audio in ways unthinkable in the days of analog, and impossible in fixed-point digital systems. If the mathematics and science around floating-point processing interests you, take a look at Bob Katz’s excellent book, Mastering Audio.
I’ll show you examples of what happens when you push beyond the point of no return, so you can see the power of the floating-point world.
Here is a test tone feeding a bus. It hovers at -14 LU on the Insight meters, as you can see.

I don’t have an ancient copy of a DAW floating around, but I can take the test tone, boost it up beyond 0 dBFS, and export it as a 16-bit file. Then, I can bring it back into the DAW and show you what it sounds like level-matched to the unaffected test tone.
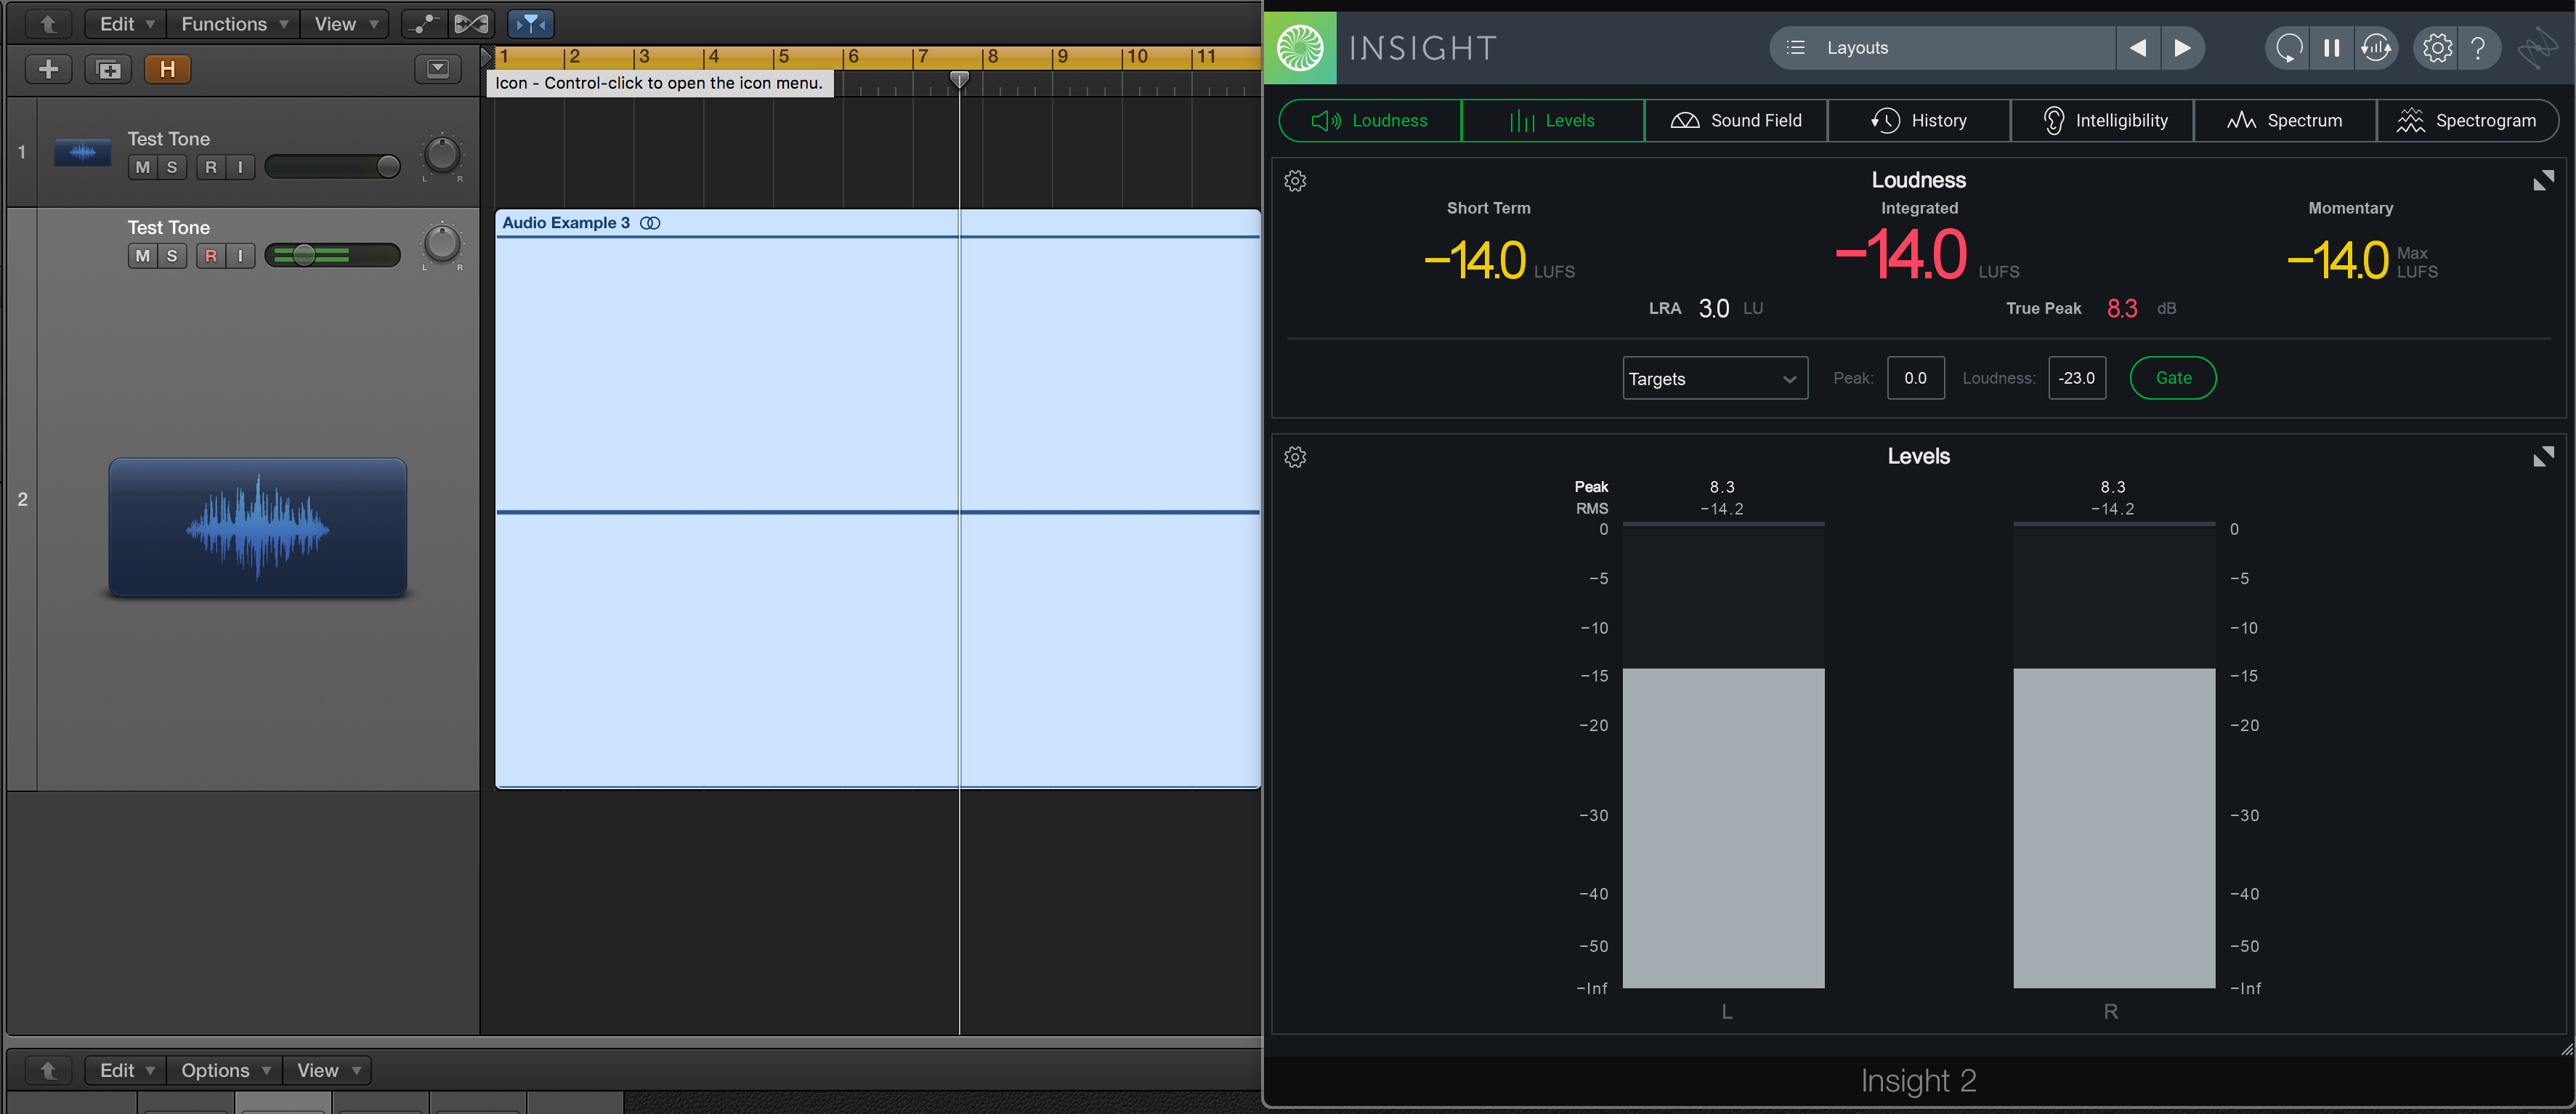
Reads the same on the meter, right? But let’s hear how it sounds.
That’s some digital distortion right there. It’s fundamentally different from the original test tone, and it sounds bad.
Let’s start again: I often use Logic Pro, a floating-point DAW. So, if I were to raise the original test tone beyond 0 dBFS, it would certainly look like it’s clipping on the meters—but check this out: the test tone has been routed to a bus. If I were to bring this bus down on the fader, I can get it to sound like the original, undistorted test tone.
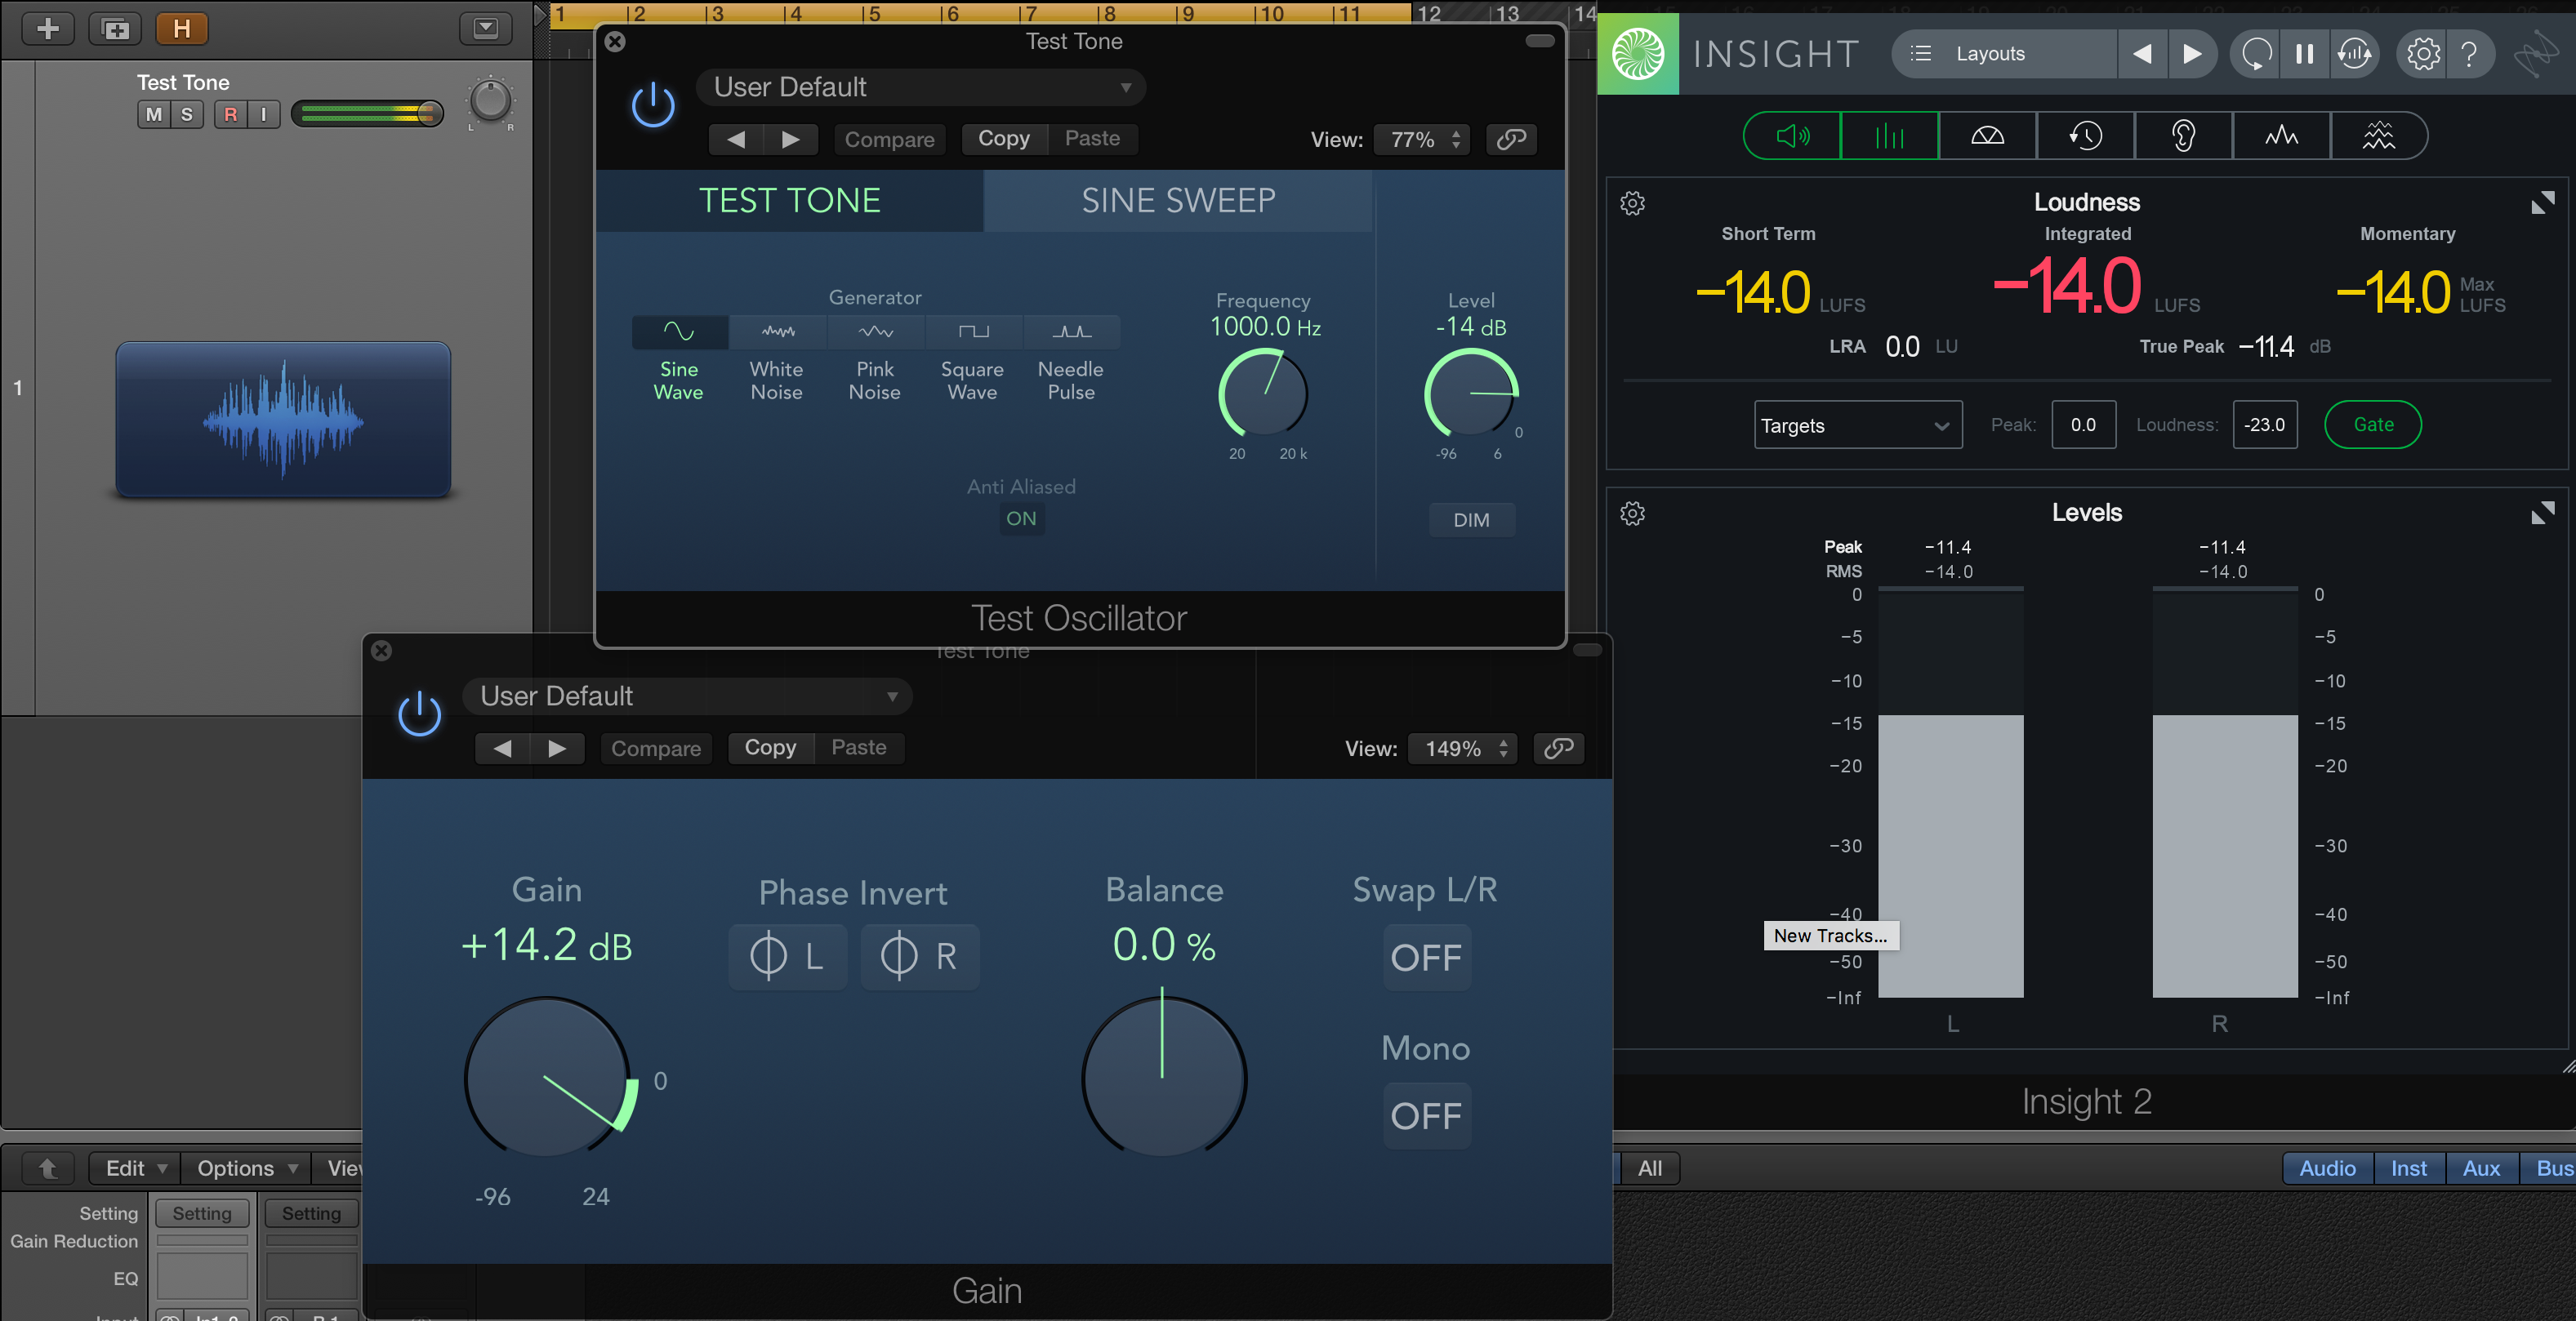
What do we get?
In case you were wondering if it really matches the original test tone, here’s a file proving they null down (cancel out) to an inaudible level.
This frees us up in many exciting ways.
Common parameters for gain staging
We’ve demonstrated that in the domain of floating-point, you can push above 0 dBFS and not harm the signal, so long as you dip back down on the track’s corresponding destination. This is all before you export it as a fixed-point file (a CD-quality WAV file, for instance), or before you send it through a D/A converter—do keep that in mind, or else you’ll incur distortion.
But what does this mean for you, the mixing engineer? Simply put, freedom—a freedom to move faders around in ways unthinkable in the olden days, so long as certain conditions are met without exception. Here they are:
Some plug-ins model analog hardware—to a fault!
This fault would be the point of analog distortion. If you’re using an analog modeler and you’re pushing it too hard, it will still sound distorted, even if you lower a corresponding bus fader. Sometimes this is what you want—sometimes this is why you employed the plug-in. Other times, however, you wanted this at the beginning of your mix, but by the end of the process, a horrid noise trips you up; such distortion could very well be the culprit.
If you’re bringing down the output of a limited bus or track, it will still sound limited.
The rules of squashing dynamic range still apply in this crazy floating-point world. So it still pays to watch your inputs and outputs, as we did in the days of analog. Does this have anything to do with clipping against the digital ceiling? Not really. But if you offer your mastering engineers a file well below 0 dBFS and still sounds limited, there’s little they can do to give it more life.
Make sure the output of the master bus doesn’t hit 0 dBFS.
This is very important, because a file exported at 24-bit that exceeds 0 dBFS will fossilize, petrify and otherwise immortalize that distortion going forward.
Now, it is becoming more and more commonplace to export 32-bit files, and theoretically that can ameliorate distortions going forward, but 32-bit files are not at all the norm in streaming audio platforms yet.
Even in these days of 32-bit files, most people still use 24-bit converters, and many distribution services still only accept 16-bit files unless you’re willing to pay extra money for the privilege of more bits.
This means you should still shoot for a file that plays nice in a 16-bit fixed-point world, where 0 is really 0. Who knows, this may change, but right now they're the rules.
How to gain stage your mix
1. At the beginning of your production
How should you use gain staging to your mixing advantage? The first instance of gain staging you can do in any mix is calibrate the gain/trim of each and every track, doing so in a very specific way.
Now, I know I’m going to use the digital-style EQs and processing that only iZotope can get me. I’m also going to use analog-modeled compressors, tape machines, delays, reverbs, and more, because they have their own special sauce.
As mentioned above, these analog-style processors are modeled to a fault: they are designed to incur distortion if pushed too hard, and this distortion doesn’t sound all that great in excess.
From reading the manual of these plug-ins, I know that many of them have a default calibration: their “0 VU” point, often thought of as the “sweet spot”, is -18 dBFS: above -18 dBFS, they’ll begin to sound saturated. Far above -18 dBFS, they’ll sound bad.
So I have my calibration point: I set a VU meter on the output of my DAW to -18 dBFS, and I adjust the gain of each track. When each track is at unity on the faders, it plays roughly around -18 dBFS. Oftentimes I’ll go just a bit lower, maybe -20 dBFS, so that I have more headroom as I stack plug-ins.
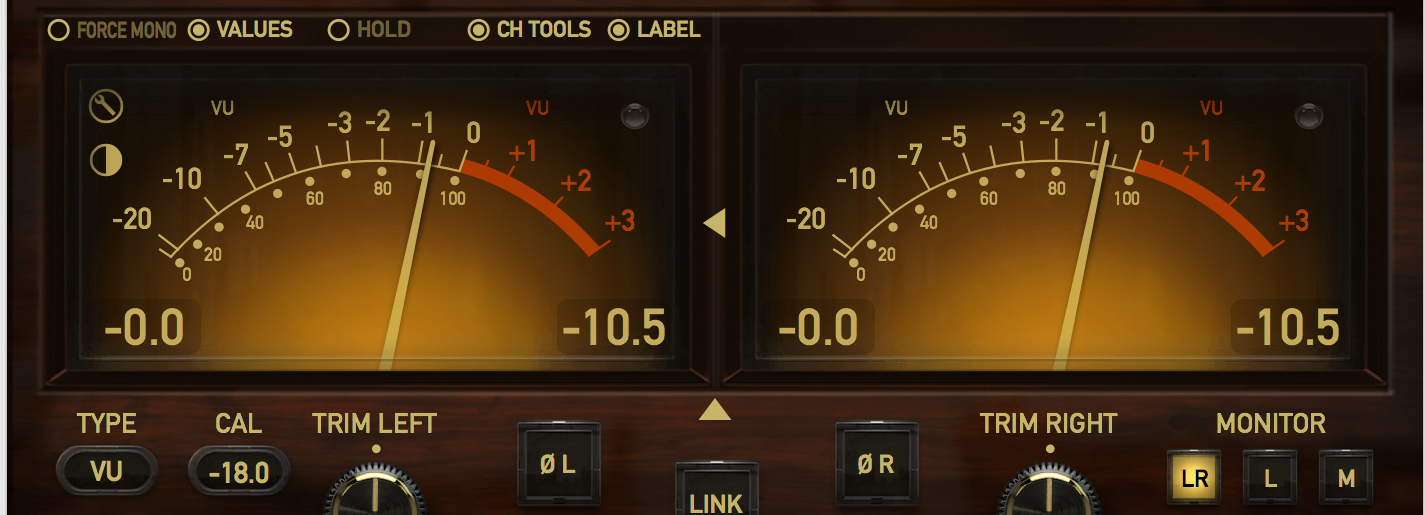
VUMT analog style metering and channel tool from Klanghelm
But that’s not all:
I mix in a hybrid system, using a summing mixer to feed a line-level preamp, some EQ, compression, or whatever the track needs. This means I also need to take good old-fashioned analog gain staging into account.
In a practical way, this means a second round of gain staging: after all the instruments have been calibrated to -18 dBFS, I route everything through my analog chain, and I calibrate the outputs of each submix (the inputs of each channel on the summing mixer) to -14 dBFS. From measuring my system with test tones and music, I know this level is perfect for my chain.
This is a lot of work! Why do I do this? Because I love the way it sounds—and more importantly, I love the way it feels: it’s more work at the outset, but the mixes come together so much more quickly.
2. Other stages in the mix
Here’s another example of gain staging in action, with many possibilities open to you. Say you’ve got a drum mix you like. The balance is great, the processing sounds awesome—but the drums push the whole mix into undesirable distortion.
Say, furthermore, that you’ve got a compressor you really like on the drum bus, so you don’t want to change how you drive it. You’ve got options for how to treat the problem, including:
Turning down the master bus fader if it’s too loud, without sonic degradation
Turning down the fader of the drum bus, likewise
Putting a utility plug-in after the compressor and turning that down
Sending the drum bus to another bus and turning that bus down
The result of these methods will get you to similar places, but each has its own benefits and drawbacks:
Option 1, turning down the master bus:
This will get you different results depending on the DAW. Say you’re in Logic; if you have processing on the master bus, you’ll still be hitting that processing at the higher, pre-fader levels, which may or may not be what you want (more on this later).
If you’re using Pro Tools, you might have the bus configured on a master fader. This means turning the master fader down will affect the processing because the fader drives the level into the processing. Confusing, isn’t it? The other options are less confusing.
Option 2, turning down the fader of the drum bus:
This may affect how the drums hit any processing on the master bus. It also may be super-annoying to turn down a fader with a bunch of automation already written for it.
Option 3, attenuating the plug-in’s output:
With this method, you can turn down the track without affecting fader automation. You can even automate the plug-in down at specific moments where you’re hitting the digital ceiling—micro adjustments that only affect the sound for milliseconds, yet save you from clipping upon export!
Option 4, setting up a new, intermediary bus:
What this gives you are different ballistics for automation from the previous option (depending on the DAW and the plug-in, of course). The output of some plug-ins, for example, can move in 0.01 dB increments, which can be either helpful or annoying, depending on what you need. A fader, on the other hand, usually moves in 0.1 dB increments, which may help or hinder you.
This all may seem overwhelming, but it’s also very, very freeing. It means that when it comes to gain staging inside the box, you can actually think outside the box.
Start gain staging in your mix
We could obviously go deeper and deeper—and longer and longer—into gain staging, but this is enough to get you familiar with the subject. Plus, that list of considerations will surely come in handy.
So the next time you’re at a music meet-and-great and fellow mixers sling around terms like gain staging, noise-floor, and headroom, you’ll have a better idea of what they mean. Of course, now that you know, you can skip the party altogether and get back to what really matters: a vibrant mix, one that you control at every level. The stage is now yours to gain!
iZotope has many gain staging tools available in the Music Production Suite. Explore compression, EQ, and more with iZotope plug-ins.
