Expanding on compression: 3 overlooked techniques for improving dynamic range
Discover the power of upward compression, expansion, and downward expansion in audio mixing. Learn techniques to enhance dynamics and breathe life into your mix.
When many engineers say "compression,” what they mean is “downward compression.” In other words, reducing the level of the signal above a threshold that you set in your compressor. However, we often forget about upward compression, where signal below the threshold is brought up in level. This technique can prove valuable in certain situations for a more transparent sound. It can even be approximated with parallel compression, if you don’t have an upward compressor available.
Similarly, expansion – of both the upward and downward variety – can greatly help your mix. Often, when presented with a dull snare sound, our instinct might be to reach for EQ. However, a little, upward expansion might do the job equally well, if not even better. When used carefully, the harder the drummer hits, the more attack and snap we can bring out, leaving undesirable resonances alone for the ghost notes and softer strokes.
So let’s take a look at the three dynamic processes often overlooked in mixing and production, with tips on how to utilize them.
Try iZotope subscriptions for free and explore all these concepts and more in Neutron and Ozone.
1. Upward compression
To quickly recap, in what we commonly call “compression,” a signal is brought down in level when it rises above a specified threshold. More accurately, this is termed “downward compression.”

Upward compression, however, works from the opposite end of a signal’s dynamics: when a quiet signal falls below a predetermined threshold, it’s brought up in level.
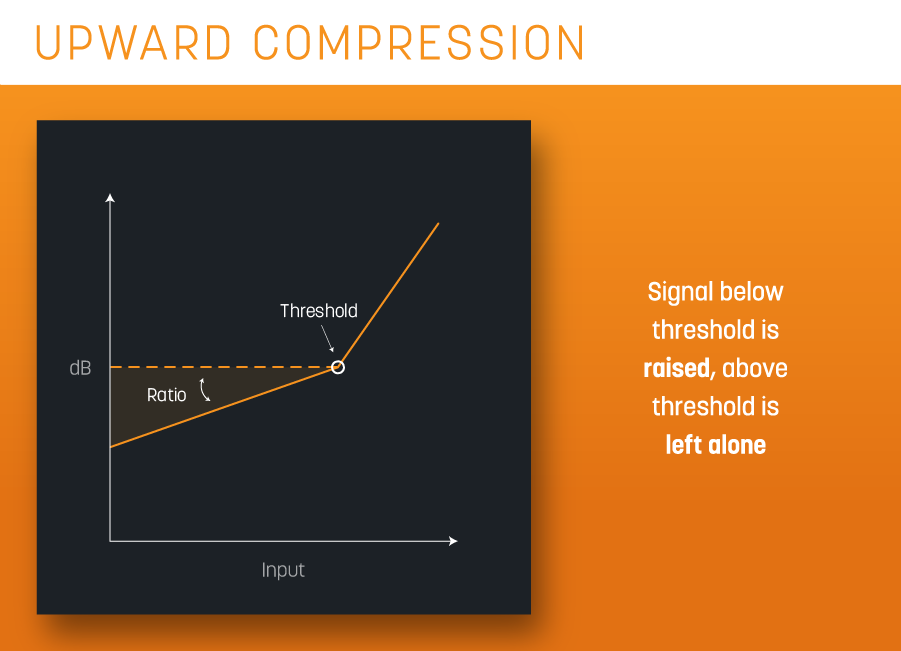
If you’re familiar with expansion – two varieties of which we’ll cover more later – you’d be forgiven for scratching your head and thinking, “Surely this must be expansion, right?” After all, you’re pushing a signal up, not pulling it down.
To that point, I’d reply that you need to think of the dynamic range of the signal as a whole. Yes, the lower level is being manipulated, specifically to be louder, but the higher level remains the same, meaning the overall dynamic range of the material is still being reduced, not expanded. Therein lies the difference. The net effect, then, is that dynamic range has been made smaller – just as in regular, old downward compression.
One place we might use an upward compressor is on any room-based track that isn’t quite roomy enough. Take the room mics of a drum set, for example. In the studio, perhaps the drum booth was rather small, resulting in a closed-in sound. Using an upward compressor in this scenario can allow you to bring out the ambiance – the space between the transients – and get a roomier feel in your track.
You might be saying, “Why not use the sustain of a transient-shaper for this?” You certainly could – but they’re not really quite the same. Upward compression allows you to specify things like ratio, attack, and release, all of which can let you sculpt the sound in a way not quite possible with transient shaping.
You can also use an upward compressor to create a room-mic sound when no room mics were actually used in the session. In fact, fellow iZotope blog contributor Nick Messitte once did this on a mix, turning a spare tom mic into ambiance.
He recalls, “I was mixing a live track for the indie band Leland Sundries, and I wanted more room tone than was provided in the recording. I didn’t like what artificial reverbs were giving me, as this was a tightly miked, live-mix scenario. Luckily for me, the rack tom on this tune was never played in the song – not even once! Instead, the mic had picked up a weirdly balanced picture of the whole kit: kick, snare, hat, cymbals, and floor tom were all represented in excellent proportions.
“But it wasn’t roomy sounding. Squashing the track with a downward compressor wouldn’t have worked, because that would’ve emphasized the transients, and I was going for the space between the transients. With an upward compressor, I was able to bring out the ring of the kick and snare, turn up the splash of the cymbals, and emphasize other room-based reverberations.”
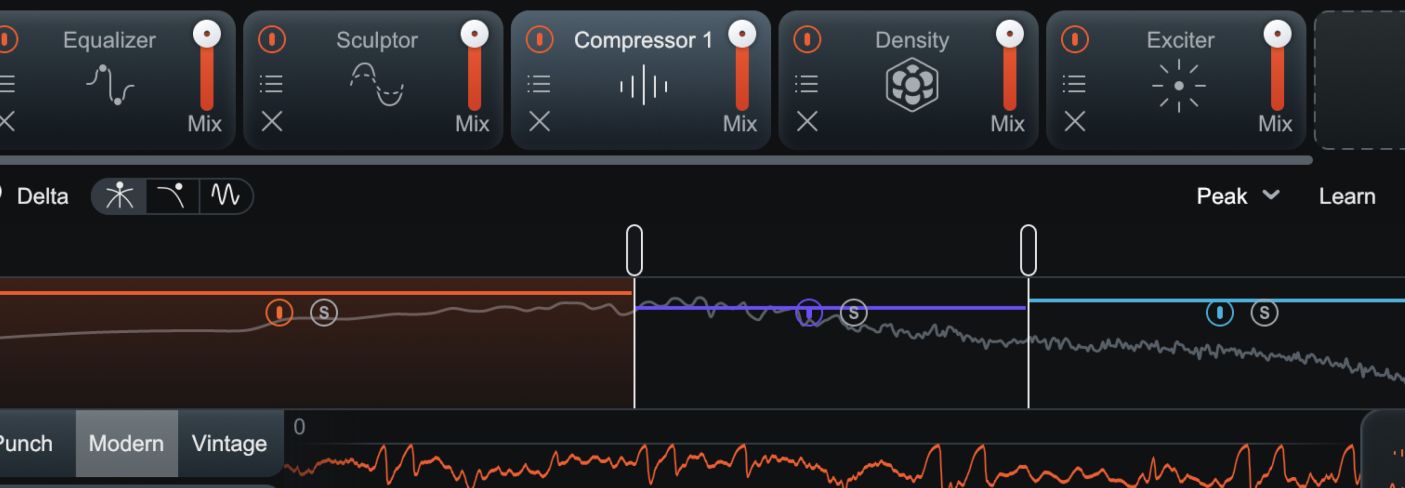
If you want to try this for yourself, it’s possible with many popular software compressors. The compressor in Neutron can be turned into an upward mode when you use ratios below 1:1, as shown below.

Upward compression in Neutron
If you’re experimenting with upward compression in this way, to pay extra-careful attention to your threshold, attack, and release parameters, and make sure to use very low ratios – maybe between 1:1 and 0.67:1 – otherwise you may bring the noise floor up 20–30 dB in quiet sections.
You’ll also likely need to shift the way you think about attack and release times, as the sonic effect tends to be the opposite of what you’re used to with downward compression. In other words, attack affects how quickly level is raised when it drops below the threshold, while release affects how quickly it returns to normal when it goes back over the threshold.
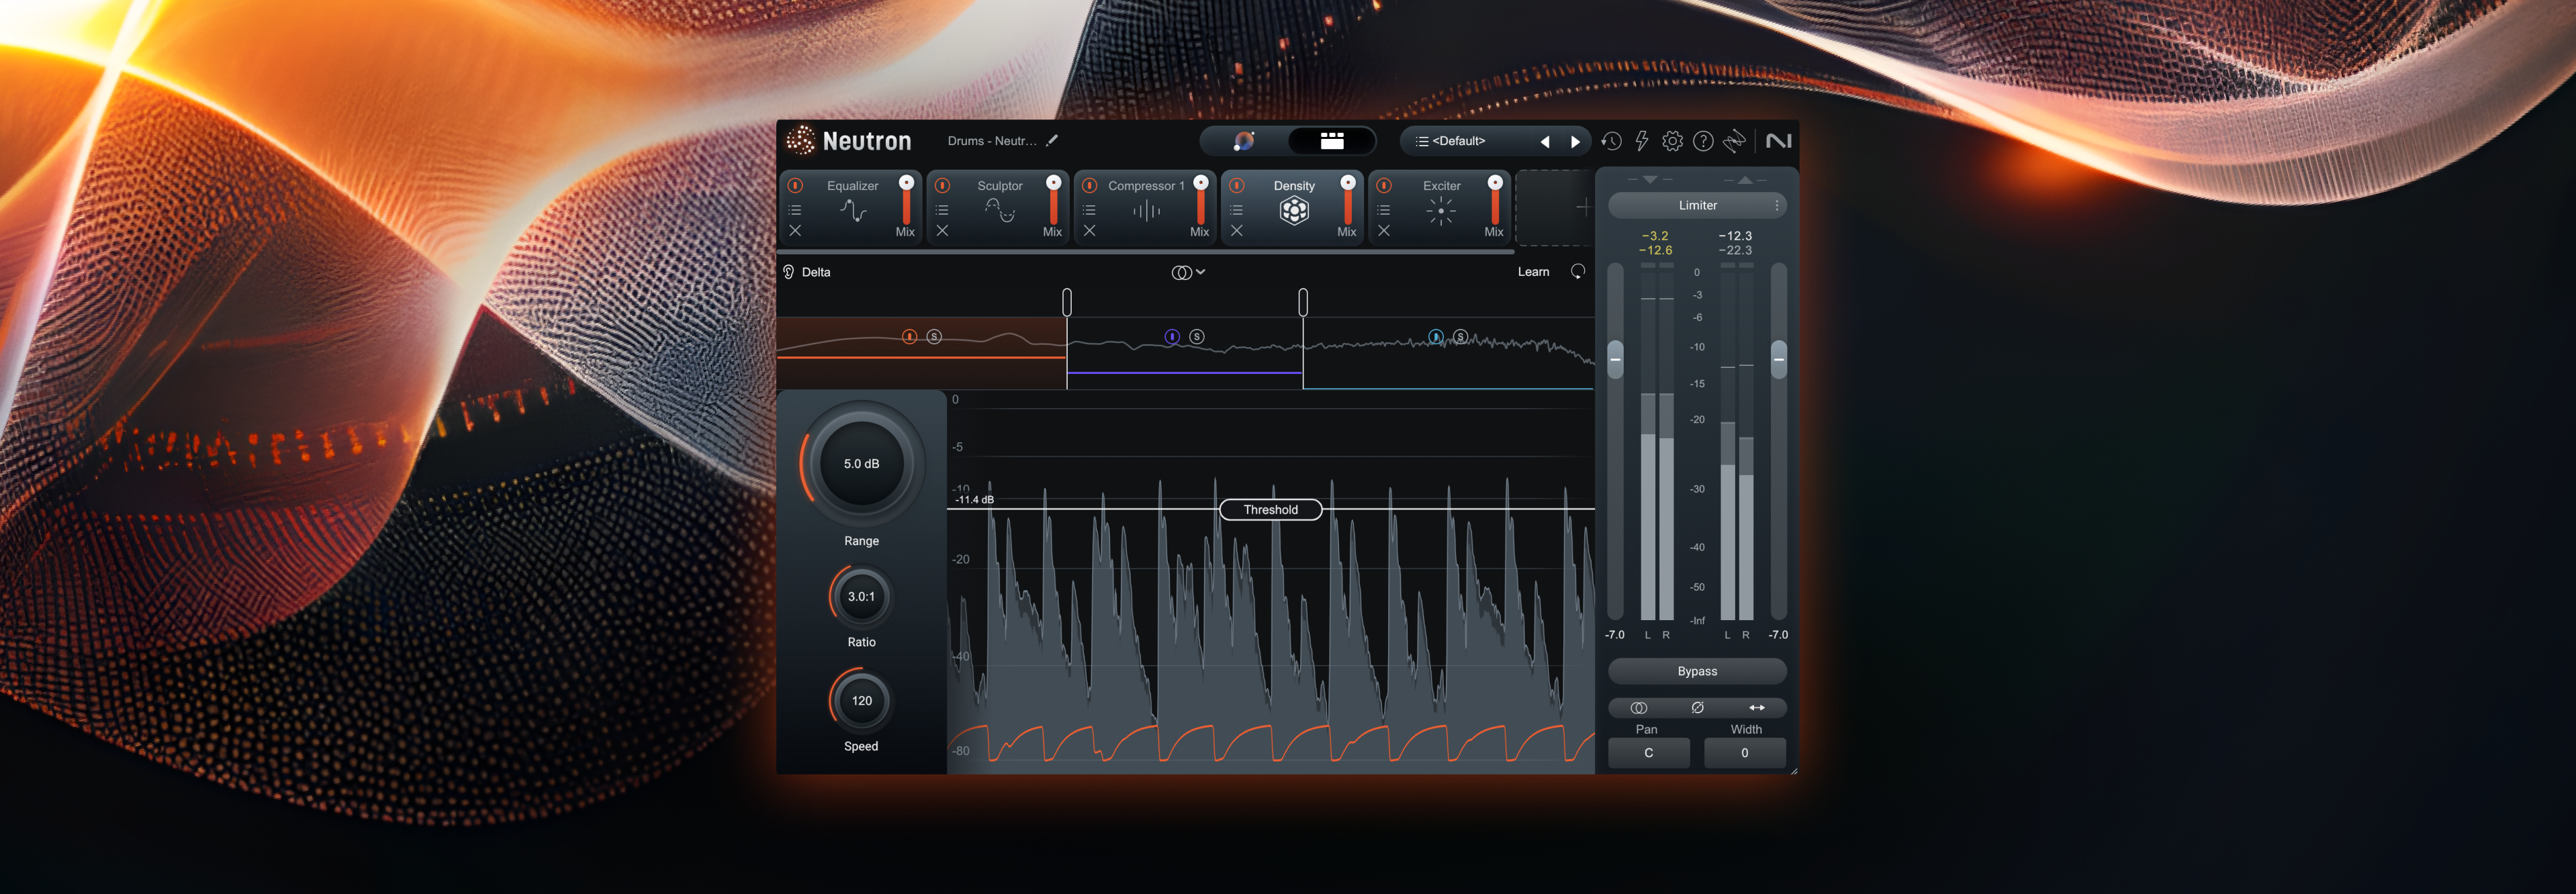
If this all sounds a bit complicated to you, don’t worry, you’re not alone! The complexities of upward compression, coupled with the fact it can often bring the noise floor and other undesirable low-level artifacts up to audible levels, likely contribute to why it’s not a bigger part of the production and mixing lexicon. However, one of the modules in Neutron 5 aims to change that! Enter the Density module.
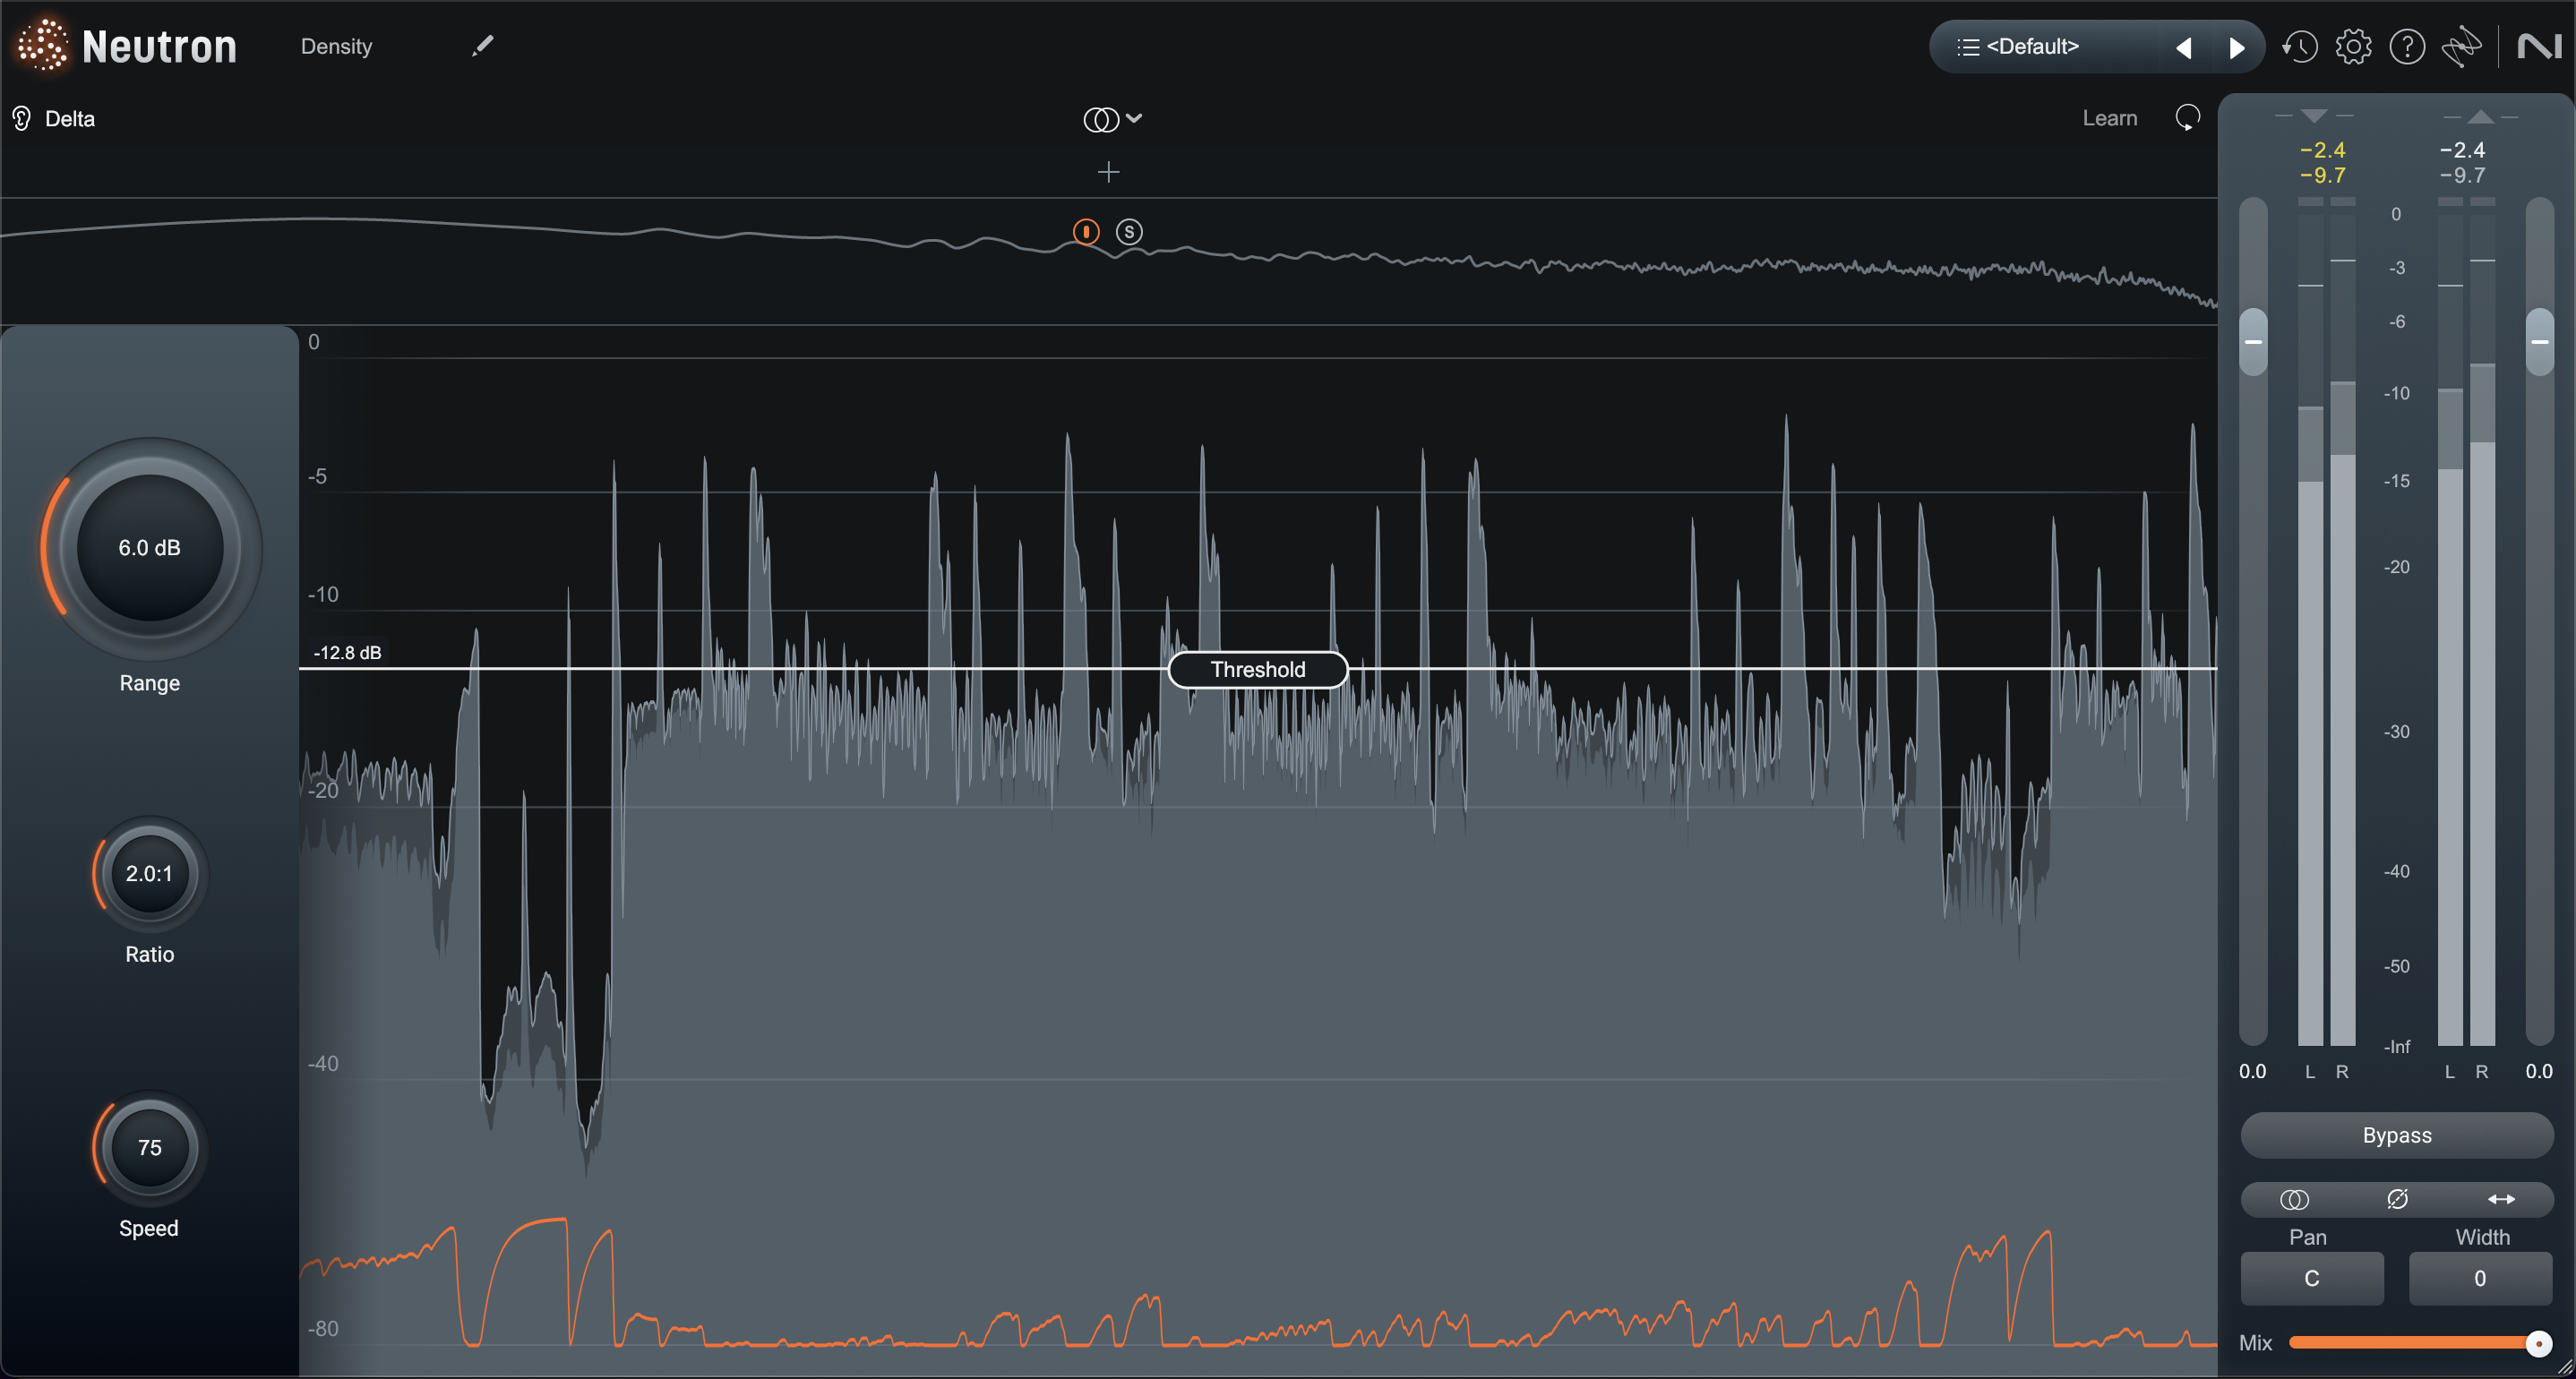
Upward compression using the new Density module in Neutron 5
Density simplifies a few things. First, the ratio is presented in more familiar terms from a super subtle 1.1:1, to a super-inflated 30:1. Second, to make that range of ratios useful, the amount of added gain can be controlled by setting a maximum amount of gain with the “Range” control. This helps prevent the aforementioned malady of bringing up the noise floor and other low-level artifacts. These few changes truly make dialing in just the right amount of upward compression a joy – and a breeze.
Add to both these approaches the multiband options available in Neutron and you start to truly open a vast world of sonic options. Whether or not you’re new to multiband compression in general, if you’re new to multiband upward compression I’m going to give the same advice I would if you were just getting started with multiband downward compression: keep it simple. Use as few bands as possible, with broadly similar settings in each, and branch out from there.
Ok, having expounded on upward compression in some depth, let’s move on to two flavors of expansion.
What is an expander? Follow along as Sam Loose demystifies dynamics processing, continuing with expanders. Learn what expanders are and how they increase the dynamic range of a signal, and discover for yourself how expanders can be used in mixing and mastering to create a more cohesive song.
2. Upward expansion
Upward expansion is akin to regular old downward compression in a key way: it affects the louder part of a signal as it crosses above a threshold. However, instead of clamping down on the signal and reducing gain, the expander pushes the signal up in level. Here is where the process earns its name – it expands the overall dynamic range of the signal.

As in compression, the amount the gain is changed once signal crosses above the threshold is determined by the ratio. That said, there is not as strong a convention as to how upward expansion ratios are expressed. I’ve seen everything from 0.X:1 and (X):1 to 1:X and even X:1. In other words, 0.5:1, (2):1, 1:2 and 2:1 could all mean the exact same thing depending on the context and the product.
All this to say: check your product manual to determine if and how you can use it to apply upward expansion.
Let’s set the math aside though – nobody’s dancing to ratios. Instead, let’s look at a few potential use-cases. One good candidate for upward expansion could be a severely-compressed snare track that’s a bit devoid of life – something you received from a sub-paran recording session. Using an upward expander, you can sometimes recreate a sense that the snare is jumping out at you.
The trick is to edge the threshold just low enough that a snare hit is just a little louder than the surrounding sonic information – the rest of the drum leakage). Once you find this sweet spot, the attack, release, and ratio settings will help you shape and boost that initial thwack. Shorter attack times will grab the transient sooner, and quicker release times will bring it back down to its original volume more quickly. The opposite, of course, is true. Electric basses that have been squashed during overzealous tracking recording sessions can also benefit from expansion employed in this way.
Another option might be to set the threshold lower so that the signal is nearly always in expansion, but using a very low ratio – something akin to 0.83:1, or (1.2):1. That coupled with the fastest attack and release you can get away with while staying short of all out distortion can increase the overall amount of movement you can get out of an overcompressed source.
It’s also worth noting that upward expanders can be employed creatively on sampled material to add a bounce that simply wasn’t present before. All you need to do is find an element within that sample, center the threshold around that element, and adjust the other parameters to bring it out.
Personally, I often use upward expansion in multiband. In mastering, 3–4 bands of upward expansion with subtle ratios can do wonders to add life back to an overcompress mix. Of course we can do similar things in mixing too. Bringing out the body of a snare drum just on the hard hits can be achieved with an upward expander set to a band in into the 100–220 Hz range. You can also use this technique to bring out the warmth of a thin guitar with too much pick attack, particularly if you sidechain the expander to the guitar’s most brittle frequencies. That way, when the excessive picking noise comes in, the attack brings up the pleasant midrange at almost the same time.
The possibilities for implementation are many. Just be aware that expansion often behaves oppositely to traditional compression. For example, where you would use make-up gain to raise the level of a compressed instrument, you might need to attenuate the level of an expanded sound, so it doesn’t jump up in level too much. Just ensure you create headroom after any expansion in order to avoid clipping further down the signal chain.
3. Downward expansion
Downward expansion – often referred to as simply “expansion” – is similar to its upward counterpart, but with one fundamental difference: when a signal drops below a set threshold, the downward expander pulls it even farther down toward the noise floor. You may even use downward expansion quite often, though you might not know it – it’s the very process behind gating.
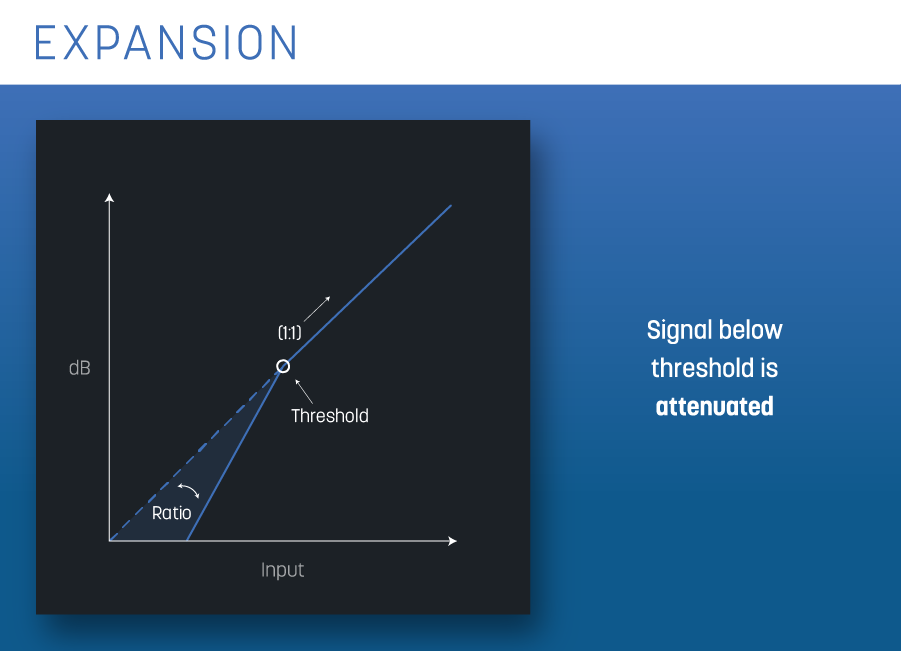
Still, downward expansion can be used for far more than gating. Rather than kill extraneous sounds outright, you can use downward expansion as a subtler, more transparent transient-shaper. This is not unlike upward compression, which can also be employed like a transient shaper. Just think of it this way: an upward compressor is similar to pushing the sustain parameter up on a transient-shaper, while a downward expander is not unlike pulling the sustain parameter down.
On drum samples this can come in particularly handy. Say you’ve got a loop with an awesome feel, but you want to emphasize its transients and downplay the atmosphere. You can use downward expansion to shape the decay of the ambiance, thus emphasizing transients in a subtractive process. This can sound audibly less distorted than using a transient-shaping plug-in—or a traditional noise-gate—to achieve the same effect. It can also sound very distorted if you use quick release times - which can be fun.
Downward expansion, like its upward variant, also works well in multiband settings. If you’ve got kick or high-hat leakage on your snare, multiband downward expansion can help take it out of the mix. Simply put the processor on your lowest frequencies for the kick, or on your highest frequencies for the hat. It won’t mitigate the problem completely, but you’ll be able to tame it.
Multiband downward expansion can also be useful to reduce the amount of ambience and reverb in a recording. Again, set up 3–4 bands with similar ratio and timing settings, and tailor the thresholds for each band so they’re at the transition of the body of the sound and its reverberant tail.
And of course, more options abound.
Reflecting on compression
Compression, in its classic form, is a beautiful thing – but it isn’t the only thing. And, it’s worth noting that traditional compression techniques have been employed for so long that even some EDM producers are getting sick of clamping down on signals. What have they turned to instead? According to Andrew Eisele – who was interviewed for a piece on mixing electronic music – the answer is expansion.
Yes, tides turn, and this tide might be turning…upward. So, when it comes to dynamic processes for mixing purposes, it is our sincere hope at iZotope that we’ve, ahem, expanded your horizons. Good luck, and happy dynamic shaping.
