How to get clean, clear masters with a polished sound
Creating a clear, open master without harshness can be tough. In this piece, learn how to use the powerful tools in Ozone 11 to create clean, clear, and loud masters.
One of the main goals of many musicians and producers during mastering is to improve the clarity and openness of their song. They’re looking to achieve a clean, polished sound, having done as much as they can in the mix to get there, and are counting on mastering to get them that final bit of sparkle and sheen. This can be one of those things that’s particularly tough to nail without certain elements getting harsh.
In this article, I’ll show you how to get a clean and clear master with a few key tips and some of the new technology built into Ozone. By the end you’ll have some good strategies to make your next master clear, clean, and open, so let’s get into it!
Follow along with Ozone 11, the ultimate collection of mastering tools that helps you unlock the full potential of your productions.
What makes a master unclear or muddy?
There are a few key elements that contribute to an unclear or muddy mix, or master. Prime among them is tonal imbalance, meaning that the proportions of low, low-mid, high-mid, and high frequency energy aren’t well balanced with each other. Historically, EQ has been the traditional tool to adjust tonal balance—and you certainly shouldn’t overlook it—but today we also have some advanced tools that are very useful.
Other contributors to unclear and muddy masters are musical elements with poor dynamic control, especially if they reside in limited frequency ranges. These sorts of sounds can contribute to masking, rob the song of headroom and power, and make it sound rough and unpolished. Here, again, there are both traditional and contemporary tools that can help us solve the issue of poor dynamic control.
How do you get a clear master?
Making a master clear, clean, and ultimately loud—if that’s what you’re after—is primarily about solving the issues outlined above. First and foremost this means addressing tonal, or frequency imbalances. EQ is a great first step toward achieving this, especially if you use it to make some broad-strokes adjustments. Things like gentle high and low shelves, or bell filters with low Q values—think 1.0 or below—are a great place to start, and can allow you to get the sound in the ballpark. From there, some of the specialized modules in Ozone can really allow you to fine-tune the sound.
The next port of call is to make sure there aren’t any frequency regions that have particularly wild dynamics. Of course, you don’t want to squash the vitality out of your track and completely smooth everything to a mirror surface, but if there are particular notes of certain instruments that are ringing out sometimes and hidden at others, you may want to take a closer look at that frequency area. Tools like multiband compression and dynamic EQ can be vital here, but again there are sophisticated yet easy-to-use tools in Ozone that can make quick work of these sorts of problems.
Tips for creating a clean, loud master
Ok, with some of the theory out of the way let’s take a look at a few practical examples of how to easily use four of Ozone’s unique processors to improve the clarity and loudness of your masters. In just a few steps we’re going to take this warm, but slightly dark and veiled mix and transform it into a crisp, clear, loud master.
Mastered Song
1. Use Clarity to improve brightness and reduce harshness
Clarity is a new module in Ozone that’s designed to dynamically optimize the spectral distribution of your track. That may sound like marketing jargon, but honestly it’s not. Let’s break it down a little. The dynamic bit hopefully feels familiar, but to put a finer point on it, it’s sort of like a dynamic EQ with hundreds of bands working simultaneously. In other words, rather than static boosts or cuts, it’s adapting the gain of each band to the incoming audio in realtime.
So what’s “optimizing the spectral distribution?” Basically, it’s taming resonances and filling in holes in the tonal balance curve, in effect smoothing it out a bit. This has the effect of making music sound both brighter and less harsh in one go and has been shown to increase the perceived loudness without changing the measured loudness. In the words of Arthur C. Clarke, “any sufficiently advanced technology is indistinguishable from magic” and indeed, Clarity feels a bit like magic.
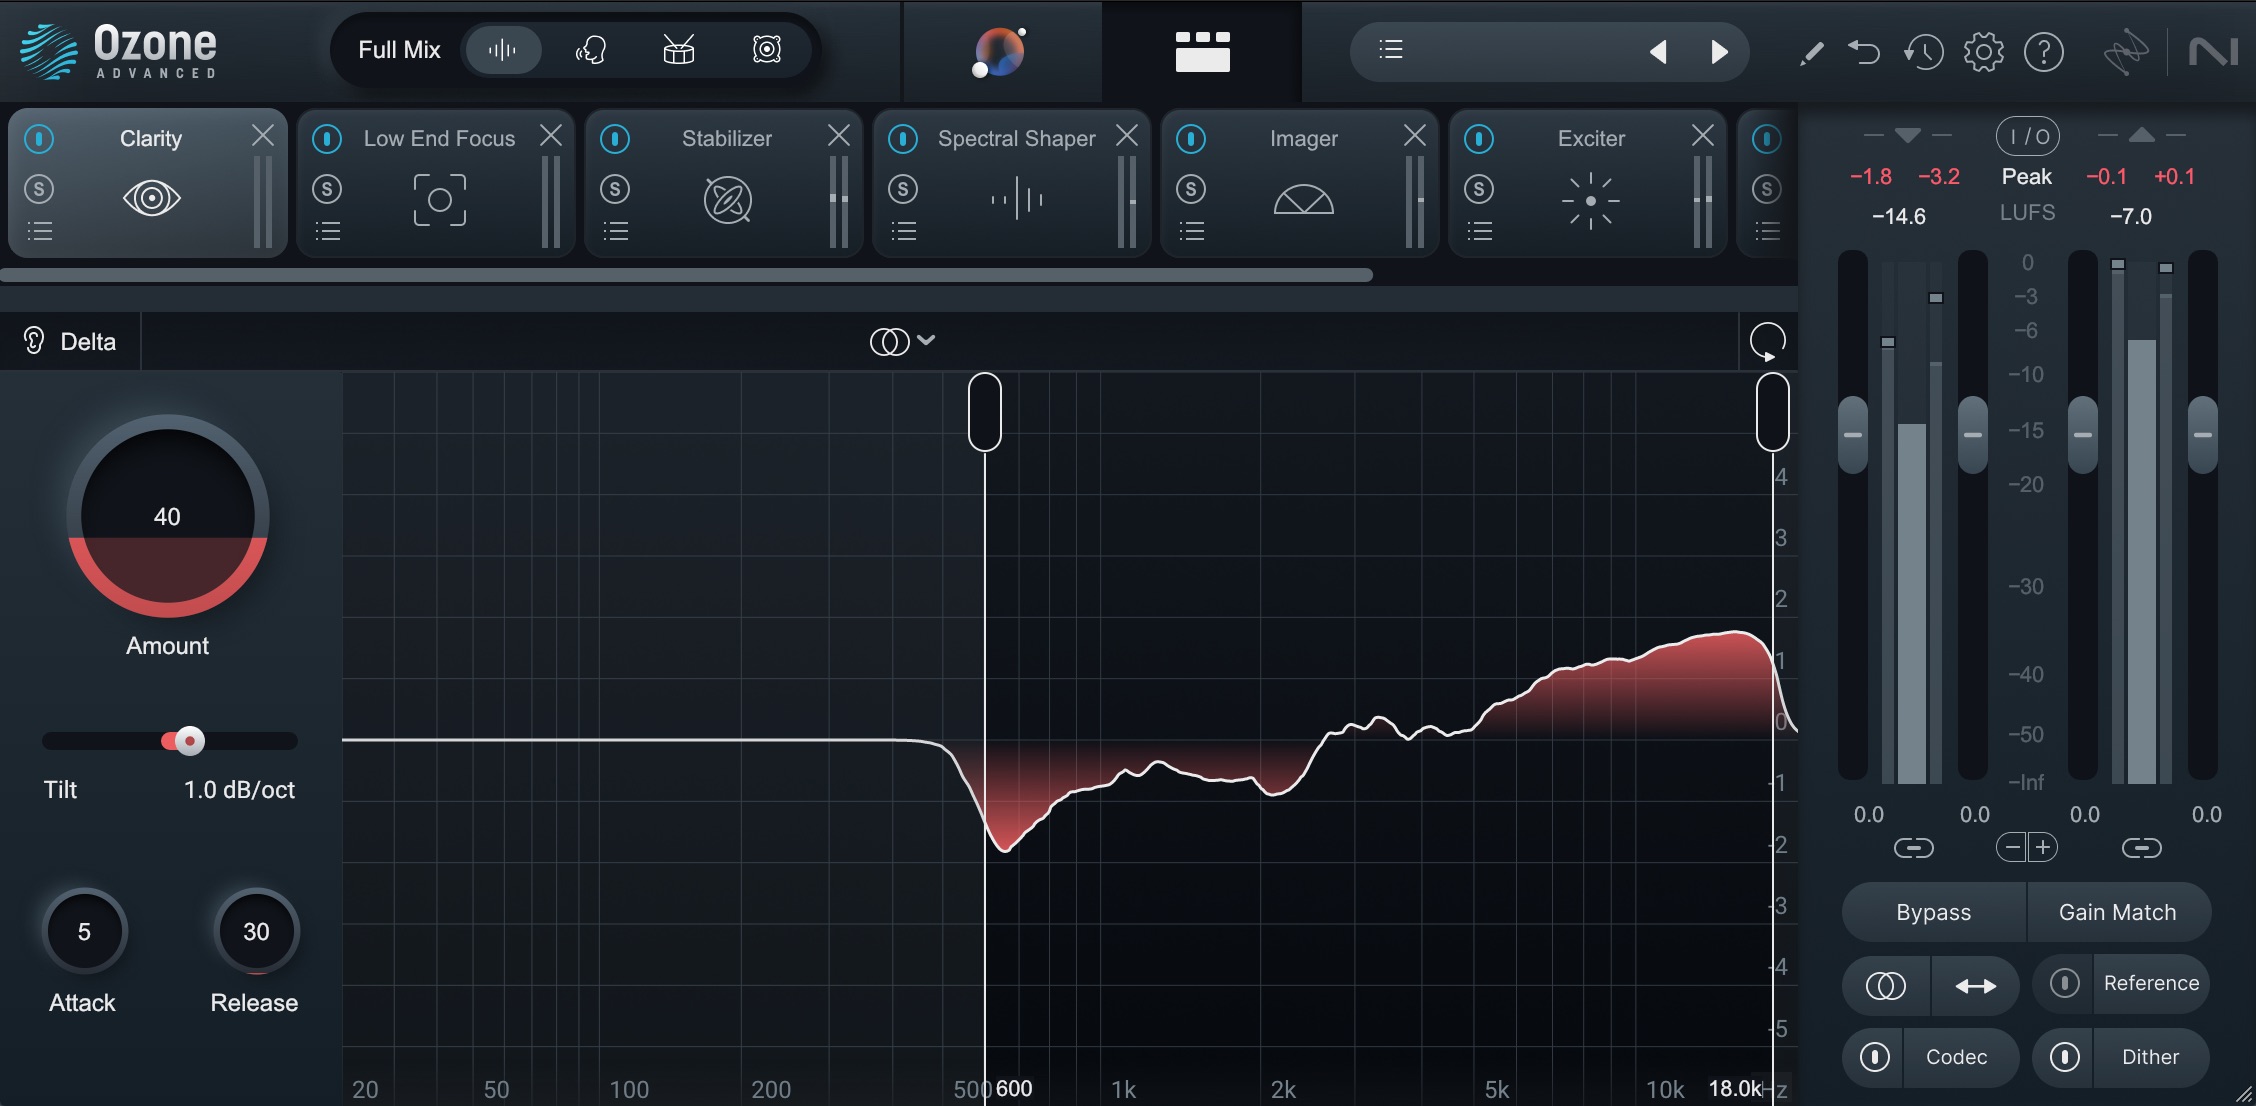
Using Clarity to improve brightness
The action region is adjustable between 300 and 20 kHz, and here we’ve pulled up that lower bound to prevent it from taking too much energy out of the fundamental of the electric keys. We’ve also adjusted the tilt to a slightly brighter result, but sped up the attack and release so that it can catch some of the pokey transients. From there, we can dial in the amount to taste. Here’s the result.
Adding Clarity for Brightness
2. Use Low End Focus to reduce muddiness
Low End Focus works on a similar principle to Clarity, but its objectives are somewhat different. In the simplest terms, you can think of it very much like a contrast control for your low end, allowing you to either accentuate or tame punchy or smooth elements in the low end.
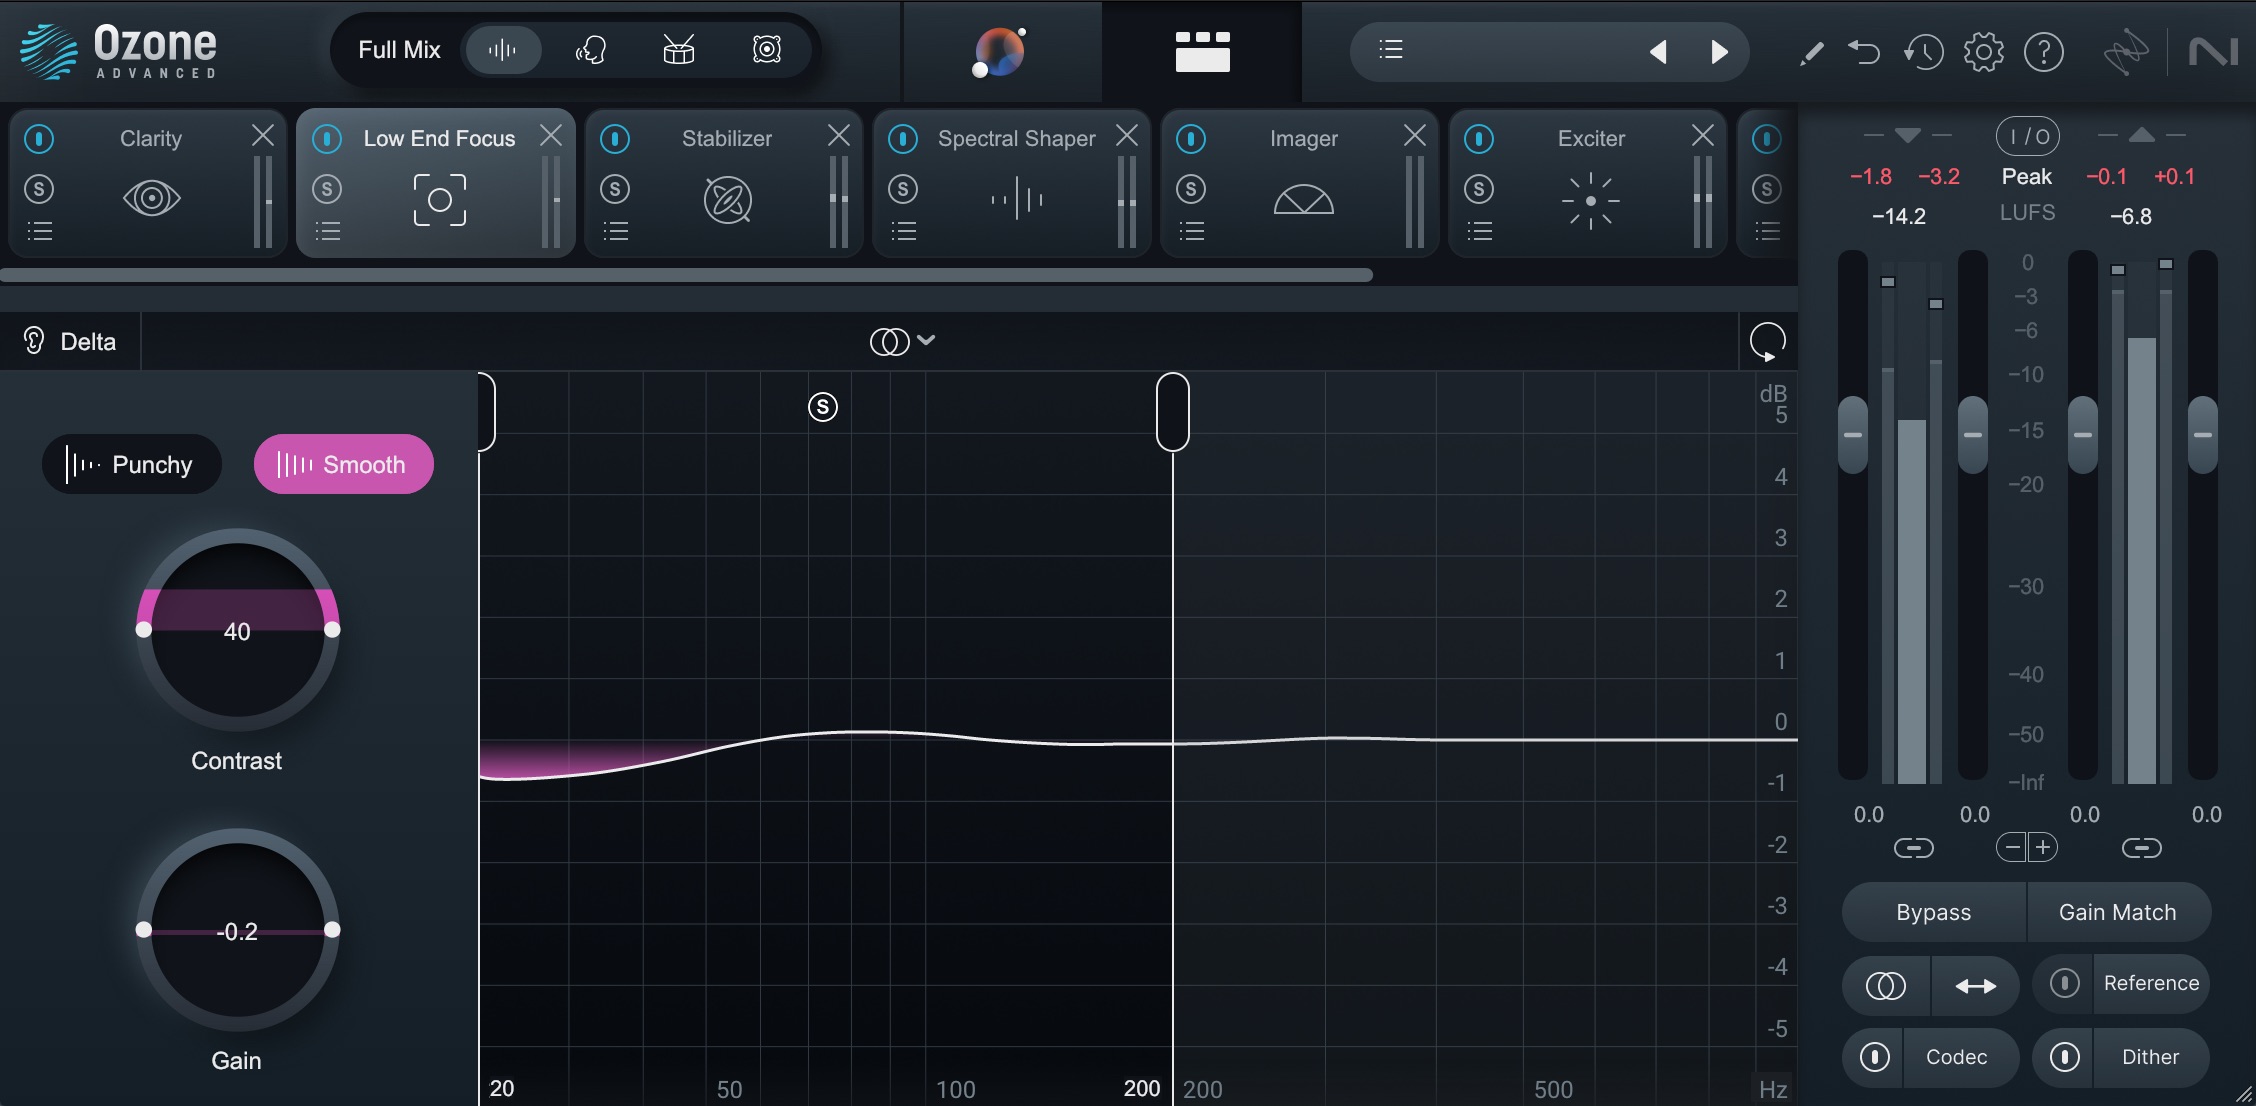
Using Low End Focus to clean up mud
Often, by increasing the contrast of the smoother elements, you can attenuate low-frequency components that muddy up the track a bit, robbing it of clarity. This isn’t always true, so play around with both modes in both directions, but often it's a good place to start. Here’s the result when applied to our example mix.
Low End Focus
3. Use Stabilizer to improve tonal balance
Stabilizer is like an intelligent auto-EQ that’s aware of your genre or customtonal balance target. It’s a great way to push your master toward a more balanced frequency distribution, while giving you some high-level controls over the amount and shape of the processing. I tend to like to turn the speed down for a slower response and the smoothing up for broader EQ moves, but you may find other beneficial applications.
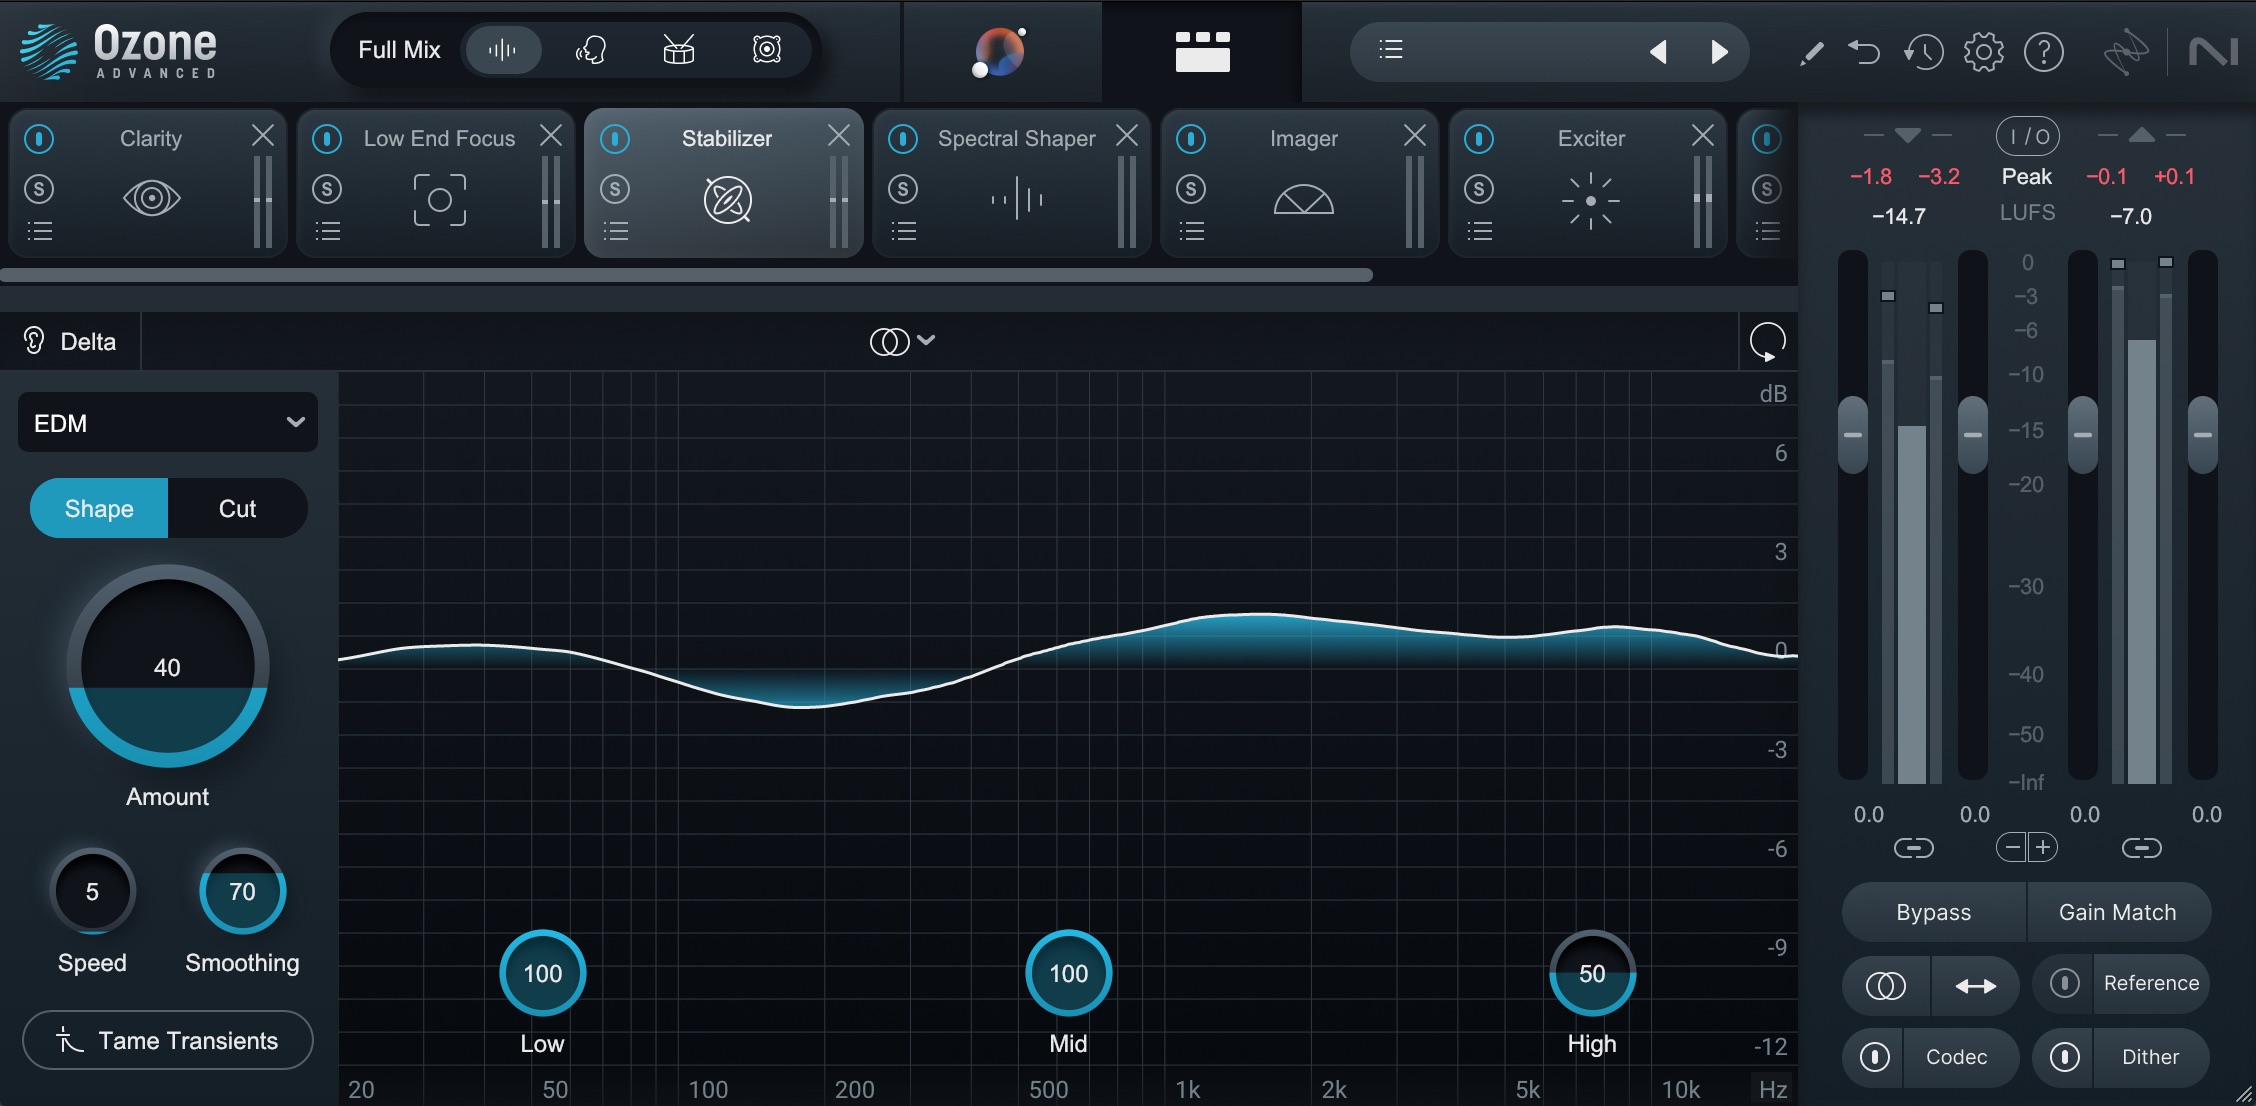
Using Stabilizer to improve tonal balance
For example, Cut mode tames resonances that exceed the upper bounds of the tonal balance target. In that scenario, higher speeds with less smoothing may be appropriate. Here though, we’re applying a slow, smooth tonal balance correction.
Stabilizer for Improved Tonal Balance
4. Use Spectral Shaper to tame resonances
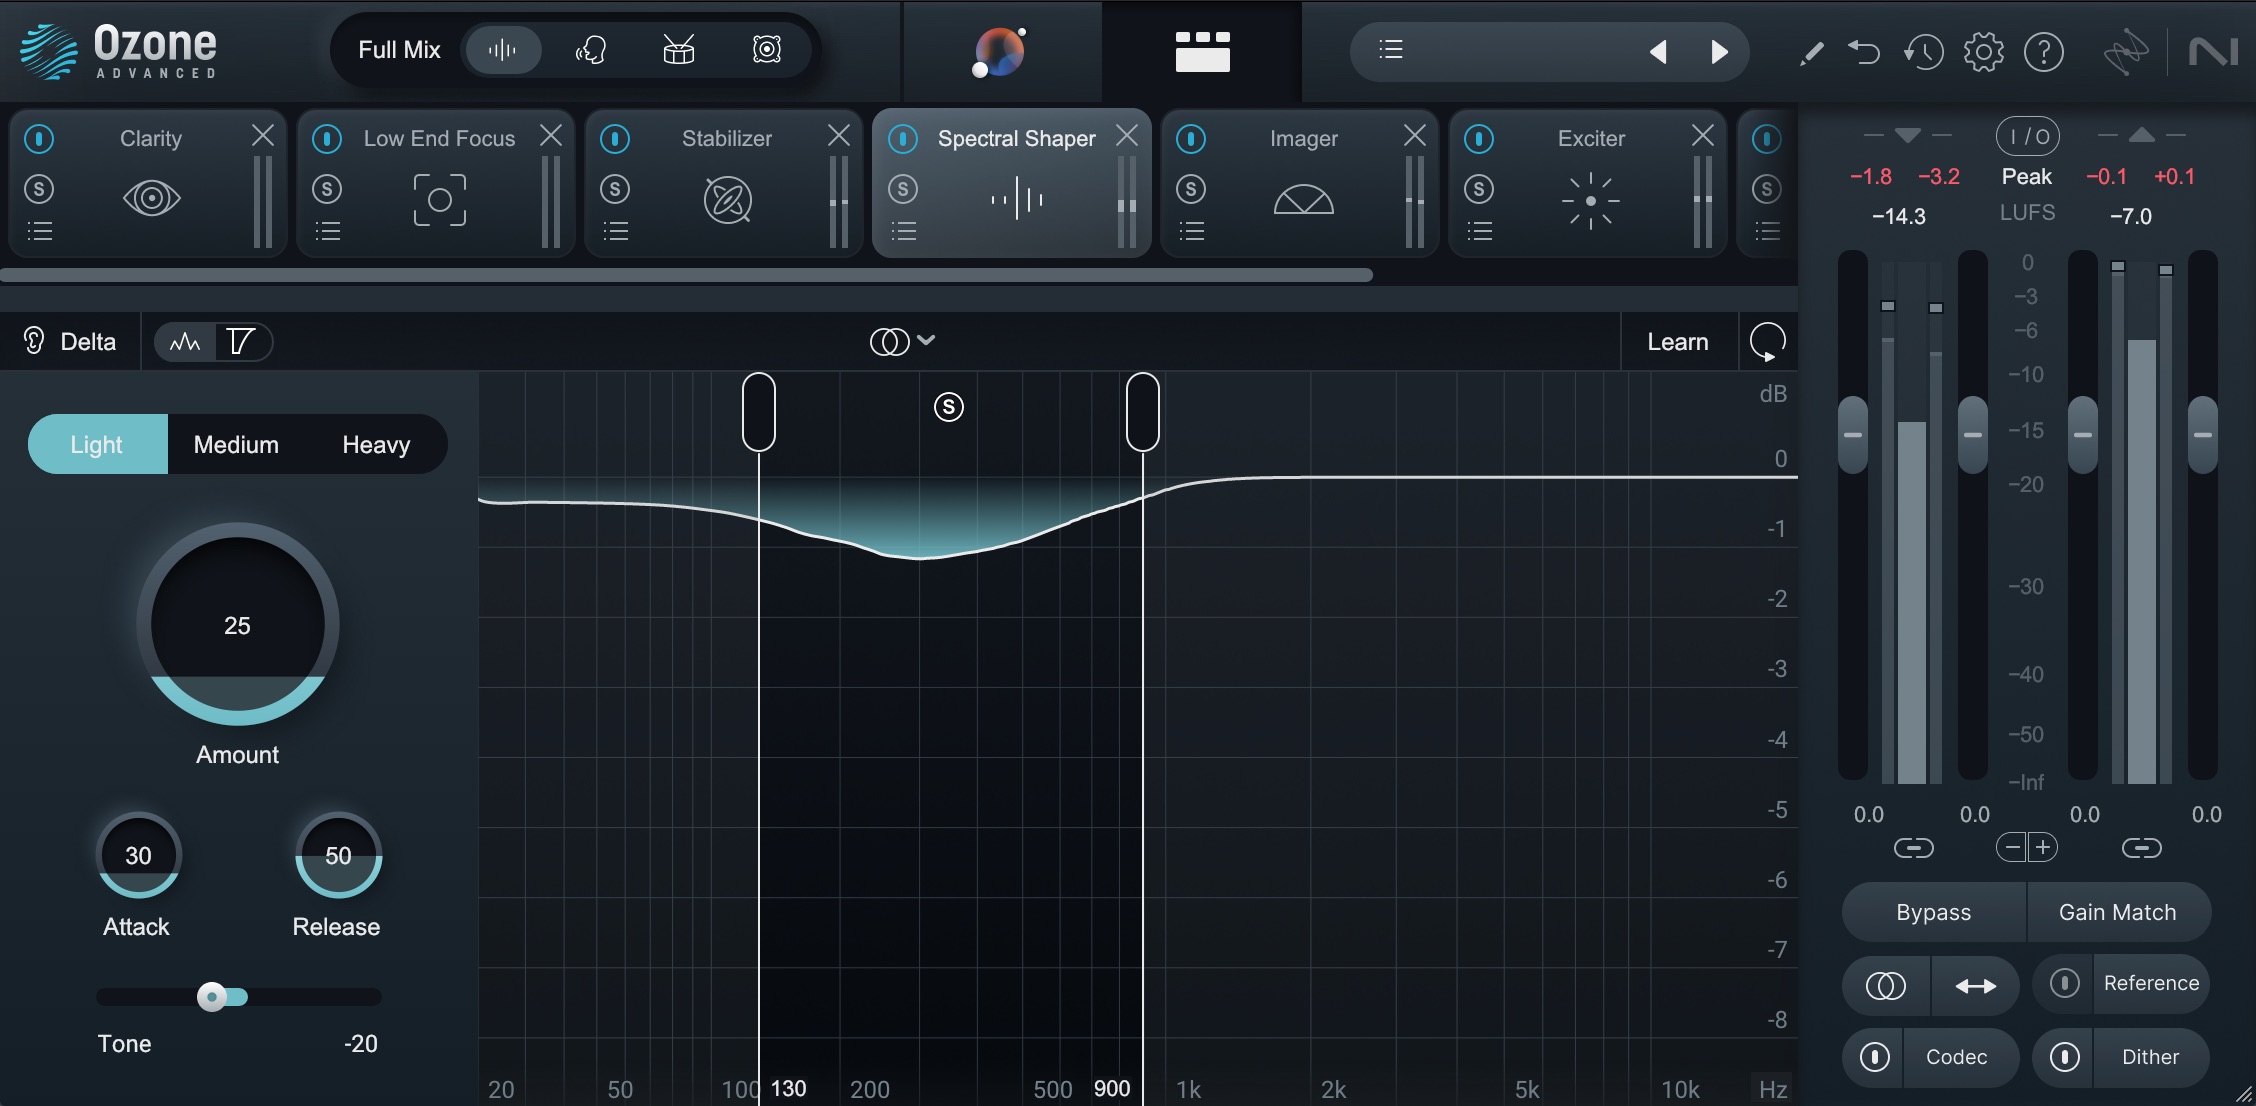
Another great tool to tame resonances is Spectral Shaper. This can be used in any part of the frequency spectrum, so can be useful for reducing muddiness, boxiness, honkyness, or harshness. Just click the “S” solo button between the action region handles to hear the frequency range you’re processing and then adjust the action region handles to surround your problem area.
Using Spectral Shaper to clean up low-mids
Here, I wanted to tame some low-mid muddiness to prevent the electric keys from getting too boomy—remember, I avoided this area when setting up Clarity, so this allows me finer and more precise control—so I found the frequency area and pulled up the amount a little. By using Light mode, adjusting the attack and release, and tweaking the Tone to focus the attenuation, I was able to clean up the low-mids nicely yet subtly.
Spectral Shaper for Taming Resonances
5. Fine-tune your master with specialized tools
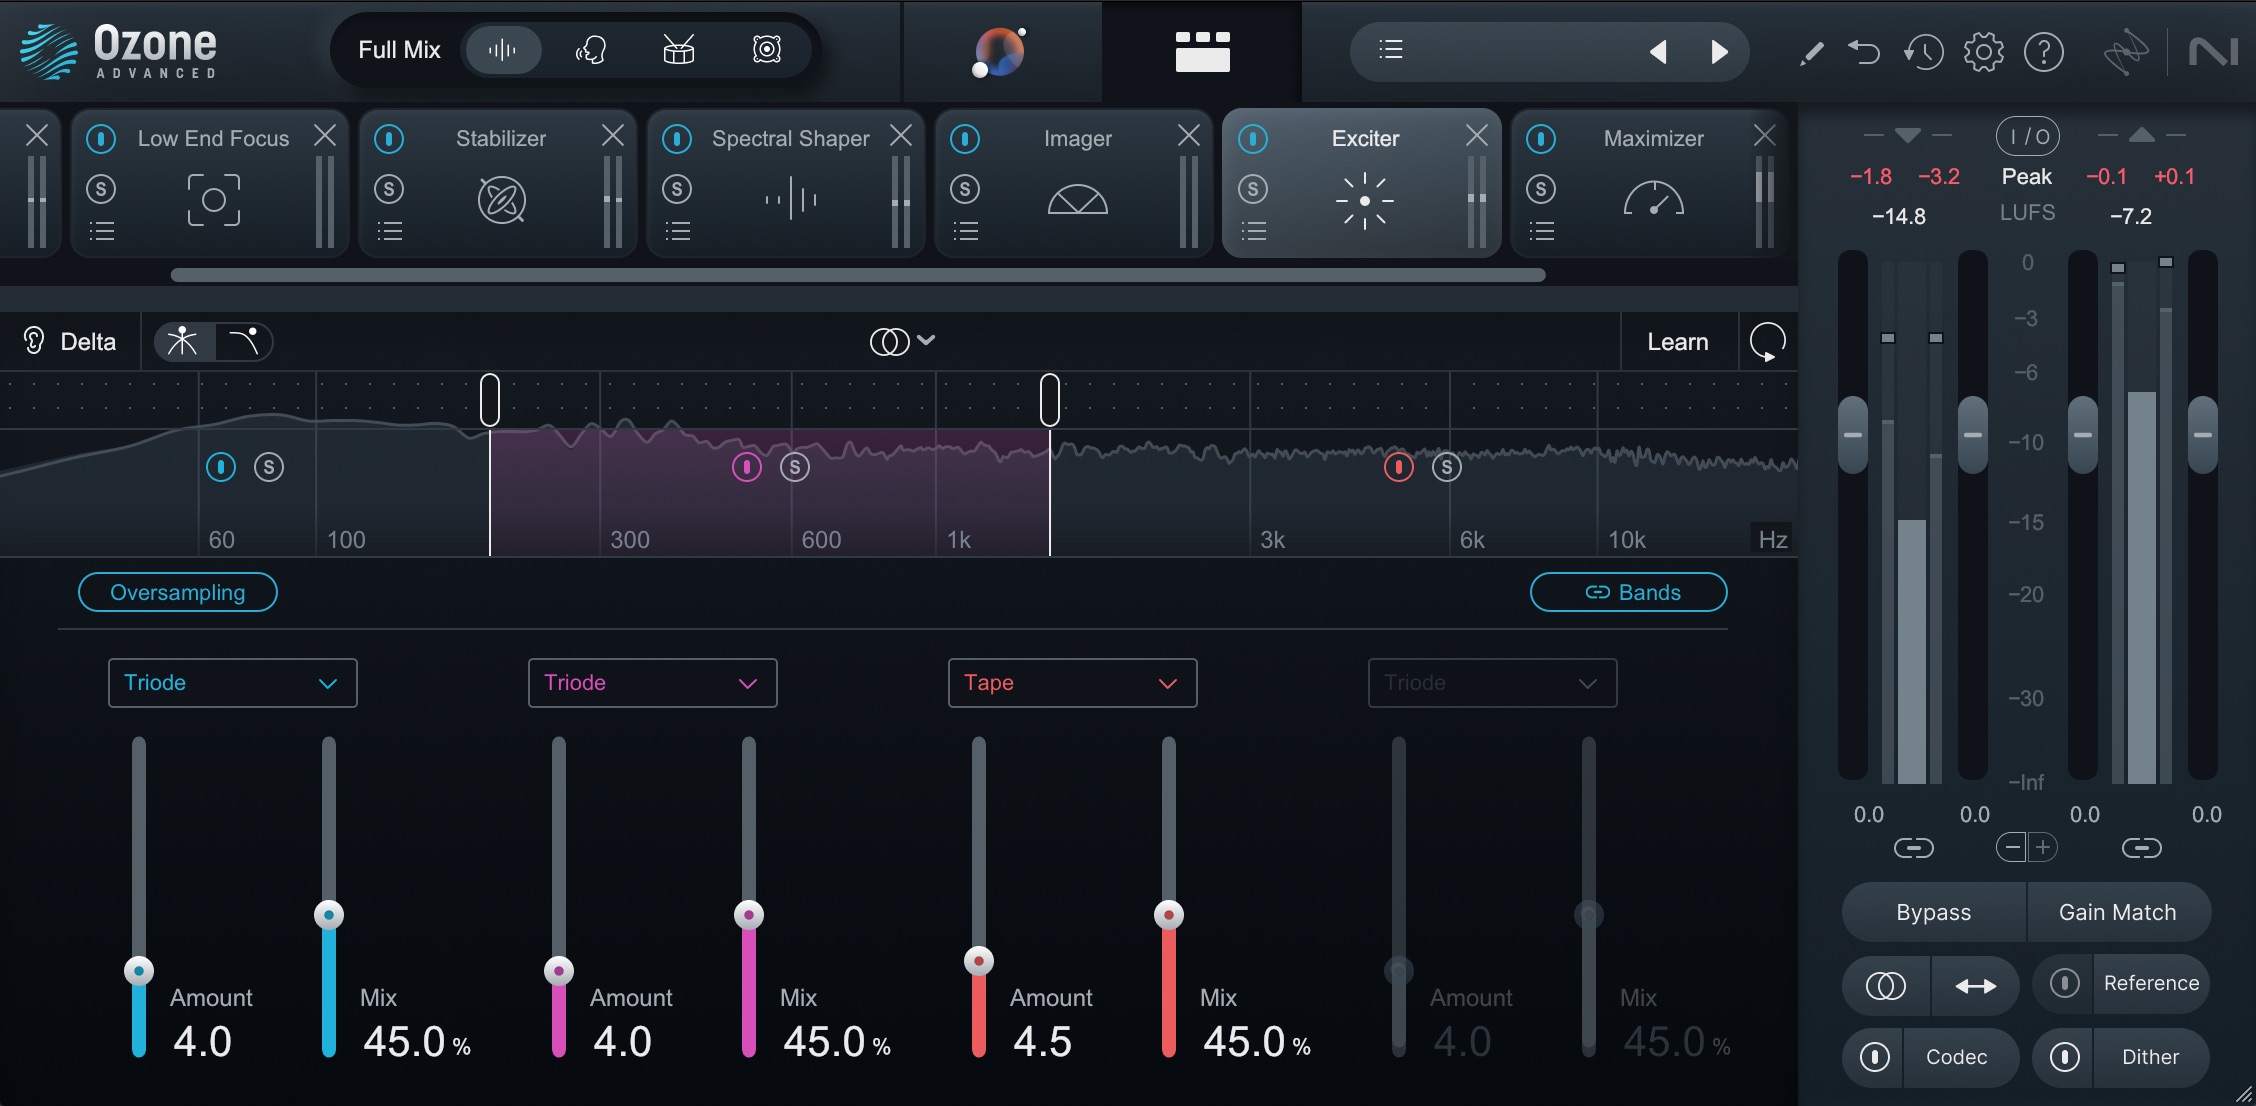
Once you’ve used some combination of Clarity, Low End Focus, Stabilizer, and Spectral Shaper to get your master to a good spot—remember, you don’t always need to use all of them—it can be a great time add a little character with some of Ozone’s other modules. Here, I’ve elected to widen the midrange slightly with Imager and also add a little saturation with Exciter.
Using Exciter to add energy
All told, this gets us a clear, open, polished, and loud master. In fact, this is probably a bit louder than I would normally recommend, but it’s nice to know that you’ve got the tools in your back pocket for when you need them! Here’s the original limited mix compared to the master.
Original Mix vs. Mastered Track
Start getting clean, clear, professional masters
So there you have it. We’ve covered not only some of the theory behind what contributes to a lack of clarity or sense of muddiness, and how to rectify it, but also some specific tips for using four of Ozone’s sophisticated yet easy-to-use modules. Low End Focus, Stabilizer, and Spectral Shaper were already quite the powerhouse, and with the addition of Clarity, it’s never been easier to get a clean, clear, professional sounding master.
You don’t have to take my word for it though. Ozone has a free, fully functional 10-day trial, so download it and give it a try yourself. Good luck, and happy mastering!