Audio post production workflow 101
Learn about the audio post production workflow, with tricks to help with everything from setting up a session to mastering your mix for broadcast.
Audio post production covers a huge range of audio topics from cleaning up background noise to understanding loudness and managing deliverables. With so much to do, the order in which you do it matters. Here, I share my post production workflow to help you get started.
Follow along with


RX 11 Advanced
What is audio post production?
Audio post production is the essential process of finalizing the audio that is paired with video. This phase of audio production incorporates editing dialogue, removing background noise, smoothing audio transitions between scenes, and creative elements such as sound design and foley. Everything is then mixed and mastered with loudness standards in mind for broadcast. You’ll often have to supply separate files for dialogue, music, and effects so the film can be dubbed in another language or for use in creating the trailer, so keep this in mind as you work through the project.
Session prep and setting up a template
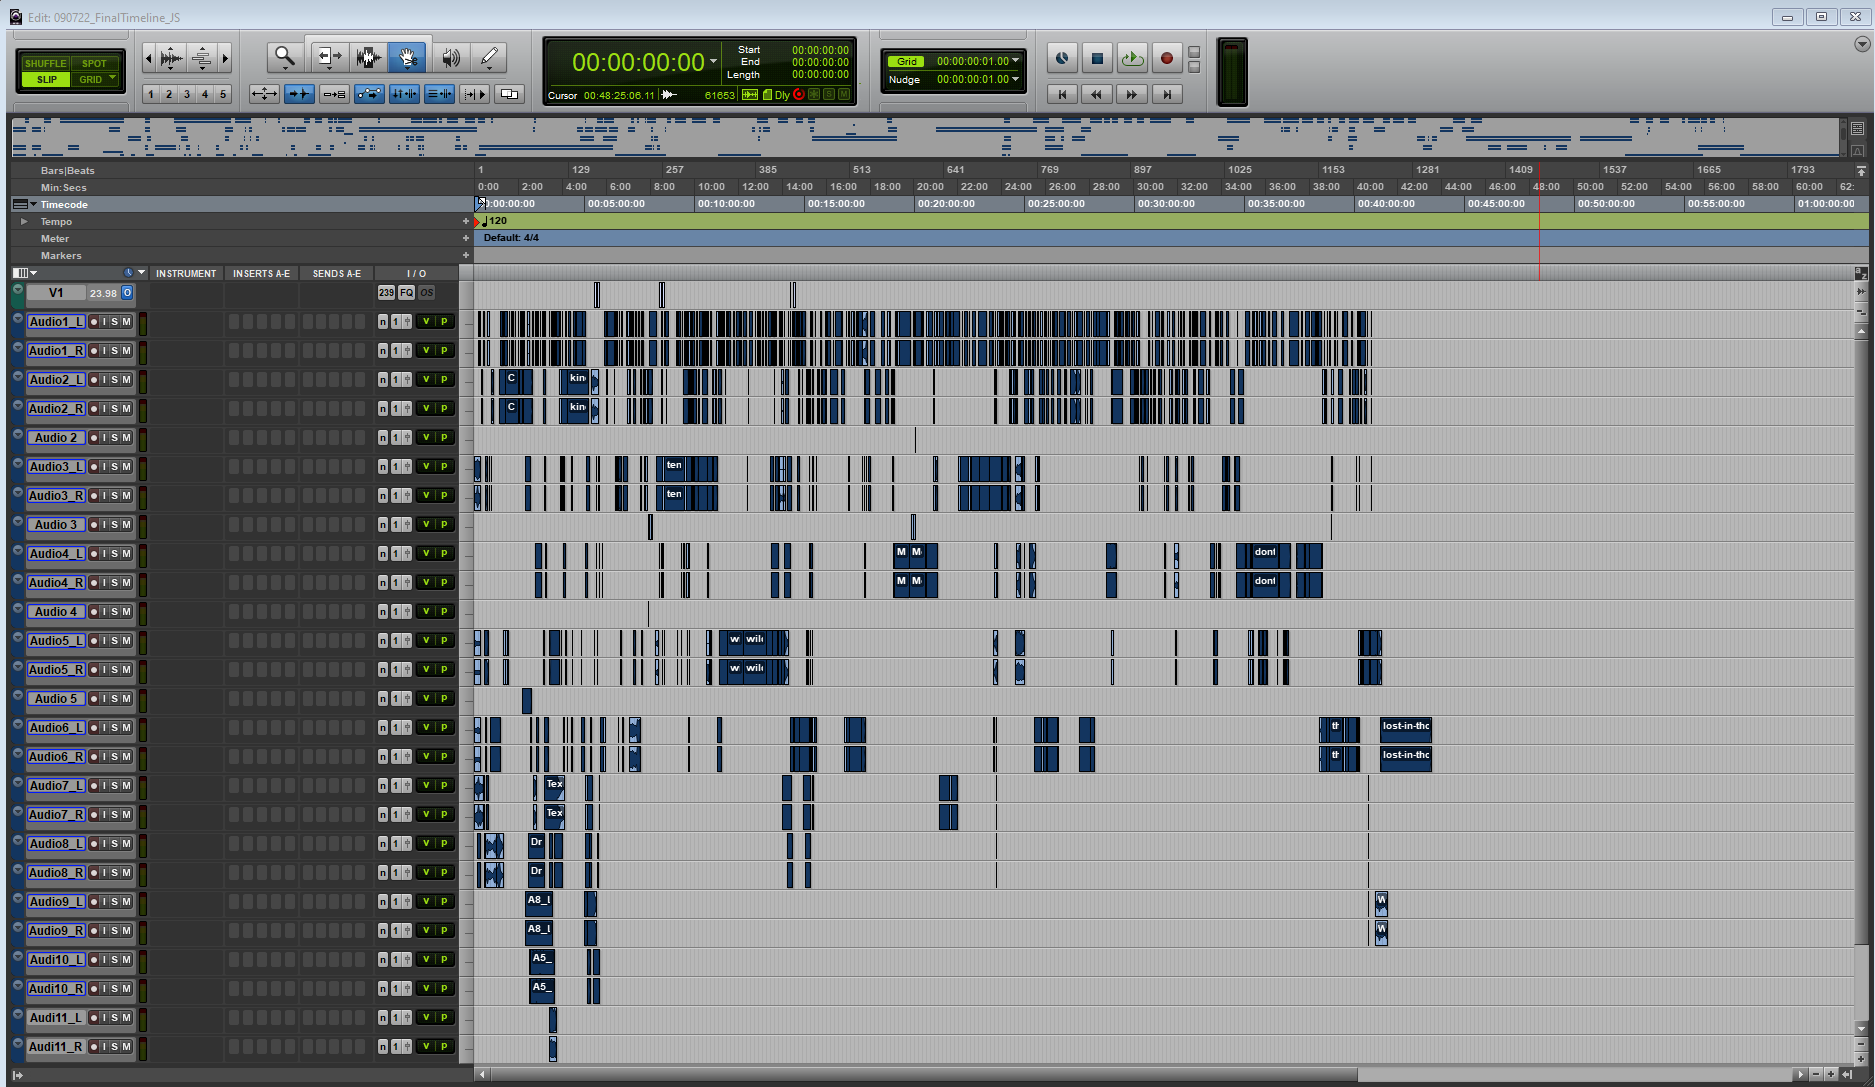
When you first open a post production project, generally you’ll have a session that looks similar to this:

A look at an AAX file provided by a video editor, opened in Pro Tools
This is an AAX file that was provided to me by a video editor. AAX files are exported from Adobe Premiere and can be opened in most DAWs, while maintaining the position of all clips in the video timeline as well as automation data.
The first thing I do is get organized and set up my routing. Since we eventually have to provide separate bounces for dialogue, music, and effects, we need to make sure to keep reverbs and other effects on aux tracks separate as well and route them appropriately. We can’t have the reverb from an explosion end up on the dialogue bounce! Your routing might look something like this:

Example of track routing for audio post production
Keep what sounds good and remove, repair, or replace what doesn’t
Starting at the beginning, mute all music tracks for now and work through the film scene by scene, listening to the quality of each of the tracks recorded on set to determine what audio is usable, what needs to be cleaned up, and what should be replaced.
If something is not usable, mute it and if applicable, mark it to be replaced with Automated Dialogue Replacement (ADR) or foley.
As I listen to the audio, I’ll move dialogue clips onto dedicated dialogue tracks, music to dedicated music tracks, and sound effects to dedicated SFX tracks so when it comes time to provide stems to my client, everything is already separated and routed, making final bounces a breeze.
Removing background noise
When cleaning up audio, you should always start by duplicating your audio so you can go back if you need to. Then either working clip by clip, or in groups of clips if the clips have the same audio issues, identify the problems that you want to correct. Depending on the type of noise, your goal might be to completely remove it or simply attenuate it. For example, a dog bark in the middle of the scene should most likely be completely removed, whereas you don’t want to completely remove all ambient sound since removing environmental sounds completely can take the viewer out of the scene.
In this post production masterclass, David Barber walks through his process for cleaning up dialogue recorded on set:
I like to use room tone to make sure all the dialogue edits and scene transitions sound smooth and natural, then I’ll create custom ambiences to set each scene. Ambience is a tool we have to draw the viewer into the world of the film and is why it’s usually one of the first elements I’ll sound design in depth.
Check out the basics of room tone in audio editing for examples of how manipulating room tone can make your edits sound smooth and add realism to the piece.
Record missing elements and add sound effects
Before we get too crazy with adding plugins and automation, it’s a good idea to make sure all of your recording processes are done. Post production sessions can get real big, real quick which can introduce some latency and synchronization issues to correct later if you save all your recording for the very last stages of the project.
Basically, we want to make sure everything is placed on the timeline and in sync before we begin to finesse the mix.
Automated Dialogue Replacement
Automated Dialogue Replacement or ADR is the process of replacing dialogue that was recorded on set with dialogue recorded after the fact in a studio, and syncing it to picture. This is done when the on-set recording is not salvageable, or in some cases, to adjust how an actor delivered the line. This is usually only done as a last resort since it can be tricky to get the newly recorded dialogue to match the clips that don’t need to be replaced.
Dialogue Match is great for processing ADR because it takes the sonic characteristics of the original audio and allows you to apply it to the newly recorded audio to taste.
Fun with foley and sound design
Every film needs sound effects! As you work through the film, you should mark any spots that need a sound effect and decide how you want to approach them. Will you use a sound effect that already exists from a library or create your own? I usually do a hybrid approach where I use some premade effects layered with foley that I’ve recorded to create something unique.
Foley is the process of recording new sound effects to enhance the existing audio. For example, if you have video of a bird taking flight, a foley artist might shake a glove near the microphone to simulate the sound of wings flapping. Quite often, I find myself having to foley some footsteps which is the sole reason why I keep various styles of shoes at my studio. You never know when you’ll need to foley someone walking in high heels across a wooden floor!
For this recording, the actor is leaving a restaurant after a fight with her daughter. In this unmixed audio, you can hear me start walking close to the microphone and move away.
Fine-tune your mix for broadcast
Now that you have your dialogue cleaned up and sound effects in position, it’s time to add some processing to really sell everything to the viewer. Reverbs and delays can add realism or take a scene into another dimension. Here’s 6 ways to use reverb in post production and sound design for ideas on using reverb in your post production projects.
The most important element in the mix is typically going to be the dialogue. Generally, you want the dialogue to be intelligible and very present in the mix. I use EQ to separate the dialogue from everything else in the mix by cutting the lowest lows and boosting around 2kHz and above to increase intelligibility. On music tracks, I’ll cut the mids a bit with EQ as well to give the dialogue even more room.
Let’s take a listen to the same foley recording now that it’s been mixed. First, I removed the room tone of my studio so it wouldn’t compete with the atmosphere of the restaurant using Spectral De-noise. Then, I automated


Neutron 5


Stratus 3D by Exponential Audio
Loudness standards for mixers
So how loud should your film be? I really liked the post production mixing philosophy discussed in The Mixer’s Guide to Loudness for Broadcast. The authors Gregory King and Jon Greasley write about how when you’re working with something as dynamic as film, it can be hard to know just how loud sound effects are without the context of dialogue. Using dialogue as your frame of reference can help you make decisions about how loud other effects should be in the mix.
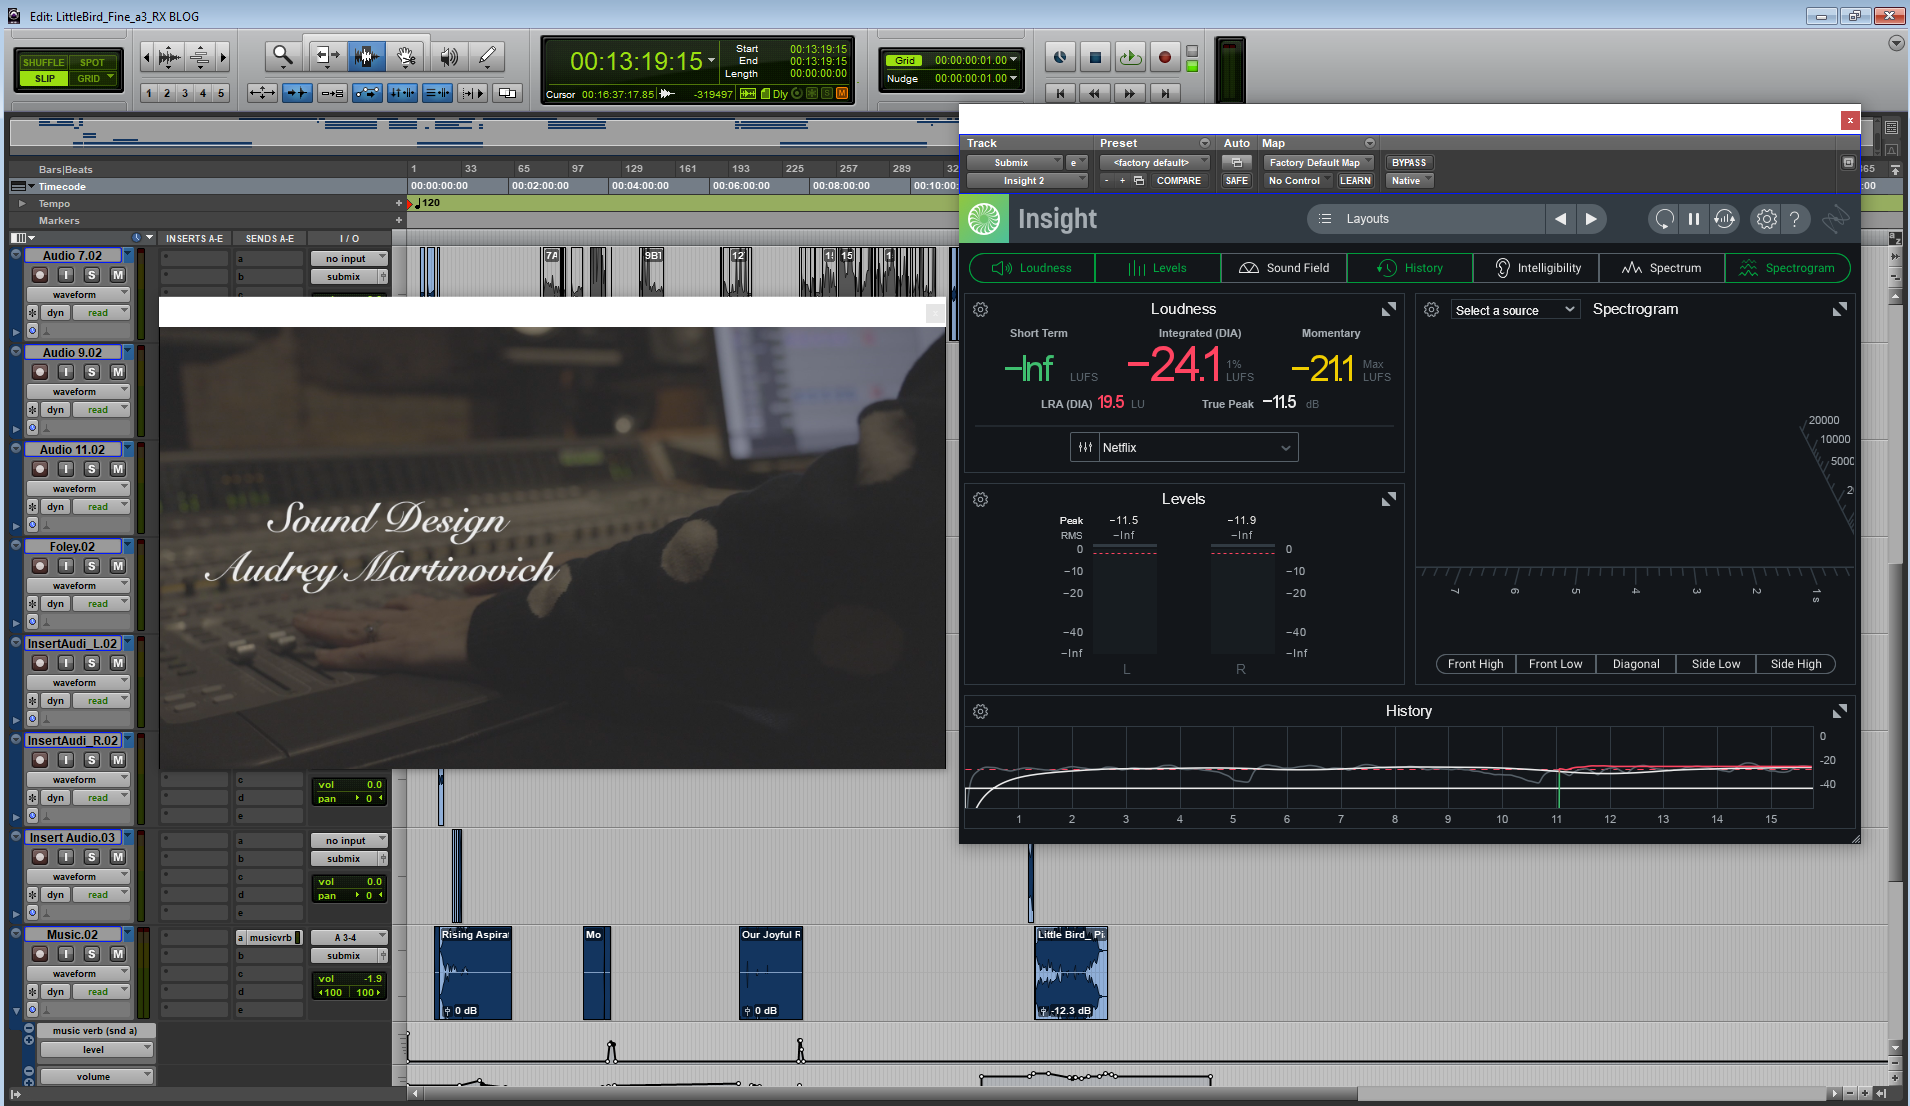
When I set up my routing, I make sure to add iZotope


Insight 2

Insight 2 measuring loudness of a short film
Now you too can “fix it in post!”
From managing deliverables to adding an ethereal touch with reverb, we’ve covered a lot of ground! Starting a post production project by organizing and “taking out the trash” will get you most of the way to a decent mix. Then, you can use this as a solid foundation that you can build on creatively. Download RX and get professional-sounding post production mixes today.


